The gazebo on the estate is an integral part of modern landscape design. The beauty is that a gazebo with your own hands can be made in absolutely any style. Many people ask the main question after they decide to build a gazebo with their own hands - where to start? We will give a clear answer to this question in today's material, and we will also analyze at least important points regarding the construction of a wooden gazebo with his own hands.
Before starting work, you need to realize that the gazebo is a fairly simple structure that does not require special skills and knowledge in the field of construction. If understand simple technology and the sequence, which will be discussed below, then the gazebo can be erected in a couple of days, with a minimum of effort, because in the end, you don’t Vacation home set out to build.
Moreover, by studying the detailed manual for building a gazebo with your own hands from wood, you will save not only time and effort, but also money. If you don’t like the gazebo design below, you can choose a slightly different shape, because you will now be familiar with the main stages and principles of construction. Who knows, maybe you will be able to make yourself such a masterpiece, shown in the photo below. The main thing is to believe in yourself.
Gazebo with their own hands. What to do?
Decide immediately on the material for future design. Majority experienced builders assure that the best gazebos are made of wood. This choice brings many advantages:
· natural look;
Ease of construction
Simple woodworking
Can be made in any style.
In addition, during the construction process, you will need the most common tool that lies in the garage of each owner. Materials for the design will take just as little, which will save significant funds. Do not forget that if you wish, you can build such a gazebo from wood, at the sight of which guests will not want to leave your site. This is sarcasm, of course, but there is some truth in it.
What about the foundation?
A wooden gazebo is quite plastic, elastic and weighs little. Thanks to these qualities, you can start its construction without a pre-prepared foundation. It is enough to treat the wood with special chemicals to protect it from contact with the ground. This will protect it from the effect of decay. Moreover, there are such types of gazebos, for example, wicker ones, which would be simply stupid to put on the foundation.
Initial stage of work
The first thing to do is to work out in detail the plan for future construction. If you can't find your bearings regarding design, then today there are a lot of magazines and websites dedicated to construction topics. There you can see examples of the most unusual, and at the same time, the simplest arbors for the estate. Making a plan includes:
The purpose of the building
shape of the gazebo
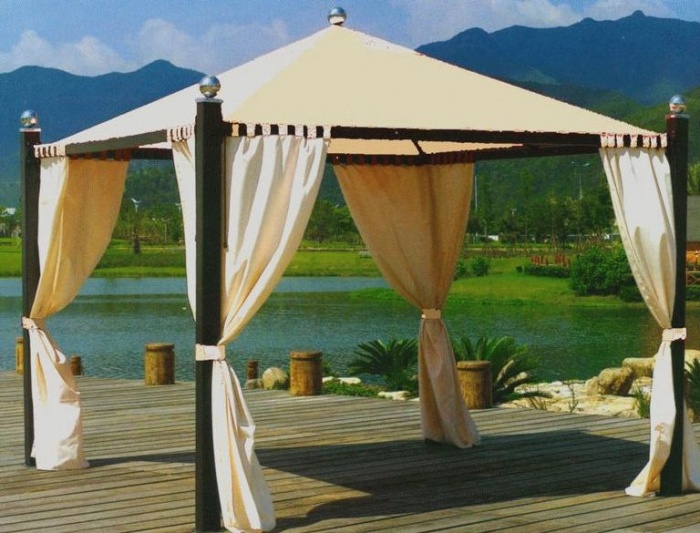
The shape of the structure can be square, round, rectangular, octagonal, hexagonal, and so on. The owners of the site with creative thinking and wild imagination can experiment by building a gazebo in the form of Baba Yaga's house, a fairy-tale palace or spaceship. Below is a very creative and unusual example gazebos.

Or you can prefer more classic style which will look simple and tasteful.

Arbors also differ in their purpose. You need to decide from the very beginning whether you want to just relax in the shade on fresh air or a large company will have fun in the gazebo.
If the first option, in this case, you can start building an ordinary gazebo with your own hands with several benches.

If you plan to build for a fun pastime of the company, give preference to a large platform and a canopy.

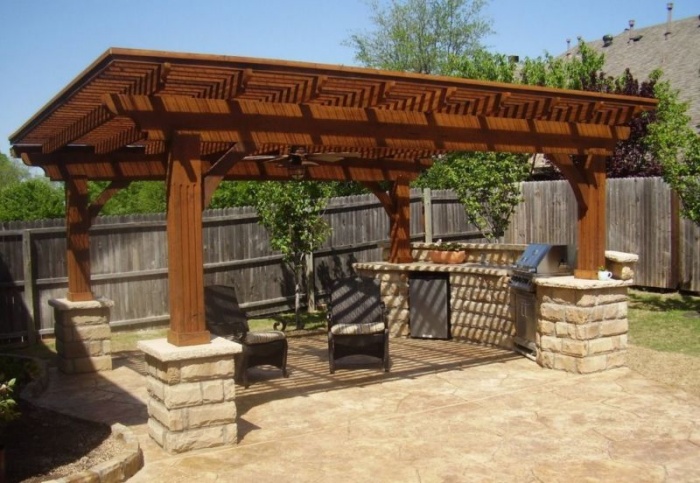
For those people who cannot imagine a vacation without a barbecue in nature and a field kitchen, a gazebo with a Russian stove or will be an ideal option.

Advice! Before choosing the shape of the future structure, you should pay attention to the existing buildings on the site, as well as landscape design in general. The chosen style of gazebo should be in harmony with the surroundings.
Deciding on a place
Once you've made your final design decision, it's time to choose appropriate place. Regarding the proximity of the location of the gazebo from the house, this question remains at the discretion of the owner. Proceed from the following - whether you want to take a break from the hustle and bustle of your home or want to spend time sitting outside with your family.
Do not place the building in a lowland, this cannot be done by obvious reasons- it is in the lowland that water will accumulate over time, which will lead to rotting of the wood.
Advice! Position the gazebo near trees, flower beds, or other vegetation. This is how you get the most aesthetic effect, because it's nice when a view of the wonderful plants from the gazebo opens.
Gazebo with their own hands. Photos, drawings
After the above preparatory activities Let's start designing. The drawing will take into account:
· height;
· the size;
· components;
fastening methods, etc.
The drawing should also take into account the number of necessary building materials which must be pre-purchased.

For example, we settled on the standard square shape roofed structures. It is this design that will be discussed in today's practical guide. We remind you, taking into account the information and examples below, you can choose any other gazebo design you like.
Necessary tools and materials
To start construction, you must have the following materials:
concrete for the process of mounting racks;
timber 15x15 cm for making the base and racks;
timber 10x10 cm for roofing elements and upper lathing;
bars for log 5x15 cm;
board for flooring;
plywood or boards for roofing;
Roofing materials, depending on your choice, it can be metal tiles, slate or corrugated board;
boards for railings and other decorative structures;
lining for side cladding;
frames with glasses (if these elements are provided for in the plan);
· paint, varnish;
Self-tapping screws, screws, nails.
It is worth recalling that changing the project will also affect the list of materials, it can either decrease or increase, keep this in mind.
Also take care of the availability of the tools that you will need during the construction process:
hatchet;
shovel
hacksaw for wood;
Electric or chainsaw
a hammer with a nail puller;
planer
· chisel;
roulette;
· stairs.
Armed with the above tools, you can build almost any wooden gazebo on your site.
How to build a gazebo with your own hands
After all the above recommendations are fulfilled, it's time to start the main thing - building a gazebo with your own hands. To begin with, it is necessary to treat the wood used with moisture-proof and antiseptics. This must be done to keep the tree from rotting.
The next step is to install the supports. Mark the location of the future building with pegs and ropes.

Advice! In order to get a perfectly even rectangle or square, it is necessary to observe the symmetry of the diagonals.
We will focus on the option when the foundation is not poured, but. This option is much easier to implement. Dig holes for the posts about a meter deep.
Pack the bottom of the pits with gravel, approximately 5 cm, after which, pour a 10 cm layer of concrete. Wait for the moment when the concrete hardens a little, and place the anchors in it. It is on them that the racks will subsequently be attached.
You can do it a little easier. Place a post upright in the hole and fill with concrete. It is important to ensure that the rack is installed exactly, strictly vertically. Racks should be dug into the ground in such a way that their strapping is a perfect square.

After installing the racks, it's time to start building the frame. This action must begin with the bottom strapping. Can be used for floor ordinary timber, which must be laid every 50 cm. This design is guaranteed to withstand the weight of the flooring.
Next, install the remaining frame structures - racks. They are responsible for supporting the roof and top harness. The location of the racks should be strictly symmetrical, the number of which depends on the dimensions of the gazebo.

After the construction of the frame, we are engaged in flooring. Batten fastened with ordinary screws or nails.
Roof installation is a critical stage of construction. First of all, the upper strapping of the entire structure is carried out from the bars, which must be attached to the supports with nails. Subsequent construction depends on what form of roof you have chosen for your future gazebo. More often, four or gable roof, due to its practicality, reliability and ease of execution.
The hipped roof looks very original, we will focus on it as an example. To make the structure stronger, it is necessary to install additional rafters fixed to the upper and main harnesses. You should follow the symmetry of the rafters, this is very important.
Important! It is necessary to fasten the material to each other every 20 cm along the entire length of the rafters.

It is worth paying your attention to the fact that you should follow the safety rules for working at heights. Make sure that the stepladder does not wobble and that there are sharp and dangerous tools under you.
The final stage is decoration. It's time to show your imagination and decorate the walls, roof and railings of the gazebo. Usually they use a standard beam for the railing, then sheathing the structure with clapboard.
If you get a little confused, you can apply carvings to the wooden surface of the railings and walls. This adds color and originality to the finished design. However, for wood carving to look really spectacular, there must be certain skills in this matter.
After, you can open wooden surfaces varnish or paint them.

The next steps depend on your preferences. You can fill the gazebo with comfortable and roomy sofas, install a deck chair in it, or give preference to ordinary benches and a table.
By the way, you can also arrange tables, benches and chairs for a gazebo with your own hands. This will complement general design. Provide light, install mosquito nets, take care of the path from the gazebo to the house and enjoy the outdoors with close friends and family.
Weaving from rods - we simplify the process
If you like simple but tasteful, then you will definitely like our next idea. Moreover, it will greatly simplify the construction process. Arbor made of rods is very popular today. It not only looks spectacular, but is also quite practical.

The process of building a gazebo from rods with your own hands is quite simple. It is necessary to drive rods into the ground to a depth of 35 cm. The main thing is that the rods form a symmetrical square or rectangle, although it is possible to make a design in the form of a hexagon or octagon.
You can also sheathe the installed wooden racks of an ordinary gazebo with wattle. This also looks spectacular. If your gazebo is located near the sea or river, you can use ordinary ropes for weaving, it will look quite appropriate.

It is worth emphasizing that weaving is a very painstaking process, although not expensive. According to the principle of the above weaving patterns, you can choose the most acceptable pattern for your gazebo.
Do-it-yourself gazebo made of wood step by step video
Surely you have verified own experience that it is not difficult to build a gazebo with your own hands from wood on your site. We figured out how to build a gazebo with our own hands. Choose your favorite gazebo design and decide on the place of construction. The main thing is to follow the above recommendations and use our methodology. Don't worry, you will definitely succeed. We recommend that you watch the following video of the gazebo construction process on your own, for a better understanding of the construction process.
A country house has been erected, but the site has not yet been equipped? It's time to think about a place to stay. Where is it pleasant to relax both in the summer heat and in the pouring rain? Of course, in the gazebo, which was built with his own hands. It is cozy and comfortable to read a book with a cup of tea in a wooden structure, to celebrate holidays in the family circle or with a group of friends. You're probably already interested, right? In the article you will find up-to-date information on the construction of a wooden gazebo with your own hands.
Arbor made of wood, its advantages and disadvantages
Before you start building, searching for drawings and choosing a place for an arbor, you need to carefully study the properties of the material. The benefits of wood are:
- The weight. Allows you to facilitate the installation of the structure, and save money on the construction of the foundation.
- Environmental friendliness. Wood is a safe material, in such a gazebo they take a meal, relax with children and spend a lot of time.
- Ease of processing. Complex design solutions implemented by people with minimal construction skills.
- Price. wood gazebo cost conifers, oak or birch is low compared to metal structures and available to everyone.
- Harmony. The building is in harmony with 90% landscape designs because of its naturalness.
Harmonious and beautiful, will fit into any design of the site
Alas, not a single material can do without flaws.
- Low fire resistance. To avoid fires, it is not recommended to install near the gazebo stationary barbecues, it is necessary to process the material with special impregnation during construction.
- Moisture intolerance. Permanent source water nearby (river, lake, artificial fountain) leads to rotting of the structure. This is prevented by applying waterproofing agents to the parts.
Getting ready to build a gazebo: project drawings, optimal dimensions
The choice fell on a simple rectangular gazebo in construction. For this type of structure, there are two roof options: gable or four-slope. We decided to make the roof of the first design, as it is easier for beginners.
- The base of the gazebo is a square with a side of 2 meters 10 cm.
- The length of the support posts is 2 meters.
- The distance from the base of the roof to its upper part is 66.5 cm.
- The middle strapping is performed at a height of 70 cm from the floor.
The project of a gazebo with opaque sheathing up to the level of the middle strapping. For such a building, it is recommended to install stationary jibs to strengthen the structure, the length of which does not exceed 15 cm.
In one of the sides of the gazebo there is an opening for entry and exit. It is carried out in the middle, the indents from the corner posts are 60 cm. The width of the opening is 80.9 cm (including additional beams).
Dimensions 2x2 meters with an opening for the entrance
The length of the rafters is 1.99 meters. When making a protruding roof, the area that the gazebo will occupy will be 2.5 x 2.5 m 2. This should be taken into account in the subsequent decoration of the area around the building.
Such dimensions are optimal for the design in which the family rests on the territory of a country house. Of course, they adjust the height of the gazebo or the area of \u200b\u200bthe base for themselves, if it is planned for large-scale holidays and events.
We choose the material (wood, logs, beams, etc.), tips. Calculation of the required amount
When choosing a material for the manufacture of gazebos, attention is paid to the type of wood and the method of construction.
Most often, the building is erected from such rocks:
- Pine: resistance to decay and mechanical strength. The disadvantage is that it is easily affected by wood-staining fungi.
- Spruce: hygroscopic and less affected by bacteria.
- Larch: 30% stronger than pine, and more resistant to moisture. Disadvantage - difficult to process; strong but breaks easily.
As for the construction method, there are 3 types.

There are 2 types of boards from which it is convenient to make wooden structures:

Tongue-and-groove board, it will be easy to fix it
The board is advised to be used by craftsmen who build buildings in one hand, since it will not be necessary for laying extra help due to the weight of the material.
- racks - 27 meters of timber or 54 meters of board,
- rafters - 10 p.m. boards,
- top trim - 8 p.m. boards,
- floor covering - 40 p.m. boards,
- railings (medium strapping) - 8 p.m. boards,
- roof - 8 square meters(roofing material or tiles).
List of building tools
Before starting work, prepare the following tools:
- saws - circular and for cutting at an angle,
- electric plane,
- chisel,
- a hammer,
- jigsaw,
- carpentry workbench,
- tape measure and building level,
- stairs,
- drill and drill.
Construction of a wooden structure step by step
Laying the foundation: is it needed and how to make it?
Before starting work, you need to prepare a drawing yourself or find it on the Internet
A common mistake in the construction of buildings near water bodies is the wrong foundation. Consideration should also be given to the possibility of close ground water and specifics wooden buildings, we advise you to build it not monolithic, but columnar. This type will allow the gazebo to acquire additional stability and save time.
Following the instructions, the process of laying the foundation will be quick and uncomplicated.
Foundation marking scheme
First, mark the site for construction according to the drawing. Install stakes around the perimeter of the gazebo and wrap them with a thick thread.
Preparatory work
After that check the correctness installed supports by measuring the diagonals (distances between opposite corners). They must be equal.
Perhaps, the best option for a small gazebo
The next step is to dig holes under load-bearing poles. Depth - 40 cm, width - column diameter + 15–20 cm. For our gazebo four pillars quite enough, but if a gazebo with an area of 6 square meters or more is planned, it is advisable to make an additional hole in the center. This will help prevent sagging of the floorboards.
Before installing the pillars, treat them with an antiseptic material (tar or bitumen).
Then insert the supports into the holes and backfill. It is better to do this with large gravel or chipped old brick. Tamp the material and check the verticality of the pillars with a building level.
Final stage. Prepare the concrete solution and fill the holes. Before further work should take two or three days, depending on the humidity of the air. Pillars can be separately decorated with bricks. It will improve appearance foundation and further protect it.
Do-it-yourself construction work on the manufacture of a gazebo to the country house
The construction of the gazebo begins with the installation of the base.
Place the pre-prepared beam horizontally, at a distance of 10 cm from the ground and fix it with self-tapping screws to the support posts ( columnar foundation). It is necessary to carefully carry out these works, since the stability of the structure and the service life depend on the quality of the base.
Reliable fastening with metal corners
A slight indent from the ground will provide good ventilation. In a wooden gazebo, a floor made of the same material looks great. In the manufactured base, we install logs for a solid floor frame. The distance between two adjacent supports is at least 40 cm.
There are two fixing options:
- screwing screws at the junction;
- a bunch of metal corners.
The next step is to lay the floor board over the lathing. They need to be nailed with a small gap of 1-2 mm for better ventilation. Each element is screwed with two self-tapping screws on each side. If you decide to use nails, then you need to pre-drill holes for them, this is necessary so that the board does not crack.
We lay the floor in the structure
Treat all wooden parts with waterproofing material if you use regular board, and not terraced (it does not require processing).
Next - install the bearing supports. Place the pre-prepared beam strictly vertically on the bearing supports. Check with building level and reinforce with jibs. To strengthen the structure, perform an average strapping. To do this, take a board prepared in advance, mark and cut out the necessary details according to the drawing. Then, using self-tapping screws, fix the base on the bars.
The upper trim connects the supporting pillars and is the basis for the roof. Screw the prepared boards with self-tapping screws and secure with metal corners for greater strength.
Top and middle harness
We install the railing, make cuts in the risers, as shown in the photo, and fix it with the help of corners. Under them we fix the crate for exterior finish, retreating from the edge to the width of the coating material, plus 1–2 cm.
It is impossible to imagine a gazebo without a railing
To give the future gazebo stability, you can perform this part of the work from a bar. Cuts are made from the end and connect it, fixing it with two nails, as shown in the photo below.
The length of the cut is equal to the width of the beam
For the roof you need to assemble truss system. It is a triangle roofing material.
With such cuts in the rafters, the roof will be much more reliable.
In the boards for the rafters, according to a pre-prepared template, cut out a gap for the beam (board) of the strapping at a distance of 30–40 cm.
Detailed drawing of the roof of the gazebo
Assemble the template very carefully, checking and trying it on several times. A roof with an overhang will give you the opportunity to relax in the gazebo in rainy weather and not get wet. Fasten three boards with a metal corner. Finished triangles rise to the height of the roof and are nailed obliquely with long nails or fastened with metal corners. For the stability of the roof during installation, it must be supported in the center. This can be done with a bar, at the end of the work it is removed. After installing each part, check the horizontal, vertical using the building level.
The inner ends of the rafters are fixed on the central headstock in such a way as in the photo.
Internal headstock for fixing rafters
Internal headstock, bottom view
If you decide to use four boards on the roof instead of eight, then you can fix them in one more way. The two main ones are connected to each other with self-tapping screws, and the rest are already attached to them.
Fastening of the four-rafter system
All triangles must be covered OSB boards 6–8 mm thick, strictly cutting them out according to the drawings.
Before you start laying the roofing material, nail one horizontal board from each end of the roof, in the figure under the letter A, on the sides. This point should not be forgotten, as this will protect you from slanting rain, and the ends of the board from moisture.
This board will protect both you and the building itself from raindrops.
Additionally, you can install droppers, then no rain can wet you and your gazebo.
Droppers will reliably protect the edges of the gazebo from any downpour
Lay the selected material (bituminous shingles or roofing material) with an overlap for better insulation from moisture. Laying should be carried out from the side of the droppers, gradually moving towards the base. Protect the joints of the roof triangles from precipitation with pieces of the remaining roofing material.
Fix shingles with special nails, in a certain place of the roofing sheet
To decorate the gazebo between the railing and the top trim, make a crate of 30x40 mm bars. Cut the ends at an angle of 45 degrees, and sand the elements to a smooth (burr-free) surface. Then, with long nails, nail the ends to the middle trim and to the base of the roof. Arrange the parts crosswise.
On sunny days, there will always be partial shade inside the gazebo.
The denser you want the "windows", the more often you need to install the bars.
Finishing: how to cover, whether and how to paint
If you want to preserve the naturalness of the material, then the maximum that should be done at the final stage of finishing is to coat the surfaces with varnish. If you wish to show your Creative skills, then the gazebo can be painted in your own way unique design. To do this, wooden surfaces must be treated with a primer, wait until it dries and proceed with painting. In order for the color to be more saturated, you can cover in 2 layers.
- The first finishing option is to install balusters. It all depends on the imagination, there are many options for sale, choose the one you like and go ahead, for the tools. You can also order according to the size and fix them in the frame of the gazebo. This is done with screws and simple movements with a screwdriver.
For every taste, for every design idea
- Another variant interior decoration- lining. This material is a board with a double-sided joint for interior cladding. This connection allows you to carefully fit the elements one to one. This material is most often chosen due to its low cost, ease of installation and thermal insulation properties. Also lining will give your gazebo naturalness.
You can also combine the finish - lining + balusters
- Interior decoration is made from pine boards. This option has a low price compared to oak, cedar or larch. A variety of colors will help you choose boards that are most suitable for landscape design.
Mounting is horizontal or vertical way. The first visually stretches the gazebo in width, the second - in height.
For finishing you will need nails, a screwdriver, a hammer, a drill, a puncher and a hacksaw.
- At the first stage, treat all the material with an antiseptic to prevent decay and the appearance of fungi and other microorganisms. After drying, apply a flame retardant and wait a day.
- The next stage is the installation of the lining on the crate, which was performed at the previous stage. The first boards must be fixed, starting from one of the corners of the gazebo, as carefully as possible, since the entire further process depends on them. Fix them on the crate using special clips (pictured), hammering in small nails. Mount the following panels as close as possible to each other, but leaving a gap of about 1-2 mm, so that when the humidity rises, the material does not begin to bulge when the boards swell. Check the laying of each part according to the building level.
Fastening the lining with these devices is easy.
- The last step is varnishing. This is done for waterproofing and improving the appearance.
Photo: types, options for finished structures
 Simple, ventilated design with hipped roof
  Option gazebo with barbecue inside it: functional and convenient
  Russian folk style May not be suitable for every area
  A simple composition of logs with a crate Almost completely closed version. Here you can escape scorching sun
  The most difficult construction with windows to implement The simplest "hut"
A gazebo made by hand will become a place for your family to relax. Properly selected materials will increase the life of the building, it will delight you both in summer and in winter.
Despite the simplicity of erecting a wooden gazebo, there are some tricks here to get a durable and solid construction. Certain requirements must be followed. In our article, we will talk about the construction of a wooden gazebo with our own hands, and also offer step-by-step instructions for installing the structure.
First you need to start by clearing the site for future construction, removing all rubbish and debris, cutting down boughs and trees. Further, the whole process is carried out in stages.

The list of materials used is very extensive: metal, concrete, plastic and glass. The simplest ones are wooden gazebos, a photo of a wooden gazebo can be seen below. The variety of patterns, patterns, shapes and designs is amazing.

Wooden gazebo
The structure is constructed quite simply and quickly in the shortest possible time. For installation, almost any foundation is used, even created from materials that were accidentally at hand.


A wooden gazebo can be portable or stationary. In bad weather or in winter, the portable structure can be moved under a canopy or hidden in a garage.

It is believed that the best wooden gazebos are made from rounded logs or timber. It is simply fascinating to work with these materials, the most beautiful arbors are obtained.

The negative aspects of the design include a high risk of fire. For this reason, avoid installing barbecues, stoves and barbecues in the gazebo.

The tree can dry out, rot and simply collapse under the influence of harmful insects. The design needs mandatory processing with special compounds.

Brick gazebo
For brick gazebo you will need a high-quality concrete foundation, a monolith is perfect, but you can also use a tape one. To select the base, the characteristics of the soil on the ground are taken into account. suburban area.

If a wooden gazebo cannot be used as summer kitchen or a brazier, then the opposite is true. You can safely install barbecues, fireplaces and stoves. This property most strongly attracts the attention of summer residents.

Among the shortcomings, only the high complexity of the construction of the building can be noted.

Arbor made of polycarbonate
Modern honeycomb material allows you to combine it with stone, metal, brick and wood. There are no strict requirements for the frame of the gazebo. It can be made even from improvised means, when the gazebo is covered with polycarbonate sheets - the effectiveness will not decrease at all.

Inside such a design there is never a lack of light, regardless of the season outside the window.

Among the shortcomings of the material, one can single out a high purchase price, a strong rain noise inside the gazebo, and finally, it is used in the construction of greenhouses. The steam room will be provided to you.

Arbor schemes
The most popular and common materials for building gazebos are metal and wood. In order to quickly and efficiently build a gazebo on your own site without the risk of making jambs due to ignorance, it is better to make a concrete screed and reject the wooden flooring. Get the simplest and affordable option country gazebo.

Drawings and dimensions of gazebos must be drawn up in advance. It is better to prepare several projects at once and choose between them, so it will be easier to choose the most best option in terms of price, quality and accessibility of understanding.


Making a gazebo with your own hands
Let's bring a little instruction how to make a gazebo If you are planning to build a gazebo at their summer cottage with my own hands, then choose better wooden. It is easy to install and assemble.

As a basis, 4 pillars of bars are used, acting as a support for future roof. themselves wooden poles installed not in the concrete foundation itself, but in asbestos-cement pipes or metal pipes. Such a pipe protrudes 20 cm above the ground. Wooden poles are installed in it.

A do-it-yourself wooden gazebo is assembled on the basis of these four pillars. They become future basis the whole structure. A longitudinal bar is attached to the pillars for further fixing the eurolining, or polycarbonate sheets. A 90 cm high fence is enough to prevent moisture and wind from entering our warm building.

If you liked a gazebo made of metal, then it is better to order or buy a ready-made structure, it is not possible to make a similar one with your own hands without special skills and equipment.

How to make a gazebo roof with your own hands? For the construction of the roof, we will use a bar with a section of 5 x 5 cm. It will play the role of a future frame. A strapping is made around the perimeter, and the legs of the rafters are fixed directly to it. They fill the crate and cover it with the roofing they like: metal, soft tiles or natural.


Even in the design process, it is necessary to take into account the roofing material used. Let's say you decide to put slate on the roof, then the length will be a multiple of one meter, and the slope will be equal to 1.75 meters. The overlap of sheets will be 10-15 cm.

Photo gazebos do it yourself


Dacha is a place predominantly summer holiday where children can safely walk all day outside, there is healthy fruits and vegetables straight from the garden, and adults arrange pleasant gatherings over barbecue or just a cool cocktail away from the bustle of the city. It is for such gatherings that it is necessary to have at least a small, but comfortable, gazebo. Inexpensive gazebo to give your own hands in short time This is not a myth, but a real reality! From what it can be made, we will consider in this article.
Materials for the gazebo
A gazebo with your own hands can be made from the following materials:
The price of the finished product will depend not only on the selected materials, but also on the complexity of the project. An ordinary quadrangular arbor will come out cheaper than a hexagonal or non-standard author's design. Any construction must begin with a drawing, selection of materials and coordination of the object with the relevant authorities. Even if you want to make for yourself a small garden gazebo with a barbecue, despite the ownership of the site, it is not recommended to build without approval, since if the norms are violated, the building may be required to be demolished, and the owner may be fined for unauthorized construction.
Wooden gazebos
The design of a wooden gazebo can be either simple - four supporting pillars with a roof, or complex, including carved elements, bends, large quantity corners and floor.
Wooden arbors are usually covered with wood, but reeds, slate, metal profiles or other roofing materials may well be used.
Advantages of wooden gazebos:

Metal gazebos
- the second most common type of these structures. This can include both gazebos made entirely of metal, and combined structures with a metal base (skeleton) or forged.
Nothing too hard to create metal gazebo no, but unlike the same wooden one, its cost is much higher due to the cost of materials, and the bases (pillars) of the structure must be concreted, which makes the process longer. Of course, in some cases, proper planning the structure can be welded and buried in the ground, and the foundation (floor) can be completely absent, but then it’s not entirely clear why it was necessary to deal with such a difficult material to work with ...
For the roof and floor, any materials can be used.
Advantages of gazebos made of metal:

Brick gazebos
If you know exactly where you want to see the gazebo, your house is built of brick and you would be happy to have a solid composition on the site, then ideal material a brick will serve as a garden gazebo. Of course, the construction of such a structure will require a lot of time and money, but its comfort fully compensates for all this.
Advantages of a brick gazebo:

Arbors made of polycarbonate
In recent years, sheds and awnings have become increasingly popular. There is nothing strange in this, since the designs are attractive and with a good margin of safety. Of course, at a cost they are more expensive than wooden ones and cannot be called cheap. But it is quite possible to do it yourself, using metal or wood as a base.
You should be very careful and responsibly approach the waterproofing of the sheet cut. When water gets in, polycarbonate darkens, which negatively affects its aesthetic appeal.
Any material can be used as a foundation. Polycarbonate itself is excellent as a roofing and wall material.
Advantages of polycarbonate gazebos:

On sale you can also find ready-made small inexpensive polycarbonate gazebos: 

Prefabricated gazebos
You can buy prefabricated gazebos. Their price is fully consistent with the quality, and the ease of installation is ahead of all the designs listed above that you can do yourself.
Most often, ready-made gazebos are awnings or, which can be equipped with various kinds of walls made of the same material that covers the roof. These walls can be equipped with "windows" made of durable transparent plastic, mosquito nets and doors with a zipper or Velcro.
The price of the simplest awning without walls starts from 3,500 Russian rubles and depends on the quality of the materials used and the dimensions.
Advantages of prefabricated gazebos:

Foundation (floor) for the gazebo
You can build a gazebo cheaply if you do not plan to make it for any weather and protect it from rain and wind from the sides and floor. A big savings will be the absence of a foundation for this structure.
If you still decide to make a gazebo for any weather with your own hands, it is better to make the foundation from concrete using reinforcement. This design will last for several decades. But for the price and labor costs, this option, of course, is not the cheapest. 
A cheap pergola with a floor can be made from almost any material at hand or with the help of wood. It is enough to dig in a few bars and lay the base of them on them, as is done in wooden houses, or make a base using boards with a thickness of 40 mm or more. The floor is mounted on them. With the right attitude and quality materials, such garden gazebo will be used for two or more decades. However, than more expensive materials and better performance, the closer the cost wooden base gazebos to cement foundation and in some cases it can be even more expensive. For example, when using larch or cedar. 
Of course, that's not all possible options the foundation for the gazebo, but the simplest and most frequently used. You can do without it at all and just make the floor from paving slabs or boards. This will be enough if the base of the structure is well concreted.
So the choice of materials for the foundation of the gazebo with your own hands should be made based on the preferences of the owner and the budget.
Gazebo with barbecue
If the design of your gazebo provides for the use of a barbecue on its territory, then take care of fire safety:


Arbor decoration
A gazebo in the country is not only a place to relax. Sometimes it becomes a full-fledged room for celebrating an event. In such cases, the same materials that are usually used to decorate any other festive premises will help to decorate the gazebo: balls, textiles, natural and artificial flowers. 
Real or forged can become a chic decoration of any gazebo. decorative elements. Both are suitable for any building, regardless of the materials used for construction. 

In the country, it is not customary to sit in a house when it is sunny and warm outside. Only during bad weather can a summer resident hide under a roof. However, you can resort to another option. You can stock up on excellent impressions in the open air if you build your own gazebo.
Such a building will become an ornament garden plot as well as a place for pleasant communication with family and friends. There are many ready schemes light gazebos. If you assemble the structure yourself, its cost will be 50% lower than that of the finished building. The simplest do-it-yourself gazebo is assembled quickly enough. With unhurried work, it can be built in 2-3 days.
Materials and designs
Cheap and practical option- a gazebo made of wood. Such material looks beautiful and is easily processed. If wooden elements are impregnated special solutions they can last quite a long time. In addition, the construction of a country gazebo will not take more than 3 days, even if the work is done slowly.
Another material that is used for the construction of such structures is metal. When making a frame from profile pipe and steel corners gazebo can serve for many decades. It can be built with your own hands. The work is done quickly enough, and the materials are quite cheap.
DIY gazebo
How to build a simple gazebo with minimum cost and effort? For the construction of such a structure, it will be necessary to create a frame and a floor. If it is wooden, the bases are made of bars. Flooring built from boards. As a base, it is better to pour a concrete screed. This version of the foundation will be simple affordable. Before work, it is necessary to choose the right place for installing the gazebo. The area for concreting should also be leveled.

Important! For a simple gazebo, you should not combine wooden and metal frame elements.
Practice has shown that even when protecting wooden supports with roofing material or bitumen, when placed in concrete, the elements begin to rot. Subsequently, this can lead to their destruction. For this reason, it is better to immediately exclude the contact of wood and concrete.

For this purpose, you should:
- Concrete round metal pipes.
- Then fasten wooden posts to them. Metal rods should come out of concrete base by 30 cm.
- Holes are made in them for fastenings.
On such supports, the gazebo can stand for more than a dozen years. Any roof can be mounted on the obtained supports. Building a wooden structure with your own hands is quite simple.
For an ordinary light gazebo, it is not necessary to erect brick fences. You can limit yourself to a simple fence from eurolining. Its height usually does not exceed 90 cm. Such a fence is attached to longitudinal bars. The gazebo will help hide from the scorching sun rays, as well as avoid back blowing strong wind. The fence for the walls of the structure is fixed to wooden poles using self-tapping screws.
Eurolining can be replaced cellular polycarbonate. This material looks great and does not obscure the gazebo space too much. It is also easy to install. The material is not afraid sudden changes temperatures and high humidity.

Roof
For the roof frame, it is better to find a beam of 50x50 mm. It is necessary to create a frame from it, on which the crate will be installed, and then the roofing material. The frame is installed on the top harness. The roof is covered with such materials:
- ondulin;
- metal tile;
- slate.

When choosing the optimal width of the roof, it is worth calculating it in such a way that you do not have to cut the sheets when installing the roofing. To do this, you must first measure the dimensions of the panels used, and then subtract the sheets overlapping each other, which will be performed during installation. The result will be taken into account when calculating the length and width of the roof. It is also worth considering the side overhangs and end overlap. You can make a gazebo with your own hands quite quickly. The main thing is to choose the right materials, including for roofing.

For example, for a slate with 8 waves in each panel, the length of the gazebo is chosen as a multiple of 1 meter. The length of the slopes in this case can be equal to 1.75 m. If several panels are laid along the slope, effective length each of them is reduced by 15 cm - this is necessary to create an overlap.
Choosing the best option for roofing, it is worth Special attention give polycarbonate.
Distinctive features of the material:
- He is great option in the construction of light structures.
- It also makes a fence.
- Polycarbonate is transparent plastic with little weight.
- In combination with it, a metal profile is often used.

Such gazebos are especially attractive and practical if they are located in the shade of trees. In the presence of a translucent roof and the shadow created by dense foliage, the atmosphere in the gazebo will be as comfortable as possible for relaxation.
Garden gazebos made of polycarbonate are simple and affordable. To create them, you need to have several tens of meters steel angle, as well as polycarbonate panels and steel strip. Also, before erecting such a structure, it is worth preparing planed boards, which will be needed for the manufacture of benches and a table. original photo gazebos can be seen below.

Manufacturing steps
To understand how to make a gazebo with your own hands, you should get acquainted with the main stages of work. It is better to choose an easier option. First you need to equip the foundation. In it, the support posts of the gazebo are concreted. After that, they should be scalded with a corner of 25x25 mm. After that, 2 belts of corners are welded to the racks. One of them is placed in the middle of the supports. The second should be put on top - the roof will rest on it.
Polycarbonate sheets have the ability to bend perfectly. For this reason, they can be used as an arched roof. For this purpose, steel strips must be welded to the racks, which have a width of 50 mm. They are mounted on support stands. And then holes are made in them to fix the polycarbonate. You can assemble a simple gazebo for a summer house with your own hands (as in the photo) quickly enough.

Also, roofing is often made of tiles. For the basis for it, OSB sheets should be prepared. The material does an excellent job of holding shingles on the roof. The thickness of such sheets can be 10-12 mm. It has a fairly high strength and rigidity. That is why it does not have to assemble a spatial frame from wooden elements. It is only necessary to firmly attach it to the harness.
Features of simple gazebos
A simple gazebo for a summer residence does not have to be done with a frame frame. Its foundation is concrete screed which was reinforced with steel bars. On such a surface, you can put a barbecue. The safety of such a design is quite high, because concrete floor not afraid of hot coals. In the case of the winter version, it is better to equip the floor with planed boards, and sheathe the area around the barbecue steel sheets. Such winter design looks simple and beautiful.

Inexpensive in construction and easy to install is a columnar foundation. In order not to overpay when building a gazebo for a summer house with your own hands, you can prepare a red brick. To install the foundation, it is necessary to dig holes for the supporting pillars, and then lay them in brickwork, place reinforcement and pour concrete. Laid in masonry anchor bolts 20 cm. There should be a thread at their free end.
Supports are placed on the pillars. The frame is best made from a bar 50x100 mm. If you put antiseptic boards on it, you can get an excellent warm floor. Subsequently, the gazebo can be equipped with an open hearth. With such a finish in the room, it will be possible to rest comfortably even during severe frosts.
To figure out how to build a gazebo, you should get acquainted with the main features of simple structures, as well as learn more about popular materials. You should also understand the sequence of erecting simple arbors.
Conclusion
As you can see, build simple design you can do it yourself, without resorting to the help of professional builders. First, an exact drawing is made, and then, in accordance with it, all necessary work. It is important to consider the capacity of the gazebo, its location and materials. In order to avoid mistakes in the process of work, it is worth performing the correct calculations.


 chancre look like?")
")


