A bathhouse can be a wonderful place to relax with the whole family, with friends and even alone, but for this you need to pay due attention to solving the issues of its interior design. You can handle all the upcoming tasks on your own. You just need to pay attention to studying the theoretical part, and then step by step put all your ideas into practice.

Pay due attention to the choice of finishing materials. The traditional material for finishing a Russian steam room is wood.
Most budget option- pine. However, if possible, you should avoid using material that is too cheap. During the operation of the steam room, the pine emits too much large number resins, which makes visiting the bathhouse too difficult.

The best option for interior decoration of the steam room is linden-based materials. This wood does not overheat, so visiting the bathhouse will be absolutely safe. In addition, the material tolerates high temperatures well and retains its original external properties for a long time.
You can also use birch, poplar and other durable species to decorate the steam room. Larch dries well, which helps create the most favorable microclimate in the steam room.

It is strictly not recommended to use cheap steam rooms for decoration. wood boards. Your choice is lining or solid wood. You should refrain from chipboard, MDF and similar solutions, because... it is toxic and flammable materials. They do not tolerate contact with moisture and very quickly lose their external qualities.
For the rest, be guided by your personal preferences and available budget.
Heating and ventilation
The “heart” of the Russian bath is the heater stove. Best materials for construction sauna stove – fire brick And natural stone. They can be used either individually or in combination.

Brick accumulates heat well, and stones allow you to get the right steam. If properly arranged, a sauna stove will be able to “keep” heat for up to 15 hours, but this point largely depends on the quality of the insulation.
The steam room must have high-quality ventilation. Quite often natural ventilation turns out to be insufficient to ensure proper air exchange and fans have to be installed. There are a lot of ventilation options. Each specific type of system is selected in accordance with the conditions and characteristics of a particular case.

There must be a drain hole in the floor of the bathhouse through which the excess moisture. This will prevent the formation of dampness, mold and other troubles in the steam room.

Floor finishing
To finish the floor of the steam room, edged or tongue-and-groove boards are used. The work is done in a few simple steps.

First step. Carefully level the base and remove any debris.
Second step. Make a concrete screed. If the rough foundation does not have significant differences, you can do without a screed. In this case, you need to fill the base with about a 10-centimeter layer of sand.

Third step. Install brick pillars measuring 25x25 cm on the base. These posts will serve as supports for the logs. Select the height of the posts so that the finished floor in the steam room is at least 15 cm higher than the floor of the washing room.
Fourth step. Lay the joists and secure them to the support posts. Traditionally, logs with a cross section of 25x25 cm are used. The optimal laying step is about 1 m.

Fifth step. Start laying the boards. Start laying from the far corner from the entrance to the room. Use galvanized self-tapping screws to attach the boards to the joists. Screw them in so that the caps are buried at least a couple of millimeters in the wood.
The bath floor is laid with a slight slope - about 1 cm per 1 m of surface. The floor design necessarily includes a drain for the timely and effective removal of excess moisture.
Wall decoration
It is best to use lining for finishing bath walls. Before starting work, bring the lining into the steam room and leave it there for a day or two so that the material has time to adapt to the surrounding conditions. All wood must be processed antiseptic. In general, the work is extremely simple and is performed in several stages.
First stage. Assemble the frame. When choosing a material for assembling the frame, consider the expected level of the upcoming load. If the shelves will be attached to the walls, the sheathing should be assembled from bars. If the shelves will not be attached to the walls, the frame can be made of slats.

When choosing an option for fastening the sheathing elements, be guided by how the lining will be secured in the future. If you attach the sheets vertically, fix the slats or beams horizontally, and vice versa.
Attach the first and last slats to the wall. Use self-tapping screws for fastening. Select the pitch of the sheathing in accordance with the width of the insulation boards.
Second stage. Attach waterproofing (polyethylene film) over the sheathing and begin laying the insulation. For insulation, mineral wool is most often used.

Third stage. Secure on top of the laid insulation vapor barrier material. To fix vapor barrier membranes, it is most convenient to use construction stapler.

Fourth stage. Proceed with the installation of the lining. Start attaching the sheathing sheets from the far corner of the steam room. The lining can be secured with self-tapping screws or other convenient fasteners. Cover all the walls of the steam room with clapboard.
In the case of finishing baths, use for finishing lining varnishes and paints are strongly not recommended.
Ceiling finishing
First step. Type to load-bearing beams overlapping lathing. To assemble the sheathing, use edged boards or wooden blocks. Place a waterproofing film over the sheathing. Select the sheathing pitch in accordance with the width of the insulation boards.
Second step. Fill the sheathing cells with insulation (usually basalt wool). Carefully align the insulation mats so that there are no gaps or cracks.
Third step. Attach a vapor barrier material to the beams on top of the insulation. Lay vapor barrier strips with a 20-30 cm overlap. Use a construction stapler to secure the material. Tape the joints with aluminum adhesive tape.

Fourth step. Proceed with the installation of the lining. Attach the sheets to the slats. Fix the sheets of the outermost row of sheathing at a distance of 1.5-2 cm from the wall to ensure effective air circulation in the space between the thermal insulation and the sheathing.

Cover the entire surface of the ceiling. You also need to leave a gap of 1.5-2 cm at the opposite wall.

The size, shape and placement of benches in the steam room may vary. To the greatest extent, everything depends on the imagination and capabilities of the owner.

The main thing is to choose suitable material for arranging benches. When choosing a material, take into account the fact that the benches will be used in a steam room - a room with high temperature and humidity. Moreover, people will sit and lie on these benches.
Therefore, the wood must have a smooth texture without any knots or resins, and also be hypoallergenic. In most cases, benches are built from poplar, oak, aspen and linden wood. The materials mentioned have many important advantages, namely:
- they do not release resin and other harmful substances when heated;
- dry quickly;
- smell nice;
- do not burn the skin;
- look beautiful;
- have a pleasant-to-touch surface.

The shelves in the steam room should look beautiful and have rounded ends. It is best to place them in 2-3 tiers against the wall opposite the heater. This is the traditional and optimal option. If you wish, you can make changes to the project at your discretion.
Remember: the shelves should be at such a distance from the stove that people do not get burned on the surface of the unit. If plaster was used to finish the stove or the masonry was left “as is,” the minimum permissible distance to the shelves should be 50 cm.
There is also a limitation on the distance between the ceiling of the bathhouse and top shelf: no more than 1.2 m and no less than 1 m.
Lighting in the steam room
In the process of planning and organizing the lighting of the steam room, you need to take into account the main features of this room - a hot and humid microclimate. Lamps in this room can be placed exclusively in the corners or right under the ceiling.
The corners and ceiling heat up the least, and artificial light with such placement of devices it will not “stare in the eyes”.
Fiber optic luminaires allow for softer and more diffused lighting. In addition, fiber optic lighting fixtures are considered safer for use in such conditions when compared with ordinary lamps.

Regardless of which lamps you choose, they need to be hidden behind heat-resistant and heat-resistant shades. To make the lampshades less conspicuous, they can be framed with beautiful wooden grilles. Also, wooden grilles will look appropriate on the ventilation openings.
In the end, all you have to do is buy or make various additional accessories for your Russian bathhouse, such as headrests, ladles, buckets, brooms, etc., and the steam room will be ready for use.

Thus, although there is nothing complicated in arranging a steam room for a bathhouse with your own hands, it is a complex, complex work that requires maximum care and responsibility from the performer. Follow the advice and instructions you receive and everything will work out.
Good luck!
Video - Do-it-yourself steam room for a bathhouse
A truly conscientious finishing of a bathhouse is not only aesthetic visual characteristics, but also the excellent smell of natural wood, the long service life of the finishing, as well as the bathhouse building itself.
The interior decoration must be done with high quality and in such a way that everyone who gets there will admire not only the beauty of the finish, the smells, but also how well the steam is preserved in the treasured steam room.
Finishing the steam room in the bathhouse - the best options
The easiest way to have a beautiful front lawn
You've certainly seen the perfect lawn in a movie, on an alley, or perhaps on your neighbor's lawn. Those who have ever tried to grow a green area on their site will no doubt say that it is a huge amount of work. The lawn requires careful planting, care, fertilization, and watering. However, only inexperienced gardeners think this way; professionals have long known about the innovative product - liquid lawn AquaGrazz.
As they say, in a real steam room of a Russian bath there is such steam that “it’s just enough to hang axes.” In some baths it is simply impossible to steam, as the temperature in them reaches temperatures of up to 120 degrees Celsius.
Therefore, the decoration of the walls in the steam room becomes so important, serving not only to protect the walls from exposure to steam, but also the person from steam burns or allergies.
Wall and ceiling finishing
The so-called "lining" or modern panels for cladding like finishing a bathhouse - for real universal choice. The question may rightly arise: why?
Well, for starters, because decorating a steam room in a bathhouse with your own hands using the indicated materials is not a difficult process, and with such finishing the walls look smoother and acquire the ability to “breathe,” which is determined by good microcirculation. Condensation will not form on such a wall of the steam room in the bathhouse, let alone external characteristics. In addition, the installation of the “lining” itself is very simple; for such work you do not need to be a carpenter or a master in this matter.

Decorating a steam room in a bathhouse with your own hands using lining
One very, very worth remembering important detail– the bathhouse will not tolerate varnish for wooden lining. Some varnishes and so-called “stains” at sufficiently high temperatures will release substances that are harmful and dangerous to human health.
Good wood means good finishing
Interior decoration of a bathhouse is a fairly simple process, but you should prepare well for it.
It depends on the quality of the wood from which it is made. finishing material, a considerable part of the whole process and the subsequent operation of the walls and their durability depend. High-quality material will always be sufficiently well dried, properly hewn, and will not have various nicks, cracks or protruding marks from knots on the surface structure.
For example, “lining” made of hardwood is almost the most ideal option. It is characterized by a reduced heat capacity, which is why the bath room will heat up very well and quickly, and at the same time the walls will not be so hot that you can get burned or scalded.
Each breed is good in its own way. For example, birch panels have the ability to positively influence the human body as a whole, aspen has healing properties.
A truly universal solution can be your desire and the implementation of a combination of several types of breeds at once.
Although, if you look carefully, birch has a loose structure, so when harvesting it will dry out quite a lot. It is easy to process, but if there is an alternative, it is better to abandon it.

Finishing the steam room with clapboard made of hardwood
And larch, as an example, has good performance durability due to the fact that it perfectly copes with changes (sometimes very sharp and quite large) in temperatures and high humidity.
As for linden, it is attractive with its light shade. In addition, it is quite moisture resistant and has good mechanical properties. It also takes a long time to heat up, so it is suitable for finishing both walls and ceilings. You can even line the wall near the stove with it for fire safety reasons. With all this, when heated, linden begins to smell very pleasant. To avoid darkening on this type of material, it will have to be processed special compounds.
Linden is also classified as a “honey plant,” which adds to its property and ability to “breathe.” It perfectly absorbs moisture and provides additional sound insulation. What can we say about the medicinal properties.
The most the best option there will be aspen according to your taste. It is also suitable for finishing steam room ceilings. Its mechanical characteristics are so perfect that it has long been used even in the construction of drinking wells, even cellars.
With proper preparation and drying of this rock, the strength indicators increase significantly, so that it will be difficult to even hammer a nail into such a plate. Suitable for the floors of your bathhouse.
Also, aspen is not at all susceptible to rot, and a pleasant plus will be its resistance to various fungi - mold, for example. In addition, there are opinions that aspen helps get rid of migraines and headaches.
Finishing the floor in the steam room

The floor in the steam room should have a quick “water drainage”
When it comes to finishing the floor in your steam room, you should keep in mind that the temperature there is much lower than closer to the ceiling. It rarely reaches 30-40 degrees Celsius. The floor in the steam room of your sauna can even be earthen, concrete or clay.
It is important to take into account the fact that the floor must have rapid “water drainage”.
Of course, in order to avoid various types of thermal shock, it is recommended to additionally cover your floor with a special mat, boards or special cork covering.
For working with the floor and its finishing, ordinary tiles or sanded boards are also suitable.
The technological process for finishing the floor is quite simple: we place the boards on the joists, preferably closer to each other, and fasten them with self-tapping screws.
If the choice is made in favor of tiles, then first you will need to screed, then properly level work surface. The tiles are laid on the intended special mixture. All seams are treated with a special moisture-resistant compound, which will not allow water to get under the facing layer and contribute to the formation of mold. It is worth remembering that this finishing option will make the floor dangerously slippery, which means you need to consider a wooden panel to create safe conditions for steamers.

Finishing the floor in the steam room with tiles
When choosing wood or tiles, remember: the good thing about tiles is that they are quite easy to care for, while wood will help create a general feeling of comfort and, from a decorative point of view, benefits more from the overall composition.
What won't work
No matter how high-quality and correct from the point of view of work technology your finishing is, the following materials are completely unsuitable for steam rooms and bath rooms:
- Linoleum covering;
- Plastics;
- Pine boards;
- Wood slabs.
The listed types of materials are characterized by insufficient resistance to high temperatures, and plastic and linoleum will even emit harmful substances. Pine is characterized by increased release of resins.
Examples of finishes
- Finishing the bathhouse with exotic “abashi”.
“Abashi”, also known as African oak, is very suitable for finishing a steam room. At sufficiently high temperatures, this type of wood will evenly distribute the temperature throughout the room and help prevent burns. Perfect for making shelves and other important elements in steam rooms.
Properties of "Abashi": increased moisture resistance, absence of knots, absence of resins in the structure, lightness, ductility, strength and durability. An impressive and noteworthy list, isn’t it?

Finishing baths and saunas with Abashi wood
- Finishing the bathhouse with Canadian cedar.
This choice and material is quite popular among others. Despite the aesthetic properties and beautiful view, cedar panels also have many excellent properties in influencing human health: it is rich essential oils. Cedar itself is capable of fighting certain types of microbes. It is also worth noting the ease of processing, moisture resistance, resistance to rotting and various temperature conditions. - Linden "lining".
This type of finishing material has become quite widespread in Russia. Linden "lining" has beautiful color and a pleasant smell. This material is also good and easy to process, it is quite hard and durable. It dries out well and does not cause unpleasant cracks in the future. Compared to the materials described above, it is quite affordable in terms of price characteristics.
Often, advertisements for turnkey baths indicate options for finishing with spruce or pine. The place of origin is the northern regions, which give this breed sufficient density. Due to this, durability and resistance to the formation of unpleasant mold increases, and indicators for moisture resistance are also positive.

Finishing the inside of the bathhouse with linden and pine
It is worth considering that spruce and pine emit enough pleasant smell, and it, in turn, gives a therapeutic effect from visiting such bathhouses decorated with this material. Despite the profitability and accessibility, you need to understand that this type of material is very demanding in processing.
A steam room in a bathhouse, finishing it with modern and high-quality materials is a delicate matter. Now that we have discussed this issue, let's move on to the issue of thermal insulation.
The future thermal insulation itself will depend on what material we chose for building the bathhouse. If we are talking about a wooden frame, then additional insulation may not be required. Although, due to the shrinkage of the timber, after some time, cracks and crevices form between the logs of this very timber. Taking this feature into account, “caulking” is made between them using flax or a special mixture of sawdust and clay.

Thermal insulation steam room in the bathhouse
Among narrow circle There is an opinion among bathhouse builders that a completely lined steam room in a bathhouse with “lining” is not quite the right solution. The opinion is explained by the fact that wood is a living material, and such serious cladding will prevent the evaporation of moisture from the steam room.
Although, on the other hand, when modern conditions There is another opinion that insulating a steam room is almost a priority task.
Of course, at the very beginning you need to decide on the position of the steam room. According to the classics, the entrance to it should be from a room where you can wash. If the decision is made to move from the dressing room, then they should be connected by a mini corridor.
The building materials market offers a whole line of insulating insulation for baths. Such materials can be either artificial or natural.
TO natural types include:
- Tow intended to combat cracks;
- The insulation of the crowns is sphagnum;
- And the employee good insulation walls with special construction moss.
These materials are environmentally friendly; at high temperatures they do not emit hazardous substances, have excellent insulating properties.

Materials for thermal insulation of steam rooms
On the other side, natural materials subject to fairly rapid rotting and decomposition, they are very loved various types insects.
The line of artificial insulation materials is presented mainly by:
- Expanded polystyrene;
- Styrofoam.
They are distinguished by a fairly long service life, they are resistant to humidity and are unloved by insects. The thermal insulation performance is simply impressive.
Requirements for seals
Any insulation or sealant must be fire-resistant and withstand temperatures over one hundred degrees Celsius, as well as have good insulating properties.
Basalt wool (for walls) has such excellent and necessary properties, and expanded clay slabs for floors. If we are talking about the ceiling, then perfect choice– expanded polystyrene.
Insulating the ceiling in a steam room usually requires much more materials than insulating walls or ceilings. This is explained by the fact that steam, by its nature, rises very quickly to the ceiling and, in order to avoid its cooling, sufficient attention should be paid to the thermal insulation of the ceiling.
The step-by-step instructions are as follows:

Wall insulation
Step by step instructions:
- We attach the foil to the walls using a 40 mm horizontal beam;
- We place a sealant between them (penotherm is suitable);
- We stretch a layer of foil over everything we have. A construction stapler is suitable for fixing it;
- Using aluminum tape, we isolate the existing joints;
- Then we attach the blocks vertically;
- We begin facing work.
About how to conduct decorative finishing and what materials are suitable for this, we talked earlier.
If the floor of your steam room is made of concrete, proceed as follows:
Plywood is attached to the floor, on top of which the so-called hydrosol is laid. We place its edges behind the wall and secure it with tape containing aluminum. If there are gaps, we process them construction hairdryer. Place it on top of the resulting reinforced mesh and pour the concrete solution.

Waterproofing the floor of a steam room
If the floor is made of wood, then first we attach a 15-centimeter layer of so-called mineral wool under the joists, and fix roofing felt on top of it. Next we process wooden surfaces special compounds such as antiseptics. We lay a subfloor on top of the roofing felt and cover it with clapboard.
Although interior decoration steam room and it seems at first glance a labor-intensive and complex process, but you should understand that at the same time, decorating the interior of a steam room with your own hands is a fairly simple and easy process if you correctly follow all the described rules and recommendations in this article.
Good luck in your construction endeavors!
Wooden cladding of walls and ceilings in a bathhouse is a traditional finishing option that allows you to accumulate heat in the premises and create an optimal microclimate for bathing procedures and relaxation.
Decorating the inside of a bathhouse with clapboards with your own hands is possible for anyone who has minimal skills in working with tools for wood construction. But at the same time, it is important to strictly follow the work technology at all stages so that the cladding does not deform over time and does not lose its functional properties.
Material selection
You can decorate the bathhouse premises with ordinary lining or eurolining, and it is recommended to use eurolining at least for covering the walls and ceiling in the steam room. The advantages of eurolining include:
- larger size lock connection(the lock is more reliable and easier to install);
- the presence of vertical slots on the back side (they compensate for internal stresses, preventing cracking of the planks, provide ventilation and condensate removal, protecting the wood from rotting);
- protective treatment (the wood is pre-treated with products suitable for use in steam rooms).
The lining of the bathhouse inside is carried out using only the highest (elite) or first grade lining - such wood has no defects. If, in order to save money, planks with knots are used, they are placed in areas where contact with human skin is excluded (ceiling, lower part of the wall under the shelves).
The choice of wood type depends on personal preferences and financial capabilities, but it is important to select a material from options suitable for use in a bathhouse. These include: traditional linden, aspen, alder, oak, cedar, larch (mainly for washing department), ash, and exotic breeds wood - abashi, hemlock, etc.

Preparatory stage
The walls in the bathhouse need quality internal insulation. First of all, a roller is attached to the wall. waterproofing material- it is mounted by pressing the sheathing slats.
Between the elements of the sheathing, mats made of non-flammable fiber insulation are laid - they are fastened by surprise, for which the size of the mat should be 2-3 cm greater than the distance between the battens of the sheathing.
A layer of foil vapor barrier is laid on top of the wool. The canvases are attached with an overlap of 10-12 cm, the joints are taped with aluminum tape. To attach the heat-reflecting vapor barrier film, use a construction stapler.
If used as insulation mineral wool with foil coating, installation vapor barrier membrane not required. The mats are attached with the foil side facing the clapboard sheathing.
Narrow 20 mm thick slats are placed along the sheathing - a counter lathing, thanks to which there will remain between the insulation layer and the sheathing. air gap for ventilation.
At the stage of preparation for finishing the bathhouse with clapboard, it is necessary to take care of ventilation - provide appropriate openings near the stove, one at a level of 150-300 mm from flooring, the second is under the ceiling. The air ducts are mounted from corrugated aluminum pipes; valves are installed on the openings to regulate the air flow.

The principle of fastening the casing
The premises are finished from the inside with clapboards in two ways: the planks are placed vertically or horizontally. Each fastening method has its own characteristics:
- Vertical installation. It is fast and easy to install, condensate easily rolls down the slots on the back side of the planks (but also easily rises through the capillaries of the wood), the tongue-and-groove lock is protected from moisture penetration. Due to the vertical arrangement of the slats, it is easier for heated air to circulate inside the steam room.
- Horizontal laying. When fastened with the tenon facing up, the lock is also protected from moisture; air circulation between the sheathing and insulation is better due to the fact that the sheathing slats are located vertically. With a horizontal lining, if necessary, you can replace water-damaged planks located near the floor without touching the rest of the lining.
Vertical fastening of the lining is suitable for saunas with dry steam, horizontal – more functional for a Russian bath with high humidity. But in general, the choice is determined by personal preferences.
Installation of sheathing
When sheathing the inside of the bathhouse, the first step is to install the sheathing under the lining. For the sheathing frame it is used wooden beam, treated with fire-bioprotective impregnation. Please note: the timber should not be pine or spruce (this wood emits pungent resin odors when heated); a specialized composition for protective treatment is selected that does not emit harmful substances at high temperatures.

If the lining will be mounted vertically, the sheathing slats are mounted horizontally; for horizontally directed cladding, a vertical frame is required. The step of fastening the elements is 40-60 cm.
Before the stage of installation of the casing, it is necessary to lay the wiring to the installation sites of the lamps, to the socket for the electric sauna stove, etc. The wires are mounted in moisture-proof, non-flammable corrugated casings.
Installation of lining
The interior lining of the bathhouse is carried out using hidden fasteners, because:
- It is easy to get burned on the open caps of metal fasteners;
- low-quality hardware rusts when exposed to moisture and stains spoil the appearance of the wood;
- open fastening (for safety, the caps are recessed into the wood) worsens the appearance of the room.
Clips and small nails are used as hidden fasteners. If you decide to use self-tapping screws, it is recommended to close the holes into which the heads are recessed with wooden plugs, which complicates installation.
Headlining
When considering how to properly sheathe a bath room, you should pay attention to the order of work. The ceiling is finished first, since the wall planks must rest against the horizontal cladding.

The planks are installed starting from the wall with front door. There should be a gap of 40-50 mm between the ends of the finishing elements and the walls, which is necessary to compensate for the thermal expansion of wood (the ceiling heats up the most as it rises towards it). hot air) and for high-quality ventilation between the sheathing and the walls.
The planks are fastened using clamps. The last board is secured using finishing nails without a head, which are driven in using a hammer so as not to damage the wooden plank.
Wall cladding
Installation of the lining begins from one of the corners of the room. The fastening of the boards is standard: the edge of the first board is fixed with hidden nails, the clamps press the edge of the groove to the sheathing, and the ridge of the next element is inserted into the groove.
The upper ends are adjusted to the ceiling point-blank. It is necessary to leave a gap of 20-30 mm between the floor and the wall cladding in the steam room to prevent rotting of the lower part of the cladding. When the lining is installed vertically, moisture rises through the capillaries by 40-50 cm, and when installed horizontally - by 20-25 cm.
By finishing the washing compartment from the inside with clapboard, the gap between the floor and the casing is increased to 40-50 mm.
The sheathing in the steam room should not rest against adjacent walls - a gap is required to compensate for the expansion of wood under the influence of temperature and high humidity. Also, the lamellas themselves should not be joined together as tightly as possible, point-blank.

To create the required gap between the slats, the following method is used:
- The ridge of the plank is driven into the groove of the previous one until it stops.
- Marks are made along the seam line with a sharp object.
- The bar moves a few millimeters relative to the marks.
- The verticality of the lamella is checked, after which it can be fixed with clamps.
If you join the seams of the ceiling and wall cladding, finishing the bathhouse inside with clapboard will look impressive.
Installation of additional elements
The outer and inner corners and baseboards are fastened using finishing nails without heads, which are recessed into the wood. Places for installing fasteners are polished sandpaper so that there are no rough edges left.
The slopes of the doorway can also be sheathed with clapboard, cutting it to size. To frame the openings, platbands made of the same wood as the door are used.

If the bath is installed wooden windows, to design the slopes you can use lining, the gaps between the junction of the wall sheathing and the window opening in this case are closed decorative strips or a strip for lining.
Finishing near the stove in the steam room
Lining is a flammable material and should not be adjacent to a sauna stove. The corner of the stove or part of the wall around the built-in stove is lined with stone or brick, or a screen is mounted from sheet metal, under which a non-flammable sheet heat insulator is laid.
Contact should also not be allowed wood paneling With chimney– in the place where the chimney passes through the wall or ceiling, a “coupling” made of non-flammable fiber heat insulator is mounted and a metal apron is attached.
Final work
Finishing the inside of a bathhouse with clapboard includes the stage of processing the material with special compounds that prevent wood from rotting and changing color under the influence of external factors.
The steam room and washing room, decorated with wood, and the dressing room are treated with compounds for water based or wax based. The environmental friendliness of protective equipment is important.
Lamps are mounted on the ceiling or walls and covered with decorative wooden grilles. The ventilation holes are equipped with valves - they are also easy to install with your own hands.

Features of shrink finishing
How to line the inside of a bathhouse with clapboards with your own hands if the log house was built recently? For complete shrinkage wooden bath It takes at least 3 years, but I want to start using it as soon as possible. To solve the problem, use special technology mounting sliding internal lining.
When arranging the sheathing frame, sliding guides are used - metal elements in the form of corners with a slot allow the sheathing to move as the frame shrinks. This eliminates the risk of deformation of the inner lining.
A gap of 20-30 mm is left between the ceiling and the wall cladding for shrinkage. The gap is covered with a plinth fixed to the ceiling.
To cover a bathhouse with clapboard without extra financial expenses, it is recommended:
- apply material different varieties and species - for the dressing room, the requirements for the type of lining are much lower, the use of cheaper coniferous wood, including 2 grades, is allowed;
- buy lining of different lengths - short slats are cheaper, and where long slats are not required, you can use them;
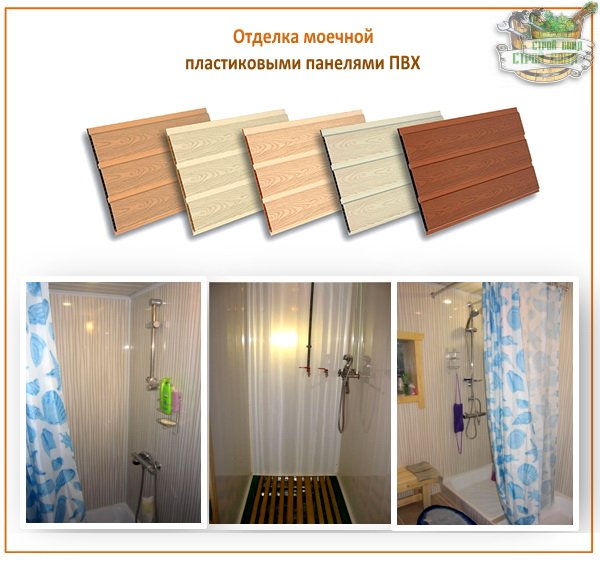
- for finishing the washing area, use alternative inexpensive options finishing, including PVC panels.

A competent choice of finishing material and adherence to the technology for installing internal cladding make it possible to finish the bathhouse yourself, saving on the involvement of specialists - the services of professionals require an increase in the construction budget.
How to properly cover a steam room with clapboard, if from time immemorial wood has formed the basis of the sauna interior. Our ancestors used it both for construction and as a finishing material, without thinking about which lining to choose for the steam room and how to install it correctly.
A return to wood is not a tribute to tradition, although it is not entirely true to talk about a return; wood has never been forgotten. The use of wood in a bathhouse is not only economically justified, but also logical from the point of view of availability and low cost.
Installing the lining with your own hands is quite possible and does not require a lot of work. The desired result turns out when making the right choice material and high-quality fastening.
Factors affecting service life
So:
- A long service life is ensured by the type of wood used to cover the steam room with clapboard and its quality. Here we can note deciduous species, which include aspen, linden (see), alder, and less often oak.
They have a lot of advantages, and since the wood density of these species is very high, they heat up quickly and retain heat well. The only disadvantage noted in practice is the acquisition of a dark color from high temperature and humidity. - You won’t let coniferous wood into the steam room, but in the washing department it will delight its owners for a long time.
- The class of wood or its grade determines the service life. “Extra”, “A”, “B”, “C” are highlighted. The first three varieties are among the most quality products, the clapboard cladding of the steam room is made with these very materials.
There are practically no knots or places on their surface where they could be. Lining with knots cracks during use. - You can't ignore this important factor longevity of finishing, as a method of installation. A natural question arises, how to properly attach the lining in the steam room, if some photos show vertical installation of panels, others horizontal, others even diagonally, and everywhere the finish looks beautiful.
Why use clapboard on a log wall
How better finishing clapboard steam room, if the Russian bath has always been famous for its wet steam room and bare frame without additional cladding. The technology for generating steam in a steam room is quite simple; the walls are made massive, hygroscopic and heat-intensive.
Famous artists depicted steam rooms as impressive in their paintings; the luxury of a bathhouse was determined by the thickness of the log house. First, the log house accumulates moisture, absorbing it, and then releases it evenly and gradually.
So:
- This design has a significant disadvantage, which more than one bathhouse owner has encountered when trying to heat the bathhouse to the desired temperature in the cold season.
- The wet mass of wood warms up for at least 4 hours in winter, now imagine how much firewood is needed, and the logs themselves will not last long with such use.
- If in the last century wood was one of the cheapest and most accessible building materials that no one spared, now the situation has changed a lot.
- Modern construction of a bathhouse is not complete without a steam room; clapboard finishing accomplishes the task of reducing the heating time of the bathhouse to one hour, which will significantly reduce heat energy consumption.
Attention: To receive desired effect the mass of the tree is reduced to 1 cm of the lining, but foil and insulation are placed under it.
- It is impossible to say that this is the ultimate dream of the bathhouse owners. Indeed, it is easy to heat this steam room; the wood consumption is small.
- But the room cools down much faster than we would like; fuel is constantly added to the stove in order to obtain the desired temperature of the Russian bath. Walls do not accumulate steam in required quantities, it is created by steam generators or expensive ovens. This process cannot be left unattended; it must be constantly monitored.
- High-quality lining for the steam room “breathes” along with the walls of the bathhouse (see).
- It prevents condensation from appearing and fungi from developing by regulating the humidity in the bathhouse.
- The advantages of lining include its durability.
- It does not rot and is easy to process.
- It has heat and sound insulation, is aesthetically pleasing and environmentally friendly.
- Finishing the steam room with clapboard provides the opportunity to obtain a surface without defects. Under it you can hide irregularities, cracks, and electrical wires.
- Here it is necessary to add a small clarification that previously the lining was made in “quarter” and “tongue”, but the slats moved one relative to the other and the density of the joints was violated. Today, the construction market is filled with clapboards with a tongue/groove profile.
Preparation and execution of work on the cladding of the steam room

Listening to the opinions of experienced bathhouse attendants, each bathhouse owner determines a steam room for himself in order to obtain a certain effect.
So:
- The vertical position of the lining affects the durability of the boards. The temperature difference at the bottom and at the top is completely different, which negatively affects the service life of the products.
The vertical arrangement of the lining is indispensable in baths with dry air and high temperature, that is, operating in sauna mode. There is practically no water in them, so the wood does not change its appearance and does not darken.
The joints of the boards are not exposed to moisture due to the absence of water splashes. For good air circulation under the lining, holes are drilled. - The video in this article shows a lining nailed horizontally. The horizontal arrangement of the cladding is done not only for the purpose of visual magnification walls in length.
It is not enough to say that in a Russian bath this arrangement of cladding material can be considered standard, the advantages horizontal mounting the linings don’t end there.
- When the floor darkens, the lining next to it can be changed without difficulty or much effort.
- Water does not get into the joint of the boards, which ensures better drying of the lining and extends its service life.
- Air circulation behind the horizontal lining is much better, because a vertical frame is needed to attach it.
- The vertical frame on which the insulation is attached becomes an insurmountable obstacle for mice.
- The last advantage of the horizontal arrangement of the lining is its installation.
Attention: When fastening the lining horizontally, the groove is directed downward.
- Incorrectly performed installation of lining can equalize and nullify how quality material, and cheap, the price of which suits a wide range of consumers.
Preparatory work

So:
- Solving the problem of how to cover a steam room with clapboard, the video gives a general direction for the work and suggests starting with preparing the surface of the walls.
- All potholes, cracks are filled, installed and secured water pipes, electrical cable.
- Materials and tools for finishing the steam room are being prepared.
| List of tools | Application |
| Wood hacksaw | Cutting boards to required sizes |
| Hammer | Working with nails and self-cuts |
| Doboynik | Device for finishing nails |
| Screwdriver | A tool for every owner who is used to working around the house |
| Electric hammer drill | Provides rotation of the tool and its longitudinal-axial movement during drilling |
| Plumb line, building level | Checking the cladding surface for compliance with horizontal and vertical dimensions |
| Roulette | Measuring tool |
| Phillips screwdriver | For working with fasteners |
| Nails, self-cutting with galvanized surface | Do not rust or spoil appearance linings |
| Staples | Fastening the sheathing |
| Kleimers | Hidden lining fastening |
- Having prepared all necessary tool, material, having decided how to properly line the steam room with clapboard, you can begin work on finishing the walls.
- The sheathing is installed in a certain sequence.
- After 60 cm, brackets are fixed to the surface of the walls.
- The cuts themselves fix the sheathing to the brackets.
- Using a plumb line and level, the horizontal and vertical position of the sheathing structure is checked.
- The space between the sheathing beams is filled with insulation and covered with a waterproofing film.
- Next, the lining is attached.
Several ways to fasten the lining
How to attach the paneling in a steam room is a question that haunts many bathhouse owners:
- Fastening with clamps to obtain neat and beautiful walls. The advantage is the ability to quickly and easily dismantle damaged boards. The ceiling and walls of the steam room, sheathed in this way, have an elegant, stylish appearance.
- One of the simplest and cheapest methods of fastening is as follows. The panel is tightly installed in the groove of the previous one and fixed with a galvanized nail, and the protruding nail heads are recessed with a hammer, then they do not interfere with the installation of subsequent panels. The disadvantage may be damaged boards.
- How to nail the lining in the steam room in another way? There is a method for this, number 3. It is used when installing the last boards in a row, as well as when assembling seats and shelves.
Here, self-cuts are used, which are wrapped in drilled holes. Then wooden plugs are driven into these holes, the protruding parts are cut flush and the surface is sanded. - The instructions recommend using the fourth method for old-style linings. Holes are drilled in the boards corresponding to the thickness of the self-cuts. The holes are drilled in the form of a cone corresponding to the screw head.
The board is fastened to the sheathing so that the surface of the screw head is integral with the board. The surface of the board is sanded and cleaned.
Put a point in this process paint or varnish applied to the lining will help. However, we must remember that in a steam room these compounds will be superfluous and experts do not recommend using them there.
ordinary log walls? This is interesting! A real Russian bathhouse, which from time immemorial was famous for its steam in Rus', is a very wet steam room and a bare log house without any additional finishing. Why is this so? The whole technology is simple: in order for the steam to last for a long time, the walls must be massive, heat-intensive and hygroscopic. At first, the log house absorbs moisture well, and then gradually and evenly releases it. During bathing procedures in such a bath, one could even hear a hissing sound - these were logs that were covered with drops of water from the condensed steam and began to absorb water into their pores. And the thicker the frame was, the more luxurious the Russian bathhouse itself was. It’s no wonder that couples in the paintings of famous artists always look so massive!
But this design also has significant disadvantages: it will take a lot of firewood to warm up the wet mass of wood, and it will take at least four hours to heat the bathhouse itself. Plus, logs, of course, will not last long - but a hundred years ago they were considered the cheapest and most accessible building material, and therefore there was simply no pity for them. Unfortunately, the situation today is different.
But in modern bath you can no longer do without finishing. Her main task– significantly reduce heat energy consumption and the heating time itself to an hour or half an hour. And to do this, the mass of wood in the steam room needs to be reduced to 1 cm of lining, under which foil and insulation are placed. It is easy to heat such a steam room; it takes little wood. But, of course, there are also disadvantages: the room cools down quickly, you have to add fuel all the time, and the regime of a real Russian bathhouse is not easy to achieve. After all, steam is no longer accumulated by the walls - it has to be created using expensive furnaces or steam generators, ensuring that it is supplied frequently and regularly, and the process itself must be vigilantly controlled.
Choosing a lining: with what lock and what length?
Good, high-quality lining helps the walls of the bathhouse to “breathe,” prevents the appearance of condensation and fungus, and uniquely regulates the humidity in the bathhouse. The main requirements for these materials are the requirements environmental safety. It is worth clarifying that at one time all the lining was made “in tongue” and “in quarter”, but the slats often moved during operation, and the density of the joints was violated. That is why today almost all lining on the market is made with tongue/groove profiles.
A little secret for those who like to save money: clapboard up to 1.5 meters long in warehouses costs much less than one that is more than 2 m long. And figuring out how to cover a bathhouse with clapboard of this length is not difficult. You just need to make a rail in the middle. But the benefits will be quite tangible.
What is the best way to mount the lining: vertically or horizontally?
Experienced bath attendants have this opinion: when the lining is placed vertically, the temperature of the boards below and above turns out to be different, which cannot but affect their durability. With lining nailed in a horizontal position, shrinkage and widening are much less noticeable later. Also, the horizontal lining of the bathhouse is done with the purpose of visually increasing the length of the wall of a small steam room. Here are more advantages of horizontal fastening of the lining:
- If the floor darkens, it will not be difficult to replace the lining around it.
- Water cannot get into the joint of the boards - and therefore the lining dries better and lasts longer.
- The air behind such a lining circulates much better - all because it requires a vertical frame, and the gap under it also ends up being vertical.
- Another vertical frame for insulation is an excellent barrier for mice.
- Installation horizontal lining much easier to produce than vertical.
An important point: if the lining is mounted horizontally, then the groove should be directed downward.
But vertical lining is indispensable for those baths that operate mainly in sauna mode - with dry air and high temperatures. There is practically no water, and therefore the wood will not darken, and water will not get into the joints of the boards due to the absence of splashes themselves. And so that the air under the lining can circulate well, holes are drilled for this - that’s the whole solution to the problem.
So what is better to sheathe: across or lengthwise? Based on whether you have a real Russian bathhouse, or whether you like the sauna mode, and “banya” is just a name.

Finishing of the washing room: wood or PVC?
In the washing room, the air temperature is, of course, lower than in the steam room, but the humidity is much higher. That is why ordinary lining is rarely used as a finishing material - only if a special hood is installed on the ceiling. And usually it is moisture-resistant larch. Yes, the usual wooden lining You can use a bathhouse inside the washing compartment - if you think carefully about how to treat it. This is necessary to prevent mold from multiplying and black spots and insects from appearing. Basically, bathhouse attendants today use colorless water for these purposes. antifungal agent water based.
But plastic PVC lining, effectively imitating wood, fits perfectly. It is easy to attach, easy to clean and lasts quite a long time. Why not use the same one in a steam room? No plastic is designed for the extreme temperatures that it experiences, but in the washing machine it does not deform and there are no harmful volatile substances does not release into the air.
More plastic lining much cheaper than wood. It is only important to make a vapor barrier in the washing room and ventilation gaps: the sheathing is attached, on top of it - polyethylene film, then - slats and lining on them
Is it possible to finish a bath that settles?
Of course, many owners of new baths are not at all happy with the fact that they have to wait more than one month from building the walls to finishing them. But how can such a bathhouse be lined with clapboard if the log house then settles by at least 5 centimeters, and the clapboard, and especially the tiles, will not survive the deformation. But, in extreme situations, when for some reason it is impossible to wait, high-quality finishing It can still be done if you use special sliding guides under the lining. In this case, the bottom is attached rigidly, and all other fasteners are firmly fixed to the walls and slide slightly down along the same guides.
You can make this floating frame according to the most different technologies, but this method has proven itself best: we make a slot the width of the block, and the same block holds the frame. At the same time, the wall sits freely along the horizon, and this process does not harm the finishing in any way. One more point: you need to take a large self-tapping screw for the lining; the ideal option is a galvanized nail.
In this case, both the guides and the casing are attached such that they do not reach the ceiling by the expected amount of draft. And the ceiling sheathing needs to be attached only to the ceiling itself, and not to the walls. And so that later, after the log has shrunk, there are no gaps between the two sheathings, the ceiling needs to be sheathed flush with the top of the wall sheathing, and ceiling plinth nail only to the ceiling.
Oddly enough, you can also lay tiles on shrinking walls - if you first install moisture-resistant cardboard on them with the same sliding guides.
The most difficult option for finishing a bathhouse is if it presents itself with icy walls in winter. In that case experienced builders They do this: inside the box they make an internal insulated frame, with an indentation from the walls. The best finishing in this case, a linden croaker, which will keep all the heat in the steam room.
The process of covering a bathhouse with clapboard is not long and simple, but then the steam room looks, of course, simply amazing.


