According to many, the kitchen is the heart of the home. All members of the house often gather there and greet guests. Therefore, the atmosphere should be cozy and warm, and kitchen renovations should be taken responsibly, especially if it is done without the help of specialists with your own hands. Thanks to interesting ideas for kitchen renovation, you can create a unique atmosphere in your apartment.
So that severe emotional shocks do not arise, and everything is done in short terms, it is necessary to follow the sequence of actions.
Carrying out repairs
Kitchen renovations are divided into cosmetic or major. With a major renovation, the premises can be redesigned and changed beyond recognition. Cosmetic may affect the walls, ceiling, floor, but without major changes in the room.
Let's consider modern renovation DIY kitchens step by step, as well as options and ideas that can be used at each stage.

Step 1 - Drawing up a design project
Serious problems can arise if you start repairs without having a plan for the upcoming work. You can start drawing up a design project yourself, or entrust it to a professional. In any design project, the arrangement of furniture is thought out, color scheme, lighting and stylistic design. In addition, you can roughly calculate in advance what budget will be needed to renovate the kitchen and in what color the renovation will be done: red, white, dark or any other.
Step 2 - Cleaning the space and removing old finishes
When the design issue has been resolved, the kitchen must be completely freed from all existing household appliances and furniture. Afterwards, the dismantling of the finishing from the ceiling, walls and floor begins.
Step 3 - Plumbing work
This stage should be given special attention, especially if it is necessary to completely replace all plumbing fixtures. Pipes should be installed closer to the wall or hidden behind it. Instead of cast iron battery should be installed modern design. The pipeline can be made of metal-plastic, polypropylene or copper.
It should be taken into account that polypropylene pipeline does not require installation of gaskets, and is inexpensive. Metal-plastic pipes are characterized by low heat transfer, rigid construction and are not subject to corrosion. Installation is not easy, and many components are used.
Durability copper pipeline occupies a leading position, is able to withstand very high and very low temperatures, and is also not subject to deformation. But such pipes are expensive.
Step 4 - Electrical work
In the process of replacing electrical wiring, it is necessary to take into account the degree of load in the kitchen with electrical appliances. It is advisable to have a separate power line with large quantities sockets. You should also install spotlights for illuminating individual zones.
It is worth contacting a professional if you plan to install gas equipment, or complete replacement wiring.
Step 5 - Window Replacement
If you need to replace a window, you should determine what type of window it will be - wooden or plastic. Today, plastic is more durable, since it is resistant to temperature changes and other aggressive factors, and, in addition, it does not require additional care. In combination with double-glazed windows, the PVC profile provides good sound and heat insulation.
But they are considered more environmentally friendly wooden windows. They “breathe”, but their cost is higher.
Step 6 - Installing the Door
In the kitchen you can install a door or make an arch; you can choose both plastic and wooden doors for installation. Plastic doors are more resistant to external factors. They do not deform, do not dry out, and are moisture resistant, airtight, and have high heat and sound insulation. Such doors can be purchased at an affordable price.
But plastic ones are significantly inferior wooden doors in terms of environmental safety and naturalness. In addition, today the latest wood processing technologies are used, thanks to which it is possible to significantly increase operational properties tree.
If you decide to make an arch, then it can be made of plasterboard or, as an option, install a frill made of wood.
Step 7 - Leveling the Walls
In the kitchen, leveling the walls can be done in two ways: plastering or using drywall. Each of these methods has its own advantages and disadvantages.
Installation of drywall is simple and does not require much time. The result will be homogeneous flat wall. Thanks to drywall, you can hide significant unevenness on the surface. But it has its drawback: due to drywall, the thickness of the wall increases, and it turns out to be hollow and hollow.
When using plaster, the surface will be smooth and monolithic. But this material will be impractical in rooms where there are uneven walls. This is due to the fact that then the costs of the material will increase and the installation process itself will be more labor-intensive.
Step 8 - Decorating the apron
At the stage of designing the apron and kitchen facade, you can use plastic and MDF panels, tiles, artificial stone or mosaics. The use of plastic and MDF panels is the most budget option.
The most hygienic and durable material counts tiles. Original idea- the apron can be made of mirror or glass.

DIY renovation ideas
Below we will look at tips and interesting ideas for do-it-yourself kitchen renovation in an apartment.
One of the most important parts of the room are the walls.
Walls
You can decorate and repair walls in the kitchen with your own hands in different ways. To make the walls look modern, you can consider ideas using bright colors. Such options will help create a special mood and enliven the room. In addition, you can include various kinds of beautiful accessories in the interior: modular paintings, watches, family photographs, saucers, beautiful patterns on a tablecloth or napkins.
To renovate a small kitchen, you should use ideas of soft tones and a light palette. Thanks to the light shade narrow kitchen will visually appear larger. In this case excellent option will use a restrained, pragmatic style that includes uncomplicated, simple patterns and monochromatic colors. Furniture of the same color will help complement the color scheme.
Wall finishing options:
- ceramic tiles
- panels
Today the ideas of using ceramic tiles for a kitchen apron. There is a huge abundance and many variations in the use of this material on the market. But some choose wall panels, which will also help make the room cozy and beautiful.
Another option is a combination of wallpaper and ceramic tiles. For small room V small apartment, it's worth choosing light wallpaper and tiles, which will help visually increase the space.
Floor
For renovation of kitchen floors can be selected following materials: linoleum, laminate, wood and even ceramic tiles. If the floor is cold, it is better to select and install a “warm floor” system.
Designers suggest choosing dark shades of the floor and light shades of the walls. Therefore, choose the gender more dark colors what the walls will be.
Ceiling
Repairing the ceiling in the kitchen can be done with your own hands, without resorting to the services of specialists, if whitewashing was chosen. But if you plan to make a suspended ceiling, then you cannot do without a company that manufactures and installs it.
Thanks to large selection colors, you can make a plain light ceiling, matte or glossy. If you choose suspended ceiling, then installing built-in lights would be a great idea.
Apron design
Ceramic tiles are most often chosen for the backsplash. You can use an interesting ornament or images of fruits. But interesting idea there will be a choice of frosted, painted or coated glass decorative film. This backsplash material, unlike ceramic tiles, is completely sealed and does not accumulate dust and grease.
Style selection
Kitchen renovation can be done in loft style, in high-tech style. High-tech is the embodiment of purity and functionality. Grey, black, red and white colors, glass, many metal elements, ceiling lighting, lamps - distinctive features modern kitchen in high-tech style.
High-tech style is suitable for a small kitchen in Khrushchev, in panel house and a small studio apartment. This style follows the main principles of minimalism. Its main features: minimalism, strict geometry and simple shapes
neutral colors, a lot of plastic, glass, artificial stone, smooth surfaces, minimal decor and ideal room lighting.

Ideas for kitchen renovation video
My home is my fortress, but how can I find the strength to repair my fortress? Just the thought of repairs starts to send a chill through your body. How to make inexpensive kitchen renovations without much effort, quickly and with your own hands, even for a beginner?
If you are limited in finances, then do the simplest, most refreshing and inexpensive repairs yourself:
Step 1 for inexpensive renovations in the kitchen: whitewash the ceiling with diluted putty, follow the instructions on the package
Step 2 for a quick renovation in the kitchen: put on new wallpaper, even if it’s not expensive, but clean new wallpaper will fill your kitchen with freshness. To ensure a strong adhesion, apply glue to both the wall and the wallpaper. You can take the glue with a color indicator to coat every section of the walls and wallpaper and not miss a single centimeter.
Step 3 for quick and inexpensive repairs: Add bright accent on the kitchen apron: if you have tiles, then of course it’s better not to touch them, let them stay in place, decorate them with stencil designs acrylic paint or aerosol. You can take stencils from the Internet: print them on a printer, stick them on cardboard and cut them out with a paper knife.
Buy paint, aerosol, masking tape and go ahead: attach the stencil to the tile with masking tape and apply paint. If you have regular paint, then it is better to apply with a sponge, but there is a little trick: to prevent your hands from getting dirty from the sponge, attach an ordinary clothespin to a piece of the sponge instead of a handle, and then tap the paint onto the stencil with light patting movements. Let the paint dry before carefully peeling off the masking tape and removing the stencil.
Step 4 for an inexpensive renovation in the kitchen: Paint the radiator, gas pipe. By the way, you can choose a color other than white to paint them - look at your wallpaper and choose a color from their design, this way you won’t disturb color scheme kitchen design.
Step 5 for creative, cheap kitchen renovations: If you don’t have tiles on your kitchen backsplash. but just a painted wall, then choose a bright one for painting the apron extraordinary color. Use the color hint of your wallpaper - choose the desired shade for the kitchen backsplash from their pattern.
Step 6 for a quick renovation in the kitchen: freshen up the paint on the door, change the handles on the door, remember that the art of the designer lies in the details.
Change the carpeting on the kitchen floor if you can’t purchase new linoleum or laminate.
If possible, change the upholstery of the furniture in the kitchen or change the coverings on chairs and stools, buy new bright oven mitts or towels, lay out a new tablecloth, try rearranging the furniture.
Remember that with a new renovation, innovations and changes always come into life. Enjoy the process of creating your home. Take your time, immediately at the beginning of your kitchen renovation, set acceptable deadlines for yourself so that work per day takes you little time, 1-3 hours, depending on your daily workload. Do not accumulate fatigue from repairs, rest and recuperate.
It has been noticed that if the repair is carried out gradually, and the participants in the repair enjoy it, then changes in their lives occur only in better side. So never be afraid of DIY renovations, but approach them with respect without unnecessary fuss and nervousness.
Walls in the kitchen are simple, cheap and effective video
How to renovate your kitchen yourself if you don’t even know where to start? It's pretty frequently asked question, because these days the materials themselves are not cheap, so not everyone can afford to pay extra for the services of masters.
And why, after all, do it good repair you can do it yourself, without resorting to the services of specialists. To do this, you need to clearly know what kind of kitchen you want to get in the end and move towards your goal according to a pre-drawn plan.
Stages of repair
So, let's look at how to renovate the kitchen on your own. Divide your actions into several stages for ease of work. Any repair requires this.
Renovation idea
Before starting any repairs, you should understand what exactly you want to achieve:
- modernity,
- comfort,
- comfort, comfort
- functionality,
- or all together.
To do this, make a list of items that are missing in the kitchen commensurate with the dimensions of the room. If the kitchen area is small, then the best step is to make custom-made furniture. This way you can squeeze whatever you want into a limited space.
But since it's a complete change kitchen set will cost a pretty penny, then not everyone decides to change anything from the furniture when carrying out repairs. Therefore, if you decide to deal only with the premises, then immediately proceed to the next stage.
Color range

A few aesthetic points
Since renovating a kitchen is quite an expensive undertaking, we settled on one of the most inexpensive options. At the same time, it is quite possible to achieve the feeling of an updated kitchen without making a radical change in furniture and equipment.
Finally, I would like to give a few tips that will help bring a touch of freshness to the kitchen interior:
- Change the chandelier. This will cost you little, but will significantly update the interior of the room.
- Purchasing a convenient dining table V in this case would also be useful. If you have limited space in your kitchen, consider installing a breakfast bar.
- Choose curtains and tulle to match the tone of the walls and don’t forget about a new cornice for them.
- If on new furniture no money then old set can be painted or covered with self-adhesive film. Decorative designs can be applied to the furniture.
Conclusion
Naturally, only you can decide what renovations to do in the kitchen. Modern materials allow you to realize any design ideas. We have considered the simplest and most inexpensive renovation option, through which you can get a stylish and modern kitchen.
You can, for example, install a multi-tiered kitchen in your kitchen. ceiling structure made of plasterboard with built-in lamps or give preference to stretch ceilings.
Take a look at the picture below. On the left is the kitchen in the “Khrushchev” (aka “Khrushchev refrigerator”), a panel house of the infamous 464 project. On the right is the same renovated one. It is quite possible for a non-professional builder to do such a kitchen renovation with his own hands alone, with occasional little help from family members. Total cost work, starting with the removal of the previous “junk” - approximately two monthly salaries, in parts as the work is completed; Repair duration is 3.5 months, on weekends and evenings. You will need to turn off the electricity in the kitchen twice for an hour and a half, and you will have to cook food on the electric stove four times over the course of 3-7 days, and wash the dishes in the bathroom.

Photo: Kitchen in Khrushchev before and after renovation
But before you say, like Gagarin: “Let’s go!”, it will take another three months of thinking, meetings and debates. A kitchen is a very difficult object to renovate, and its modern renovation, which is also long-lasting and inexpensive, must be thought out to the smallest detail. We will try to help our readers with this.
What are the difficulties?
When preparing a kitchen renovation, you need to always remember the following features of the room:
- High humidity– fumes from cooking and/or washing.
- Fever.
- Availability of powerful heat sources: The stove alone provides more than 10 kW of heating power.
- Aggressive atmosphere– during cooking, fat, products of its hydrolysis during frying, and others also evaporate volatile substances from products.
- Sharp fluctuations in the above factors; For decoration and furniture, this “hits” harder than their consistently high values.
- Increased requirements for room hygiene: a coating of organic matter and its accumulation in nooks and crannies creates favorable conditions for the proliferation of microorganisms, especially in warm, humid air.
- Availability gas appliances; special attention must be paid to ventilation.
- High room utilization: The occupancy rate and habitability of the kitchen is higher than that of any other room.
- Small room area and low ceiling if this simple kitchen in a typical house.
- Constant indoor circulation fragile, breakable and dirty items.
Stages of the long journey
Where to start renovating a kitchen? What to do first and what to do next? When to purchase materials and how to distribute expenses cash? We will briefly describe the stages, and then give explanations for each point.
- Measurement and inspection of the condition of the premises;
- Development of equipment layout;
- Development of design, furniture plan and final selection of furniture;
- Cleaning the premises;
- Cleaning walls, ceilings, floors;
- Inspection and repair of the base floor;
- Audit and basic repair ceiling;
- Re-laying of communications;
- Improvement of ventilation;
- Replacement of windows and doors;
- Ceiling finishing;
- Wall decoration;
- Flooring;
- Installation of skirting boards;
- Installation of equipment;
- Furnishings;
- A ceremonial banquet, if you still have strength left.
The specified work will have to be completed in full, possibly with unforeseen complications, if the kitchen is being renovated in a Khrushchev-era building. In older or newer homes, some steps, especially on the ceiling and floor, will be easier. But still, kitchen renovation is the limit of complexity and labor intensity for home handyman, therefore, after reading the article, think carefully: is it possible? Isn’t it better to stretch yourself financially and entrust this matter to professionals?

Measurement and revision
The following dimensions need to be taken:
- Length, width, height.
- Window and door - dimensions of OPENINGS and distance from walls, ceiling, floor (for windows).
- Mezzanine - dimensions, location, material.
- Rosette groups (group) – distance from the floor and walls.
- Water supply and sewerage are the same.
- Gas riser is the same.
- Ventilation vent - the same, plus a revision of the ventilation device, see below.
- Cornices, stucco molding, projections of floor slabs, if any - the same.
The measurement accuracy is no worse than 0.5 cm. Repairing a small kitchen must be done according to an exact plan, see below. Otherwise, an accumulating error may ultimately result in a door that won’t close, or dishes that are constantly accidentally swept onto the floor by your elbow, or some other irreparable inconvenience.
When inspecting the ventilation device, it is necessary to determine by external inspection and/or a thin flexible rod whether the building design provides for a separate ventilation duct for the kitchen. If the vent is on a vertical box in the wall, then yes, and that’s good. If the ventilation duct goes towards the bathroom and toilet, this is not very good, but it can be fixed, see below.
Planning and project
As a result of the procedures described below, you should have a plan for placing furniture and equipment in the kitchen, see figure:

Traditional Kitchen Equipment Plan
Furniture must be pre-selected in advance and its exact dimensions taken on site from the seller or taken from the catalog. In order not to draw and redraw on whatman paper or toil through 3D graphics or CAD systems, we recommend the following method:
- From cardboard, to scale, we glue a box without a lid, cut a window and a door in the walls.
- We cut cubes and polyhedrons from foam plastic, also to scale, corresponding to the furniture and equipment; We mark where things are with inscriptions or roughly draw the front panels on the foam with a marker.
- We play with cubes until we get an acceptable option. We stick the model to the walls of the box with pieces of plasticine or chewed gum.
- We simulate natural light with an LED flashlight. By moving it, you can display the course of the Sun in different times year. To simulate cloudy weather, cover the flashlight aperture with a piece of thin paper.
- Upon receipt of a satisfactory layout based on the known dimensions of the models, we build a plan, on paper or on a computer. In the latter case, it is enough to spend 2-3 hours in CorelDraw, and developing a layout layout in 3D requires at least a day of work by an experienced designer.
The main principle of kitchen layout is a triangle of functionality: stove, sink, refrigerator. Its sides should be approximately equal length, and no more than 6 feet (1.85 m) each.
The planning sequence is as follows:
- Communications;
- Equipment;
- Furniture.
Video: example of a small kitchen project
Communications
The main problem here is to remove the ugly gas drop from the riser along the wall. Fortunately, it is now possible to connect gas appliances flexible hoses, and gas workers, as soon as you show them at least a photograph, most often meet halfway and issue a permit without delay - such fruits of constructivism from the era of the unforgettable Nikita Sergeevich are an eyesore and a headache for them.
Warning: Under no circumstances should you carry out work on gas yourself! You need permission and specialized team: you will have to cut and weld gas pipes!
When planning, you need to clearly remember: permissible length flexible gas hoses – 4 m; water and sewer lines - 1.5 m. Bending of rigid sewer pipes V horizontal plane unacceptable; corrugated bends - let's say one-time at least 120 degrees.
If you have a kitchen with a gas heater, then “on the sly” it is highly advisable to immediately obtain permission to move and replace it. You can specify any location according to the preliminary plan; they won’t measure down to the millimeter later.

Gas hoses and pipes should be accessible for inspection, but this does not mean that they should be displayed in plain sight. It is quite acceptable to place them behind furniture without rear walls(I opened the doors and it’s visible) or behind a washing machine on wheels that can be easily rolled out. Hoses behind a washer that sits firmly on the floor may cause a complaint from the gas service.
In Khrushchev kitchens, as a rule, there was initially only one socket on the wall farthest from the stove. Of course, you also need a socket group above the cutting table, so when planning you need to provide a separate branch of wiring to it. It is also advisable, instead of the standard dose (electrical distribution box; kitchens always have one) for the kitchen as a whole, the washing machine and the electric boiler, if there is one. This will require turning off the electricity in the apartment twice for a short time; Wiring for additional sockets is laid during the work on the walls and ceiling.
Equipment
Stove, hood, ventilation
A stove with a hood is a stumbling block when renovating a kitchen: it can disrupt ventilation for both you and your neighbors. A hood with air recirculation and a carbon filter is not a solution: odors still seep through it, and the disposable and not very cheap filter needs to be changed periodically.

Exit – hood with a reusable (washable) aluminum grease filter and exhaust in home ventilation. This will require an additional ventilation vent. Actually, this is already a redevelopment, and permission is needed, but this is exactly the case when it is possible, if you are careful. The main thing is not to create a vent for anyone from the ventilation and to prevent the ventilation duct from becoming clogged with construction debris.
If the kitchen has a separate ventilation duct, then the vent for the hood should be made BELOW the main one (on the right in the figure). In such moves good traction, and blowing from a hood with a fan up to 65 W will only improve the standard ventilation. At the same time we get rid of exhaust pipe(the lower the vent for the hood, the better) and space is freed up on the wall.
Warning: but remember - under no circumstances should you run the exhausts of the hood and gas boiler into the same ventilation passage! Here you are no longer risking fines and sanctions, but your life!
If the ventilation of the kitchen and the bathroom is connected to a common ventilation line (this is in the same 464 project, so that its creators have neither a bottom nor a tire), then the vent for the hood must be made FURTHER DOWN THE AIR FLOW, and as far as possible, in the figure on the right.
The next task is to break through the new vent cleanly, “without noise and dust.” This is done as follows:

- In the center of the cut-out area, drill a hole through and drive a self-tapping screw into the dowel; fastener size – any. We do not tighten the self-tapping screw completely.
- We tie a twine to the protruding head of the self-tapping screw, and attach its other end higher to the ceiling or furniture.
- Along the contour of the future vent, using a 4-6 mm stone drill, holes are drilled “to the point of piercing” after 5-10 mm. It is advisable to immediately drill the contour of the hood pipe according to the template.
- Using a narrow chisel or a special chisel for cutting grooves - a cross-cutting tool - we cut off the jumpers between the holes to 1-1.5 cm in depth.
- Use a vacuum cleaner, always with a dust collector, to suck out the groove.
- We repeat the procedure until the cut piece hangs on the twine; then we take it out - the clean vent is ready.
- About how to further install the hood -.
Notes:
- You don’t have to buy a dust collector - a 2-3 liter jar with a sealed lid makes an excellent homemade one, see the picture above. Hoses – garden PVC diameter on the inside not less than 20 mm.
- It is easier and cleaner to carve with a cross-section than with a chisel or regular chisel. The tool is specific, they don’t offer it for rent, but it’s inexpensive and will come in handy later on the farm.
Off topic note: It’s funny, but the tricks described are known not from construction practice, but from their criminal practice. A piece of the wall was cleanly removed by the characters of the famous film “All In,” and with the help of a dust collector, a large Amsterdam jewelry company was completely robbed several decades ago. The accomplice inside had a hose pushed through the vent. Completely legal window washers, called by the owners, were working on the façade, while in their van, meanwhile, a powerful industrial vacuum cleaner was working just as hard.
Stove, boiler and refrigerator
According to the operating rules for gas appliances, they must be located no closer than 80 cm from each other, and in the case of a stove with a boiler, this requirement is not formal. It is also undesirable to move the refrigerator closer to the stove closer than 60 cm - heating it from the side significantly increases the energy consumption for the budget and increases the likelihood of breakdown.

An example of an incorrect kitchen layout is given in the figure on the left, and a correct one, in compliance with the triangle of functionality, is shown on the right. Location of the refrigerator next to gas boiler Admittedly, it doesn’t provide much heat to the sides, but in general we should talk specifically about the refrigerator in the kitchen.
Fridge
The refrigerator in the kitchen, as mentioned above, has a hard time. The cooler it is outside, the better it is for him. That's why best option placement of a refrigerator in an apartment - on glassed balcony or, if there is space, in the hallway. It’s generally wonderful on the balcony: the electricity consumption of the refrigerator in the summer decreases by 1.5-2 times, and in the winter – by 6-10 times. The exception is the southern balcony in warm regions. There, due to direct heating sun rays In summer, the effect may be the opposite.

Washing machine in Khrushchev's kitchen
But wandering back and forth all the time for groceries is unlikely to appeal to any housewife. The solution is a small single-compartment (without freezer) refrigerator for consumable food supplies. This is an expense of 3-5 thousand rubles. additionally, but it pays for itself in a winter or two.
In the Khrushchev kitchen, this completely naturally frees up space for the washing machine (see figure), and small refrigerator can be placed on the table above it. Instead of one unit kitchen equipment- two in the same area, which is not in abundance in the kitchen.
A consumable refrigerator requires absorption or semiconductor, based on the Peltier effect. These do not make any noise at all, and the latter do not require refrigerant charging. True, they freeze worse, but for a consumable portion of food this is not significant.
Of the domestic models, “Morozko” (on the left in the figure below) was specially created for such a purpose. A used Morozko, almost like new, can be bought for 1500-1700 rubles. Biryusa, Sansung and Shivaki (pictured in the center) are equipped with small freezers, but are more expensive. It is not advisable to buy a Ukrainian Nord: it costs only a little less than the “company”, but breaks down much more often.

As for the Chinese-Swiss (it happens...) Liberton LMR-128, in Fig. on the right, then it is better to bypass it by the tenth road:
- After a month or two it begins to grumble and itch unpleasantly.
- The freezer works to self-freeze, not to freeze food.
- Remove from freezer boiled sausage or a piece of meat is impossible: the upper protrusion of its lid works as a stopper.
- At the slightest frost, when you try to open the freezer lid made of thin, fragile plastic, it breaks.
- Animals, egg laying, not falling out of the corresponding Liberton trays, are unknown to science.
- After six months, the interior lining made of low-quality PVC begins to crack.
In general, Europe and China turned out to be China for all China.
Microwave
It is better to hang a microwave in a small kitchen on the wall under the cabinet. Most microwave ovens are designed to be hung on the wall.
Electrical safety at work
Before starting construction work, the kitchen is completely de-energized by disconnecting the branch that feeds it near the meter or in the apartment panel. The instrument will have to be lit and powered during operation from an extension cord pulled from another room.
If the kitchen is powered by the same branch as the toilet and the bathroom (project 464 again, damn it!), then in the bathroom the section to the kitchen is disconnected: the wiring is probably aluminum with dried out insulation, and it still needs to be changed. After this, power to the bathroom is restored. This work, of course, is carried out in a completely de-energized apartment.
Stages of repair and finishing work
Cleaning the premises
IN old kitchen the ceiling, walls and floor are saturated with grease fumes up to the main wall, and a lot has also been absorbed into it. Therefore, cleaning a room includes three stages: stripping, washing and impregnation, otherwise there is no confidence that the finish will hold. But first of all, the old flooring is removed down to the screed.
Peeling is done with preliminary soaking of the coating: the paint and plaster are additionally cemented by the child, and you can’t just take them away. Water-based coatings and soak the plaster with water from a spray bottle:
- Spray generously.
- Held at tight behind closed doors and windows for an hour or two.
- Quickly, before it dries, remove the coating with a spatula or a “stocking” - an abrasive mesh.
- If it dries before finishing the work, repeat the procedure.
Oil and other paints are removed in the same way, but they are moistened with a sponge with a composition for removing it, and the surface is kept according to the instructions for it. They peel off in parts: the composition, naturally, more expensive than water and there is no point in wasting it. Imported and domestic formulations are equally effective, but ours require longer aging and are cheaper. Work to remove oil or alkyd paint carried out in a respirator and protective gloves, in a widely ventilated apartment, except for the kitchen.
On walls saturated with kitchen fumes, paint and plaster will either adhere poorly or will then begin to peel off. Therefore, after stripping the walls, floor and ceiling, you need to wash them with any dishwashing detergent diluted in water in a ratio of 1:20 by volume. Also add 5% to the washing solution table vinegar. First you need to check with a small portion whether the vinegar reacts with the detergent. Bubbles, seething, pungent odor - the components are incompatible, you need to use a different detergent. Wash with a metal sponge with pressure, often dipping it into the solution. Then rinse with clean water twice with a foam sponge.

The final stage of cleaning the room is impregnation with a deep penetration primer on concrete. Soak twice every other day. The primer must contain biocidal additives. When purchasing, we check the recipe on the label: thiuram and its derivatives (fernazone, arozone, thiram) are unacceptable. If the recipe is not indicated, we do not take it.
Floor revision
The purpose of the operation is to identify the following on the floor:
- gaping, more than 2 mm wide, cracks;
- crisscrossing cracks, especially in the center of the floor;
- cracks or a network of cracks around the perimeter;
- depressions and protrusions more than 3 mm in height (depth);
- deviation from horizontality is more than 3 mm/m, or more than 10 mm diagonally in the room.
If any of the first three factors are present, it is necessary to replace the screed. This is complex and time-consuming work. Small cracks are repaired using any of the known methods.
Check the floor for evenness and horizontality bubble level at least 1 m long. If there are only minor irregularities great solution– , see below. If there are large holes or bumps, or the floor is skewed, it needs to be leveled, not only for the convenience of working on the flooring, but also so that spills do not flow into the corners.
The optimal solution in this case is a cement-based self-leveling floor with a layer of 10 mm from the highest corner or hillock. Such a leveler is not very expensive, the consumption for a small kitchen is small, and you can lay the finished floor directly on it. By the way, when pouring with cement leveler and small cracks may not be closed.
Ceiling inspection
The kitchen ceiling is her most painful place: this is where all the children go first of all. On top floor houses with flat bitumen roof The ceiling often drips, and the kitchen is full of electrical appliances. Therefore, in addition to the floor, the ceiling also needs to be cleaned, and very carefully.
When inspecting the ceiling, first of all, the rusts are removed - the seams between the slabs; in the kitchen there is most often one of these. Then they pull out from the channel between the plates old electrical wiring. Evenness and horizontality are checked with the same level, but here a deviation of 20 mm diagonally is permissible. When the slabs are displaced vertically by 30 mm or more relative to each other (this happens in the same 464 project), we do not level the ceiling: extra difficult work, money, materials. A suspended ceiling will solve the problem, see below.
What needs to be done during an inspection, especially on the top floor in a panel house, is to foam the channel between the slabs better (layer by layer) with a gun with a narrow spout. This will not save you from getting wet from above, but the drops will go into the adjacent bathroom and toilet, where there are fewer electricians, and the floor screed is designed for heavy flooding. 
Laying communications
Gas, water, sewage and ventilation are discussed above. Let's add only the basics about electricity.
If you plan to replace the dose with a shield, you need to hollow out a niche under it at a height of approximately 1.8 m so that children cannot reach the machines. It is inconvenient to place the shield in place of the dose: it is too high for adults to reach.
We lay the wiring using any flat three-wire cable in double insulation. The wires are rigid, single-core. Such a cable does not sag or sag slightly when laid. The core cross-section is at least 1.4 square meters. mm (2 mm diameter).
In a dry room, it is advisable to lay the wiring in grooves and in a metal corrugated hose, but if there is a danger of getting wet, it is better to lay it directly along the bare ceiling. In any case, descents along plastered walls (if replastering is not provided) will have to be grooved. We fix the cable every 10-15 cm with masking (paper) tape to begin with; then in the grooves - with strokes of gypsum or alabaster, and on bare surfaces with drops of construction silicone.
We lead branches for lighting and sockets to the center of the ceiling. There the lighting branch ends, and the socket branches go further, then turn to the walls at 90 degrees and go down along them to their respective places. We let the branches for the washing machine and boiler run along the wall 15-25 cm below the ceiling, also wrap them down at a right angle and bring them to the spot.
Carrying out wiring “as crooked or crooked as God wills” is a common construction hack; The saved cable is run “to the left”. This then significantly complicates troubleshooting and creates a risk to life during subsequent construction work. Deceiving yourself is the last thing, and cable savings in a small kitchen are negligible.
If the apartment is not yet grounded, we leave the protective (yellow with green stripe) cable conductors in the shield or dose, always insulated. When replacing the dose with a shield, it is better to immediately insert them into the corresponding terminals of the circuit breakers and RCDs.
Window and door
We replace the window and door or restore it, if required, upon completion of work on communications. You can do it before, it’s not important, but you need to make sure that volatile residues from previous operations have evaporated. To do this, close the room tightly for a day, then smell it. If you can still feel the smell, ventilate it some more.

From getting dirty further work We protect the window and door as usual: plastic film on masking tape.
Ceiling
The ceiling in the kitchen must meet the following requirements:
- Be resistant to sudden changes in temperature and humidity.
- Fading, fading and changing tone as little and evenly as possible under the influence of kitchen fumes.
- Do not allow children to pass through you so that organic deposits do not form in the space between the ceilings - a tasty treat nutrient medium for microbes.
- Be brush washable.
- Allow complete or partial overhaul and repair without renovating the entire premises.
- Have a design life of at least 10 years.
Based on this, foam plastic and suspended ceilings, contrary to popular recommendations, are definitely rejected: in the kitchen they last no more than 5 years, when using an ionic or ultraviolet ionizer, and the relief on foam boards within six months it begins to turn black and yellow.
Materials
The materials for the ceiling should be chosen as follows, in order of preference:
- Plastic lining or slats.
- Laminate impregnated from the inside out with PVA water emulsion.
- MDF lining impregnated with it.
- Waterproof (green) plasterboard, rolled from the inside out with a needle roller and impregnated twice with PVA emulsion on both sides.
The length of the lining and MDF boards is 2.95 m. In most cases, this is enough to cover the ceiling with solid boards, but first you need to calculate how best to sheath it, lengthwise or crosswise, so that less material is required and less of it goes to waste.
Lathing and light
The sheathing for the sheathing can be made linear, without cross members, from metal profiles or wooden slats. Lag pitch – 400-600 mm; The pitch for fastening the joists to the ceiling is 300-400 mm. If the base ceiling is uneven, you can place pieces of plywood in the gaps under the slats or sheathing profiles. Such a ceiling will not be ideally flat, but there will be no small irregularities on it, which would spoil the view in slanting daylight.
During the installation of the sheathing, slots are made in it for the already laid electrical cable, if it is not in the grooves. Wiring for spotlights is done along the casing using a free-lying flexible cable with a cross-section of 0.7 square meters. mm.
For spot light, the inter-ceiling space must be at least 80 mm. Under the lampshade or chandelier in the center, 20x40 mm sheathing slats, laid flat, are sufficient. The option of one main light is generally preferable, since it practically eliminates the paths of penetration of organic fumes and their harmful consumers into the interceiling.
Sheathing
The ceiling sheathing is done in the usual way: the panels are placed on mounting adhesive and secured with small nails in the corner of the groove of the tongue, finishing off with a hammer (for) or with self-tapping gluers, for. In this case, when purchasing, you need to check that the ridge of the tongue fits into the mating groove with the gluer freely or without significant force.

We were able to begin the repairs by sending the entire family to their historical homeland. To make repairs less boring, I decided to take pictures of everything along the way. Maybe someone will find my experience useful.
So, IT WAS: an ordinary smoky gray room with an area of 6.5 square meters. m (I forgot to take a photo, sorry).
I wanted something cool and lofty, but money was tight.
The first two days I studied the assortment of Ikea, Leruamarlen and Obi and tried to compare my desires and possibilities. The results were not very pleasing, so first I decided to dismantle everything old.
To begin the renovation, you need to disassemble everything old, unscrew it and drag what you need into the next room.


I took 5 heavy bags to the trash heap. As luck would have it, the elevator did not work.
I tried to get close to the wiring to do everything the way I needed.

Finally managed to clear the last wall of wallpaper. The war was fought for every centimeter: a hellish mixture of glue, which becomes terribly slippery from water, left me practically without hands.
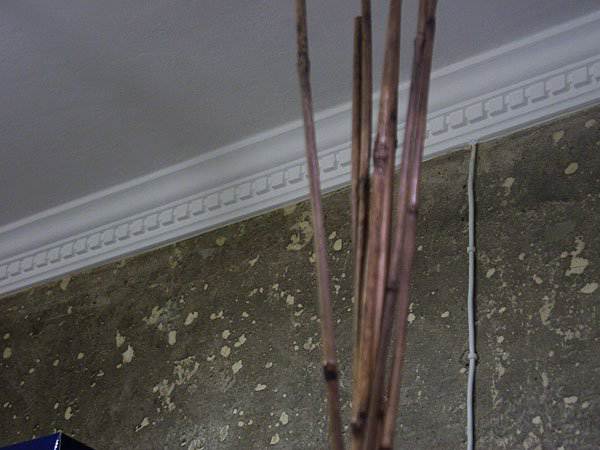
This richness of the textures of the peeled wall, which time has worked on, is terribly inspiring to me. If I lived alone, I would ask a designer to design such walls.


He started making holes for 4 - all the neighbors came running. As soon as I remember, I will tremble.

The ceiling has already been done, all that remains are the walls and furniture. Work area above the stove I decided to leave it this way.

And our ceilings are crooked. The door frame is level.

Having cleared the paint from the window sill, I saw such a stunning color that I couldn’t raise my hand to paint it back. And I will select the color of the laminate to match the color of the window sill.

I could not find a lamp that was suitable in size and price in stores. Refurbished an old chandelier. Here is the result.

Installed new doors on the mezzanine

I'm starting to laminate the floor.

The most interesting thing is that the last stage of repair turned out to be the most protracted and costly. Hanging furniture, connecting the washing machine, shelves, hooks and other little things took more time and money than the renovation itself.
To be honest, the impetus for starting the renovation was the dream of such a faucet (switching modes, pull-out sprayer) and a sink.

This is what our kitchen looked like after the renovation:


The concrete was thoroughly washed and covered with wax from Ikea
I decided not to put up wallpaper, so I painted the walls water-based paint. The top was covered with mother-of-pearl enamel from Leroy. It feels nice to the touch and washes perfectly.


")


