They are afraid of one thing - enamel damage. How to paint a cast-iron bathtub and what is the best way to do it if you have damaged its inner coating? In this article you will find 3 possible options with step-by-step instructions and all their pluses and minuses, as well as a description of the "bath to bath" method.
When do you need to paint a cast iron bath?
Painting a cast-iron bathtub is needed in two cases:
- The enamel is mechanically damaged and cracks have gone along it.
- The enamel turned yellow over time or due to improper operation (exposure to toxic household chemicals or other reagents), too active cleaning during washing.

Cast iron bath restoration options
A cast iron bath can be restored in 4 ways:
- Paint.
- Cover with epoxy enamel.
- Cover with acrylic.
- Bath to bath.
We will consider all these methods in more detail below.
Cast iron bath painting
The most logical method of restoration to the layman seems to be painting the bathroom.
Pros of this method:
- the cheapest;
- simple enough;
- can be dyed in any color.
- smell;
- dents and chips on the surface of the bath will still be noticeable;
- will last from 10 months to a couple of years if you use high-quality paint and apply it correctly.
Paint selection
Not any paint is suitable for restoring a bathroom by painting, as there will be constant contact with water, temperature changes and mechanical friction of the surface. You will need a special paint and you can find it among such manufacturers:
- Dulux (Great Britain) is the leader among manufacturers coatings. For painting the bathtub, you should stop at "DuluxRealifeKitchen&Bathroom";
- Tikkurila (Finland) is a manufacturer of paints known for its quality. For the bathroom, take the Luja staining system (primer + paint);
- Jobi (Germany) - good quality affordable price. For bathroom painting, opt for JobiWaschFest. This paint is moisture resistant and is designed for rooms with special conditions, which can definitely include the bathroom.

You can, of course, paint regular paint, but such a coating will last from the strength of one to two weeks. It is unlikely that you are counting on such a short effect from the restoration, so it is better not to save on paint and buy high-quality one right away.
Required Tools
To paint a bath you will need:
- roller or brush natural bristles 70-90 mm wide. If you prepare two, it will be even more convenient, because if the brush gets dirty during the painting process (especially in something greasy), then you cannot continue working with it;
- drill with sanding attachment;
- a paint knife and tweezers - for caring for a brush when bristles come out of it (this is quite normal for a new one);
- acetone or thinner No. 646. Others do not use!;
- cotton rags, coarse calico, flannel or microfiber cloths. The main thing is that there is no pile.

Coloring process
The staining process can be divided into 3 stages:
- Preparatory work.
- Direct staining.
- Drying paint.
Preparation for staining
Preparatory work for the restoration of the bath is to remove dirt from the surface. This is best done with alkaline household chemicals. After using it, the bath should be rinsed well and wiped dry.
alkaline household chemicals burns the skin, so you should work with it in rubber gloves.

Next, degreasing is carried out with a special chemical composition. You can take a car. Alternatively, you can use regular Fairy dishwashing detergent, but it will need to be left for some time (20-30 minutes) on the surface of the bathtub and then washed. The procedure will need to be repeated 2-3 times.
You can check whether you have degreased well with a jet of water. If when pouring water on the walls from the shower, you do not see drops or streaks, then the fight against fat on the surface can be considered complete.
On this preparatory work do not end. You need to remove the layer of enamel or paint that is currently covering your bathtub. This is done using an electric drill with a special grinding nozzle. It is allowed to remove the entire enamel or only the top layer - your choice.

Before applying paint to the surface, it must be cleaned of dust and dried. Drying can be done with a hair dryer or by waiting - the bath will dry itself in a few hours. After that, a primer is applied. It can be applied with a brush, roller or flexible spatula.
Painting a cast iron bath
The process of painting the bath should begin after the final drying of the primer. First you need to paint the sides. The paint is applied in a thick layer and gradually flows down the sides. The sides of the bathroom are painted in the same way, but taking into account the paint already on its surface. Try to make the layer after "draining" as even as possible. Painting the bottom of the bathroom consists in distributing the paint that has dripped from the top.
The whole process of staining will take you quite a lot of time and effort, so start it at a time when you have the greatest efficiency.

You can paint the bathroom with paint using a roller - it will be faster and more convenient.
After painting the bathroom, it is necessary to close it for 10-12 hours, and preferably for a day. This is necessary to prevent dust from entering the painted and still wet surface. The process of final drying of the paint takes 2-5 days. It is highly undesirable to use the bathroom until this moment.
Bathtub restoration with epoxy enamel
Most old way restoration of cast-iron bathtubs is the application of new enamel. It has been widely used for over 20 years. The process of applying enamel is somewhat reminiscent of the painting we examined, but the composition is completely different. There are only 2 categories of compositions: professional and for self-restoration.

Professional Lineups epoxy enamel more liquid. They are applied in several layers, so the process is quite long and laborious. Do-it-yourself formulations are thicker and easier to work with.
Bath enamel, which is sold in aerosol cans, is easy to apply, but it will last a maximum of a year.
Advantages of bathtub restoration with epoxy enamel:
- a fairly cheap way;
- no need to dismantle the bathroom;
- suitable not only for cast iron, but also for steel baths.
The disadvantages of this method:
- dries for a long time (up to a week);
- long and laborious process;
- bad smell;
- the coating is very sensitive to shock;
- the service life of a new enamel rarely exceeds 5 years;
- does not cover dents and chips;
- even if everything is in order with the enamel and you have not damaged it in any way, after a few years it will turn yellow.
Enamel bath restoration tools
To restore a bathtub with epoxy enamel, you will need:
- spray gun or roller, if professional enamel is used, or a flute brush, if enamel is for self-application;
- a paint knife and tweezers will be required to carefully remove the brush hairs that have come out;
enameling process
The process of applying enamel to the surface of the bathroom can be divided into the following stages:
- Preparatory work.
- Direct application of enamel.
- Drying.
Preparatory work
The preparatory work is the same as when painting with bathroom paint, so we will not repeat them. You can read above.
Enamel application
Enamel before application should be prepared according to the instructions on the package. You do not need to immediately mix the entire composition, do it in batches, as it starts to set quite quickly (40-45 minutes), and applying in 2 layers takes quite a long time.
If you apply a professional composition, then you can use the spray gun. But for home application, it is still better to choose special mixtures that are thicker and suitable for application with a regular flute brush.

To apply the enamel on the surface of the bathtub, moisten the brush liberally and swipe vertical stripe from the bottom to the edge. After that, rub the enamel on the sides as hard as you can. The next strip should be drawn side by side so that its “rubbing” is enough to reach the already treated area, and by repeated rubbing you cover about half of the previous strip. So, with an overlap, the first layer is applied. Wait 15-20 minutes and apply the next one.

The second layer is applied from the same place as the first. The direction of application must exactly match the first layer. Only in this way the coating will turn out beautiful and uniform.
How to remove streaks and sagging of enamel during application?
During the application of enamel on the walls of the bathroom, streaks and sagging of the material often form. Their appearance should be controlled. Usually they become noticeable 10-15 minutes after application, so keep an eye on the areas covered while working.
To remove streaks, it is necessary to make a brush stroke without material up to the place of smearing. The sags that form on the edges of the drain holes must be removed after the enamel has hardened. For this, a painting or mounting knife is used.
When is the bath ready for use?
After applying the enamel, it is necessary to close the bathroom for 3-7 days, until the new coating is completely dry. The longer you pause before the first use, the less likely the enamel will peel off.
Bathtub restoration with acrylic
One of the most modern ways to restore the enamel of the bath - restoration with acrylic. On sale you can find it under the name "Stakril".
Advantages of the method:
- at correct application and careful operation, such a coating can last you 10 years or more;
- a professional performs such work in 2-3 hours. You will need more time, but the process itself is easier than with enamel;
- attractive appearance - after application and drying you will see a smooth glossy finish;
- no unpleasant odor.
Disadvantages of the method:
- if in some place the acrylic layer is scratched to the bottom, then it will very quickly begin to collapse and lag behind the surface;
- the cost is higher than with enamel coating;
- drying takes 2-3 days.
Acrylic Bath Restoration Tools
To restore a bathtub with acrylic you will need:
- flute brush or roller;
- flexible spatula;
- a paint knife and tweezers for carefully removing brush hairs that have come out;
- drill with a grinding nozzle.
acrylic application process
The process of applying acrylic can be divided into 3 stages:
- Preparatory work.
- Direct application of acrylic.
- Drying acrylic.
Preparatory work
Preparatory work is similar to the methods described above. Read more about this in the section on painting with paint.
Enamel application
Acrylic is more liquid than homemade enamel, so it is most convenient to apply it using the pouring method in a tapering spiral from the edges of the tub to the drain. Be very careful! Unfilled fragments can be filled with material using a flexible spatula. With its help, the edges of the bath and its bottom are leveled.


If during the application process bubbles appeared that did not burst themselves, then they must be pierced gently with a brush.
The second method of applying acrylic is similar to painting. For application, a brush or roller is used.
When is the bath ready for use?
After applying acrylic, it is necessary to close the bathroom for 2-3 days so that dust and other dirt do not get on the surface before drying.
Bath to bath restoration
The “bath-to-bath” restoration method consists in installing a new acrylic liner inside the old cast-iron bath, which completely repeats its shape.

Advantages of the method:
- perfectly even coverage;
- durable acrylic;
- service life - about 15 years;
- no unpleasant odor;
- can be used already on the first day after installation;
- the surface will not turn yellow.
Disadvantages of the method:
- high price. Especially if your bath custom sizes and will need individual production liner;
- impossible to do on your own;
- the mounting foam with which the insert is attached can move and then cracks will appear;
- possible detachment of the liner and the appearance of an unpleasant musty smell due to the constant formation of condensate between the liner and the bath;
- it will not be possible to make repeated restoration or repair;
- during installation, you will have to dismantle part wall covering at the edge of the tub.
- To clean the bath at the preparation stage, do not use compounds with chlorine.
- It is better to paint the bathtub with paint and enamel in warm time year, so that it is possible to ventilate an apartment or house.
- Before applying paint, primer, enamel or acrylic, remove the cuffs and seal the hole with masking tape.
- During the painting process, do not touch the bristles of the brush with your hands. From any fat, the paint departs faster in the future. Better stock up on a few brushes for work.
- In no case do not touch the bath with your hands while applying paint, enamel or acrylic!
- After the restoration of the bath with enamel or acrylic, it is necessary to replace the cuffs and gaskets, as the drain holes will become narrower, and the walls of the bathroom will become thicker.
- To bath with acrylic coated served you longer, apply 2 layers of material. Then it will be more difficult to scratch through it.
- Acrylic liner can only be installed in high-quality cast-iron bathtubs. It is not suitable for bathtubs made of "light cast iron" with thin walls.
Whether it is worth restoring the bath and how exactly to do it - the owner of the bathroom and the plumbing item decides. Of course, no restoration lasts forever, but if there is no money to buy a new one, then take hygiene procedures If you want comfort, then you should definitely do it!
Any bath after several years of operation becomes less attractive, rust appears and yellow spots. Might start to chip enamelled coating. And many people in such a situation decide to either replace the bathtub with a new one, or install it on old surface special acrylic insert. But these procedures cannot be attributed to cheap ones, so the question arises of how to paint a bath at home.
Epoxy enamel or acrylic
 Painting a bathtub with enamel with your own hands is quite simple, you can cope with the task without the appropriate skills. The success of this event will directly depend on the coloring matter. Not every paint will do for use in the bathroom, especially for painting the bath itself. And the problem lies not in contact with water, but in the level of humidity, which is always high in this room. Therefore, the paint must have high moisture resistance and good adhesion.
AT hardware store you can choose from two types of compositions that usually paint the bathtub from the inside: epoxy and acrylic enamels. Other paints will not give the desired effect, they will begin to peel off and peel off a few weeks after application. All work will be in vain. Enamel is produced in different colors, so there will be no problems with the selection of the desired shade. But it is better to buy products from trusted manufacturers who have already proven themselves in the construction markets, so that there is no question of how to paint a bathtub inside at home. These include:

If you plan to paint a cast-iron bath, then you need several layers, three are best. But shabby and old products and three layers of enamel will not save you in any way. Everywhere requires an individual approach. It is worth remembering that each composition is prepared immediately before the start of work. If you knead the paint with a margin, then it may become unusable after a couple of hours, the composition will no longer be so elastic, it will become tight, and even layers will not work. To dry the applied enamel layer, the time is required, which is indicated on the packaging for the product. Only after drying can a second layer be applied.
When working, the door to the room must be closed, as well as the windows throughout the apartment. In this way, many problems can be avoided. For example, the circulation of air masses provides not only Fresh air, but also the dust in in large numbers. It is very important that when painting the bathtub, small contaminants do not get on it. Changes in temperature and humidity levels can also adversely affect the painted surface.
Paint carefully, smearing the composition with a flat brush. She must have a natural pile. It is with this tool that you can avoid the appearance of streaks on the surface. smart technology drawing coloring composition implies staining from the beginning of the sides to the bottom.
Preparatory measures
 To paint the bath, you must first complete a series preparatory activities. First of all, the inner surface of the bath itself is cleaned of limescale and grease. To do this, you need to use an alkaline agent, the usual "Pemolux" or "Sanoks" will do. But you can not use substances that contain chlorine. Degreasing is easy to perform: the substance must be applied to the surface with a moistened sponge and washed off after 20 minutes.
Next, the surface must be cleaned of dirt, rust, the old layer of paint, if any. Here you need to have grinder or electric drill. Need protect your face with a respirator wear safety goggles and gloves. A lot of dust and debris will soar in the air from the grinder. But with the help of an electric tool it is easy to remove old layer. And in the places of the drain and in inside corners need to work wire brush or medium grain sandpaper.
After that, the surface will be matte and rough, without corrosion and signs of old pollution. If there are significant mechanical defects (chips, cracks, dents), then they need to be puttied, otherwise they will grow into large cracks in the future. And then it remains only to replace the bathtub with a new wash tank.
This can be considered finished surface preparation. It remains only to vacuum it, rinse it again with an acid solution to repeat the degreasing procedure. There must be no dust left in the air previous works. No matter which paint is chosen, the surface preparation always remains the same:
- washing and degreasing;
- treatment electric tool;
- repeated degreasing and washing.
Then the desired level of paint adhesion will be obtained, due to which the service life of the new enamel layer will increase significantly. It is desirable to free the room from nickel equipment, remove all faience items from there for a while. In the process of staining, the enamel will highlight different volatiles, which will adversely affect nickel products. washing machine usually cover plastic wrap to also protect its surface from enamel secretions.
Staining technique
After all preparatory stages you can move on to the most important thing - painting the surface. Some paints warm up first to increase efficiency. If you want to do this, then you just need to create the effect of a water bath: an open can of paint is sent to a container with warm water for half an hour. Then warm composition stir. Everything, it is ready for further use. To find out if you need to warm up certain kind paint, it is enough to carefully study the instructions from the manufacturer, all these nuances are usually indicated there.

After staining, be sure to check if the cuffs and pads are suitable. Several layers of enamel can change the diameter of the drain hole and increase the thickness of the tank walls. Therefore, it is worth paying special attention to this.
Acrylic update
 Of course, not everyone wants to paint the bathtub with enamel. Therefore, you can resort to the method of restoration using bulk acrylic. There is nothing complicated in this procedure either, and it is very easy to deal with it.
First you need to carry out the preparatory work described above, then pour the acrylic on the sides of the tank: the liquid will begin to flow down the surface, filling all the old flaws. This method has significant drawbacks. For example, acrylic has poor grip with old enamel, so it needs to be carefully cleaned off. In addition, if the acrylic surface is scratched strongly, it will begin to break down, over time, the water will simply wash away new layer, tearing off the dried acrylic in whole pieces. But you can minimize these risks by covering the product with two layers. The thicker the applied acrylic layer, the more difficult it is to damage it.
In general, restore old bath simple enough. This does not require a lot of materials and tools. It is necessary to approach responsibly the choice of the coloring composition and surface preparation, then the result will please the same appearance over a long period of operation.
Each product has its own service life, which ends sooner or later. Any thing once becomes unusable, and cast-iron bathtubs are no exception. Time and water have had on her Negative influence and lead to the destruction of the enamel coating.
Agree, changing the bath is expensive and time consuming. More practical solution- Restore plumbing with your own hands.
We will tell you how and with what you can paint a cast-iron bath, give recommendations on choosing a method, and also give step by step instructions for product updates.
The enamel coating of the bath becomes thinner over time, rust appears on it under the influence of water, and if measures are not taken in time, the process can become irreversible. The bottom can simply rust to holes, and then the bath can no longer be saved.
Bathtub covered in rust and limescale, looks, to put it mildly, not aesthetically pleasing. Undoubtedly, putting a new bathtub will be the only right decision if you plan to do overhaul, change tiles and plumbing. However, if the repair is still far away, then the purchase new bath will bring more problems than joy.
Modern cast-iron bathtubs are not cheap, you will also have to pay a rather large amount for delivery. because of heavy weight products, dismantle the old one yourself and it is unlikely to succeed. You need to either ask friends and neighbors, or hire people, which again costs.
Most likely, you will have to make repairs, even if it was not planned.
Image gallery
If there are chips and cracks on the surface, they must be puttied and then treated with sandpaper, after which the resulting dust must be removed again. This completes the preparation process, you can start staining.
Bath restoration with enamel
Enameling a cast iron bath is an old time-tested method that has been used for a very long time. But one should distinguish between professional enameling, which the bath is subjected to during the production process, and home enamel painting.
In the first case, professional compositions are used that require preheating of cast iron to certain temperature. It is impossible, and not necessary, to paint a cast-iron bath in this way at home, since today there are easy-to-use and inexpensive enamel dyes for self-application.
Advantages and disadvantages of the method
Among the advantages of this method of painting are:
- inexpensive cost;
- lack of installation work;
- Can be used on both cast iron and steel surfaces.
However, this method also has disadvantages:
- the coating is quite thin and fragile, the enamel is very sensitive to household cleaners and shocks. Therefore, the bathroom will have to be handled very carefully so as not to inadvertently damage it;
- the coating does not allow to eliminate severe defects: chips, dents, cracks;
- over time, yellowness forms on the surface;
- the enamel dries for a long time, the bath can not be used for about a week.
The service life of the coating is from 5 to 9 years. Although for those who are going to make repairs in the future and change the cast-iron bathtub to a new one, such a service life will certainly suit.
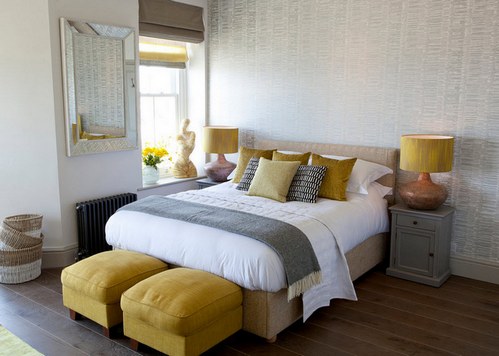
Today, the choice of heating radiators is very diverse. There are models aluminum, steel, bimetallic. However, cast iron batteries are still in great demand due to their affordable price, high strength and classic design. Modern radiators made of steel and aluminum are sold already painted. Resistant powder paints are used to cover them. Expensive cast iron radiators also come from the manufacturer in a painted form. Inexpensive products go on sale, as a rule, unpainted. However, with the modern range of paints and varnishes, this is not a problem. good paint plus diligence - and the cast-iron battery will have a completely presentable appearance. Even if it is not new, but has worked faithfully for more than a dozen years.
How to paint a cast iron battery?
Now in any store of paints and varnishes you will definitely find special paint for radiators. On the container with it, a battery is usually depicted. The main difference from wall paints is elevated level heat resistance.
Most suitable for cast iron batteries There are two types of colors:
- acrylic (or acrylate) enamel;
- alkyd enamel.
The advantage of acrylic and acrylate enamels is that they never turn yellow. After all, acrylic is, in fact, plastic. In addition, such enamels dry quickly and do not have a strong odor.
If the battery in the apartment rarely warms up to temperatures above 80 degrees, you can use any acrylic enamel(not heat resistant). For example, the one that painted the walls. However, in this case, the radiator will have to be handled with care. Do not dry wet clothes on it.
If the radiators are very hot in winter, it is necessary to purchase heat-resistant acrylic paint. This will ensure that the painted surface will not change color or crack.
Alkyd enamel, unlike acrylic, turns yellow over time, but does not crack or peel off, even if wet things are dried on the battery. Alkyd enamel is also good because it can be applied over old layers of oil paint.
If you plan to paint a new radiator or old battery, cleaned from the previous layers of paint, you will need not only enamel, but also an anti-corrosion primer for metal.
How to paint a cast iron battery?
If the battery is not new and has been painted more than once, it is advisable to remove the old paint. After all, the more layers - the less heat. If the radiator was painted more than two or three times, this is already critical. To remove old paint, you need to use a special remover ( chemical agent for removing old paint), carefully following the attached instructions.
The wash softens the paint film and reduces its adhesion to the surface. As a result, the paint is easily removed with a scraper, spatula or cloth.
After cleaning the radiator from paint, you should wash it thoroughly. Further, the surface can be polished in order to at least partially smooth out the numerous roughnesses typical of domestic cast iron radiators. To do this, you can use sandpaper or a cork brush. The main thing here is not to overdo it, because excessive grinding can make the battery more fragile. On the perfect result it is still not worth counting - absolute smoothness cannot be achieved.

After sanding - primer. As already mentioned, an anti-corrosion primer for metal is required. The primer must be completely dry, and only after that you can paint.
If the battery is very old, painted for the first time already in the 50-60s, it is advisable to purchase a new radiator. Firstly, peeling off numerous layers of paint will not be easy at all. Secondly, cast iron radiators also have an expiration date. The longer the battery lasts, the worse it heats, because plaque accumulates inside, preventing the circulation of water. In addition, old radiators begin to rust, and sometimes leak. If there are a lot of layers of paint, the wash will have to be used several times, and a good wash is not cheap. A new battery will probably cost the same amount.
Now let's talk about the next step - coloring. It is recommended to paint only cold radiators, as hot paint dries too quickly. There is not enough time to properly distribute the paint over the surface. This causes various flaws: “bald spots”, smudges, brush marks, etc. Moreover, some paints, if applied to a hot battery, may wrinkle.
It is convenient to paint the radiator with a brush. If the battery is cold and the paint is thin enough, the film will apply evenly and smoothly. If conditions allow, you can use an airbrush or spray paint.


Most of the time, one layer is not enough. It is necessary to wait for the first layer to dry and only then apply the second.
What color to paint the battery?
Radiator white color - classic. It is customary for us to place batteries under the windows, and they are almost always white. A radiator in the color of the window sill and frames is the most familiar and absolutely organic solution. However, it is far from the only one.

Very relevant today black batteries. There is an opinion that a black-painted radiator heats a little better than a white one. However, experts say that the difference, if any, does not exceed 1-2%. The black color of the battery is more a tribute to design than a concern for warmth. Such radiators can often be found in modern interiors, especially those that are decorated.

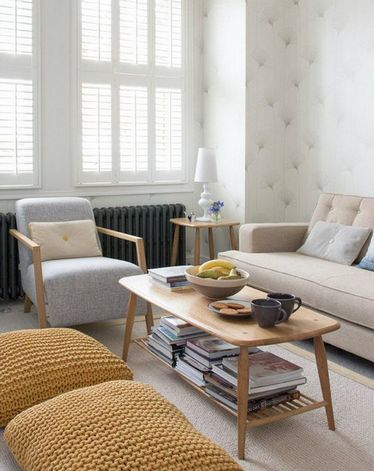
Battery in the color of the wall- the solution is less common, but, of course, successful. Of course, this does not mask the battery and does not make it invisible. However, thanks to this technique, the radiator does not stand out from the general space and does not look like something alien.

Photo from the project of designer Galina Yurieva


Not many dare to paint the radiator in bright color, contrasting walls. Making the battery an accent is a bold move. And very effective. This design option is suitable for a modern minimalist interior.

An interesting idea is to color the battery using the ombre (or gradient) technique. The end section is painted, for example, white. The second has a subtle color, and each subsequent section becomes more and more saturated.

Photo source: the-village.ru

Colored batteries are especially appropriate in children's rooms. Here you can safely be creative. For example, decorate the radiator with patterns, drawings, thematic painting. Or color the battery in the form of colored pencils, rainbows, etc.

Sky-high prices for cast-iron bathtubs good quality forced to seek real alternative the acquisition of new clothes made of cast iron. The easiest way to solve the problem is to restore the enamel coating, for example, paint a bathtub. The way to solve the problem does not cause any particular difficulties. It remains to choose how to paint the cast-iron bath inside. To be honest, the range of materials is extremely limited, any polymer coating according to its characteristics, it is inferior to the mineral enamels that cover the bath. But it’s still worth trying to repair a cast-iron bathtub with paint, because if you’re lucky, you can solve a serious problem at the lowest cost.
Coating Requirements for Cast Iron Surface
The industry produces a huge number of different composition of paints and varnishes. Approximately half of them enter the market, are widely available to the average buyer, and several brands of coatings can be used as paint for a cast-iron bath. There are certain restrictions on the use of cast iron bathroom paint:
- The layer of paintwork applied to the bath should be as dense as possible, hard and give a gloss, the smoother the coating is, the longer the new enamel will last;
- The paint must not contain toxic or irritating ingredients or solvents. All residues should not pass into water, evaporate into the air, wipe off during mechanical cleaning or dissolve under the action of detergents.
Advice! Before you paint a cast iron bath at home, apply a few strips of purchased enamel on a small sheet of glass.
First, it helps to evaluate real color how the bath will look after the paint layer has dried. To do this, you just need to look at the paint from the back, that is, through the glass. Secondly, you can evaluate how much the bath "sheds" after the first two washes using a liquid agent. You can forget about powders, even laundry detergents, soda or dish detergent after painting a cast-iron bath. Due to excessive concern for sterility cast iron bath will lose the paint layer in a few months.
Proven Restoration Products, Like New Bath
To date, there are only four types of paint that can be used to paint a cast-iron bath in a house:
- Epoxy two-component enamel or glue;
- Acrylic two-component materials;
- Powder paints;
- Specialized paints and varnishes for restoring the enamel coating of bathtubs from leading manufacturers.
In addition to the above, there is a huge number of paint coatings that, in theory, can be used to repair cast iron bathtubs. These are stoving automotive paints. They give a uniquely smooth finish and hold up well to soap and shampoo, but the process of applying to a bathtub requires some pretty sophisticated equipment. Gloss and gloss on cast iron walls is determined by the amount of glyptal varnish added to the paint.
Advice! In search of how to repair enamel scratches on cast iron bath, it is best to stop at a white oven-baked car enamel.

You only need to prepare a bath, dry and degrease the damaged area, apply a thin layer of paint with a pneumatic spray gun and dry the patch with a hot hairdryer. To be sure, you can lay 3-4 layers on the cast-iron wall.
The advantage of car paint is that the enamel can be laid in the bath in a small spot, and the coating will not peel off during operation. All other paint options - epoxy, acrylic, and even the vaunted Tikkurila enamels - require a full painting of the cast-iron bowl.
If the house has powerful 1000 W halogen spotlights, then you can try to repair the bathtub with automotive paint in in full. But before you paint a cast-iron bath, you need to make a quality exhaust ventilation and tightly seal the doors to the room at the time of drying. Automotive paints have a very unpleasant, irritating odor.
Branded materials for painting
The easiest way, which does not require any tricks with heating and drying, is to use ready-made repair enamels. You can paint a bath in a couple of hours, but paints are very expensive.
From large selection LKM can only advise German and Finnish paints:
- Wasch Fest by Jobi;
- Tikkurilovsky Reflex No. 50;
- "Realife Bathroom & Kitchen" by Dulux;
Deluxe paint is the most popular, but the masters say that all three options restore very well enamel coating. Before applying paint to the bath, the enamel surface must be cleaned with emery, washed with solvent 646 or alcohol, and can be painted. Paint material mix thoroughly, but without the addition of a solvent, and apply to the walls with a roller with short bristles or a soft brush.

Epoxy based paints
The main advantage of epoxy and epoxy-polyurethane varnishes is the high hardness of the new coating on the cast iron bath. A properly prepared paint composition is practically odorless, but this does not mean that the mixture epoxy resin and the hardener is harmless. It is necessary to cover the cast-iron bathtub with paint under powerful ventilation. The hardener contains maleic or phthalic anhydride, a very toxic substance, but after curing the coating becomes relatively harmless, and the bath can be used without restrictions.
There are a lot of options for paints and varnishes based on epoxy resin, but not all are suitable as bath paint. There are also water-soluble ones, so when buying, you always need to specify the water resistance of the paint material. Best Option there will be a resin for the repair of yacht hulls or electrical compounds. The most durable and at the same time tough coatings are obtained from them, the paint can be used for cast iron bathtubs in any condition, even with cracks and corrosion.

Almost all resin based paints have yellow tint, from light straw to honey orange. In any case, it will not be possible to make a cast-iron bath snow-white with the help of an epoxy mass, even if titanium oxide is used as a filler.
This filler option is considered the safest and at the same time giving maximum degree whiteness. To enhance the effect, often not fully cured paint is blown or rubbed with dry oxide, and the cast-iron bath is almost like new. The only drawback of any two-component bath repair mixtures is the need for very accurate dosing of the components and maintaining the temperature of the cast-iron body within 22-25 ° C.
On a cold bath, the epoxy coating will harden for three days, on an excessively warm bath it will seize in 30-40 minutes with waves and blisters.
Acrylic and powder materials
Today, acrylic two-component varnish is considered one of the best existing materials to restore the enamel of the walls. On condition High Quality almost any novice repairman can paint a bathtub. There are many masters' stories about how to and not to paint a cast-iron bath, but they all admit that the final result depends 90% on the quality and chemical composition, and only 10% on the desire and skills of the master.
If there is a desire to repair a cast-iron bathtub on your own, then it is best to use proven brands of paint, such as Stakryl, acrylic ready mixes"Eco-bath" and "Alfa-bath".
If the acrylic mixture is applied strictly in accordance with the requirements of the manufacturer, then the result is a fairly durable glossy white coating, a kind of acrylic bath inside cast iron.

If it is required that, as a result of the repair, the bathtub receives the most wear-resistant and durable coating, it is best to use hot curing powder paints. In industry, coatings based on epoxy-polyurethane powders serve for 20 years in difficult conditions. A home bath will last no less.
The only condition for applying a paint coating is the use of a special thermal hardening procedure for the coating. You can try to apply and fix a layer in the bath with building hair dryer, but it will be easier to dismantle and take her workshop.
Conclusion
Of the entire list of materials with which a cast-iron bath can be restored to its original freshness and whiteness, the most effective and expensive is liquid acrylic. The minimum price for the material is 5000 rubles. per litre. Next come special alkyl-polyurethane coatings and car paint hot drying, about 600 rubles / l. The most budgetary is the epoxy compound, about 450 rubles. per litre.


