An economical and quick option for finishing the ceiling is the installation of foam boards. There are many types of this material, which makes it possible to show imagination. From foam, you can make figured elements and even a multi-tiered ceiling. It is easy to do all this with your own hands, without resorting to the help of specialists.
Pros and cons of the material
Styrofoam has many positive characteristics that are revealed during installation:
- he weighs little;
- processed without problems;
- improves sound insulation in the room;
- has heat-saving properties;
- is inexpensive;
- lends itself well to further processing: coloring, etc.
There are few drawbacks to the foam, it is noted that the material turns yellow with prolonged exposure to sunlight. it is fragile and breaks if handled carelessly.
Slab finish
During the installation of foam plastic, there are no serious problems. The main thing is to properly prepare the surface of the ceiling and choose the glue. For the installation of plates, compounds are used that contain active chemicals.
The adhesive may protrude at the edges during the gluing of the board. It can be used to seal joints between tiles. Decorative plinth is an indispensable element of ceiling design, mounted using finishing putty.

Surface preparation
This process consists in cleaning the ceiling of dirt, accumulated dust, remnants of old coatings. For best results, carefully remove all interference. Then prime the plane with a special liquid and leave to dry. If the ceiling is suspended from drywall, then it is even, and the tiles will stick without problems.
Styrofoam is attached according to a pre-compiled scheme: diagonally, symmetrically or staggered, combining a number of adjacent plates by half the length.

Mounting order
If the plate is mounted diagonally, work begins from the center of the room or from the window. The plates are glued in turn, at this moment it is important to look carefully so that no gaps form between them, and in general the foam has a regular, symmetrical pattern without deviation in a straight line.

Volumetric compositions are made using plates of large thickness and size. They are not inferior in appearance to multi-tiered structures on the frame, but are faster and easier to perform. To do this, curly elements are cut out of the foam and glued to the ceiling. Such works differ from the variant with tiles not only in design, but also in the adhesive composition used. He must be stronger. Liquid nails are suitable, which firmly connect various materials.
Before gluing the cut parts, they are treated with a deep penetration primer. Then the plates require further processing. A plaster mesh is glued to their surface so that cracks do not subsequently appear. After that, it is covered with a starting putty, and after drying, it is sanded until a smooth surface is formed.
An even and smooth foam is treated with a thin layer of finishing putty, sanded again with a special tool, primed, allowed to dry and painted. This is how volumetric figures are created on the ceiling without much effort. It is not necessary to make a frame, you also do not have to purchase and use drywall sheets.

Various types of tiles
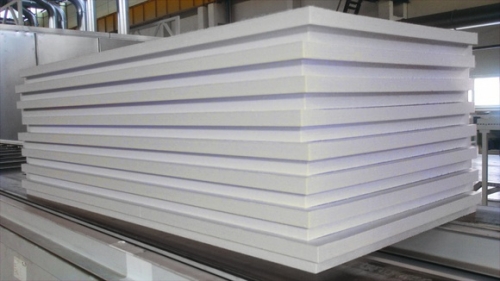
This building material is distinguished by production methods. The plate is pressed, made by stamping from polystyrene strips. The finished product has a thickness of 6-8 mm.
Extruded boards are made by pressing from a polystyrene strip. The thickness of the elements is 2.5-3 mm. The surface is smooth and shiny. The plates are given a different structure: similar to marble, cut wood and other natural materials. This is clearly visible in the photo.

The injection plate is produced by a method by which the raw material is sintered. The product turns out to be of the correct shape, with a deep pattern, 9-14 mm thick.
Tile selection
When purchasing a building material, pay attention to the geometric parameters of the product. If these are squares, then the angles must be the same and equal to 90 °. If there are deviations in this respect, then the seams will be uneven.
The edges of a good plate are dense, not crumbling, and the grains are uniform in caliber. High-quality foam - with small grains. Under its own weight, it does not crumble if the slab is held in weight by one of the corners. The drawing on it is clear, bright and without flaws. The slightest dent will be immediately noticeable.
Attention! The quality is easy to check. Take the edge of the tile and shake it. If the material is poor quality, it will break.
Calculation of the amount of tiles and glue
After the type of plate is selected in terms of physical parameters and appearance, the amount of material required for finishing is determined. Assuming culling or accidentally broken corners, buy 15% more. To find the surface area, multiply the length by the width.
The foam goes on sale with the dimensions of the side lines 50 x 50 cm. If there are errors, then gaps at the seams are formed during the finishing. This nuance is important to consider.
Liquid nails allow high-quality gluing of tiles. If you want to save money, it is better to purchase rubber-based glue. Its consumption is lower than that of liquid nails. But in order for the fixation of the plate to be strong, you need to give a little time after applying the glue to dry it.
Adhesives such as "Moment", "Titan" seize well and connect the plate to any surface, and after drying they hold tight. After connecting to the ceiling, the element is pressed and held for some time.
Fastening methods
In order to do the installation of plates with your own hands, you first make a markup. From diagonally located corners, two lines are marked through the center with a stretched thread. The place of their intersection is the starting point of the installation. If a chandelier hangs from the ceiling, then it serves as a starting point for getting started. The joint near the wire is cut, anyway, in the end, this place will be closed with a special glass. This is clearly visible in the photo.

You can start installation from one side of the wall and gradually, row by row, lay the slab. This is a fast and simple method. But there are also subtleties. It is better to start the first row from the side of the wall that is near the door, not the window. In this case, the gaps between the plates are less noticeable. Observe the symmetry of the ornament, which is located on the edge of the plate. After all, if the patterns do not match, the integrity and beauty of the finish will deteriorate.
Location options
There are many options for the arrangement of elements. Often used diagonal or parallel. Styling methods and color schemes are combined to achieve interesting effects. Elements are staggered or serpentine using different colors. After the installation is completed, decorative plinths are laid around the perimeter. They are fixed with liquid nails or special glue.

If the ceiling is whitewashed, it is more difficult to lay polystyrene on such a surface. In this case, the surface is pre-coated with a primer 2-3 times and allowed to dry. Only then do they start working.
The second option is to partially scrape off the whitewash, this is done with a metal spatula. Then a layer of glue is applied to the wrong side of the foam board and pressed against the ceiling. It is worth holding it in order to fix it well. Through a thin layer of whitewash, the glue will be absorbed and set with the coating.
If a budget repair is planned, purchase pressed plates, their price is lower than that of other products. If desired, such plates are coated with water-based paint. But they cannot be used in a bathroom where there is high humidity, the material is made in such a way that it absorbs water.
For a seamless finish, use a deep-patterned injection plate that can be stained. The main disadvantage is the high price.

To make a do-it-yourself ceiling in the kitchen or bathroom, purchase extruded material. After all, it washes well if you add a mild detergent to warm water.
Tool
To install the foam on the ceiling with your own hands, you will need the following tools.
- Stationery sharp knife;
- Corner:
- Painting cord for marking;
- Ladder;
- Roulette;
- Metal spatula.
The technology for gluing polystyrene foam to the ceiling is not complicated. With the right approach, everyone will do it. But some subtleties, if you know them, will help to avoid inaccuracies and errors.
- Before starting installation, leave the material for some time in the room where it is supposed to be used.
- Color combinations can be arranged in a rhombus.
- Do not interrupt the process in the middle of the row so that notches form and the seam does not go astray.
- The ability to wipe the gaps appears only after the glue has dried. For this, a special putty or sealant is used.
- Remove the glue from the stove immediately before it dries.
- Press the slab to the ceiling not with your hands, but with an even block of wood to distribute the load evenly.
- Install high-power lighting devices at a distance of at least 20 centimeters from the coating so that the foam does not melt.
- So that each individual part looks in one direction, apply a small arrow on the wrong side so as not to go astray.
- Align the parts relative to the ceiling with a two-meter level or rule.
To learn more about how to glue a plain or multi-colored slab, watch the detailed instructions on the video:
Styrofoam ceiling is one of the inexpensive ways to insulate and decorate the ceiling. More recently, such raw materials were used for crafts; today it is a sought-after finishing material. Today, foam plastic is presented in a wide range, so you can always find an option that suits your idea.


One of the main advantages of such a ceiling is the fact that you can carry out the installation yourself, without resorting to specialists. Consider the features, pros and cons of this material.
Advantages and disadvantages
A room can lose about a quarter of its heat through the roof. Styrofoam tiles are a unique material that provides a high level of thermal insulation of the room. It is used in cottages, baths, cellars and other premises.
For example, in private cottages, foam coating is one of the most popular solutions. It allows you to save on the purchase of insulation and maintaining heat.


This material is an environmentally friendly product. During its operation, toxic substances will not be released into the air, it is harmless to health. During production, molten foam plastic acquires density through heat treatment, and its quality characteristics increase. To obtain a certain tone, dyes are added to the product, which provide the material with a bright and saturated color.
Styrofoam has many advantages, we note the main ones:
- Acceptable price. Through this material, you can create an original decor of the room.


- Light weight. The material can be used for newly erected buildings and old houses. Styrofoam practically does not weigh down the ceiling and walls.
- Large selection of finishes. It can be plaster, plastic.
- The foam is moisture resistant. It can be used to finish baths, saunas and bathrooms, however, additional waterproofing is needed in bathrooms. The coating withstands large temperature fluctuations. It does not deform in harsh winter, hot summer. Such material gives excellent sound insulation, it is easy to paint.


Polyfoam also has disadvantages:
- This material is highly flammable. When it is used over a gas stove or column, additional protection is required.
- Before insulating the roof with foam plastic, it is necessary to impregnate the wooden elements with flame retardant liquid. This is especially true for fully wooden buildings.
- The material is not durable. Additional protection is needed: at the slightest damage, the foam begins to crumble.


- Styrofoam cannot be coated with nitro paint or varnish. Only water-based dyes are applicable.
- This finish is airtight. Due to this, in non-ventilated gaps, there is a high risk of fungus or mold.


How to choose?
To choose this material correctly, it is worth considering several recommendations.
- Pay attention to the corners of the tiles. If the shape of the tile is square, all corners should be straight. The slightest deviation will make itself felt, exposing uneven seams, this is especially important when applying seamlessly.
- The edges of the tiles must be even, shedding is unacceptable. Good foam does not crumble if held at one corner. In addition, the drawing must be clear, any flaw will be visible on the ceiling with the naked eye.
- High-quality material is easy to check empirically: take the tile by one corner and shake it. Poor quality material will break.


If you decide to insulate the ceiling with foam, you need to know the basic rules, thanks to which you can enjoy inexpensive and high-quality repairs without the ensuing problems:
- Such a coating requires careful handling, any resulting dent cannot be repaired.
- Avoiding joints when applying plates will not work. For aesthetics, you need to use white putty, in addition, remember to be extremely careful.
- In order to avoid difficulties with borders in the corners and joints, you can buy ready-made corners, choosing their width as accurately as possible with the main plinth.


- To mask the place of attachment of the chandelier, you must buy an outlet in advance.
- Carefully approach the gluing of the picture. Already glued material is difficult to remake.
- Think about whether to glue the foam over the stove. It is unacceptable to create dangerous situations.
- Finishing with such material is a good solution when repairing a corridor and a bathroom. But it is in the bathrooms that you need to additionally cover the ceiling with a layer of water-repellent paint.


There are universal adhesives for all types of foam. However, the best tool is a one-component polyurethane adhesive. Its advantage lies in the quick fight, you will not have to stand with your hands up for a long time, holding the tile. Keep in mind the nuance: the cost of glue of different brands is significantly different. If the Russian composition costs about 300 rubles per 1 kg, Polish-made glue will be 9,000 rubles for a 15 kg package. The savings are tangible.
If your ceiling is immaculately flat and clean, a three-kilogram container of PVA glue will suffice. For perfect bonding, it is recommended to add a pack of white Moment-assembly to the solution.
If you live in an old house, it would be wise to additionally reinforce the sheets with dowels with white plastic umbrellas. Then they can be masked with white putty.


Often the ceiling is uneven, so you have to use ordinary putty to level it. She copes well with the task of leveling, masking cracks. In addition, putty is a good preparation material: after surface treatment with a primer, foam tiles will hold on stronger. You can combine dry gypsum putty and PVA glue. The advantage of this combination is the fact that the joints can be puttied with this composition.


Surface painting
Expanded polystyrene is contraindicated for aggressive components of dyes that corrode the material. These components include acetone and alkyd additives. For this type of ceiling, it is recommended to use neutral water-based paints. An excellent choice would be a water emulsion. To date, there is a huge selection of colors of this paint in stores.


It will be interesting to look like bronze or silver decor. Such staining is recommended to be done with a soft cloth, paint must be applied pointwise: this is how an imitation of aged gypsum stucco is created. Many choose the bright decor of foam tiles. If desired, the surface can be decorated with a contrasting pattern.

- Carefully remove whitewash, old plaster and chalk from the ceiling surface.
- Wipe the base with a damp cloth or almost dry sponge.
- Mark the ceiling.
- Prime the surface with a deep penetration primer.


- Cut out the corners of the panels for the sockets of the ceiling lights in advance.
- Start work from the center and gradually move towards the corners.
- Don't forget to let the glue dry.
- Carefully mask the joints between the panels.


One of the important elements are cornices. This nuance is quite difficult to perform if you have no previous experience. To make things easier, buy a light-weight decor and a powerful adhesive that will save you the hassle of attaching the border to the surface. The last step is to remove the coloring mixture. Do not be too lazy to do this immediately after gluing the tiles, as it will be difficult to clean the surface later.

How to install a skirting board?
In order for the skirting board to firmly grasp, you need to apply glue to the cornice and wall. This is not very convenient, since the material consumption will be quite large. For more economical consumption, you can apply glue to the baseboard, attach it to the attachment point and let the glue dry. Then you need to press the skirting board tighter and hold for two minutes.

Acrylic sealant is the most convenient material. It seizes immediately, it is enough to hold such a plinth for a couple of seconds. Corner joints are the most difficult task. It is necessary to cut them precisely so that the edges fit perfectly to each other. To do this, you can use a sharp knife or a special knife for cutting foam. It can be purchased at any hardware store.

In the process of repair and construction work, developers cannot do without the use of reliable and practical materials that guarantee the durability of a residential or commercial building. As for finishing the ceiling plane, there are quite a lot of ways and options. Tension and suspension systems, wooden structures and other materials are successful. Styrofoam tiles are most often used for ceiling decoration, as they are distinguished by such advantages as the low price of foam plastic ceilings, easy installation and maintenance, water resistance, thermal insulation, and environmental friendliness of the material.
The concept of foam ceiling
The cheapest and easiest ceiling covering, which is installed without the help of installers, is foam boards. Such tiles can have any color, just be white or laminated with a transparent film.
Foam boards can be of standard size 50x50, as well as 100x16.5. If you want to install such a ceiling in the kitchen, it must be laminated with a film. With the help of this technology, it is possible to hide various defects and irregularities in your ceiling.

Plates are glued to any treated surface. When creating decorative foam ceilings, it will be correct to use a special glue so that, if necessary, the tiles can be easily peeled off. The disadvantages of such a ceiling are poor moisture tolerance, they are short-lived and may turn yellow.
Production of foam tiles
Styrofoam is an environmentally friendly product that does not have the ability to release toxic substances. That is why it is used in houses for the construction of ceilings. It is also a heat-insulating material that will reduce your heating costs.
Foam ceiling is suitable for corridor, living room and bedroom. The size of the tiles for all manufacturers is the standard 50 by 50 centimeters. Tiles are made in three ways: extrusion, stamping and injection. To learn more - watch the video about foam ceilings.
Extruding
Material for manufacturing - pre-melted foam. Tiles are formed from the molten substance by the vacuum-thermal forming method. They are resistant to mechanical stress and durable.
In order for the product to turn out to be of a certain color, various dyes are added during manufacture, which provide a clear, high-quality color. This method requires high precision in order to obtain the correct geometric characteristics. Therefore, in the end you get a very expensive foam ceiling with a smooth surface.
Punching
Of all types of tiles, the material that is made by stamping is the cheapest. Production is carried out using special stamps, the starting material is foam.

The resulting materials have a high grain size and are produced in white. But such tiles can be laminated and covered with various substances that give a luxurious look. Provides easy installation, paint can be applied. Fragile, moisture-resistant tiles practically do not absorb sound.
injection
Ready-made tiles in white color, but perfectly resistant to painting with water-dispersion-based substances. It is also called tiles without seams. This is an innovation in the construction market. Used in public and domestic areas.

Despite their name, the seams are still present, although less than 1 millimeter thick. Therefore, after installing the foam ceiling with your own hands, it is recommended to seal the seams. To do this, you need to choose a high-quality putty or grout, sealant. Never use silicone, a suitable option is acrylic. Silicone sealant turns yellow over time, no one needs it.
Advantages of foam tiles
Foam boards, which are used to cover ceilings, have the following advantages:
- Waterproof, not moldy;
- Absolutely different design, cheap, wear-resistant, not bad heat and sound insulation;
- Practical, easy to clean with detergents;
- The surface is waterproof, with waterproofing;
- Resistant to temperature differences;
- In case of any kind of damage, they are easily replaced without the need to do a complete dismantling of the ceiling;
- They will go well with drywall, and a variety of coatings and patterns on the foam ceiling will give it an expensive look;
- With the help of such tiles, the appearance of a seamless structure is created.

Choice of ceiling tiles
Before purchasing this product, you need to know what it is. Tiles are divided into three types: extruded, injection, pressed. All types are made of polystyrene foam, but in different ways.
Regardless of the type, before fixing the foam to the ceiling, you should look at the corners of the material. They, like the edges, should be even, and the angle should be 90 degrees. Avoid any dents or roundings. To check if the edges match, stack the tiles in a stack.
To check the quality and strength of the material, take the tile by the edge and shake it: good material should not break under its own weight. When choosing tiles, buy with a margin of about 15-20%, depending on the area of \u200b\u200bthe ceiling.

We figured out the criteria for choosing foam tiles, now let's look at the qualities of each type. Remember that extruded material is used in any room. This is the most expensive of polystyrene foam tiles, however, despite this, it has many drawbacks: the presence of freon dangerous for the ozone layer in its composition, the absence of clear geometric shapes, and the uneven surface of the wrong side.
The injection surface allows you to create the appearance of a seamless ceiling coating. It is characterized by good waterproofing and excellent sound insulation, resistant to temperature changes, easy to clean, does not burn and has increased strength. It is produced exclusively in white, but is able to transfer painting with a water-dispersion-based composition.
The large thickness and porosity of stamped tiles provide low noise and heat insulation properties. The disadvantages also include its instability to the effects of water, high fragility and inaccuracy of its geometric shape.
Foam mounting technology
So, you are interested in how to fix the foam to the ceiling. Remember - the ceiling in the room can be done with your own hands. Polyfoam - the material is inexpensive and very practical. Polystyrene tiles can be laid on drywall, wood, concrete, in general, on any ceiling. The work is being done in stages.
Preparatory work
Preparatory work includes a lot of operations. The first step is to stock up on the right tools and materials. For independent work, you will need a minimum set of tools: a knife, scissors, spatula, level, tape measure and fly brush. To purchase materials, we measure the area of \u200b\u200bthe ceiling and purchase them with a margin, you will also need glue and a framing frieze.
Before laying the tiles, the surface must be carefully prepared. It is necessary to clean the ceiling from whitewash, level and prime the irregularities. If there is a fungus on the ceiling, then the place should be cleaned and treated with an antiseptic. To fix the foam to the ceiling, glues "Creative", "Akrol", PVA and many other special glues are used.

Before gluing, to evaporate moisture, it is necessary to keep the tile in a dry room for 3 days. After checking the accuracy of the corners and the perimeter, mark the ceiling from the center to the edges. To do this, it is convenient to use a chopping cord, with any dye.
When marking, consider the type of tiles on the ceiling (diagonal or longitudinal rows). With the help of diagonal rows, you will visually increase the ceiling plane, but this is a more time-consuming process. Panels are recommended to be located from the center of the room.
Ceiling paneling
The result of all your work depends on how the foam is glued to the ceiling, and the quality of pasting. To begin with, the tiles are cut with a knife or scissors to the required size. Then, using adhesives, the material is installed. Keep a few tips in mind:
- De-energize the wiring before work;
- Work with gloves so as not to stain the tiles;
- Glue is applied in dots along the diagonal and perimeter of the tile (20-30 dots);
- Let the glue dry for five minutes;
- When gluing, press the material firmly;
- Remove excess adhesive with a damp cloth.

To fix the tile on the ceiling, use double-sided tape while the glue dries. At the end of the work, it is necessary to remove the gaps between the ceiling and walls. Styrofoam plinth for the ceiling is perfect. Special corner elements will decorate the room. In addition, there is an insert for a chandelier where the wires will hide. It is desirable that all this be framed in the same style.
Styrofoam tile care
Any white tile turns yellow over time, to avoid this, it is necessary to prevent exposure to sunlight, ultraviolet rays. But there is another option. After the ceiling is made of foam plastic, in order to increase the service life and give a certain beauty, the tiles must be coated with water-based paint. If the tile is moisture resistant, you can wipe it with a wet cloth or sponge, if not, then clean it from dust with a vacuum cleaner.
Styrofoam ceiling decoration
Each developer wants to make his home more comfortable and chooses the interior to his liking. This also applies to decoration, in particular ceiling decor. Many options are used for decoration - stained-glass windows, plaster, mosaic, painting, etc. Just look at the photos of decorative foam ceilings! Indeed, in the construction market now you can find everything you want for a unique and luxurious decor for your ceiling.

There are two options for "decorating" the ceiling with your own hands. In a simple version, a standard surface is used, in a complex one, a surface with additional structures. In addition, there are two design methods: “simple” and “complex” materials with different and multi-level designs.
simple decor
The easiest hand finishing is whitewashing the ceiling with painting. It is clear that the surface is pre-prepared - cleaned and primed. After that, just paint. Paints can be selected at your choice and mixed. Do not buy a lot of paints at once, because the color in the photo of foam ceilings can differ significantly from the one acquired and the shade after mixing may disappoint you.
Therefore, first try to paint a small section of the ceiling, if everything suits you, then continue to work in the same spirit. This finish can be repainted many times, painted on it in any form. Be sure to complement the adhesive ceilings with various skirting boards or moldings. This will add even more beauty.
Sophisticated decor
It is carried out using gypsum, various designs, tension systems. Such finishing methods are quite possible to do it yourself. The advantage of this finish is that it will hide all your defects in the ceiling surface.
Additionally, for decoration, you can use caissons of any shape, peculiar recesses in the ceiling of various geometric shapes. The ceiling, trimmed with such elements, is called coffered. The disadvantage in the design of such a ceiling is that with such a decor, the height of the room decreases.

The smaller your room, the lighter the tone of the ceiling paint. And vice versa. This unwritten rule is intended for rooms that require a visual increase or decrease in space. The color of the ceiling should differ from the decoration of the walls by at least two shades. In low and small rooms, ceiling moldings and cornices should not be more than 100 millimeters wide. Thoughtful lighting is a prerequisite for decor.
Now you know how to glue the foam to the ceiling, and got acquainted with the main types of ceiling tiles. Choose the appropriate type depending on the qualities of the ceiling that you plan to achieve after the repair. A styrofoam tiled ceiling in your home will give your room elegance and originality. As well as the work done by one's own hands, and saving money, the worker will be a real pleasure!
The idea was suggested by the wife's brother from Zhytomyr! But at the time there was no work himself, he was leaving for his homeland on a visit, so they did it without him, but everything seemed to work out. Unfortunately, I did not find all the photos, but you will understand the idea. 
We lay out foam around the perimeter on the floor. In this case, 50 mm. outline the drawing, cut according to the drawing. 

We process the ceiling and foam elements on both sides with concrete contact (special primer with sand). After drying, the surfaces become rough, providing reliable adhesion.
We smear the upper side with putty (any for drywall and concrete) and press it to the ceiling. Hold for a minute or two. The foam is lightweight and holds up well. Let's get a hold of the day.


Under the spotlights, we cut recesses in the foam with grooves along the perimeter, on top of the plasterboard cover, we make a hole in it for the lamp, we also pass the wires through the slot directly through the foam. Unfortunately, I can not find a photo, but in one of the photos you can see the outline, for clarity.

We apply a gypsum plaster mixture through the plaster mesh (Rotband is used in our region, it retains elasticity longer). Along the perimeter, we also plant a flexible plastic corner on the Rotband. We align everything with Rotband. 
From above we go through the finishing putty (we used Shitrok). We paint. We admire. 

Living room technique is the same. By the way, they were afraid to use incandescent lamps in spotlights (suddenly the foam will melt) they used LEDs. 

If someone has doubts, will it crack. Already the third year has gone. We don't see any changes. Thus, there is no need to mess with profiles and drywall, and even the work is silent, a puncher is not required.
Despite the fact that the ceiling is not always visible at first sight, a sloppy and untidy ceiling can ruin even the most expensive and beautiful repairs. Therefore, its improvement should be thought in advance. There are several options for decorating the ceiling.
Each of them has certain features.
Each of the types of ceiling can be suitable for a certain interior. In addition, not all are equally easily and quickly mounted. Consider several options, preferring the simplest and fastest way to update the ceiling.
Suspended ceiling
The name itself explains the installation and design features.
As a rule, a suspended ceiling is mounted on a specially prepared metal structure. Its installation requires a sufficient amount of time and skills.


Suspended ceiling can be made of special boards or drywall.
Stretch
This type is most common in the case of author's repair and certain design solutions.
It is made of a special polymer fabric, which is stretched onto the main ceiling using a special technology.


In this case, it is worth noting the low cost of work, as well as the inability to independently perform the installation.
Styrofoam false ceiling
The third type is the simplest and most inexpensive.
Do-it-yourself foam ceiling
For this, such a versatile material as polystyrene is used. As for the result, then, looking at the photo of the already finished false ceiling with foam, it can hardly be distinguished from the same drywall.
It is about this species that it is worth telling in more detail. Polyfoam has a wide range, application and a lot of advantages over other finishing materials. For example:
- breathes. Due to its texture, the material does not form any films that interfere with air circulation;
- keeps warm.
This is perhaps one of the main operational properties of the foam. Indeed, by making a false ceiling, you will save more heat;
- flexibility. This material is amenable to cutting, it can be used to make an imitation of modeling, for example;
- ease of installation. Let's talk about this in detail. However, it is worth noting that the false ceiling does not need profiles, screws and other elements.
Installation of a false ceiling made of foam boards
In order to start work on the installation of plates, it is enough to clean the base of the ceiling from grease and dust.
No special preparation is required for this method of ceiling design. This is a real time and cost savings for installation.
Styrofoam ceiling tiles, as a rule, are produced in sizes of 50x50 cm, or in rectangles of 16.7x100 cm.
After selecting the necessary plates and preparing the surface, you can proceed to gluing. For this, it is best to use a special glue. As a rule, it is sold in the same place as the plates. After work, give a little time until everything dries.
Everything, the false ceiling made of foam plastic is ready without much difficulty.
This option will allow you to easily make a neat ceiling, and most importantly, hide its flaws. Along the edges, you can put a special plinth or baguette from the same material as the plates.
Another advantage of such a false ceiling is its operation. Firstly, the foam does not form cracks.
Secondly, this material, due to its synthetic structure, is not a favorable environment for the development of mold and mildew, so ceiling tiles can be used in rooms with high humidity, such as bathrooms.
And, thirdly, polystyrene refers to non-combustible materials, respectively, it is safe, while environmentally friendly.
Ceiling foam - how to make tiles with your own hands, video processor manual, photos of different ceiling designs
Anyone who has started renovating their homes intends to facilitate the use of various materials for this purpose. Today, expanded polystyrene is in high demand, with good results.
So, how to make DIY polystyrene sheets and what type should you use?

Foam types
Before you start distributing foam, you need to be familiar with the technical issues.
Polyester columns are classified into three types: stamped, extruded, injection. They are presented in the form of ceiling panels.
Stamped panels
Special dies are used to produce such plates.
The raw material is a piece of white foam with an increased grain size.
Styrofoam foams use paint to disperse water. Sometimes they are laminated. Such manipulations prolong the life of the material and improve external data. The cost of such plastic foam is quite acceptable, so many consumers love it.
However, these plates and defects are not without.
These include:
- High deviation of measurement accuracy during production, which often leads to the creation of a gap during their installation;
- The need for edges. This way, each tile will be assigned to all the others on the ceiling;
- Increased fragility, which requires the boards to be handled with care and under appropriate transport and installation conditions.
Important! Since the panel is fragile enough to be cleaned, it is not recommended to use abrasive cleaners as this may damage it.
extruded plates

Such a plan is made by extruding polystyrene.
They become off-white, so a special film is applied through the material.
Extruded plates have good strength. Their thickness is standard.
Thanks to a wide range of colors, you can choose a version of the panels that harmoniously matches all types of space.
Taking into account the disadvantages of extruded plates, it should be noted that they do not have exact geometric relationships, and therefore gaps may occur after installation. Completing the ceiling with such plates means a large financial outlay, unlike other coating options.
Plates for injections
This coating is obtained by compressing high quality raw materials.
Foam ceiling panels
The structure of its granules is not destroyed. At the output, we get matte white plates, the thickness of which is 9-14 mm. Their advantage is good water repellency. Therefore, this material will be an ideal option for accommodating rooms with high humidity (kitchen). In addition, the coating has soundproofing properties and is widely used in houses with thin walls.

Tiles do not need to be painted.
They have a relief shape and create one straw solution. After installing them, the slave is almost invisible. For the manufacture of discs, the material is used in the form of expanded polystyrene, which is self-extinguishing and fire resistant.
Calculation of the amount of material and surface preparation
To ensure that the installation of polystyrene ceilings is written before proceeding with the relevant measurements and calculations.
The space length and width indicators should be multiplied so that you can determine the area of the room. When choosing a roofing material, you need to know which surface is being calculated (number of entries per pack). You can also multiply the size by the amount of material in one lot.
Then the area of space must be divided by this image. The result will be a number that will indicate the number of packages needed. During the installation of panels, errors can occur manually, resulting in wasted material.
Therefore, it is advisable to buy products with a small margin so that in the future you do not have to buy in search of the same package of plates.
Calculation example
If room length is 6m, width is 3.5, area is 19.5m2 and panels are 0.5 to 0.5 and then 86 for renovation (19.5 / 0.25 = 78 + 10% ).

Required Tools
Before you put the styrofoam on the ceiling, you should prepare a set of tools, which should include:
- Writing a knife;
- Sharp scissors;
- laser level;
- spica;
- Table (for molds);
- Strong brush;
- roulette;
- corner;
- ladders;
- cords;
- head teacher;
- Pencil.
Preparatory work
Before the foam is glued to the ceiling, you must prepare the surface.
It needs to be cleaned of the remnants of the old. Then the base is leveled and ready. If there are fungal formations on the ceiling, they must be cleaned and treated with an antiseptic.

Important! If there are slight irregularities on the base on which the tile is installed, the cover will not be accurate.
Therefore, the alignment procedure must be responsible.
Before using the foam, you must leave them in a dry room for 3 days.
This must be done so that the panels can withstand moisture. After the substrate is leveled and the plates lie for the required time, it should be marked.
This level of work is very important.
Initially, places are planned where additional elements will be installed in the form of foam ceiling sockets.
To place panels on the ceiling, different methods are used:
- series.
This setting is the simplest, such as a chessboard.
- In meters. Each time the material is laid, each row is moved half a tile.
- diagonal. This type of placement is the most creative. The result is a bright and original ceiling.
Line stacking mode
Placement often starts from the center of the room, or from where the chandelier is located.
At the beginning, the cord is fixed in a long corner with adhesive tape, the other end should be placed on the opposite side of the room. Setting the second line first. Because of such manipulations, space is divided diagonally.

At the point where the chip is cut, a rectangular corner should be formed with a line from the center of the space.
From this point on, you need to start laying the foam. Then you must draw the place of the pencil where it crosses the line. It can then be canceled and continue with completion.
Roof tiles
Before plastic foam tiles are glued to the ceiling, they must be cut. Such actions can be performed using a mounting knife or sharp scissors. The most important thing is to correct mistakes, as this can lead to inequality.
Installation steps:

If you give imagination, you can recreate a stylish interior, but you don't invest in large sums of money.
For example, you can create a reduced foam ceiling.
Do-it-yourself foam ceiling

In the process of repair and construction work, developers cannot do without the use of reliable and practical materials that guarantee the durability of a residential or commercial building.
As for finishing the ceiling plane, there are quite a lot of ways and options. Tension and suspension systems, wooden structures and other materials are successful.
Styrofoam tiles are most often used for ceiling decoration, as they are distinguished by such advantages as the low price of foam plastic ceilings, easy installation and maintenance, water resistance, thermal insulation, and environmental friendliness of the material.
The concept of foam ceiling
The cheapest and easiest ceiling covering, which is installed without the help of installers, is foam boards. Such tiles can have any color, just be white or laminated with a transparent film.
Foam boards can be of standard size 50x50, as well as 100x16.5.
If you want to install such a ceiling in the kitchen, it must be laminated with a film. With the help of this technology, it is possible to hide various defects and irregularities in your ceiling.
Plates are glued to any treated surface. When creating decorative foam ceilings, it will be correct to use a special glue so that, if necessary, the tiles can be easily peeled off.
The disadvantages of such a ceiling are poor moisture tolerance, they are short-lived and may turn yellow.
Production of foam tiles
Styrofoam is an environmentally friendly product that does not have the ability to release toxic substances. That is why it is used in houses for the construction of ceilings. It is also a heat-insulating material that will reduce your heating costs.
Foam ceiling is suitable for corridor, living room and bedroom.
The size of the tiles for all manufacturers is the standard 50 by 50 centimeters. Tiles are made in three ways: extrusion, stamping and injection. To learn more, watch the video about foam ceilings.
Extruding
Material for manufacturing - pre-melted foam.
Tiles are formed from the molten substance by the vacuum-thermal forming method. They are resistant to mechanical stress and durable.
In order for the product to turn out to be of a certain color, various dyes are added during manufacture, which provide a clear, high-quality color.
This method requires high precision in order to obtain the correct geometric characteristics. Therefore, in the end you get a very expensive foam ceiling with a smooth surface.
Of all types of tiles, the material that is made by stamping is the cheapest. Production is carried out using special stamps, the starting material is foam.
The resulting materials have a high grain size and are produced in white.
But such tiles can be laminated and covered with various substances that give a luxurious look. Provides easy installation, paint can be applied. Fragile, moisture-resistant tiles practically do not absorb sound.
Ready-made tiles in white color, but perfectly resistant to painting with water-dispersion-based substances.
It is also called tiles without seams. This is an innovation in the construction market. Used in public and domestic areas.
Despite their name, the seams are still present, although less than 1 millimeter thick. Therefore, after installing the foam ceiling with your own hands, it is recommended to seal the seams. To do this, you need to choose a high-quality putty or grout, sealant. Never use silicone, a suitable option is acrylic.
Silicone sealant turns yellow over time, no one needs it.
Advantages of foam tiles
Foam boards, which are used to cover ceilings, have the following advantages:
- Waterproof, not moldy;
- Absolutely different design, cheap, wear-resistant, not bad heat and sound insulation;
- Practical, easy to clean with detergents;
- The surface is waterproof, with waterproofing;
- Resistant to temperature differences;
- In case of any kind of damage, they are easily replaced without the need to do a complete dismantling of the ceiling;
- They will go well with drywall, and a variety of coatings and patterns on the foam ceiling will give it an expensive look;
- With the help of such tiles, the appearance of a seamless structure is created.

Choice of ceiling tiles
Before purchasing this product, you need to know what it is.
Tiles are divided into three types: extruded, injection, pressed. All types are made of polystyrene foam, but in different ways.
Regardless of the type, before fixing the foam to the ceiling, you should look at the corners of the material.
They, like the edges, should be even, and the angle should be 90 degrees. Avoid any dents or roundings. To check if the edges match, stack the tiles in a stack.
To check the quality and strength of the material, take the tile by the edge and shake it: good material should not break under its own weight.
When choosing tiles, buy with a margin of about 15-20%, depending on the area of \u200b\u200bthe ceiling.

We figured out the criteria for choosing foam tiles, now let's look at the qualities of each type. Remember that extruded material is used in any room. This is the most expensive of polystyrene foam tiles, however, despite this, it has many drawbacks: the presence of freon dangerous for the ozone layer in its composition, the absence of clear geometric shapes, and the uneven surface of the wrong side.
The injection surface allows you to create the appearance of a seamless ceiling coating.
It is characterized by good waterproofing and excellent sound insulation, resistant to temperature changes, easy to clean, does not burn and has increased strength. It is produced exclusively in white, but is able to transfer painting with a water-dispersion-based composition.
The large thickness and porosity of stamped tiles provide low noise and heat insulation properties. The disadvantages also include its instability to the effects of water, high fragility and inaccuracy of its geometric shape.
Foam mounting technology
So, you are interested in how to fix the foam to the ceiling.
Remember - the ceiling in the room can be done with your own hands. Styrofoam is an inexpensive and very practical material. Polystyrene tiles can be laid on drywall, wood, concrete, in general, on any ceiling. The work is being done in stages.
Preparatory work
Preparatory work includes a lot of operations.
The first step is to stock up on the right tools and materials. For independent work, you will need a minimum set of tools: a knife, scissors, spatula, level, tape measure and fly brush. To purchase materials, we measure the area of \u200b\u200bthe ceiling and purchase them with a margin, you will also need glue and a framing frieze.
Before laying the tiles, the surface must be carefully prepared.
It is necessary to clean the ceiling from whitewash, level and prime the irregularities. If there is a fungus on the ceiling, then the place should be cleaned and treated with an antiseptic.
To fix the foam to the ceiling, glues "Creative", "Akrol", PVA and many other special glues are used.
Before gluing, to evaporate moisture, it is necessary to keep the tile in a dry room for 3 days.
After checking the accuracy of the corners and the perimeter, mark the ceiling from the center to the edges. To do this, it is convenient to use a chopping cord, with any dye.
When marking, consider the type of tiles on the ceiling (diagonal or longitudinal rows). With the help of diagonal rows, you will visually increase the ceiling plane, but this is a more time-consuming process.
Ceiling paneling
The result of all your work depends on how the foam is glued to the ceiling, and the quality of pasting.
8 Tips for Choosing and Applying Styrofoam Ceiling Tiles
To begin with, the tiles are cut with a knife or scissors to the required size. Then, using adhesives, the material is installed. Keep a few tips in mind:
- De-energize the wiring before work;
- Work with gloves so as not to stain the tiles;
- Glue is applied in dots along the diagonal and perimeter of the tile (20-30 dots);
- Let the glue dry for five minutes;
- When gluing, press the material firmly;
- Remove excess adhesive with a damp cloth.

To fix the tile on the ceiling, use double-sided tape while the glue dries.
At the end of the work, it is necessary to remove the gaps between the ceiling and walls. Styrofoam plinth for the ceiling is perfect. Special corner elements will decorate the room.
In addition, there is an insert for a chandelier where the wires will hide. It is desirable that all this be framed in the same style.
Styrofoam tile care
Any white tile turns yellow over time, to avoid this, it is necessary to prevent exposure to sunlight, ultraviolet rays. But there is another option. After the ceiling is made of foam plastic, in order to increase the service life and give a certain beauty, the tiles must be coated with water-based paint.
If the tile is moisture resistant, you can wipe it with a wet cloth or sponge, if not, then clean it from dust with a vacuum cleaner.
Styrofoam ceiling decoration
Each developer wants to make his home more comfortable and chooses the interior to his liking. This also applies to decoration, in particular ceiling decor. Many options are used for decoration - stained-glass windows, plaster, mosaic, painting, etc. Just look at the photos of decorative foam ceilings! Indeed, in the construction market now you can find everything you want for a unique and luxurious decor for your ceiling.
There are two options for "decorating" the ceiling with your own hands.
In a simple version, a standard surface is used, in a complex one, a surface with additional structures. In addition, there are two design methods: “simple” and “complex” materials with different and multi-level designs.
The easiest finish by hand is whitewashing the ceiling with painting.
It is clear that the surface is pre-prepared - cleaned and primed. After that, just paint. Paints can be selected at your choice and mixed. Do not buy a lot of paints at once, because the color in the photo of foam ceilings can differ significantly from the one acquired and the shade after mixing may disappoint you.
Therefore, first try to paint a small section of the ceiling, if everything suits you, then continue to work in the same spirit.
This finish can be repainted many times, painted on it in any form. Be sure to complement the adhesive ceilings with various skirting boards or moldings. This will add even more beauty.
It is carried out using gypsum, various designs, tension systems. Such finishing methods are quite possible to do it yourself. The advantage of this finish is that it will hide all your defects in the ceiling surface.
Additionally, for decoration, you can use caissons of any shape, peculiar recesses in the ceiling of various geometric shapes.
The ceiling, trimmed with such elements, is called coffered. The disadvantage in the design of such a ceiling is that with such a decor, the height of the room decreases.
The smaller your room, the lighter the tone of the ceiling paint.
And vice versa. This unwritten rule is intended for rooms that require a visual increase or decrease in space. The color of the ceiling should differ from the decoration of the walls by at least two shades. In low and small rooms, ceiling moldings and cornices should not be more than 100 millimeters wide.
Thoughtful lighting is a prerequisite for decor.
Now you know how to glue the foam to the ceiling, and got acquainted with the main types of ceiling tiles. Choose the appropriate type depending on the qualities of the ceiling that you plan to achieve after the repair.
A styrofoam tiled ceiling in your home will give your room elegance and originality. As well as the work done by one's own hands, and saving money, the worker will be a real pleasure!
Based on site materials: http://strport.ru


