Is it possible to plaster OSB boards? This question is often asked by owners of housing built using frame technology. Such buildings, like those built from any other materials, need insulation and decorative finishing. Plastering is a great way to solve these issues.
Activities prior to plastering
It is not recommended to apply plaster directly to the surface of the slab. This is due to the ability of plaster mixtures to absorb moisture from the air and transfer it to the base. As a result, the panel will be constantly exposed to water and its service life will be reduced.
In order to avoid direct contact of OSB panels with plaster, it is necessary to carry out mandatory measures that will not only protect the surface of the walls from excess moisture, but will also allow the solution not to crack during operation.
It will be possible to plaster OSB panels if they are first prepared in several stages:
- Secure sheets of sheathing made of bituminized cardboard, facing kraft paper or roofing felt on a paper base;
- Install reinforcing mesh made of galvanized steel or fiberglass;
- Fill the resulting structure with special glue, ensuring that the mesh is completely immersed in it;
- Treat the resulting base with a primer.
All work on preparing the panels can be carried out only after they are rigidly fastened to each other and to the floors in order to eliminate vibration during the finishing work and further operation of the house.
Having completed the necessary steps, you can begin plastering work. It is better to give preference to vapor-permeable compositions on a mineral or silicate basis. Unlike conventional cement mixtures, they have pronounced decorative properties due to the additives that are included in their structure at the production stage.
 The procedure for applying traditional mixtures to OSB boards is quite cumbersome and requires a professional approach. Ready-made compounds have appeared on the modern market, which are applied to the base in a thin layer. The process is rather similar to puttying, as it covers the walls with a layer of 1.5 to 5 mm. They are suitable for outdoor and interior work.
To finish OSB panels, polymer-based compounds that have high adhesion are used. Plasters with a polymer binder are produced different types. For wooden surfaces suitable option based on synthetic resins: acrylic or latex. After drying, it forms a vapor-permeable, durable surface that is resistant to moisture.
The application of polymer finishes has its own nuances and requires preparatory work:
- the surface of the plates is cleaned with sandpaper;
- primer is applied;
- ready-made mixtures are applied.
The polymer composition can also be used on a leveled base made of cement plaster. The cost of such finishing is much higher than traditional compositions, but is compensated by a long service life, up to 25 years, during which the beautiful appearance of polymer plaster is maintained.
 Thermal insulation of the facade is carried out mineral wool or polystyrene foam. The insulation is attached directly to the surface of the OSB panels. Then actions are carried out according to the already familiar scheme: installation of reinforcing mesh, adhesive composition, primer and plaster composition.
Plaster perfectly protects the insulation from mechanical damage and exposure to the external environment:
- precipitation:
- sunlight;
- wind loads.
Vapor-permeable plaster mixtures allow the house to breathe and do not accumulate condensation on the surface of OSB panels. As a result, the walls are reliably protected from the appearance of fungus and mold.
The combination of plaster and insulation in the facade decoration can significantly improve the quality characteristics of the building:
- reduce building heating costs by more than 50%, thanks to good thermal insulation;
- increase the soundproofing characteristics of the house by 2 times.
All that remains is to choose the type of plaster mixture. Each composition has its own advantages and weaknesses. The decision in favor of using one type or another is made on an individual basis.
OSB plaster(OSB) boards are quite possible. In addition to insulating the building, it helps in decorating the exterior through the use of decorative plasters or paints. Mineral-based mixtures are well suited for further coloring.
Silicate-based plaster is used not only for finishing facades, but also for interior work. Using polymer-based mixtures, you can also solve interior design issues.
Oriented strand boards (OSB, OSB or OSB), invented in Canada during the era of mass construction of frame residential buildings, have also become interested in Russia. Lightweight, fairly strong slabs are used both for cladding facades and for interior decoration premises. It is quite understandable that they are trying to improve the nondescript surface of glued wood chips with decorative materials. One of the popular ways to achieve this is by applying protective plaster over an OSB board on the facade of your house.
Is it possible to plaster OSB
Having decided to clad the façade of their home with OSB or use particle boards indoors, homeowners carefully consider their finishing options. At the same time, the question of whether it is possible to plaster an OSB board is the first to arise in most cases. After all, if you neglect decorativeness and leave the OSB without outer covering(especially on the facade), then even wood coated with water-repellent compounds will absorb moisture.
This water is enough to swell the slab in summer and defrost in winter. The OSB will darken, warp and lose its strength. In addition, a serious disadvantage of OSB is the chemical component of the binder, which is why the boards must be protected from temperatures above +30°C. Therefore, from the moment the production of slabs began, builders began to think about a protective coating for them.
The most commonly used types of finishes are:
- painting (the cheapest and easiest option);
- wallpapering (suitable only indoors);
- cladding with decorative panels attached directly to the slabs (a rather expensive method that does not solve all the problems of preserving smallpox);
- covering with siding (does not eliminate the problem of flammability of slabs, requires additional measures for vapor barrier of OSB);
- tiling (suitable for indoors, but “blocks oxygen” to wood);
- facing slabs with a coating of decorative stone(the most expensive and time-consuming method);
- plastering.

Types of OSB board finishes
Properties that a protective coating for OSB should have:
- waterproof and waterproof;
- sufficient mechanical strength;
- temperature stability (withstand sudden changes);
- vapor permeability;
- environmental friendliness;
- fire safety;
- long service life;
- maintainability;
- unattractive to mold, mildew and rodents;
- resistance to solar radiation;
- light weight;
- affordable price;
- simple operation without extra costs;
- opportunity to do it yourself.
Why do OSB panels need to be plastered?
Plaster has all of the above properties.
Plaster coating also:
- serves as additional heat and sound insulation;
- forms a monolithic coating that hides seams and surface defects;
- can give the building a unique look.
Therefore, private owners actively use OSB plaster on the facade and for interior decoration.
Having correctly plastered the wood chip slabs once, they forget about repairs for a long time. And if you get tired of the appearance, you can easily change it by painting it in new colors. This coating is easy to clean, reliable, and does not allow drafts.
What plaster is used for OSB boards
If plaster is the final completion of the “layer cake” - a composite coating of OSB, then especially complex problems As a rule, this does not arise with the choice of plaster composition. Therefore, speaking about plasters, we will touch upon conventional compositions based on various binders. In addition, there are compositions specifically designed for plastering OSB.

Layer cake pattern
Using foam plastic for insulation wooden structures possible but not advisable!
Plaster mixtures are divided into types:
- leveling (roughing);
- decorative (finishing);
- special (waterproofing, etc.)
Plaster mixtures are divided by area of application into:
- internal (for use only in heated rooms);
- external (used for facades, as well as indoors);
- universal.
All compositions have a base: binders, filler (natural or artificial particles that make up most of the volume), certain functional additives.
Mineral
- silicone (vapor-permeable, waterproof);
- siloxane (water resistance lasts only 3-5 years);
- polymer cement (filler – polymer fibers);
- and others.

Binding components are polymers.
Basics of two types:
- water soluble;
- soluble in organic diluents.
The prices of the compositions are higher than the prices of mineral mixtures.
Decorative
Specially formulated mixtures for decorative work.
The following types of mixtures are produced for facades and premises:
- stone (and plasters);
- flock;
- colored;

The decorative effect is achieved by methods of layer processing, or due to the type of filler.
Methods for plastering OSB boards
When applying a plaster layer, the following problems may occur:
- absorption of moisture from the solution by wood;
- the formation of cracks in the plaster coating due to the “play” of wood when moistened;
- difficulties in ensuring reliable adhesion.
These problems are solved in various ways. There are two main methods of plastering OSB:
- without insulation;
- with insulation.
In both cases, OSB boards must be firmly fixed to the wall to prevent significant movement during work and during shrinkage.
Traditional way
Information on how to plaster oriented strand board sheet material without insulation, we present it as an extreme option, which it is advisable to avoid. A plaster coating without insulation can cause a lot of trouble for the property owner during operation.
For plastering you will need:
- membrane vapor-permeable material, for example, Tyvek StuccoWap;
- broaching mesh for reinforcement;
- adhesive composition;
- plaster mixture.

Sequence of work:
- A membrane panel is attached to the surface of the OSB with a stapler. The panels are joined with an overlap (10 cm) using glue or double-sided tape.
- A reinforcing mesh is placed on top, attached to the OSB.
- Apply a layer of adhesive (to completely immerse the mesh in the composition, two layers must be applied).
- A primer is applied to the dried glue to increase adhesion (preferably deep penetration).
- Plaster the dried surface.

Scheme of the standard method of plastering using OSB
For this method, it is especially important to use an elastic plaster composition from a trusted manufacturer, otherwise the plaster layer will crack due to the “movements” of the wood surface. Most often, cracks occur at the joints of OSB. Instead of a membrane, you can use roofing felt, kraft paper or bitumen cardboard.
Another way to protect OSB is to putty it under plaster. Putty is similar to plaster mortar, only its filler is a very fine fraction (practically, stone flour). Before puttying, the chip surface is sanded, cleaned of dust and primed. Not just any primer is suitable, but wood compositions that do not contain water. Then, applying the primer will not remove moisture from the slab.

puttying OSB under plaster
The primer mixture is applied with a roller twice, allowing each layer to dry. After applying the primer and drying it, a reinforcing mesh is stapled onto the surface of the OSB and puttyed. The mesh should be inside the putty. After the putty has dried, the chip surfaces are plastered with elastic, vapor-permeable, decorative compounds.
The most vulnerable areas of OSB to moisture penetration are the ends. They must be thoroughly primed before installing the sheets.
Insulation and plastering
Insulation is usually carried out outside the building. For example, to plaster OSB slabs, 40 mm thick sheets are used as insulation.
Subsequence:
- Sheets of insulation are glued onto the prepared OSB surface. After the glue has dried, the sheets are fixed with mushroom dowels, recessing the caps into the foam. The joints between the sheets of foam plastic are foamed, the foam protruding above the surface is cut off.
- Apply the adhesive composition in a layer of 3 mm, apply the mesh, straighten it, smooth it with a wide spatula, immersing the mesh fabric in the solution. The solution that protrudes over the mesh is leveled.
- After the adhesive solution has dried, the prepared plaster mixture is applied.
Installation of foam plastic Fixing dowels with mushrooms Foaming foam joints
Fastening the reinforcing mesh Applying the plaster mixture
The method resembles a technique Wet facade. Therefore, the nuances of implementation can be found in the corresponding article.
Using drywall
Gypsum plasterboard sheets (GKL) are classified as dry plasters. Tandem plasterboard + OSB does not ignite and can significantly reduce noise than a separate OSB. You can attach drywall to OSB indoors directly (without a guide frame). In this case, the OSB is secured with self-tapping screws to the guides. The gypsum boards are secured with self-tapping screws through OSB to the same guides.
But the joints of OSB and gypsum board should not match. Drywall can even be glued to OSB and then secured with self-tapping screws. GK sheets are well puttied and plastered. Almost all types of plaster mixtures are suitable for plastering. There is no need to install a vapor barrier under the gypsum board in dry rooms.
Features of plastering indoors and on the façade of a building
In addition to the fact that the plastering materials used and plastering of OSB boards, performed indoors, differ from plastering outdoors in working conditions. During facade plastering work, select several days of dry, windless, warm weather. The workplace is covered with a canopy from the sun and unexpected rain. The air temperature should be above +5, but not more than +35°C.
Indoor conditions are more comfortable. Here great value humidity plays a role (no more than 65%), absence of drafts. Fans and heaters cannot be used to speed up the drying process of plaster solutions. Violation of the conditions will lead to the appearance of cracks. Before plastering, de-energize the electrical wiring.
Tool
Basically, the same tools are used as for other types of plastering:
- spatulas (with a metal working part);
- trowel;
- grater for grinding (with sandpaper);
- level;
- containers;
- short-hair roller;
- mixer;
- brush;
- masking tape;
- rags.
OSB surface preparation
OS boards may be dusty and dirty. It is necessary to sand the surface, remove dust and dirt stains. Because wash wood material no, they are used for cleansing special means in organic solvents, for example, white spirit. The seams are sealed (the sealant for OSB is elastic, since the slab must have an expansion gap on the sides), primed and puttied to obtain a flat surface.

Sealing seams between slabs with sealant
Step-by-step plastering technology
Plaster on OSB board on the facade in sequence:
- After installing the particle boards, inspect the wall surface.
- Clean the surface from dirt and stains.
- Sand the protrusions. They go over the panels with a vacuum cleaner, removing dust.
- Coat the joints with an elastic sealant.
- The seams are puttied and smoothed. The wall is being dried.
- Apply primer with a brush or roller. Dry.
- A vapor barrier material is applied (roofing felt, membrane fabric, etc.). Fixed with a stapler.
- Apply a 3 mm layer of adhesive composition (for example, Ceresit ST85) to the surface with a spatula.
- Apply a reinforcing mesh, straighten the canvas, and press it into the adhesive solution with a spatula. Make sure that there is a layer of glue between the mesh and the base. The mesh should not “whiten” over the adhesive composition. If necessary, coat the top with the solution.
- A day later, a millimeter layer of the adhesive mixture is applied over the mesh (for leveling). Dry.
- Prime with a composition from the same manufacturer (for example, ceresit ST16). Dry the primer.
- They begin finishing plastering work. Apply a plaster solution (from the line of decorative compositions from the same manufacturer), and form the surface in the manner chosen to create the desired effect.
- The dried finish is painted or varnished.
When working with OSB, the room is ventilated. But during plastering works drafts should not be allowed - plastered surfaces need " greenhouse conditions", otherwise cracks will appear.
Plastering on OSB is one of the ways to protect and decorate particle boards.
We hope that the information on how to plaster OSB will help you complete the work correctly. The appearance and durability of the cladding of your home depends on compliance with the technology.
Oriented strand board (OSB), also known as OSB (OSB or OSBI), is perfect for construction. These slabs are increasingly used in house construction. This is especially true for the construction frame houses. They are used both for cladding exterior facades and for arranging interior spaces inside. Therefore, the question is which method to prefer for finishing interior spaces, is relevant for every home owner.
Main types of interior decoration
Various methods can be used to decorate interior spaces whose walls are made of OSB. The choice is always up to the owners. A short list of finishing works that are suitable for OSB is given below:
- wallpapering
- painting
- varnish coating
- decorative putty and decorative plaster
- gluing tiles or ceramic tiles
All listed types of finishes have one common feature. The OSB surface must be properly prepared before the final finishing coat is applied.
The weak point is oriented particle boards in fact there is only one thing. This is the ability to absorb and gradually accumulate moisture. Over time, the entire slab or part of it swells and deforms. Therefore, the OSB surface must be insulated from exposure to high humidity. And here many people have a question: is it better to putty OSB walls or cover them with a layer of plaster?
Initially, the puttying process is used to seal seams between slabs and to level walls. This layer serves as the basis for applying paint, wallpapering partitions and, oddly enough, for the finishing layer of plaster. So the conclusion is quite definite: putty is an element of rough finishing of premises.
So it is quite possible to plaster interior walls made of OSB. This, along with others, is a fairly common finishing method that is often used by designers. It should be added that the use of a conventional sand-cement mixture in this case is not recommended. There are special types of plaster that are intended for interior work with OSB panels.
What plaster is used for OSB indoors
Plaster, in this case, is used to create the last layer, which largely determines the design of the premises. These mixtures are called decorative plaster. For wooden surfaces, it is recommended to use compounds that have high adhesion. We are talking about polymer-based plaster mixtures. A layer of such plaster “breathes” and prevents the formation of fungi and mold. The plaster layer helps to significantly reduce sound transmission and retain heat. It is environmentally friendly and absolutely safe. A wall covered with plaster looks absolutely uniform. Joints between slabs and other defects are hidden. This coating will last more than twenty-five years.
Plaster mixtures are sold ready-made or dry. Dry varieties should be diluted with water or another reagent before application, in accordance with the instructions. It is very important to make sure that the OSB boards are rigidly fixed and not subject to movement. Only after this can you start working. Otherwise, the plaster may crack and begin to peel off in places.
Decorative OSB plaster indoors. Types, characteristics.
Decorative plaster can be classified according to two parameters: the composition of the filler and the type of binding components. Based on the type of filler, one can distinguish Venetian, structural, textured and flock.
Venetian plaster when applied, it can form a smooth surface. It contains an admixture of tiny marble chips. This gives the surface a mirror shine.
Structural mixture has small impurities of quartz and other components. The surface becomes rough. Its main difference is that when applied to the wall, multi-colored spots appear on it.
Textured plaster may have different kind and include admixtures of any suitable material. These can be small pebbles, pieces of mica, silk fibers or other fabric. Wall panels coated with this mixture have a pronounced texture, which is determined by the filler.
The most difficult thing to work with seems to be flock mixture. But it is very advantageous in design. The fact is that it consists of three layers - the main one, the layer with flocks and the varnish coating. Pieces of dried acrylic paint are used as flocks.
Types of decorative plaster for OSB indoors by composition
Based on the presence of different binding components in the mixture, textured plaster can be divided into the following types:
- mineral
- acrylic
- silicone
- silicate
IN mineral plaster Cement acts as a binder. It is not very suitable for OSB, since it is afraid of impact when hardening. Although the finished layer only becomes stronger over time, it lacks a certain plasticity. An accidental impact may cause a piece of the coating to come off the wall.
Acrylic plaster made on the basis of acrylic resin. Compared to the previous mixture, it has lower strength and service life. Has many color options. You can color the mixture yourself by adding a special colored paste. It is quite suitable for application to a prepared OSB surface.
Synthetic resins serve as a binding component for silicone decorative plaster . It is very flexible and can be easily applied to the wall. Silicone plaster is resistant to moisture, vapor permeable and has an antiseptic effect. There are many color varieties. This view textured plaster fits perfectly into the solution of the task.
Silicate plaster stands out because liquid glass is used to create an astringent effect. The frozen surface has increased strength, moisture resistance, vapor permeability and antifungal properties. This plaster will last a long time, up to fifty years or more. This option can also be used for working with OSB.
Relief of textured plaster for OSB in the house
According to the shape of the surface relief, the most famous types of textured plaster are: “lamb”, “bark beetle” and “fur coat”.
"Lamb" It has a fine-grained structure due to the filler of small unprocessed pebbles.
Plastered surface "Lamb".
"Bark beetle" resembles a tree that has been attacked by bark beetles.
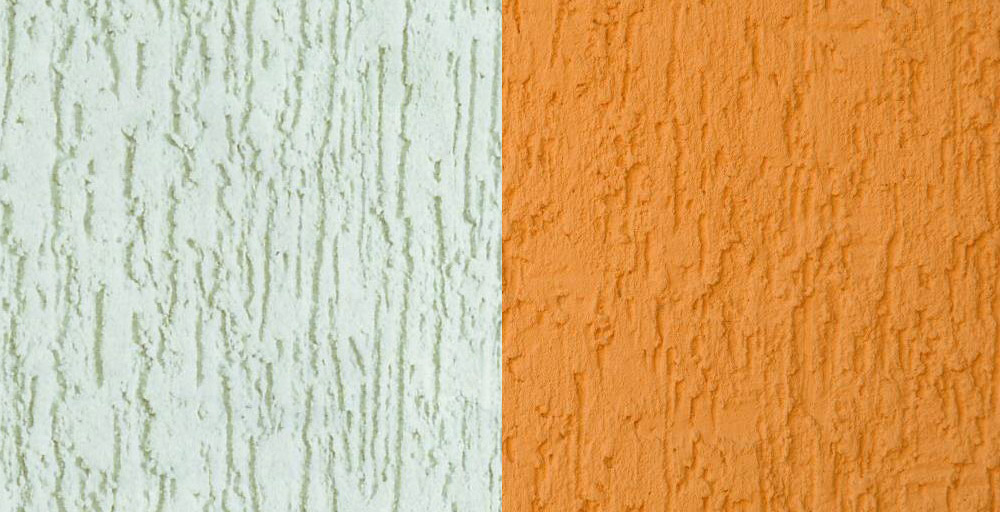 Plastered surface "Bark beetle"
 "Fur coat" has a smoother surface compared to the first option, since the filler in this case is cement.
 Plastered surface “Shuba”
 OSB surface preparation
As already mentioned, the finishing of walls and ceilings from OSB sheets indoors takes place in two stages. The first, roughing, includes preparing the facade of the slabs for finishing coat. The second, finishing, involves applying plaster to the prepared base.
Surface preparation begins with sealing the seams between the slabs. For this it is advisable to use acrylic or silicone sealant . After completing this operation, it is recommended to get rid of all visible irregularities and defects using grinder. If this is not possible, then you can go over the walls with ordinary sandpaper.
 Sealing joints with sealant.
 The walls should be cleaned of dust using a vacuum cleaner. For ceilings, all processes are similar. If necessary, wipe the surface with white spirit. After this, the first layer of primer is applied. Best used acrylic primer with additives, which improve its properties . Adhesive-grade primers have also proven themselves well. They contain fine quartz chips, which help keep the putty on the walls. After the first layer of soil has completely hardened, the operation should be repeated.
Next up is plastering the walls. There are specially developed mixtures for OSB panels. It is better to use adhesive-based putties. Before applying the composition, a special metal or plastic mesh is attached to the walls, which helps the putty adhere better. Fastening is easiest done with a construction stapler. Then the first layer of putty is applied. The mesh should be completely hidden under the mixture. To create a perfectly flat surface, you can putty the wall a second time when the first layer has dried.
The next two videos show the preparation process clearly.
More details about the intricacies of choosing putty, preparing the base and puttying can be found in a separate article:.
After this, you can think about applying a decorative coating, be it wallpaper, paint or decorative plaster.
Applying decorative plaster indoors
The selected mixture is prepared as written on the package. The work is not much different from puttying. However, getting the wall surface to look as intended requires some skill.
To apply the mixture, use a flat spatula, as shown in the figure. The plaster is carefully applied in several layers. The layer thickness is small, ranging from one and a half to five millimeters. Typically, two or three coats are sufficient. It is very important to ensure that before applying the next layer, the previous one has dried and gained strength.
 Applying plaster to the prepared surface
 This is circuit diagram works on plastering internal surfaces made of OSB. It should be noted that each type of decorative plaster has its own nuances during application. This type of finishing is relatively inexpensive. And if everything is done correctly, the resulting interior will satisfy the most demanding tastes and will last for many years.
 An example of Venetian plaster with a pattern.
 15103 0 10
OSB putty: a proven method, plus answers to frequently asked questions
Greetings. In this article I will talk about how and with what to putty OSB board. Today’s topic will be of interest to both developers building frame houses, as well as owners of houses lining their premises with particle boards. You will also find out the characteristics slab material, and why it needs finishing.
A few words about oriented strand boards

Oriented Strand Boards (abbreviated OSB or OSB in foreign terminology) - This building material, made from compressed large-sized chips.
During production, it is arranged in several layers crosswise relative to each other. The outer layers occupy the longitudinal direction in the slab, and the inner layers occupy the transverse direction, and it is this feature that ensures their mechanical strength.
The chips in the slab are glued together with a mixture of resins, boric acid, synthetic wax and a number of other additives. Thanks to the additives used in the binder component, the board acquires additional strength, resistance to excess moisture and resistance to biological factors.
On the other hand, the use of resins as a binder in combination with a number of additives results in some disadvantages, including:
- High formaldehyde emission – release volatile substances, potentially harmful to health and everyday well-being;
- Semi-gloss surface of the slab and, as a result, difficulties in subsequent decorative finishing;
- Microrelief due to the heterogeneity of the surface, and therefore the impossibility of wallpapering, as unevenness will appear.
In order to compensate for these shortcomings, the surface of particle boards must be puttied.

A layer of applied putty will even out the microrelief and serve as barriers to the release of formaldehyde. In addition, the degree of adhesion will increase, since the putty layer will cover the gloss of the surface.
Features of applying putty

As previously mentioned, OSB board has a semi-gloss surface and this is the reason that no paints and varnishes stick to it. The situation is similar with most putties, which will fall off when applied to a particle board.
This problem is especially aggravated if the slab is finished with your own hands not on the walls, but on the ceiling.

Are there ways to level the surface so that the layer of applied mixture does not fall off? Yes, there is such a method and you can familiarize yourself with it in the instructions below.
Preparatory work is half the success
Before starting to putty walls and ceilings lined with OSB boards, preparatory work is carried out, which consists of the following stages.
Surface primer

In order to improve the adhesion of the surface, we treat it with Ceresit CT 17 primer. What is the advantage of using this particular primer? Oriented strand board is a textured and porous material, and this primer is highly penetrating and can penetrate most pores.
Sealing cracks and technological gaps

After the applied primer has completely dried, fill the gaps of up to 1 cm between the plates with putty - in the corners between the walls, at the junction of the walls and ceiling, etc. As a putty mixture for OSB, I recommend Knauf Rotband paste mixed with water to the consistency of thick sour cream.
Installation of plaster mesh

After the joints between the slabs are filled with the mixture, a fiberglass mesh is lined and attached to the surface. The mesh on one side is needed so that the layer of leveling mixture adheres to the surface and does not move away from it. On the other hand, installing a mesh will prevent cracks from appearing in the corners.

When installing the mesh, consider the following:
- We lay the mesh on the surface in overlapping strips(strip to strip) 10 cm wide and fastened to the slabs with a construction stapler;
- We lay the mesh so that the bend of the strip goes along the corner;
- The fold along the entire length of the corner should be smooth without waves., because if there is a wave, the mesh will have to be cut, which means its reinforcing properties will be impaired;

- We aim the fixing staples with a stapler at a distance of no more than 10-15 cm from each other.
Why do we fill the seam before installing the mesh, and not afterwards? If you fix the mesh and only then apply the mixture, it is unlikely that you will be able to properly fill the gaps. If you putty the gaps in a timely manner, there will be practically no gaps left.
Installation of plaster corner

After the fiberglass mesh is fixed over the entire surface, we attach the plaster corners - special metal profiles. The installation of corners can be external, for example, along the outer perimeter of window slopes, and internal, for example, at the internal junction of walls.
Correctly set angles allow you to accurately and evenly apply a layer of putty. In addition, the set angle will press plaster mesh, which will enhance the surface finish.
The instructions for installing the corners are as follows:
- We measure the length of the corner that is supposed to be reinforced with a metal profile;

- We measure this length on the metal profile and cut it with metal scissors;
- At the ends of the prepared profile, we cut each of the two shelves (sides) at 45° so that when combining several profiles, their ends do not overlap each other;

- We apply the prepared corner to the surface and shoot it on both sides with staples from a stapler, so that the staple passes through the perforation.
Putty on the prepared surface

Now that the building surface is ready, you can begin applying putty. The instructions include the following steps:
- Preparation of the leveling mixture is carried out in accordance with the manufacturer’s instructions;
- Application of the mixture and leveling;
- Applying a finishing layer over the starting layer, if necessary;
- Sanding the leveled surface.

How to putty an OSB board for painting and how to prepare this product correctly? I recommend a proven option - the Knauf Rotband mixture, to which we add PVA glue at the preparation stage. That is, by 3 kg ready mixture add 50 grams of glue and mix the mixture until smooth.
Adding glue allows you to make the mixture more plastic, but at the same time the applied layer will take twice as long to dry. Thus, if we add glue to the putty, we wait for it to dry before applying the second layer, not for a day as usual, but for two days.

Application of the mixture is carried out traditionally using two spatulas - wide and narrow. Using a narrow spatula, take the mixture from the container and apply it evenly to the edge of a wide spatula. Next, we press a wide spatula with putty to the surface of the slab and move it towards us at an angle of 45-30°.

By the way, the greater the angle between the spatula and the surface being treated, the thinner the layer of putty on the wall and vice versa, the closer you tilt the spatula to the plate, the thicker the applied layer will be. Try to ensure that the thickness of one layer does not exceed 2 mm.
Knauf Rotband is a universal putty that can be applied as a starting and finishing layer. The feasibility of applying a second layer is determined by a powerful spotlight, which is placed close to the surface and, under strong light, determines how intense the relief is.
If leveling the surface is carried out for subsequent wallpapering, you can get by with one layer; if the wall or ceiling is puttied before painting, then apply it on top of the starting layer finishing layer, which will bring the surface to zero.

Sanding the walls is the final stage, after which you can begin painting work
For the initial leveling, prepare the putty with the consistency of thick sour cream, while for the finishing layer, dilute the mixture to the state of liquid sour cream. Liquid putty is good because it fills the smallest irregularities and does not create a new relief.
Answers to frequently asked questions
- Is it possible to putty an OSB board with gypsum putty on the outside? ?
I advise using gypsum mixtures only for interior finishing work. For the outside, I recommend polymer or cement based putties.
By the way, you can make such a mixture yourself and its price will be lower than the cost of store-bought analogues. Mix dry cement into the PVA glue until you get a plastic mass with the required degree of viscosity. This product has a low tendency to crack and is characterized by excellent adhesion to various surfaces.
- How to putty OSB board under wallpaper in rooms with high humidity ?
Let me start with the fact that it is generally not recommended to glue wallpaper in rooms with high humidity. However, if you decide to glue, I recommend Vetonit VH dry mixture, specially designed for wet rooms and for surfaces that require higher adhesion of finishing materials.
- How can I putty particle boards for painting? water-based paints?
In this case, any construction putties are suitable without restrictions. But there is one condition - after leveling is completed, the surface will need to be primed with a composition that will correspond to the type of putty used and the type of paint selected.
- Is it possible to paint something on an OSB board without prior puttying? ?
Without putty, oil, alkyd enamels and similar compositions are applied to particle boards.

But there is a problem - after such painting, nothing will fall on the surface except similar paintwork materials. Again, when painting without prior leveling, the relief will be visible through the paint layer, however, some designers specifically achieve this effect.
Conclusion
Now you know how and how to putty an OSB board. If you have any questions on the topic, ask them in the comments, I will definitely answer all of them. And, of course, I recommend watching the video in this article, I’m sure it will interest you.
December 12, 2016If you want to express gratitude, add a clarification or objection, or ask the author something - add a comment or say thank you!
Plaster, in this case, is used to create the last layer, which largely determines the design of the premises. These mixtures are called decorative plaster. For wooden surfaces, it is recommended to use compounds that have high adhesion. We are talking about polymer-based plaster mixtures. A layer of such plaster “breathes” and prevents the formation of fungi and mold. The plaster layer helps to significantly reduce sound transmission and retain heat. It is environmentally friendly and absolutely safe. A wall covered with plaster looks absolutely uniform. Joints between slabs and other defects are hidden. This coating will last more than twenty-five years.
Plaster mixtures are sold ready-made or dry. Dry varieties should be diluted with water or another reagent before application, in accordance with the instructions
It is very important to make sure that the OSB boards are rigidly fixed and not subject to movement. Only after this can you start working
Otherwise, the plaster may crack and begin to peel off in places.
Decorative OSB plaster indoors. Types, characteristics.
Decorative plaster can be classified according to two parameters: the composition of the filler and the type of binding components. Based on the type of filler, one can distinguish Venetian, structural, textured and flock.
Venetian plaster when applied, it can form a smooth surface. It contains an admixture of tiny marble chips. This gives the surface a mirror shine.
Structural mixture has small impurities of quartz and other components. The surface becomes rough. Its main difference is that when applied to the wall, multi-colored spots appear on it.
Textured plaster may be of various forms and may include admixtures of any suitable material. These can be small pebbles, pieces of mica, silk fibers or other fabric. Wall panels coated with this mixture have a pronounced texture, which is determined by the filler.
The most difficult thing to work with seems to be flock mixture. But it is very advantageous in design. The fact is that it consists of three layers - the main one, the layer with flocks and the varnish coating. Pieces of dried acrylic paint are used as flocks.
Types of decorative plaster for OSB indoors by composition
Based on the presence of different binding components in the mixture, textured plaster can be divided into the following types:
- mineral
- acrylic
- silicone
- silicate
IN mineral plaster Cement acts as a binder. It is not very suitable for OSB, since it is afraid of impact when hardening. Although the finished layer only becomes stronger over time, it lacks a certain plasticity. An accidental impact may cause a piece of the coating to come off the wall.
Acrylic plaster made on the basis of acrylic resin. Compared to the previous mixture, it has lower strength and service life. Has many color options. You can color the mixture yourself by adding a special colored paste. It is quite suitable for application to a prepared OSB surface.
Synthetic resins serve as a binding component for silicone decorative plaster. It is very flexible and can be easily applied to the wall. Silicone plaster is resistant to moisture, vapor permeable and has an antiseptic effect. There are many color varieties. This type of textured plaster fits perfectly into the solution of the task.
Silicate plaster stands out because liquid glass is used to create an astringent effect. The frozen surface has increased strength, moisture resistance, vapor permeability and antifungal properties. This plaster will last a long time, up to fifty years or more. This option can also be used for working with OSB.
Relief of textured plaster for OSB in the house
According to the shape of the surface relief, the most famous types of textured plaster are: “lamb”, “bark beetle” and “fur coat”.
"Lamb" It has a fine-grained structure due to the filler of small unprocessed pebbles.
Plastered surface "Lamb".
"Bark beetle" resembles a tree that has been attacked by bark beetles.
 Plastered surface "Bark beetle"
"Fur coat" has a smoother surface compared to the first option, since the filler in this case is cement.
Plastered surface “Shuba”
Alternative to elastic plaster
The most widely used is oil-adhesive putty. Available in prepared or concentrated form. Derivative mixtures:
- drying oil or oil paint- binding component of the composition;
- CMC glue forms a strong connection between the plaster and the OSB board;
- chalk as a mineral filler;
- driers to speed up the drying of drying oil;
- plasticizers soften the composition, making it easier to apply and level the putty;
- water is added in small quantities to prevent the mixture from drying out during storage.
Nitro putties are applied in a thin layer. Used to treat minor damage or for decorative purposes. They have a pungent odor. Work is carried out in well-ventilated areas. Solvents act as a base. Fillers: red lead, koalin, zinc white. Finishing of the surface is required: painting or wallpapering.
There is another way to apply plaster to the surface of an oriented strand board: thin sheets of polyurethane foam are glued to the surface and plastered with mixtures based on cement, lime or gypsum.
Application technology
After purchasing all necessary materials you can immediately start working. It is worth noting that pox putty is carried out in the same way, regardless of whether the surface is painted or wallpapered. Puttying OSB should be done in the following sequence:
- Applying primer in 2 layers. Depending on the type of mixture, the drying period varies from 4 to 12 hours.
- Puttying. Work must take place in a room with above-zero temperatures and permissible air humidity of 60%. For maximum effect, putty mixtures are applied in 3 layers.
- Grinding. After the putty has completely dried, the surface is sanded to remove possible defects and make it smooth. You also need to carefully remove any dust that has formed on the surface.
- Reinforcement. Requires overlapping material.
- Alignment. An adhesive solution is applied to the surface, after which the coating is leveled. Next, you can plaster or glue wallpaper.
Puttying process
If we talk about whether it is possible to putty OSB boards, we must take into account that for these purposes it is preferable to choose specialized compounds that do not contain water.
putty osb walls makes them suitable for painting, as well as for gluing vinyl, non-woven or liquid wallpaper.
The article states full information about how to putty an OSB board, tips on choosing materials and application rules. This finish is not at all necessary, but will help protect the base from moisture and allow you to make a beautiful, high-quality decorative coating.
Now you know how to putty OSB boards profitably and in a fairly short time. Compliance with the described recommendations will allow you to carry out high-quality putty on OSB boards, guaranteeing a long period of use and maintaining an excellent appearance.
OSB preparation and puttying technique (2 videos)
Necessary tools and putty work (36 photos)
When working with OSB boards, first of all you need to remember that more than 90% of these products consist of wood. Therefore, high-quality OSB finishing slabs is associated with the use of materials characteristic of working with solid wooden surfaces. The slabs lend themselves to almost any finishing: they can be glued, painted, puttyed, varnished and even, subject to certain rules, plastered. All processing methods have their own characteristics, so each one should be analyzed separately.
How to putty OSB
It is very good if the slabs have not yet been installed. Then you can prime their ends, which absorb moisture abundantly. Once the installation has already been completed, this will no longer be possible. During the preparation process, the slabs need to be sanded. This is the only way to achieve a noticeable increase in grip. In any case, it is advisable to coat all seams with sealant.
Advice! Want to save your time? Then it’s worth purchasing OSB already sanded. The price difference is not that big, but for interior decoration living rooms they are more convenient. This must be taken into account when wallpapering is planned.
 To protect the OSB from moisture, as well as better adhesion, the boards must be well primed before puttying.
Now you can proceed directly to applying the putty.
- A polymer primer is applied. There is no need to spare it; it forms a protective film on the surface that prevents resins from escaping. It is important to dry the surface thoroughly; this can take three to five hours.
- After which a thin layer of putty is applied. You can use a large spatula for this. All excess must be removed and the surface leveled. For greater effect, puttying is done in different directions. The first layer is horizontal, the second is vertical. The temperature in the room should be extremely positive.
- You need to wait until everything dries well. Sanding can begin. To do this, use sandpaper. All existing defects must be eliminated. This is important if no further processing is planned before applying the decorative coating. All dust must be wiped off.
- For greater effect, you can use a painting canvas. But this is not always justified. But if possible, it will be useful. Then gluing wallpaper onto an OSB board will be even easier.
When all stages have been completed, you can begin decorative coating. You need to decide for yourself which method to give preference to; it could be wallpapering, painting or something else.
OSB boards are a material that has solved a large number of problems. Having many advantages, it appealed to both professional builders and simple home craftsmen. This material, with all its advantages, requires additional processing. To putty it, it is better to use specialized compounds. They should not include water. Strict adherence to all application rules will create a smooth surface that will not cause concern. And then you can successfully stick wallpaper.
Positive and negative sides of OSB boards
The advantages of OSB boards are an undeniable advantage this material, and include:
- strength/reliability. OSB boards are distinguished by their strength due to their manufacturing technology. Namely, the clear direction of the chips in one direction increases the reliability of the product several times;
- moisture resistance. Thanks to the processing of the boards, OSB perfectly resists moisture, does not rot or swell when exposed to water;
- ease of processing. OSB installation the slabs are not complicated and can be easily carried out by one untrained person;
- resistance to natural influences. OSB boards are not afraid of insects or fungi, thanks to the impregnation of the material with natural oils. The slabs are also resistant to mice trying to gnaw their way through OSB walls;
- fire resistance. OSB boards are not susceptible to fire, so fires are not dangerous for such walls.
Of course, even this functional material not without its shortcomings. There is only one problem - the difficulty in treating the surface of the slabs with paints. But in subsequent paragraphs of the article you will see that this problem can be solved simply and elegantly.
Slab painting
A material such as OSB can be painted with water-based or oil-based compositions applied with a brush, spray or roller.
The question often arises: is it possible to paint OSB boards with water-based compounds? It is possible, but this will increase the shape of the sheet slightly (swelling is possible), so it is highly advisable to use OSB 3. If you paint only on one side, this may lead to a slight bending of the panel. Therefore, it is worth treating the slab with water-based paints in cases where the appearance is not important. In opposite situations, it is necessary to use oil compounds. What are the features?
1. Any paint tends to spread on sharp corners. Therefore, before painting, they must be rounded by light sanding (with a radius of at least 3 mm)
This is especially important for OSB used for exterior finishing.
 Before painting OSB, the perimeter is first painted
When treating slabs located outside, it is necessary to use paints intended for use on outdoors. In this case, you should follow the manufacturer's recommendations for painting wooden surfaces.
2. Edges. Their surface is more porous than the plane of the slab. The result is greater absorption, i.e. moisture absorption
Therefore, attention should be paid increased attention sealing edges. Moreover, this operation must be carried out before priming and applying the main coating.
 Painted OSB floor
3. Padding. If you decide to treat the slabs with an antiseptic or fire-retardant impregnation, then you should carefully read the instructions - some of these chemicals may contain a high alkali content, which will require the use of a special primer.
4. Layers of paint. The opinion that the thicker the layer, the better it will protect the surface, is not entirely true. It is better to apply several thin coats rather than one thick one. In this case, each layer must be thoroughly dried.
- the edges must be processed before the assembly of the structure begins (rounded and sealed);
- If water-based sealing compounds are used, then due to swelling in the future, mandatory grinding will be required. Therefore, it is better to use solvent-based formulations (for initial processing);
- when using transparent dyes, it is necessary to use those that prevent the penetration of ultraviolet rays (i.e., inhibitors must be present in the composition of such materials);
- slabs must be fastened in such a way that there are no potential areas for moisture accumulation;
- It is necessary to cover both sides with dye equally;
- A 45 degree end connection is not recommended (due to the formation of sharp edges). If the finishing requires that the edges will be visible after completion of the work, then they must be filled with cellulose (wood) filler, then sanded and primed.
What is so remarkable about OSB boards?
The abbreviated name OSB is actually a Russian sound English abbreviation OSB, which stands for oriented strand board. Translated into Russian, this expression means “oriented strand board” (OSB). This means that the most correct name for the material, characterizing its functional features, is OSB, but builders often call it OSB.
The boards are formed from many layers of wood chips, compressed using high pressure and high temperature. Between the layers there is an adhesive, which is made up of synthetic resins. These OSB components are supplemented boric acid and synthetic wax, also included in its composition.
Chips in product layers in different directions. For example, longitudinal laying is used in one layer, and transverse laying in the next. This order makes the slab more resistant to various mechanical influences.

At first glance, the slabs look aesthetically attractive, but such a surface is not practical. Therefore, it needs additional improvement with putty. The main thing is that the surface of the slab is leveled by puttying, which makes it possible to glue the prepared layer of wallpaper or cover it with paints and varnishes. Second positive result Puttying is an extension of the life of the ceiling and walls.
Like any wood product (the content of wood chips in OSB is 80-90%), the board has the ability to absorb moisture. This property leads many to doubt the advisability of puttying OSB. Still, paint and wallpaper glue can subsequently cause swelling and deformation of the base. This problem can be solved by refusing to use water-based formulations. The absence of water will eliminate the threat of swelling of the canvas.
Important! The degree of moisture resistance of OSB depends on its brand. The most stable in this regard is OSP-3
This stove is intended for installation in rooms with high humidity.

Along with what was said earlier, it is worth noting that many people prefer the look of natural wood structure and wonder whether it is possible to leave the surface of particle boards unchanged. Yes, this is quite possible, but this design is more suitable for a country house or utility room. In this case, it would be appropriate to varnish the panels.
2 What should the primer be?
There are no specially developed compositions for OSB. Conventional solutions are used, subject to certain requirements. Immediately exclude preparations containing water. After application, it is absorbed into the material, which begins to swell. Use only a primer intended for wooden surfaces. These are compositions with an acrylic, glyphthalic or gypsum base. They take into account the fact that putty will be applied, so alkyd products are not used - they are good for painting.
Primer for OSB boards – universal, deep penetration. Acrylic is the most suitable of them, used for painting and puttying. For unheated room additives are added to prevent the development of fungus. Some formulations, for example EuroPrimer, already contain such additives. Sold in concentrated form, diluted before use according to instructions.

The slabs contain resins and other substances that sometimes bleed through the finish and spoil the work done. To eliminate such a nuisance, quite complex technology is used. First, an insulating paint is applied (example: Aqua-Deck E.L.F.), then a dispersion putty containing synthetic resin. Allow to dry for 12 hours and stick on special material for bonding cracks in putty: Variovlies A 50 Basic. After such preparation, no stains will appear.
In some cases, an adhesive primer is used - Concrete Contact. It differs from other compositions in the content of quartz sand, which makes the surface not smooth, but with slight irregularities. Used when as finishing decorative plaster or tiles. Thanks to the unusual filler, adhesion is significantly improved. When applied with a poppy brush or long-haired roller, other tools do not ensure uniform distribution of the composition over the slab.
It is recommended to mix all soils before use, but in the case of Concrete Contact this is a very important operation. Quartz sand settles quickly; if the process is not carried out very carefully, the mixture will turn out to be heterogeneous. Moreover, when working, this procedure is repeated every 10 minutes; only under such conditions will the coating be of high quality.
- varnish on acrylic base for wooden surfaces, which is diluted with solvent in a ratio of 1:10;
- latex - after drying, a thin film is formed that prevents the penetration of resins;
- alkyd varnish, diluted to more liquid state white spirit.
Except the right choice primer, it is important to apply it according to the technology:
- 1. The plates are cleaned. Dried dirt is wiped off with a damp cloth, the rest is removed with a vacuum cleaner or broom.
- 2. Seal the joints. It is possible to use acrylic sealant or polyurethane foam. The excess is removed with a knife, and the sealant is treated with sandpaper.
- 3. The prepared composition is applied to OSB. Usually they start with the joints, process them with special care, then move on to the rest of the surface.
The quality of priming depends on the patience of the master. Do not immediately apply a thick layer, it will not have any effect. It is recommended to repeat the operation three times, carefully distributing the drug over the surface. Let it dry thoroughly each time. How long it takes depends on the air temperature and the properties of the composition and thickness of the layer. You'll have to be patient and do something else, but the quality will be excellent.

Before puttying, the surface is first sanded and then primed. To carry out the work, material is selected based on a number of requirements, namely:
- Choice of primer. It must be primed with special mixtures intended for wood processing. As a rule, these are compositions based on drying oil or glyphthalic varnish that do not contain water. The end parts of the OSB are first treated with primer mixtures even before the sheets are installed, since this is very problematic to do afterwards. The primer will help prevent stains from resins and other substances contained in the material.
- Choice of putty. You should opt for compounds intended for finishing wooden bases. The walls should be plastered in several layers, horizontally and vertically, which will provide a more even surface. It is also worth remembering that in order to avoid cracks after drying, it is recommended to reinforce the surface with elastic materials, for example, non-woven fabric.
Advice! It is preferable to buy already polished slabs, the price of which is not much higher, but finishing work will go by much faster.
Plaster on OSB sheets, to be or not to be
When building a house, you often have to think about saving money or mothballing construction for a certain period. One of these ways to save money or take a break to accumulate funds can be plastering the facades of a frame house.
Finishing the facades of wooden houses with plaster became widespread in our country after the fire of 1812, and was often used until the beginning of the 20th century. Then this method of finishing facades was practically forgotten. But in the USA it was used until the 70s of the last century, until plastic siding appeared on the construction market.
Today there are two ways to apply plaster mixture to the facade of a house. The first, the most common, is that the external walls of the house are covered with sheets of foam plastic and a plaster mixture is applied to them. At the same time, the thermal insulation and energy-saving characteristics of the house are improved.
The second method is plastering directly on the sheets of external cladding of the house. Unfortunately, if you are not a fan of the fakferkh style (when simulating fakferkh, the seams are covered with flashings), then this method of finishing can be considered solely as temporary. As practice shows, within 5-7 years, even if everything is done efficiently and correctly, cracks will appear at the joints of the external cladding sheets, which will spoil the appearance of the facades. But plastering on OSB sheets for external cladding is an excellent way to take a “break” and save up money for finishing facing bricks, fiber cement siding, thermal panels with clinker finishing or other materials that have a high cost.
So, how to apply the plaster mixture directly on OSB sheets external cladding of the house? Already on initial stage we must try to reduce the joints of the sheets to a minimum - one of the ways is to use for external cladding OSB sheets, format 1250 x 2800. It is also advisable to cut window and door openings in whole OSB sheets, rather than using leftover material around them.
Step.1. We go through all the joints of the OSB sheets with frost-resistant sealant, apply self-adhesive “serpyanka” over the seams, and putty.
Step.2. We prime all the walls
It is important that the primer allows the walls to “breathe” and does not isolate water vapor inside the house, for example, for this you can use the Knauf-Tiefengrunt primer or similar.
Step 3. We apply a thin first layer to the pre-primed sheets of the outer skin, spread a fiberglass mesh on top, recess it a little into the first layer (in addition, the mesh can be “shot” with a construction stapler). Then we apply a second layer of plaster mixture.
Step 4. Painting the facades in the chosen color. The paint used for facades should also not isolate water vapor in the wall.
Plaster on OSB sheets, to be or not to be? When building a house, you often have to think about saving money, or mothballing construction for a certain period. One of these ways to save money or take a break to accumulate funds can be plastering the facades of a frame house.
Source:
Polymer compositions for plastering
The fastest way to apply plaster to the surface of OSB boards is to use polymer compositions based on acrylic or latex synthetic resin. They are available in the form of ready-made solutions. After opening the container, everything must be used very quickly. Because the plaster sets quickly and it is impossible to dilute or restore the original consistency.

Now let’s figure out how to plaster an OSB board in this way.
- Grinding. To do this, choose coarse-grain sandpaper. At the same time, all elements that protrude beyond the surface of the slab and do not connect well with it are removed.
- Primer. After sanding, the slab is cleaned of dust and covered with deep penetration primer intended for wooden surfaces. This will not only protect the wood from moisture, but will also increase adhesion, which means the plaster solution will be easier to apply.
- If there are any unevenness on the OSB board or there are gaps at the joints, then after the soil has dried they are treated with acrylic sealant. The composition is sent into the uneven area and carefully leveled with a spatula. This process will allow you to use less polymer plaster.
- Plastering. After the sealing layer has dried, begin applying the finished composition. The solution is applied to the wall and leveled to obtain a layer 5 mm thick. You need to work quickly.
The polymer layer of plaster does not require painting, but if desired, the owner can change the color of the finish at any time. This method of decorating OSB boards is expensive, but its service life of over 25 years makes it possible to eliminate this drawback.
The compositions that are used for plastering slabs harden very quickly, so if the owner does not have experience in this area, then it is better to use the work of a professional team.
Is it possible to paint and how to paint OSB boards
The type of paint is selected based on the operating conditions of the material: indoors or outdoors, degree of load (floor, walls), exposure to moisture, sun, sub-zero temperatures. The following paints are used for painting unplastered and unputtyed surfaces:
- Oil paints Coloray, Syntilor and others. They have good viscosity and adhesion to wood, are suitable for painting OSB both inside and outside the house, updating the painted surface will be required after 2-3 years;
- Alkyd enamels Tikkurila, Farbex And Enamel. Used for painting outside and inside buildings, they are absorbed into the surface, creating stronger adhesion to wood;

How to paint OSB. Photo
Advice. To reduce material costs, use factory-polished boards. Their cost is slightly higher than unpolished products, but the finishing work will take less consumables, time and effort.
Since wood tends to absorb moisture and swell, the question arises whether it is possible to paint OSB boards with water-based paints. If the slab has already been treated with varnish, drying oil or primer, then it can be painted with water-based acrylic, silicone or silicate paint. If the slab does not have a waterproof coating, you should apply it yourself, and paint the OSB only after the primer has dried. This type of paint is used for interior work and has the main advantage - they do not emit harmful fumes and can be used in residential areas, including children's rooms.
Another water-based paint used on wood is AQUACOUT. It dries quickly, forms an abrasion-resistant coating, and has no pungent odor. Indoors, painted walls and ceilings are updated based on aesthetic criteria, but can last up to 15 years without repair. The floor is painted depending on mechanical loads, but the coating should not be completely abraded to prevent damage to the surface of the wood board.
There are three ways to paint an OSB board after leveling it with putty: with a brush, roller or spray gun. If the surface is being painted for the first time, the paint is applied first with a brush, and after drying with a roller or spray. This method allows you to get a perfectly flat surface without streaks or drips.
Execution Sequence
 How to putty OSB walls? It is recommended to do some procedures before installing the slabs. In particular, prime the ends of the slabs, since they absorb moisture most strongly. This will not be possible after installation.
Another preparatory stage– sanding the surface with sandpaper or wire brush. It will also increase the adhesion between the sheet and the covering material. If you don’t want to waste time and effort on this, it is better to purchase slabs that have already been polished in the factory. It will cost a little more. When everything is ready, you can start working. By this time, all seams should be sealed and leveled.
- Application of a polymer primer designed to create a protective film on the surface. It will prevent the appearance of stains caused by resins and other substances contained in OSB. This layer must be dried for at least 4 hours, depending on the type of primer.
- Puttying. It is carried out in 2 stages - a small amount of putty is applied to the wall with a steel spatula, and the excess is removed with the next movement. The layer turns out to be quite thin and even. It is advisable to perform puttying in 2 layers - one in the vertical direction, the second in the horizontal direction. This will make the surface more even. This should be done in a room with a humidity of no more than 60% and only at positive air temperatures.
- After complete drying, proceed to leveling the surface with sandpaper. At this stage, it is necessary to eliminate all existing defects. Before proceeding to the next stage, the walls must be thoroughly cleaned of accumulated dust.
- Reinforcement with non-woven canvas or any other rolled material intended for this purpose. The sheets are glued overlapping, and then a double cut is made at the thickening point and the excess is removed. This layer will protect against the formation of cracks that appear when the building shrinks.
After this, you can begin decorative finishing, be it painting, wallpapering or plastering.
To ensure that there are no problems when preparing the wall and that it does not swell from moisture, it is necessary to select the correct mixture. We have already found out how to putty OSB - with plastic compounds based on polymers, oils, glue, resins or latex. Clear and step-by-step implementation of all recommendations will allow you to create a perfectly flat and smooth surface that will last for many years.
3 Requirements for putty and its choice
- 1. Acrylic. Levels any surfaces, including OSB.
- 2. Nitro putty. A quick-drying composition containing cellulose, resin, plasticizers, fillers. Before use, dilute with solvents recommended by the manufacturer.
- 3. Oil-adhesive – containing varnishes, glue, additives, oil and plasticizers. Dissolve with drying oil.
- 4. Gypsum with polymers. Considered the best for working with wooden surfaces.
- 5. Dispersible with synthetic resin. Highly elastic, used for finishing plaster.
The listed types of putties must have certain properties
Before purchasing, it is recommended that you read the instructions on the packaging and pay attention to the characteristics. Among these, a very high degree of adhesion is of particular importance, because not every composition will adhere to the resinous surface
When preparing for use, it is important to achieve a uniform consistency. Coating requirements include durability and sandability
If it is necessary to putty small areas, then the costs of the compounds are not particularly sensitive. When finishing the entire house built using frame technology, it hits the budget. There is a recipe for making the composition yourself, which is used by some craftsmen. It consists of inexpensive components:
- oils: 2.8 kg of linseed and 0.6 kg of turpentine;
- 0.3 kg ground pumice;
- 0.2 kg of gelatin and the same amount of casein;
- 170 ml of ammonia solution;
- 3 liters of water. Pumice is ground into dust, the mass is poured into linseed oil and stirred until smooth. Pour in turpentine oil and stir again. When the mixture has steeped for 10 minutes, add everything else. Heat in a water bath, stir, infuse, repeat again until homogeneity is achieved.
Making your own putty
The cost of factory-produced putty compounds is not too high. However, if large areas need to be treated, including walls, floors, ceilings, then total cost alignment may not be so small. Therefore, some craftsmen decide to make their own wood putties.
To create a putty composition you will need the following components:
- linseed oil - 280 g;
- turpentine oil - 60 g;
- ground pumice - 30 g;
- gelatin - 20 g;
- casein - 20 g;
- ammonia solution (18%) - 17 g;
- water - 300 g.
First, grind the pumice until it becomes dust. Then pour the resulting mass into a container with linseed oil and stir until you get a homogeneous consistency. Next, pour turpentine oil into the same bowl and stir the mixture well again.
Let the stirred mass sit for several minutes, after which we add the remaining components from the list. The solution is prepared in a water bath, then stirred and infused again. After the last settling, the mixture is ready for use.
And a little about the author’s secrets
Have you ever experienced unbearable joint pain? And you know firsthand what it is:
- inability to move easily and comfortably;
- discomfort when going up and down stairs;
- unpleasant crunching, clicking not of your own accord;
- pain during or after exercise;
- inflammation in the joints and swelling;
- causeless and sometimes unbearable aching pain in the joints...
Now answer the question: are you satisfied with this? Can such pain be tolerated? How much money have you already wasted on ineffective treatment? That's right - it's time to end this! Do you agree? That is why we decided to publish an exclusive in which he revealed the secrets of getting rid of joint pain, arthritis and arthrosis.
Attention, TODAY only!
Polymer-based pox board plaster
With the advent plaster compositions Based on a polymer base with high adhesion to wood, the problem of how to plaster OSB on the outside has lost its relevance. The elastic mixture effortlessly lays a thin layer on the base of the slab, tightening minor irregularities. A kind of rubber shell is formed, resistant to mechanical and atmospheric influences.
Suitable for indoor and exterior finishing. Tinted with acrylic dyes. Technical requirements are standardized:
- withstands 10% linear tension (compression) square meter coatings;
- water permeability 1 sq.m. no more than 8 grams per hour;
- operating temperature range from -50°C to +60°C;
- 150 freezing cycles without loss of quality;
- preservation of properties for at least 25 years;
- 24 hours for the applied composition to dry;
- consumption 2 - 2.5 kg of mixture per 1 sq.m.
Plastering on OSB with elastic putty is performed in the following sequence:
- The plate is cleaned with coarse sandpaper. This removes protruding wood fibers that have a weak connection with the base;
- to increase adhesion, the cleaned surface is primed with an appropriate agent;
- After the soil has dried, the uneven areas are filled with acrylic sealant and smoothed with a spatula soaked in a soapy solution. This will protect the instrument from sticking of the composition;
- The composition is applied to the prepared surface and leveled to obtain a layer up to 5 mm thick. Plaster is applied on the OSB board on the facade maximum thickness, isolating the room from cold and moisture leaks. For decorative finishing For interior walls, 1.5 - 2 mm is sufficient.
Plastering facades made of OSB is especially practical using decorative polymer compounds:
- bright colors will decorate any facade;
- coloring the entire thickness of the layer will hide surface damage;
- the building will receive additional external protection.
The high cost of composite structures forces the developer to look for alternative options. Plastering OSB boards on the outside is possible using oil-adhesive mixtures and nitro putties.
Work order
The surface is prepared for painting or wallpapering; the humidity in the room should not exceed 60%, and the air temperature should not be lower than +200C. Putty work should begin after the primer has completely dried on the surface of the slab.
If heavy wallpaper is to be hung, then reinforcement is mandatory. For this purpose, fiberglass or nylon reinforcement mesh is used. Fixing the reinforcing material directly onto the putty is possible, and if you decide to use glass fiber, you can glue it using wallpaper glue, designed for fixing wallpaper on a non-woven basis.
Fixation of reinforcing sheets is carried out strictly joint to joint.
After applying the first layer of putty, the surface of the slab becomes absolutely smooth, but preparation for painting requires the creation of a second (finishing) layer.
The reinforcing mesh or fiberglass sheets are glued overlapping, then a cut is made and the excess material is removed. Thus, a high-quality butt joint is obtained. If an adhesive composition was used for fixation, then further work begins after it has dried.
A layer of adhesive-based putty is applied to the reinforced surface. The layer thickness should not exceed 0.2 cm. In rare cases, puttying to create a layer 0.5 cm thick is permissible.
After the first layer of putty has dried (after 3-4 hours), you can use a regular spatula to knock off the scars and sagging remaining on the surface and begin applying the second finishing layer. Its thickness does not exceed 0.2 cm.
An important condition for high-quality work is to process the surface of one wall without stopping. This will avoid the appearance of a sharp boundary between the layers and facilitate the final processing of the created surface. 10-12 hours after completion of the work, you can begin sanding. For this you will need sandpaper or a mesh coated with fine abrasive components.
More details about the process in the video:
Carrying out work on puttying OSB boards is not particularly difficult. The quality of the created surface depends not only on the qualifications of the master, but also on the correctly selected putty
By purchasing the right composition, all requirements and recommendations of qualified craftsmen should be taken into account.


