Do-it-yourself wall plastering is recommended only for those home craftsmen who have experience in finishing work. In the absence of such experience, you should choose a small section of the wall or take a sheet of drywall and practice on it. If the result is far from desired, it is better not to try to save money, but immediately contact a construction company. Others are advised to follow the instructions provided.
Wall plastering can be carried out in two ways. In the first case, the solution is simply applied to the walls, and then leveled with a rule. In the second, before plastering the walls, paint beacons are installed or threads are pulled to indicate the level. This operation is required only in the case of very uneven walls. These two methods of wall plastering are considered the main ones, but each master can make small adjustments to the technology.
According to modern rules SNiP III-21-73, there are 3 types of coatings:
- Low quality. This type of plastering is suitable for wall decoration in non-residential premises. Permissible vertical and horizontal deviations are 3 mm per 1 meter. Also, for every 4 square meters, 3 smooth irregularities are allowed, the depth of which does not exceed 5 mm. Surfaces can be plastered with cheap starting mortars.
- Average quality. In this case, the requirements for surfaces are more stringent: vertical or horizontal deviations should not exceed 2 mm per 1 m. As for smooth irregularities, their number is limited to 2, and the depth is 3 mm. So you can plaster the facades.
- High Quality. The requirements for this type of coating are the most stringent. Horizontal and vertical deviations should not exceed 1 mm per 1 m, and there can be no more than 2 smooth irregularities, while their depth cannot be more than 2 mm.
VIDEO:
Process features
Depending on the material from which the walls were made for plastering, as well as on their location (outside or inside the building), different plaster mixtures and application techniques are used. Before you plaster the walls with gypsum plaster or other composition, you need to know some of the nuances of finishing various bases.
brick walls
Such structures are usually finished with cement-based plasters. In some cases, a little lime is added to them to increase the plasticity and moisture resistance of the material. The thickness of the plaster layer on brick walls should not exceed 3 cm. It is also recommended to use a reinforcing net to strengthen the layer.
 When finishing a brick wall, it is necessary to use a reinforcing mesh to strengthen the plaster layer
 If we are talking about facing bricks, then working with it is quite difficult. Its surface is very smooth, so the solution can fall off even if a reinforcing mesh is used. Such material must first be impregnated with special primers, only after that proceed with the finishing.
concrete walls
Smooth surfaces of this type are pre-treated with primers containing quartz sand or flour. This material increases adhesion and provides a tighter contact of the plaster with the wall. To finish such surfaces, cement-based plasters are used, to which a little gypsum or lime-gypsum mixtures are added. For rough concrete walls, ordinary cement plasters without additional components are sufficient. The main thing is to treat them with "Betonkontakt" before plastering the surface yourself.
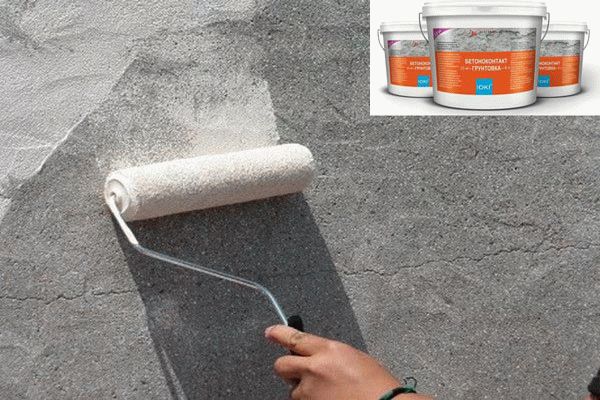 Concrete walls are recommended to be treated with a primer "betonkontakt"
 Aerated concrete walls
If the building was erected or insulated with gas or foam blocks, then they will be quick and easy. At the preliminary stage, it will only be necessary to treat the walls with deep penetration impregnation. Such surfaces can be plastered with concrete or lime mortars.
On a note! At the moment, hardware stores offer a wide range of plasters suitable for certain surfaces and operating conditions. Manufacturers indicate the proportions in which the mixtures need to be diluted, and give various recommendations for use, so there will be no problems with the choice.

Necessary tools and materials
To plaster a wall, stock up on the following consumables and tools:
- mortar, primer (acrylic or "Betonkontakt"), putty;
- painting beacons, self-tapping screws, dowels;
- screwdriver, hammer, metal shears or grinder;
- perforator with a set of drills and a mixer nozzle, a mixing container;
- building level, plumb line, tape measure;
- thread, marker or pencil;
- spatulas (wide and narrow), brush or roller, usually stroked.
In addition, you need to take care of work clothes, protective gloves and a hat. The above list is quite large, but the main ones here are a puncher and a set of drills, everything else is not very expensive.

Plaster work
There are several stages of wall plastering. Only with full observance of each of them can you get a high-quality coating that will last for many years.
Preparatory stage
Plastering walls with your own hands requires careful preparation.
- First of all, you should get rid of the old coating. It is necessary to remove paint, wallpaper or decorative plaster. The starting layer of plaster can only be left if it is strong, otherwise it will also be knocked down.
- After that, you need to tap the entire surface of the wall with a hammer to identify weaknesses that are sealed with putty or cement-sand mortar.
- Metal elements that can be obtained are removed from the wall (these can be nails, self-tapping screws, and so on), and the reinforcement is cut with a grinder and treated with an anti-corrosion compound.
- Before plastering, furniture and other surfaces are also covered with a film.
 Preparatory work before plastering
 Marking
First, you should check the walls with a building level and find out the deviation, for this you need to apply it to different parts of the surface horizontally and vertically. After that, you need to find all the bumps and depressions, applying the rule to the wall. Mark these defects with a marker or pencil. If the deviations are more than 3 cm, it is necessary to remove the bumps with a grinder, and fill the cavities with putty.
Now you can proceed directly to the marking under the paint beacons. You should start from the corners of the room, stepping back 30 cm from them and drawing straight vertical lines from ceiling to floor. Then step back 160 cm from the drawn line and draw the next one, and so on until the end of the wall. After that, you need to decide on the length of the beacons. In this case, it should be taken into account that you should retreat 15 cm from the floor and ceiling and mark these points. Holes are drilled at the points and dowels with self-tapping screws are installed.
 Marking rules for plaster beacons
 Then pull the cord from corner to corner horizontally - near the ceiling and floor. The result should be two parallel lines. The cord will cross the rest of the vertical lines, marks should be made at the intersections, holes should be drilled and dowels should be installed without self-tapping screws. The result should be two rows of holes running exactly in the same line.
Primer
This stage is mandatory, since the duration of the operation of the future surface depends on it. The primer increases the adhesion of the wall, so the plaster will hold better and longer on it, in addition, primers can serve as antiseptics, improve surface ventilation and serve to remove dust. Deeply penetrating compounds are used when finishing brick walls or surfaces made of cellular concrete; for smooth ones, you can get by with Betonkontakt.
The selected primer is poured into a paint container, and a roller or brush is dipped into it, then the tool is pressed against a special surface on the container and the entire area is treated. After applying the first layer, you need to wait about 2-3 hours, then repeat the procedure, and leave the walls to dry for 10-12 hours.
 The priming process improves the adhesion of the plaster to the wall, which means that the coating will last much longer.
Beacons are installed using the following technology:
- First, the upper self-tapping screws are screwed into the holes, after which a rule is attached to one of them and it is checked how deeply the lower self-tapping screw needs to be screwed in so that a straight vertical line forms between their caps. This can also be checked by making a plumb line from the top screw. Thus, all fasteners are checked and adjusted.
- Then you need to stretch two diagonal lines between the caps of the fasteners, then put a beacon under them and draw it to check if the beacons will subsequently protrude. If the product catches the thread, you need to double-check the level of the screws. Next, pull the cord between the upper and lower fasteners and also check them with a beacon.
- Now you need to calculate the distance between the upper and lower dowels and cut off the beacon profile so that it recedes 5 cm on each side.
- After that, prepare a little plaster according to the recipe given by the manufacturer on the package.
- Then they collect the solution and apply it to the wall along a vertical line, after which they take the cut off beacon and press it into the solution so that it is at the same level as the caps of the screws. This operation is best done with a partner in order to simultaneously press the beacon from above and below.
- At the end, you need to check the correct level and remove the screws from the wall.
- Thus, profiles should be installed along all marking lines and the mixture should be allowed to harden.
VIDEO FOR A BEGINNER: preparing walls for plastering and installing sinks
Let's talk about how to properly apply the plaster mortar.
Wall plaster
Consider applying the material to the wall using the example of a gypsum composition.

Areas in the corners, near the floor under the ceiling remain unprocessed. The technology of gypsum plaster walls implies their finishing after the main area has dried.
Making corners and squares near the floor and ceiling
The application of gypsum plaster to these areas is carried out very quickly. It is recommended to start from the ceiling. Before applying the plaster to the remaining surfaces, again prepare a solution of the same consistency as for the main area of \u200b\u200bthe walls. A solution is collected on narrow spatulas and gently stretched. If you get a small overlap - it's okay, it can then be sanded with sandpaper. In the same way trim the area near the floor.
The plastered wall element is also leveled as a rule, cutting off excess material. The corners are made using the same technology, but the perpendicularity of the walls is constantly checked with a square. Instead of lighthouses, the finished surface of the wall now serves as a guide.
 Checking the perpendicularity of the walls on the square
 At the end, you need to check the surface for cracks, if any appear, they should be repaired with a liquid solution and leveled with a rule. You also need to check the coverage with a level, if there are differences of more than 1 mm, they are removed with the sharp edge of the trowel.
After that, beacons are removed from the wall, and the resulting strobes are sealed with mortar, the plastered area is leveled. Then the seized surface is treated with sandpaper. Plastering with gypsum plaster does not require finishing.
This completes the gypsum plaster. It remains only to wait for the coating to harden, after which it can be operated. The required time is specified by the manufacturer.
Plastering walls allows you to level their surface for further finishing the area with putty, ceramic tiles. If you try and plaster correctly, in compliance with the technology, then in the future you get an ideal surface that allows you to complete the finish without problems and additional labor costs.
A quality finish is half dependent on the evenness of the surface on which it is performed. In addition, an important role is played by the overexpenditure of an expensive finishing component, which will go instead of an inexpensive starting mixture for plastering.
Various formulations for application
Plastering can be done with various compositions and components, depending on material wealth and the expectation of the final effect.
Wet plaster
Made from original natural ingredients kneaded manually or in electric mortar mixers:

The use of dry mixes
In modern conditions of the construction industry, they are plastered with dry ready-made mixtures, which are carefully crushed and upgraded during the manufacturing process in the factory. The mixture contains gypsum components. Such dry mixtures should only be mixed with water in sufficient quantities and can be applied to the walls.
They are very convenient to work with, as gypsum makes them plastic and increases adhesion to various substrates. A slight disadvantage is that ready-made aqueous solutions harden quite quickly, but for craftsmen this is not a weighting factor - they manage to work out the solution long before setting. Dry mixes are divided into:
- for plastering interiors, gypsum-sand compositions are used with the addition of modernized components;
- plastering of external walls is done with cement-gypsum mixtures with plastic additives.
Plastering technology
Perform plastering walls in two ways:

Plastered surface acceptance tolerances
Requirements for the quality of work are prescribed in SNiP III-21–1973 and are classified according to complexity for high quality, improved and simple plasters.
Simple plaster is used in rooms with low quality requirements, deviations from the vertical are allowed within 0.3 cm per 1 linear meter, provided that the total vertical deviation in a standard room with a height of 2.5 m does not exceed 0.75 cm. depressions and protrusions in the amount of 3 pieces for every 4 m2, provided that they are not more than 5 mm. Horizontal deviation is allowed no more than 3 mm per linear meter.
The requirements set out in SNiP for improved plastering allow for fewer irregularities. Vertically, the wall can deviate no more than 0.2 cm per linear meter, the total deviation allows an error of no more than 1 cm for the entire height of the room. For the same 4 meters, no more than two depressions are allowed or bumps 0.3 cm deep. A deviation of no more than 0.2 cm is allowed along the horizontal line.
High-quality plaster should be taken even more strictly. For her, the characteristic tolerances are 0.1 cm per vertical meter. At four meters, as in the previous category, two irregularities are allowed, but their allowable depth is reduced to 0.2 cm. A difference of only 0.1 cm per meter is allowed along the horizontal plane.
DIY wall plastering tools and materials
 Lighthouses are narrow strips of metal with a rigid central guide, equipped with a large number of holes on the side surfaces. Beacon rails will play the role of leveled and fixed longitudinal supports for holding a rule along them when leveling the applied solution. Lighthouses are divided into types of 0.6 cm and 1 cm, they are produced 3 m in length.
The rule is a flat and strong rail with a sharp plane on one side. It is designed to pull excess solution from the surface, relying on a frame of lighthouses. To check verticality and horizontality, a level is inserted in some rules. Also for plastering with your own hands you will need such tools and materials:
- drill with a mixer for mixing the solution;
- perforator with drills for fastening beacons;
- dowels, black wood screws;
- a rule with a level or a separate building level two or more meters long;
- metal scissors for cutting lighthouse rails;
- hammer, chisel, plumb;
- large spatula, from 40 to 60 cm;
- stroked, trowel;
- buckets for mixing mortar and water;
- wide brush-brush for priming the surface;
- tape measure and gloves with a rubberized surface;
- dry mix bags;
- deep penetration soil.
When all materials and tools are prepared, plastering of the walls begins.
Preparation, priming of walls and fastening of lighthouses with your own hands
 To begin the installation of beacons, the walls are examined for deviations from the vertical and horizontal. All peaks and valleys mark with a pencil or chalk. Sometimes large protruding parts are easier to knock down with a chisel or ax so as not to put a lot of mortar around them. All this is objectively evaluated and the right decision is made. For the correct concept of the preparatory inspection, there is a video in which all the steps are shown in detail.
After that, they begin to mark the surface for the installation of lighthouse rails. The extreme beacons on both sides are installed first of all, stepping back from the edge by 0.3 m. The distance from the first to the second beacon is determined by the length of the rule. If the rule is two meters, then the distance take about 1.6m. In this case, you need to be equal to a straight line laid at the level of the floor and ceiling from the first to the last lighthouse on one wall. The top and bottom of all intermediate rails must be on it. For clarity of the position of the straight line, the threads should be pulled.
When installing beacons with your own hands, you should achieve such alignment so that all angles are 90º as a result. Before installing the beacons, the wall must be treated with soil, while the instructions on the package are used to dilute the solution. Loose surfaces are primed twice, the first layer is applied with a weak solution, and the second in the proportion on the package. After complete drying, work on the markup continues.
The installation of all intermediate beacons is carried out only along the borders of the threads, stretched diagonally and horizontally in several places. Lighthouse rails should touch them from the inside, but not protrude beyond their borders and not pull them.
At first, the beacons are not fixed, but only applied to exposed self-tapping screws by checking their level. They are fastened with a mixture for plaster, diluted specifically for this operation. The mixture is applied in a straight line along the screws so that it protrudes beyond their plane.
The lighthouse is brought to the line of self-tapping screws and pressed down until it touches the caps. It is convenient to do this with two people from above and below. The installation process of the beacons is perfectly shown in the video. After the initial setting of the solution, they proceed to the installation of the next beacon. The rules and levels involved in the process of work must be cleaned of the adhering solution.
The process of applying plaster
 To prepare the solution, pour water into the bucket and only then add the dry mixture. If you do the opposite, then the resulting solution will seize during the kneading process and it will not be possible to thoroughly stir the mixture until smooth. To apply a thick layer, a thick solution should be made, which will stay on the spatula. It is impossible to apply a large layer with a liquid solution.
The solution is applied with a spatula between the beacons. If you do this work with your own hands several times and watch the corresponding video, then you can adapt to apply just as much plaster in order to properly cover all the voids. You need to apply the solution from the bottom up, gradually removing the excess solution with the rule, progressively lifting it with zigzag movements. The solution remaining on the rule is carefully removed into a bucket with a spatula or applied to the wall above for further use.
Mortar particles that have fallen on the floor are not recommended to be added to the total mass, since dried particles in the mixture will be left on the wall surface long and deep furrows, which will additionally have to be filled with plaster. In the resulting voids, where the mortar was not sufficiently laid, you need to add the mixture and reuse the rule.
After the plaster is completely applied to the entire strip between adjacent lighthouse rails, it is necessary to carry out control dragging the rule along the lighthouses several times. As a rule, at the very bottom and top there are unfinished areas that are additionally superimposed.
After plastering, the surface is checked using the rule at different angles. If there are bumps that do not fit into the overall picture, they can be scraped off with a spatula while the solution has just solidified. Cracks and deep scratches are covered with a liquid solution and smoothed.
After setting and hardening, the mixture is removed metal beacons, which can rust and show up as brown spots on the finish. After removing the slats, grooves will remain, which are filled with mortar and smoothed to obtain the correct surface.
There are times when you need to apply a layer of plaster more than five centimeters, then it is recommended to apply the solution in two stages.
 For this procedure, the mixture is diluted in small portions and a more liquid composition. Before grouting, the place of work with an area of \u200b\u200babout a meter is treated with water. The solution is applied to a trowel and evenly applied to the surface. So they continue to do it many times, strongly pushing the rule. If everything is done correctly, then the result will be a flat and smooth section of the wall, and there will be no liquid solution left on the trowel.
This is how the following neighboring sections are processed, the process of work can be viewed on the video to make it more clear. The grouting process should take place without interruption and you can only be distracted by the preparation of the solution.
If the plastering and leveling of the walls is done as a basis for tiling, then it would be right not to rub the walls. The smallest irregularities on the surface, on the contrary, will help the adhesion of the adhesive solution to the surface.
Mechanical methods of applying plaster mortar
 They are used when finishing walls in rooms of a large area and length, both inside and outside the premises. For such a process, which can be seen in the video, it is used special plastering machine, equipped with a water supply and a container for receiving a dry mixture. After mixing the solution, it is fed to the wall through a special hose with nozzles.
During mechanical application, the beacons are set in the standard way, and the solution is leveled using the rule. The mechanical method is distinguished by a decrease in labor intensity due to the exclusion of the operation for preparing the solution from manual labor. Due to this application, it is possible to process a much larger area in the same period of time.
Wall alignment plaster mortar is an integral part of any interior decoration in modern conditions; the amount of basic finishing material spent depends on its correct implementation.
Plastering walls is a painstaking and complex job. For its implementation, special compositions are usually used, most often on a gypsum basis. In addition, for a high-quality result, it is very important to follow the correct sequence of the process: it is performed in several stages.
Plastering walls is a matter that requires special knowledge, skills and abilities from the performer. Properly executed alignment of the walls will facilitate the process of gluing and significantly improve the appearance of the room. Such work can be done independently, but more often it is still trusted by the masters. In any case, when carrying out this procedure, you will have to take into account some nuances.
To get a high-quality result (perfectly smooth walls), you need 4 components of success:
- experienced master plasterer;
- high-quality plaster mixture (you need to carefully read its composition and manufacturer);
- correct preparation of the solution;
- proper storage conditions for the plaster mixture before starting work (no moisture ingress is allowed).
In addition, you need to clearly understand the purpose for which the walls of this room are finished with plaster. Plastering walls for wallpaper is a slightly different situation than plastering bathroom walls for tiles. In this case, you need to properly plaster the walls with gypsum plaster so that the main decor (tile or wallpaper) holds.
The better to plaster the walls depends on the wallet of the owner of the house, as well as on the characteristics of the room in which repairs are required. In addition, it is important to understand why plaster walls - for wallpaper, tiles or just painting.
 What plaster is better to use? First, you need to know that the plaster is dry or wet. Secondly, both dry and wet plaster exist three types:
- ordinary (actual composition for leveling walls);
- decorative (color, terrasite or stone);
- special.
The cheapest option is lime plaster. But this option, unfortunately, is short-lived and is only suitable for plastering walls inside the building. The outer part is plastered with a different composition. In addition, lime is categorically not suitable for the bathroom. The fact is that lime is afraid of moisture.
The main advantages of gypsum plasters are good sound and heat insulation. It is a ductile material that rarely cracks. Such plaster quickly dries and hardens. A few hours are enough for this.
Unfortunately, such mixtures are not sufficiently resistant to moisture and mechanical damage. Before plastering the walls with gypsum plaster, you need to study all the features of the room. At the same time, you can finish the walls with Rotband (popular gypsum plaster) even in the bathroom.
Cement is a versatile option for plastering walls both inside and out. The main advantages of the material are resistance to moisture and temperature extremes. They can also be used for plastering bathroom walls before laying tiles. It is recommended to choose it if the owners do not know which dry or wet plaster is better to finish the interior or exterior walls.
Also, many users are interested in how quickly the applied plaster dries. From this point of view, cement and gypsum mixtures are practical. In addition, on a bag or bucket with a mixture, you need to read at what temperature the mixture dries the fastest.
Varieties of dry plaster
Dry plaster may be:
- simple;
- improved;
- high quality.
The quality of dry plaster is determined by differences. Normal - with drops no more than 3 mm, improved - with drops no more than 2 mm. In high quality, differences of a maximum of 1 mm are allowed.
Simple usually finish warehouses, basements and other premises for household purposes, the second is used in public institutions - hospitals and schools. But high-quality trim the walls of residential buildings.
To know how to plaster walls with your own hands, you can read a lot of tips on the Internet.
 However, it all comes down to two options: plastering on beacons and without beacons. Everyone can learn how to plaster walls, although it will be more difficult for a beginner than for a professional plasterer.
When deciding how and with what to plaster the walls in the bathroom under the tiles or the walls of the living rooms before wallpapering, it is important to correctly assess the quality of the existing surface.
To plaster the walls yourself, you will need to apply the solution in three layers. The resulting excess is removed with a trapezoidal spatula. You will have to buy it before you plaster walls from any material with your own hands.
In any case, the solution must be applied very carefully.
Plastering in a plane (using a rule) is a good option if the walls are relatively even. If there are serious irregularities on the walls, the performer has no other choice but to plaster the walls on the lighthouses. Thanks to beacon profiles, irregularities are eliminated with an accuracy of 1 mm/m2.
 Usually, metal beacons are used for this, although artificial plaster beacons can also be created. In the second case, you can save the plaster mixture (the layer with iron beacons will be at least 6 mm).
Before plastering aerated concrete walls, you need to make sure that the plaster mixture is ideal for them. This material is environmentally friendly, it lets in oxygen and removes carbon dioxide from the room, so the choice of plaster should be taken responsibly.
The technologies of how to plaster walls made of foam block, foam concrete, as well as how to plaster concrete walls differ little from each other. It is important to choose only the right mixture here. The technology is similar to how to plaster wooden walls.
How to plaster brick walls depends on the location of the surface being trimmed. Concrete and other moisture-resistant products are suitable from the outside, and it is also permissible to plaster brick walls inside the house with gypsum mixtures.
The technique of how to plaster walls with a cement-sand mortar is similar to how to work with any other wall finishing products. The main thing is to add the required amount of water.
How to plaster walls with beacons?
Many users are looking for tips on how to plaster walls without beacons. Here it is necessary to determine the thickness of the layer and the quality of the surface by eye. This method is suitable for relatively flat surfaces. Thus, small imperfections are smoothed out.
Plastered walls are already trimmed with selected paint, wallpaper or tiles - it depends on the purpose of the room and the desire of the owner.
Mother of two children. I have been running a household for more than 7 years - this is my main job. I like to experiment, I constantly try various means, methods, techniques that can make our life easier, more modern, richer. I love my family.
Plastering walls is the most important step in any renovation. The quality of this work directly depends on two main factors: the quality of materials and the technology of work. Moreover, these two points are closely related. Without the right technology, the quality of the material will not save you from marriage, and vice versa.
The main thing in plastering walls is the calculation of the required volume of plaster and the selection of the optimal solution.
But today, most people prefer to use the services of experienced professionals if the need arises for plastering. Moreover, this does not always mean that people do not want to work independently. Often they are simply afraid to make mistakes, because they do not know how to plaster. How can you quickly learn to do such work with high quality?
The process of plastering walls consists of several stages, the sequence of which must be observed first of all. Therefore, in order to learn how to plaster walls correctly, it is important to follow these steps, as well as listen to useful recommendations. Let's take a look at these important points one by one.
Materials and tools for work
Before embarking on the work itself, you need to stock up in advance with all the necessary materials and tools. Not only the success of the work, but also the speed of its implementation will depend on this. So, for plastering you will definitely need:

- building level and plumb;
- Master OK;
- a small bucket for a set of mortar for throwing;
- a construction mixer or a special drill for mixing the mortar;
- a hammer;
- building hair dryer or perforator with a nozzle for removing old plaster;
- guide rails;
- roulette;
- wooden grater for grouting;
- container with clean water;
- semiter and a rule for leveling the solution;
- primer for walls;
- primer brush;
- hard brush;
- spatula and chisel for removing the old coating;
- fiberglass mesh;
- soft dry cloth.
Back to index
Removing the old coating
First of all, you need to properly prepare the surface of the walls. If you do everything according to the rules, it can take quite a long time, up to a week. But it is necessary to focus on the fact that the preparatory work should be completed approximately 3-4 days before the start of the application of the main plaster.

First you need to well free the walls from old coatings. First of all, the old layers of plaster are removed, which are already poorly adhered to the wall. This can be done with a spatula, chisel. But if the process goes badly, then it is advisable to use a building hair dryer or a perforator. You should not feel sorry for the old coating, as it will not hold properly anyway.
After that, it is necessary to clean the wall with a stiff brush, and then check the surface for cracks and grooves. All large recesses and cracks should be filled with base mortar. In this case, before embedding, it is desirable to cover the surface with a primer so that the adhesion force is better.
Back to index
Correction of wall defects
When applying the base plaster, please note that in the case of a brick wall, it is important to close the cracks between the bricks not to the end, but to leave small depressions. This will greatly increase adhesion to the underlying plaster. The same goes for plates.
Next, you need to check the wall for greasy stains. Ideally, this is done by transillumination with an ultraviolet lamp. But if you don’t have such an opportunity, then it makes sense to treat the entire wall with a special degreasing compound. This must be done so that during subsequent plastering, fat is not an obstacle to high-quality adhesion of the solution. This is especially true of the walls where it is planned to arrange decorative plaster.

Next, you need to strengthen the weakest and most vulnerable places of the wall. To do this, you will need a special fiberglass mesh. It is planted on a thin layer of mortar at the junction of plates, wall connections with chimneys, in openings, etc. Please note that this material will in no way affect the degree of evenness of the wall. In this case, it is not necessary to use such a grid over the entire surface.
Now you need to wait until it all dries, and then cover the surface of the entire wall with a primer. The primer can not be spared. The more it is, the better the wall will be protected from fungus and the better the adhesion of the future plaster mixture to the surface will be. After drying, the primer can be taken for plaster.
So the foundation is ready. Now it's time to choose the optimal composition of the plaster and the method of its application.
To date, the most common is gypsum and cement-sand mixture.
Both types are good, but there are cases when it is more appropriate to use only one of them.
Back to index
Rules for applying a cement-sand mixture
Cement-sand plaster. Working with such a mixture is based on three layers: spray, primer and coating. This mixture is ideal for a wall that is not even enough, provided that you have enough time left to wait for the plaster to dry completely.
After mixing the thick mortar, you need to plaster the wall by spraying. To do this, the solution in small amounts in the form of cakes is simply thrown onto the wall, while special attention should be paid to the deepest places on the wall. At the same time, you should not be afraid of the negligence of work, since all this will be corrected in the future without any problems.

Next is the soil. Here, based on the thickness of the spray, the mortar is simply collected with a trowel and applied to the wall. In this case, it is immediately optimally aligned. Please note that before the ground you need to wait for the spray to dry (about 1-2 days will be enough). Try to apply the primer as densely as possible, while pressing the mortar against the wall with a trowel.
Next, you just have to make a cover. This is a kind of grouting of the wall, which is the final stage when working with a cement-sand mortar. Usually, during the covering, the surface of the soil is first rubbed, and then a thin layer of gypsum is applied on top. Gypsum also serves as a covering, which ensures the strength of the fit.
During work, use water for better adhesion and a building level with a plumb line to correct imperfections in time. After that, it is necessary to allow the plaster to dry, which can take 15-20 days. And only then it is possible to be accepted for the device of a decorative covering.
Evgeny Sedov
When hands grow from the right place, life is more fun :)
Content
Everyone who decides to start an independent repair of an apartment, house or other premises thinks about this question. Plastering helps to level the surfaces of partitions, walls or other planes, making them perfectly even. How to eliminate visible defects on a plane using a mixture?
The better to plaster walls
Before leveling the surface, you should know how to properly plaster the walls and what kind of plaster is:
- Normal. It is used to level the work surface, so that later it can be applied with a thin layer of decorative coating. Ordinary plaster protects the walls from the outside from the harmful effects of the environment.
- Special. Designed to improve the heat and sound insulation of the room. This kind of mixture creates a shielding layer on the surface, which protects against x-rays, etc.
- Decorative. Serves as a finish, increases the aesthetic expressiveness of the design.
For plastering walls, the following mixtures are often used:
- Lime-sand mortar. Recommended for interior decoration, for the reason that its consistency is less durable, in contrast to the cement-sand mortar. The advantage of this mixture is its environmental friendliness and ease of use.
- Cement-sand mortar. It can be applied to alignment of internal and external surfaces. The composition for a relatively small cost can change your brick garage beyond recognition or serve as the basis for tiles in the bathroom. When working with such plaster, significant wall defects can be corrected. If the mortar was properly prepared and applied to the wall, then the outdoor coating will last for many years.
- Gypsum mix. Suitable for indoor decoration. The use of selenite and alabaster guarantees an absolute smoothness of the surface. The gypsum plaster finishing process is quick and easy. The downside of the coating is its high price and instability against moisture.
- magnesium mixture. It is an additional component in the preparation of specialized plaster, with the help of which finishing work is carried out indoors.

wall plaster technology
The person performing the repair work needs to know how to properly apply plaster to the walls. Then you can already define the tools necessary for work:
- A plaster trowel is the main inventory of finishing work, without which you can not do. Thanks to it, the process of dosing raw materials, mixing, throwing, leveling the solution is carried out.
- Liter bucket. It is necessary for the dosage of the finishing material and the accurate application of the mixture.
- Half graters. They come in various sizes and are designed for leveling the finished surface and grouting the last layer.
- Beacons - reiki-rules, with the help of which the level of applying the solution to the surface is determined.
If all the tools that are necessary for finishing are available, then you can proceed to direct alignment. To do this, you need to know how to plaster the walls with your own hands. The process means:
- Cleansing, moisturizing and thorough preparation of the walls. If the coating is brick, then the seams should be cleared, the depth of which will be at least one centimeter. On wooden and cinder-concrete walls, frequent notches must be applied or covered with a reinforced mesh with a mesh diameter of not more than five centimeters. It is better to cover the grid with paint so that it is not damaged by corrosion.
- Placing husks on a previously prepared surface. That is, mortar grades are smeared in the corners, which are equated to the thickness of the required layer of plaster mass. Beacons are attached to these places and the solution is thrown into the cavity between the marker and the wall in three layers: the first is a five-millimeter spray with a liquid mixture, the second is the soil, which is the thickest layer (thicker than the spray), the third is a two-millimeter covering applied to the ground, which has already frozen, and then leveled.
- Plastering the main wall in three stages. Beacons are placed on it, and then a solution is thrown.
- Grout. The applied composition is rubbed with the help of trowels with intensive circular movements, and the remaining relief depressions are filled with fresh plaster.

How to level walls with plaster
Plaster is an excellent finishing material that contributes to perfect alignment. How to plaster walls? For this you need:
- Remove the finish in the form of wallpaper, the top layer of plaster that was previously on the surface. Try to rid the walls (brick, others) of cracks, chips, voids.
- Apply the correct coat of primer so that the new plaster is perfectly fixed.
- Measure the curvature of the surface before the direct installation of the pendulums. Apply a level to it and calculate the difference between the top and bottom points. The site should be chosen at least one and a half meters in order to establish accurate indicators of curvature. If the difference is less than a centimeter, then leveling can be done with putty, but noticeable differences need plastering.
- Fix beacons with alabaster in a vertical position along the entire length on the upper drops. We pull the thread on the profile from top to bottom.
It's time to learn how to properly plaster the walls: first of all, we prepare the mixture, and then apply the mortar from the pendulum to the pendulum with casts. The process will go much faster if you use special equipment - a compressor (gun) for plastering. After one layer has dried, apply another. Do not try to level the plaster at once, it is impossible. The leveling layer must be applied with a spatula. It is subsequently rubbed with a trowel or sandpaper.

Lighthouse wall plastering
Lighthouses help to make any surface perfectly flat. They visually allow you to see how much plaster should be applied. Plastering on lighthouses is carried out in the classical way, which is often used in construction: pulling on a pair of cords parallel to the floor and ceiling, vertically and diagonally. This method of marking gives a clear idea of the unevenness of the walls, which should be covered with plaster.
The distance between the cord and the work surface is chosen arbitrarily, but it must be sufficient so that there is no contact. The first two marks should be placed in the corners of the wall with an indent of fifteen to twenty centimeters and fastened with alabaster. Intermediate ones are installed along the cords that are stretched between the profiles coming out of the corners. How then to plaster the walls? The solution is applied from beacon to beacon.
Leveling walls without beacons
The advantages of plastering by this method are savings, since the consumption of finished plaster is significantly reduced due to the application of a thin layer and due to the lack of labor-intensive preparatory work for setting up beacons. So, for alignment without beacons follows.


 in the configuration?")


