A shower cubicle is an essential attribute of a suburban area, designed to brighten up our stay at the “hacienda”. How to make a summer shower with your own hands in just one day and without spending much on building materials? We have developed step-by-step installation instructions collapsible design a country hygienic cabin, which can be dismantled for the winter and stored in a protected place.
Location requirements
The process of manufacturing a summer shower should begin with the choice of a place for its installation. In doing so, we advise you to consider three points:
- you will have to heat the water using the energy of the sun (if you do not provide for the option of electric heating);
- the capacity of the tank, designed for bathing 2 - 3 people, is about 200 liters of water, so its supply should be ensured;
- drains should not accumulate in the shower or fall on plants.
Based on this, when choosing a place for installing a summer shower, follow these rules:
- choose a well-lit area where there is no shadow or it appears for a short time, then the water will warm up well. Consider also the presence of drafts: the cabin will not be airtight and will not be able to protect you from them;
- it is unlikely that you will want to draw water into the shower by hand, dragging it in buckets. Therefore, when choosing the location of a summer shower, take into account the proximity of a tap, a well, a well and the presence of hoses;
- if you plan to use the shower regularly, take care of the drain hole. She should be away from the booth, so she also needs to take a place.

To DIY outdoor shower, be aware of some requirements, non-observance of which can lead to instability and destruction of the structure. First, do not forget that the water tank has a decent weight, and therefore the support legs must be chosen so that they can withstand it. In addition, they must be securely fastened: experienced gardeners it is recommended to bury the racks in the ground, or even better, fill them with concrete.
Secondly, it will be necessary to make a drain in the floor and ensure the drainage of water - for this purpose they usually use a pipe buried in the ground under a slope large diameter. Stagnant moisture threatens you with a putrid smell, as well as an abundance of mosquitoes and midges.
Third, do right choice when buying a tank. metal containers more durable, but they are more heavy, and the water in them heats up slowly. Plastic ones weigh much less, are easily washed out and contribute to the rapid heating of water, but have a shorter service life.
Materials used in the decoration of country shower cabins
And now about the materials that you can use if you decide to make a summer shower with your own hands. Most often, summer residents make a frame (base) from wooden beams or metal pipes(profile), and as a skin used:
- plastic lining. It has a relatively low price, is not afraid of moisture and is quite resistant to sun rays and cold, it is lightweight and does not require additional processing - in general, it is almost ideal;
- waterproof plywood. Despite the assurances of the sellers, this material is still exposed to moisture and has a shorter service life compared to lining;
- slate (flat or wave). Having an unattractive appearance, this material is characterized by excellent practical properties: reliable, durable, not subject to corrosion, tolerates temperature changes without consequences;
- professional sheet. Due to the anti-corrosion coating, it is not susceptible to rust, has a low cost, but is very attractive to thieves, since it is made of metal. So, once returning to the dacha, you run the risk of not finding it in the right place;
- tree. An environmentally friendly material that requires special care, as it is affected by moisture.
Step-by-step instructions for making a collapsible shower
It's time to tell and show how to make a summer shower with your own hands in just one hour. We offer a collapsible cabin option that can be easily dismantled and stored until the next summer season.
For its manufacture you will need:
- 15.2 m of a profile pipe with a section of 20 x 20 mm;
- 16 pcs. fasteners;
- plastic tank (preferably flat);
- opaque waterproof curtain.
Cut the pipe into 4 pieces of 2.2 m and 8 pieces of 0.8 m.

Prepare fixtures for assembling the shower.
Using two pipes of 2.2 m and two of 0.8 m, assemble a rectangle.

Then make a second similar rectangle and connect them together with the remaining 0.8 m long pipe sections.

Install the frame and place the tank on it.
Hang the curtain and the shower is ready. You can use a wooden pallet as a flooring.
If you want a more stable and durable shower for a summer residence you can use the tips from this video:
In hot weather, a summer shower for a summer residence is not a luxury, but a necessary one. outbuilding. The shower makes it possible to freshen up, wash off the dirt after garden work. The presence of a shower on the site ensures a comfortable stay in the country, especially if there is no nearby reservoir suitable for swimming. When designing a country shower, its size, materials used and the place where you plan to build it are taken into account. The cabin should be quite spacious so that it can comfortably accommodate everything you need and move freely. A comfortable shower height is 2.5 m, the most common cabins are 190/140 mm and 160/100 mm. Want more details?!
For a garden summer shower, it is better to choose sunny place away from other buildings. In the sun, the water heats up quickly, which is convenient if you plan to build an unheated shower. If the tank is painted black, the water will heat up faster. Consider also the fact that the water supply to the shower is convenient, preferably automated. Climbing up the ladder with a bucket of water to fill the tank is not the best way.
So, the place for the shower is chosen. Now you need to prepare the base - remove upper layer soil, level the site and fill it with sand. For creating right foundation markings are made with the help of pegs hammered in the corners and a rope stretched over them.
A shower can be a lightweight structure, or it can be a permanent building. The type of foundation depends on the materials used. If the shower is brick, use concrete foundation, the depth of which should be at least 30 cm. Before you start pouring, a place is prepared for pipes - you need to lay a log wrapped with roofing material. The base is poured with concrete using guides and a level so that it is even. When the base is ready, laying can be done. A brick shower will be more hygienic and aesthetic if it is tiled. But this is an expensive labor intensive option.
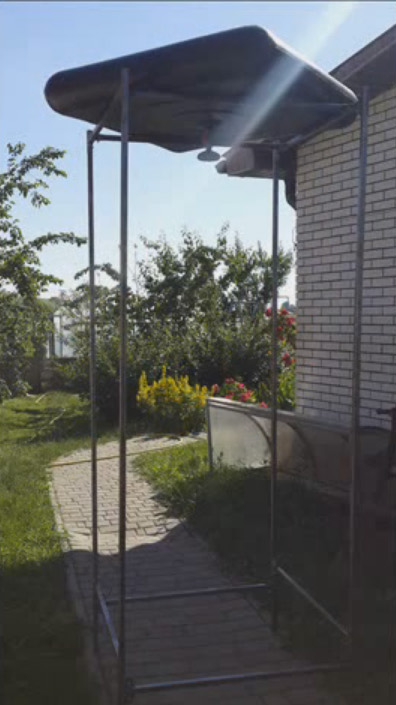
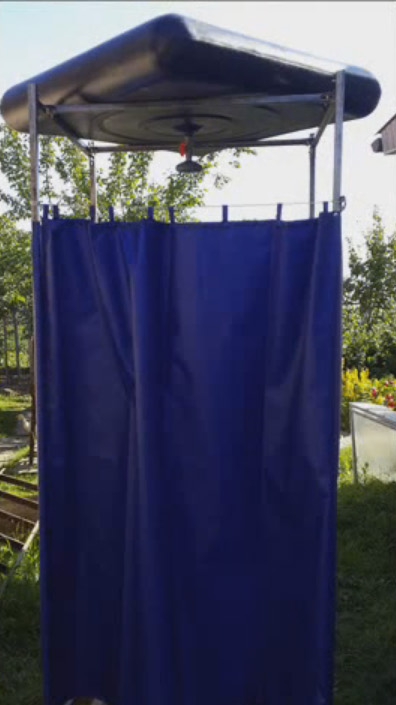
Option # 1 - a budget frame summer tarp shower
This option will allow you to build a summer country shower without resorting to high costs. After all, if you come to the dacha only in the summer, you can get by with a simplified version. For example, build a canvas shower using a metal frame.
A metal frame will require the most cost, but it will still cost much less than a brick. For construction frame shower you will need: tarpaulin (3/5 m), metallic profile(18 m, 40/25 mm), a plastic shower tank, preferably black (volume 50-100 l), a shower head, a ½ squeegee and a faucet with such a thread. Parts such as a watering can, nuts, squeegee, faucet, gaskets and washers are very popular materials, which is why they are often sold in one set, which is especially convenient.
It is not difficult to build a tarpaulin shower, it is convenient and functional, the tarpaulin can be removed for the winter, the frame can be covered with cellophane so that it does not rust
Similar to this design - a shower for giving from flat slate. It has exactly the same frame, but in this case the profile replaces the square (40/40 mm).
Water from the base in the shower should drain towards the drain pipe, and a shield (usually made of wood) is placed on top, on which a person stands and performs hygiene procedures.

If you don’t want to build a shower yourself, you can buy a ready-made one - for example, with a polycarbonate cabin, or completely open, and enjoy water treatments right in the garden
Advice. Better stock make water with a waterproof layer - lay a PVC film, hydrostekloizol or roofing felt on an inclined embankment. The slope is made in such a way that the drain from the shower is directed towards the trench or drainage tank. Well, if the drain is ventilated, it dispels unpleasant odors.
The problem of water flow today can be successfully solved using a septic tank. When installing a septic tank, do not place it directly under the shower. In the summer, when large volumes of water are consumed, the septic tank may flood and the drainage work poorly, resulting in unpleasant odors. It is better to arrange a drain at a distance of several meters from the shower, place a septic tank nearby.
Advice. Plants that grow well in moist soil will be appropriate near the shower - they will perform a drainage function.
Option # 2 - solid construction on a pile foundation
When quite high altitude the shower structure must have a stable base. To build a summer shower of a strong structure, you can make pile foundation from pipes. Pipes should be 2 meters high (diameter 100 mm), holes of one and a half meters deep must be drilled in the ground under them. Above the soil level, the pipe should rise by about 30 cm. The dimensions of the beam for the frame are 100/100 mm.

In order to drill holes for supports, you can call a team that installs fences, the work will take about half an hour
On the ground, a rectangle is measured according to the size of the soul, foundation supports are installed in the corners. The next step is the installation of the beam and the bandaging of the pillars. It is convenient to assemble the frame on the ground and fasten the structure with long bolts. Then a dressing is done inside the frame structure - these will be the logs of the floor in the shower. Rigid elements are placed between adjacent pillars in the thickness of the wall.
The floor can be made with gaps between the boards to drain water. But sometimes you have to take a shower in cool weather, and blowing air into the cracks will not add comfort. You can also install a tray, the water from which will drain through a hose. More convenient would be a shower consisting of a dressing room and a bathing area, which can be separated by a bathtub curtain. At the same time, the locker room should be separated by a threshold to avoid water leakage.
As an outer upholstery, lining, sheets of moisture-resistant plywood, and fiberboard are most often used. If all the buildings on the site are made in the same style, the shower should not differ too much from them.
If you expect to use the shower outside of the hot summer weather, it needs to be insulated. It is most convenient to use polystyrene foam for this. As interior decoration waterproof materials should be used - plastic, PVC film, linoleum. wood paneling needs to be sanded and painted.

A water tank is installed on the roof of the structure. It can be connected to the water supply or filled with a pump. It is good to equip the barrel with a plumbing valve that will shut off the water when the container is full.
In order for the water in the tank to heat up better, you can make a frame for the tank that acts as a greenhouse. It is made according to the size of the container from a bar and covered with a film. In such a frame, the water in the barrel will remain warm even if the sun hides. The wind will also not cause a decrease in its temperature.
As they say, it's better to see once:
A selection of diagrams and examples of a shower device
The drawings of the summer shower below will help you choose the right size, choose suitable material, visualize what kind of shower you want to see in your area.

Shower cladding options with different materials: boards, clapboard, moisture resistant wood paneling, different types tanks

There are simple devices that allow you to use the shower more comfortably: a - the float intake will take warm water from the top layer; b - a tap driven by a foot pedal (a fishing line from the pedal is thrown through the block, it is connected to the retractable spring and to the tap that opens at a right angle, which will save water); c - an improved scheme for connecting the heater to the water tank will allow the water to warm up and circulate evenly

Summer shower heated: 1 - tank, 2 - pipe, 3 - tap for supplying water from the tank, 4, 5 - blowtorch, 6 - a watering can, 7 - a tap for supplying water from a watering can
The choice of design, materials, work on the drawing - important points which should be given attention so that the process of creating a soul is continuous and error-free.
In the summer, even when resting, and not working, the opportunity to wash is necessary in the country. The easiest way to organize this is on the street, and not in the house. You can make a portable - mobile shower. it great option for the first time. But I want something more solid. To do this, build a summer shower in the country. Although it is stationary, it is lightweight.
portable summer
Let's start with the most simple models that even devices cubicles or large capacity do not require. There are mobile showers that work on the principle of a foot pump. The source of water is any container that you put next to you - a bucket, a basin, a tank - whatever you have. In it, lower the end of the hose connected to foot pump, which most often looks like a rug.
Foot summer shower - toptun
A hose with a watering can is connected to the outlet of this "pump". To get a stream of water, trample on the mat alternately pressing the pump pads. We trampled - the water went.
What is good about this option is that you can carry it with you. It's warm outside - wash on the lawn. It got colder - they went into the house, put a trough, washed themselves there. You can also take this shower on a hike - it fits in a standard package. Another plus is that you can regulate the temperature of the water yourself: if you pour it warmer, you wash yourself in warm water. If you want to freshen up, take a bucket of cooler water. A good option for a shower for summer use.
Summer stationary shower in the country
When installing a stationary shower, the first question arises: where to drain the water. If there is already a drain pit for, you can lay a pipeline there. But this solution is not the best if you are using bacteria or waste treatment products in the pit. In this case, a certain humidity is required, and with a shower it will be clearly more than normal.
For the shower it is better to make a separate drain hole. If the soil has normal drainage capacity, it is enough to dig a hole about 60 * 60 * 60 cm nearby, fill it with expanded clay, or you can use broken bricks. This should be enough for the average water consumption. If your family belongs to the category of "waterfowl" or the water goes badly, make the hole bigger.

On sandy soils, you may encounter another nuisance: sand can crumble. Then the walls can be strengthened with a net by driving pegs on the sides. Another option is to sheathe the walls with boards (as in the photo). But this is if the board is in the remnants.
Base
Whatever the summer shower, it usually weighs a little. Therefore, the basis for it is not made too serious: there is no point in burying money. Most often used small foundation blocks, which are set by level. The shower in the country is raised above ground level by 20 cm or so. This is enough so that the treated wood (if it is used as a frame) does not rot.

If you are going to cook the frame from metal, you can put it in general on the level paving slabs or stove. If desired, you can cast the columns yourself: put the formwork, lay the reinforcement and pour concrete.
frame
The dimensions of the soul are chosen arbitrarily: there are no standards here. In addition, the shower cabin is often only one of the parts. In another, they arrange, for example, a locker room or a room for a water heater (electric or wood-burning - according to the conditions). Someone plans to take the other half under the pantry or store inventory. So a country shower is not always just a booth "for washing."
If, however, a light structure is planned, in which they will only be washed, and, moreover, the simplest option is with a curtain instead of a door, you can take minimum dimensions: a square with a side length of about 90 cm (drawing below), the height of the racks excluding the tank is 2.2 m or higher (if the family is tall).

But such a width is far from convenient: it is too crowded even for people of average build. It is more comfortable with a minimum width of 100 cm, and preferably 120 cm. This frame is assembled from metal or wooden blocks.
metal
The metal frame for the shower is boiled from a corner with a thickness of at least 4-5 mm. The width of the shelf is chosen depending on the planned load. The frame is usually loaded with water tanks and sheathing. If you plan to put a plastic one on top square container liters per 100, and to cover the walls with a film, impregnated cloth or something as light, you can take the section to a minimum. If you plan, for example, two 200 liter barrels, and sheathe the shower cubicle in the country house on both sides with clapboard, the load will be completely different. And here large sections are required.

Another metal frame for a country shower can be made from a profiled pipe. The wall thickness for the racks is 3 mm, 2 mm is also suitable for strapping. It has a rectangular square section, which greatly facilitates the fastening of the crate and sheathing. To attach something to a corner, it is often necessary to first screw the bars to it, and attach the rest of the strapping to the bar. The piping can be fastened directly to the profiled pipe - with bolts or screws with pre-drilled holes.
The metal frame is best welded. If there is no apparatus, you can make a collapsible frame on bolted connections. Craftsmen do it this way: they cut pipes of the required length, take thick mounting angles and assemble the frame with bolts.

In case you plan to learn how to weld metal, the choice welding machine — .
from wood
A wooden frame for an outdoor shower is assembled from a bar. For the bottom strapping, as a rule, they use pine timber 100*100mm or 150*100mm. Racks can be set to a smaller section. Again, it depends on the load. If the tank on the roof is voluminous, make racks from weaving. If they hold only the roof (water is heated in titanium nearby) or a very small tank, then 50 * 50 is enough.

You can attach the bars in different ways. If correct, you need to cut a spike and a groove. If in a quick way, you can dock directly, reinforcing the connections with corners.
Having set the racks, they immediately make the upper harness. It already definitely goes 50 * 50 mm or 50 * 40 mm. They also make intermediate strapping. There may be one, two, or even three. If you are going to sheathe the shower with clapboard, imitation of a beam, it is better to fasten the crossbars more often: it will be possible to more tightly fit not quite even lumber. The quality of wood materials sold on the market is, to put it mildly, low. We have to correct the jambs of geometry due to force.
The construction of a frame from a bar is shown in the video
sheathing
You can fit the frame with any material:

You can use any other fence that comes to your mind and will perform its functions. For example, on one suburban area weaved the lining for the shower. Type .

shower tank
As a tank for a summer shower, use any suitable container that is on the farm. Most often - this is a barrel - metal or plastic. If there is nothing suitable, you can buy a container. They are available in a large assortment: plastic, metal - from ferrous metal and stainless steel.
Not everyone likes plastic ones, since water heats up worse in them. For the southern regions, this is not scary - there is already enough heat, but for Middle lane-may be critical. Although in this region, most of the summer, water even in black metal barrels requires heating. On the other hand, plastic containers are inexpensive, light, there are square flat shapes, which means they fit well on the shower frame and there is no need to invent a method of attachment.
In a metal barrel, water will heat up faster, especially if it is painted black. But if it is made of ordinary metal, there will be a lot of rust by the end of the season. So much that it will be noticeable on the body. This is the main disadvantage of such tanks. Much better than stainless steel. If finances allow, allow yourself one.
Summer shower tray
There are two options for a country shower device: when the septic tank (drain hole) is located directly under the shower stall. Then you can simply make a pouring floor: lay boards with a gap of 3-5 mm. A simple option that works great on sandy and sandy soils. In this case, the water leaves very quickly, without stagnation anywhere, therefore such a device does not cause any inconvenience.
But this option is only suitable if you plan to use the shower only in warm weather. And spring-autumn will not go - it will be cold, as it will blow from below.
If a normal drain is required or you need to divert the drains to the side (drain pit away from the building), you need to make a pallet in the shower. The easiest case is to buy ready-made. Then, during the construction and selection of frame sizes, you will have to focus on the size of the pallet: under it you need bars to which it is attached. They also connect it as standard: they put a siphon with flexible hose like in the bathroom.

If the pallet is plastic, just bars around the perimeter will not be enough: support is required under it, otherwise it “walks” too much. This foundation is usually laid out of bricks. You can bind them with a solution. Just remember to leave room for the drain hose.
In some cases, they try to make a more solid drain: without using a finished pallet. In this case, fill concrete slab. To do this, they dig a pit of the required size, with a depth of about 30-40 cm. A layer of gravel 15-20 cm thick is laid on the bottom. Already at this stage, a mortgage is installed - a drain pipe and a drain grate. They put up formwork. It can be non-removable - made of brick. Crushed stone is rammed, everything is poured with concrete (). A week (at a temperature of + 17 ° C and above) is waiting for the base to gain strength. After you can continue work: put the frame and continue construction.

Tank filling and water heating
Filling the shower tank with water is usually not a problem. Sometimes they carry water in buckets - if you want to wash, you will carry it. Not very convenient, of course, but it happens ... If there is water supply in the country, they fill it with a hose, install a supply pipe with a valve. It is necessary to add water - open the tap, the tank is full - closed.
How to autofill a tank
The most advanced do automatic filling. Then the water supply is opened / closed by a float system similar to the one in the tank. Only in the event of a breakdown, it is necessary to provide for the drainage of excess water. And, preferably, when leaving the cottage, shut off the supply tap. And then you can turn your own and neighbor's cottage into a swamp.

An exemplary scheme for the implementation of auto-filling the tank is shown in the figure above. Please note: water is taken into the shower close to the surface: here is usually the most warm water. Only this pipe is placed in opposite end from the cold water inlet, otherwise the water will still be cold.
Two pipes go to the sewer: one overflow (mustard color). With its help, the tank will not overflow in the event of a breakdown of the float mechanism. The second drain into the sewer for a complete drain ( Brown color). It will come in handy during the conservation of the system - draining for the winter, therefore a crane is installed on it.
Organization of heating
The easiest option is to use solar energy. Yes, it heats water through the walls of the tank. But the water column is too large for it to warm up quickly. That's why people think various settings for solar water heating.

As mentioned above, in the tank the warmest water is at the top. And the traditional feed comes from the bottom. That is, we take the most cold water. In order for the warmest water to enter the watering can, a hose is attached to it, and it is attached to a piece of foam that I let float. So the water intake is from above.
To speed up the heating of the water, they make a “coil” (in the photo above, this is the right figure). At the bottom of the water tank and above, two pipes are welded in one of its walls. A black rubber hose is connected to them, which is folded in rings in the sun. If there is no air from the hose, the movement of water will be quite active.
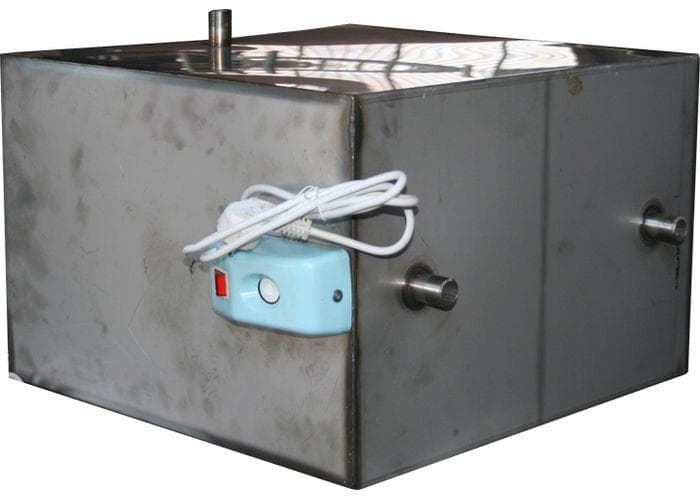
If the sun is not enough for you, but you can bring electricity to the soul, you can use heating elements (wet). We need them with a thermostat so that you can set the desired temperature. Usually used in storage water heaters so you can find it.

When you pull the power line to the shower, do not forget to install an automatic device with an RCD. This is the minimum that will ensure your safety.
Building a shower in the country: a photo report
It was decided to use a fence at the far end of the site as one of the walls of the shower. It was decided to do a shower with a locker room - it's much more convenient.
The soils are sandy, the water drains very quickly, so only one tire was buried for draining. Shower tests have shown that no more is required. Much more water was poured than in my barrel, but no puddles were observed.


Then the frame was welded. Used rectangular pipe 60*30 mm. It's a bit too much for this design, but they used what was: the remains of the construction of the fence.

Having welded the floor frame, and having indicated its level, they formed a drain. They reported the missing height with a brick (battle, remnants). Everything was filled with concrete, forming a drain into the tire.

Leveled the floor and in the second half, left to set. Started working on wood. Purchased aspen board. She was first treated with a skin fixed on a grinder. After impregnated with a protective composition.


While the impregnation dries, we continue to cook the metal frame for the shower. The middle harness was welded from the same profile pipes. Then it was used as a scaffold for working at height. Already dried boards were placed on the strapping pipes. From this pedestal, the upper harness was cooked.

The frame is almost ready. It remains to weld the frame under the barrel at the top.

The metal used is old, so it's covered in rust. She was cleaned off by a grinder. Then the frame of the shower was painted three times with rust paint. She's chosen of blue color, as it was planned to sheathe the shower with blue polycarbonate.

Polycarbonate was mounted on self-tapping screws. During installation, neither special nor ordinary washers were used. This is a violation of technology, which can lead to the fact that in sunny weather it will crack. This material has a large thermal expansion, which is enhanced, since in this case it is attached to a metal frame.

The barrel in the barn has been washed. Pipes are welded to it. One is for filling water, the second is for connecting a watering can. After that, the barrel was painted black.

Dacha is the dream of almost any resident of the metropolis. Many townspeople enjoy spending part of their holidays and weekends at the dacha. They are happy to work in the garden, the garden, the arrangement of the dacha itself: this is how they are distracted from the noisy city bustle. It is good if the site is located near rivers, reservoirs. The rest have to build their own country shower cabin on the site, equipping it with heating and a locker room. How to do it yourself, we will talk in this material.
The choice of materials for a country shower
A country shower with heating and a dressing room is not so difficult to build. But how cool it is to swim after a hard day in comfortable conditions. It's worth it to spend a little time and effort, and for your own convenience. However, it is not necessary to spend a large number of funds for the construction and equipment of the structure.
For a summer shower, you can choose practical and not the most expensive materials. First, cement mortar is required. More massive structures it is better to install on a flood foundation; for light models, you can choose a pile option.
When choosing materials, you should be guided by the features of the work. For a small foundation pit, a shovel, which is available in every house, is enough for pouring the foundation. For pile structures, narrow but deep pits will be required, which are dug using special electric or pneumatic tools.
When choosing the right material, take into account not only its cost, but also the characteristics and requirements for preparation and care (impregnation protective equipment, the need for timely ventilation, etc.).
What material to build a summer shower
- brickwork is not the most cheap option, but the most durable of all. If you still have a brick from building a house, then choose this option. Such a shower with a dressing room and heating will stand for a long time;
brick building
- you can often find wooden shower buildings in the country. Natural wood is eco-friendly, looks spectacular against the backdrop of nature and has quite acceptable strength. But it is important to remember here: to ensure the durability of the building, it is necessary to provide high-quality ventilation shower cabin. For this purpose, during construction, wide gaps are specially left in the floor and walls. The disadvantage of this option is that in windy weather or when it gets cold, it will blow from these slots. In addition, it is necessary to treat the wood with a fire retardant (flame retardant) to protect it from fire, because the building is equipped with heating devices (electric or fuel);
- a modern version - a garden shower with a locker room and heating made of polycarbonate. This material has a lot of advantages: with a small weight of the sheets, their cellular structure provides high strength. In addition, polycarbonate does not change its properties under the influence of natural factors. Ease of cutting and installation are also convincing arguments in favor of this material. Thanks to the mass of pluses, it is quite convenient to work with polycarbonate even for those who first took this material in their hands;
- an outdoor shower is quite often built from plywood. This material is inferior in strength to the boards, but it is also much cheaper. Plywood also needs to be treated to resist fire, moisture, and rot;
- slate with a straight surface can also be used to build a country shower. It is more difficult to work with it when cutting material, but it has strength and durability, is not afraid of moisture, therefore it is quite suitable for building a shower cabin;
- sheet plastic is a moisture-resistant material that allows you to build a summer country shower with heating and a locker room on your own in the shortest possible time. On sale there are varieties with different characteristics. When choosing, you should pay attention to strength, possible temperature range, lack of toxicity, including emissions. harmful substances when heated;

Plastic shower
- it is also possible to use corrugated board or siding.
All sheet materials are used as frame sheathing. The frame itself can be made of wooden beams, metal pipes or profiles. special attention deserves the top flooring, on which the water tank will be placed. It must rest securely on the vertical parts of the frame and have sufficient strength to support the weight to the brim of the filled tank.
Heated tank options
The tank, that is, the water tank, is selected based on how many people will use the shower. If few people come to the dacha, then there is no need for a large tank. The compact tank is easy to install, weighs a little, so it heats the water faster. For washing 1-2 people this is enough.
There are several types of tanks for giving, depending on the material of their manufacture:
- carbon metal. This material is quickly covered with rust, so its surface must be enamelled. Its disadvantage is that with the slightest damage, corrosion develops over time, and leaks form. Such a tank is not at all the best choice;

Carbon steel tank
- stainless steel. This material is not afraid of moisture, temperature changes, but it has another disadvantage - a lot of weight, which makes it necessary to build a more durable frame.
- Cink Steel. The coating lasts longer than black steel, but is also short-lived.
- plastic. Nowadays, country showers are increasingly made of plastic. Its basis is food polyethylene. Light weight, different colors, fast heating - all these are the advantages of plastic tanks for a country shower.
Heating methods
There are two ways to equip a shower with heating:
- use solar energy;
- apply heating element- TEN.
For a summer residence, which is visited mainly in hot weather, the option with natural heating. To increase the effectiveness of the sun's exposure to the water tank, choose a black container.
Artificial heating is carried out by such a device as a heating element. This accessory is sold separately, so you can equip the shower yourself with it. At the same time, you can purchase a ready-made container with a heating element already installed. Its advantage is in the quality of the installation, as well as the ability to purchase a tank with a thermostat.
Tank with heating element
You yourself set the temperature to which the water will warm up. Mount two containers on the roof, one of which will be with a heating element, and the second without heating device. So by mixing water, you can use your wooden or polycarbonate shower any time of the year.
Dressing room blueprint
First you need to choose a place where the shower will be installed. It is best to put it on the edge of the site in a well-lit place on a small hill. The optimal height is 2-3 meters.

Drawing of a street building
The space that the cabin itself will occupy must be at least 100x100 cm. Together with the dressing room, its standard dimensions can be 160x100 cm or a little more.
Having decided on the place, you can begin to develop the project. Despite the simplicity of the design, it is better to put your idea on paper first. This makes it easier to identify bottlenecks and calculate the amount of materials needed.
DIY construction
The process of building a summer shower on the street begins with the preparation of frame parts. It is better to build it from a pine board. You will need:
- 4 horizontal frame parts (20x90x664 mm);
- Vertical jumper (20x90-664 mm);
- 2 lattice boards (15x90x700 mm);
- 7 planks (15x90x700mm);
- 4 vertical parts (20x40x1820 mm);
- 4 links (transverse) (20x40x1820 mm);
- hose support (20x40x160 mm);
- 8 fixing strips (20x40x660 mm).
It is also necessary to prepare the following details for the construction of the shower:
- shower head (with external thread) with mounting plate;
- connecting element with internal thread;
- couplings for connecting a shower to a watering hose (4 pcs.);
- shut-off valve;
- clamps (6 pcs.);
- loops 25x180 mm (4 pcs.);
- wood glue;
- long bolts, nuts, screws.
Construction must begin with installation support pillars. Then the frame is assembled separately and mounted on supports. It is recommended to use long bolts as frame fasteners, since the structure must withstand the load from a filled water tank.
How to make a floor
The floor can be made of boards, fitting them to each other not very tightly so that the water leaves the booth through the cracks. But the minus of this option is that from under the floor will come cold air. It is better to use a ready-made shower tray. A hose is connected to the drain (water supply) hole, through which water will be discharged to a place intended for draining.

Foundation laying
Space demarcation
An outdoor shower can be separated: one part can be allocated for the locker room and blocked with a plastic curtain, and the second can be made directly as a shower. The second option is to install a partition made of moisture-resistant plywood or polycarbonate between these rooms.
Wall cladding and door installation
It is not necessary to install a door from the locker room to the shower - it is enough to hang a curtain made of waterproof material. However, if you have laid a wooden floor, then it is better to build a high threshold between the shower room and the dressing room.
The outer door must close tightly. However, a well-fitted door can swell with moisture, and then it will jam. To prevent this from happening, a gap must be provided between the door frame and the door, which will be blocked by a sealant attached along the contour of the door leaf or frame.
The frame can be sheathed with polycarbonate. The shower cabin will be bright enough. You can also sew up the walls with siding or clapboard, but then you have to arrange artificial lighting.
Electricity supply
To connect the heating elements to the mains, it is better to call an electrician who will select the desired wire section and do everything necessary to ensure safe operation device. An inexperienced person should not undertake this part of the work.

Electricity supply
As you can see, building a summer shower with a dressing room and heating is not so difficult task if there is a desire and an opportunity to make such a shower with your own hands. For this you need:
- Decide on the model of the soul;
- Choose a method of heating water and materials;
- Find a suitable place for installation on the site;
- Build a shower, taking into account all the rules listed above in the article.
Video
Creation example warm shower to give look at the video
Conclusion
Using this shower is easy and convenient. They can be used in the off-season, and with a strong desire - in the winter, just need to be insulated. All in your hands.
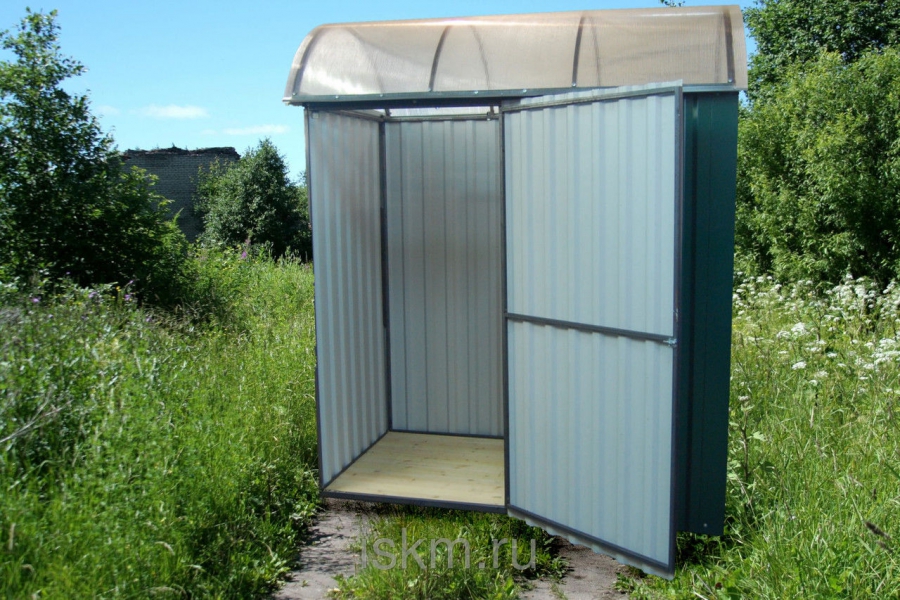
You can’t argue about the need to build a toilet in a summer cottage. Installing a summer shower in the country is also no less important and the right part comfort. But buildings built separately take up a lot of space, and if the summer cottage is small, then they try to build them small sizes. This option is inconvenient and uncomfortable. To solve this problem, you can build a toilet and a shower combined in one building with your own hands.
Features of design and operation
The main feature of the design of the toilet with a shower is a single building and a common dividing wall. Each room is equipped with a separate door.
The design of the toilet, separated from the shower room, is equipped with a tank for storing and supplying water. Plastic pipes supplying water are connected to this reservoir. In the shower room, the tube is connected to a watering can. Adjustment of water supply is carried out using a tap. It enters the toilet room through pipes that are connected to the washbasin and toilet bowl. In the latter case, it is supplied when installing the appropriate plumbing.
Such a construction saves the territory of the cottage
The cesspool should be located no closer than 15 m from a well or water well. The most acceptable distance is 25 m. This is necessary to avoid the possibility of foreign impurities entering the water used.
When choosing a site for the construction of this structure, it is necessary to take into account the possibility of access for sewers to pump out sewage. If the cesspool is deep and wide, it will take longer to fill. We must not forget to equip it with a hatch to drain the contents.
If the pit is located closer than 15 m from a well or water supply station, its walls and bottom must be carefully sealed.
Advantages and disadvantages over separate structures
The following criteria should be included in the parity property:
- It is more expedient to design the construction of a toilet and a summer shower in one building. Each meter of land in a summer cottage is fertile soil, where you can grow vegetables, plant a tree or break a flower bed. The construction of separate structures will take up much more space than a single frame.
- During the construction of individual structures, it is necessary large quantity material, since each of them needs an individual foundation, roof and construction additional walls(in the combined version, only a partition wall is needed). This will also affect financial costs.
- The construction of a combined toilet and shower will reduce the construction time, since in this case, work is being done for both structures at the same time.
- If you build everything separately, then for both structures you need to equip your own drain pit. In addition, the walls of each of them must be reinforced with bricks, roofing felt, slate or concrete, which will additionally entail financial waste.
The disadvantages include the following points:
- Unpleasant smell from the cesspool, the risk of contamination of soil and groundwater with sewage, as well as the high cost of pumping out its contents.
- If you do not connect a pump to the summer shower tank, then in order to swim, you will have to carry water in buckets and pour it with your hands into a container on the roof.
- In the absence of sunlight, water will not heat up well in all seasons. And in order for it to become warm on hot days, it must be prepared in advance.
Preparation of a project for a shower room combined with a bathroom
The design of a combined toilet with a shower should, above all, be functional and comfortable. It is designed in any shape, size and color. Comfortable to use will be a house with a size of 2750x200x2520 mm. In such rooms it is convenient to install rectangular benches and shelves. It is not difficult to build a frame of this form. The diagram and drawing below show optimal parameters to build this building.
Optimal parameters presented
Here is a separate toilet with a shower in one building. The structure is located on a columnar foundation. Its dimensions make it convenient to use the structure for its intended purpose. The shower and toilet rooms are large enough to accommodate additional furniture and plumbing. In the toilet, you can place a washbasin and shelves, and in the shower room - benches and a bathing cabin. With a width of 130 cm and a length of 200 cm, each room will not be crowded. The height of 2.5 m makes it possible to use this building even for a very tall person.
The length and width of the structure is selected individually
If the door opens as shown in the drawing, then it is better to place the washbasin on the right side. In this case, when entering and leaving the toilet room, the sink will not interfere. The bench in the shower room can be installed in the same way.
Material selection
For the construction of a toilet with a shower, various materials are used. In our case it will be frame structure on a columnar foundation with a gable roof. For frame building a deep foundation is not needed, as it has a relatively small weight. Thanks to the pillars, the structure will rise above the ground. This will protect the lower trim of the structure from dampness and fungus. Water will not linger under the base. The gable roof will allow you to equip cold attic for business needs. Water from such a roof flows faster than from a shed.
When purchasing bars and boards, you need to take into account their humidity, the degree of which should not exceed 22%. To determine this, use a needle moisture meter.
To build a country toilet with a shower, you need to prepare the following materials:
- For the lower and upper strapping: four beams 2750 mm long and the same number - 2000 mm each, all with a section of 100x100 mm;
- For vertical supports, bars with a section of 50x100 mm are needed, in the amount of 24 pieces, each of which is 200 cm long;
- Wooden edged boards with a section of 10x100 mm, for lathing;
- Bars with a section of 50x100 mm, 200 cm long, in the amount of 12 pcs. - for the roof frame;
- For flooring (in the toilet), boards with a section of 40x150 mm are required in the amount of (minimum) 20 pieces. OSB sheets are used as a finishing floor;
- If the floors in the shower room will be covered with tiles, then an amount equal to 2 m² is required;
- Plastic pipes and sewer drain;
- Concrete mix (M-200) in the amount of one and a half cube;
- Plywood sheets for the manufacture of formwork;
- Sand and gravel;
- Metal tile.
All wooden elements must be free of knots, cracks, mold and insect damage.
- As draft ceiling sheets of plywood, chipboard, fiberboard or OSB boards are used.
- For the convenience of fastening the bars, metal corners and plates are used.
Required Tools
When building a country toilet with a shower, you will need the following tools:
- Shovel bayonet and shovel;
- Electric jigsaw or hacksaw;
- Concrete mixer;
- Electric welding machine;
- Large container with water;
- Buckets or wheelbarrow for carrying concrete mix, gravel and sand;
- Pliers and cutters.
- Screwdriver or Phillips screwdriver.
- Axe.
- A hammer.
- Building level.
- Square.
- Yardstick.
- Cord.
- Self-tapping screws and nails.
- Plane.
- Pencil.
Do-it-yourself step-by-step instructions for building
When all necessary materials purchased, and the tools are prepared for work, you can start building a country toilet with a shower:
- First you need to choose the right place for this structure. The site should not be in a lowland or pit.
- For this building will be used columnar foundation. To install it, you need to make markings on the ground with a tape measure and a cord.
- After that, it is necessary to dig a pit for a cesspool. Its depth should be from 1.5 to 2 meters or more. The width and length of the pit can be different. Usually these values \u200b\u200bare equal to 100x150 cm.
The cesspool can be either round or square.
- Once the hole is dug, it needs to be reinforced. To do this, we lay out the walls of the pit with bricks. We use cement mortar as an adhesive.
- When the walls are ready, cover the bottom of the pit with a mixture of sand and gravel, and then concrete. The result is a concrete container that does not let the contents through its walls.
Brickwork will prevent soil and groundwater pollution
- Next, you need to install a columnar foundation. To do this, we dig holes 80 cm deep and 20 cm in diameter.
- Their bottom should first be covered with a 10-centimeter layer of sand, which must be compacted.
- On top of the sand, pour a layer of gravel 10 cm thick, which must also be carefully compressed.
The correct foundation device will create a rigid foundation for the structure.
- After that, from plywood sheets or boards, you need to make a formwork for the pillars, which should rise 30 cm above the ground.
- Insert 3 to 5 rebars in the middle of the hole to strengthen the concrete. Elements metal frame connect with wire.
- Mix concrete and pour it into the formwork. In case of construction works in hot weather formwork with uncured concrete must be covered with something. If this is not done, the concrete may crack.
- Leave the future foundation for a couple of days to solidify.
- After the specified time, remove the formwork.
Formwork attached square shape column, and metal reinforcement - strength
- Next, you need to install a drain pipe under the shower. Place the drain in the specified place, and bring the other end of the pipe out.
Thanks to the withdrawal Wastewater, moisture will not accumulate under the shower
- For the lower trim, use bars with a section of 100x100 mm. Connect wooden elements in a half-tree way. between wood and concrete pillar lay two layers of roofing material. Connect the frame with a concrete base to metal studs with nuts.
- As a framework for cesspool use a metal channel.
- Now you can move on to building frame walls. To do this, you need to install bars with a section of 50x100 mm in the corners. Check their vertical position with building level. As connections, vertical supports and bottom strapping, use metal corners and plates.
The ends of the beams are connected in a way in half a tree
- In the frame, install two pillars 1960 mm high in place of the doors. Make the distance between them 770 mm.
- After everything vertical supports installed, it is necessary to make the upper trim of the bars with a section of 100x100 mm. Fix it to metal plates and corners with self-tapping screws.
Wooden braces temporarily strengthen the structure
- On the top harness, middle, set three vertical racks, on top of which to fix the ridge board.
The height of the pillars will determine the angle of the roof
- From boards with a section of 10x40 mm, make rafters for gable roof in increments of 65 cm. Length rafter legs should be 20 cm larger than the edges of the walls of the structure. Fix all elements with self-tapping screws.
- Then from edged board make a crate in increments of 20 to 30 cm. Connect it to each other on the ridge element. The length of the boards should be selected so that they protrude by 20 cm.
The protruding parts of the crate will serve as a visor for the construction
- Nail the wind boards. Cover the roof with sheets of metal tiles, which are fixed to the crate with self-tapping screws. A vapor barrier layer is not provided for this design, since it will not be heated.
- Now move on to installing the floor in the toilet. Cut the bars of the desired length from boards with a thickness of 40 mm, which are fixed on the bottom trim with self-tapping screws. The length of the floor from the entrance to the pedestal with the seat is 100 cm.
- Cut 5 bars 40 cm long, and use metal corners and self-tapping screws to screw them to the floorboard. Parallel to them on the channel also install 5 vertical bars by connecting them with the same boards. Attach the same bars to the side supports (of the future toilet room) and the back ones. As a result, you should get a frame that looks like a large step. This construction of wooden beams is designed for a pedestal.
This structure is reinforced metal corners which make it stronger
- Sheathe it with a board 20 mm thick. Then you need to insulate the walls of the toilet and shower. To do this, upholster the inner side of the frame of the structure with boards 20 mm thick. Then firmly insert between each vertical support foam boards 10 mm thick. Fill the gaps between them with mounting foam. It is also necessary to insulate the ceiling.
Styrofoam will reliably protect the walls from cold and heat
- Then you need to upholster the outer walls and the inside of the ceiling with boards 20 mm thick.
- Now you can start building the soul. In order for the water to go into the ground not under the building, you need to do drain system. To do this, dig a small ditch in which to lay a regular sewer pipe with a diameter of 10 cm. One end of this pipe should lead to a right-angle outlet to connect to the sewer drain.
- Cover it with polyethylene and attach to the pipe.
- In the shower room, fill the floors with a layer of rubble. This is necessary in order to spend less concrete. Crushed stone must be positioned so that its level around the drain is less than along the perimeter.
- Top with concrete and level it. As a result, the surface along the entire perimeter will have a uniform descent to the place of drainage for water. This base should be without pits and protrusions so that it flows freely.
Slope of the floor towards the drain
- wait until concrete base harden, and then cover it with a layer of bitumen-rubber mastic. Before use, it must be heated to a liquid mass. Then, using a brush, apply to a dry and dust-free concrete floor. In the same way, it is necessary to process the lower trim of the structure.
- When the mastic hardens and cools, you can proceed to the installation wooden floor in the shower. To do this, it is necessary to cut boards 40 mm thick into fragments 137 cm long.
- Lay the indicated boards on the strapping and fasten with self-tapping screws. In order for water to leave through the floor, it is necessary to leave a distance of 15 to 20 mm between the wood.
The gaps between the boards contribute to a better outflow of water.
- Upholster the inside of the shower room with boards 20 mm thick. Treat everything with a moisture barrier. Cover the entire shower with yacht varnish in two layers. After the first time, let it dry and only then proceed to the second application. Beat everything with the same boards external walls the buildings.
- By using grinder clean up wooden surfaces shower and toilet.
- Then you need to secure the foundation from water flows. To do this, you need to install a drainage system. Attach drain channels to the edges of the rafters, to which drain pipes are installed on each side.
Thanks to pipes and gutters, water will not accumulate near the walls of the structure
- Now you need to pay attention to ventilation in the toilet and its pit. To do this, you need to make a hole with a diameter of 10 cm in the lid of the cesspool section, into which to insert plastic pipe. Its height must be made 70–100 cm higher than the ridge part of the roof.
- For ventilation in the toilet room, it is necessary to drill a hole in its wall with a diameter of also 10 cm. Insert a plastic pipe into it and bring it out parallel to the previous one. On top of each pipe, fix umbrellas from precipitation.
Installing a ventilation system will create conditions for the release of methane
- To use the country shower and toilet in the dark, it is necessary to conduct electricity. To do this, drill a hole in the partition between the toilet and the shower, into which to lead the wires and connect them to the junction box. Attach the lamp to the ceiling and screw the cover of the closed type. Put the switch on the wall. Do this in both rooms.
Wiring connections must be carefully insulated from moisture.
- Now we need to install the doors. They must be treated with the same compounds and varnish as the shower room.
Installation and nuances of use in the country
When the design of the country toilet and shower has been erected, you can proceed to the direct installation of a water barrel, attaching a tube with a shower head to it. It is also necessary to install a place for a seat in the toilet.
Most suitable for installing a water barrel flat roof. Since in our case it is gable, it is necessary to build a stand for this container. It must be made from metal pipes, a channel or a corner, using electric welding. In our case, a metal corner with sides of 50 mm and a thickness of 3 mm was used. To strengthen the structure, it is necessary to weld the amplifiers perpendicularly, every 100 cm. The total length of the frame is 4 m. The result should be a solid stand in the form of a tripod. Then, near the shower wall, drill three holes 1 m deep. Lower the tripod into them and pour concrete.
In order to save material, the frame is made of three metal corners
Used as a water tank plastic container 20 cm high, 100 cm long and wide. Due to the small height, the water in such a container heats up quite quickly from the sun's rays. Under it, you need to make a wooden frame. In our case, it is made of bars with a section of 50x50 cm, 100 cm each. It is necessary to connect their ends in a half-tree way and secure with self-tapping screws.
The shape of this tank holds a lot of water, which quickly heats up in the sun.
The wooden frame must be attached to the rack with self-tapping screws.
Now you can proceed to the installation of pipes for the shower. For this, it is better to use plastic ones with a diameter of 25 mm. Carefully drill a similar hole in the barrel, into which, using locknuts and rubber seals, install the fitting. Attach a pipe to it, in which, after 50–60 cm, connect a ball valve. It is necessary to shut off the water in case of any repair or construction work. Then drill a hole in the ceiling and stick a pipe into it. Using tees and fittings, place it in the shower. Install a watering can with a tap in the tube under the ceiling.
Now you need to install a seat in the toilet. To make an even hole, you need to attach a bucket to the middle of the pedestal and circle it with a pencil. Using a jigsaw, cut a hole in the marked area.
The bucket will hide the edges of the hole
Insert a bucket into it and fix it with self-tapping screws. In the case of using the toilet in winter, it is necessary to purchase a foam seat. In any weather, it will be warm, which is important for health.
The appearance of the finished building will fit well into the territory of the suburban area
Video: stages of construction of a country toilet with a shower under one roof
With little effort, you will build the necessary and convenient building with your own hands. Rest and living in the country will become much more comfortable. To swim after working in the garden on a hot day, you do not need to heat water and waste electricity. Thanks to various materials exterior decoration, a toilet and a shower combined in one building will not violate the architectural ensemble of summer cottages.


