Just as the theater begins with a hanger, so each apartment welcomes guests in its own hallway. Shoe racks are not only a useful piece of furniture, but also serve as a part of interior design. And if the owner of the apartment is a lover of creative solutions, then he will definitely begin to surprise his guests, starting from the threshold of the house. For guests, beautiful shoe racks will be a subject of delight and admiration, and for their hosts they should also serve as a place to store many pairs of sneakers, shoes, boots and many other shoes. After all, the question of storing shoes arises for quite a few, especially if the apartment has a very small entrance hall.
Of course, it’s easier to buy a ready-made product, but, as a rule, shoe racks offered in stores have many drawbacks and are unable to fit perfectly into the dimensions of the hallway. The store may offer very large shelves for shoes, which will cost a lot of money, or completely unsuitable for the finished interior of the hallway. And it is at this moment that a quite reasonable question arises: how to make a shelf for shoes with your own hands so that it can perfectly fit your requirements and remove all shoe wealth out of sight?
To make a shelf, you first need to have a pair of long boards one and a half or two centimeters thick and twenty to thirty centimeters wide. Of the tools you will need: a ruler and a pencil, a saw, a screwdriver, metal corners and screws. Metal corners will be needed to strengthen the entire structure so that it does not stagger, but firmly stands in its place. To mark the line of cuts, use a ruler and a pencil. For the manufacture of a simple structure, it is necessary to cut out two side parts from approximately seventy to ninety centimeters high from pre-prepared boards, and several transverse parts that will serve as the lower and upper parts of the shelf. You can choose any length, focusing on the dimensions of your hallway.
Next, using a saw, we cut the boards to the desired length. When working with wood, you need to remember that when cutting with a saw, uneven cuts can result. Sandpaper is ideal for fixing this problem, it can be used to easily sand uneven edges. You also need a rail, from which you will need to make several segments. The calculation of the number of segments is based on the number of shelves, two segments per shelf. The length of the rail should be equal to the width of the side parts of the shoe rack. Now you need to markup for future shelves. On the side parts in the designated places with the help of a drill, holes are drilled slightly smaller than the diameter of the self-tapping screws. We fix the parts with a screwdriver with self-tapping screws for attaching the shelves.
The lower and upper parts are attached from below and above with the help of metal corners. You can strengthen the structure by using not only metal corners, but also for more experienced craftsmen, you can use the butt joint method. After performing all these operations, a wooden box is obtained, having bars on its sides. After these simple manipulations, a do-it-yourself shoe rack made of wood is almost ready. It remains only to put your shoe rack in the hallway and place separate shelves inside. This design can become the basis for designing shoe racks with any configurations and sizes, everything will depend on your imagination. And if you also master the technique of working with chipboard boards and learn how to use them in the manufacture of such simple furniture, then you can generally get a hallway bedside table with doors.
When using the above technique, shelves in the form of a bench are very popular. This is a very worthy and practical option for any hallway. In this case, the shelf will perform two functions: a capacious storage for shoes, and, importantly, a place for shoes. Such models have a lot of options. If you do the work using natural wood, then in the end you can get simple and beautiful models. It also looks great shoe racks in the form of a bench with a padded soft top cover. And it's comfortable to sit and look beautiful. When mastering the already known technology, you cannot stop, but you need to improve your skills and bring your most daring ideas to life.
The oval-shaped shoe rack is very original. Few people will refuse to have such a beautiful shelf for shoes of the original form in their hallway, and even with a soft harness on top. This type of work is quite difficult, but the result will not make you regret the work done. As they say, the eyes are afraid, but the hands are doing. To make an oval shelf that can be moved, store shoes and comfortably put on shoes, you will need the following materials: chipboard twelve millimeters thick and 60 * 60 centimeters in size, parts for attaching shelves, wood screws, special plugs to hide attachment points. To make a soft harness, you will need foam rubber and fabric.
As it was thought before, our do-it-yourself shoe shelf will have an unusual shape; for this, we draw circles on all chipboard blanks. To make the circles even, for this we drive a carnation in the center of the sheet and tie a strong thread to it. We take a pencil and, using the free edge, draw a circle that will fit into the square of chipboard as much as possible. Clearly along the marked lines with a jigsaw, cut out three identical circles. Rough edges can be processed with sandpaper, or if there is, then a grinding machine is used. Next, you need to draw two diagonal lines on each of the resulting circles. The lines are drawn in such a way that they are clearly perpendicular to each other. Two holes must be drilled on each part. Holes will be needed for attaching partitions.
Four partitions are installed on the round part, which will be the base of the shelf. Partitions are installed in such a way that they are clearly at the outer edge. From below, with the help of screws, they are fixed. Then it is necessary to fix the middle circle and partitions are fixed with screws on top of this circle. The remaining four partitions are fixed in the same way, only shifted so that they are clearly between the previous partitions. And the final step is to fix the upper circle. To complete the complete picture, it is necessary to close the screws with special caps and paint the shoe rack in any color you like and suitable.
And, of course, do not forget about the soft seat. To do this, several circles are cut out of foam rubber and covered with a cloth. All this with the help of a construction stapler is fixed on an already finished shelf structure. If there is a desire for the shelf to move to any part of the hallway, then four rollers are fixed to the lower base of the structure.
Another idea for a shoe rack is a corner shelf. This is another idea in the piggy bank for the master. This type of shoe shelves is very common, because it is this type of design that can be installed in any corner of your hallway. In the corner, the shoe shelf will take the most advantageous position, and will not clutter up the passage. What is important for small hallways. To make such a product, you will need several sheets of MDF, self-tapping screws, a jigsaw, a drill, drills and a screwdriver. The work is being carried out in several stages. First of all, it is necessary to make markings on the MDF sheet. Two rectangular parts are drawn, they will be the side walls of the shoe shelf. It is also necessary to draw triangular details, which will be directly the shelves themselves.
Then, with a jigsaw, all the previously drawn details are cut out, and their edges are processed with sandpaper. The whole structure is fastened with a drill and self-tapping screws. To do this, marking the location of future shelves is carried out on the side parts and all this is fixed with the help of self-tapping screws. To give an aesthetic appearance, the design of the shoe shelf can be coated with acrylic paint. So that such a shelf for shoes does not fall with your own hands, for reliability, you need to pull its sides with dowels to the wall. Now you can safely use such a design and not be afraid that the shelf may crumble from careless movement. And, of course, one should not forget that such designs do not provide for the possibility of storing high boots on them.
There are many more different ideas for creating unique hallway furniture. And if you still need a do-it-yourself shoe rack, photos of various configurations can be found on the expanses of the worldwide web, and not only. And if you also experiment a little with the already presented drawings of shoe shelves, then it is quite possible to create some kind of masterpiece and an exclusive piece of furniture. Fantasy and again fantasy will help you create a unique interior for your hallway. Such furniture can please not only yourself but also your loved ones. The created DIY shoe rack will be a great gift for friends and family. This kind of present will be not only original, but also very functional. And, as you know, a handmade gift is very pleasant.
Having become acquainted with some of the intricacies of creating shoe shelves, it becomes clear that there is nothing complicated in this and it is quite possible to create any design of shelves for shoes on your own. The main thing is to show a little imagination and diligence. And, of course, to purchase all the necessary tools for work and materials.
Every person's wardrobe is undoubtedly large. Among all things, shoes occupy an important place. It is placed separately from all other items of clothing. In most cases, shoes, for convenience, are stored in the hallway or corridor. In order for it to serve for a long time, it is necessary to handle it carefully, as well as properly store it. For the latter, a separate shelf is best suited. You can buy it in the store or make it yourself. From this article you will learn how to make a shoe rack with your own hands.
To date, furniture stores have a huge number of shelves of different shapes and designs. Choosing a model yourself is sometimes difficult. First of all, the dimensions of the structure are calculated:
- height;
- length;
- width.
It is also worth considering the number of shelves or cells and their height. To do this, you need to review all shoes for their size. In addition, the design can be supplemented with a pedestal, bench or other decorative trim. The shelf can have an angular, round, rectangular shape, be rotating.
A simple, but at the same time durable shelf can be made from improvised materials, such as wood or a fiberboard sheet.

The durability and practicality of a shelf for shoes will depend on the material from which it is made. So today there are practically no restrictions in the choice. Among the most common materials are:
- plywood;
- wood;
- laminate;
- slats;
- profile;
- box;
- pipes;
- metal.
The most common is the tree. You also need to buy varnish or paint. Thanks to this, the shelf will repel moisture and dirt. This also applies to chipboard. Experts advise for wet shoes to provide a lower shelf, which will serve for drying. Metal products also need additional protection, as corrosion can form as a result of exposure to moisture. Remaining paint can be used to create a protective layer. The finished shelf can be installed in the hallway.
Thanks to the protective layer, the tree will not swell and, as a result, deform. This will increase the life of the product by several years.

To make a shelf at home does not take much time and effort. In most cases, it all depends on the design, so specifying a standard set will be somewhat problematic. When choosing tools, be sure to include in the list:
- electric drill;
- screwdriver;
- hacksaw (for metal or wood);
- ruler;
- pencil;
- glue;
- fasteners;
- chisel;
- grinder or sandpaper.
When planning to make a shelf of wood and metal, carefully select paintwork materials. It is desirable that the finished shelf is combined with the interior of the room.

The most relevant and simple option is a shoe rack made of wood. For its installation, it is enough to take a few boards that remained after the repair and finishing work. As already mentioned, first of all, it is necessary to determine the dimensions, functionality and design of the product. After selecting all the tools and fasteners, you can proceed with the assembly:
- From the prepared lumber, it is necessary to cut out all the elements in a given quantity: support bars, crossbeams, side racks.
- To prevent injury, all prepared parts are processed with fine sandpaper.
- With the help of self-tapping screws and a screwdriver, the frame is fastened and the shelves are installed.
- The finished product is varnished or painted.
An old cabinet or shelf can serve as the basis for making a shoe rack. In this case, the whole procedure is greatly simplified.

An equally simple option that you can do yourself is a combination of wood and metal planks. You can use both ordinary boards and fiberboard sheets, but the thickness should not exceed 1.5 cm. The planks should have a cylindrical shape with a diameter of 2 cm. Stainless steel, which is not afraid of moisture, is ideal. Do not forget about fasteners.
For convenience, it is better to draw a sketch of the future product on paper. This will help avoid errors or defects. Side and back walls are cut out of wood. All edges must be smooth. For convenience, a grinder or sandpaper is used. Before fastening all prepared elements, it is necessary to apply markings. Nails and self-tapping screws can serve as fasteners.
It is best to place such a shelf on the floor. In order for a large structure to be held on the wall in the corridor, it must be securely fixed.
So, creating a shelf for storing shoes yourself is quite simple. You need to have a desire, as well as allocate a little time. Having shown imagination, you can get not only the necessary thing, but also an original decor element that can harmoniously fit into the interior of the hallway.
You may be interested in these materials:
Video
From the provided videos, you will learn about two simple methods for making a shoe rack for shoes:
A photo
Below are a number of photos with different ideas for making a shoe rack with your own hands:


Summer is replaced by autumn, autumn - by winter, winter - by spring - and so on, according to a circle set by nature. And we try to adapt to the whims of each season, acquiring a bunch of clothes and shoes for all occasions. The question of placing the latter in a city hallway that is often unable to boast of extra square meters remains open. What to do? A completely rational and economical option is to make a shoe rack in the hallway with your own hands. Not enough imagination to make the end result pleasing to the eye? We offer 20 photos of self-made shoe shelves - you will certainly find something for yourself according to your criteria.
materials
Plywood
The best option is to cut the existing plywood into small pieces of equal size, then thoroughly sand and assemble into the structure of the shape you need. U-shaped structures are usually preferred. As a result, we have a strong and pretty shelf that perfectly copes with its immediate function.
Wood
The traditional material for homemade shoe racks is good old wood. Never fails, absolutely non-toxic and perfect for processing. All you need is a planer, hammer, pencil, slate, as well as a tape measure and a saw.

Chipboard
Compared to untreated wood, it has a greater visual appeal, however, according to the main characteristics, it outright loses exclusively to natural material. For the manufacture you will need a grinding machine. Irregularities and other shortcomings of the workpiece are leveled with sandpaper, and your shelf will acquire its final “marketable” appearance when you stick a special tape on the sanded surface.

Metal
Rarely enough, metal is used to make a do-it-yourself shoe rack, but such options often flash on the net. As a rule, they are a modification of accessories that have already served their purpose.

Perhaps the easiest option. It is made quickly and easily, roomy enough and will perfectly fit into any interior.

Even something as insignificant at first glance as a shoe rack can look like a real design revelation.

An example of a huge chipboard shoe rack. The simplest design guarantees increased stability. As you can see in the photo, absolutely all the shoes will fit in such a shelf. There will also be room for your guests. And the cat :)

An excellent rack, which has a solid capacity with a fairly modest size. Such self-made shelves can often be found in small Khrushchev hallways.

In the photo - forged homemade shelf. It will fit well into the format of both a city apartment and the design of the hallway of a private house. However, it is unlikely that you will be able to fit all the shoes on it. The shelf is small and perfect for a small family of 2-3 people.

A vivid example of how skillful hands can give a second life to even scrapped furniture.

A common option, especially in demand in small hallways. The shelf is attached to the wall and allows you to do without a bulky dresser or cabinet, thereby saving precious meters of living space. It will not be difficult for anyone to make such an option: the main thing is to collect all the necessary parts and tools. Note: wet shoes in such a suspended state dries much faster!

budget shelves
The need for invention is cunning: sometimes in order to conveniently place shoes in an apartment, you don’t need to do anything. Just a pallet is enough, and now your sneakers, sneakers, shoes, boots are in their place. True, before using such a shelf directly, it should be carefully treated with sandpaper - in order to exclude damage to the shoes.

What a small and modest shoe rack in the hallway - and how much it contains! You can really make anything with your own hands - the main thing is that your hands grow from the right place.

An interesting handmade shoe rack. As you can see, both wood and materials from already deceased furniture were used. As a result, we observe an extremely practical option with a rather specific look.

Did you know that a shoe rack can be made from ordinary cardboard? A minimum of effort and time spent, but what an original and practical accessory has been drawn in the hallway!

It seems to us that such an impromptu metal shoe rack will fit perfectly into the format of a large private house. However, in the conditions of the good old Khrushchev and panel apartments, she will also find a place. You can make it in half an hour - there would be a desire, material and tools.

This is what happens when a person with progressive design thinking slowly but surely brings his crazy projects to life.

Above, we have already considered an example of a homemade shoe rack from an ordinary pallet. Here, the source for the furniture accessory is the same, with the only difference being that it was noticeably "ennobled", generously adding rich colors.

Creative shelf for shoes in the hallway. It will probably find its place in an apartment or house of a person prone to design thinking.

You can make a shelf for shoes from pipes. The "recipe" is simply outrageous: take several long pipes, cut them into pieces of equal length, fasten them with a neat bundle to the wall - and, voila, your shoes are stored in a comfortable place and appropriate conditions.

Looking to update your computer desk? Do not rush to throw away the details of the old. The photo shows a vivid example of how to put into action even seemingly completely unnecessary things.

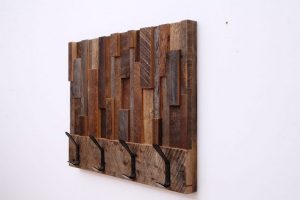
An aged wood motif is a good idea for making your own shoe rack. The main thing is not to overdo it with style, otherwise your design risks losing its designer charm and gaining a purely nominal value.

An option for a shoe rack in the hallway, which you can easily and quickly make with your own hands. The steel sheets used in this example are durable and will not allow your shoes to end up on the floor. One can argue, of course, about the spaciousness of this type of shelf, but we won’t: both the idea and its direct implementation are painfully good.

An example of a do-it-yourself shoe rack, for the manufacture of which you may need the ability to forge. In fact, a practical accessory in the hallway. If someone fears that shoes can be damaged in this way, we hasten to dispel your doubts: the product is carefully varnished at the very end and will not leave a trace on your shoes, boots, ballet flats and other types of shoes.

Look at this cute girl: her dad just made a shoe rack in the hallway with his own hands - and now the first shoes have taken their rightful place. A classic version of a popular home-made product that you can’t find fault with, even if you really want to.

Summary: We hope that you are convinced that the shoe rack in the hallway is easy to do with your own hands, and the end result can leave even standard store items far behind. The main rule is not to be afraid of your own imagination. A certain supply of creative courage in one direction or another and direct hands will allow you to seriously surprise your household and once and for all solve the problem of placing shoes in a small hallway.
Photo: moreidei.ru, ok.ru, uhouse.ru, vk.com, forumhouse.ru
In Russian apartments, as a rule, little space is left for the corridors according to the layout. In the future, households have to puzzle over how to make a small space as functional as possible. For things there is a universal spacious wardrobe. Nightstands for shoes have to be selected individually for each apartment, paying attention to the material of manufacture, as well as the design capabilities of the product.
A wide selection of various cabinets for shoes in the hallway is available on the market. We conditionally divide them into types.


Bona is a wide and spacious closet, usually with mirrors on the doors. Furniture of such a plan reaches a height of the level of human growth or a chest of drawers. It is easy to store boots, shoes, and sandals on its wide and capacious shelves. They are often made from materials - chipboard, MDF and a noble array.
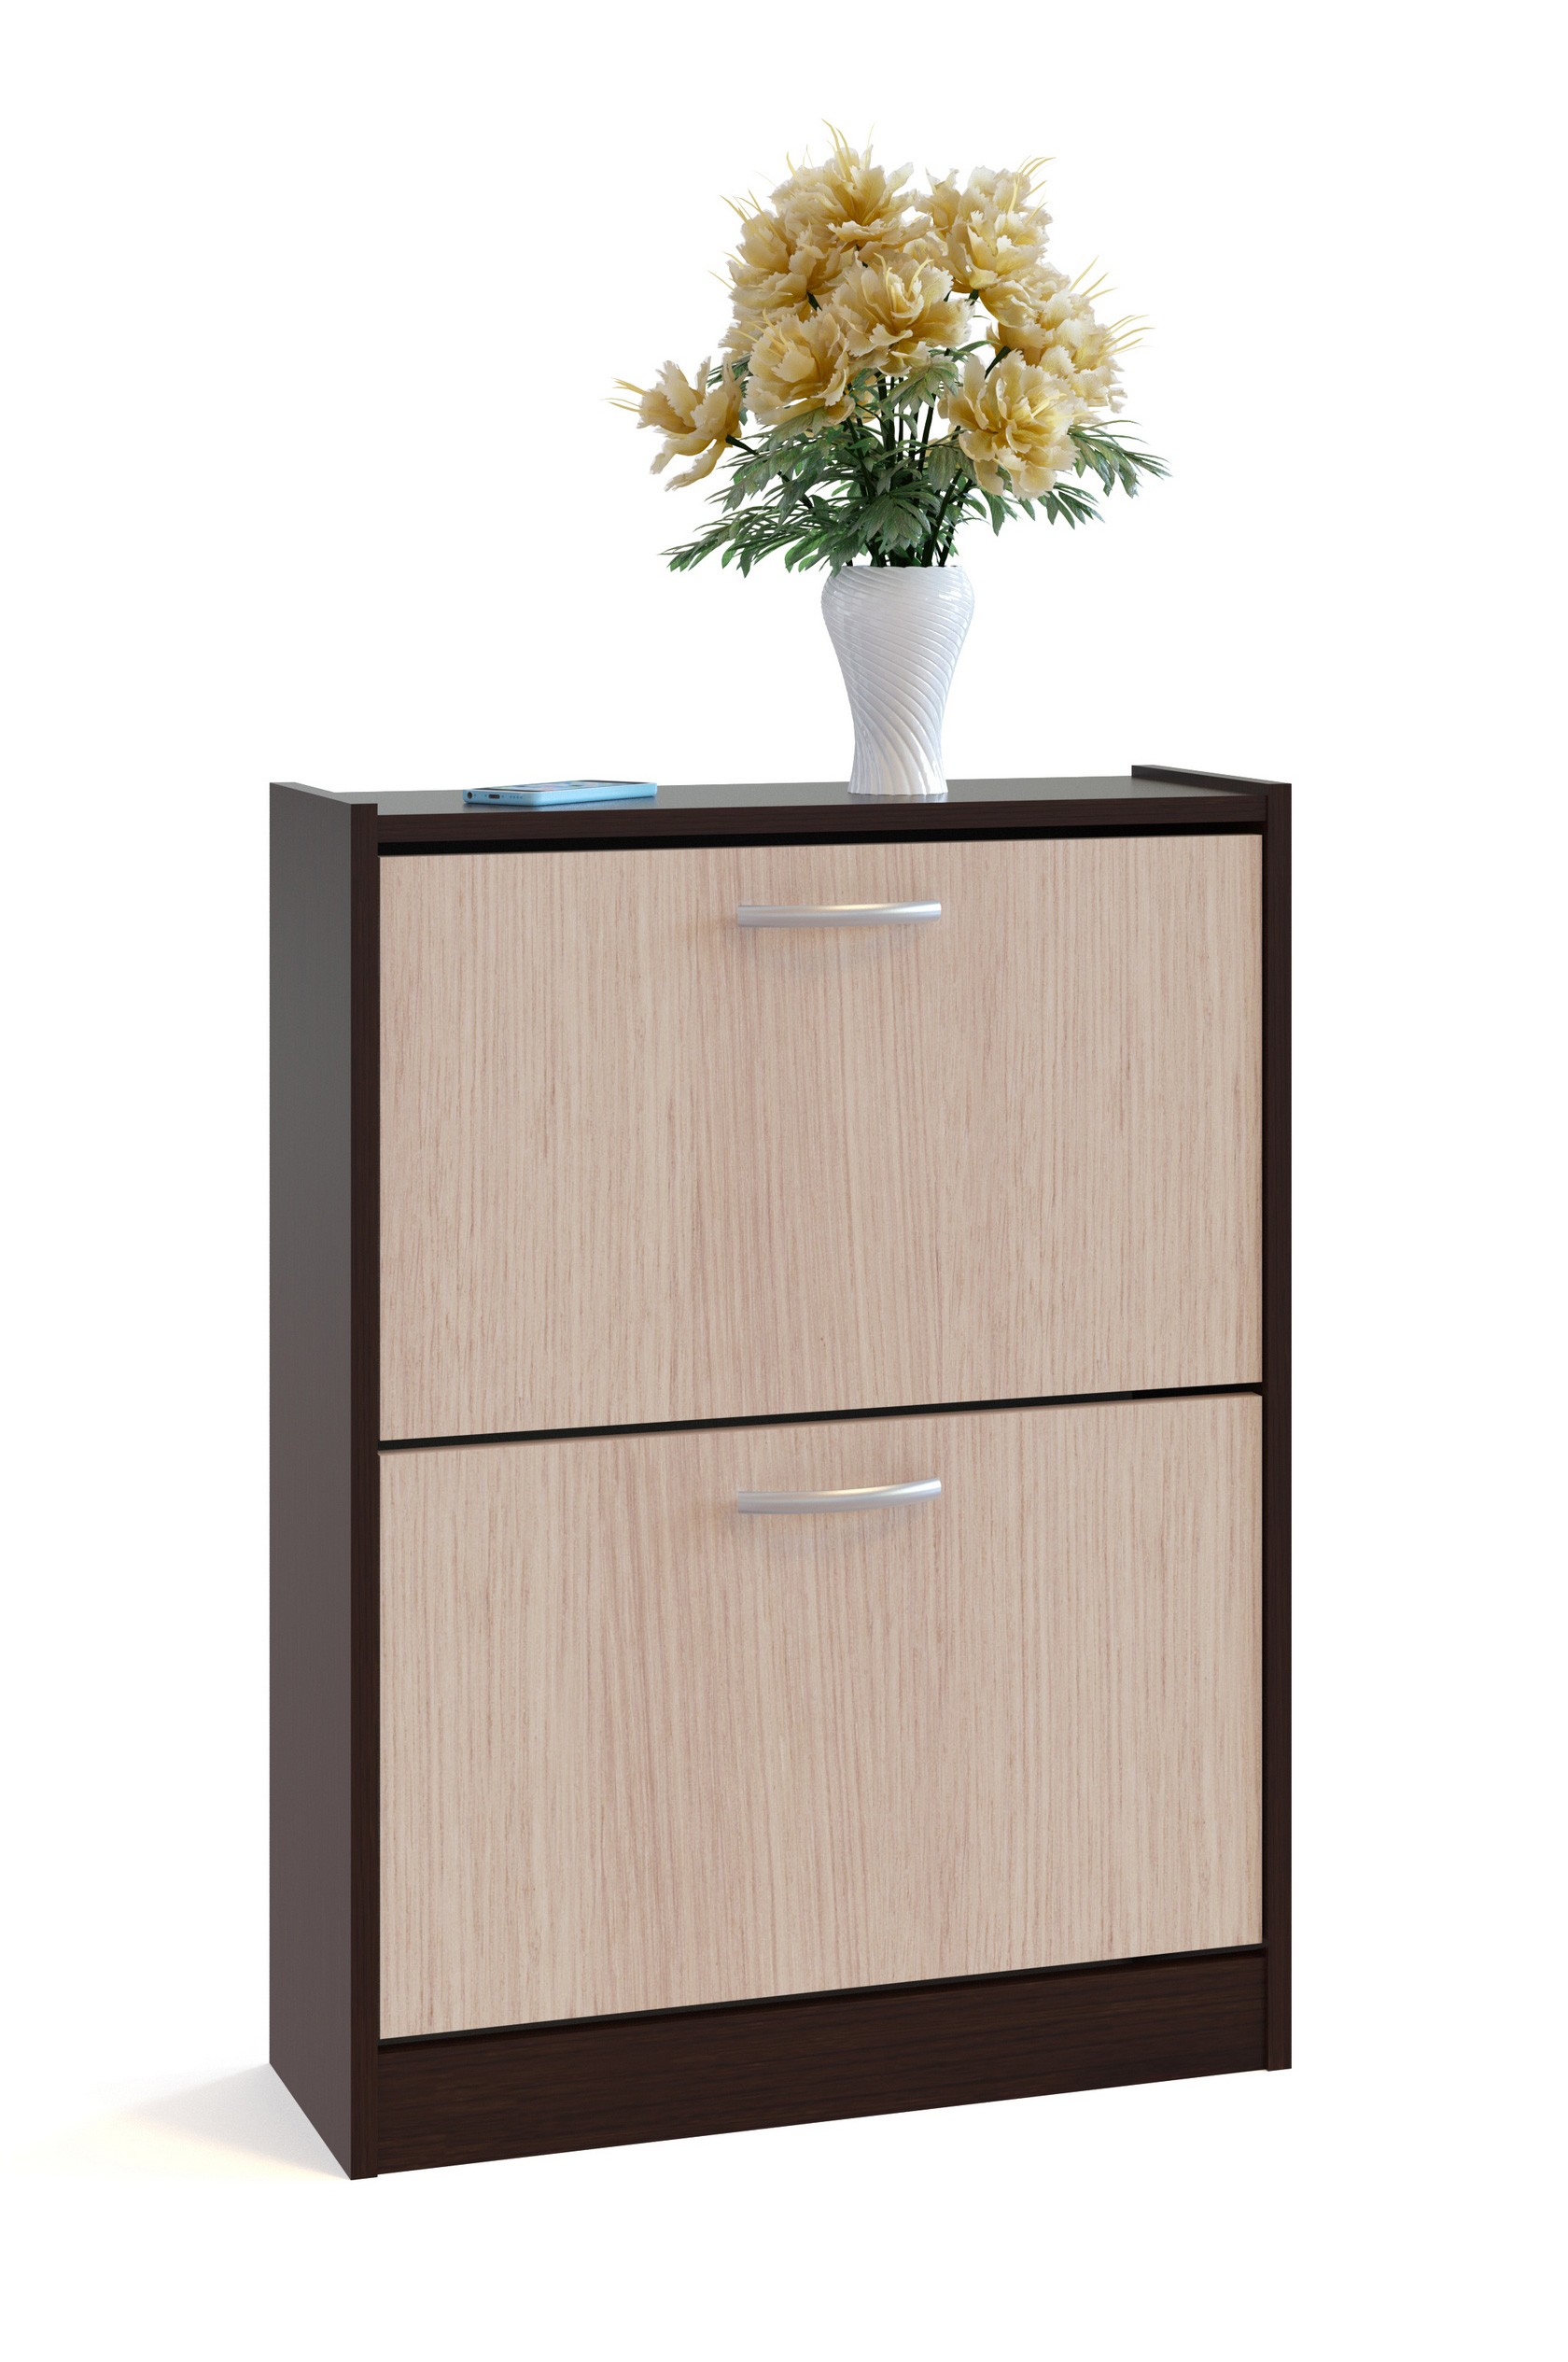
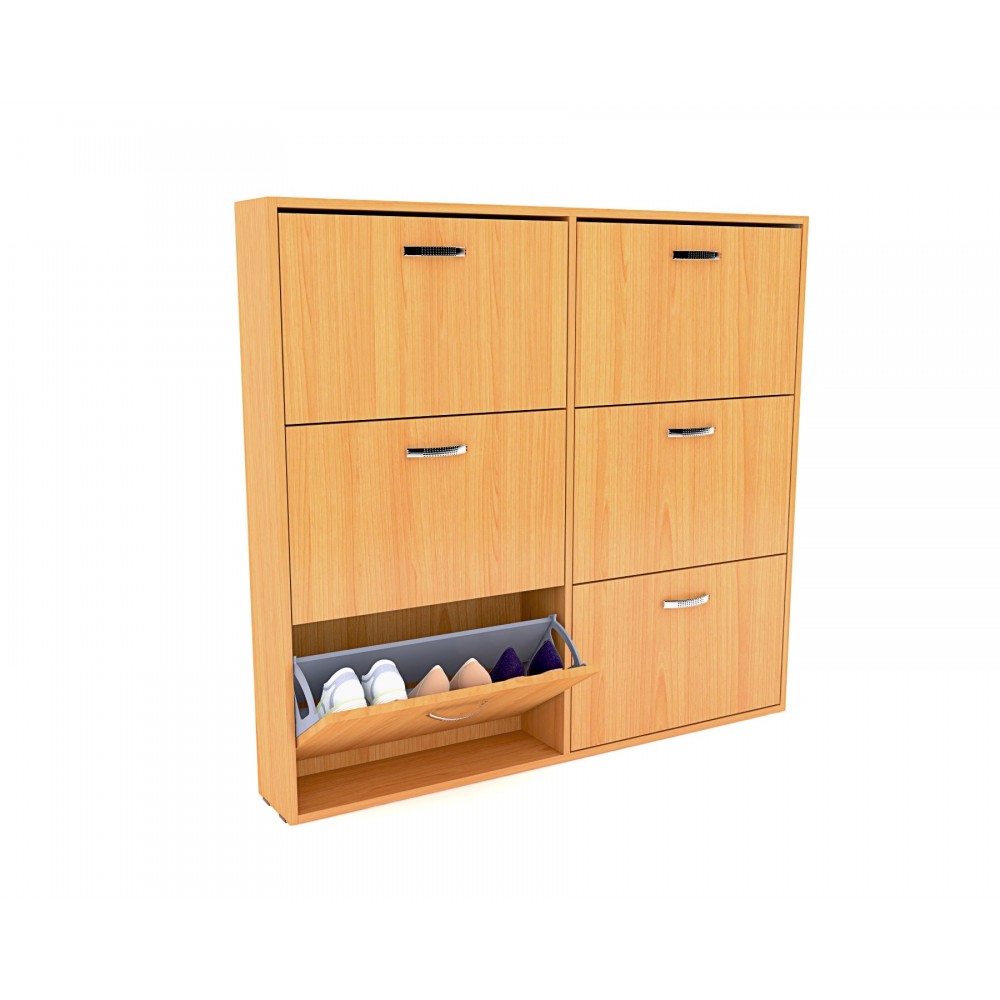
Cabinets "slim" - ideal for small apartments and narrow hallways. However, they do not remove boots or high boots. But a large number of low shoes will fit in there. The shoes are folded into retractable drawers at an angle of 45° or 90°. By this principle, open shelves are made. Closed options are made of various heights, often the doors are decorated with mirrors, further expanding the space of the corridor. They are mainly assembled from cheap and light chipboard or MDF.


Classic whatnots, popularly referred to as shoe cabinets, are furniture with spacious shelves. Such cabinets are made with doors or open, they complement low products with a banquette.
Higher options are made with shelves or drawers for small items. There are a sufficient number of variations on the market that differ in size and materials of manufacture.
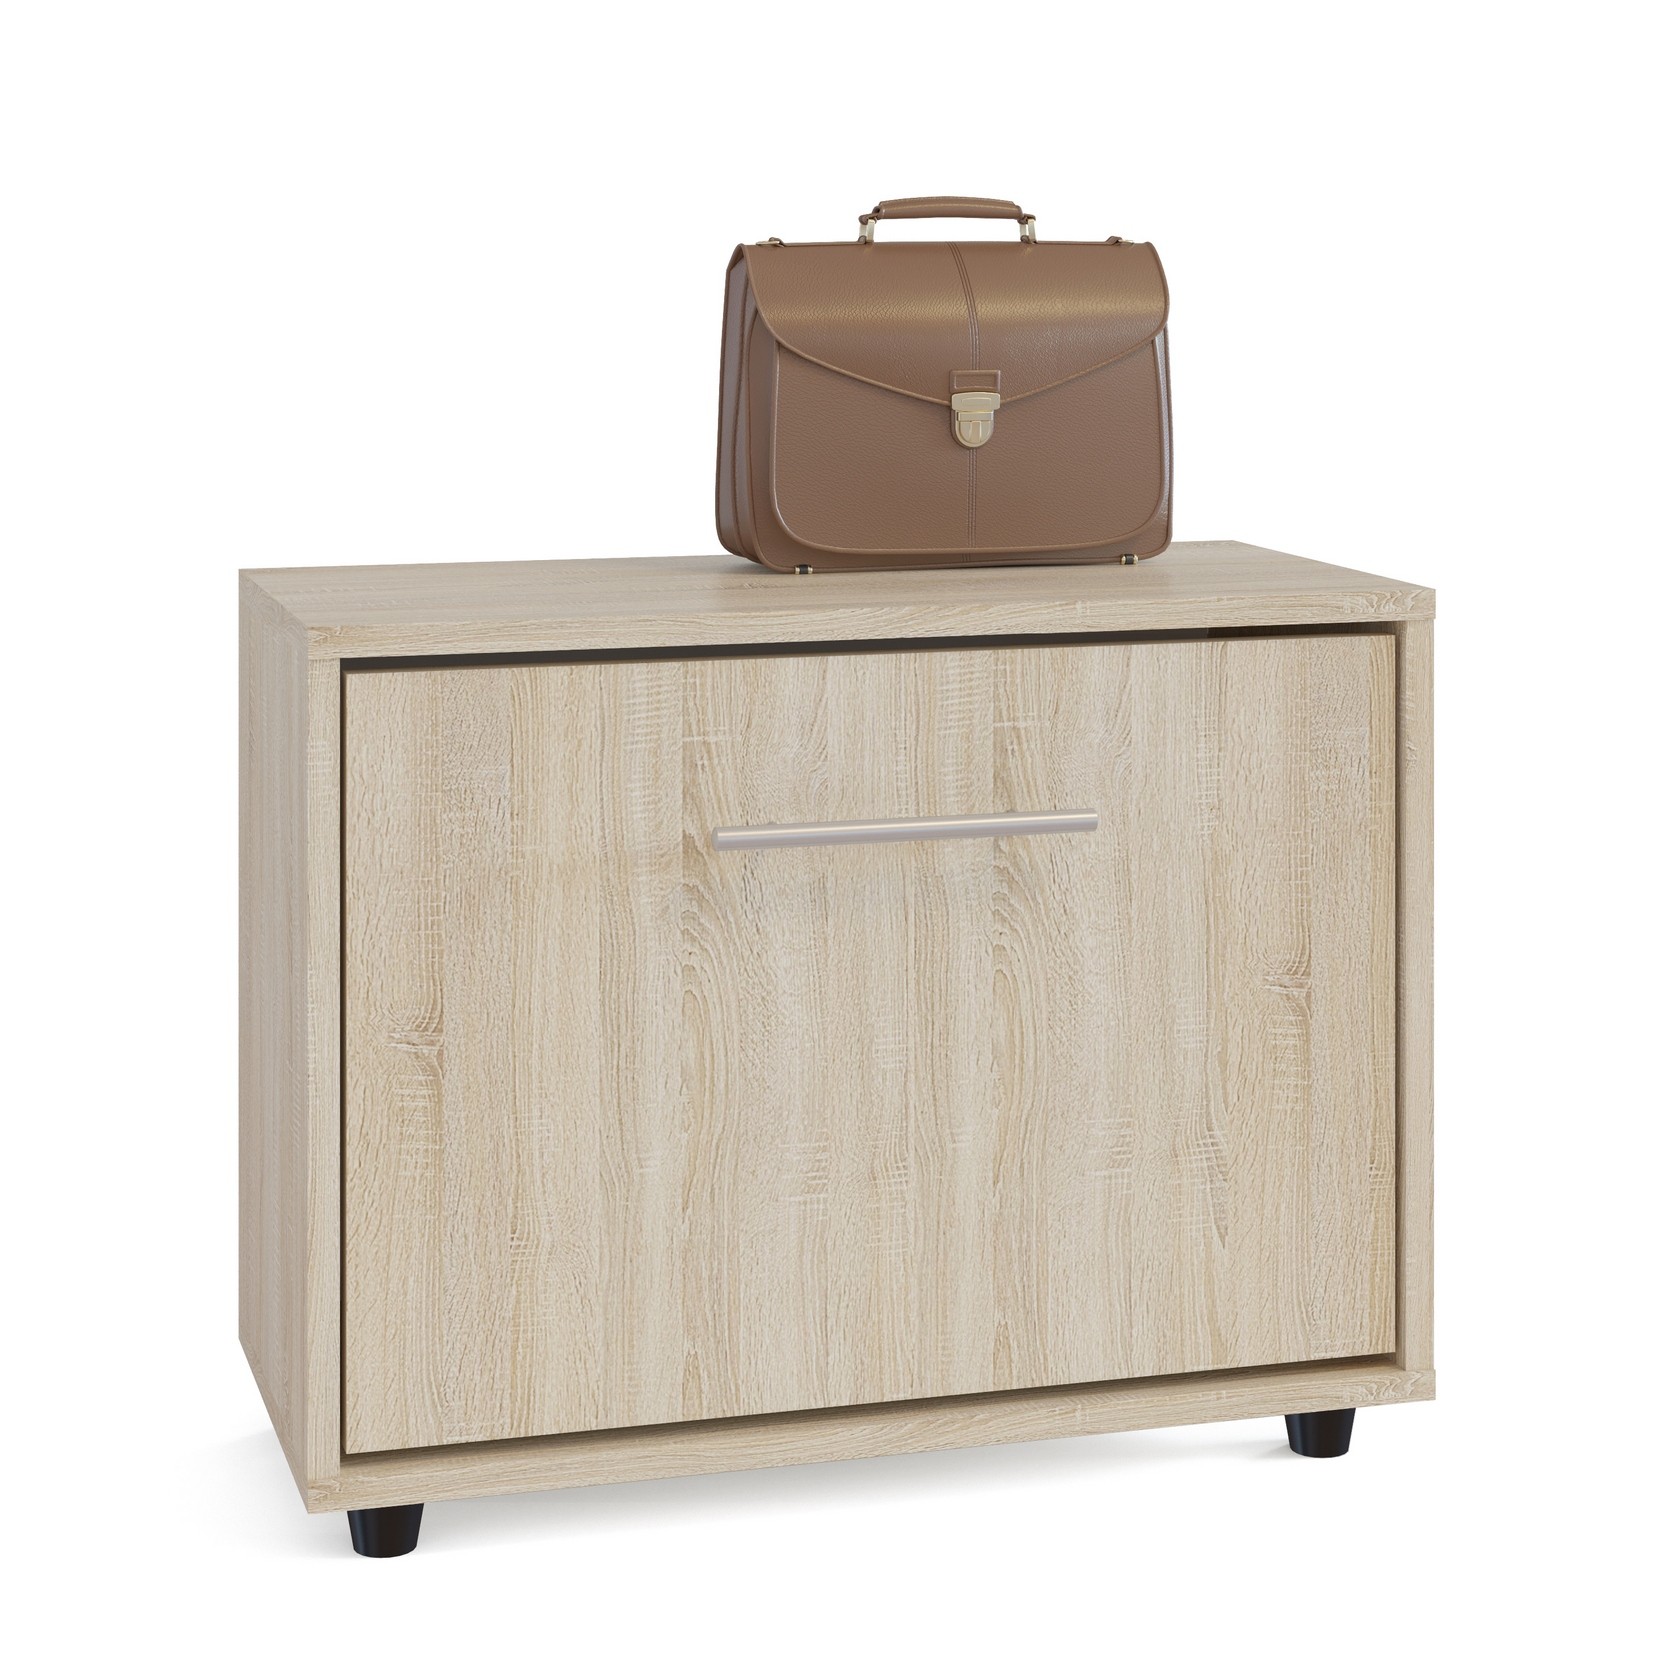
Shoe cabinets are small in size, with several shelves where only shoes, sneakers and shoes will fit. As a rule, such furniture is part of modular hallways, combined by manufacturers with hangers, ottomans and cabinets of various sizes. This option is most often made from inexpensive materials - chipboard and MDF.


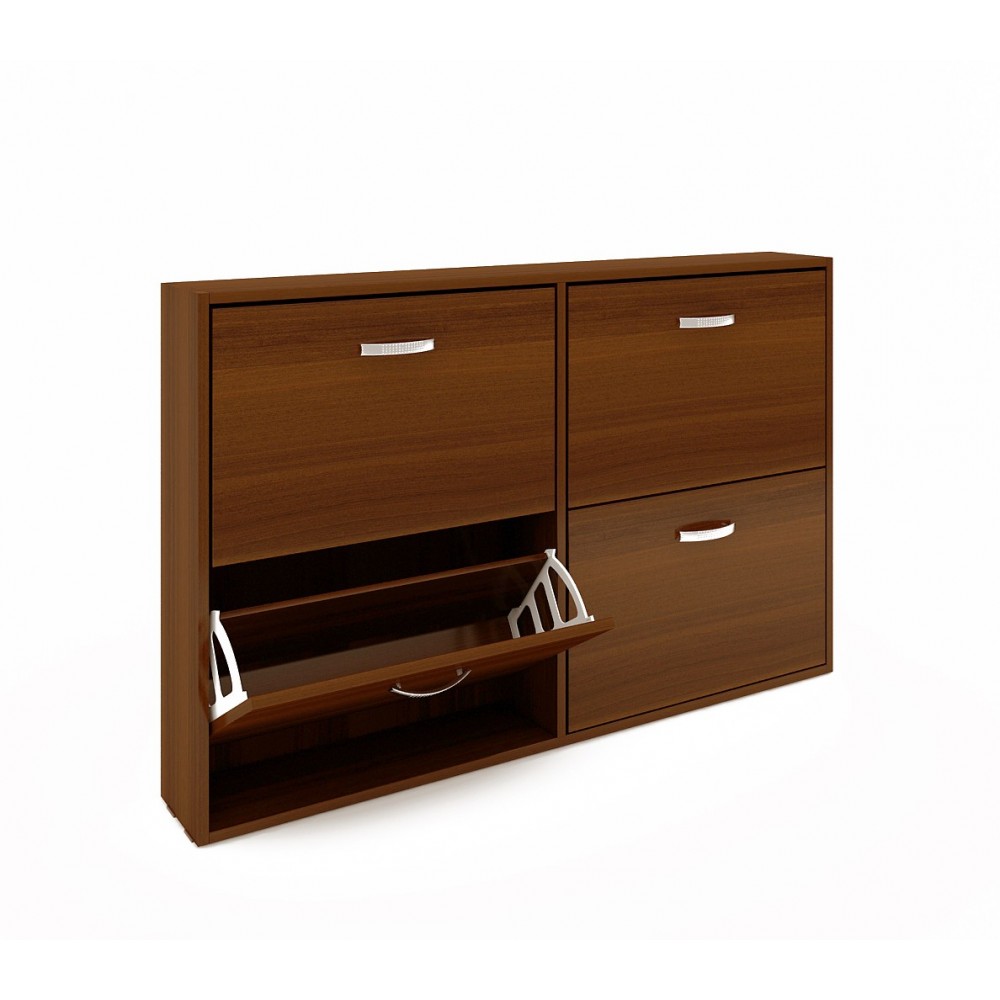
The wall-mounted shoe rack has a shallow depth of 10-15 cm, but the client determines its height himself. To prevent it from falling during operation, it is attached to the wall. As a result, the product does not take up much space in the hallway, but thanks to the cells that open according to the principle of a slim wardrobe, it will fit enough shoes and boots. Such furniture is made from chipboard or MDF, much less often from solid wood;
Combined options involve combining open slim shelves and closed drawers in one nightstand for shoes. This allows you to put the shoes on the open part immediately upon arrival home, and store the washed and dried shoes in the closed sections. Furniture is made from several materials - the bottom is metal, and the top is chipboard, MDF or solid wood.

There are curbstones for shoes and according to the material of manufacture:
- Metal;
- Chipboard and MDF;
- Plastic;
- Wood.
Sometimes furniture in the hallway is made combined and according to materials. At the bottom, metal is used for slim shelves, and above boxes with doors are assembled from MDF, chipboard or wood.


Shoe racks can be represented by different types of furniture. It could be:
- shoe stand;
- cabinet with drawers and shelves;
- shoe cabinet;
- nightstand;
- dresser;
- special rack;
- high shelf or small shelves;
- shoe cabinet.
In addition to size and color, important parameters that you need to decide on when choosing include the material used in the manufacture, as well as the configuration.
Shoe racks can be open and closed.
- The first option allows the shoe to dry quickly, and the disadvantages are represented by a significant accumulation of dust, accessibility to pets and not too attractive appearance.
- Closed models are aesthetically pleasing, equipped with doors that serve as full protection for shoes.
Characteristics of the types of shoe racks in the hallway
The classification of furniture for shoes is carried out not only by the type of material used in the manufacture, but also by design features, the principle of operation and appearance. MDF, chipboard-laminated type, forging, durable metals and high-strength modern plastic, wicker and natural processed wood are most often used for manufacturing.
Modern furniture for the hallwayChoosing a dishwasherTo make it cozy in the corridor too: how to choose the right wallpaperHow to make a mirror in a wooden frame yourself
Narrow shoe racks in the hallway
Standard models are usually 600-800 mm wide. A wider version is installed in spacious hallways and can have a width of 100-120 cm, which allows you to store any type of shoe and prevents deformation. Narrow models are designed specifically for small spaces, and their width, most often, does not exceed 13-18 cm, which makes installation convenient even behind a drop-down door. It should be noted that narrow designs are not designed to store winter shoes with high tops.
See also: Long-burning stoves: the principle of operation and selection criteria for giving
A compromise option is represented by narrow shoe racks with a width of 400-500 mm, in which the shoes are installed quite freely and dry well. Some manufacturers produce narrow and high exclusive models with a depth of 150-200 mm. Among other things, the consumer can order a non-standard model in shape or size, as well as make it on their own using standard drawings and diagrams.
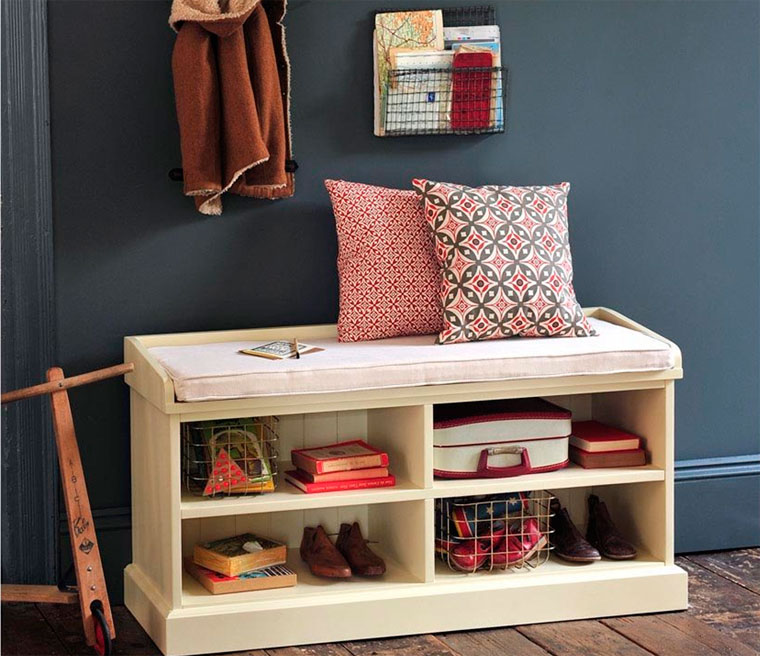
Shoe cases with a seat
Designs equipped with a seat, which is most often sheathed with soft upholstery fabric, velor or leatherette, are widely used in fairly spacious rooms. An ottoman shoe rack or a bench shoe rack is the perfect solution for small hallways. The advantage of such models is the presence of seats installed on top of the pedestal, which will save usable space.
The seat can be equipped with a backrest, and this design resembles a small sofa in appearance. Additional equipment of models with a seat is most often represented by sections for umbrellas and side shelves.
Racks and shelves for storing shoes
The open type of shoe storage includes several options that differ in design features and are presented:
- frame systems in the form of a set of racks and racks made of wood or metal. Such systems can be easily assembled and disassembled, they do not take up much space, which is especially important for small hallways;
- a modular system containing compartments, shelves and sections that are easily and quickly assembled independently according to the principle of the designer;
- mesh system, characterized by lightness and compactness, which is very important when arranging small hallways.
Panel systems are popular, very stylish, but expensive designs that are easy to use and can become a real decoration of almost any interior.
Ideas for storing things in the hallway (video)
Shoe design
A shoe rack of any size and type serves as part of the furnishing of the room, and can be not only open, corner or wall-mounted, but also poured in style. Designs can be made in the style of "modern", "rococo", "classic", "baroque", "hi-tech", "Provence" and "country", as well as "fusion".
- designs that have an original appearance and carved legs are ideal for decorating a rococo hallway and will serve as a good addition to elegant pieces of furniture;
- for a private household or an apartment decorated in a decorative baroque style, a beautiful forged shoe rack is best suited, the dimensions of which are selected based on the area of \u200b\u200bthe hallway;
- the entrance hall, made in a minimalist style, is perfect for the purchase and installation of simple and discreet, plain iron models equipped with convenient drawers.
Especially popular in recent years are light and practical, incredibly attractive wicker designs that allow you to decorate the hallway in the Provence style.

How to make a wooden shoe rack in the hallway with your own hands
Traditionally, the simplest and cheapest shoe storage option is a do-it-yourself wooden structure. Wood is a natural, very convenient and aesthetic material, characterized by environmental friendliness. Among other things, shoe structures made of wood and treated with special antiseptic compounds are durable and suitable for installation in halls decorated in almost any style.
See also: How to choose a closet in the hallway
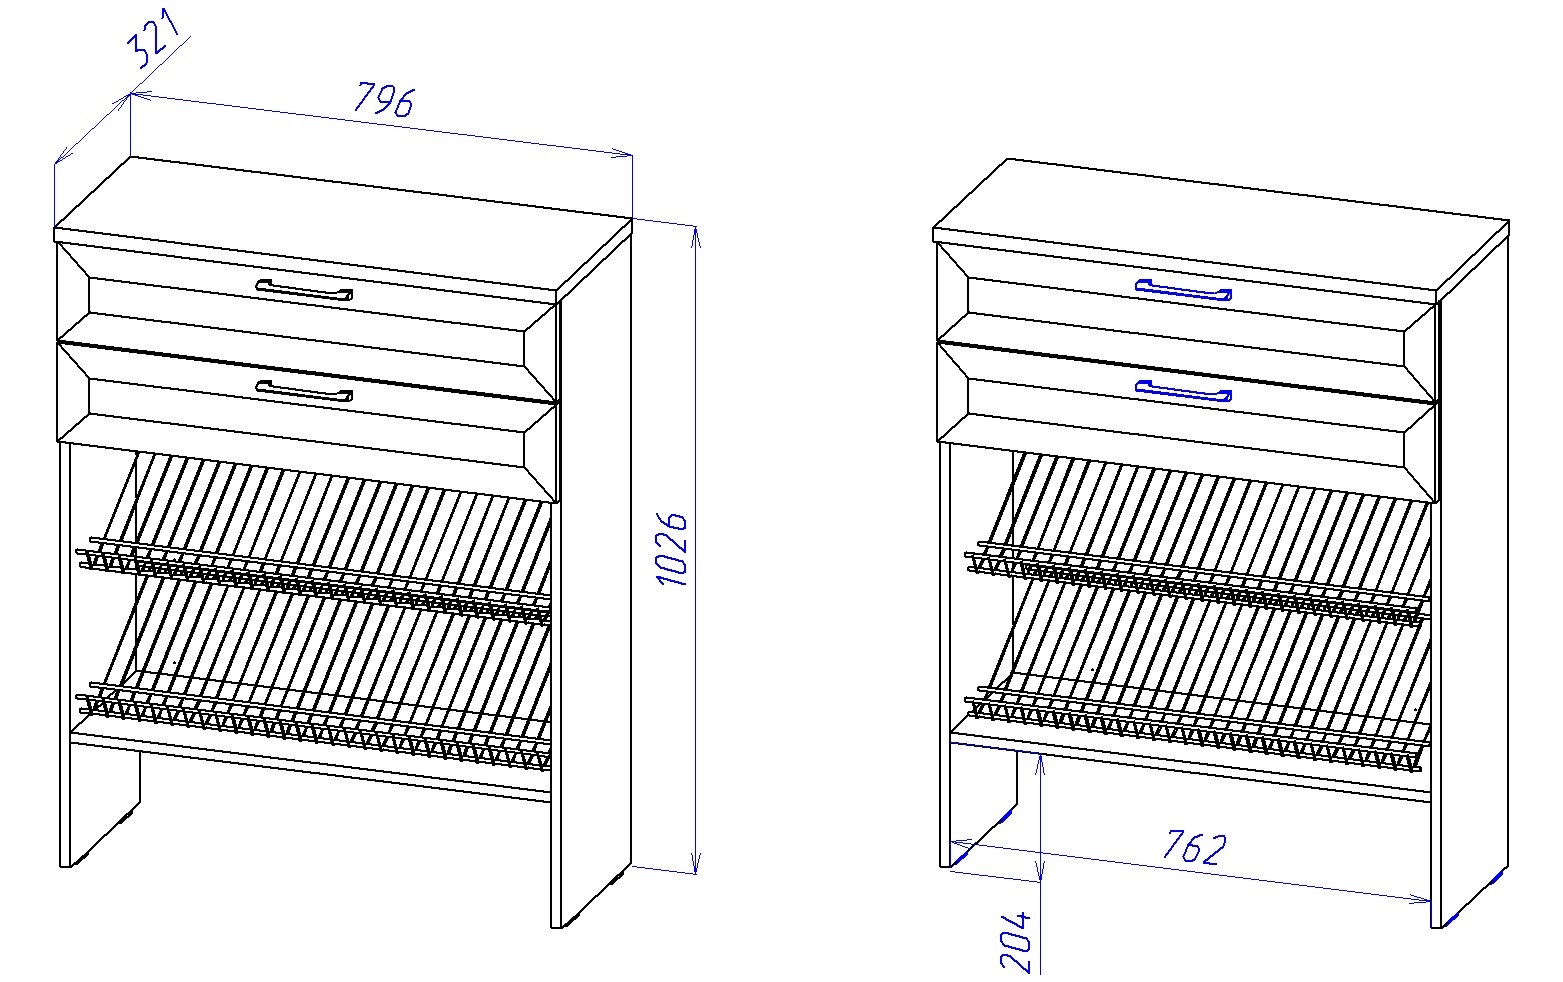
Preparation of drawings and diagrams with dimensions
At the first stage, a design sketch is developed. You can take as a basis ready-made schemes and drawings of such a piece of furniture for the hallway, or develop a sketch with a designation yourself, based on the size of the room and its layout. In the drawing being executed, it is imperative to display the number and dimensions of shelves or other elements, as well as the overall dimensions of the entire structure.
As a material for self-made shoe racks, you can use MDF boards, chipboard boards, plywood sheets or wooden boards. One of the most durable and easy-to-use materials is plywood sheet, but even moisture-resistant plywood needs additional processing and coloring. The high cost of MDF boards allows only the front part of the furniture to be made from such material, and the body of the structure, as a rule, is assembled from fairly budget chipboard boards.
Manufacturing steps
For the manufacture of a design made in the style of minimalism popular with designers, it is necessary to prepare the basic materials and working tools presented:
- furniture metal corners in the amount of eight pieces;
- self-tapping screws;
- kings;
- hinges for hanging doors in the amount of four pieces;
- metal mesh shelves, the number and size of which directly depend on the prepared sketch;
- handles for opening doors;
- construction tape measure;
- marker;
- screwdriver or hand drill;
- screwdriver;
- grinder or sandpaper;
- a hacksaw for wood or an electric jigsaw;
- hammer;
- pliers.
See also: A variety of types of roofs by design for private houses
All elements of the drawing are transferred to the material selected for the manufacture of wooden shoes. In accordance with the markup, the parts are cut with a hacksaw. After all the details are cut out, the sidewalls are drilled with the shoe construction being performed. In the drilled holes, it is necessary to securely fix metal drawers with the help of confirmations, the end part of which must also be drilled. If the selected depth is 55-60 mm, then the diameter of the drilled holes should be 0.5 cm, and in the sidewalls - 0.8 cm. The coincidence of all the holes made must be checked.

At the next stage, it is necessary to securely screw four metal furniture corners to the lid. The remaining four similar pieces of furniture should be fixed on the back wall of the manufactured structure, which will allow them to be used as convenient wall fasteners. After the lid is screwed on, it is required to connect all the remaining cut out elements of the shoe structure to each other.
It is very important in the process of self-assembly to check the geometry of the manufactured piece of furniture without fail - the diagonal direction must be the same.
On the front part of the rack in the form of a dryer, it is necessary to make markings for the installation of furniture hinges. After screwing them, you need to hang the doors of the shoe rack. Then a place is marked for the installation of decorative elements, if they are provided for by the sketch, and the fittings are screwed onto the doors.
Despite the fact that the dimensions of the product entirely depend on personal preferences and the size of the hallway, the standard distance between the installed mesh shelves should not be less than 30 cm, which will ensure ease of use of the structure. Among other things, shoe shelves made on the basis of a metal mesh will be more convenient if they are installed at a slight angle.
How to assemble a shoe rack with your own hands (video)
Final works
At the final stage, it is necessary to check the completed structure using a building level, and also, if necessary, sanding and painting if moisture-resistant plywood was used for manufacturing. As practice shows, if there is a need to perform the original design of a spacious hall, then it is best to order a piece of furniture, having previously selected the design and optimal configuration that matches the style of the room.
Attention, only TODAY!
Features of work
A self-assembled shoe rack (a photo of successful work is presented below) will become a real decoration of the hallway. The design can be made according to the classical scheme or using a creative approach. The choice depends on the taste preferences of the owners of the house.

Before starting work, it is necessary to carefully plan the type and dimensions of the future product. Many owners, due to lack of space in the hallway, store seasonal shoes that are not currently needed in closets, pantries or on the mezzanine. This causes some inconvenience. With the change of season, you will need to get such shoes from high shelves.
Some do not pay due attention to the storage of their shoes, boots, sneakers at all. In this case, their service life is significantly reduced. Left in the hallway or boots dumped at random, slippers quickly lose their attractive appearance. Deciding to put them on, a person is faced with the fact that the skin or textiles are deformed, wrinkles appear on them.
To prevent this from happening, it is important to organize the right one. When creating a project for future furniture, you need to take into account the dimensions of the room, as well as the number of boots, boots and shoes that the owners of the house or apartment have. You can make shelves for shoes with your own hands, which will consist of several sections. On the open parts of the structure, shoes and sneakers are left, designed to be worn in the current season. The rest of the shoes are hidden in closed cells. In this case, the material from which the structures are assembled can be different.
Varieties of materials
Most often they assemble a wooden shoe rack with their own hands. This is the classic version. Wood is environmentally friendly, beautiful texture. It is easy to process. However, its cost can be quite high. If you choose the wrong type of wood, it will be too hard, which will not allow it to be processed with hand tools, or, conversely, too soft. This creates a lot of difficulties. If the wood is too soft, it will quickly become dented and scratched. This requires restoration.

Wood does not tolerate moisture. Therefore, only dry shoes are stored on such shelves. If desired, you can increase the resistance of wood to adverse environmental influences. To do this, apply varnish, paint. If you want to make a shoe rack with your own hands from wood, you need to pay great attention to the processing of the material.
Cheaper to make such furniture from plywood. It is also easier to cut and assemble into a single structure. However, it is worth considering that this material weighs more than wood, while it actively absorbs moisture and collapses under its influence. Many masters choose plywood, since in this case special skills are not needed. The work is done quickly and without much difficulty.
Another popular option is a chipboard shelf. This material has a protective coating and does not let moisture in. At the same time, high-quality chipboard sheets are not afraid of temperature changes. The cost is relatively small. After assembling the structure, no additional grinding or painting is required.
However, chipboard also has some disadvantages. If the protective layer is damaged, the structure of the material will quickly collapse. In terms of durability, chipboard is inferior to plywood and wood. Such material is optimal for those who want to build a shelf quickly and inexpensively.
Other options
They construct a shelf for shoes with their own hands from wood more often than from other materials. However, this does not mean at all that you need to be limited only to this option. One of the most durable designs is a metal shelf. It is quite heavy material. It requires proper handling. Otherwise, corrosion will appear on it.
The disadvantage of metal is the difficulty of working with it. You will need to prepare special tools (for example, welding) to assemble such a product. The master must have certain skills when working with metal.

Spectacular shelves are created from forged elements. They can be purchased at a specialized store and put together by welding. However, it is much easier to build such furniture from metal pipes. They are simply fastened, like a designer, with fittings. You can combine this material with metal or polymer meshes, as well as wood.
Some craftsmen create their own shelves for shoes from pipes. The design looks unusual, it is relatively inexpensive. Plastic pipes come in a variety of shapes and sizes. They are not afraid of changes in temperature and moisture. The shelf will be durable. However, the disadvantage of this design is its appearance. Not every interior is suitable for such a product, as it looks cheap. But even a child can build such a shelf.
Sometimes plastic is used as a material for such furniture. It is also inexpensive. Easy to clean and not afraid of moisture. However, shelves from it can only be open. Otherwise, mold may appear on the shoes.
improvised means
An interesting and unusual look is a do-it-yourself shoe rack made from improvised materials. This is cardboard, fabric, etc. The work does not take much time. If the shelf needs to be done quickly, the option using improvised means will be optimal.
Different designs are created from cardboard. With proper handling, this product will last a long time. To fasten the parts, ordinary glue is used. You can make a bookcase out of cardboard. Cells should be small. This will allow you to arrange all the necessary shoes in ascending order of their size. The largest boots and boots should be placed at the bottom. Moccasins or slippers will be stored at the top.

The cardboard chest looks original. To do this, simply take a large box of household appliances. Cells are made in it (also made of cardboard). Shoes are installed as if this shelf was simply turned flat. The lid will cover the shoes from dust. It is recommended to decorate such structures with vinyl wallpaper or a waterproof film. This greatly improves the appearance of the product, and also extends its life.
When deciding how to make a shoe rack with your own hands, you can consider another interesting option - from fabric. This will require a canvas to which the pockets are sewn. They can store children's shoes, slippers or just light summer shoes.
You can make a shelf from old bedside tables and trellis, from pieces of building materials that remained after the repair. Pallets, plastic bottles, grates from an old refrigerator, etc. are also suitable for this. The author's imagination is practically unlimited.
Varieties of design
When creating the design of a shoe rack in the hallway with your own hands, you need to choose the right design - stationary or portable. If the material is heavy, the shelf will be fixed in one place. Lightweight structures can be moved during the cleaning process.
Also, the product can be closed or open. In the first case, the shoes are hidden from view. It is in a design with closed doors, it can be installed not only in the hallway, but also in the room. Shoes are stored here for a long time.

Open structures are located in the corridor. Here, on beautiful shelves that do not have doors, they place shoes that are often used. Free air circulation allows the use of various materials in the process, including plastic. The shoes will dry quickly, and there will be no unpleasant odors in them.
Considering the options for how to make a shelf for shoes with your own hands, you should determine its type of installation. The bookcase can be floor-standing or wall-mounted. The first option is more often chosen for hallways with enough free space. Floor structures usually have significant dimensions. You can make similar furniture with a seat. This will allow more rational use of free space.
Wall structures are smaller. They can be mounted even in a narrow corridor. At the same time, cleaning under the shelves will not cause difficulties. The right design will visually increase the space in the room.
Creating a Wooden Shelf
To make a shelf for shoes with your own hands, you need to consider step-by-step instructions. One of the most popular varieties is wood products. First, a drawing is created. It indicates the dimensions of the furniture, as well as its location in space. Every detail must be carefully considered.
To create a shelf, boards about 30 cm wide are suitable. Their thickness should be 2-3 cm. First, you need to cut out the side walls of the product. Their height corresponds to the created drawing (average value 70-80 cm). After that, prepare the crossbars. They must be the same. The average length of the crossbars on which the shoes will be installed is 65-80 cm.

When all the blanks are prepared, they are processed with sandpaper. It is desirable to cover the wood with an antiseptic composition. Wet shoes can cause fungus to develop on them. Shelves are attached between the side walls. For this, metal corners and self-tapping screws are used.
You can prepare small support bars, the length of which will correspond to the width of the shelves. They are fixed with self-tapping screws on the sides of the product. Then shelves are laid on the support bars. When the assembly is completed, the finished product is varnished or painted in 2-3 layers.
Crates and pallets
It is quite possible to make a shelf for shoes with your own hands from various improvised means. For this, old unnecessary boxes or pallets are often used. Drawers are more often used for open construction. It will be possible to store high boots and boots in it.

Several boxes need to be sanded by hand or with a grinder. Then they are installed one next to the other in random order. One box can stand on its long side, and the other on its short side. Create multiple tiers. The boxes are bolted together.
If the shelves turned out to be high, they need to be additionally attached to the wall. Otherwise, they may fall under the weight of the shoes. To do this, holes are drilled in the wall at the corners of the cabinet. Dowels are driven into them, with which the structure is attached to the base.
Another interesting option is the use of pallets. This option will look spectacular both in the country and in the apartment. The pallet must be cut in accordance with the drawing, the material must be sanded and covered with a layer of paint. It is optimal to choose a separate shade for each tier. The resulting parts can be installed one on top of the other. They are fixed with self-tapping screws.
From above it is appropriate to equip the seat. To do this, a pillow is placed on the pallet or the surface is covered with a layer of foam rubber. The fabric that is being laid must be waterproof. Otherwise, it will quickly become dirty.
A hanger is an obligatory attribute of any room, be it an apartment, a museum or a theater, which, as the proverb says, begins with it. The person who entered inside first of all wants to leave his jacket, jacket, etc. somewhere, so the presence of a hanger is simply necessary, another question is whether it is worth using a structure created by yourself?
There is no reason to refuse such an opportunity, since the main thing is to provide ease of use and aesthetic appearance.
Is it worth it to try it yourself?
Before we figure out how to make a clothes hanger with our own hands, we list some of the positive aspects of this design solution.


The most striking pluses are the following:
- Having seen a high-quality hanger, made personally by the owner of the apartment, guests will be impressed and will appreciate his talent;
- The cost of new hangers can reach decent amounts, and a homemade hanger will save money for really important purchases;
- Manufacturing requires minimal tooling skills;
- As a material, you can use any unnecessary items that are at hand and lie without any use;
- The required toolkit does not include any special tools.
What are the advantages of floor hangers?
Having decided to create a product for outerwear with your own hands, you need to choose what type the finished design will have. All hangers are divided into two types: wall and floor. Each of them has a number of advantages and disadvantages, starting from which one or another type should be preferred.


In what cases is a hanger resting on the floor of the hallway suitable?
To begin with, it should be noted that not every apartment will fit in this room. However, if there is sufficient space or the wardrobe is fenced off separately, then a floor clothes hanger is a great option.
We list a number of features due to which many prefer them:
- Clothes hanging on the hangers of the wall structure will dry quickly and will not stretch, and the collar and lining will not tear;
- A product whose width reaches at least one and a half meters can easily accommodate the clothes of all family members for the season, freeing up space in the closet for other things;
- You can perfectly attach storage for shoes to the floor hanger, which will greatly simplify the process of arranging a hallway or wardrobe, and will also save additional square meters;
- Proper calculation of the dimensions of the product will not allow clothes to be damaged on the wall of the room;
- The floor hanger is mobile and will not become a problem when moving furniture in the hallway.
The manufacturing process of the floor structure
Having a desire to make a hanger yourself and taking the necessary tools, you can start creating a product.
First, of course, you need to think about the dimensions and draw up at least a minimal drawing. Then you need to choose the material, which is perfect for wood of any hardwood.
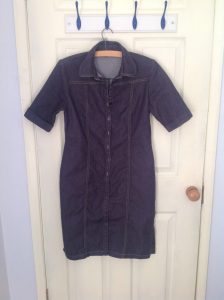
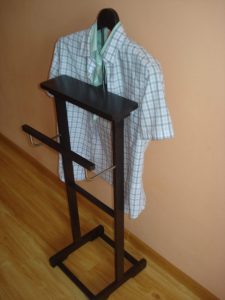
The new product will look like a suit hanger, but with a greater height and a trouser bar moved to the upper end, on which hangers are to be hung. In place of the tie element and handles, we mount a shelf, and place the shoe compartment at the bottom.


On numerous photos of the hanger, you can see at least one of the possible options for a drawing drawing for this design.
So, a floor hanger is a great solution for spacious hallways and wardrobes, which performs its functions perfectly and has an impressive list of positive qualities.
It is not difficult to assemble it with your own hands, the main thing is to put a little effort and soul into your product. Then it will delight you and the guests of your house, day by day fulfilling its task one hundred percent.
DIY clothes hanger photo


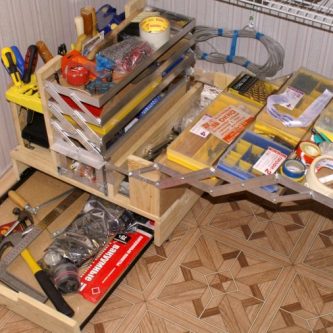 DIY tool box (69 photos): instructions for ...
 Do-it-yourself comfort in the house - the basis for creating a comfortable ...
 DIY bead curtains (50 photo ideas): step by step ...
 House layout 6 by 6: layouts and projects of one-story and…
 Billiard table with your own hands: how to make a quality ...
 Polycarbonate Roof - Installation Instructions and…
How to choose a narrow cabinet for shoes
The main criterion for choosing a bedside table should be its size. Moreover, the option you like is chosen a little less measurements, but in no case more. So the purchase will definitely fit into the place prepared for it.
As for the material of manufacture, first of all, the client must rely on financial capabilities. The cheapest, but not very practical, is plastic. Metal options are durable, but open metal shelves do not always meet the aesthetic requirements of the buyer.
Furniture made of materials such as chipboard and MDF will externally decorate the hallway, hide all the shoes and boots in the drawers from sight. However, if you put wet sneakers or shoes into products made of chipboard and MDF, then it will quickly lose its appearance and fail. In closed cupboards with undried and dirty shoes, a persistent unpleasant odor will certainly appear. At the same time, chipboard and MDF will quickly absorb it.


Options for a hallway made of environmentally friendly material - solid wood - are more expensive.
The durability of the cabinet depends on the quality of production and proper operation. It should be checked whether a special water-repellent coating has been applied to the surface.
Combined cabinets will be an excellent option in any hallway. Open metal slim shelves are perfect for boots, which, upon arrival at the house, can be immediately removed and put away to dry. In the closed shelves above, you should store washed and dry shoes for going out or another season. Such options are durable and comfortable to use. The material of the upper part of the product is chipboard, MDF or solid wood.


When choosing a cabinet in the hallway, you should focus on the composition of the family and its needs. The more shoes you need to put in the closet, the more spacious it is to choose a product. At the same time, a small version with a couple of shelves is quite enough for one person.


Additional pieces of furniture - banquettes, tables, drawers and other elements - should be chosen as needed. For example, a cabinet with an ottoman in the hallway will come in handy for older people, but it is unlikely for a young couple. Bench takes up space that can be spent on an additional shelf. The latter is needed by young fashionistas more than an ottoman.


Advantages and disadvantages of a narrow cabinet for shoes
The undoubted advantage of such products is their dimensions, thanks to which in a small apartment a small hallway can be made functional, and its appearance - aesthetic.


But compact bedside tables have a drawback - you can’t remove high boots or boots in them. The slim drawers only include shoes or sneakers. On shelves installed at an angle, high shoes cannot be placed. Therefore, along with this furniture in the house, you will also need a place to store the remaining boxes.
Video: DIY shoe cabinet
50 photo ideas for shoe cabinets in the hallway:
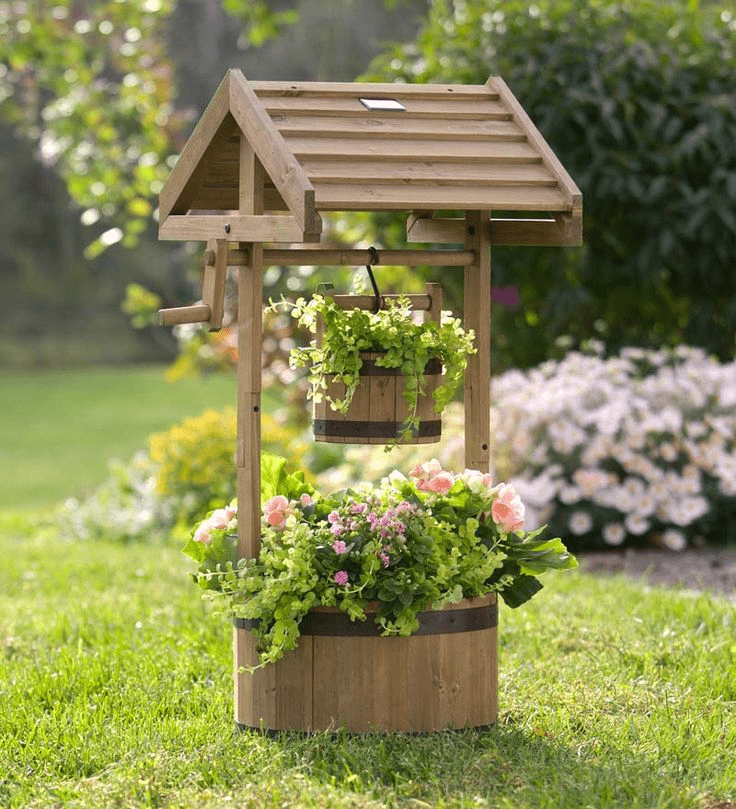
DIY garden crafts (photo)
To create an original art object for your garden, it is not necessary to run to the store to buy material. You can make your new creations without them. Take a look around. After all, for sure in your household there is something that you have not used for a long time for one reason or another.
It can be a broken bike, old furniture, a leaky bucket, worn out tires and tires, accumulated plastic bottles, leftover building materials, basins, barrels of unnecessary shoes and much more. It is very simple to give new life to all these used things, the main thing is not to be afraid of experiments.

First you need to decide for yourself in what style you want to see the design of your garden. In the style of Provence, hi-tech or modern, or you prefer minimalism. Taking into account the characteristic features of each direction, as well as your own preferences, you should proceed to its design and decoration.
DIY crafts for the garden can be not only an aesthetic addition to your garden, but also carry a functional component that can be useful in the household.


Natural materials will also help decorate your garden. Field boulders, river stones, tree trunks and their stumps, clay, glass, etc. All this will bring beauty and improve the habitat on your site.
The most important thing is the pursuit of perfection, it is this that will help create a unique and beautiful decor for your site.
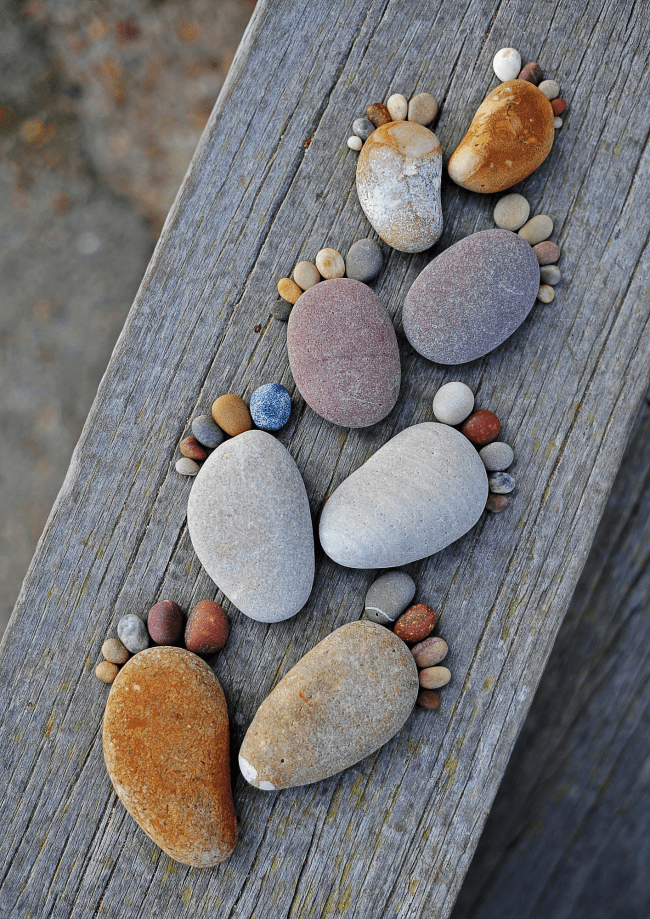
Stones for garden decor
Flat stones are a real find, especially if they are large. You can draw anything on them. And most importantly, making crafts for the garden with your own hands from stones is exciting and fun, especially with children.
Large stones can simply decorate the garden, and medium-sized stones will serve as excellent helpers in the garden. It is necessary to take pebbles in the shape of a certain fruit or vegetable, draw it on it and put it in the garden in accordance with the drawn one. The garden and garden will immediately be filled with bright colors.


What can be done from an ordinary plastic bottle
Products from plastic bottles, which received a "second chance", long ago "won" the hearts of environmentalists and ordinary inhabitants of the Earth. Very often, people by any means try to involve the public in the environmental problem of recycling plastic waste, volunteers now and then carry out campaigns to clean up natural areas and parks - they explain to people that the right attitude to dishes made of this material will help keep our world cleaner. Many talented designers have made a name for themselves by creating plastic art objects.
How you can use plastic bottles to make the whole world talk about you
Nebraska resident Garth Britsman succeeded. In his hometown of Lincoln, he created a canopy for his car from 1,500 used plastic bottles, on the bottom of which he poured specially colored water of blue, yellow and green, in such a way that the canvas resembles a flower carpet. The process of creating the "kinetic ceiling" took more than 200 hours of work. The construction reminds of itself every time it rains or the wind blows - a kind of noise and rumble is heard throughout the area. Nevertheless, the find has already entered the top 50 most unusual structures in the world and brought great fame to its author.

And how many useful things can be made from an ordinary plastic bottle? It is enough to drive this query into the search bar on the Internet. No one will name the exact number. Dozens and hundreds of Russians have long been using plastic containers to decorate the garden, store small things, create unusual lamps and furniture. Needlewomen willingly share instructions on how to turn transparent plastic into toys, spectacular jewelry, and tell how to create flowers from plastic bottles with your own hands.
For many housewives, not only beauty and decor come to the fore, but also functionality. Do-it-yourself homemade plastic bottles can replace dozens of things needed in the household.
Here are just some original ideas for useful household items made from plastic bottles.
Even a small amount of untidy shoes in the hallway creates a feeling of untidiness and disorder. But what if the family is large and there are a lot of shoes? What if the corridor is too narrow? In such a situation, capacious and light-weight shelves for shoes will save. With their help, you can compactly place all sandals, shoes, boots and boots, saving space in the lobby. We offer to organize free space in the hallway and make a roomy shoe rack. Moreover, a do-it-yourself shoe rack is a great opportunity to show off your knowledge and carpentry skills, because its design is extremely simple.
Another positive point in favor of making your own shoe stand is the availability of materials from which you can make it. In addition, if you use the available tools and materials for its manufacture, you can significantly save the family budget.
Wood is the most common and affordable material for creating any homemade furniture, this also applies to shoe racks. There are options for making shelves from chipboard or MDF, from boards or furniture panels. You can get a budget shelf if you make it out of plywood with your own hands. Opt for quality birch plywood.
In addition to suitable material, you will need a standard set for carpentry tools:
- hacksaw or jigsaw;
- sandpaper or grinder;
- drill;
- screws and metal corners for fastening the structure or furniture ties;
- special protective equipment for the processing of wooden products.
The first thing you need to think about is the drawings and diagrams of the shelf or rack you like. You can draw them yourself or find suitable ones on the Internet and fit them to your size.

So, to create a shelf for shoes made of wood, everything is prepared, you can get to work.
Operating procedure:
- Cut out all the necessary parts from the prepared material in accordance with the available drawings.
- Wooden parts, especially the cut points, carefully sand with sandpaper and treat with a protective agent, this will prolong the life of the product. You can paint the details or cover with stain. So, your wooden shoe rack made of inexpensive material can easily be turned into an instance of noble wood.
- The edges of the chipboard blanks should be pasted over with a melamine edge.
- At the junction of the side walls and shelves, drill holes of a slightly smaller diameter than the size of the screws. If through side holes are embarrassing, you can use all kinds of furniture ties (screw, eccentric, conical), as well as furniture corners or euro screws for fastening.
- Attach the top cover last. By the way, on top it can be decorated with a soft foam seat and covered with material that will echo in color and texture with other interior objects of the hallway.
Advice! If a home-made shelf for your shoes is made of MDF or chipboard, then they can be cut at the construction company where they were purchased, this requires a cutting pattern. In addition, there you can order the processing of the edge of parts.
That's all the shelf for your shoes with your own hands made of wood is ready.
corner shelf

By the same principle, a corner shelf for shoes can be made. This rack is ideal for small apartments.
Metal shelves
You are afraid that wooden shelves for shoes will quickly become unusable in the off-season, when it is slushy outside. Indeed, shoes in such weather are very wet and should be dried before putting them on the shelf.
There is also a way out of such situations, to make metal shelves. For this, for example, plumbing pipes with a diameter of 3/4 inches or rods and fasteners to them may be suitable.

Procedure:
- You need to build a frame of suitable dimensions from wooden boards.
- In the racks, drill holes for pipes or rods.
- Fix in the holes of the pipe using special mounting fittings or washers and nuts.
- Do not forget about the usual processing of wood products and grinding. This do-it-yourself bookcase for your shoes can also be painted in your favorite color and decorated with a soft seat.
Having made a metal shoe rack with your own hands, you will protect the product from excessive moisture.
Also, a metal rack for shoes in the hallway with your own hands can be made using ready-made fittings, which can be purchased from companies specializing in the manufacture of custom-made furniture.
More shoe rack ideas
- There is no need to spend money on purchasing materials to create an exclusive shoe rack. A beautiful rack can be made from pallets or construction pallets. It is easy to make such a bedside table yourself, it is enough to show only a little imagination.

- A shoe rack made of PVC pipes deserves attention due to its unusualness, as well as ease of manufacture.

We will tell you how to make a shoe rack with your own hands from this material.
The idea is frankly simple. You do not even need a drawing of such a shoe rack.
Cut pipes with a diameter of about 30 cm into pieces of the required length. Drill holes at the joints and fasten with small decorative screws (you can simply glue it with special glue for plastic or liquid nails). Before connecting the parts, they can be painted in the desired color or even in several colors.
- As you can see, a nightstand for shoes does not have to have any traditional outlines at all. For example, for shoes with heels, it is enough just to fix a polyurethane ceiling plinth on the wall. It is easily painted in any color, and fastened with a special glue.

- Surprise, but a simple cardboard box from a TV or other equipment is also suitable for a rack. True, such a do-it-yourself shoe shelf is useful for storing, perhaps, slippers.

Round base
If you tend to shock your guests, then a do-it-yourself round shoe cabinet is what you need.
To make it you will need:
- Chipboard with a thickness of at least 12 mm (or other material);
- screws and plugs;
- furniture wheels.
Operating procedure:
- Cut round blanks of the required diameter with an electric jigsaw from chipboard (we recommend a diameter of 60 cm), as well as dividing walls 20x25 cm, 4 pcs each. for every level.
- Sand the cuts and glue the melamine tape with an iron.
- Drill connecting holes on each round base and each spacer piece (2 each).
- Connect with screws. Decorate the holes on the front side with plastic plugs or self-adhesives.
- Screw on the wheels.
- The top part can be decorated with a soft seat.
Nuance. The dividing parts of each subsequent level are attached in a checkerboard pattern.
Such an unusual do-it-yourself shoe organizer will decorate any interior and will not take up much space, and made to the appropriate size, it can easily fit in a wardrobe closet.
If you want to hide your shoes from prying eyes, or a dog lives in your house, who constantly strives to gnaw another leather shoe, then a shoe cabinet will become your salvation. Its advantage is a glass door protecting your wardrobe.
Of course, making a shoe cabinet with your own hands is somewhat more difficult than just a shelf, but this can be done with a little perseverance.

The dimensions of the cabinet will depend on the dimensions of the hallway. We suggest making inclined shelves and a drawer hidden by a frosted glass door, but folding shelves can also be provided. These will allow you to place more shoes, but they will also deliver a lot of work. All the necessary fittings for such shelves can be purchased at hardware stores.
Summarizing, it is safe to say that the compact storage of shoes in your hallway is a simple and very exciting business. Try to make a shoe rack with your own hands and, perhaps, then you can transform the interior of your home beyond recognition.


 Constellation Scorpio description")


