Cork flooring has become widespread relatively recently. Nevertheless, the popularity of cork flooring is growing: manufacturers are developing and offering full-fledged relatively inexpensive substitutes for solid natural cork veneer, and do-it-yourself cork flooring is available to a person with basic home repair skills.
However, it is not possible to lay cork floors everywhere. Therefore, before purchasing material and getting down to work, you should understand what a cork floor is, and, especially, what are its advantages and disadvantages. Otherwise expensive material and painstaking work can go down the drain.
Types of cork floors
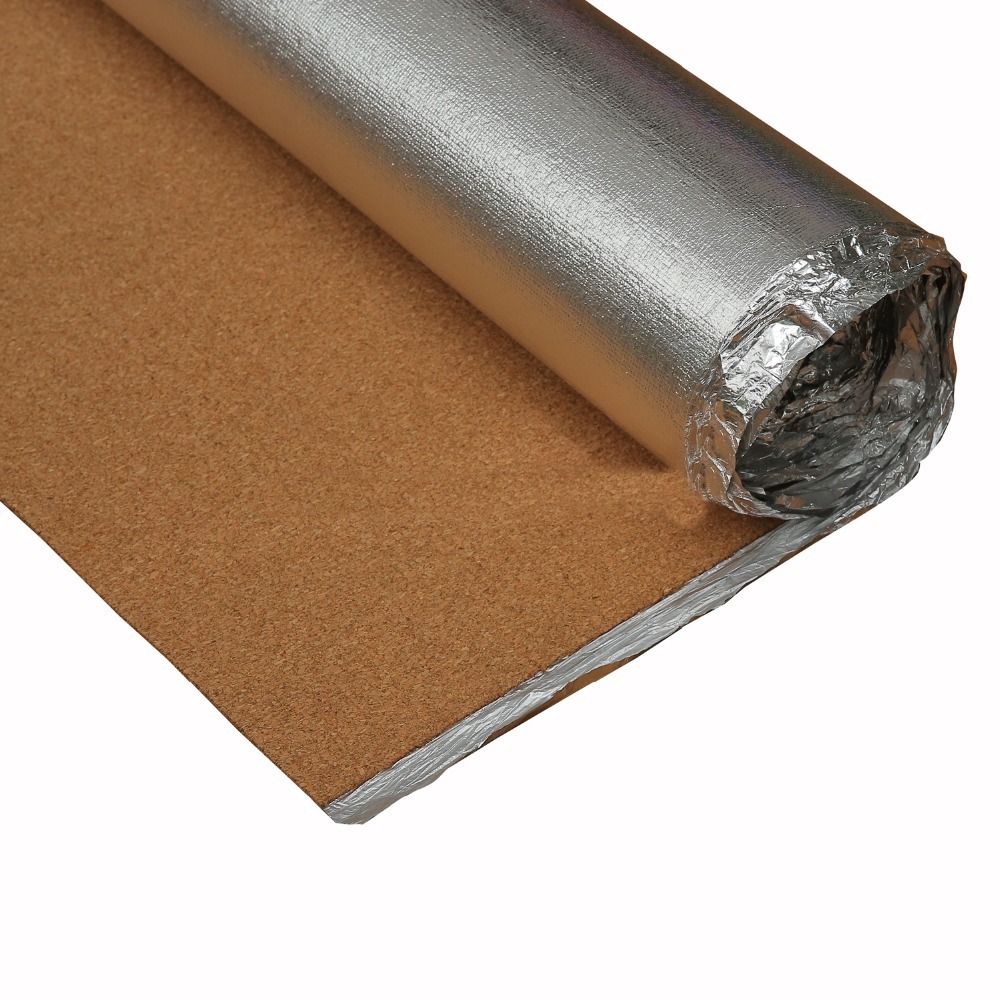
- The most expensive - whole cork veneer, or Cork board(cut cork oak bark), covered with wear-resistant varnish. Do not confuse it with school cork boards. Absolutely eco-friendly material, combines both best virtues, and the most serious shortcomings of cork. It can be produced in large (up to 6 sq. m) layers 4-6 mm thick and in rolls; Also - in the form of tiles. Often, its underside, not the front side, is protected with a vinyl film, which facilitates gluing and laying on a concrete floor.
- MDF panels with cork. Medium price material. It is also often called a cork board, although in reality it is - cork laminate: MDF base, then - a layer of processed also according to MDF technology(dry hot pressing) of cork chips, and on top - a layer of cork veneer 2-4 mm, protected by varnish and / or vinyl film. By useful qualities almost equivalent to solid veneer, but not so demanding on the quality of the underlying surface.
- Cork laminate Available in a standard laminate size and thickness.
- Pressed cork chips. It is made from inexpensive cork tiles. On sale, it is easy to recognize by its fine-grained texture, similar to a cork from an inexpensive wine. The color of the solid cork is complex irregular shapes in yellow-brown tones. However, cork tile provides a finish that is not inferior in quality to that of solid veneer. For a budget cork floor - the best option.
The main dimensions of cork tiles are 30x30, 60x60 and 60x90 cm. On sale, under the guise and at the price of a tile, you can find scraps and waste of solid veneer. They are small, but if you have the desire, time and artistic taste, you can get such coverage from them that sophisticated connoisseurs will gasp.
What is good and what is bad cork floor
The cork floor is perfectly springy, not slippery even with a protective coating. Well "wins back" the load, including a regular alternating sign. Provides excellent sound and heat insulation. Absolutely environmentally friendly and harmless: for the entire centuries-old history of the use of cork, no signs of its effect on health have been noted.
However, there are also significant disadvantages of cork floors. Apart from high price- fragility and sufficient complexity of laying on glue. Without skillful hands and an accurate eye, it is better not to take on a glued cork floor.
Further - a high coefficient of thermal expansion even for wood. In addition, the cork swells strongly if the water contains dissolved organic matter. As a result, the cork absorbs well and firmly retains the smell and color of impurities. Perhaps you have an old wine cork lying around somewhere - try to return it to her cylindrical shape, remove the color and smell from the part that was in the bottle.

As a consequence of the above, the cork floor is short-lived in any premises in variable temperature regime: from thermal deformations, the cork will soon begin to crumble. Therefore, the answer to the question of whether it is possible to lay a cork floor in the kitchen, balcony and hallway: only cork laminate with a protective coating, and even that is not very desirable.
As for the toilet and bathroom, there is a definite “no” to the cork floor. Even if you and your guests use the services absolutely carefully during the wildest fun, anyway, microcracks will soon form in the cork coating due to temperature and humidity fluctuations, through which moisture will pass, and then peeling off, most often in hidden places: under the baseboard or under the bathroom where water vapor stagnates.
Cork does not have antiseptic properties; it is a biologically neutral material. Therefore, if you find and open such a “pimple”, under it you will find a disgusting-looking mucus, from the contents of which, under a microscope, a microbiologist who is not indifferent to his work immediately faints.
Where are cork floors good?
However, there are types of rooms where cork flooring is highly recommended and others where it is perfectly acceptable:
- Children's. Here you can lay any cork floor; if funds are available, it is better from solid veneer. First, the child will always be warm. Secondly, a slapped tomboy won't hurt himself. Third, walking bare feet on the cork gives a somewhat irrational, but beneficial effect on the psyche and the development of the mind, a feeling of a living connection with nature.
- Bedroom - for the same reasons as in the nursery.
- Study. In addition to all the same, the cork dampens sounds well, without creating deadly silence at the same time.
- Living room. It is better to use cork laminate here, as in any other frequently visited premises. Cork flooring, even with perfect care for it, does not differ in durability.
How cork floors are laid
Laying cork on the floor can be carried out not by two, as they often write, but by three different ways:
- Cork laminate, with some additional precautions regarding tooling and laying techniques, see below.
- The same cork laminate and solid veneer can be laid freely, without fastening - this is a floating cork floor.
- Any type of cork floor can also be laid with glue.
The technologies for laying a floating cork floor and an adhesive floor are fundamentally different. But the requirements for the preparation of the premises are the same. The tool used is also special.
It is necessary to lay a cork floor in the warm season so that the temperature difference during delivery from the seller's warehouse to the room does not exceed 5-7 degrees. It is also desirable that the humidity of the air in the room under the floor was no more than 60%; humidity of 75% is already unacceptable when laying.

Tools, accessories and additional materials
To lay a cork floor, you will first need a rubber carpenter's hammer (mallet). Then - manual Circular Saw or a jigsaw with a circle or a “clean cut” file, very finely toothed. From any hand saw the cork will crumble around the edge. For the adhesive floor, you will need a rolling roller - similar to a paint roller, but metal, heavy, and small, 20-30 cm, but an accurate level.
Planks of cork laminate for a floating floor will have to be corrected and leveled. Spacer wedges for this will need to be made from its own scraps - the wooden ones will crumble the cork. Also, the rule for fitting is a piece of cork board, which rests against the adjusted one and corrects by lightly tapping rubber mallet. You cannot use a hook clamp to tighten the cork laminate.
From additional materials you will need a special plinth for the cork floor, which is attached to the wall. It is impossible to make a cork floor in doorways, so special sills will be required. For the adhesive floor - special glue and also a special spatula for its application: wide, finely serrated.
A small but important device for laying a glued cork floor is a canned vegetable or coffee can with a quick but tight lid. It will need to keep a rag moistened with solvent - a lot of small shreds. Use a rag to wipe off the glue. Outside of a tightly closed vessel, it will dry quickly, and abundantly moistened will spoil the coating.
Room preparation
Any cork floor must be laid on a level, smooth and dry surface. A leveled concrete screed is not enough - it is rough. Cork when walking on it, or rolling the chair "plays". Concrete in this case works as an abrasive; the cork is a soft material, and it is quickly rubbed even on the adhesive layer.
Especially "does not like" the cork floor of the wet underlying surface. The point here is not only and not so much in the fact that the adhesive connection will be fragile, but in the swelling of the cork. Because of this, a “pimple” is formed somewhere, described in the section on the bathroom, and with the same content. Therefore, before laying the cork floor, the base must be leveled and dried.
Concrete floors should be checked for moisture before laying. To do this, a room or part of it, but not less than 2 sq.m, is covered for a day plastic film, approximately a rectangular piece, not a stripe. If, after a day, moisture has not settled on the underside of the film, you can proceed to the final leveling. If not, then you need to dry it. Numerous complaints that, they say, a solid floor at 60-80 euros per square in a week went stained and swelled, are explained precisely by a too wet base.
Note: moisture can pass from the neighbors below. Therefore, immediately inspect the “bare” floor carefully, and seal all the cracks; especially at the heating risers.
floor leveling
The base floor under the cork is leveled with a liquid leveler. Dry leveling (a layered composite of soft material between two layers of plastic film) is not suitable: cork is harder and brittle. From a stiletto heel or chair leg, a cork floor on such a basis can crack.
(Read more about wet screed for leveling the floor)
Even the cheapest cork floor is not a cheap pleasure, and its reliability and durability are highly dependent on the foundation. Therefore, we can recommend before the cork, the cheapest, even substandard:
- The mechanical properties of marmoleum are similar to those of cork; failure of the top from a concentrated load will not happen.
- Marmoleum "flows around" the underside of the unevenness of the base, and its upper surface will remain flat.
- Marmoleum has bactericidal properties: suddenly a harmful “pimple” forms under the cork, marmoleum will not allow harmful microflora to develop in it.
If linoleum, laminate or are already laid on the floor, then it is better not to touch them, but lay the cork on top.

floating floor
Floating cork flooring can be stacked inlaid, made from a single piece of veneer or large parts of it, and made from cork laminate. The first two options are the prerogative of a team of at least two well-working professionals. Independent attempts of this kind end in the breakdown of an expensive coating: the price of cork veneer increases rapidly with an increase in the size of the piece.
The laying of a floating floor made of cork laminate is done as follows:
- The room is measured, the material is purchased. Upon delivery, it is unpacked and aged for a day for acclimatization - equalization of temperature and humidity.
- In the meantime, the base floor is covered with a plastic film with an overlap of 20-30 cm and with a 10-15 cm approach to the walls. The joints of the pieces of the film are glued together with adhesive tape.
- Planks of a row incomplete in width are cut to size from the side of the tongue crest; groove cannot be touched. When laying with a seam shift by half, half of the outer boards are sawn in half along the length.
- Laminate boards are laid from the far corner in transverse rows with a shift of the seams by a third or half the length of the board, like a regular laminate: the crest of the next board is inserted into the groove of the previous one, holding it at an angle, slightly pressed and lowered. Tighten to the place with a rule and a rubber mallet. From the walls you need to maintain an indent of 20-30 mm. They stand it, and pull the board extreme in front of the wall with spacer wedges.
- The excess film is cut off.
- A “cork” plinth is attached to the wall with a mounting adhesive. It should not lie on the floor, but hang over it by 1-2 mm. To do this, it is convenient to use matches or toothpicks. True, what to do with the debris that will inevitably fill up in the gap before the cork swells, the manufacturers of cork floors do not report.
- The floor is ready, you can immediately walk on it.
Video instruction for laying cork flooring
Cork floor with glue
How good a glued cork floor will be depends a lot on the glue. Coating manufacturers recommend each of their own, but the best adhesives should be recognized without a volatile aggressive solvent - Cascoflex and the like. They are non-toxic and dry the longest (5-10 minutes); this is enough to fit the tile or board. But such adhesives are expensive, so the question is often asked: Is it possible to lay a cork floor on PVA?
It is impossible to lay a cork floor on liquid PVA: this glue is on water based, which the cork is contraindicated. You can let the PVA dry until tacky with pressure (15-25 minutes) so that all the water evaporates from it. But then each tile will have to be put immediately exactly in place: it will not be possible to move it; she immediately grabs tightly. And you can apply liquid PVA only on one surface - the base floor, and this is a violation of the gluing technology. And the humidity of the air in the process will increase. So, alas, it is impossible to recommend laying a cork floor on cheap PVA.
Lay the same glue cork floor like this:
- We work from the center of the room in a spiral. Right or left twisted - as you prefer. For right-handers, it is more convenient to “unwind” clockwise.
- We apply glue on the base with a spatula in an even layer, lay the tiles, tighten them with our hands or with a rule.
- We roll with a roller.
- Level twice, diagonally, check the horizontal position. If the next tile is pulled up somewhere, we tap it with a rubber mallet.
- The glue that comes out at any stage of work is instantly wiped off with a rag moistened with a solvent. We throw away the used flap: if it is reused by mistake, it will only smear the glue drip, and it is impossible to remove the dried glue from the cork.
- Along the perimeter, we leave the same gap as for the floating floor.
- At the end of the work, we wait a day, sew up the gap with a plinth - the floor is ready.
Video: the process of laying cork on glue
HDF cork laminate
The cheapest material for a cork floor is HDF (high density fiberboard), covered with pressed cork chips. But behind the “smart” foreign abbreviation lies the well-known fiberboard, which is not consistent in properties with cork and with “chemical” impregnation. Therefore, you can recommend HDF cork for flooring only in one case: if you want to cheaply tell your friends that you have a cork floor.
Summary
Cork flooring can be both very good and useful, and very bad and harmful. It depends on whether it is laid in a suitable room for it. And only its decorative qualities depend on the price category of the material and the method of installation.
Cork floor, from the first days of use, has become popular and has earned wide recognition among consumers. Relatively affordable cost, and the ability to lay such flooring yourself, increase consumer demand for cork. Manufacturers offer big variety product and quality affordable prices for analogues and substitutes for natural veneer.
It must be borne in mind that there are some subtleties of laying such a coating on different stages implementation of this solution. You should study the issue in detail before going to building base or to a special store for the purchase of material. It is necessary to familiarize yourself with the positive and negative sides of the cork floor, otherwise there is a risk of not only throwing money away, but also wasting time on wasted work.
Types of cork flooring
Most popular species materials are considered:
- cork veneer flooring;
- cork MDF boards;
- cork laminate;
- pressed cork slabs.
Covered with wear-resistant varnish, is the most expensive. It is not easy to confuse it with a school cork board. Natural veneer is environmentally friendly pure material, combining both the strongest pluses and minuses of cork. It is produced in large sheets up to 6 square meters. m., 4-6 mm thick, as well as in the form of tiles and rolls.
As a rule, its underside is protected by a vinyl film, which facilitates the process of gluing to a cement-concrete surface. The texture of natural cork is complex irregular shapes in yellow-brown tones.
 . This material occupies an average price position in its line. This is a two-layer cork laminate, the bottom layer of which consists of a full-fledged MDF board, and the top layer is made of 2–4 mm veneer, covered with protective varnish. In terms of useful properties, cork MDF panels are similar to solid veneer, and are not too demanding on the quality of the surface on which they need to be laid.
It is produced in traditional sizes and thicknesses for this coating.

 . it cheap material for floor covering. In stores, it is easy to identify by its fine-grained texture, which is similar to a cheap wine cork. However, the quality of the cork board is almost as good as solid natural veneer. Pressed cork tiles - good quality budget option cork floor. Standard sizes cork tiles:
- 300*300mm;
- 600*600mm;
- 600*900 mm.
Pros and cons of cork flooring
The floor, made of cork material, does not slip and does not spring. It perfectly withstands the significant loads directed at it. This flooring has good heat and sound insulation. One of the main advantages of this floor is that it is absolutely safe for human health and environment. Throughout the history of cork flooring, there has never been a single case of harm to human health.
With all the benefits and positive properties cork coating, unfortunately, it also has disadvantages. This is an expensive material.

In addition, we can not say about the relatively complex and painstaking procedure for its installation. The cork has a fragile structure and does not tolerate careless handling. Without sufficient knowledge and certain skills to start self-coverage cork flooring is not recommended.
This material is highly sensitive to temperature changes, mechanical damage from the claws of domestic animals. It depends entirely on this internal composition and appearance. It swells with water and quickly absorbs any odors, followed by a long retention of them in itself.
Where it is not recommended to lay cork flooring, and in which rooms it is possible
In accordance with the above points, we can conclude that the cork floor is not suitable for rooms with temperature changes, high humidity. From any short-term temperature changes, the cork crumbles and becomes unusable.
Therefore, cork flooring for the kitchen, hallway or balcony is not suitable. If desired, a cork laminate can be laid there, but this may also be an impractical solution. Rooms in which cork flooring is strictly not recommended:
- bathroom;
- bathroom.

Very high humidity and sudden changes in temperature have a negative effect on cork, since moisture can penetrate through microcracks into the material, after which it swells and exfoliates. This process is imperceptible, in poorly visible places, for example, under baseboards.
Areas ideal for cork flooring:
- Kids room.
- Bedroom.
- Office cabinet.
- Living room.
Kids room. Any kind of this covering is ideal in a children's room, as it will be warm for children to stand and move barefoot on the cork floor at any time of the year. In addition, falling on the floor, the child will not be injured. Walking barefoot on it renders beneficial features on the psyche of the baby and, according to the sensations, brings him closer to nature.

Bedroom. Installing a cork floor in a bedroom is good for the same reasons as in the case of a children's room.

office cabinet. To the above reasons, you can add the excellent soundproofing properties of the material.

Living room. In the living room, cork laminate is best suited, since in this room natural veneer will quickly lose its proper appearance.

Cork underlay
When laying the castle floor, you need to use a substrate. As a rule, the material for the substrate is made from compressed fine-grained chips from cork oak bark.
The substrate is an important coating layer. It is needed for sound, heat and waterproofing. Non-combustible, wear-resistant, natural and environmentally friendly cork underlay is several times better in properties than other insulating materials.
Technical cork is produced in rolls. The leaders in cork flooring typically offer underlays with different thicknesses, but for a floating type of floor, 2 mm is enough.
The main function that the substrate should perform is to protect the cork coating from excessive loads that can cause deformation of the material. It also protects against the formation of condensation and dampens the sound of footsteps on the floor.

Laying the underlay for the castle floor
For successful installation of the cork substrate, you must perform the following steps:

- at least one day before the start of work, rolls of technical cork must be brought into the room where it will be laid;
- to protect the surface from moisture, you first need to lay pvc film with entry to the walls not less than 5 cm;
- if a single piece of film is not enough, the remaining pieces are overlapped with a margin of up to 200 mm;
- parts of the film must be glued with adhesive tape;
- on the film, over the entire area it is necessary to deploy technical cork rolls;
- the gap from the wall to the substrate, as well as at its joints, should be 1.5 cm.
It should be remembered that the quality of the subsequent cork coating and its service life will directly depend on how correctly the substrate was laid.
Cork flooring technology
To lay a cork floor, the following tools and materials are required:

- rubber mallet;
- a jigsaw or a circular saw with a fine-toothed cut, since cork material will crumble around the edges from any hand saw;
- level with high accuracy;
- metal ruler;
- ordinary measuring tape;
- a special marker or pencil for painting;
- if there is a glue floor, you need a metal roller;
- putty knife;
- paint brush 100 mm with natural bristles;
- varnish composition;
- special glue;
- several empty containers for varnish and glue;
- rag.
Cork flooring characterized by softness, environmental friendliness and comfort. This floor is appropriate in the children's room and bedroom. It has high soundproofing characteristics. But in order for the coating to last as long as possible, the cork floor is laid in compliance with the technology. Cork tiles can be laid independently if you know some of the nuances of installation and the features of the choice of materials. We will also tell you how much cork flooring costs.
Varieties of glue plugs for the floor by structure
Many useful and beautiful things are made from the bark of the cork tree, including finishing materials.
Floor adhesive cork has several varieties:
- adhesive agglomerated cork coatings;
- self-adhesive strips and tiles made of crushed cork;
- cork laminate.
Agglomerate cork
This type of cork coating is made from material crushed into crumbs. It is then mixed with synthetic-based thermosetting resins and pressed. As a result, blocks are obtained having a density of 450-800 kg / m³. The semi-finished product is cut into sheets up to 0.6 cm thick. Further, planks and tiles with a maximum width of 30 cm are cut out of these sheets on the machine and maximum length 1.2 m. Products are glued end-to-end, because they have even edges.
Important! The cost of a cork floor made of agglomerated cork starts at $11.6 per square.
The agglomerated glue plug on the floor has the following features:
- It is allowed to be placed on underfloor heating. But at the same time, you need to use a special elastic adhesive, which is marked that it can be used for heated floors.
- Manufacturers do not recommend glue such a cork on a screed with electrical system heating.
- If as finish coat varnishing or waxing is used, then material suitable for indoor installation with increased traffic and significant floor loads, for example, in the living room, corridor, kitchen.
- Adhesive cork floors successfully combined with other floor coverings (laminate, ceramic tiles, parquet).
Self-adhesive cork
These are thin slabs of veneered or traditional agglomerate. An adhesive layer is applied on the back of the material. It is protected by paper on top to prevent the glue from drying out. Self-adhesive products are very convenient to lay on the floor, walls and ceiling.
Important! If you are interested in a self-adhesive cork floor, the price per meter starts at $13.3 per square.
Such cork flooring is produced mainly in the form of square tiles with a side of no more than 300 mm. Their thickness is in the range of 3.6-5 mm. Less common are adhesive-based strips with a width of not more than 180 mm and a length not exceeding 900 mm.
This adhesive cork flooring has the following features:
- The front surface does not have a finish coating and needs to be protected from the ingress of dyes, water, abrasive compounds and household chemicals.
- Gluing is carried out without the use of additional adhesive mixtures, but for better adhesion to the base, it must be carefully and correctly prepared.
- Allowed gluing on floors with a water heating system.
- The self-adhesive cork can only be mounted on the floor in a room with normal humidity, for example, in a bedroom, nursery, living room.
- The coating is suitable for interiors in eco- and retro-style.
Attention! Craftsmen are laying a glue plug at a price of $ 4.8 per square. This price does not include foundation preparation services.
Glue plug laying technology

Before laying the cork floor, you need to prepare necessary tools and materials:
- Before laying the coating, prepare the base. To do this, you will need repair and leveling compounds for a wooden or concrete base (epoxy or cement mixtures, self-leveling floors, plywood, OSB, chipboard, etc.).
- Tiles can only be glued to a primed base. Therefore, for a wooden base, buy a fungicidal primer, and for a mineral floor, an adhesive primer is suitable.
- The technology of laying agglomerated tiles requires the use of polymer adhesive.
- As a final protective coating use wax, oil, acrylic or polyurethane varnish.
- Brushes and rollers for applying protective compositions.
- To apply the adhesive, you need a short pile velor roller or a notched trowel.
- Level, tape measure, hygrometer, pencil, square, coloring cord.
- Rollers or mallet for rolling the coating to the floor.
- Sponge to remove excess glue.
- Drill for making technological holes and cutter.
Important! The material is laid after it has matured in the room where it will be installed, within 1-2 days.
Work is carried out in compliance following conditions in room:
- heaters should not work;
- get rid of drafts;
- optimum temperature air is within 18-25°C;
- relative humidity 55-65%.
Choosing a cork floor adhesive
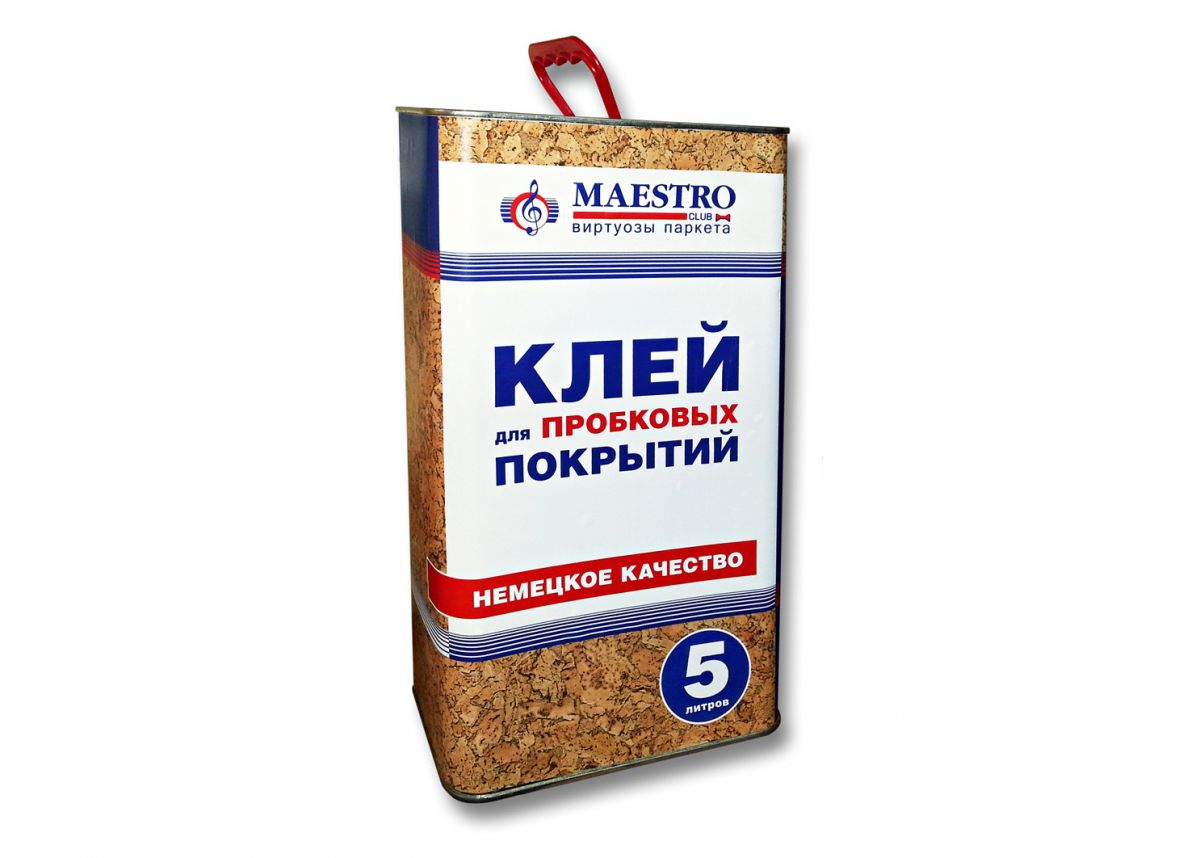
The adhesive method of laying involves the selection of a suitable adhesive. So, cork coatings without a finishing layer are allowed to be glued using water-dispersion compositions. Tiles with a lacquer or vinyl protective layer are fixed with solvent-based adhesives.
It is important to remember that all solvent-based adhesive mixtures are flammable and slightly toxic, so work is carried out using protective equipment and in a ventilated area.
Important! Glue on organic solvents is environmentally friendly and less toxic.
Water-based adhesives do not like contact with water, so if the room is flooded, there is a risk that the tiles will peel off. If work is carried out in the cold season, then it is better to buy glue that is resistant to cold and temperature extremes.
Choice of laying pattern

If you will use square tiles, then there are only two ways to lay them out:
- according to principle brickwork with a joint shift in each subsequent row by half an element;
- traditional chess laying seam in a seam.
Important! Rectangular and square shape laid diagonally in the room or traditionally parallel to the walls.
As for the elements rectangular shape, then they are stacked in several ways:
- traditional laying apart;
- ordinary and triple brickwork;
- diagonal laying;
- flooring according to the herringbone principle;
- deck masonry;
- network;
- square flooring.
Foundation preparation
The step-by-step process of laying cork flooring begins with the preparation of the base. Since the elements have a small thickness, all defects in the base will be visible after they are laid. That is why the beauty of the floor depends on the quality of the preparation of the base.
Requirements for the draft base:
- Compressive strength - not less than 150 MPa.
- The maximum allowable height difference is not more than 2 mm per two meters.
- The base should not have cracks, loose and rotten areas.
- There should be no traces of glue, soot, grease, soot, bitumen and remnants of the old coating.
- The indicator of residual moisture for a wooden base is 8-12%, for a concrete base in the range of 0.5-2 percent.
To level the base, a mineral screed or sheet wood materials with shunted edges. To fill the seams between the sheets are used acrylic sealants or a mixture of PVA with sawdust.
To improve the characteristics of the base, deep penetrating and strengthening primers are used. If you need to increase adhesion to the base and make the absorbency of the floor more uniform, use an adhesive primer.
After that, proceed to the marking of the surface:
- With a tape measure or laser level find the center of the room.
- Through the center, parallel to one of the walls, we draw a line from which we will lay the tiles. At diagonal laying The line is drawn at 45 degrees.
- We carry out a preliminary layout of cork elements in a checkerboard pattern or with an offset.
- We cut the extreme products to the required size, taking into account the centimeter gap around the perimeter of the room.
- If required, technological holes are cut in the elements.
- Sometimes a chamfer is made on the tiles. For this, the edges of the product are treated with fine-grained sandpaper, and the dust is removed with a damp sponge.
Look for interesting solutions to renovate an apartment? How do you choose to install cork flooring? Do not know what it is, what is the benefit for you and how to do it? Everything is very simple. Consider what a cork floor is, how to lay it correctly.
Cork oak bark is used as a material for the manufacture of cork cloth. Bark is removed from trees aged 25-30 years, but it is not used in construction. Then, within 6-9 years, the bark is restored, it is removed again (if the technology is followed, the tree is not damaged). And this material already underway for the manufacture of various products.
By technology, cork cloth can be divided into types:
- veneer - the most expensive type of cork;
- agglomerate is the cheapest option (manufactured by pressing at high temperature crumbs with the addition of various resins);
- combined - both pieces of veneer and chips are used for manufacturing.
Finished panels can be treated with various compounds that affect the properties of the cork and give it greater strength and moisture resistance.
Pros and cons of the material
Benefits of cork floors:

- excellent heat and sound insulation;
- cork - the material is elastic and resilient, does not creak, does not slip, it is pleasant to walk on it;
- the cork is not subject to rotting and is fireproof;
- the material is hypoallergenic, does not attract dust and does not accumulate static electricity;
- cork floors are able to withstand high pressure, including point pressure.
Flaws:
- like anyone natural material, the cost of cork panels is higher than the usual laminate or parquet board;
- the base under the cork coating must be perfectly flat;
- if there are cats or dogs in the house, then claw marks may remain on the cork;
- over time protective layer is erased and tracks remain in places of heavy traffic.
Back to top
Types and options of cork flooring
- Floating type (you can meet the name cork parquet). It is produced in the form of panels with locks and is a layer of cork glued to an MDF panel.
- The adhesive type is produced in the form of square or rectangular tiles. Sizes may vary. A protective layer may be applied on top.
- Process cork is sold in rolls or plates and is used as a substrate.
For the final finish, the first 2 types are widely used, it all depends on your choice. It should be borne in mind that if you plan to lay cork in the bathroom or bathroom, then you need to give preference to the adhesive type. This is due to the fact that it is processed special composition which prevents the floor from swelling.

Floating type cork flooring is best used indoors with a low level of humidity: in the bedroom, nursery or hallway.
To lay cork flooring with your own hands, you will need:
- Pencil.
- Roulette.
- Square for precise cutting of panels at right angles.
- Long line.
- Chopping cord.
- Construction knife. With it, you can easily cut adhesive-type cork panels.
- Spatula or roller for applying adhesive to floors and cork boards.
- Electric drill. Useful if you need to drill holes, for example, under the heating pipes.
- A hacksaw with fine teeth or a jigsaw. These tools are useful for cutting floating panels.
- Rubber mallet for adjusting cork slabs in place.
Back to top
Cork flooring technology
Surface preparation
Before laying the cork flooring, the surface must be leveled if necessary. It must be dry, clean and primed.
The old flooring can be left on, but the cork flooring can be laid on top.
Laying a cork floor with glue:

- Before laying the 1st row of cork tiles, it is necessary to mark with a building cord main line, along which its assembly will begin. It can be a diagonal from opposite corners of the room or laying in a straight line along the walls.
- Draw a line with a pencil using a ruler along the chopping cord.
- When working with glue, you must use a respirator, such as RPG-67. Cork tile adhesive is flammable and has a pungent odor. After work, the room must be thoroughly ventilated.
- Apply adhesive evenly to the substrate using a spatula or roller along the marked line.
- It is also necessary to apply glue to the panel and let it dry for 10-15 minutes.
- Then attach the panel to the base and tap the entire surface with a rubber mallet.
- In some places it will be necessary to adjust the cork panels. To do this, marks are made with a pencil, marking is carried out using a square or a ruler and construction knife the excess is cut off.
- After laying the tiles on the floor, it is necessary to cover it with 2-3 layers of varnish. For these purposes, a two-component polyurethane varnish is perfect.
- The glue dries within 24 hours. It is advisable not to walk on the laid panels during this time in order to avoid their displacement.


 Constellation Scorpio description")


