The now popular floor with a 3D effect can be mounted independently, with minimal finishing skills. You will learn how to do this from our article, where we will describe in detail what materials and tools are needed, as well as consider the step-by-step installation technology.
The emerging new technologies for creating three-dimensional coatings open up a huge field for the imagination of designers. Almost any image can be placed in the thickness of the transparent 3D polymer floor material, which will emphasize the stylistic orientation of the room or hall, creating a three-dimensional effect. Such work is within the power of not only specialists, if you scrupulously follow the technology and act strictly in stages, a three-dimensional floor can be made independently. Let's try to do this.
We prepare everything necessary for work
We will need:
- ventilation hood for air purification or a fan for forced ventilation of the room;
- aeration needle roller;
- drill with a nozzle for mixing the composition;
- brush or roller;
- perforator;
- grinder with a diamond disc;
- rule;
- construction level;
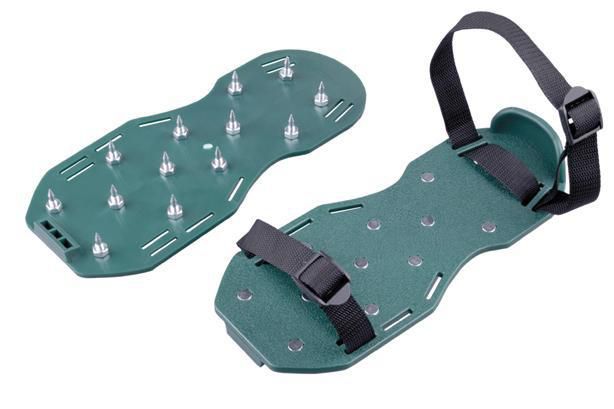
- shoes with studded soles;
- clean buckets;
- vacuum cleaner;
- transparent polymer mixture based on Ed-20 resin;
- hardener PEPA (polyethylene polyamine);
- decorative elements;
- polyethylene film.
As decorative elements of the future floor, you can use the artist's drawings, photographs, colored sand or pebbles, various crystals, dried plants, whatever your imagination tells you.
We carry out the preparation of the subfloor
It is necessary to remove the old coating from the floor, dismantle interior doors and skirting boards. For rooms with high humidity, you need to lay waterproofing - this will extend the life of the floor. Then a concrete screed is made, followed by its alignment with a cement-sand mortar.
Any self-leveling floors require a dry base. Therefore, before starting work with polymeric material, a fresh screed is kept to dry for at least 30 days.

In the process of further preparation, you need:
- remove any irregularities with a puncher and grinder;
- repair potholes and cracks in the screed with a mixture of cement and epoxy resin;
- remove oil stains from the floor surface with solvent or gasoline, if any;
- clean the prepared floor from small debris with a vacuum cleaner.
Then the concrete base is primed twice with a roller or brush, the first layer should dry well. This is done using a KNAUF primer for adhesion of screed materials and the polymer layer of the future 3D floor.

Apply base coat
It is necessary to place decorative elements on it. This work begins no later than 24 hours and no earlier than 4 hours after priming.
When using artificial or natural materials, the base layer serves as a background for them. Therefore, it is necessary to adjust its shade and qualitatively perform the laying of elements.
Before performing work, wear rubber gloves and turn on forced ventilation, since the components of the polymer mixture are very toxic.
For work, you can choose any polymer based on epoxy resins of domestic and foreign manufacturers: Bautech (Poland), IVSIL, NMG (Russia), Prospectors, BudMayster, Litokol, ABS (Sweden), Uzin (Germany), Caparol, Forbo , Durocem (Italy), Fomalhaut-Polymin, Vetonit (Finland), Osnovit, Bergauf and others. Their products are distinguished by high adhesion to substrates, strength, resistance to chemical attack and ultraviolet rays. The average price for epoxy compounds with a hardener is 280-350 rubles per kilogram.
The minimum flow rate of the self-leveling floor is determined by its fluidity on the surface of the base. With a smaller flow rate, an ideal surface will not work. Therefore, 1 liter of the composition is usually taken per 1 m 2 of the floor with a layer of 1 mm.
It is also necessary to take into account the density of the solution to adjust its consumption. Epoxy floors have a final density of 1.5 kg/l. Applying this coefficient, we obtain a consumption of 1x1.5 = 1.5 kg / m 2 with a layer of 1 mm.
Some manufacturers, in order to reduce the cost of materials for self-leveling floors, add heavy fillers to them. This increases the density of the composition and, accordingly, the cost of 1 m 2 of the floor by about 30%. In most cases, the purchase of such mixtures is not economically feasible. Below is a table of consumption of materials and prices for 1 m 2 of self-leveling floor.

Now we prepare the solution. To do this, you need to mix a transparent finishing polymer with a suitable solvent in a ratio of 2: 1 using a mixer in the form of a drill with a nozzle. Then a hardener is added at the rate of 8-10% by weight of the polymer. The process involves the use of clean dishes: a bucket, basin or tank. The polymer mixture is prepared in batches for its production with alignment at a time. This is due to the rapid, within half an hour, the beginning of the hardening of the composition.
After thorough mixing, pour the mixture onto the floor surface. The alignment of the base layer is done by the rule. In this case, a special spiked roller is used, rolling the spilled substance with it, it is necessary to remove air bubbles from it. In a day, complete polymerization of the base layer will come.


Applying an image
This is perhaps the most expensive part of 3D flooring.
There are two ways to create an image for a 3D floor:
- make a drawing with special paints
- paste the finished image
The first method is more reliable, more efficient and much more expensive than the second. Here, paints are used that are resistant to sunlight for a long time. The work of the artist to create a drawing is the main cost item of the first method. After the paint has dried, it should be covered with a layer of protective varnish. So you can save the image from the impact on him of subsequent operations on the floor.
A sticker of an already finished image is the most common and affordable way. To do this, you need to select a picture suitable for the room and process it using a graphic editor: adjust the color, contrast, brightness, stretch, etc. Then you should print the image in the right size on a suitable medium. An inexpensive option is a banner fabric with thermal printing and vinyl film. The work is done in a printing house, the resolution of the picture is chosen by a value of more than 1440 dpi. The cost of 1 m 2 of the image is about $100.

We transfer the printed pattern to the base as follows:
- Prime the base layer with a brush or roller. The primer is made from a finishing material diluted with solvent No. 646 in a ratio of 2:1. Primer consumption - 300 g / m 2.
- Then the image is carefully laid, pressed and rolled with a dry roller to avoid the formation of air bubbles under it.
Then we move on to the next step.
Applying the final layer
First, we calculate the required amount of transparent polymer for pouring it. With a layer thickness of 3 mm (this is its minimum value), 4-5 kg of material is required per 1 m 2 of coating. A greater effect of the "depth" of the 3D floor is achieved by increasing the thickness of the layer.
The procedure here is the same as when applying the base coat:
- preparation of polymer solution;
- its accurate filling on the drawing;
- leveling the surface with a rule;
- rolling the layer with a needle roller to remove air bubbles.

You can move on a fresh layer only in shoes that have high spikes on the sole.
After laying the polymer mixture, we cover the finished floor with a film for a gradual gain in strength.
The final polymerization time of the new coating depends on its thickness, humidity and room temperature. On average - from one week to three.

Now that the finish layer of the floor has hardened, it remains to perform one simple procedure. For additional protection against various damages, the 3D floor should be coated with a protective varnish. The properties of such a material will subsequently allow wet cleaning with any detergent.
The hardened polymer of the floor grows into its base so reliably that it is necessary to dismantle its pieces literally “with meat”, while removing part of the base itself, but this only confirms the strength of the 3D floor. If you get tired of its image, instead of dismantling it will be easier to apply another coating on top. Based on these "disadvantages", bulk 3D coatings are made once and for a long time, especially since its service life is more than 20 years.
Sergey Kolymsky, rmnt.ru
With the development of modern technology, volumetric graphics have entered our lives. "Live" drawings began to appear on the asphalt and walls of city houses. Street artists are increasingly surprising with the skill and realism of the picture. The new trend is reflected in the interior design. We are talking about 3D wallpaper on the floor, which enliven the room and make it unique. How such a pattern is created, with what interior it is combined and how much money is needed for this, we will talk in our article.
With the development of modern technologies, volumetric graphics have entered our lives.
Modern materials make it possible to embody the most daring fantasies in the interior, including the creation of 3D floors using new technology. Qualitatively performed work is not only a beautiful, but also a reliable floor.

To create a 3D effect on the floor, you need to prepare a high-quality high-resolution picture or objects that you want to pour into the floor:
- pebbles
- shells
- colored sand
- dried flowers.

The thicker and better the upper transparent layer is, the more realistic the volume effect will be. The technology itself provides for high-quality preparatory work. It includes:
- Foundation preparation. Usually it is a concrete screed. It is important to ensure that the surface is perfectly flat, without cracks and tubercles;
- Ensuring maximum removal of dirt, dust and moisture. If this step is skipped, the bulk polymer material will crack;
- Installation of a printed pattern or decorative items;
- Pouring a transparent polymer coating. It is necessary to knead the solution with a mixer in order to obtain the most homogeneous mass;
- Applying a final protective varnish.
Self-leveling 3D floors for the home (video)
Characteristics of types of 3D floors
Self-leveling floors differ in the main component of the poured mixture. The most popular of them:
- Epoxy
- Polyurethane
- Cement-acrylic
In general, all self-leveling floors can be divided into two large groups: one-component and two-component.

One-component resin floors
This coating is ideal for technical and utility rooms. In this option, a rich color palette is not needed, but a reliable composition, strength and quality of the filling material are important.
 One-component resin floors
 Two-component resin floors
Two-component filler floors are used much more widely. This is the design of office and home spaces, where a wide range of color schemes, effects in the form of marble chips, starry sky, golden sand and other textures are required. This type of flooring includes both transparent shades (to create a three-dimensional effect of patterns) and matte tones (from light pastels to deep dark colors). Often, during the installation of the filler floor, luminescent dyes are added to the composition, which ultimately create a stunning fantastic effect.
 Two-component resin floors
 Self-leveling floors with the image: fantasy in the interior of rooms
Despite the fact that self-leveling floors with a three-dimensional pattern require much more time and financial costs, this technique in the design of rooms wins the hearts of owners of country houses and city apartments. Difficulties in technology and cash injections ultimately pay off with an amazing “wow effect” at the end of the work.

To choose the right pattern for its implementation in the interior, you need to pay attention to such points as:
- Personal preferences and functionality of the room. If you adore seascapes, sea pebbles and the look of the waves, you do not need to fill such a floor in the bedroom, but rather it will be suitable for the bathroom;
- The psychological message of the image. Too aggressive pictures and drawings with a terrible plot will not have a positive effect on your well-being and condition.
- Failure effect. The illusory picture of a failure in the floor (a deep break or cracks) has an alarming effect on the psyche. A person perceives the earth as something stable, and by violating this feeling, one can end up with the opposite effect.
The process of selecting and installing 3D floors with an image must be approached seriously and responsibly. If you are not confident in your abilities, it is better to contact specialists. The designer's view and experience in carrying out such work will guarantee the embodiment of fantasy in the interior, which will delight the eye for many years.
Gallery: 3D floors (53 photos)


How much do 3D floors cost
Be prepared that the cost of 3D floors is significantly different from other coatings by 5-10 times. The price for 1 sq.m will vary from many factors:
- The choice of building mixtures. We have already mentioned that polymer filler floors come in several types and manufacturers. The better and more durable the material, the more it will cost;
- Image printing. The drawing can be printed on banner fabric or vinyl film, and there is also the option of applying the picture directly to the base with acrylic paints;
- Do not forget that installation of a three-dimensional image implies extensive work on the overhaul of the base itself, and this also "eats" a lot of money.
The price is also influenced by factors such as the total area of the floor covering, the technique of applying the pattern, the professionalism and experience of the company. On average, the cost of covering an area of 15 sq.m in Moscow costs $200-$250. In the regions, the price ranges from $8 to $10 dollars per 1 sq.m.

If you do not spare money for fantastic beauty in the house and love unique drawings, then the cost of applying a three-dimensional image by an artist with acrylic or polymer paints will cost you about $ 100 per 1 sq.m.
Which floor to choose in the bathroom (video)
Self-leveling 3D floors with an image in the interior
Almost any image that inspires, calms or makes you smile can be used to create 3D floors. But important to remember and that such a coating is durable, so you should not obey momentary desire or fashion trends. Such drawings will soon become the past, and you will admire the floor for several more years. Designers recommend choosing neutral, classic motifs: nature, seascape, space theme or wildlife.

For bathrooms, a polyurethane screed floor is best, as you end up with a thin, but very durable and beautiful finishing layer. Moreover, in this option, you can choose the surface texture, glossy or matte. Experts recommend the optimal thickness of the coating in the bathroom 1.5 mm.
The benefits of pouring floors in the bathroom are obvious. It has no seams, which means that no floods are terrible for you or the neighbors below. The filler floor is easy to clean, strong and durable. In addition, mold and other bacteria that love moisture do not form on it.

The most common design solution in the design of 3D floors in the bathroom is a marine theme. Pebbles with a rolling wave, cute and friendly dolphins, a bright bottom with colorful fish, starfish and shells.

The use of 3D floors in the bedroom allows you to make the room stylish, trendy and different. You can not limit your imagination, because you can print almost any photo you like in good quality on a plotter. As a flooded floor with a three-dimensional image is already a work of art in itself, make sure that the rest of the interior does not argue with the main motive, but complements it with accessories and a color palette.
An important point at the stage of choosing a drawing is also the presentation of the overall layout of the room. You need to place the furniture so that the bed or wardrobe does not cover the main elements of the image.
As for the theme, here you can pick up bright floral motifs, and graceful weave patterns in oriental style, and even abstraction. In the child's bedroom, it is possible to decorate the floor in the topic that is close to him (sports, music, travel, animals).

With the help of self-leveling 3D floors, you can visually expand the space of the living room, make it original and stylish. The strength, fire resistance and durability of polymeric materials gives additional advantages in choosing flooring for the living room.
In spacious rooms, 3D floors look spectacular Yes, you can let your imagination run wild here. But even for small living rooms, you can pick up a beautiful and original pattern, which will become the main focus in the design, or an unusual addition to the overall style.
By decorating self-leveling floors, you can zone the living room space without using additional equipment for this. This can be done with the help of color, texture, graphic drawing. This technique will look spectacular in living rooms combined with a kitchen.

3D floors in the interior of the kitchen
For the kitchen, the option of self-leveling polymer floors is ideal. Such a floor is not afraid of water and fire, impact-resistant and easy to clean. Usually the kitchen area is not as large as the living room or bedroom, and this can save a lot of money.
The image for the 3D floor can be matched to the overall interior and facades of the kitchen set, or you can focus on the floor if you are planning a set and overall color scheme in delicate pastel colors.
Juicy orange slices, fresh grass with dew drops, bright flowers, surf - all these motifs can be easily used in the design of kitchen floors. Distribute the pattern so that the image does not fall under the headset or dining area. If you are not sure how exactly the furniture will be arranged, choose a covering for the kitchen with a common background: sea stones, wooden boards, abstraction.
How to make self-leveling 3D floors with your own hands (video)
Interior design with the help of flooded 3D floors with a three-dimensional image is not an easy task, requiring a lot of patience, imagination, careful calculations and cash injections. But in the end, such an unusual floor design will delight you for many years, and delight your friends and family.
Attention, only TODAY!
The technology of manufacturing self-leveling floors with the 3D effect, which has become widespread in industrial and civil construction, has made it possible to significantly expand the possibilities for implementing the most daring design ideas. About how 3D floors are made, and why manufacturing technology requires strict adherence to all operations without exception, will be discussed in this material.
The process of manufacturing floors with three-dimensional images includes three main stages, which, in turn, are divided into several intermediate operations:
- Foundation preparation, which begins with the pouring of the concrete screed and continues with drying, priming and final leveling of the surface;
- Application of the actual decorative coating, when various primers, glazing paints and three-dimensional drawings are used on a self-adhesive basis or applied with a special glue;
- Applying a final protective layer which makes it possible to obtain not only a wear-resistant coating, but also visually increase the depth of the applied image.
Self-leveling floor technology

The technological map for 3D floors indicates exactly which components are used in the performance of a particular technological operation. It details the drying and polymerization time, the time for applying the compositions and the sequence of work. Most often, polyurethane or epoxy-based materials are used for the manufacture of self-leveling floors with a three-dimensional pattern.
Tip: For a durable, wear-resistant finish, it is highly recommended to use 3D floor materials from a single manufacturer that are technically and chemically balanced and provide a complete system that delivers the best quality finished floor.
Foundation preparation

Self-leveling polymer floors are installed on a solid concrete base, which should not have visible and hidden damage, interspersed with separating materials and traces of any contamination, therefore, before making 3d floors, a number of preparatory operations must be carried out:
- Checking the concrete base for damage, which is carried out by visual inspection, tapping the floor surface or using special radio frequency or ultrasonic meters. Modern devices with sufficient accuracy determine the presence of cracks or voids even in a fairly thick layer of concrete;
- Repair of a concrete base with special repair mixtures. In case of significant damage or impossibility of repair, it is necessary to re-make the concrete screed. To ensure maximum floor strength with a small coating thickness, the old base must be destroyed to the state of crushed stone of the middle fraction and then poured a new coating. If the layer thickness does not exceed 40 mm, a special reinforcing mesh is used when installing the screed;
- After repair, the screed must be dried until moisture is completely removed, and the new base must be kept for 28 days with periodic moistening to gain the necessary strength;
- The base intended for drawing 3D images must be absolutely even, without sinks, subsidence and other possible defects. For final leveling, it is best to apply thin-layer self-levelling floors based on cementitious binders, which are applied to a pre-primed screed.
Video showing surface preparation before pouring
drawing

High-quality drawing on the prepared floor surface provides about half the success in the manufacture of three-dimensional floors. The slightest fold or air bubble instantly distorts the picture and destroys the volume of the image. Therefore, before making 3D floors, one should not neglect some additional operations:
- Cleaning, if necessary, washing the floor with special detergents using an industrial vacuum cleaner. Not the slightest grain of debris and not the slightest speck of dirt should remain on the entire surface of the floor;
- Drying the base and applying a special primer that increases adhesion;
- Drawing a picture on a self-adhesive vinyl base or made on special paper and glued to the base with a special glue;
- The final operation after drawing is to control the surface moisture before applying the protective layer. This operation must be approached very carefully. Concrete bases must have a moisture content of no more than 6% to prevent the polymer from peeling off the base.
The video shows the drawing process
Application of a transparent layer of polymer and protective varnish

Protective coatings in the manufacture of floors with three-dimensional images can be based on epoxy or based on polyurethane composites. Moreover, it can be either one or two-component compositions. There are some differences in how 3d self-leveling floors are made on an epoxy or polyurethane basis, but, in general, the technological operations are similar:
- When using any mixture, follow the manufacturer's instructions exactly. When pouring, special attention should be paid to the “survivability” time of the composition, during which it retains the ability to spread;
- When pouring, it is required to prepare the next portions of the composition in a timely manner in order to avoid the appearance of coating heterogeneity and visible steps between the flooded areas of the floor;
- The leveling of the poured mixture is carried out with a special squeegee with an adjustable coating thickness and a needle roller, which serves to improve the spreadability and accelerate the removal of air trapped in the polymer layer;
- To create a shock-resistant wear-resistant coating, depending on the selected polymer, an additional layer of protective varnish can be applied to the floor surface, further increasing the “depth” of the image.
Having completed all the technological operations, it is necessary to withstand the coating for 3-4 days for the final polymerization, after which the floors are ready for use.
You got a rough idea of how 3d self-leveling floors are made. For all the seeming simplicity, the pouring of polymer floors is a rather complicated undertaking that requires well-coordinated actions of the construction team, and precisely adjusted in time. Even after watching a video on how to make 3D floors, you should not take on their device alone, especially with large areas. The slightest inaccuracy can spoil the results of the work done, and it is very difficult to dismantle polymer floors due to their high strength.
What kind of curiosity this is, self-leveling 3D floors, for many remained a mystery until quite recently. It was possible to see this miracle only in expensive restaurants and some nightclubs. But today, Elakor-ED (Russia), which relatively recently appeared on the market, have become available to the general public, and everyone can use this amazing novelty to decorate the interior of their home.
In the manufacture of new self-leveling 3D floors, a surprisingly simple technology is used. The base of the surface is preliminarily prepared, then a two-dimensional graphic image is pasted on it, and the final step is the application of a special polyurethane composition. Installation of a warm self-leveling 3D floor "Elakor-ED" at the request of the customer will also not be difficult.
Thanks to the latest technologies that were used in the development of all Elakor-ED floor components, the quality of the product is not inferior to the best brands of foreign manufacturers. The advantages of 3D floors are as follows:
High wear resistance
Abrasive wear resistance
Excellent resistance to UV and visible light
Up to 2 mm depth of optical transparency of the floor layer
Ease of operation and maintenance
If we talk about the aesthetic appeal of the new 3D floors by Elakor-ED, no one will doubt this side of the issue. The proposed variants of the original design of the novelty create a stunning effect. How do you like the idea of seeing a piece of a sea beach with a wave running ashore instead of the usual floor? Or a warm floor with an image of a flowering meadow, a globe or fluffy clouds with the effect of full presence? With the help of self-leveling 3D floors "Elakor-ED" you can implement any, the most and create a unique, original, amazing interior in the room. Just do not forget that all the beauty of the “picture” opens only in the space that is as free from furniture as possible.
Even today, new 3D self-leveling floors "Elakor-ED" can be purchased on the Russian market at quite affordable prices.
Related materials
At the mention of the phrase "concrete floor" something dull, gray and cold appears under your feet. It turns out that this is not the case at all...
You can talk about the importance of floor screed for a very long time. Not without reason, many articles are devoted to this topic on our blogs. How...
Since July 2017, the high-strength self-leveling floor WEBER.VETONIT 4100 has been produced in a new 20 kg package. The company "Saint-Gobain" managed to improve the process ...
Today, a bright and voluminous drawing can be created not only on the walls of the apartment, but even on the floor. Probably, most of the readers of the site have already visited the exhibitions of 3D paintings that are popular today and even came to the galleries of 3D drawings, where you can take unique and interesting photographs. And such works of art can be created even in your apartment. Modern building technologies allow you to create 3D floors with your own hands, step-by-step instructions for arranging which are given below.
DIY 3D floors - step by step instructions
3D paintings on the floor in the apartment are created on the basis of self-leveling floor technology. And before you have the opportunity to study the instructions for creating a unique pattern on the floor, you should get acquainted directly with this type of finish and find out its advantages / disadvantages.

So, the self-leveling floor in construction is a special type of screed, for the creation of which special self-leveling building mixtures are used. They are quite fluid, and therefore, in the process of pouring and drying, they manage to be evenly distributed over the surface of the subfloor-base and make the final surface almost perfectly even.

On a note! The minimum thickness of the pouring layer is 3.5 mm.
Self-leveling floors can be divided into two types:
- with top coat, which becomes after drying directly the final floor covering;
- fast drying concrete screed, which allows you to prepare the subfloor for laying various types of flooring.

The article will focus on the first type of floor finish, in which case the finishing layer will be applied. And a full-fledged 3D floor can be called when a pattern is applied to it in a special way, from the side it seems voluminous. To create such a floor is a special chic and an opportunity to give the premises uniqueness and originality, because on the surface of the floors you can reproduce any drawings, even those created by yourself.

Self-leveling floors can be used not only in residential premises - they can also be created in warehouses, gyms, shopping centers, etc.

3d self-leveling floors
Self-leveling floors
Any self-leveling floor consists of several layers - there can be 3 or 4 of them. As a rule, this is a rough floor, a primer layer, a leveling layer, a finishing layer. In this case, a building mixture is used as a leveling layer, and a special polymer mixture (two-component) is used to create a finishing layer.

The desired pattern is created, by the way, not on the surface of the finished floor - the image is placed between the leveling and finishing layers.

On a note! The thicker the finish layer, the more pronounced the 3D effect will be. This part is in the structure of self-leveling floors and is responsible for the depth / volume of the picture.
By itself, the self-leveling floor, sometimes called "liquid linoleum", has no gaps and crevices. Coating thickness - up to 7 mm. To the touch, this finish may resemble tiles.

Pros and cons of self-leveling floors
One of the main advantages of self-leveling floors is the ability to make the flooring original and unique. , patterns on linoleum, PVC tiles and other materials for decorating floors have already become boring to many, and the self-leveling floor allows you to change the room beyond recognition.

Other advantages of self-leveling floors:
- during pouring between the rooms there will be no gaps and cracks;
- high strength characteristics;
- ease of care - the surface is easy to clean;
- attractiveness and uniqueness of appearance - self-leveling floors will make the room unique;
- high resistance to various chemicals;
- the opportunity to realize the most daring fantasies;
- compatibility with any style of interior;
- high rates of moisture resistance;
- excellent heat resistance – compatible with various underfloor heating systems.


Also, self-leveling 3D floors have disadvantages - yes, this is far from an ideal coating. The disadvantages of this type of finish are as follows:
- the complexity of both installation and dismantling - in both cases, large labor costs will be required;
- The glossy floor is quickly covered with scratches. Based on this, there is another drawback of the self-leveling coating - the need for protective measures in order to keep the surface in good condition for the longest possible time;
- creating a self-leveling floor is not a cheap pleasure, as it will take quite a lot of materials, tools and fixtures.


Attention! When creating a self-leveling 3D floor, it is important to strictly follow the entire technology. Otherwise, there is a risk that the floor will quickly become unusable.

Types of self-leveling floors
There are 4 main types of self-leveling floors - they differ depending on the components that are part of the mixtures used to create them. In general, the technology of their application is similar.
Table. Types of self-leveling floors.
| View | Characteristic |
|---|---|
| This type of self-leveling floor is based on methyl methacrylic resin. The coating performs well indoors and outdoors. It is often used in various objects of various industries. Resistant to high and low temperatures, not afraid of ultraviolet radiation, depending on certain additives, it can somewhat change its properties. Differs in resistance to influence of hostile environment. It polymerizes quickly, and pouring work can be done even at sub-zero temperatures. Disadvantages - the need to work very quickly, as the coating dries quickly. Requires the help of professionals. It has an unpleasant pungent odor. |
| The most commonly used type of coating, characterized by durability, lightness, strength. The coating is not afraid of exposure to water and temperature fluctuations, resistant to shock loads and abrasion. Differs in high rates of hygiene therefore it is recommended for use in medical institutions and rooms of food appointment. The main disadvantage is the importance of careful preparatory work (preparation of the base), while installation must be carried out at low humidity. Another disadvantage is the significant cost of building materials. |
| The base is epoxy resin. Such floors can be equipped on wooden, concrete, metal bases. Resistant to abrasive substances, not afraid of chemicals. Often settled in the premises of pharmaceutical and food industries, laboratories. Advantages - ease of maintenance, high resistance to chemical and mechanical stress, environmental friendliness. Disadvantages - inelastic, and therefore easily damaged in the event of strong impacts. |
| The basis of such a floor is cement, a polyacrylate copolymer, a special filler. Previously, such floors were created only in the territory of food production, where various loads often move and the floors are under heavy load, are constantly disinfected, quickly get dirty and are subjected to constant cleaning. Self-leveling cement-acrylic floors are not afraid of water, chemicals, mechanical influences. They do not slip (matte), do not peel off, they cope well with temperature fluctuations. The main disadvantage is that it is difficult to install. |


If we compare all the above types of floors, we can conclude that polyurethane, epoxy floors can be done independently. As for methyl methacrylate, they are not recommended for independent construction work. The most elastic are polyurethane floors, but epoxy ones are not afraid of chemicals. To level the rough coating, cement-acrylic mixtures can be used.

On a note! In addition to the main four types of self-leveling floors, there is also a mass of combined coatings.

DIY 3D floor
Creating a 3D floor in your house yourself is quite difficult, but possible. The process takes place in several stages: making calculations and preparing the base, creating a leveling layer, drawing a picture and then - the finishing layer. It is the latter that will provide the very 3D effect that people like so much.
Attention! To achieve the desired effect, transparent materials are used as a topcoat.

Materials and tools
In order to create a 3D floor, certain materials and tools are needed:
- primer required for processing the subfloor;
- polymer mixture, due to which a leveling layer will be formed;
- directly the drawing itself, which is usually made on banner fabric;
- transparent two-component polymer, which will act as a top coat;
- adhesive composition, thanks to which the pattern will be fixed on the leveling layer;
- protective varnish, which covers the finish coating;
- masking tape;
- polyethylene film;
- spatulas;
- rule;
- brushes;
- special shoes.

masking tape
If the drawing is created by hand, then you will need acrylic paints and brushes. A protective composition will also come in handy, which will ensure the safety of the drawing.

Preparation and calculation
So, one of the initial stages is the calculation of the amount of required consumables. In many ways, the consumption will depend on the condition of the subfloor (base), the thickness of the layer, as well as the material used (information on consumption can be found on the packaging).

To create a self-leveling floor with a thickness of 3 mm, it is necessary to spend about 4 kg of building mixture per 1 m 2. Based on this, you can make the necessary calculations. The average cost of 1 m 2 of self-leveling floor with a 3D pattern will be about 6000 rubles. Costs can be slightly reduced if all the work is done independently. By the way, the most expensive part of the entire self-leveling floor is the picture printed on the banner.

Attention! Self-leveling floors with a 3D pattern will look good only on areas larger than 10 m2. It is not worth creating them in small rooms - the whole drawing will simply be lost and invisible.
How to prepare a drawing
To begin with, you should choose the picture that you would like to see daily. The choice of illustration should be approached very responsibly, since it will take a long time to coexist with it. It is necessary that it also fits the interior - you should not draw dolphins in the hall, unless, of course, the design of the main room is not made in a marine style.
On a note! If you want to create a drawing yourself, then you should not choose a complex image if there are no artist skills. Let the picture be simple, but memorable and pleasant.

The selected image should be printed on banner fabric. This can be done in any agency that deals with outdoor advertising. By the way, they can also help with the choice of pattern. It is very important to clarify the technical parameters of the final work with the company - the illustration must be printed with a resolution of at least 1440 pixels on matte satin.

Step by step work
After the drawing has been selected and printed, all the necessary tools and materials have been purchased, you can proceed to the work itself.
Step 1. The first stage is the preparation of the foundation. The rough floor is thoroughly cleaned of debris and dust. The surface is degreased if there are stains of oil or paint on it. All cracks, chips are sealed with sealant, irregularities are polished. The surface is thoroughly dried (permissible indicators of base humidity - no more than 4%, air - no more than 50%).

On a note! If the draft floor was poured over a new one, then at least 30 days must pass before the installation of the bulk floor.
Step 2 The surface is primed with a special primer mixture for bulk flooring. The application of the mixture can be done with a roller or spatula. This is necessary so that the base with the leveling layer is very firmly connected.

Step 3 After the primer has dried (about 4 hours), a white epoxy material is poured onto the surface to level the base. Leveling the layer is done with a wide spatula. It is necessary to wear special studded shoes (paint shoes) on your feet, which will allow you to walk on a damp surface.


Step 4 The surface is treated with a special spiked roller. This will remove excess air from the thickness of the material. The surface is dried for at least 24 hours, after which the evenness of the layer is checked.

Step 5 A drawing is being applied (paints, banner fixing, etc.). The base layer is primed, a transparent polymer solution and a solvent mixed in a ratio of 2:1 are applied to it - an adhesive solution for a banner. Also, the adhesive composition can serve as a finishing material. It is applied to the draft surface, and a banner is glued on top. It is very important to expel all the air from under the banner fabric. Work can be done with a clean roller.
On a note! It is very convenient to use a self-adhesive banner for drawing a picture, which works on the principle of translation. A protective film is removed from one of its sides, the pattern is glued to the surface and rolled with a roller.

Step 6 The amount of the polymer mixture of the finishing layer is calculated - it will depend on the required thickness and floor area. On average, the consumption is 4-4.5 kg / m 2. Further, the material is poured onto the surface of the banner, carefully leveled with a rule. Air is expelled by a spiked roller. Next, the floor is covered with a plastic film until completely dry, and then varnish is applied to the surface, which will protect the surface from mechanical damage.

Video - How 3D floors are made
A few tips will help you create 3D floors as quickly and efficiently as possible:
- during the installation of self-leveling floors, in order to protect them from cracks, it is recommended to lay a damper tape along the walls;
- in the room where work is carried out, there must be good ventilation;
- during work, it is important to use a respirator;
- it is desirable to produce a floor bay at an air temperature of at least +10 degrees;
- it is necessary to level the finishing layer within 30 minutes, as it dries quickly.

Proper surface care
Caring for self-leveling floors is simple, but still it must be regular in order to maintain the beauty of the coating for many years. For example, every 6 months a special mastic should be applied to the surface, and when making repairs, the floor should be covered with covering material. Also, special protective caps are put on the legs of the furniture or linings are used.
![]()
Floors should be washed with an aqueous solution of detergent, and then wiped with a clean cloth.
Attention! Do not use substances containing chlorine or acids to clean self-leveling floors.

With some effort and spending a lot of money, you want to immediately get the perfect job. However, creating a self-leveling 3D floor is not an easy task, so you should be prepared for the fact that a beautiful coating will not work the first time. However, over time, you will be able to train, and the drawings on the floors will get better and better.


")


