Regardless of model and brand drain tank toilet bowl, the fundamental purpose of the shut-off valves of the drain tank is unchanged:
- open the water supply if it is empty;
- turn off the water when filling it.
The cistern fitting kit consists of the following items:
- drain mechanism (it includes a siphon with a lid and a sealed gasket between the drain pipe and the tank);
- jet adjustment lever (connected to water pipe by means of a ball valve);
- float (adjusts the filling level of the tank). Connected to the drain mechanism with a spoke.
The design of the mechanisms for draining and filling the tank depends on the type of installation.
Type 1- a tank suspended high above the toilet. This type is familiar to almost every inhabitant of our country. Not too pretentious in appearance, it nevertheless has undeniable advantages:
- simplicity of design (which makes it easy to repair it on your own);
- the high speed with which the flow of ode rushes from a height into the toilet bowl.
Type 2- a drain tank installed on the toilet shelf. Most modern apartments and public institutions this type of device is being used.
Type 3- a tank built into the wall. It looks more like a thick-walled polyethylene canister.
All manipulations to replace the fittings of such a tank are performed through the hole in the drain button.
In order to successfully install a toilet or bidet, you need to know what it should be, this is necessary so that the pipes do not clog and wear out ahead of time. The most important and up-to-date information.
If the toilet "does not flow", then the water consumption is minimal. However, in addition to paying for water, it is necessary to check water meters regularly. About the cost, conditions and frequency of this procedure, there are many useful tips how to save on checking meters!
Drainer mechanism ^

It is hardly necessary to consider in our time the device drain fittings for suspended structures: they have long lost their relevance.
Therefore, in the future we will only talk about the valves of the most common types - cisterns installed directly on the toilet bowls.
According to the method of actuating the drain device, the mechanisms are divided into two groups:
- exhaust (rod). In order to activate the device of this group, it is necessary to raise the top of the rod that locks the drain hole with the handle.
AT modern models tanks, such a mechanism is practically not found. It was preserved only in fairly old models;
- push (button). The mechanisms of this group are divided, in turn, into two subgroups:
- Croydon valve. It consists of a body, an axis of the float lever, a piston and a seat. The float arm drives the piston.
The piston movement in Croydon valves is vertical. This design is installed in old-style tanks.
- piston valve. In this design, the axis of the float lever is fixed in a cotter pin, split in two.
Moving, the lever causes the piston to move in a horizontal direction. The piston, in contact periodically with the saddle, regulates the flow of water into the tank.
A gasket is mounted at the end of the piston, which blocks the water flow at the moment the piston presses on the seat. Tanks with piston valves are in many Russian apartments.
- diaphragm valve. In this type of design, a membrane (rubber or silicone) is installed instead of a piston gasket.
The plastic piston, moving under the action of a lever, also moves the membrane. It blocks the water inlet. The diaphragm valve is the latest advancement in cistern production.
In addition to plumbing, water can be used for additional space heating. AT recent times warm water floors are gaining popularity, creating an optimal microclimate in the apartment. Read about how this can be organized in the article, this is not such an expensive pleasure, but the benefits of keeping your feet constantly warm are undeniable!
Summer water outages are not terrible if you have a water heater. One of the most popular companies in Russia is the Termex company, read about its water heaters with a capacity of 80 liters or more, let it always be comfortable in your home.
Tank filling method ^
The tank can be filled in two ways:
- through the side water supply;
- through the bottom water supply.
The cistern with side inlet fills with water noisily while at the bottom supply, water fills the tank almost silently.
But many manufacturers began to supplement the fittings of the tank with a side supply with a drain pipe. It is made of soft plastic and sends a jet of water to the lower area of the tank.
Thanks to this addition, drain cisterns with a lateral supply have ceased to make noise.
In what cases does the question arise about the replacement of reinforcement ^

Waste tanks entering retail chains are usually equipped necessary kit fittings.
And the majority of users are not interested in what mechanisms provide normal functioning devices.
But time passes, and the tank ceases to cope with its task. It is at this moment that the user has to get acquainted with his device, solve the problem of acquiring spare parts.
Moreover, the problem is not that they are difficult to buy, but how to buy a quality product.
The quality of the cistern fittings plays a huge role in its normal operation.
It is faulty mechanisms that cause various problems. For example, water begins to seep into the toilet bowl, which is why the snow-white surface of the toilet bowl covered with red streaks.
For more information about the types, cost, sizes of toilets and bidets, what is typical, installation methods and selection tips, read only on our website.
Sewer pipes require periodic cleaning. About cleaning methods, cost, special devices for this procedure and much more, let your sewer system function as it should.
Or the flushing mechanism ceases to control the volume of flushed water. Such troubles can happen different reasons but the most common ones are:
- low quality of plastic elements of mechanisms leads to their distortion. The same effect can give too sharp drop water temperature even if high-quality fittings are installed in the tank;
- many import production mechanisms(they use diaphragm float valves) can't stand the quality of our water: rigid, having a large number of impurities (such as chlorine). For guard imported equipment sometimes has to be installed coarse and fine filters at the entrance of the water pipe to the apartment;
- when using materials Low quality for the manufacture of cistern fittings, it is subjected to premature aging and abrasion.
So, in what cases does it become necessary to replace the fittings:
- continuous flow of water into the tank. Such an "accident" can happen due to a misalignment of the float lever.
But if nothing has changed after adjusting it, then the float is damaged: it lets water in, becomes heavier from this and sinks to the bottom. In this case, you will have to purchase a new float.
It costs quite a bit - just about 4 rubles. But in practice, in the event of a float failure change the entire float valve. This node costs an average 200 - 300 rubles.
- Continuous flow of water into the toilet. There is only one reason for this - the membrane of the drain tank siphon is damaged. In this case, there is only one way out: replacing the membrane.
The cost of this element depends on the method of its manufacture:
- stamped membranes stand 6 rubles;
- molded with vulcanization 30 rubles.
Many users often wonder: is it worth replacing individual elements tank fittings?
After all, if the mechanism begins to wear out, then one breakdown will be followed by others. It is safer to replace the entire set of fittings.
In addition, it is very difficult to find, say, a membrane or a float for an imported cistern. BUT replacing a part with a "non-native" one often does not lead to the expected result.
If you decide to replace the valve set in the cistern. Ask price ^

The cost of a set of fittings for a Polish-made Cersanit tank with a lower water supply is 650 rubles. The kit includes:
- exhaust valve;
- filling valve;
- ring sealing;
- fitting plastic BAS 24;
- button and sleeve are metallized.
Fittings for the Vidima cistern 1250 rubles. But for products of this brand membrane can be ordered separately. It will cost in 300 rubles.
Hybner cistern outlet with stop function 1800 rubles.
The drain valve of a tank of the Spanish production of Jika costs 2800 rubles. The product is available in two versions:
- button height is short;
- button height increased.
The Jika flush valve can be used in the ROCA and JIKA flush cisterns of the collections:
- dama senso;
- victoria;
- vega etc.
fittings domestic production costs much less. For example, armature "way"(produced in Pskov) will cost the buyer from 250 to 340 rubles.
Moreover, the manufacturer claims that all plastic elements are made from virgin polypropylene, and shut-off valves are produced with the addition of natural rubber.
Interesting options are offered by the Ryazan company Center heating equipment and plumbing." They produce fittings brand "RBM" with three types of valves:
- direct action;
- membrane;
- backpressure.
They can be used in tanks with both side and bottom water supply. They have models with stock and push-button start mechanisms.
Universal Design:
- with rod mechanism from 99 rubles;
- with diaphragm backpressure valve (push-button) from 205 rubles.

Well drilling technology for water, the cost of this procedure

Cost, types, features of installing a caisson for a well
11 responses to the article“ What you need to know about fittings for the toilet cistern: characteristics, firms, prices”
- Oksana
It’s even strange that a tank suspended high above the toilet bowl is not in fashion now, yet it seems that it really is the most efficient, after all, the speed of the water flow is enough important factor. I even wanted to do this at home, I will have to find out if it is possible to do this now, otherwise I was recently in a plumbing store, but I didn’t see something like that.
- Anna
I really like the hidden toilet barrels that are built into the hay. Only one button is visible on the face. Unfortunately, such a system is very expensive, and not everyone can afford it. Recently, I began to think about the economy of the toilet bowl drain barrel. Today it is very actual question for all. Are there systems that allow you to save water?
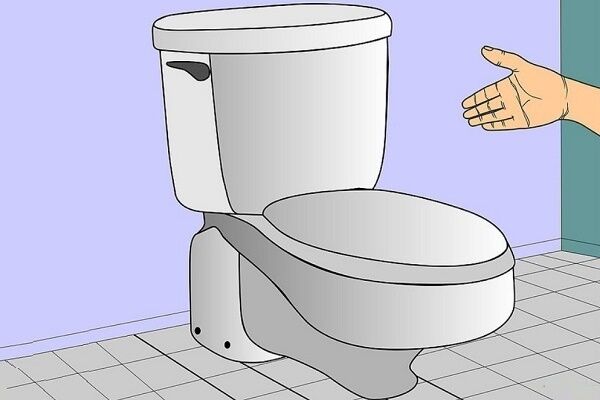
The toilet bowl is an integral household element of any apartment, and it is always designed for long term services. In addition to its external part, it has a draining device, also called a fitting. It is this equipment that needs periodic maintenance and sometimes under renovation. In addition, during the initial installation of the toilet bowl, it is very important to correctly select all of its elements.
The outer part of the toilet bowl consists of the following elements:
The fittings for the toilet bowl perform the functions of draining and filling water into the tank. It consists of the following elements:
Assembled armature looks like this.
Components and principle of operation of the drain system
- rack with a tank;
- lid;
- button for flushing (now 2 buttons are often used).
- a float that regulates the filling of water into the tank when the level is insufficient;
- a shutter that closes the hole in the tank when the flush is completed;
- traction in the form of a bar or chain.
The cycle of the toilet bowl is shown in the video.
A schematic representation of fittings for a toilet in the figure below.

Pressing the siphon cover opens access to the pipe where the water drains. As a result, the level of the water in the tank drops, and the float filled with air drops.
The tank works in 2 modes - draining and pouring water.
- In flush mode, the toilet flushes waste by mechanically opening the drain hole and supplying a large volume of water. In old mechanisms, a special handle rises, in new ones, buttons (one or two) are pressed. If there are two buttons, then pressing them simultaneously gives a fuller pressure, while one button gives a standard force pressure.
- In the mode of supplying water to the tank, it comes from the pipe through the side channel. The float drops and water flows freely into the tank. When it reaches the desired level, the current stops due to the rise of the float.
The operation of the device is based on the principle of a water seal - the drain pipe always has a curved appearance, due to which there is always a certain volume in it pure water. It blocks the access of smells from the sewer to the apartment. Excess water from the tank also flows into the same pipe, so it never overflows and does not heat the room. Schematically, the circulation of water is shown in the figure.

In this case, water can enter the tank in two ways:
- The bottom feed mechanism assumes that water enters the tank from below. The float moves vertically and presses on the device (membrane) that closes the drain, as a result of which, when the optimum filling level is reached, the flow of water into the container stops.
- The top feed mechanism is more traditional - water comes from special pipe due to the movement of the float down, and then when it reaches optimal amount, the float rises and blocks access. This mechanism is simpler, but it is noisier than the first one.
The device for the action of the fittings for the toilet bowl is discussed in detail in the video.
Thus, the fittings for the toilet bowl work due to the ordinary forces of attraction.
Varieties of toilet bowls
There are quite a few types of toilet bowls. This diversity is due to different appearance, different fusion mechanism. pressure force, etc.
So, according to the location of the drain pipe, they distinguish:
- toilet bowls with horizontal drain;
- with oblique drain;
- with vertical outlet.

By type of drain, toilet bowls can be:
- horizontal (cascade);
- circular (shower).

In the first case, water enters the toilet bowl directly and flushes waste with a strong stream. The second option is more efficient, since the pressure goes along the inner surface of the rim, due to which water turbulences are formed, which well entrain all objects. At the same time, a circular drain is quieter than a horizontal one, since the water flows more evenly.
By type relative position cistern and bases of the toilet bowl distinguish their types:
- compact;
- monoblock;
- angular;
- separated.

The first 3 varieties form a single whole with the tank and vary depending on the size of the toilet room. The second is separate, and the tank can often be hidden in the wall. Such types are often installed in large shopping centers.

Also, toilet bowls can be made of different materials:
- faience (in most cases);
- metal (for example, in train cars).
vacuum toilet
Separately in a row is a vacuum toilet. It uses a different drain mechanism. The fittings for the toilet in this case work not only due to the draft of water, but also with the help of air flow. Its main difference from the usual ones is that it includes:
- valve that opens at the touch of a button;
- vacuum pump, which ensures the occurrence low pressure in a sealed chamber.
When the button is pressed, the valve opens, air begins to be sucked into the toilet due to the greatly reduced pressure in the chamber. This air, along with water, provides strong pressure to remove residue. At the same time, a characteristic sound is emitted, which was heard by everyone who used the toilet on long-distance trains - they are there in all cars.

IMPORTANT. If usually from 4 to 7-8 liters of water is used for draining, then the vacuum toilet spends no more than 1.5-2. In fact, it saves 2-3 times more water, how conventional system. This is achieved through the assistance of air in the formation of pressure. Therefore, vacuum toilets are often installed in apartments.
Types of fittings for the toilet
The fittings for the toilet bowl are its most important link, the functioning of the system as a whole, as well as the duration of its trouble-free use, depend on the correct choice and installation of which.
The classification of fittings depends on their device. For example, according to the method of actuating the drain mechanism it happens:
- exhaust fittings (rod) - to drain, the handle simply rises or the rope with the tip twitches, the locking element opens the drain hole, and water enters the waste bowl;
- push (another name - push-button) - the most common option with a push-button drain.
Depending on the features of the float device, there are:
- piston valves - the float is engaged with the piston by a special lever that moves the piston horizontally. A special gasket is glued to the lower end of the piston, which closes the water supply when the optimum level is reached;
- membrane - instead of a gasket, a membrane made of rubber or silicone is installed. It reliably blocks access to excess volumes of water. Serves for a very long time, therefore it is considered the most correct choice;
- the croydon valve provides vertical movement of the piston; it is not used in modern toilet bowls.

Perhaps the most important classification of toilet fittings is based on the principle of its operation.
Shut-off valve for the toilet
This name describes main function this mechanism. It closes the hole with the water supply when there is enough liquid in the tank. On the contrary, it opens a hole. when the waste was washed away. The components of such a system are:
- a glass where the mechanism is located;
- valve with attached membrane;
- float;
- thrust;
- guide.

When flushing occurs, the float goes down following the falling water level, the thrust presses on the valve and opens it, as a result of which the volumes new water enter the container. Water will be poured until the float returns up with it, and the membrane reliably closes the valve.
Drain fittings for the toilet
The flush fitting for the toilet provides a process for direct flushing of waste. In addition, it provides an emergency discharge of water when the tank is full for some reason.

Drainage is provided by opening the drain hole with a piston and closing immediately after flushing due to gravity.
Fittings for the toilet should be optimally suited for each specific device and its technical specifications. One of these important indicators is the features of the supply of new water to the toilet tank.

Toilet fittings with bottom connection
As already mentioned, this is a more efficient and quieter way to supply water. It is often installed in modern toilets. In these cases, fresh water is pumped from the plumbing below, directly into the tank with the toilet bowl.
It also creates a more aesthetic appearance of the device as all communications are hidden from view.
In cases with bottom water supply Special attention when buying fittings for the toilet, you should pay attention to airtight gaskets. The fact is that the forced supply of water from the bottom up creates a constant pressure on the pipe, as a result of which leakage is often observed. However, reliable sealing of all connections makes it possible to practically eliminate this phenomenon.
Side connection
This is classic version which can be found in any old apartment. Water is poured through a special hole on the side, and it is located above the water level.

The fittings in this case are brought directly to the water pipe, from where the water comes. It has a push button valve with a metal button.

You can learn more about the types in this video.
How to choose fittings for the toilet
If the question arose of replacing old fittings or buying a toilet bowl and a device for draining new apartment, then before making a choice, you need to evaluate under what parameters of the bowl and toilet bowl you select drain systems, how important water saving, noise and pressure, aesthetics are for you.
IMPORTANT. The last factor to consider is the price factor. You can choose among a particular product cheaper offers in various stores, but choosing the cheapest model initially is more expensive for yourself. The fact is that the poor-quality articulation of components, the short-lived material of which they are composed, will not allow the system to function for as long as we would like. There will often be cases when a leak occurs or the flush becomes weaker, etc. Therefore, it is better to pay extra for quality than to spend time and money on solving problems.
Models and prices
Quality models are supplied to the market by manufacturers famous brands, such as Wirquin, Optima Siamp, AlcaPlast and some others. Approximate prices they are shown in the table below.
The fittings for the toilet bowl and its components as a whole are completely affordable, and installing them yourself will not be difficult. The cost of it increases not only depending on the initial quality of the parts. but also on the complexity of the mechanism. So, two-button drain systems are more expensive. Besides. some of them are equipped with a manual flush stop system - this saves water consumption.
Replacing fittings for the toilet with your own hands
You can install fittings by inviting a plumber, but if you understand well, you can do it yourself. Moreover, when buying, the kit always comes with an instruction that describes in detail the installation algorithm.
Video instructions for replacing the toilet frame
When installing the system with your own hands, the main elements with which you will work will be:
- float;
- twists - connect the float to the crane;
- supply fitting;
- float valve, which is attached to the fitting.
Schematically, the system looks like this.

AT general view you need to carry out the following sequence of actions:
- When it comes to replacing fittings, the old one is carefully removed first. To do this, the water supply to the tank is shut off (usually there is a special control valve for this), and the nuts and screws supporting the piston racks are carefully unscrewed. All fittings are unscrewed and the system is removed.
- The elements of the new fittings are assembled according to the instructions: the drain mechanism is installed on a special sealed gasket. Then it is screwed into the tank with a plastic nut.
- The bolts are inserted into the holes, and on the other hand they are screwed with nuts, and plastic washers are put on top.
- The tank with the assembled fittings for the toilet is attached to the bowl. This is usually done with the self-adhesive rubber that comes with the kit, as well as with bolts that are carefully tightened with nuts.
- Next, a hose is connected through which water will be supplied to the tank.
- If the armature has additional mechanisms they need to be adjusted to suit your needs. For example, you can choose the optimal position of the glass. moving it up or down; you can change the position of the drain pipe a little. In the process of operation in the first days, take a closer look at how much water is spent. If too much is poured out, then you need to adjust the fittings so that less water enters the tank. More details can be found here

IMPORTANT. When assembling the entire system, pay special attention to tightness - carefully fasten all connections, tightly fit rubber gaskets. In the first week after installation, you need to be especially careful to check for leaks. If even small droplets are formed, then the system must be disassembled and reassembled, since in the future the gaps will only increase.
Possible problems during operation
Over time, during the operation of any, even the highest quality fittings for the toilet, failures in the system may be detected:
- Water flow from outer side branch pipe. Here the reason is obvious - a leaky gasket. Perhaps it was installed incorrectly, or it has already worn out and moved away from the surface. To begin with, you can try to screw the nut that connects the tank to the pipe until it stops. But if the leak continues, then you need to turn off the water and pull the gasket out from under the tank with careful movements. When it appears completely, you need to remove it by making several windings with fluoroplastic sealing material (fum).
- If the lever that drains the water does not work, then you need to replace its components, usually they universal sizes, and this procedure will not be particularly difficult.
- If the water does not drain at all, then you need to adjust the angle of the lever on which the float is attached. This is done with a plastic screw.
- If the drain occurs unevenly, then in large, then in small portions, this indicates that the fastening of the lever has become more loose. It is necessary to tighten the bolt and in this position adjust the lever to the required level
- If too much water is poured, then the float is broken. Perhaps it is a little skewed or its mechanism does not work. Need to either fix the spoke
- If, on the contrary, the drain has become weak, and water drains in small quantities, then most likely the pipe connecting the tank and the bowl is clogged. It needs to be cleaned up.
- If inside the tank is formed limescale, then you need to drain all the water, block access to fresh water and wipe off the plaque with citric acid then rinse it off with water.
- If there is a sewer smell in the apartment, this indicates that due to a strong pressure drop in sewer the water level in the knee (flush) has dropped sharply - this can be seen with the naked eye. It is possible that the drain connection to the sewer was not properly installed, in which case it needs to be redone, otherwise the smell will continue to do so. Another option is that the drain is dirty, it needs to be cleaned with a plunger or a plumbing cable.
How to save water for draining
Properly selected and installed fittings provide not only high-quality drainage, but also help save water.
You can experiment with savings if you notice that the drain is too strong and water is wasted. To do this, there is one simple option - to reduce the volume of water supplied to the tank after draining.
- Pour in plastic bottle with a volume of 1.5-2 liters, fill it with up to half the volume of sand or small stones for gravity, and then add water.
- Carefully place this bottle to the side so that it does not catch on the moving mechanisms of the armature.
- Close the toilet lid.
At first glance, the savings of 2 liters is small. But if you do even 7-8 plums per day, then you will save at least 300 liters of water per month, i.e. almost half a meter. Convert it to money and feel the difference.
Another method involves using water from the washbasin to flush the waste.

In this case, of course, re-equipment of the entire system is required. However, if we are talking about newly created communication, take a closer look at this idea. The fact is that the toilet spends up to 25% of the total water consumption, and such a measure can significantly save resources.
Another option is to purchase a water flush restrictor. More about it here.

With average consumption, the savings per year will be about 2500 rubles.
toilet care
And of course, do not forget that in order to maintain cleanliness and extend the life of the toilet bowl and cistern, you need to follow simple rules for caring for them:


It is important not only to choose the right plumbing, but also to carry out constant care for it. Then it will serve you for a very long time.
Complies with the requirements of TU 4953-001-02903999-2014
AB 69.57.55.3
Purpose of the product
Designed for filling flush tank(popularly a flush tank) with water and supplying it for flushing into the toilet.
Security measures
The materials used for the manufacture of fittings, under operating conditions, do not emit into environment harmful substances and do not provide harmful effects on the human body through direct contact. Work with fittings does not require special measures precautions.
Specifications
- Operating pressure range, MPa 0.05 - 1
- Tank filling time in the volume of 6.0 l, no more than 2.5 min
- Level stability: change in water level when pressure changes by 0.1 MPa, no more, mm 5.0
- The diameter of the hole in the lid of the tank, 38 ... 44 mm
- Installed resource, not less than 150.0 thousand cycles
- Connection size G1/2-B
- Product weight, no more than 0.62 kg
Completeness
Fittings kit includes:
Product storage and care
The fittings should be stored in a packaged form in dry enclosed spaces at a distance of at least 0.6 m from heating appliances.
Not allowed to use detergents, which include abrasive, acid - alkali-containing substances, organic solvents.
Manufacturer's Warranty
The warranty period for fittings is five years from the date of commissioning, but not more than six years from the date of manufacture. The fittings service life is 6 years.
The product warranty does not apply if:
- its mechanical damage;
- installations in violation of the requirements of this manual;
- improper maintenance during operation:
- water inconsistencies technical requirements GOST 2761-84.
To increase the reliability and durability of the fittings, it is recommended to additionally install a filter in the water supply network.
Reinforcement installation
The fittings are delivered assembled, complete and configured for a specific type of tank

After installing the fittings, do not allow the moving parts of the valves to touch each other and the walls of the tank.

When connecting the water hose to the inlet valve, hold the valve from turning.

To avoid leakage from under the gasket, tighten the fixing wing nuts evenly on both sides.

Check that there is a gap of 3 - 19 mm between the tank cover and the button assembly, inserted all the way into the thread of the exhaust valve (without screwing in).

For reliable centering of the threads, before screwing in, make 1 - 2 turns counterclockwise until a characteristic click, which will show that the thread has “sat down” in its place.
- If the distance between the reservoir cap and the button assembly is beyond
limits 3 ... 19 mm, it is necessary to adjust the outlet valve in height
(see fig. 2 and the table for adjusting the height of the reinforcement), Disconnect the rod 23 from
overflow body 12. Squeeze cup latches 10 and move
racks 6 up and down achieve a gap of 3 ... 19 mm.
Attach the rod to the overflow body.

- To adjust the water level in the tank
disconnect the rod 2 (see Fig. 1), move
float up or down and reattach
drawn to him. Minimum distance between
water level and the upper edge of the tank 45 mm.

- After adjusting the water level in the tank, adjust the overflow pipe 7
(see Fig.2). To do this, unscrew the bayonet cover 9 and move the pipe
overflow to a position at which the risk on the pipe corresponds to the level
water in the tank. Tighten the bayonet cap.

* For long stem fittings
** when setting to this division, remove the overflow pipe 7
Rebar height setting table
| Rack scale division | Height H, mm | Rack scale division | Height H, mm |
| M** | 285-304 | 15 | 360-379 |
| 1 | 290-309 | 16 | 365-384 |
| 2 | 295-314 | 17 | 370-389 |
| 3 | 300-319 | 18 | 375-394 |
| 4 | 305-324 | 19 | 380-399 |
| 5 | 310-329 | 20 | 385-404 |
| 6 | 315-334 | 21 | 390-409 |
| 7 | 320-339 | 22 | 395-414 |
| 8 | 325-344 | 23 | 400-419 |
| 9 | 330-349 | 24* | 405-424 |
| 10 | 335-354 | 25* | 410-429 |
| 11 | 340-359 | 26* | 415-434 |
| 12 | 345-364 | 27* | 420-439 |
| 13 | 350-369 | 28* | 425-444 |
| 14 | 355-374 | 29* | 430-449 |
Possible malfunctions and ways to eliminate them
| Fault name | Probable Cause | Remedy |
| Valve does not close | ||
| Valve does not open | Clogged hole in slider assembly 5 - guide 3 | Disconnect the guide 3 and wash the assembly with the slider |
| Slow tank filling | Clogged filter 11 | Unscrew the water supply hose, remove the filter 11 from the housing 8 and rinse |
| Water is leaking into the toilet | Incorrectly installed bottom valve 13 on the overflow body 12 | Adjust landing bottom! valve 13 on the overflow body 12 J by turning around the axis |
| Loose nut 21 | Tighten nut 21 | |
| Overflow pipe set incorrectly 7 | adjust | |
| Rod set incorrectly 23 | adjust | |
NOTE: Due to the presence of various impurities in the water, the performance of the outlet valve may deteriorate over time due to sedimentation on its parts. In this case, it is necessary to disconnect the valve from the seat, flush it and reinstall it.
Valve drawings
Inlet valve (bottom connection) | Rice. one

Release valve | Rice. 2


Fittings for drain tank | Video instruction
Video provided by uklad.net
To write the article, I used the instructions that come with the fittings with the tank.
I also offer you:
Mounting the toilet lid | Video instruction
The video provides extensive instructions for assembling and installing toilet seats.
With plastic adjustable, with plastic non-adjustable fasteners, microlift and metal fasteners.
I wish you successful installation!
Even the most reliable plumbing fixture can break. It is especially unpleasant if this is a product used daily by all family members. If the fittings of the toilet cistern are out of order, then you don’t want to wait a couple of days until the plumber comes, do you agree? Moreover, such a problem can be successfully solved on its own.
Before proceeding with the repair, it is necessary to understand the design of the tank, the device of the drain mechanism and understand the principle of operation of the spillway. The article discusses in detail all of the above points, as well as describes possible breakdowns toilet fittings and ways to eliminate them.
The toilet is the centerpiece of any bathroom. If you can do without a shower or bath using a ablution tray, then the toilet is an indispensable device not only for every family member, but even for some pets.
Therefore, it is simply necessary to know its features and device so that on Saturday morning you will not be alone with such a breakdown.
You can repair or replace the fittings of the tank with your own hands. The main thing is to turn off the water before starting work and read the manufacturer's recommendations for adjusting the design
Features of drain tanks
Tanks for toilet bowls differ in the material of manufacture, the method of installation and connection to the water supply, the type of location of the button / lever. And the price range of this type of plumbing fixtures is very wide - from inexpensive domestic models to exclusive design options well-known manufacturers of sanitary ware.
According to the material of manufacture distinguish the following types toilet cisterns:
- faience;
- plastic;
- cast iron.
The drain fittings used for toilet bowls are mainly made of plastic. This applies even to expensive models.

Only in exclusive options plumbers use metal fittings. Moreover, it is made of brass and bronze alloys.
faience cisterns received recognition and the greatest distribution around the world. It is this material that can most often be found in bathrooms, where a pair of toilet + cistern is installed.

Faience products are produced as domestic producers and well-known Western firms. Pick up the most best option for your bathroom is not difficult
plastic models drain tanks have a flattened shape. This is due to the specifics of their application - the so-called, when the flush device is installed in the wall. The design is reliable, easy to maintain and long service life.

Plastic tanks for toilets after installation must have an inspection window. It is usually located behind the flush button.
Cast iron tanks is a relic of the past. Heavy, bulky and unpresentable designs are still used by many zealous residents of our country. But during repairs, old cast-iron products are often replaced with a beautiful one. modern plumbing.
According to the method of connection to the water supply, there are tanks for toilet bowls with an upper and lower connection. The latter are more preferable - they look more presentable and create less noise during operation.

The top connection option is produced by many Russian plumbing companies. To reduce noise during filling after draining, the fittings have been improved
There are three ways to install the drain tank:
- top mount;
- installation in a false wall;
- on the toilet seat.
Top mount is a retro version. This arrangement of the drain device is used in bathrooms made in retro style.

Retro style toilet bowls are very popular among owners of large bathrooms. In a modest bathroom, such a product would be inappropriate, and its price is very high.
Toilet installation is used for suspended models when the tank is hidden in the wall. This allows you to save space in the bathroom and harmoniously fit plumbing into the overall style of the bathroom / toilet room.

Embedded in the installation, hidden by a false wall, the cisterns differ more high price compared to inexpensive domestic faience sanitary ware
Installation on the toilet shelf is the traditional solution. These are the usual models of a plumbing pair when drain system attached to the shelf of the toilet bowl.
Advantages: simplicity and affordability. And the choice is very wide - you can choose both a domestic version and elite plumbing fixtures from Italian, French or German manufacturers.

A cistern on the toilet shelf is the most maintenance-friendly option. If there is a need for repair, then getting to the fittings is easy
The internal structure of the tank
Each cistern contains shut-off valves to control the operation of the toilet. For many models, fittings come with all the necessary fasteners and nuts.
According to the method of water supply and the installation location in the tank, the following types of fittings are distinguished:
- top eyeliner;
- bottom eyeliner;
- universal.
Top entry design built into the collection tank. A flexible tube for water supply is attached from above. This must be taken into account, because such fittings are not suitable for every model of a drain tank. Basically, only domestic manufacturers provide for top connections in their plumbing products.
Fittings with bottom connection comes with most western cisterns. Moreover, the design is plastic, but the quality of all components is high.
Most often, you may encounter such problems:
- filling does not occur;
- water constantly flows into the toilet bowl;
- lack of response when pressing the button / lever;
- leaks at the joints;
- weak drain pressure.
Problem #1. Filling does not take place if the inlet diaphragm is heavily clogged. Then you can not do without cleaning or replacing it. If the condition of the membrane is working, and the reservoir is not filled with working fluid, then you need to check the correct functioning of the float. Perhaps to come.

In built-in models, inspection, adjustment and repair of valves passes through an inspection hole hidden behind decorative panel with button
Problem #2. Water constantly flows into the toilet, increasing the meter reading cold water. This problem occurs when large debris or other objects enter the tank. Everything else gets in the way normal operation filling fittings of the tank. It is necessary to remove foreign objects from it.
It can also cause misalignment, loosening or breakage of the float. You can repair the float valve without much difficulty with your own hands:
Image gallery
Before proceeding with the repair of the float valve that controls the water supply to the tank, we shut off the water supply to it
We flush all the water from the toilet bowl by pressing the key, button or handle intended for this
The screws that attach the valve to the float, located around it, unscrew
If necessary, move the device holding the float of the toilet bowl
Remove the membrane or washer from the valve locking mechanism. If they are damaged, we change them to similar ones.
Using vinegar and a brush, instead of which you can take an old toothbrush, remove calcium and rust deposits around the float valve
We install the membrane or washer back, assemble plumbing fixtures, close the tank with a lid
We check the operation of the repaired float valve. If everything is in order, we proceed to operation
Step 1: Turn off the water supply to the tank
Step 2: Flushing all the water from the cistern
Step 3: Loosen the fasteners around the valve
Step 4: Float Holder Offset
Step 5: Removing the Washer or Valve Diaphragm
Step 6: Removing sediment around the float valve
Step 7: Reinstalling the Washer or Diaphragm
Step 8: Checking the function of the float valve
In the case when everything is in order with the float, you need to check the condition of other plastic parts of the armature - the rod, the diaphragm lever or the float spoke.
Problem #3. When you press the flush button, nothing happens. Here it is necessary to check the presence of gaps in those places where they should not be - at the joints. Also, plastic fittings may be broken, which is especially common in cheap models that have served for more than 3 years.
A common cause of a disruption in the supply of water to the tank is the inappropriate length of the drain and fill pipes or their damage. In dealing with the situation, we perform the following steps:
Image gallery
If the water enters the tank too weakly or splashes when it enters, we check the condition of the drain-overflow mechanism. The overflow tube should be approximately 1 cm below the drain button or handle
If splashing occurs when draining water from the tank, shorten the filling tube to the required length
If damage is found on the filling tube or its condition does not inspire confidence in long-term service, cut off a tube of equal length. It should be equal in diameter to the worn tube
We insert a new segment into the seat of the old filling tube, if necessary, adjust it in length
Step 1: Checking the position of the overflow tube
Step 2: Checking the condition and length of the filling tube
Step 3: Cutting the new filling tube for replacement
Step 4: Putting the New Tube in Place
Problem #4. Another trouble that occurs with the toilet cistern is leakage in places threaded connection. To eliminate this trouble, you will need to replace the sealing gasket. If this part has not yet had time to wear out, then you need to check whether the nuts are well tightened and if there are any distortions.


