Ideal place for storing fresh bread is a wooden product that prevents the product from spoiling and preserves its original properties and taste. Popular name for a loved one kitchen accessory- bread box. A unique wooden bread box, made with your own hands from scrap materials, will be an excellent gift and will decorate any home.
This article contains general recommendations, diagrams and drawings for independent work, tips and ideas for decorating finished products are given. If you follow these diagrams, you can get attractive and practical models for home use.
Features of wooden models
Natural wood is well ventilated and has an attractive appearance. Bread bins that are designed and decorated in the “country”, ethno-version or “Provence” style will become especially conceptual.
The optimal choice of raw materials are ash, linden and birch leaves wooden boards. These types of wood do not have a clearly defined and intrusive odor (like spruce and pine). They do not interrupt the taste of bread and meet all environmental requirements.
The ideal bread box will be made from juniper or birch bark, but not every craftsman will be able to find a suitable sheet of wood. You can try to find similar material in folk art shops.

In addition to the advantages, it is worth remembering the disadvantages of a wooden container for storing bakery products:
- a wooden product requires a special approach; it must be carefully monitored so that mold and rot do not appear on the surface;
- a wooden bread box cannot be cleaned with standard household chemicals, and it also cannot be washed in a dishwasher;
- temperature changes in the room are detrimental to wooden products;
- you need to understand in advance that a wooden bread box has a certain service life, it needs to be changed periodically, since the wood base actively absorbs odors, which are very difficult to remove, optimal mode care is regular ventilation.
Types of wooden bread bins
Strictly speaking, wooden products include those listed in the following groups:
- birch bark bread bins;
- plywood bread bins;
- bamboo bread bins;
- bread bins made of wooden components (for example, sticks).

Any of these materials “breathes” perfectly. The air inside such products naturally circulates and therefore birch bark, plywood, bamboo can be easily combined in one bread box, complementing it with wooden elements to your liking.

Depending on the door format, they are divided into:
- simple bread bins - without canopies and handles;
- carved bread bins;
- bread bins made of wood with curtain-blinds.
Prices for various types of wooden bread bins
Wooden bread bins
How to choose a bread box
Personal preferences, tastes and kitchen style influence the choice of product, but there are a number general recommendations that should not be ignored:
- The volume and size of the bread box may vary. The standard product holds one or two loaves. You should not store bread too tightly - it will quickly become stale and spoil. The choice corresponds to the number of family members. If 1-2 people live in the house, a small compact product will be enough for them. For big family It is advisable to make a bread bin with several compartments or a two-tier one.
- Also, when developing a work plan, the type of bread that will be stored inside the product is taken into account. Wheat does not “get along” well with rye. If you combine them in one wooden box, the wheat box will become moldy and may also become saturated with specific additives that are usually present in recipes rye bread– garlic, cumin smell, or coriander smell, etc.
- When preparing the pattern, you need to make sure that the diagram provides for a tight, hermetically sealed connection between the lid and the base. This will keep the bread fresh for a long time. Lid wooden bread box can move or be removable. One way or another, it should fit tightly and close securely.
- The color, shape and design of a wooden kitchen accessory will be determined by the style of the kitchen. The classic semicircular model is compact and suitable for more options, but it is not so easy to care for. High square model It will take up more space in the kitchen, but it can be easily cleaned from dirt.

For small room good choice there will be a hanging bread bin.

General scheme of work
Briefly, the process can be outlined in the form of stages/steps:
- elements that fit tightly together (for any size) are prepared according to the drawing;
- seams at the joints are treated with glue for better connection, in places of strengthening, these joints are carefully processed with sanding paper;
- forming the door is the final stage of work, and modern models most often equipped with a so-called curtain made of slats;
- so that the movement of parts relative to each other is easy, a groove is laid inside the body.

Schematic representation of bread bins
You can make a simpler cover so that there is no need for additional structural elements. It is folding and does not complicate the work scheme. Wooden planks can also serve as material for this shape. Sometimes they are replaced bamboo mat, which is stitched and reinforced with red thread.
When developing a work scheme, you need to take into account that the model can be either completely wooden or combined, where the main part of the product is made of wood, but there are plastic, metal elements, etc.
The bread bin can also be built into kitchen set, then its production is carried out according to an individual project.

How to prepare for work
The first stage in the manufacture of any handmade product is the preparation of materials and tools that will be required during assembly. They are selected in accordance with the chosen scheme. The materials were mentioned above, now we should touch directly on the working equipment.
In a workshop environment, the process is accelerated, since it is possible to use a milling machine circular saw. At home you can get by with hand tools:
- manual jigsaw;
- carpenter's ruler with a clamping mechanism;
- manual milling cutter;
- clamps;
- jigsaw machine (if you don’t have one, you can replace it with a simple manual model).
Schemes of basic models
The first option is a spacious, two-section bread bin model. It is intended for a family of four or more people. Front covers not only serve the function of isolating the product from external environment, but also suitable for cutting bread. To use them, you need to lift them and remove them from special slots. The top part of the bread box is good for storing various jars where you can pour salt and spices.
The illustration shows a diagram of the cutting of parts, as well as various angles of the product in its finished form, and the corresponding dimensions are given. The parts of the bread box are assembled in a standard way(connection and additional gluing of elements), with the exception of special situation caps
This model can hang on the wall or stand on the wall - it is universal. In order to make the model wall-mounted, back wall a special hole is made.
The top part of the bread bin is missing from the drawing. The master can apply various schemes at your own discretion, use different decor and even abandon the top part, making the model more concise and compact.
The material for the bread bin is a board measuring ten to twelve mm. (width of raw materials). The parts should be tightly located next to each other - joint to joint. To ensure a tight fit, screws and nails are used. Another option is a tenon joint, which, after adjustment, is lubricated with glue.
The main difficulty and design feature is the creation of neat and even slots for the movement of the lid. Clean the groove walls with wood wrapped in sanding paper.
The second option for assembling a bread box with a hinged lid also performed by standard scheme. The shape of such a product duplicates popular plastic and metal models. The peculiarity of this bread box is a flexible curtain lid made of slats on a cord. Tight fit wooden slats perhaps due to the special profile presented in the diagram. One edge of each part is rounded, another has a small recess in the form of a groove. Due to this, the lid moves and a tight fit of the parts of the structure is formed.


The two-story model is also equipped with a flexible curtain. Another design feature is that the width of its shelves is different (the top one is narrower).
At the back there is a restriction in the form of a wide bar, and it is located so that there is free space between it and the rear common wall for both shelves. The curtain goes there when the bread bin is opened. Otherwise, the product inside would interfere with the movement of the parts relative to each other.
If these three options are difficult for a novice craftsman, you can make a bread box with a flexible hinged lid, which is made up of narrow slats. Its connection to the base is magnetic. There are also special latches on sale - you can use them in the absence of magnetic parts. The diagram shows an option with two sections.

Prices for different types of solid boards
Solid ash board
Making a bread box with a wooden hinged lid
To make a container for storing bread, you will need a 10 mm thick board of wood. (it is acceptable to use plywood), wooden slats, fasteners, handle. The set of tools for assembly includes: a drill, a drill of a suitable modification, electric jigsaw, grinding machine or a machine tool, furniture screws, a key for them, rivets, drawing accessories.

Prices for popular models of jigsaws
Jigsaw
The hinged lid can also be rigid and made entirely of wood.
Step 1. Source material– leftovers wooden sheet. We make markings on it and cut out parts.

Remains of a wooden sheet


Step 2. We round off the sidewall parts using a jigsaw and sand the edges.


Step 3. We form the base for the door. We equalize the length of the lid slats, then glue the parts with PVC glue, fix them in clamps, and wait for the glue to dry completely.


Step 4. Sanding the round part for the door with sandpaper.

Step 5. Open the remaining parts of the bread box.
Step 6. We grind the glued parts and fasten them together with PVC glue.

Step 7 After the lid parts have dried, we assemble the frame.


Inside any bread bin you can equip several compartments. To separate you will need a board or plank.
Video - DIY bread box
Video - Assembling a radius rounding
Making a bread box from wooden sticks
Unusual and interesting way– creating a container for storing bread from popsicle sticks. At first glance it seems that this is very difficult. But in reality the process is not so complicated. The first work with sticks will allow you to construct a product in 45 minutes, and with the second and subsequent approaches the time is reduced to 30 minutes.
An additional benefit of a bread box made from wooden sticks from ice cream – exceptional strength of the product.

We collect necessary materials for work
To work you will need sticks and glue. Using hot glue is not advisable unless you have the appropriate skill. Otherwise, unsightly marks will remain on the bread bin.

Layout of the first three sticks in the form of guides

Adding three sticks to form a hexagon
At this stage, it is worth considering the layout, since in subsequent steps it will be reproduced and influence the final appearance of the product made from wooden sticks.


The final stage of work. Making the bottom, as it is ready for this step only the upper part of the bread bin that is not closed.


So the product should stand for 2-3 days and dry completely, and in the meantime you can prepare a cover made of wood, birch bark, plywood, decorate it using the decoupage technique, add decorative wooden elements, glue bows, stones and other decorative elements from a craft store.
A similar model can be made from Chinese chopsticks. In this case, the bread bin will be larger and more spacious.
Bamboo bread box
The combined model is made from a simple napkin and some materials that play the role of a frame, decor and ultimately make it easy and simple to manufacture.
The master will need:
- any suitable napkin;
- durable paper - for example, cardboard base;
- self-adhesive film;
- scissors for cutting paper and fabric;
- lace details;
- pieces and cuts of fabric (depending on the finishing method);
- pencil for notes;
- ruler for patterns and other measuring work;
- decorative handle (if possible and desired, it can be purchased and added to the design).

The first thing you need to do is decide on the size of the bread bin for storage. The dimensions are dictated by the size of the bamboo base. With a napkin width of thirty centimeters, the final width of the product will be 28 cm, the height of the bread box will be seventeen centimeters. The depth of the final version is twenty centimeters.
For the frame, details are marked on cardboard (in cm):
- 28 by 20 – bottom;
- 3.5 by 28 – front;
- 17 by 28 – rear part;
- sides – 17 by 20.
To prevent the napkin from puffing up, the sides are rounded.


You need to make sure that the film fits tightly to the base. There should be no dents, creases or swelling. Smooth processed frame base– the key to high-quality work on creating a product.
The next stage is processing the napkin itself, which is cut into two parts. One will decorate the front wall with a height of 3.5 centimeters. The second one will serve as a lid. .


At the final stage there is general fee designs. The napkin is glued to so that the napkin can smoothly lie on the frame and cover it entirely. Here it becomes clear why the frame should be more compact than the lid.


Decorate finished product it can be done in different ways. The cover can be complemented with felt patches, pieces of embroidery and knitting, beads, rhinestones and much more. The soft and flexible lid allows you to apply many techniques to it and not limit yourself to just one thing.
The next section presents brief overview decorating techniques that can be applied both to the indicated model and to all the basic patterns presented above.
A combination of handicraft techniques always looks advantageous if the materials and accessories are chosen harmoniously. You can decorate any part of the bread bin, and in the case of a wall-mounted bread bin, you should think about the attractiveness of not only the front side and sides, but also the bottom.
Wooden bread bin design
In addition to making a base for storing bread, it is important to think about the decor of the product. Homemade bread boxes with smooth, simple details leave room for creativity. Over the centuries, traditions have developed to decorate kitchen boxes with wooden overlays, painting, engraving motifs, etc.
Table 1. Decoration methods.
| Name | The essence of technology |
|---|---|
| A good way to decorate a bread box and make it attractive is to add relief to it. The image can be anything - from individual parts of a pattern and ornament to large compositions. Motifs of nature look attractive on wood, fairy tale characters and human figures. Pictures are cut out on wooden parts using hand router or automatic milling tool. |
| Popular in various fields of creativity, napkin technology allows you to decorate accessories and kitchen interior items with picturesque illustrations. Excellent for wood and ideal smooth surfaces, which is typical for many models of bread bins. In this case, a piece of a napkin or a picture from a book or magazine will lie perfectly flat, repeating the silhouette of the part and merging with the base. For decoupage, use any images, including newspaper clippings and postcards. |
| This method is suitable for those who are good at drawing. Brushes, wood paints and imagination are the ingredients for a well-structured composition and skillfully selected bread box decor. A beautifully painted surface can contain any elements that fit into the style of the space: flowers, birds, landscapes, portraits of people in the interior, etc. |
| Craquelure can act as an independent decorative element or as an additional one. Its essence lies in the artificial aging of the surface. For this you need brushes, special composition, protective gloves. The antique-decorated surface gives a stylish look to many household items within the framework of the corresponding interior style. |


Decoupage of a wooden bread box
In this material, we will consider one of the techniques for creating a unique handmade bread box - applying images to a wooden surface using the decoupage technique.
For high-quality execution and decoration of the product, the craftsman will need the following materials.
- elements with a pattern that can be glued (on a thin base - including part of a napkin, the top of a thick card sheet, etc.);
- sandpaper;
- scissors;
- acrylic primer;
- acrylic paint;
- varnish for woodworking;
- PVA glue;
- brush.
The scheme for decorating a bread box using the decoupage technique is presented in the form of a series of steps.
Step 1. Wooden surface bread bins are rubbed with a layer of sandpaper

Step 2. Prime the surface and let it dry.

Priming the wooden parts of the bread box
Step 3. Apply a layer of paint with a brush and wait for the first layer to dry completely.
Step 4. Decorative elements are smeared with PVA glue or special glue for decoupage and attached to wooden parts bread bins. They are carefully leveled so that no wrinkles appear on the surface of the wood, and they are also allowed to completely dry the wood along with the glue.
Step 5. At the end of the work, apply finishing coating. This can be a standard layer of varnish or craquelure to create an antique effect on a handmade item.
If necessary, work with the first and subsequent layers of varnish is carried out the next day. It is not necessary to complete the work at once if you can wait. If you have time, you should pause to make the product look even more impressive. For example, when using craquelure between the first and final coats, you can use oil umber to fill the cracks that have formed and make them stand out visually.
Step 6. The completion of work using the decoupage technique always involves covering the product with several layers of acrylic varnish - two or three are enough to create a glossy or matte effect and visually complete the composition. Aged areas can also be tinted with bitumen, decorated with vintage tape, as well as wooden overlays with a thematic picture applied using the same technique.

Decoupage accompanies not only the base of the bread box and its lid, but also decorates the sides and individual elements.
Video - Decoupage of a wooden bread box
Conclusion
Breadbox – useful thing on the farm. The wood from which the product is made opens up scope for creativity. Flat and smooth frame parts allow the use of various methods finishing, and this does not require complex tools. The product can be assembled either from a specially purchased wooden sheet or from scrap material. Caring for the bread bin correctly is not taking care of appearance products, but also about the health of family members who eat bread daily. It is important that it is made in such a way that the products in it remain fresh and tasty.
There are bread bins different sizes, shapes and designs. The choice is made based on the dimensions of the kitchen, the personal preferences of household members, the degree of filling of the container, and woodworking skills. Self-production Bread bins are a great way to start decorating your home or apartment with your own hands. The techniques are varied, where everyone will find something suitable for themselves.
A homemade bread box will wonderfully decorate the table in your kitchen. The kitchen is rightfully considered the heart of the home.
How to make a wooden bread box with your own hands. MK No. 1
Usually bread is stored either in a plastic bag or in the refrigerator. But best place for him, of course, a wooden bread box. There, more or less constant humidity is maintained and such a bread bin breathes, thanks to which the bread does not become moldy or stale for a long time. A wooden bread box is not so difficult to make with your own hands.
Here is her drawing: 
The materials we need are boards 10-12 mm thick, preferably birch, oak, ash or linden. Pine is not suitable because... it will saturate the bread with a resinous smell. You will also need wooden slats for the flexible lid, a handle and fasteners.
We cut out two sidewalls, a bottom and a top bar from the board (see figure).
From the inside in the sides it is necessary to make a semicircular groove for the flexible cover. It is better to choose it with a router. You can use a finger cutter on a drill. The grooves run in a semicircle. The lid slides over them and falls into back bread bins. The grooves must be made in such a way that the lid does not get stuck in them, but slides easily and freely.
The lid itself is made of thin wooden slats. The slats can be glued to a fabric base or a cord can be inserted inside. 3 holes are drilled in each strip equal distance and a fishing line is inserted through them as shown in the diagram. In general, they are attached with fishing line.
If your family is large, you can make a two-tier bread box using the same principle: 
The bread box can be coated on the outside with varnish or linseed oil, but it’s better to leave the inside uncoated. However, a wooden bread box can be decorated by burning, decoupage or painting as you like.
Wooden bread box. MK No. 2

It is best to store bread in a wooden breadbox. I developed my own form and I think it is very successful. Even a beginner in this business can make such a wooden product. A beautiful wooden bread box made with soul and love will decorate any kitchen.
I had to make out different breeds wood, but most often from pine and birch. This bread box is made of pine. First of all, I made a template for the side walls and used it to calculate all the dimensions of the remaining parts.
Part Dimensions
Cover 373 x 220 x 15 mm - 1 piece
top 375 x 120 x 15 mm - 1 piece
rear 375 x 185 x 15 mm - 1 piece
bottom 375 x 230 x 15 mm - 1 piece
side 255 x 205 x 15 mm - 2 pcs.
You need to choose clean areas on the board. The largest board width is 230 mm. When choosing a material, you must immediately look at where each part will fit. You can make such a bread box out of plywood, but I always made it out of wood. 
Having chosen the boards, you need to start by jointing one side and the edge. Then we run it on a thicknesser to right size thickness 15 mm. On the saw we pass all the parts along the width and then trim to the final size. Using the template, I draw two identical sidewalls and also cut them out on a saw. Before assembling small sandpaper go through all the edges and knock down roughness.
Assembling a bread box
When assembling, the most important thing is to make accurate markings. I always take an awl and a metal ruler. I make punctures on the sides and ends of the parts. There are three connections in the lower and rear parts, two in the top and the lid opens on one on each side. This means nine punctures must be made in each side wall. After marking, drill with a 5 mm drill to a depth of 10 mm in each part. The connecting parts were made of metal. Using a hacksaw, I sawed 18 pieces of 19 mm each from 5 mm nails. 
You can, of course, make it out of wood, but the lid should be made of metal. The connecting blanks must be rounded using sandpaper. Glued a wooden bread box onto epoxy resin. The first step is to insert the connections into the lid; they will hold it tightly and open and close easily. 
Covered with glue drilled holes, lightly tapping the hammer to drive the connection into the part from the beginning. Having placed the side part and coated the holes in it with glue, insert the top, back and bottom parts. Apply glue to the holes of the second side part and press it from the top. No glue is applied to the holes where the lid is inserted. Before the glue dries, watch how the lid opens and closes. If everything is good, then you can carefully place it on one side and put the weight on top. Any thread can be applied to the finished glued product. 
The wooden bread box is well suited for carving. I used geometric carvings on this wooden bread box. It was made a very long time ago and the carving on it is the simplest. Before cutting, you need to apply a design. Everything is done as in drawing, circles and squares. I always draw in different ways, so I drew what I liked. When carving, you only need one cutter. After cutting, I covered the product with stain. Let the stain dry thoroughly. Wood products must be varnished twice. After the first coat, remove any raised lint with fine sandpaper and only then apply the second coat. The varnish used is waterproof and the wooden bread box can be wiped with a damp cloth. I made this wooden bread box more than twenty-five years ago.
Wooden bread box + bamboo napkin. MK No. 3
Every housewife has a place in her kitchen where she keeps buns for tea and bread for lunch. Some people wrap the bread in a plastic bag, others carefully place it in a plastic bread bin bought in a store.
I made my own bread box from 10mm thick wooden planks and a small bamboo napkin, which you can easily buy at your local supermarket. 
I have drawn the dimensions of the blanks in the figure below. Basically, they are determined by the size of the bamboo napkin. I didn’t give the radius of the curves because I did it myself using a template that was already prepared in advance. The pattern can be drawn on thick cardboard with a pencil, and then the side walls of the bread box can be cut out using a jigsaw. If necessary, we carefully process the sawn parts with fine sandpaper.
a href="http://img0..jpg" rel="li-bigpic" target="_blank"> 
We glue the side walls to the bottom with “Moment carpentry” glue and strengthen them with self-tapping screws or small nails. To make legs, the bottom can be glued to the sides, stepping back from the edge by five millimeters. 
We glue and nail the back in the same way. Its height is less than the sides. This way the bamboo napkin will lie more beautifully. 
After the glue dried, I ended up with something like this. 
There are bamboo napkins different colors. You can choose one that will fit well into the interior of your kitchen. 
Before attaching the napkin to the bread box, you need to try it on so that it lies neatly. 
I varnished the wooden parts of the bread box. When the varnish had dried, I laid a napkin on top and attached it to the back and side walls with decorative furniture nails. The front of the napkin hangs freely, not secured by anything. 
This is such a beautiful bread box I got.
Kakunin Valery Pavlovich - the city of Minusinsk.
Today, things in the handmade style, that is, made with one’s own hands, are becoming increasingly popular. They feel the warmth and love of the one who made them. I also really like that even the simplest and cheapest materials can be transformed into beautiful and useful household items.
About two weeks ago I was visiting a needlewoman friend. I really love coming to visit Olga, because her home is so interesting, and she herself is simply overflowing with various creative ideas which I am happy to share with friends and acquaintances. I came to her for advice on how best to decorate the house for the New Year, but what I saw on her kitchen table, struck me to the core.
DIY bread box
I really love beautiful dishes and unusual household items. I’m also close to things with history, so when I saw Olga’s amazing bronze bread box, as if from the Middle Ages, I was delighted. But the most interesting thing is that a friend made it with her own hands, and from plastic bottle! She watched a video on the “Master Sergeich” channel and was inspired to make the same beauty. The video will be below! The channel is awesome, so much useful things you can look at it.
Having found out in detail how she made such beauty, in the evening of the same day I was able to give a gift to my home in the form of a new and stylish bread box.
Editorial “So Simple!” I described in detail for you an unusual master class about how to make a bread box from a five-liter plastic bottle.
You will need
- five liter plastic bottle
- newspapers
- PVA glue
- hot melt adhesive
- regular napkins
- three-layer napkins
- acrylic paints (black, lilac and gold)
- acrylic varnish
- 100 g peas (halved)
Manufacturing
- First, take a five-liter plastic bottle and cut off the bottom and neck. Then lay it on its side, mark 8 cm at the bottom and cut horizontally on one side and the other to divide the workpiece into two halves.

- There is no need to throw away the bottom of the bottle - cut it in half.

- And now these two semicircular parts need to be glued on both sides to the main workpiece. Positioning the tape across, attach the parts to that half of the bottle, which will soon turn into a bread box.

- Now you will need old newspapers, they need to be cut into strips. After this, dilute PVA glue with water in a ratio of 1: 2. After first dipping strips of newspaper into the glue, paste them over the plastic blank. Apply two layers outside and inside.

- Generously coat this paper surface on both sides with PVA glue using a brush. Now we move on to the neck, which also needs to be covered with newspapers.

- Wait until all parts of the future bread box are completely dry, and proceed to gluing the two parts using a hot gun.

- Draw wavy lines along the edge of the bread box and the rounded leg part that will become the stand. This can be conveniently done using a coin, placing it next to the previous outline.
Re-dilute the PVA glue with water, coating the workpiece with this mixture to glue thin napkins in two layers along the entire perimeter.
Now let’s move on to thick napkins with a pattern. You won't need the colored part, so set it aside. From the lower white part you need to twist a thin tube, wetting it with water for convenience. You will need to make an edging with such elements, gluing them along the wavy edge of the bread box.

- Now glue the halves of dry peas along the edges, placing them with the convex side out.

- Draw patterns on the workpiece with a marker, and then glue various curls from pre-rolled napkins along the marked lines.

- When all the decorative elements are ready, we move on to painting. The first step is to cover the bread bin. acrylic paint black color.

- Then apply to curls and other decorative elements. lilac paint, and then go over the raised parts with gold paint. When the paint is dry, you can cover the bread bin acrylic varnish.


A bread box made of wood is an environmentally friendly item that allows you to keep bread soft for a long period of time. In addition, it is a beautiful decorative item that complements the chosen kitchen design. If you creative person and love filling your home with original, handmade items, you should definitely make your own bread bin!

Initial stage of work: Preparation
First you need to prepare necessary tools and materials, as well as make drawings in accordance with the dimensions, think over a way to open the door on the bread bin. The first step is to decide what material to make the case from.
It could be: Tree. Bamboo. Birch bark. Plywood.

Note! All of these materials are capable of regulating humidity inside and allowing air to pass through. Sometimes they are combined to create one product.

To make fastenings, you need to stock up on screws and wood glue. The choice of fittings depends on the method of opening the door.
Bread storage containers are:
- simple;
- carved;
- with curtain-blinds


Important! To make the product, you will need a carpentry kit.
Making a bread box from wood yourself
To make a wood product, choose varieties such as linden, birch or ash. Conifers have a pungent odor that will be transferred to the bread. For manufacturing, you will need to complete the following stages of work:
Cut out all parts from wood in accordance with the drawing. Required condition is the tight connection of all elements with each other.
Product dimensions may vary. The parts can be fastened together with screws, furniture nails, or use wood glue.
If you have experience in carpentry, then you can use a tenon to create a fastener.
To improve the joining, the joints are coated with wood glue.
Don't forget to sand the cut areas with sandpaper.
The door is made separately.
Most often this is a curtain that is made of small slats.
To ensure the movement of the curtain, a groove is made on the body along which the door moves.
The structure is coated with a special varnish or stain.

Note! You can make a curtain door that opens outward. It is also made from narrow slats, instead of which a bamboo mat is sometimes used.

Natural material ensures environmental friendliness and is combined with different interior design styles.
Bamboo bread bins are another simple option.
This material can be used as a decoration for a wooden product or made from it into small bread bins. The main advantage will be the speed of completion of the work. It only takes you a few hours to create a bread box!
To carry out the work you need: Bamboo napkins. Thick fabric. Durable cardboard. Scissors. Self-adhesive. Pencil. Door fittings.


To get the job done quickly, you should follow some recommendations:
— dimensions are limited by the size of the napkins; the body of the structure is made of cardboard;
- on one side, the side walls are made rounded - this allows the door to fit tightly and move without problems; — all parts are connected using glue;
— the outside and inside of the structure is covered with self-adhesive, which will provide the product with additional strength;
- at the final stage, finishing with bamboo occurs. To do this, cut the napkin in two: the first part is suitable for the door, the second for the bottom.


Decorating options Tip!
You can make a version of the product with several compartments. This production makes it possible to conveniently use and sort flour and bakery products. The separator is made of slats or a thin board.
Hand-made bread bins are distinguished by individuality and original design, and all this thanks to exclusive decorative methods. Several centuries ago, rich decorative elements were applied to bread storage products using veneer, carving, engraving and painting. In aristocratic houses one could find boxes with monograms. In poor houses, items made of birch bark were used. Peasants used wicker options for storing bread.


To create beautiful and individual decoration you can choose different methods:
— Wood carving allows you to create relief compositions from ornaments, patterns or images. You can choose natural motifs and create them using milling.
— Decoupage is a technique of pasting napkins with bright, beautiful motifs. This design option is well suited for wooden products. The surface needs to be made smooth, then the napkin will repeat the silhouette of the structure without flaws. Newspaper clippings or postcards also work.
 Note! To get inspired by ideas for creating a bread box, you can watch a variety of photos or videos with design options. Handmade original design will look attractive in different styles interior and will last a long time!
Learn to make bread bins from wood, birch bark and the most unexpected materials, such as plastic bottles, cardboard, paper.
DIY bread box from a plastic bottle: master class

The master class video itself:
To make this bread tray you will need:
- five-liter canister;
- scissors;
- five-ruble coin;
- napkins;
- PVA glue;
- water;
- halves of dry peas;
- acrylic paint in brown, lilac and gold;
- acrylic varnish;
- tassels;
- marker.

Don't throw away the bottom of the bottle; cut it in half.

You will need two semicircular rings from it, which need to be glued on both sides to the main part. Positioning the tape across, attach them to the 1st and 2nd half of the bottle, which will soon turn into a bread box.

Cut newspapers into strips, dilute PVA glue with water approximately twice. Dipping strips of newspaper here, cover the plastic blank with them on the outside and inside in two layers.

Now generously coat this paper surface on both sides with PVA glue using a brush. Take top part bottles, cut off the neck, it is not needed. Cover the workpiece with newspapers as well.

Wait until these parts are completely dry. Then glue the small round one onto the large one using a hot gun.

Draw wavy lines along the edge of the bread box and the rounded leg part that will become the stand.
It is convenient to draw the openwork edge using a coin, placing it next to the previous outline, and also outline it with a marker.
Cut along these markings with scissors. Dilute the PVA glue with water again in a ratio of one to one, coat the workpiece with this mixture, and glue thin napkins here in one or two layers.
Take thick napkins with a pattern, separate this upper colored part, you will only need the lower white part. Roll each into a thin tube on the table, moistening it with water. You will need to make an edging with these elements and glue them along the wavy edge of the bread box.

Now glue the halves of dry peas along the edges, placing them with the convex side out.
This is how the bread box is further transformed.

You will need to draw patterns on it with your own hands, then glue here various curls from napkins previously rolled into a tube.

To do this, apply glue using a thin brush, then attach the paper elements here. When they are well dry, paint the bread box with black acrylic paint.

Then apply lilac paint to the coils and other elements of the decoration, and then go over it with gold paint.

All that remains is to coat the product with acrylic varnish and wait for it to dry completely. Now you can put a napkin inside, lay out the bread and serve it to the table.
DIY bread box made of fabric and cardboard
Surprisingly, these materials will also help you make a bread basket. It will look good in such a container; this device will help you set the table in an unusual way.

To sew it, take:
- two pieces of cotton fabric square shape with sides 28 cm;
- square sheet of cardboard with sides 27 cm;
- ruler;
- scotch;
- pins;
- ironing board;
- iron;
- scissors;
- braid.
Insert a sheet of cardboard here and stitch the unsewn side. To ensure that the edges of the bread box are decorated equally, make the same stitch along the entire edge of the rectangle.
Stepping back 7 cm from the edges, draw a square inside with chalk, which also needs to be stitched. Connect the corners, pin them together with a pin, and machine stitch here.

If you want to sew a round bread box from fabric and cardboard, then with your own hands you need to draw a circle on thick paper, this will be the diameter of your product along with the sides.

It is necessary to cut out 2 canvases, place a circle of cardboard between them, sew up the edges using braid. You will sew it on the edges perpendicular to this surface. A total of 12 tapes are needed, two for each fragment. Then you tie them up and make a bread box with sides.

Instead of fabric, you can use a blank that you knit yourself. This is very easy to do. The result should be a square like this, but without corners. Two identical parts are required.

Place it on a piece of cardboard and cut it out using this template. Fold the product so that the two cut out parts are on top and bottom, and the cardboard is inside. But first, the sides of the cardboard need to be bent to give the product its shape.
Sew it at the corners and you will get a bread basket like this.

If you want to close the device so that the bread does not go stale, then use next view handicrafts.
Weaving a bread box from newspapers and paper: master class

This is how beautiful bread boxes made from tubes turn out. To do this, take:
- newspaper and magazines;
- thin stick;
- clothespins;
- tray with sides.
If this is a decorative bread box, you can use newspapers, but for a real one it is better to take thick paper that does not contain dyes.
First you need. Let's start weaving a cover out of them first. Take 6, place them next to each other.

Place two more on top of them, securing them with the third.

Using the same technology, attach two more tubes, placing them next to the ones you just attached.

Take a couple more of these elements and place them next to the ones you just made. Also secure the data using the third tube, placing it in a cross.

Continue to weave, but in a circle with a rope of two tubes.

See what should happen at this stage.

As you can see, this blank needs to be attached with clothespins to rectangular base. Then, use a tray for this. To give the tube bread baskets an oval shape, then weave only on the elongated sides.

After this, weave again in a circle, then braid the sides of a deep tray or other container of a similar shape.

In the same way, not only the lid is created, but also the base of the bread box with your own hands with lower sides. Make a handle on the lid so that you can take this item off and on.

This is how weaving from newspapers or paper is done. If you have the opportunity to work with wood, then look at another option for making this useful item.
DIY bread box made of wood
For this type of work you will use:
- planks;
- bamboo mat;
- wood glue;
- small carnations;
- wine cork;
- furniture handle;
- plastic food mat;
- furniture stapler.
- under the number 1 there are four parts - 2 will go for the bottom, one is for the top, another one is for the back panel;
- under the number 2 there are two sidewalls;
- number 3 is the front panel.

Everything is extremely simple. You need to cut out these parts and knock them down with small nails. After which the corners at the top are sawed off.

Saw the wine cork into 7 pieces and glue them to the bottom surface of the bread box. They will become the legs of this item.

Attach a furniture handle to the bottom of the mat, and attach it to the front panel of the bread bin using a furniture stapler.

Use plastic as a tray cutting board, the excess can be sawed off. To make the sides, make small cuts in the corners and lift the edges of the pallet up.

This is how you will get a wonderful bread box, made with your own hands from wood and a mat.

Breadbox made of birch bark: master class

Before you make it, read the rules for preparing this material.

- In order not to destroy the tree, birch bark must be harvested in permitted places where trees are subject to felling.
- Collect bark during the sap period, when it is most pliable.
- Birch bark is dried naturally, without the use of fans and radiators.
- After this, various irregularities are cut off so that it becomes as smooth as possible on both sides.
- Boil water, put birch bark here, boil for half an hour.
- The last stage is drying the material, after which you can move on to creativity.

You can use two weaving options. For the first one you need to put even number stripes horizontally. Starting from the left edge, weave them through one another. The second strip is also attached vertically, but in a checkerboard pattern with respect to the first. The third tape repeats the amplitude of the first.
For the second method, you need to bend the edges of the previous tape onto the subsequent ones.
To secure the edge of the straight weave, when creating this fragment of a birch bark bread box, add wire made of stainless metal.
See how to add additional ribbon during the weaving process.

To create a birch bark bread box, take 24 strips cut from this material. Half of them will be needed for the vertical, half for the horizontal.

When you complete the body, you need to decorate the corners between 5 and 6 with tape, using the same method indicated above.
Then you need to make a bread box lid, the height of which is 1.5–2 diagonals from strips. Finish the edge with teeth.

In such a birch bark bread box, bread will remain fresh for a long time and will not become moldy, since this natural material has bactericidal properties.
You already know how to make a bread box from wood. But not everyone has such planks and tools for cutting them. Check out another master class that will solve this problem.
DIY bread box made from affordable materials

To make this, take:
- thick cardboard;
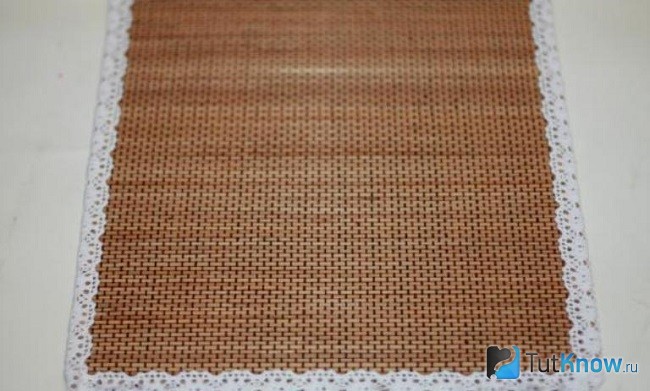
- bamboo napkin;
- scissors;
- self-adhesive tape;
- textile;
- lace;
- glue;
- ruler;
- pencil;
- furniture handle.

Calculate the size of the bread box parts based on the size of the napkin. IN in this case, the napkin is 30 cm wide, so the width of the bread box will be 28 cm. Based on these dimensions, cut out from cardboard:
- front wall 28 by 3.5 cm;
- bottom measuring 20 by 28 cm;
- two sidewalls measuring 20 by 17 cm;
- the back wall measures 28 by 17 cm.

Now you need to cover this blank with self-adhesive film. Choose a color so that it harmonizes with the color of the kitchen. If you like wooden products, then you can also take rattan film.

Stick it not only from the inside, but also from the outside. Take a napkin and cut a strip from it that you will use to decorate the front panel of the bread box. Glue this part, decorate the top edge with lace, attaching it in the same way.
We continue to work with the large remaining part of the napkin. Sometimes on such things the reverse side is decorated with a piece of fabric; if you don’t have this, then glue the fabric to the back side of the napkin.

On the front side, glue the lace on the sides and bottom.
Glue part of this napkin to the back wall so that it goes down and covers the front of the bread box. Now you understand why the napkin should be a couple of centimeters wider than the bread box.

To make it more convenient to fold back the napkin to remove or put in bread, glue a small wooden handle to the bottom.

This is such a wonderful device for storing bread. You will spend a minimum of money on it, and if you decide to buy a bread box in a store, it will cost you much more.
Step-by-step decoupage of a bread box with your own hands
You can not only make a bread box from scratch, but also decorate an existing one. If it is monochromatic, but you want a holiday, cover it with flowers in the Provence style. This way you can update your old bread bin.

For creative work you will take:
- acrylic primer;
- napkins of the desired pattern;
- brush;
- water;
- PVA glue;
- scissors;
- acrylic varnish;
- acrylic paint in the desired tones;
- sandpaper.

Acrylic primer will wooden thing more durable. Acrylic paint fits better on such a surface.
When the primer is dry, coat the bread box with paint of the desired tone. In this case, white was used. The side stripes are covered in blue.

Cut the napkin into the required pieces and separate the top part. It will be needed for further decoration.

If you have a special glue for blending, use it; if not, then take PVA, diluting it slightly with water. Using this solution, glue the napkins onto the surface of the bread box and let it dry.
If you want to add an antique effect, then rub the surface of the bread box with sandpaper in some places.

Apply three coats of varnish, allowing each to dry. This is how you can decorate a bread box using decoupage.
If you want to see how bread box decoupage is done, then this is your opportunity.
The second story will reveal the intricacies of how a bread box is made from tubes.


