First, sift the flour into a deep bowl (it is better to do this 2-3 times). Then add sugar, salt and vegetable oil, mix well with your hands.

Now you need to add a pre-prepared sourdough. Everyone has their own recipes for its preparation, I make it from flour and water. In short, the recipe is as follows: on the first day, mix 100 grams of flour and 100 grams of water, cover with a cloth and put in a warm place (it is important that the wind does not walk there). During the day, the starter must be stirred 3-4 times.

On the second day, we add another 100 grams of flour to the sourdough and add water so that it becomes the same consistency as it was on the first day. Again put in a warm place, covered with a cloth, stir 3-4 times a day.

At the end of the second day, we will see small bubbles on the surface of the starter - this is a very good sign. On the third day, add 100 grams of flour again and water again, return the consistency of the first day. Mix thoroughly and put in heat. During the third day, the starter will increase in size and thickly covered with bubbles - now it is ready.

So, back to our bread recipe. We added sourdough to the mixture of flour, salt, sugar and butter. We begin to slowly knead the dough, gradually pouring water. When it becomes elastic and elastic and does not stick to our hands, we cover it with a towel right in the bowl and put it in a warm place. The dough should double in size, then we can continue working.

In food, as in clothing, there are fashion trends. AT modern world product trends change like gloves: to change white rice- brown; spaghetti - in no case from flour, but from zucchini; no refined sugar - only muscovado. In the wake of all these trends, it was recently announced that unleavened bread- dietary and healthy alternative to yeast. The latter was exposed in such an unsuitable light that it only remained to be excluded from the daily diet, and when losing weight, it was not to be remembered at all.
How true are these statements? Should they believe and forever abandon the lush loaf and soft loaf?
How to prepare
The name of the product speaks for itself: bread without yeast is made from flour and sourdough. It happens like this:
- sourdough is prepared from flour, water and bacteria in bunker dough preparation units or batch mixers (this is a multi-stage and multi-day process);
- the dough is kneaded in a special mechanism;
- the kneading process is carried out for a long time and carefully so that the dough is saturated with air and more magnificent;
- then it crashes;
- uploaded to forms;
- sent for proofing for a couple of hours (at 40 ° C and humidity 85%);
- it is usually baked at 230-250 ° C from half an hour to an hour (depending on the production technology used by a particular bakery).
For production, the following ingredients can be used:
- leaven;
- flour (peeled rye, wheat, whole grain);
- seeds and nuts as flavorings;
- bran;
- salt, sugar (introduced in the form of solutions);
- sunflower oil;
- dry wheat gluten;
- water.
However, each manufacturer has its own secret recipe. As a natural sourdough use:
- whey;
- sugared brew of carbohydrate-protein fraction of amaranth with hop cones;
- fruit purees;
- citric acid;
- rye mix peeled flour, sugar, honey and water;
- hop mixture - wort from flour and malt.
The chemical composition of yeast-free bread is represented by: beneficial substances, as:
- potassium, magnesium, phosphorus, iron, manganese, copper, selenium, sodium;
- vitamins B1, B2, B9, PP;
- cellulose;
- mono- and disaccharides (digestible carbohydrates);
- glutamic acid (amino acid);
- omega-9 fatty acids (oleic).
The lower the grade of flour, the richer and healthier its composition.
What is the difference between unleavened bread and yeast bread

First, its effect on the body. It is believed that yeast-free bread is healthier because, unlike yeast bread, it does not disturb the intestinal microflora, is better absorbed and can be used in dietary nutrition, as it has a lower calorie content.
Second, properties. Yeast-free, for example, is stored longer and does not get stale, retaining a maximum of useful qualities. But yeast is more magnificent, softer and tastier.
Thirdly, composition. It is believed that yeast-free is richer in fiber and vitamins, since they are not consumed by the nutrition of yeast, which, as you know, are living organisms.
Myths and truth
More recently, the question of which bread is healthier: yeast-free or yeast-free did not raise any doubts. And now most people will stop at the first option. This point of view has been discussed and explained in detail above. However, in recent times more and more experts are arguing this moment and claim that it was nothing more than a marketing ploy by manufacturers. As evidence, they give quite weighty arguments.
Argument 1: sourdough also promotes fermentation
For production regular bread compressed yeast is used. They are created specifically to speed up the baking process, as they contribute to the rapid "ripening" of the dough. Having opened harmful properties fermentation (supposedly it disrupts the intestinal microflora and worsens digestion), manufacturers hastened to announce this to consumers and began to produce yeast-free products based on sourdough. But the latter is a bakery semi-finished product obtained by fermenting a carbohydrate mixture (flour, water, sugar and honey) with lactic acid bacteria. That is, the fermentation process still occurs, which means that yeast fungi are also present there.
So to the question of whether there is yeast-free bread, technologists of the baking industry will answer unequivocally: no! And here is the dough. Everyone knows its types: pancake, puff and soda. However, the first is intended for frying, which means that it no longer fits into either proper or dietary nutrition. The second is prepared on the basis of oil, which gives it a high calorie content. Soda products often provoke heartburn and unpleasant belching, and also have many contraindications.
Argument 2: Yeast is all around us
If you think that by giving up yeast dough, completely protected themselves from the harmful effects of this product, you are deeply mistaken. Yeast fungi are present in the air, on the surface of fruits and vegetables, and somehow they still get into the digestive tract. In addition, everyone's favorite drinks are prepared on their basis: kvass, wine, beer.
Argument 3: in finished products no yeast
Any bakery product is baked at high temperatures, in which live yeast fungi die, and in this state they cannot affect the intestinal microflora in any way.
Argument 4: there is no more fiber in yeast-free bread than in yeast
Recent studies show this. The amount in a bakery product depends on how much bran and cereals it contains, but this has nothing to do with yeast microorganisms.
All these points become a stumbling block for disputes. Manufacturers say one thing, scientists say another. There is no consensus and large-scale studies with conclusions, so you can only rely on such assumptions. But in any case, it is strange to hear that yeast is so harmful to the body, because they are even sold in the form of a pharmacy preparation as a source of B vitamins. Moreover, they differ from their baking counterparts only in the form of release and additional additives, but not in properties.
Benefit and harm

What is useful
It is believed that the main benefit of yeast-free bread is in the normalization of digestion, due to the increased content of fiber, which:
- cleans the intestines and removes from it harmful substances and stagnant masses;
- stimulates peristalsis, due to which the absorption of the rest of the food improves several times;
- relieves the condition with intestinal disorders (flatulence, bloating).
Due to the fact that the body begins to absorb vitamins and trace elements in full, immunity is strengthened and the risk of developing infectious diseases is reduced.
Their beneficial features yeast-free bread also manifests itself in cases where there are contraindications to yeast bread. For example, with gastritis, ulcers and other serious diseases of the gastrointestinal tract, yeast causes heartburn. If abused with breastfeeding, the baby will suffer from colic, bloating, he may begin diarrhea. But a yeast-free product of such side effects will not cause if consumed in moderation.
It also turns out to be useful for diabetics, since it has a low glycemic index against the background of other types of bakery products. For these people, almost all types of bread are banned, which is extremely unfavorable for the body, which requires fiber. AT this case you can use this alternative. But do not forget that this is still, so it is not recommended to get involved in it. It would be better to consult a doctor about its use.
What is harmful
Nuts and various seeds in the composition of unleavened bread can damage the thin walls of the intestine. Therefore, it is better to purchase it without such "surprises". It can also worsen the condition during exacerbation of pancreatitis and gastric diseases (the same gastritis and ulcers mentioned above). Often, due to a too dense consistency, it scratches the throat, so doctors do not recommend eating it with sore throat and problems with the vocal cords.
Advantages and disadvantages
- It has natural composition: does not contain synthesized ingredients, dyes, preservatives, flavors;
- good for health;
- fits into dietary menus;
- easily digestible;
- stored for a long time;
- recommended for baby food.
- unusual taste with sourness;
- there is no usual bread aroma;
- dense texture, no splendor;
- damages the gums due to dryness;
- not suitable for those who have dental problems;
- costs more than usual;
- difficult and time consuming to cook at home.
Is it possible to have yeast-free bread when losing weight
Those who get rid of excess weight, are constantly interested in whether people get better from yeast-free bread and whether it can be included in the diet. With the right choice of product and correct use it can even be useful for the figure, because:
- Fiber has a beneficial effect on digestion. Due to this, fats are used to produce the necessary energy, and not in reserve.
- It helps with toxins. This speeds up the metabolism and starts the process of fat burning.
- It provides long-term saturation, which allows you to endure until the next snack without bouts of unbearable hunger. This reduces the risk of a breakdown.
However, in order to correctly enter this product in the diet menu, you need to know how many calories are in yeast-free bread, the ratio of BJU and what is its glycemic index. These indicators largely depend on what flour and on what sourdough it was prepared.
For example, in yeast-free black bread:
- calories - 199;
- glycemic index - 35 units;
- BJU - 5.6 / 1.4 / 36.4 (in grams).
For yeast-free white (wheat):
- calorie content - 225 kcal;
- glycemic index - 45 units;
- BJU - 8/1/46.
According to these indicators, both the GI and the calorie content of yeast-free rye bread more suitable for weight loss than the characteristics of wheat. But they will largely depend on the recipe, in particular, on the ingredients used by a particular manufacturer. Therefore, carefully read the composition of the product that you have looked after yourself. If the starter is made from honey and sugar, the menu diet food he definitely doesn't belong.
Helpful advice. Even if the package says: "dietary yeast-free bread" - do not take my word for it, be sure to check both the calorie content and the composition. Otherwise, instead of losing weight, you will earn a couple extra pounds on the sides.
Which to choose
On the shelves of modern stores you can find a wide variety of brands of yeast-free bakery products. Here are just a few of them:
- Boyarsky, Merchant, Peasant, Noble, Fragrant (Riga bread company);
- Multigrain Kaiser (Smak);
- Classic Riga custard, rye-wheat, lenten (Bread town);
- Dobry (Slutsk Loaf);
- Krepysh, rye custard (Volga baker);
- Bogatyr, Krasnoyarsk, Slavic, Old Russian (Yarkhleb).
The market leader is the company "Rizhskiy Khleb": they have in their assortment more than 30 types of yeast-free bread from different varieties flour and with numerous additives.

Without yeast, Armenian lavash (236 kcal), Jewish matzo (312 kcal) and Ukrainian breads(198 kcal). The first two options are distinguished by excellent taste, but the high calorie content does not allow them to be used when losing weight.
Criterias of choice:
- the composition should not contain sugar and honey;
- not expired;
- no mold;
- when pressed with a finger, elasticity is felt, not softness;
- vacuum packaging.
If you choose it for weight loss, the calorie content should not exceed 200 kcal per 100 g of the product.
We will answer frequently asked questions.
How to store?
Due to the fact that yeast-free bread has a longer shelf life than yeast bread, many consider it almost eternal. Although it spoils and causes various intestinal disorders. On average, from the date of release, it remains edible for 10 days (plus / minus depending on the production technology and composition).
Does unleavened bread get moldy?
Yes, but only if it is not properly stored (keep in open form next to other products on which the fungus multiplies quickly), as well as after the expiration date. If, immediately after opening the package, place it in Plastic container, then it will retain its useful properties for a long time and not deteriorate. Although this applies only to a truly high-quality product.
How much can you eat?
The daily norm for weight loss should not exceed 150 g, for a normal diet of a healthy person, it increases to 250 g.
What is better to eat with?
Yeast-free bread is combined with the same products as yeast bread. But the dense and rather rough texture sometimes makes it unsuitable for sandwiches. But with a bite for breakfast or lunch, it will be just perfect.
When is the best time to eat?
Like any carbohydrate - in the morning, for breakfast and for lunch. It is already undesirable for dinner, and immediately before bedtime it is not recommended at all, since you can load the stomach and knock down the digestion process.
Recipes

If you don't trust modern manufacturers, discover home cooking bread without yeast. It will fit into both proper and dietary nutrition.
A few culinary tips:
- It is allowed to add coriander, sesame, cinnamon, raisins, cumin, chopped nuts, milk, whey, oat flakes.
- If you are preparing a product useful for weight loss, add.
- But it is better not to use flax seeds, since when heated they release carcinogens.
- To make the bread softer and more plastic, add a little vegetable oil.
- Cook right away large volume dough - 3-4 loaves, but bake one per day. Store the rest in the refrigerator.
Try different recipes in order to eventually find your product, which will suit your taste and contribute to weight loss.
Recipe 1. Kefir
Sift 800 g flour. Add 10 g of salt and soda, 15 g of sugar. With constant stirring, in a thin stream, pour in 400 ml of fat-free kefir (but not cold). Knead the dough. If done correctly, it should be sticky. Add 15 ml olive oil. Lubricate the baking dish with a thin layer of vegetable oil, lay out the dough. Bake at 190°C for 40 minutes.
Recipe 2. For a bread machine
Mix 500 g of rye flour, 250 ml of fat-free kefir, 10 g of salt, sugar and soda. Put in the bread maker, first set the kneading mode, and then baking.
Recipe 3. Dietary
Sourdough preparation. Mix 50 g of rye flour and 50 ml of water. cover thick cloth. Leave in a warm place. After a day, add another 50 g of the same flour, knead thoroughly and leave it warm for the same amount of time.
Mixing dough. Knead 500 g of rye flour with 250 ml of warm water. Pour the starter in a thin stream with constant stirring. Knead thoroughly so that the dough is homogeneous, without lumps. Give him a "rest" for a couple of hours. Pour into a mold and bake at 200°C for 40 minutes.
If the cooked bread turns out to be too bland, you can add sugar and salt at the stage of kneading the dough. But then the product will no longer be dietary.
Recipe 4. Monastic
Dissolve 10 g of edible salt in 800 ml of warm water. Add 50 g of washed raisins and 50 g of whole seeds (pumpkin or sunflower). Gently pour this composition into the previously sifted combined flour (700 g rye and 300 g wheat). It will be difficult to mix at first. It may seem that there is too much flour, and you will want to add water. You do not need to do this: be patient and knead. When you get a tough dough, cover it with a damp towel and leave for 20 minutes.
Put the dough on a table sprinkled with flour. Knead. Form large koloboks, roll in flour, beat off with your hands. Cover again with a towel, leave for 12 hours. Pour into molds and bake for exactly one hour at 180°C. Do not leave in the oven. Take out immediately, remove from the mold and cover with a damp paper towel for half an hour.
Yeast-free bread was at the peak of popularity for a long time, until denials began to appear about its exceptional benefits compared to yeast. To date, this question remains open and is the subject of controversy among scientists, manufacturers and ordinary people. Which side to take is up to you, after weighing the pros and cons and focusing on your own preferences and state of health.
Bread is an integral part of our life, without which we cannot imagine our ordinary day, and all because it is universal.
For example, sandwiches can be made with anything and anything: sweet - with honey, jam, condensed milk; hearty - with sausage and cheese, with sprats and cucumber, and so on.
This product is suitable for everything, and some people do not even imagine a single meal without it, they say that food becomes less tasty without it.
Useful and harmful qualities of yeast-free homemade bread
Pros:
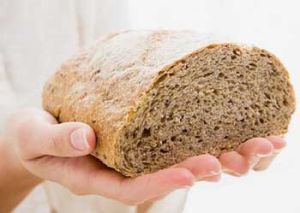
The only disadvantage of preparing such a product is its taste, hardness and small size. The taste of yeast-free bread is lean, barely perceptible.
Often its density is much higher than that of purchased yeast bread, and not everyone may like it to taste.
How to make sourdough for homemade yeast-free bread
The basis of this type of baking is sourdough, on which the taste of the future bread bun directly depends.
So, to prepare the sourdough classic recipe we will need:
- 1 glass clean drinking water;
- 1 cup flour (pre-sifted);
- Tablespoon of honey (optional)
This version of the starter is prepared in several stages, and, accordingly, for several days.
Stage 1: we take 100 g of flour (about a third of a glass), honey and a third of a glass of water. We cover the resulting mass with gauze or a waffle towel so that oxygen can freely penetrate, but no dust.
We put in heat for two days.
Stage 2: after two days, add another third of a glass of flour and the same amount of water to the sourdough. The reaction of the dough should be unambiguous: small air bubbles on the surface and a slight sour aroma of the dough.
We leave covered with a cloth in a warm place (for example, in the kitchen) for another day.
Stage 3: the sourdough in a day should acquire a clear smell of alcohol and increase in size, add again a third of a glass of flour and the same amount of clean drinking water and leave it for the next day.
Stage 4 (final): after the last day, the starter should increase significantly in size. Now you can use it by adding a certain amount to the dough, after doing simple and memorable actions: a third of a glass of flour and the same amount of water, put in heat until signs of fermentation appear, that is, bubbles and an increase in volume.
The remaining mass is usually stored in a jar in the refrigerator. By consistency, such a leaven looks like thick rustic sour cream, very viscous and elastic.
An elementary recipe for yeast-free bread in a bread machine
To make bread we need:
- half a glass of warm milk;
- 1 egg;
- butter- 1.5 tablespoons;
- half a teaspoon of salt;
- 2 tablespoons of sugar (to taste);
- 3 cups flour (possibly with a slide);
- 1 teaspoon baking powder (optional)
The whole process of making bread in a bread machine is correct sequence loading ingredients. First, pour warm milk into the bowl, then add the egg, then add butter, salt and sugar.
For better mixing, the butter can be melted or softened. And finally, flour with baking powder. 
It remains only to choose the size and color of the bread bun, as well as the correct mode, for example, “fast”. Such bread is usually baked for an hour and a half.
The bread machine will let you know about the readiness of bread with a specific sound signal.
It is best to get the bread cooled and only then cut it. The deed is done, ladies and gentlemen, yeast-free homebaked bread ready to use.
Lean yeast-free bread in the oven
Unfortunately, not every hostess has a bread machine, so we offer a recipe for making such healthy bread in the oven. The taste of this will not change at all, and the simplicity of the recipe will pleasantly surprise you.
So let's get started:
- 1 cup rye flour (coarsely ground);
- one third of a glass of wheat flour (coarse grinding);
- 2 cups of kefir;
- 2 tablespoons of bran (optional);
- 1 tablespoon of sugar;
- 1 teaspoon of salt;
- 1 teaspoon of soda;
- 1 tablespoon melted butter or margarine
Preheat the oven to 200 degrees and start creating. Immerse all dry ingredients in a deep bowl and pour in 1 cup of kefir. 
Knead the dough, steep, dense and practically not viscous. You may not need a second glass in in full. When adding kefir, be guided by the recommended state of the test.
It is better to choose a form for future bread in advance. It is convenient to use both silicone and metal molds, the only criterion in choosing for you should be its depth.
The deeper the mold, the higher the loaf of bread will be. The dough should cover half of the mold.
Cover the selected form with parchment or baking paper, then lay out the dough, distributing it evenly over the entire form with moistened hands. As a topping for homemade bun you can use cumin, sesame or oatmeal, which should be sprinkled on top of the bread.
Well, now we send our bread to the oven to bake until we observe a golden crust, about 20-30 minutes, after which we take it out and wrap it with a towel. In this form, the bread should cool, then it will remain soft longer.
How to cook yeast-free bread at home is described in detail in the video.
Cooking rye yeast-free bread in a slow cooker
For cooking we need:
- one and a half glasses of wheat flour;
- half a glass of rye flour;
- half a glass of oatmeal;
- 1 teaspoon of salt;
- 1 teaspoon of soda;
- 1 tablespoon of sugar;
- 1 glass of kefir;
- 2 tablespoons of butter;
- 1 tablespoon of breadcrumbs.
Combine the melted butter with a glass of kefir. Combine all the dry ingredients of the recipe with the liquid ones and knead the dough.
It must be kneaded quickly, otherwise it will become more rigid.
Lubricate the multicooker bowl with oil and sprinkle with breadcrumbs. Now you can lay out the dough.
Then turn on the "Baking" mode and after half an hour wait for a signal of readiness. The bread must be turned over with a kitchen tack or a knife and left to bake again for half an hour, but on the other side.
With this method, the bread is baked evenly on both sides.
Hot bread should be carefully removed from the multicooker and placed on a dish, then dug up with a cloth towel and allowed to cool. Then the crust of bread will be soft.
With cooled bread please your loved ones and yourself.
Monastic homemade unleavened bread
To bring such bread to life, we need some free time, a good attitude and a bit of patience.
First you need to prepare the sourdough, since it is this type of yeast bread that is prepared on its basis. You can use the sourdough recipe above, or you can try the one that church ministers usually use.
For sourdough we need:
- warm brine (cucumber or cabbage without vinegar);
- some rye flour;
- a small amount of sugar.
The amount of ingredients depends on the amount of bread you are going to bake. This sourdough starter can be prepared ahead of time, then you need to store it in the refrigerator.

Add flour to the warm brine and mix until a creamy consistency is formed, add a certain amount of sugar (to taste) and leave to rise in the heat. The sourdough should rise several times, each time we mix it, releasing carbon dioxide and remember that the rise time is gradually decreasing.
After you have received the starter, you can start preparing the dough: mix warm water, sourdough, sugar and flour. The dough should be viscous and elastic, and in state resemble thick sour cream.
We leave it to brew, periodically knocking down if it rises.
We knead the dough for monastery bread, gradually adding flour, salt and, if necessary, sugar. Spread the light and airy dough into the molds, filling only half of their volume.
Then leave the dough to rest for half an hour and you can send it to the oven.
To keep the crust soft and pliable instead of breaking, dampen the hot bread with a little water, cover with a clean, dry cloth and let it cool.
It is best to prepare the sourdough in advance and have a free day in reserve, since extra time never hurts, and in a hurry, you can chop wood and miss one of the ingredients.
All components of each recipe should be fresh and on hand at the culinary specialist, as this is your personal masterpiece, which deserves all the best.
Check the readiness of the bread, if in doubt, you can use a toothpick. Pierce the finished loaf to her.
If there is dough left on the toothpick, then you need to wait a little longer and send the bread back to the oven.
How to cook white yeast-free bread can be found in the video.
In contact with
As the old Russian proverb says: "Bread is the head of everything." But do you know what modern bread is made of, which is sold in shops and supermarkets? Many people do not even realize that in addition to water, flour and yeast, the manufacturer adds various flavors, baking powder, flavor enhancers and other components that make bread softer, tastier, give it a marketable appearance, but nullify its benefits.
For me, the question of the quality of bread became acute just a few months ago. It was then that I thought about how to learn how to cook sourdough and bake homemade, delicious on my own. To be honest, I relied on recipes that were found on the Internet, but over time I brought out my own, which I will talk about today. So my yeast free bread recipe on sourdough is quite simple and if you follow the tips and recommendations given below, then very soon you will be able to cook delicious, fragrant, fluffy bread that will forever make you forget about the purchase.
The author's recipe for yeast-free bread: what ingredients are needed?
To prepare yeast-free bread, you will need a minimum of ingredients and no more than 6 hours of time (4-5 of which will take the process of raising the dough). So we need:
- Flour - 500 grams
It doesn't matter what flour you use. You can use coarse grinding, because they say that it is more useful, you can use regular, peeled, white. I always use regular flour and yeast-free bread comes out delicious, fluffy and soft. It is also worth noting that 500 grams is only a "starting" amount of flour. In total, you should have at least 700 grams, because you can not calculate with sourdough or add a lot of water, and then the dough will turn out to be liquid. In such cases, I always add flour and bring the dough to the desired consistency.
- Sourdough for yeast-free dough - 100 grams

- Water
Water is needed in order to bring the dough to the desired consistency. I can't say exactly how much it will take. I always gain about 500 grams and add little by little, kneading the dough. When I see that the dough is on the way, I stop adding water. Everything is quite simple and clear. My advice, you don’t need to immediately pour half a liter of water into the flour, because it can turn out very batter and then you have to add flour, add sourdough, carry out unnecessary manipulations.
- Salt and spices
Here, too, everything is done to taste. The last bread I made with the addition of dry garlic powder and one tablespoon of salt per kilogram bread. This recipe for yeast-free bread will be very pleasant. Garlic added a special aroma, while there is no sharp taste and smell. Yes, and I guessed with salt, because the bread turned out to be moderately salty. My advice is to add salt gradually so as not to oversalt and spoil everything.
- Soda - 1 teaspoon
Previously mine yeast free bread recipe did not contain soda. But just a few days ago I decided to add it as an experiment. The bread turned out even softer and fluffier. As practice has shown, soda does not harm either the taste of bread or its properties, but on the contrary, it makes it even softer.
Recipe for yeast-free bread: proceed to the cooking steps
Pour the flour into a large bowl and add all the sourdough that you have to it. I make the ratio of flour and sourdough about 1 to 5. If we take 500 grams of flour, then at least 100 grams of sourdough. After looking at other recipes for yeast-free bread, I realized that the authors put less sourdough. But my recipe has already been tested in practice more than once and it has always turned out excellent bread. I also want to note that I do not use scales and do not put everything straight down to the gram. The sense of proportion comes with experience, so at first you can use cups and measuring cups, and then such a need will disappear.

Next, we begin to gently pour water into a bowl with flour and sourdough, and knead the dough. It should turn out quite dense and should not stick to your hands. As a rule, the dough will turn out to be initially watery and sticky, because a novice baker does not yet have experience and knowledge. But don't be discouraged if that's the case. Just add flour, continuing to knead the dough, and bring it to the desired consistency. The ideal dough should not stick to your hands, be soft like children's plasticine, should be of a uniform consistency and density. On average, I knead the dough for at least 10 minutes. I do it by hand, but you can also use various electronic devices. When kneading by hand, I feel the dough and I can understand when to add water or flour.

In the process of kneading, salt and spices should also be added to the dough. How much and what spices to add - it depends entirely on your preferences and desires. If you want a sweet bread, you can add raisins and nuts, if you want more spicy, then garlic, if you prefer spicy bread, then experiment with chili peppers. I, in most cases, limit myself to just salt. My advice is to add salt carefully and gradually. Added half a teaspoon, kneaded well, tried the dough a little. If you feel that there is not enough salt, then add more. I also used to follow recipes and pour in a tablespoon at once, and as a result I got salted yeast-free bread.

As I wrote above, the process of kneading the dough takes me at least 10 minutes. In the end, the dough for yeast-free bread should be dense, but at the same time quite soft and elastic. If you interfere with it, then it should easily take any form, should not crumble or fall apart. If the dough crumbles, then it is too dry, you need to add a little water. If the dough is very sticky to your hands and dishes, then it is too wet, and you should add a little more flour.

After you have kneaded the dough, we form a “bun” out of it, sprinkle with a small amount of flour, cover with a slightly damp towel (you can also dry it) and set aside in a warm place to rise for 3-5 hours. If you added a lot of sourdough, then the dough will rise in just 3 hours, if there is not enough sourdough, then it can rise for 10 hours. On average, my dough rises in 5 hours. AT last time I added a little sourdough, and left the dough to "ripen" overnight. In the morning it has already risen and the result is quite tasty bread. Another tip - do not pour too much sourdough. Although this will speed up the "ripening" of the dough, it will affect the taste. Your unleavened bread will have a sour taste that many may not like.

After the dough has risen, put it into the molds and send it to the oven. I usually put in square shapes, or I just bake round bread on a baking sheet. You can make several cuts on the dough so that it bakes better. Also, these cuts will add aesthetic beauty to the finished yeast-free bread.
In the picture you can see how my yeast-free bread rose in just 4 hours. It has increased in size by about 2 times. Therefore, when you send it to "ripen", keep this in mind so that later you do not collect the dough on the table and floor :)

The last step is baking. I set the oven to 200 degrees and send the dough into it. The first 20 minutes I bake at this temperature, then I reduce it to 180 and continue baking for another 40 minutes. In total, the bread bakes for 60 minutes, which results in a crispy baked crust and all the bread is perfectly baked. I used to bake for 40 minutes, as I read in one recipe, but there was always a taste of damp and sticky dough. I decided to increase the baking time and everything fell into place.

I want to say that for the first time I didn’t get bread, but some kind of incomprehensible hot mass, which remotely resembled bread. I made the sourdough incorrectly, did not follow the recommendations from the recipe, added a lot of water, as a result of which the dough did not rise. But now every bread is something unusual, tasty, soft and fragrant. Therefore, if you do not succeed the first time - do not be discouraged, everything comes with experience. However, I will give you some useful tips.
- Do not add a lot of sourdough, because it gives the bread a specific sour taste. It is better to knead the dough during the day, setting it to rise for 6-8 hours and cook fragrant yeast-free bread in the evening, than to add a lot of sourdough, and after 2 hours send the dough to bake.
- Be careful with salt. Add it gradually. At the same time, knead the dough well and constantly taste it. You can always add salt, but with salted dough there is much more trouble.
- Keep in mind that the dough will double or double in size. Therefore, take suitable dishes so that it does not "run away".
- After you take the finished yeast-free bread out of the oven, cover it with a damp towel and let it cool. If this is not done, then the crust of the bread will turn out to be hard, it will be poorly cut and crumble a lot. And if you cover with a damp towel, then the whole crust will be soft.
That, perhaps, is all. I submitted my yeast free bread recipe which I hope many will like. I want to say that I have been preparing this bread for several months, I treat my friends and relatives to it. Once you have tried homemade yeast-free bread, you will no longer want to buy unleavened store baked goods.

Previously, I did not really like cooking at home, but over time I woke up an interest in home cooking. And I began to try different recipes, adapting them and making them more convenient. I started with onion pancakes. And then there were others, from the banal potato and onion pie to the exotic homemade falafel and hummus. All my recipes are incredibly simple and delicious, and I have collected them for you at the end of this article.
Having learned how to cook delicious everyday meals at home, I suddenly thought about why I still buy bread in the store, since I don’t like it? After all, this is the product in our kitchen that is used every day. By that time, I had already tried many options, but I did not find the right one for me. Yes, you can buy special "homemade" bread in expensive stores, it is much better in quality than ordinary yeast bread. There is such an option in Moscow. However, I do not think that such bread is also a way out. Firstly, it is somehow strange when bread costs more than 100 rubles. Yes, as long as you find the same taste which one you like, it suddenly turns out that these rolls are no longer sold. Even worse, if the ingredients for them began to save. And again, you need to look for something new.
Is yeast harmful?
Once I also thought about whether yeast is harmful or beneficial. I read a lot of articles, listened to what experts say. And then I started listening to my body. And he clearly did not like the chemical yeast that is used in mass production today. And I decided to stop eating yeast baking. Moreover, chemical yeast, on which almost all bread production in the modern world is built, is unhealthy. According to studies that are hushed up, it is yeast that creates such an environment in the human body that, with regular use, various diseases begin to develop, including cancer. And I thought - why would I even buy bread in the store if I don’t like it and there is so little useful in it?
How I decided to bake yeast-free bread
And, of course, I began to think that I should start baking bread myself. After all, someone is doing it in ordinary apartments So does that mean I can do it? I found out that there are special bread machines, and they sell ready mixes for baking, but for some reason it did not inspire me. After all, then you also have to use yeast. And after a while, it fell into my hands homemade bread recipe which can be baked in a conventional oven.
The main difference of this recipe was that its preparation required a natural, "live" sourdough, and not chemical yeast. And although it is also a product of fermentation, but this is a natural process, which is much more pleasant to realize. And since it is customary in our family to lead healthy lifestyle I happily got down to business!
Ingredients for baking bread
Delicious recipe for homemade yeast-free sourdough bread
Having tried the recipe I found, I adapted it to my conditions and now I am sharing it with you. Of course, you can always bake bread with yeast, it does not require much attention. But, despite the fact that you have to fiddle with the “live” sourdough, it is much more pleasant. After all, in a bank, in fact creature which gives you the opportunity to be healthy and contented. From communication - and admit it, almost all of us talk with pots, kettles and cakes! - it tastes even better with bread!
So now I no longer buy bread in stores, but bake it myself at home, and I do it like this. Saturday night I take out the starter and feed it. Early on Sunday morning I make the dough. In the evening of the same day, I turn it into dough. BUT new week I start by baking bread. Yes, at first glance it looks simple. But there are nuances that I will share!
Let's start!
Sourdough recipe for baking bread without yeast
To start we need bread sourdough. If you don't have anyone around to share some of your sourdough starter, you'll need to make your own. Having spent your time once, you can use it in the future. It is not difficult at all and will take 3-4 days.
First you need to buy a two-kilogram package of rye and wheat whole grain (whole-ground) flour in the store. You will also need a permanent starter container. Find a container that closes (but not tightly!) and is high enough so that the starter does not escape. It should be easy to handle so that it is easier to mix your sourdough in it. I use a two-liter jar for this, and it's not very good. It is a little difficult to stir the starter. For the rest, it just fits.
So here's how I prepare mine sourdough for homemade bread:
- The first day. Half a glass of rye flour and half a glass of hot boiled water should be mixed in a container for bread sourdough. You should get "flour sour cream". If it looks like sour cream in consistency, then everything is in order. It is necessary to close the container, but not completely, so that it breathes, cover with a damp towel and hide in dark place where there are no drafts. You can additionally cover with a still warm towel if the apartment is cold (especially in winter). Note that the starter can run away and then it will flood everything around, so choose a place for it carefully. And secure everything that is stored in your dark place. Until you make friends with the sourdough, it can be mischievous. It will be good if you take well or spring water to prepare your sourdough, if possible. And if you live in an ordinary city apartment, then you can use thawed water to make homemade bread (in urban conditions, such water will also be the best way out for drinking!). But if you do not want to bother, then filtered water for sourdough will do.
- Second day. Take out the leaven. See the bubbles on the surface? Fine! Again add half a glass of rye flour and half a glass of hot boiled water. Got sour cream? Cover with a damp cloth, leave not completely closed, hide in a dark place.
- Day three. There should be more bubbles on the surface of the bread sourdough, and it will increase in volume by itself. Now again add half a glass of rye flour and half a glass of hot boiled water, bring to the consistency of sour cream. Close, clean up.
- Day four. A day has passed and we again take out the leaven. If you like it, then you can proceed to the next step. If it seems that it is not enough, then you can hold it for the fourth day by following the same procedures as the previous days.
Once you have decided that the sourdough is completely ready, take half of its volume for making bread. Feed the second part again with flour and water, and put it away for half a day in a dark place. And then put in the refrigerator in a loosely closed container until the next time. As soon as you need the starter, you take it out of the refrigerator, add half a glass of flour and half a glass of water, put it in a dark place, and the next day it will be ready. And so in a circle. If you take a break and do not bake homemade bread for more than a week, then the sourdough must be fed so that it does not get upset and is alive.
Bread dough recipe
To prepare the brew you need:
- Take the starter, feed it, hold it for half a day in a dark place, use half for dough, and put the rest in the refrigerator.
- Add half a glass of hot boiled water, a spoonful of sugar (to ferment better) and rye flour (until the dough turns into “sour cream”). If you do not use sugar or want to give it up, then replace it with a spoonful of honey, which you dissolve in the dough.
- It is best to cook the dough for bread in a large saucepan that can be tightly closed.
- Cover the pan with a warm towel and hide in our safe dark place. Opara should stand for half a day or a day (as convenient).
- When you open the bread dough container, there will be bubbles on the surface, and it will increase in volume on its own.

Opara is similar in consistency to sour cream

The first stage - the dough should stand for 12-24 hours under cover
Preparing dough for baking
After the dough has stood, it is necessary to prepare the dough. At this stage, I add nice little things that make the bread unique. I add raisins and herbs (basil, oregano, marjoram, thyme, rosemary, sweet paprika, and so on) to the saucepan. And then you need to add 3 or more cups of whole wheat flour. So the dough turns into dough for bread. You need to pour until the spoon in the dough does not stand. After that, the container with the dough must again be closed, covered with a warm towel and hidden. Leave the dough in a warm place for half a day or overnight, during which time it will increase in volume, “rise”.

The spoon must stand in the dough!

You can add any nice little things that you like to homemade dough without yeast - raisins, herbs, nuts, sesame seeds, seeds
We bake bread in the oven
Then ready dough it is necessary to lay out on a baking sheet or in forms, greased with oil. The original recipe says that now you need to close the dough again and hide it for an hour and a half in that very dark place. But I found another option. At home I turn on my electric oven at the very minimum, and put the dough in it for about an hour. After the future bread is slightly browned in the oven and increases in volume, the temperature must be raised to 180 degrees and bake for another hour. But keeping track of time can sometimes be difficult in household chores, so you can use a timer or alarm clock to not overcook the bread in the oven and move on to the next step in time.
Well, finally, an hour has passed, which means that it is already necessary to turn off the oven and let the future bread stand for half an hour in it. After you take the finished ruddy bread out of the oven, you need to do a couple more things:
- Moisten its crust a little with water, I use a brush for this;
- Wrap fresh yeast-free bread in a cotton or linen towel for an hour.
It will take a little more time until your bread is ready. Now it's ready to be served! Is it really so tasty that you can get enough of it? But most importantly, it is made with your own hands!


