Self-cooking concrete mortar for pouring the foundation is a very responsible and time-consuming process. In many ways, the quality of construction depends on the foundation.
In order to obtain a high-quality solution mixture, it is necessary to use the right materials and make the right proportion. If the most common strip foundation is used during construction, increased requirements must be imposed on the quality of concrete.
When preparing concrete, it is necessary to take into account the following factors that affect its strength:
- the amount of cement contained in the mixture;
- the level of reaction with other substances (the higher the level of cement reaction (activity), the larger the structure can be installed on it);
- the ratio of water and cement in the composition of the substance (the lower, the better);
— the quality of aggregates (the use of fine-grained fillers reduces the strength of the composition);
- degree of compaction.
Necessary materials
The main component for the preparation of the solution is cement. When choosing it, you need to pay attention to the main indicators. AT this moment the construction market has a wide range of types of cement, so it is important to choose quality material. Quality assurance is the material class with an error level of 13.5% (coefficient of variation).
for the foundation it is better to use cement grades 400 or 500
Strength is indicated on the package with the letter “M” and numbers in the range from 400 to 1000. This indicator indicates how much weight the concrete can withstand per 1 cm after hardening. It is best to use cement grade M400-M500 (depending on the density of the soil and the load on foundation). Before making a purchase, it is advisable to find out the name of the manufacturer, reviews about the manufacturer, as well as in what packaging the products are packaged. On the packaging, you need to pay attention to the series and number, they should not be duplicated. These simple precautions will help you avoid buying fakes.
Also, for the preparation of concrete, you will need sand, water and crushed stone (gravel). When choosing these materials, it is also necessary to take into account their properties. Sand for concrete must first of all be clean. Sticks, leaves and debris are not allowed in it. Also, it should not contain clay, the permissible error is no more than 5% of total weight.

ideal crushed stone for concrete - granite
The presence of crushed stone or gravel is allowed if, as a percentage of the total mass, it does not exceed 0.5. In addition, it is necessary to take into account the fineness (fraction) of sand. Not every building material is suitable for this parameter. Perfect option fractions - in the range of 2-2.5. When preparing a mortar for the foundation, the sand must be dry. If the sand used is wet, it must be dried, or less water should be used when preparing the concrete.
Gravel or crushed stone is better to use a fine fraction. Crushed stone must be clean, without impurities. The most durable crushed stone is granite, but it is more expensive than the others and has an increased radiation background. It is better to choose lime or gravel material. In no case should you use river pebbles.
The exact proportions of the solution
Before preparing the solution, you first need to calculate how much concrete will be needed. The calculation is carried out according to a simple formula: the product of the length of the tape, width and height. You can also use ours to calculate. Having decided on the volume and materials for pouring the foundation, it is necessary to observe the correct proportion of the mixture. The process of drawing up the proportion must be strictly observed, otherwise the foundation will be unreliable.
As a rule, the ratio of sand and cement in concrete is 1:2, and the amount of crushed stone is 4 parts. Based on this proportion, you can easily prepare a concrete mixture. If the solution is too dense, it must be diluted with water. The resulting consistency should be stirred with a shovel with little effort. In this case, the solution should not quickly drain from the shovel.
The components can be mixed in various ways. but if possible. it is better to do this with a concrete mixer.

with the help of such a device, the mixture is better mixed
Pouring concrete - instructions
After the concrete has been prepared, it must be poured into reinforced formwork. The ideal temperature for pouring is from +5° to +15° C. If the air temperature is below 0° C, the poured foundation must be covered with foil. Do not remove the formwork until the concrete is completely dry.
If the street is above +15° C, the foundation must be watered once a day and also covered with foil to avoid cracking. Formwork can be removed the next day.

pouring the foundation can be done in warm weather
Complete drying occurs within 2 days. The pouring should take place calmly, in layers of 25 cm. The time between pouring the layers should be from 30 minutes to 1.5 hours, depending on the brand of cement in the concrete.
Air must be released from each filled layer. To do this, you can use conventional reinforcement, lowering its parts into concrete at a short distance from each other.
Also, each layer must be aligned. If the filling takes place in one layer, then it is necessary to use a vibro-shrink tool. If everything is done according to the instructions and you do not save on materials, then the house built on such a foundation will delight its owners for many years.
According to SP 63.13330, the brand (according to the new class) of the strength of concrete used for monolithic foundation, must correspond to the temperature and humidity conditions of operation. To do cement mortar, providing the maximum resource of an underground structure, it is necessary to select the composition of the mixture recommended by this set of rules.
Each brand of concrete solution approximately corresponds to the following strength class (M - grade, B - class):
- M400 - B30
- M300 - B22.5
- M200 - B15
- M100 - B7.5
- M350 - B25
- M250 - B20
- M150 - B10
With considering economical consumption cement at self-manufacturing concrete for a monolithic foundation, the dependence of brand strength on the type of soil and the technology for building a house box is as follows:
To make a monolithic structure durable, it is necessary to use brand cement from M400. Usually, all the proportions of the components are indicated specifically for a binder with these characteristics. In order to properly prepare the solution, ensuring the specified grade strength in the concrete mixer, you should focus on the following ratio of components:
| Concrete | Volume ratio P/C/Sch (l) | Weight ratio P/C/Sch (kg) | The output of the mixture from a bucket of cement (l) |
| M400 | 11/10/24 | 1,2/1/2,7 | 30 |
| M300 | 17/10/32 | 1,9/1/3,7 | 40 |
| M200 | 25/10/42 | 2,8/1/4,8 | 55 |
| M100 | 41/10/61 | 4,6/1/7 | 77 |
| M350 | 15/10/28 | 1,6/1/2,7 | 35 |
| M250 | 19/10/34 | 2/1/4 | 44 |
| M150 | 32/10/50 | 3,5/1/5,7 | 65 |
П/Ц/Ш - sand/cement/gravel
For chemical reaction education cement stone(hydration) concrete is sufficient volume of water component. However, ¼ of the mass of cement, this amount is not enough to normally mix the product even under the conditions of the mortar unit. Excess moisture evaporates from the concrete on its own during the curing of the material in the first 28 days.
The maximum frost resistance of the foundation is achieved by rational selection of the water-cement ratio W/C. It is recommended to use 0.5 - 0.6 parts of water by weight relative to total weight cement used in the batch. For example, for 100 kg of cement (two bags), this will be 50 - 60 liters.
Important! With insufficient plasticity and workability, it is strictly forbidden to add water to the finished mixture. It is better to use Superplasticizer or any gel-like detergent(for example, Fae).
Requirements for the components of the mixture
Portland cements are manufactured industrially, which drastically reduces the likelihood of "non-conformity". Non-metallic materials, which are the main fillers of concrete, are purchased by the developer in bulk. Therefore, it is very important to choose the right gravel and sand from the manufacturer. It is not recommended to dilute the mixture with water from a natural reservoir with an unknown composition. Therefore, it is necessary to take into account the following requirements for the components of the solution.
Cement
To make a foundation with the necessary operational characteristics, it is necessary to choose Portland cement grade M400 and higher. Hydration processes (formation of cement stone) proceed better at air temperatures from + 5 to + 20 degrees C. Therefore, when concreting in the heat or off-season, you should choose fast-hardening modifications with the letter B in the marking.

Before you open the bag and dilute the cement with water according to the technology, you need to make sure of the expiration date:
- within 60 days from the date of packaging, the product is guaranteed to have the declared strength;
- in the first 3 months, it loses up to 20% of its characteristics;
- after six months, the strength cannot be higher than 70% of the declared;
- after a year, cement loses 40% of its strength, after which it should not be used in critical structures.
Advice! It is possible to knead concrete for a leveling screed-footing from budgetary cement M200. At the same time, the cube of the product should contain 220 - 240 kg of binder.
The composition of mixtures for the structures of the foundation itself should include cement from M400, which provides grade strength B15 - B25. If B30 concrete is included in the project, it is necessary to use cement from M500.
Sand
The main part of the harmful concrete structures clay is found in the sand. The structural material collapses when the moisture-saturated clay expands. Therefore, it is best to add river or washed quarry sand to the solution with the following characteristics:
- fraction 0.15 - 5 mm;
- clay content within 3%;
- the percentage of fine particles up to 0.65 mm within 3%;
- bulk density from 1400 kg/m³.

Attention! In normal quarry sand(not washed) contains maximum percentage clay. Using natural sand from the building spot, it may contain organic matter, silt, which will have to be washed out with lime milk, since this cannot be done with water. However, in some quarries, the purity of the sand is quite acceptable.
You can choose the right amount of sand depending on the fraction of crushed stone according to the table from the training manual for the construction civil defense Mastek:
| Concrete | Fraction of crushed stone (mm) | ||
| 40 | 20 | 10 | |
| M400 | 35% | 36% | 38% |
| M300 | 37% | 38% | 40% |
| M200, M250 | 40% | 41% | 43% |
| M100, M150 | 42% | 43% | 45% |
- fill a third of a 2 liter bottle with this material, pour water, shake;
- try to squeeze non-metallic material in a fist.
In the first case, an intense turbidity of a red color will report an excessive amount of clay, which will not settle for a long time. In the second variant, a lump is easily formed from the material, which does not crumble after the fingers are unclenched.
To make a foundation with high performance properties, it is necessary to use the appropriate crushed stone. This non-metallic material has the following characteristics:
- strength - 300 - 800 units;
- frost resistance - F50 - F150;
- flakiness - I - V group;
- radioactivity - increased radio background occurs exclusively in crushed granite, so in housing construction only class I product is used.

Crushed stone is obtained by crushing rocks(dolomite, gravel, granite) with initially unequal properties:
- limestone (dolomite) - budget price, low strength;
- granite - is more expensive than other materials, has maximum characteristics;
- gravel - average price, properties.
To obtain a cement mortar of a design strength grade, it is recommended to use crushed stone with strength:
| Concrete | crushed stone strength |
| B30 | 800 |
| B25 | 800 |
| B22.5 | 600 |
| B20 | 400 |
| B15 | 300 |
Therefore, budget dolomite crushed stone may be included in B15 concrete. To obtain brand strength B20 - B25, you can apply gravel crushed stone. For high-strength concretes B25 - B30, only granite material with a fraction of 5/10 or 5/20 mm is used.
Attention! Do not buy crushed granite from unverified suppliers offering low prices in the absence of supporting documentation. In 90% of cases, the developer runs the risk of obtaining class II non-metallic material with an increased radio background, suitable only for the construction of roads.
Water
Ideally, the solution can be properly diluted with purified natural or tap water. In practice, water bodies in the immediate vicinity of the construction site are often used. In this case, it is necessary to take into account that it is harmful for the foundation:
- films of oil products on the water surface;
- pH below 4, above 12.5 units;
- dissolved salts at a concentration of 5000 mg/l;
- suspensions from 200 g/l;
- organic matter from 10 mg/l.

Cement in this case reacts worse, the hydration period increases.
Important! The water resistance of concrete can be adjusted even without special additives by the W/C ratio. For example, a slurry with a W/C ratio of 0.6 will have a W6 permeability by default. If you dilute concrete with a W / C of 0.45, you can get a W8 permeability suitable for use in soils with a high groundwater level.
How to prepare the solution correctly
The chemical reaction of water with cement begins immediately after mixing these components. However, the process of formation of the structure of the cement stone begins only after the laying and vibrocompaction of the concrete. With the most thorough manual mixing, the strength of the structural material is guaranteed to be 40% lower than inside the concrete mixer.

To prevent the cement mortar for the foundation from sticking to the inner walls of the bunker, the following technology is used:
- supply to the rotating drum of 20% of the water that is part of the concrete;
- backfilling 1/3 sand, half cement;
- adding the remaining parts of the binder, fillers, water.
If a small concrete mixer is used to pour the foundation, the order of work changes. First, half of the cement, sand, gravel is mixed in the drum, then the entire amount of water is supplied, the remains of the filler and binder are poured.
The cement mortar is usually ready in 1.5 - 2 minutes, depending on the W / C ratio, concrete plasticity. Due to the large volumes for the foundation, the mixture is produced immediately. If concrete was mixed for finishing operations in difficult areas, maximum time mixing should not exceed 2.5 hours. Water reacts with cement excess moisture starts to evaporate. At the same time, it is forbidden to add it to increase plasticity.
Thus, the choice of concrete components, grade strength depends on prefabricated loads, soil characteristics and wall construction technology. Concrete mixers should be used when preparing the mixture on the construction site.
Advice! If you need contractors, there is a very convenient service for their selection. Just send in the form below detailed description work that needs to be done and offers with prices from construction teams and firms will come to your mail. You can see reviews of each of them and photos with examples of work. It's FREE and there's no obligation.
concrete walkway on personal plot or near a private house - practical and convenient solution. And if you make it with fiction and taste, then it will also become wonderful. decorative element. Moreover, to cope with such work, it is not at all necessary to be an experienced builder.
To each home master quite on the shoulder to make a path,. And today we will tell you about the various intricacies of making tracks, tell you about which solution to put the plastic on, how to fill the product with a mixture with a mesh, in what proportions it costs for concreting the tracks and much more.
Product Features
In order for the finished concrete path to serve for a long time and not to squeeze under your feet, you should take care of proper preparation grounds.
- Having previously drawn on paper, mark the contour of the future track on the site with the help of pegs and a stretched rope.
- They remove a layer of earth (twenty centimeters) and fall asleep with a layer of ten to fifteen centimeters.
- Then they lay a special polymer material- geotextile. It will give strength and will not allow weeds to grow.
- The last layer is placed, which must be moistened (so that moisture from the concrete does not go into the ground) and compacted. sand layer is four to five centimeters.
- Then, along the edges of the path, formwork from the boards is placed.
The solution, as a rule, is poured into molds that can be of various patterns: rectangular, polygonal, round, imitating natural stone. Polypropylene molds are often found on sale, with which you can quickly make whole pieces of the track with beautiful pattern.
The outer walls of this stencil, which can withstand at least a thousand fills, are 6 millimeters thick, and the inner walls are 3 millimeters thick. Height - from 5 to 6 centimeters. It is equal to the thickness of the tile.
The resulting seams between the individual tiles can be sealed with a cement mortar of a contrasting color, covered with sand or sown in these places with decorative lawn grass.
About how to make a strong cement mortar (cement mortar) for garden path and how to prepare a concrete solution for pouring, read below.
Composition and structure
Ingredients
 So, let's try to prepare a high-quality composition of the solution for the garden path in the country with our own hands. For solution use classic materials-, sand, gravel and water. They must be of the appropriate quality:
- Sand- washed, dry, not too small (so as not to absorb too much water) and not too large (so as not to reduce the plasticity of the concrete solution).
- rubble- also taken clean, with a fraction of five to ten.
- Cement- preferably high grade (M400, M500). It must be crumbly and dry. By the way, the brand of cement can be visually determined by the color of the powder. The darker it is, the higher the brand.
- To water there are no special requirements. Do not use only sea or too dirty water.
- Sometimes, to increase plasticity, a certain amount is added to the solution. clay.
Recipe
Now let's talk about the recipe. It may be different. You can, for example, make a solution only from sand and cement (without using crushed stone). Or vary the ratio of ingredients. By the way, it is undesirable to purchase a ready-made solution. It may be of inadequate quality.
And here are the recipes:
- One part cement plus three parts sand plus water (you can add a little clay).
- One part cement plus three parts sand plus three parts gravel plus water.
- One part cement plus two parts sand plus two parts gravel plus water.
Coloring additives can be added to the solution for garden paths to give the desired shade. For example, HLV brands. Such a pigment, produced in four primary natural colors (red, green, yellow, brown), will require about 250 grams per 25 kilograms of dry cement.
The following video will talk about popular mistakes in the manufacture of garden paths:
Manufacturing
After measuring the dry ingredients, mix them. You can do this in some clean container using a shovel or chopper. If there is a concrete mixer, then it is better, of course, to use its help. Water must be added little by little to ready mix did not pour, but slowly flowed down (like thick sour cream from a spoon).
Having prepared the base as described above (removing the turf from above, pouring crushed stone, sand, laying geotextiles and making formwork), you can begin to create a path. The easiest way to do this is with a ready-made plastic mold. It is installed on wet compacted sand and a solution is poured there. After twenty minutes, the mold can be carefully removed and the process repeated.
Until the mixture has hardened, you can decorate the path. By pressing, for example, into its surface pieces tiles or pretty pebbles, laying them out in a beautiful pattern. For hardening, within two hours after pouring the solution, you can cover it with cement milk, using a brush.
Do it yourself
Coloring composition

On the track looks elegant and beautiful.
- For you can buy ready-made pigment and enter it at the time of preparation of the solution.
- You can also add some acrylic paint.
- Another option: rub with a damp concrete surface a mixture of cement (two parts) and dye (one part). This is called ironing:
- To make a track yellow shade, for example, ocher is added to cement.
- Red color is given by one portion of white cement, two portions of sand and half a portion of umber.
- A green tint is achieved by adding glauconite greens to sand and white cement.
- Black - taking one part of gray cement, one and a half parts of sand and 0.15 parts of ordinary soot.
If, when pouring a garden path, you need to cut it, then the following video will help you with this:
Additives
How to make standard solution we have already told.
- Now we should mention additives that are introduced, in particular, to increase strength (for example, fiber based on propylene).
- Sold and special components designed specifically for concrete garden paths (HLV-15).
- If there is a desire to imitate, then for plausibility, stone chips and the corresponding dye are added to the solution.
In addition, the surface of the finished track can also be treated with a hardening compound.
- A good result is obtained by impregnation made on the basis of wax and synthetic resins. It is applied with a brush or sprayer.
- Coating, in addition to a significant increase in strength, gives a very beautiful smooth surface.
Forms for tracks
Finished plastic molds convenient, but they require certain costs. If you want to save on this, then it is quite possible to make these elements yourself. For example, like this:
- We will put thin boards right in the formwork on the edge, using them to create partitions in the right places and get a chosen pattern. We use a half-tree join.
- We put together a rectangular frame from wooden bars. The bottom (which does not need to be fixed) is a sheet of metal or plywood. is placed on the table, a frame is placed on top. At the bottom (if there is such an idea) a mosaic of pebbles or tiles is laid. Then the solution is poured in two portions, between which a reinforcing metal mesh is placed.
- To get round tiles, take a plastic bowl. To make it easier to remove the form, lay a plastic film on the bottom.
- To make a template for imitation natural stone, you will need the stone itself (cobblestone, granite,) and sculptural clay. The plasticine mass is softened (dipped in a bag in hot water) and a stone is pressed into it. Then they make around wooden formwork. Pour in the solution.
- You can make templates from hoops from old barrels. They are bent the right way. And some craftsmen use tin cans by removing the bottom from them and connecting them like honeycombs.
The following video talks about the benefits of a polypropylene garden path mold and how to work with it:
Due to its strength, durability, unpretentiousness and versatility, concrete floors are popular not only in rooms where heavy loads on the floor surface are expected, but also in private housing construction. So, for example, a concrete floor in the kitchen, bathroom and bathroom is a must. And in bedrooms, hallways, living rooms and other rooms, concrete pouring began to be used with the advent of the "warm floor" system, which solved the important problem that such a floor is very cold. Even in private houses, where they used to equip exclusively wooden floors on the logs, began to pour concrete everywhere. And here questions began to arise, how to pour a concrete floor onto the ground and what are the features of pouring onto floors. In this article, we will reveal common technology fills and outline some of the nuances and differences.
Technology of laying concrete floors
Concrete floors can be installed on various surfaces: directly on the ground, on the floor slab, on the old concrete surface, even on the old wooden floor. Concrete is a simple, undemanding material available to everyone, and, importantly, relatively cheap.
In order for the floor to end up strong and durable, all technological conditions and stages of work should be met. When pouring concrete on different surfaces exist distinctive features, but there are general rules for all cases.
Concrete floors - pouring technology and stages of work:
- Foundation waterproofing.
- Thermal insulation.
- Reinforcement.
- Installation of guides ("beacons").
- Pouring a rough concrete floor.
- Grinding the surface of the concrete floor.
- Filling leveling screed.
Depending on the design features premises, some stages of work can be added. For example, when arranging a concrete floor on the ground, backfilling should be done on the base.
For guard concrete screed from cracking in it cut expansion joints, of which there are three types:
- Insulating expansion joints are performed in places where the concrete floor comes into contact with other structural elements buildings: walls, columns, ledges, etc. This is necessary so that vibrations are not transmitted from the floor to other structures. Otherwise, there may be a warp or partial destruction of the foundation.
- Construction seams are performed in places where concrete hardens unevenly, i.e. in the event that the filling did not take place at one time, but with breaks that were more than 4 hours.
- Shrink seams perform to relieve stress due to uneven shrinkage and drying.

Expansion joints must be cut before random cracks appear, but the concrete must already have gained the necessary strength. The depth of the joints should be 1/3 of the thickness of the concrete layer. In the future, the seams are filled with special sealants.

Given the laboriousness and dustiness of concrete flooring work, many hire construction teams to carry it out. The price for concrete floors depends, first of all, on the complexity of the ordered work and the thickness of the layer. The cheapest option would be a regular cement-sand screed. A coating with reinforcement will cost a little more. The cost of a concrete floor is affected by the type of reinforcing mesh: if it is a regular road mesh, it will turn out cheaper, and if a frame welded from reinforcement, then it will be more expensive. The most “biting” option for the price is a concrete floor with a hardened top layer, it will cost 30 - 40% more than a regular floor of the same thickness.
With minimal skills in construction, knowing how to handle a tool and inviting one or two partners, you can easily pour a concrete floor with your own hands. It is enough to make calculations, stock up essential tool, material and study technology, so that everyone performs their functions and the case is argued. Then the price for pouring a concrete floor will depend only on the material that will be used and its quantity.
How to make a concrete floor on the ground
The arrangement of the floor directly on the ground is always associated with a number of questions: what to make the backfill from, and with what layer, and how to waterproof, and at what stage to insulate, and so on. The concrete floor on the ground is a "layered cake", which we will discuss below.
Pouring a concrete floor: the scheme of the "pie"

Conditions under which it is possible to lay a concrete floor on the ground
Before going directly to technological process arrangement of a concrete floor, I would like to note that not all soils can be poured with a concrete floor. First, the level ground water should be no higher than 4 - 5 m to prevent floor flooding and moisture suction through the capillaries. Secondly, the soil should not be mobile, otherwise the concrete floor can quickly collapse, damaging the foundation. Thirdly, the house in which such a floor is planned must be residential and heated in winter time, since the soil freezes in winter, and with it the floor, which will put additional pressure on the foundation, deforming it. Well, the last restriction - the soil must be dry.
Marking the level of the finished concrete floor: "zero" mark
We begin all work on arranging the floor only after all the walls are fully erected and the building is covered with a roof. So we will be protected from the surprises of nature.
First of all, it is necessary to outline finished floor level, i.e. the mark to which we will fill the floor. Since we do not plan to carry out the threshold, we will focus on the bottom of the doorway so that the floor turns out to be even and the same in all rooms.

We apply the “zero” level as follows: from the lowest point of the doorway we set aside exactly 1 m upwards. We put a mark on the wall, then transfer the mark to all the walls in the room, draw a line, the horizontal of which is constantly controlled using the level.
After the line is drawn, we lay 1 m down along the entire perimeter of the room from this line. We draw a line. This will be the level of the finishing floor. For convenience, in the corners of the room we hammer nails on the line and pull the cord. This will make it easier to navigate.
Foundation preparation work
We remove everything from the room construction garbage. Then we shoot upper layer soil and take it out for garden or landscaping purposes. How deep to excavate? The concrete floor on the ground is a multilayer cake, about 30 - 35 cm thick. Focusing on the "zero" mark, we are just trying to remove the soil to a depth of 35 cm.
Be sure to tamp the surface of the soil. It is better to do this with the help of a special vibrating plate or vibrating machine, but if there is no such equipment in the arsenal, you can get by with improvised means. We will need a log to which we will attach handles, and from below we will nail a flat board. Using this log together, we compact the soil to such an extent that no footprints remain on its surface.
Important! In the case of high strip foundations, there are situations when the distance from the “zero” mark to the ground is more than 35 cm. In this case, we remove the top fertile layer, and instead of it we pour sand and carefully tamp.
Measures for additional waterproofing of the floor may include the arrangement of clay bedding. Then clay is poured on top of the soil and carefully compacted. In the future, it will prevent the penetration of moisture into the floor.
Formation of bedding from gravel, sand and crushed stone

Before you make a concrete floor on the ground, it is necessary to perform backfilling.
First layer - gravel(5 - 10 cm). Pour in water and seal. To make it easier to control the thickness of the layer, we drive pegs of the required length into the ground, set them according to the level, and after backfilling and tamping, we take them out.
Second layer - sand(10 cm). We control the thickness and level with the same pegs. We spill the layer with water and compact it with a vibrating plate or a log with a board. For this bedding, you can use ravine sand with impurities.
Third layer - rubble(10 cm). Carefully level and compact. Our task is to make sure that there are no sharp edges of rubble on the surface. If they are, you need to smooth them out by unfolding the pebbles or removing them. Crushed stone with a fraction of 40 - 50 mm should be used. After tamping, crushed stone can be lightly sprinkled with sand or crushed stone and compacted again.
Important! Do not forget to control the horizontal with a level.
It should be noted that backfilling can be performed only from two layers: sand and crushed stone. Also, to simplify control over the thickness of the layers, their level can be applied to the walls of the foundation.
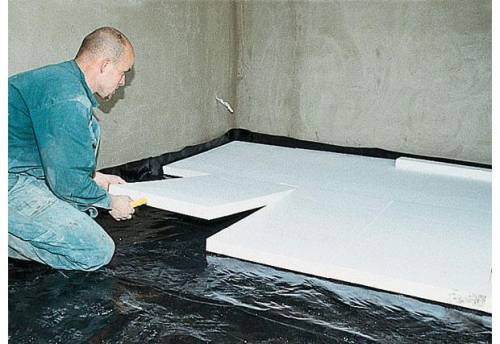
Laying waterproofing and thermal insulation

If the crushed stone layer is compacted tightly and there is no sharp corners, then waterproofing material can be laid directly on top of it. To do this, you can use modern roll materials and membranes, roofing felt in several layers or just polyethylene film with a density of at least 200 microns. We spread the material over the entire area of \u200b\u200bthe room, bring the edges to the “zero” mark on the walls and fix it there, for example, with adhesive tape. If the canvas is not enough to cover the entire area, then the joints must be made with an overlap of 20 cm and glued with adhesive tape.
On top of the waterproofing, thermal insulation can be performed using the following materials: expanded clay, perlite, extruded polystyrene foam, polystyrene foam(Styrofoam), stone basalt wool(corresponding density), polyurethane foam.
Consider the option of laying extruded polystyrene foam boards. They are laid out in a checkerboard pattern, tightly to each other, the joints are glued with a special adhesive tape.
Important! There are cases when it is not possible to perform hydro- and thermal insulation directly on the backfill. Then a layer of so-called "lean" concrete (liquid consistency) up to 40 mm thick is poured on top of the bedding. When it hardens, the above procedures can be performed from above. "Skinny" concrete firmly binds the crushed stone layer together and is a stronger base that cannot break through or damage waterproofing materials.
The concrete floor pouring technology necessarily includes reinforcement in order to strengthen the floor as much as possible. The reinforced floor is able to withstand heavy loads, which are evenly distributed over the surface.
Can be used as a reinforcing material metal and plastic mesh with different cells, and rebar frame. Most often, welded reinforcing meshes with dimensions of 5x100x100 mm are used. Less commonly, for floors that will be subjected to heavy loads, use a frame welded in place from a reinforcing bar with a thickness of 8 - 18 mm. In this case, more thorough vibrocompaction of the concrete mixture will be required.

The reinforcing mesh or frame cannot be laid directly on the base, as it will not fulfill its functions and will even be superfluous. It must be raised by 1/3 of the thickness of the future concrete pouring. Therefore, we install the grid or frame on coasters 2–3 cm high, which are called “high chairs”.
Installation of "beacons" and the formation of "maps"
The installation of guides, or as they are also called "beacons", allows you to fill the concrete mixture as evenly as possible, at the same level.
As guides, you can use round pipes or metal square profile, as well as wooden blocks, if their surface is smooth enough, special aluminum "beacons" can be laid.
We divide the room into segments of 1.5 - 2 m wide.
We install the guides on the "buns" made of concrete mortar. By pressing them in or adding mixtures, we control the location of the "beacons" so that their upper edge is strictly along the "zero" line. We lubricate the guides with special oil, in extreme cases it can be worked out to make it easier to remove them in the future.

Important! We control the strictly horizontal arrangement of the guides with the help of a level and a level. It will be possible to fill the floor with concrete after the “buns” harden enough so that when you click on the “beacon”, they do not push through.
The breakdown of the premises into "maps" is carried out if its area is large enough and it is not possible to fill with concrete in one step. Then the room is divided into square or rectangular "maps", the size of which is dictated by the performance of the construction team.
We mark the area into sections. We knock down the formwork-frame from freshly sawn wood or from laminated plywood. Naturally, the height of the formwork must be strictly set to zero.
Preparation of mortar for pouring concrete floor
To ensure that the concrete floor has the best possible thermal insulation properties, expanded sand or perlite should be added to the solution. And in order to have time to pour and knead the mortar with high quality, you need to purchase or rent a concrete mixer.
The secret to preparing the solution is as follows:
- Pour 2 buckets of perlite into the concrete mixer.
- Add 10 liters of water and mix. After adding water, the volume of perlite should decrease noticeably.
- When the sand mixes well with water, add 5 liters of cement and continue to knead.
- Add 5 liters of water and continue to knead.
- When the mixture becomes homogeneous, add 10 liters of sand and 2 liters of water. Knead until the mixture becomes loose.
- We pause in the batch for 10 minutes, in no case do not add water.
- After 10 minutes, continue kneading until the solution becomes plastic.
For pouring the floor, it is best to use cement M400 and M500.
Pouring concrete floor, leveling mortar
We begin to fill the floor from the corner opposite from the door, trying to fill several “cards” in one or two steps.
Since the concrete should not fit snugly against the walls and protruding structures of the building, we isolate them by laying a damper tape along them.

The resulting solution is poured into the "map" with a layer of 10 cm and leveled with a shovel. We perform piercing movements to remove excess air and compact the solution. If possible, you can use a deep vibrator, which is immersed in concrete, and when concrete "milk" appears on the surface, it is transferred to another place.
We level the solution with the rule. We install it on the guides and pull it towards ourselves with light movements to the left and right. So excess concrete is removed and distributed into the voids of other "maps".

After completing the leveling of the solution along the guides, we take them out and fill the vacant space with fresh mortar.
In the following days, we constantly wet the surface with water, you can additionally cover the concrete with a film. We give concrete to gain the maximum of its strength characteristics within 4 - 5 weeks.
Leveling screed concrete floor
When pouring a concrete floor, it is rarely possible to make the surface perfectly flat, most often there are small flaws, sagging. If you plan to install ceramic tiles, then perfect evenness is not needed, so you can immediately start work. But if you want to make a floor from a laminate or linoleum, then the surface must be perfectly flat.
Self-levelling compounds allow you to make the floor surface mirror-smooth.

According to the instructions on the package, we prepare a solution of a self-leveling mixture, pour it onto the floor and level it with a special brush. Then roll with a spiked roller to remove air bubbles from the solution. Let dry for at least 1 week. After that, the concrete floor is ready for use.
How to pour concrete floor over floors

A feature of pouring the concrete floor over the ceilings is that there is no need to backfill.
Checking concrete slab overlap, whether there are any cracks, crevices and chips on it. If we find, then close repair mortar. wooden floor must also be strong, without large gaps.
AT without fail we waterproof the overlap by laying a polyethylene film with a density of 200 - 300 microns.
We lay the insulation on top. It can be expanded polystyrene, extruded polystyrene foam boards, boards basalt wool or sprayed polyurethane foam.
We install beacons and fill the solution with a thickness of 100 mm. All other operations are carried out in the same way as in the arrangement of the floor on the ground. If something is not clear to you in the pouring instructions, perhaps watching a video demonstrating the concrete floor will help you.
It is quite possible to pour a concrete floor on your own, the main thing is not to save on materials and follow the technological process. Then the floor can last for decades without requiring major repairs.
Pouring concrete floor: video - example
Each owner of a private house should know how to prepare concrete - this will help in home improvement or suburban area. Often it makes no sense to order just a couple of cubes of factory concrete, it's just not profitable. To save money, the solution can be mixed by hand and in significant quantities if the right ingredients are available.
Instruments
At home, a concrete solution is usually prepared manually for utility buildings, but when building housing, this procedure must be approached very responsibly.
The main rule for preparing the mortar: the brand of cement should be 2 times the brand of concrete that is needed for pouring. Those. if concrete M150 is needed, then cement must be at least M300.
For pillows under the foundation and preparation of work in dry soils, a solution of B7.5 (M100) of a hard consistency is used. As a filler, crushed stone 5-20 mm is used. From the same concrete, but more plastic, stairs, steps are made, fences, paths, etc. are poured. For the same purposes, in wet soils, it is recommended to prepare hard concrete B10 - B12.5 (M150). From a mixture of hard consistency of this brand, both the subfloor and the paths are made.
Bookmark strip foundation, unloaded parts of the building, a hard mortar B15 (M200) or B20 (M250) is suitable. He, only a little more plastic, is suitable for cesspools, sedimentation tanks, septic tanks. For the foundation of a good residential building, you need to make concrete M300 (B22.5): this will the best option and crushed stone is better to take fractions of 20-40 mm.
Concrete grades M350 (B25) and M500 (B40) are used for high-rise structures, heavy-duty structures, storage facilities, runway laying and are not used in home construction - there is no need, and it is difficult to work with such a solution.
To mix the solution you will need:
- trough or concrete mixer;
- shovels;
- hammer (for crushing hardened cement);
- buckets;
- sieve for sifting sand;
- containers for washing the filler.
Components
Before you prepare concrete, you need to control the quality of the components well.
Water
Water should be as clean as possible, without impurities, dirt, clay, soil. It is impossible to take sewage from swamps, stagnant sources, chemically contaminated. The solution just won't set well. On average, half of the mass of cement is needed for water.
Never add water to an already prepared solution.
Filler
There is a fine filler - sand, and a large one - gravel, crushed stone. For light mixtures - expanded clay filler, slag, brick or limestone crushed stone. There is a rule: the strength of a large filler is two to three times the design strength of the finished solution. Crushed stone creates a kind of power skeleton for the mixture.

The aggregate should be as clean as possible, without earth, branches, soil, and especially clay. It is sometimes washed, sieved at the construction site. Permissible amount of impurities: 35% for crushed stone, 5% for sand. Organic impurities destroy the solution from the inside. It is recommended to sift, rinse and dry the filler before use.
Sand
It is desirable to take coarse sand, it is more versatile. There are 5 groups of sand: from 3.5 mm - with large grains; up to 1.2 mm - fine-grained. The last builders recommend only for lightweight concrete.
Checking the contamination of sand: 200 ml of it is poured into a bottle, water is poured, shaken, poured. Water carries away impurities, volume loss is more than 5% - poor quality. When kneading, it is taken into account that dry sand contains 1% moisture, after rain - 10%.
Fractions are used small (up to 12 mm, up to 40 mm). Granite screenings or crumbs are taken for floor screed, bulky work.
Rubble happens:
- granite - the best;
- gravel - standard for private construction;
- limestone - not recommended for buildings, as limestone becomes limp from moisture.

The most popular fractions: 5–20, 5–10, 10–20, 20–40 mm. The size of the material should not exceed a third of the width of the product in the narrowest part and 2/4 of the distance between the reinforcement. Do not recommend crushed stone more than 150 mm.
It is advisable to use two fractions - fine (at least a third of the coarse aggregate) and large - so the concrete will be denser. Pebbles are categorically undesirable: they are smooth and do not bind the solution well. Expanded clay (3-5 cm in size) is suitable for light screeds in houses with wooden floors.
Cement. Rigidity
We will consider the characteristics of cement separately in close connection with the determination of its amount in the mixture. Proper preparation of concrete is based on a harmonious ratio of components. Concrete must be used all at once - it is never left "for later", so the amount of the mixture must be well calculated.
Rigidity
Rigidity is determined by slip: if the mixture flows down from horizontal plane- it is too liquid, plastic; when sliding when tilted - medium plastic; if it sticks without slipping, it is low-plastic; does not settle, remaining a lump - tough. liquid concrete easier to lay, but hard is better in quality and strength.
The most popular brands of cement for private construction are M400, M500.
Table - The composition of the concrete mixture per 1 m3 of concrete:
So, the amount of material M400 for 1 cubic meter of the mixture:
- for concrete B7.5 - 180 kg;
- B10 - 200 kg;
- B15 - 260 kg.

The main amount of cement sold on the market is Portland cement M500. If it is taken, then the above norms must be multiplied by 0.88. This and the following formula will come in handy for buying the right amount cement. The length, width, depth of the foundation is multiplied - the volume (cubic capacity) is obtained, based on the above proportions, you can find out exactly how much cement is needed.
Nuances
Cement at home is often taken stale, from the remains of other construction. It should be borne in mind that such a material does not have the necessary properties. To prepare the mortar, you need a dry, not expired material without lumps - so the concrete will not crack. The shelf life of cement in its original packaging is 90 days, in open packaging - no more than a week for dry conditions and no more than a day for wet ones. Stale material must be carefully crushed with a hammer.
For the preparation of the solution by hand, concrete grades M100 - M350 are popular. All calculations are by weight and based on the mass of cement. The ratio of ingredients is calculated as their weight ratio to it.

The grade strength of the solution is determined by the ratio of water and cement (VC). Less water - a higher brand. But with its lack, the opposite effect can occur, so the rule "more cement - better (stronger) concrete" is erroneous. As mentioned above, the brand of cement should be 2–3 times higher than the design grade of mortar. Knowing the water-cement ratio, you can increase or decrease the grade of the mixture.
Handmade Recipe
Consider the option of how to prepare a concrete mix for home construction manually, based on the proportions with the tables. Here are two tables, using which you can determine the proportions and the number of components for 1 cubic meter of solution.
Table of water-cement ratio (aggregate indicators averaged):
Table - The ratio of water and cement
| Concrete, brand | V/C | |
| Cement M400 | Cement M500 | |
| 100 | 1.04 | - |
| 150 | 0.86 | - |
| 200 | 0.70 | 0.80 |
| 250 | 0.58 | 0.66 |
| 300 | 0.54 | 0.62 |
Calculation of water for filler per cube. m and the percentage of sand in it.
Table - The ratio of sand, gravel and water
You also need to know the approximate density of fillers, mass in kg / m2:
- for gravel filler - 1600;
- for crushed granite - 1500;
- for quartz sand - 1500;
- for expanded clay - 600–800;
- for cement - 3000–3200 (bulk -1300 ÷ 1800).
Preparation of concrete M300 (1 cubic meter). Ingredients:
- crushed stone with a fraction of 25 mm;
- medium-grained sand;
- Portland cement M400.
The first table defines V / C - 0.54; the second is the amount of water, with such a filler, 196 liters are needed. Cement: 196/0.54=363 l. Filler volume and percentage: 1- ((363/3000)+0.196)=0.680 m3. We look at the percentage of sand according to the second table - 45%, it turns out 680 × 0.45 = 306 liters of sand. Crushed stone: 680–306=374 l.
The volumes were determined in liters, so you can work with a 10 liter bucket. If the supplier measures fillers in tons, then it is not difficult to convert them into liters according to the above weight-volume density values in kg / m2 (for cement, you need to take bulk density).
Other popular recipes and proportions
The following proportions are generally accepted for the preparation of concrete at home: 1 (C) / 4 (Sch) / 2 (P) / 0.5 (V). In terms of weight, it looks like this: 300/1250/600 kg, water - 180 liters.
If you take cement M400 - you get concrete M250, if cement M500, then mortar M350. For solutions of low grades, it is necessary to reduce the cement content. For solution B20 (M250) there is another recipe: 1 (C - M500) / 2.6 (P) / 4.5 (Sch) / 0.5 (V) or in kg: 315/850/1050, water - 125 liters per cubic meter m.
More proportions (cement: sand: crushed stone; water - half of the cement):
- 1:3.5:5.7 - M150 (for floors, paths);
- 1:2.8:4.8 - M200 (fences, foundations of garages and baths);
- 1:1.9:3.7 - M300 (walls, strip foundations);
- 1:1.2:2.7 - M400 (very strong, professional, quickly sets and hardens).
simple secret
There is an easy way to determine proportions. Crushed stone is poured into an empty bucket and evenly distributed. Measured utensils (a jar of 1 liter) add water until its level is equal to the edge of the gravel. The volume of liquid is the required volume of sand.
Further, crushed stone is poured out, in its place sand is poured with the same can of the same amount as there was water. Then water is poured again until it covers the sand. This determines the required volume of cement. The last component is water, its amount is 50–60% of cement.
The method is based on the principle that sand fills the voids between the gravel pebbles, and cement fills between the grains of sand. In this case, the strength of the solution will be approximately the same as that of crushed stone. This method does not take into account the expansion of the filler grains, some other parameters, but it is simple and can be used for non-critical structures.
Mixing methods
The preparation of the concrete mixture is carried out in two ways:
- manually;
- using a compact concrete mixer (mechanical or automated).
Many are mistaken in believing that a container is needed for manual kneading - no, cooking is carried out by means of a shield made of boards, they also use metal, tin shields, troughs with various materials, the concrete mixture is kneaded even just on a flat hard surface. If the shield is built from boards, they need to be tightly fitted and, ideally, upholstered with roofing iron, although it can also be kneaded simply on a sheet of such iron with edges slightly turned inward.

First, sand is poured in a slide along the length of the shield, a furrow is made in the center, cement is poured there, the sand is wrapped little by little from top to inside, gradually stirring. Further, in two shovels, sand and cement are mixed 3-4 times, then everything is wetted with water from a watering can, mixed again. Then gravel is evenly thrown, the mixture is simultaneously mixed, water is gradually added until the required consistency is formed.
Another sequence: cement - water - sand - gravel (crushed stone).
There are two types of these devices: with a gravitational or with a forced mechanism. The simplest and most affordable first. This is a pear with blades inside, rotating in an inclined position. For kneading, you need about 2-3 minutes of rotation.
Preparation is carried out in stages - so the concrete mixture mixes well:
- the mechanism always turns on empty;
- water is poured;
- pour half of the cement;
- fall asleep all the large filler;
- add the second half of the cement;
- sand gradually falls asleep;
- rotation - 2-3 minutes.

Everything is poured only into a horizontally standing (maximally inclined) bowl. The more horizontal the concrete mixer, the better. After unloading the concrete, the bowl must be washed with water so that there is no solidified solution on it. There are small mechanisms, they are convenient, but at a time they are able to mix no more than 4 buckets of gravel, if you load more, you won’t be able to tilt the bowl, the batch will be of poor quality.
In winter, the order changes: first hot water, then crushed stone, cement, sand. Potash (potassium carbonate), antifreeze additives are added to the solution, but you need to know the measure, they destroy the reinforcement.


