A distinctive feature of the tape type foundation lies in its very name. It is a closed circuit - a "tape" (reinforced concrete strip laid under the bearing walls). Through the use of a strip foundation, the resistance to the forces of heaving soil increases, while the risk of warping or subsidence of the building is minimized.

Strip foundation - photo of a freshly poured structure
It is this foundation that is built on dry or heaving soils. And the more weight future design, the deeper the foundation is laid (sometimes even up to 3 m, depending on the depth of soil freezing and the level of groundwater).


These and other characteristics are regulated by GOST 13580-85 and SNiP 2.02.01.83.
GOST 13580-85. REINFORCED CONCRETE PLATES OF BELT FOUNDATIONS. Specifications. Download file
SNiP 2.02.01-83. FOUNDATIONS OF BUILDINGS AND STRUCTURES. Download file
During construction, special attention is paid to waterproofing, since the strength, quality and durability of the structure will depend on it. In the absence of protection, groundwater and precipitation can significantly damage concrete, and the consequences can be the most dire - from permanent dampness to subsidence and cracking of walls. For this reason, do-it-yourself waterproofing of the strip foundation is one of the most crucial stages.


Waterproofed foundation - photo
Below is the average depth of soil freezing in different regions. If your region is not in the table, then you need to focus on the one that is closest to the others.


Regardless of the chosen method of isolation (they will be discussed a little later), a number of technical requirements must be followed in the work.
- Be sure to take into account the level of groundwater, because the type of insulation depends on it.
- It is also necessary to take into account the conditions for the future operation of the facility (if it is being built, for example, warehouse space, then the requirements for waterproofing will be more stringent).
- It is also necessary to remember about the possibility of flooding during large floods or precipitation (this applies in particular to loose soil).
- The force of "swelling" of the soil during frost also plays an important role (during defrosting / freezing, the structure and volume of water change, which can lead not only to the rise of the soil, but also to the destruction of the foundation).
The main methods of waterproofing
Waterproofing can be of two types - vertical and horizontal. Let's consider each of the options.
Important information! When constructing the foundation, you do not need to save money and abandon the sand "cushion". Sand is needed not only to prevent leakage of concrete, but also to prevent washing out of the structure.


It is performed even during the construction of the foundation, and additional time (15-17 days) may be required for preparations. The main function of such insulation is to protect the base in horizontal plane(mainly from capillary groundwater). An important component horizontal waterproofing is a drainage system, which is equipped with high level groundwater.

It is worth noting that under the "tape" there should be a sufficiently strong base, on top of which a waterproofing layer will be laid. Often, a “cushion” of a slightly larger width is cast for this than that of the future foundation. In the absence of a need for high quality(for example, if the foundation is being built for a bath) it is enough to prepare a screed of sand and cement in a ratio of 2: 1. In Soviet times, asphalt screed was made, but today this technology is practically not used.
The horizontal waterproofing procedure consists of several stages.
Stage 1. The bottom of the pit, dug under the base, is covered with a sandy "cushion" about 20-30 cm thick (clay can be used instead of sand) and carefully compacted.
Stage 3. When the screed dries (it takes about 12-14 days), it is covered with bituminous mastic and a layer of roofing material is fixed. Then the procedure is repeated: applying mastic - fastening the roofing material. On top of the second layer, another screed of the same thickness is poured.

Stage 4. When the concrete hardens, the construction of the foundation itself begins, the surfaces of which are additionally covered with vertical types of waterproofing (they will be discussed later).


Important information! If the building will be built from a log house, then it is necessary to waterproof the top of the foundation as well, since the first crown will be installed there. Otherwise, the wood may rot.
Drainage
Drainage may be required in two cases:
- if the permeability of the soil is low and water accumulates rather than being absorbed by it;
- if the depth of the foundation is lower or corresponds to the depth of the groundwater.

The algorithm of actions for the arrangement of the drainage system should be as follows.

Stage 1. Along the perimeter of the structure - about 80-100 cm from the foundation - a small pit 25-30 cm wide is dug. The depth should exceed the depth of pouring the base by 20-25 cm. It is important that the pit has a slight slope in the direction of the water collector, where water will accumulate.

Stage 2. The bottom is covered with geotextile, while the edges of the material must be wrapped at least 60 cm onto the walls. After that, a 5-centimeter layer of gravel is poured.
Stage 3. A special drainage pipe subject to a slope towards the water collector of 0.5 cm / 1 running. m.


Laying pipes on geotextiles and backfilling crushed stone


Thanks to this design, water will flow into the drainage pipe, while it (pipe) will not become clogged. Moisture will be discharged into the water collector (it can be a well or a pit, and the dimensions depend on the inflow of water and are determined on an individual basis).

Prices for a drainage well
drainage well
Vertical waterproofing
Vertical type insulation is the processing of the walls of the finished foundation. There are several ways to protect the base, which are possible both during the construction of the building and after construction.
Table. Strengths and weaknesses of the most popular waterproofing options
| Material | Operational period | Ease of repair | Elasticity | Strength | Cost, per m² |
|---|---|---|---|---|---|
| 5 to 10 years | ★★★☆☆ | ★★★★★ | ★★☆☆☆ | About 680 rubles | |
| Polyurethane mastic | 50 to 100 years old | ★★★☆☆ | ★★★★★ | ★★☆☆☆ | About 745 rubles |
| Rolled bituminous materials | 20 to 50 years old | ★☆☆☆☆ | - | ★☆☆☆☆ | About 670 rubles |
| Polymer membranes (PVC, TPO, etc.) | 50 to 100 years old | - | ★☆☆☆☆ | ★★★☆☆ | About 1300 rubles |

Inexpensive and simple, and therefore the most popular way to waterproof the foundation. It implies complete processing with bituminous mastic, penetrating into all cracks and voids and preventing moisture from entering the house.

Important information! When choosing one or another bituminous mastic, pay attention to the marking - this will help you find out the heat resistance of the material. For example, mastic marked MBK-G-65 has a heat resistance (for five hours) of 65°C, and MBK-G-100 - 100°C, respectively.
Advantages of bituminous mastic:
- ease of use (can be done alone);
- affordable cost;
- elasticity.


Disadvantages:
- low speed of work (requires the application of several layers, which takes a lot of time);
- not the best water resistance (even high-quality application does not guarantee 100% protection);
- fragility (in 10 years you will have to re-treat the foundation).
The process of applying mastic is extremely simple and consists of several stages.
Stage 1. Surface preparation. Below are the basic requirements.
- The surface of the foundation must be solid, with chamfered or rounded (ø40-50 mm) edges and corners. Fillets are made at the transition points of the vertical to the horizontal - so the joined surfaces will be mated more smoothly.
- For bitumen, sharp protrusions are extremely dangerous, appearing where the formwork elements are joined. These protrusions are removed.
- Concrete areas covered with shells from air bubbles are rubbed with a fine-grained cement mortar based on dry building mix. Otherwise, bubbles will appear in the freshly applied mastic, which will burst 10 minutes after application.
Also, dirt and dust should be removed from the surface, and then dried thoroughly.

Important information! Substrate moisture is a very important indicator and should not exceed 4%. With more high rate the mastic will swell or begin to flake off.
Testing the base for moisture is quite simple: you need to lay it on concrete surface a piece of PE film measuring 1x1 m. And if in a day there is no condensation on the film, then you can safely proceed to further work.
Stage 2. In order to increase adhesion, the prepared base is primed with a bituminous primer.

You can go the other way and prepare a bitumen primer yourself. To do this, BN70/30 grade bitumen must be diluted with a rapidly evaporating solvent (for example, gasoline) in a ratio of 1:3.

One layer of primer is applied over the entire surface, two at the junction. This can be done with either a brush or a roller. After the primer dries, the actual mastic is applied.
Stage 3. The bitumen bar is broken into small pieces and melted in a bucket over a fire.


It is recommended to add a small amount of “mining” there during heating. Then liquid bitumen is applied in 3-4 layers. It is important that the material does not cool down in the container, because with one more heating, it partially loses its properties.

The total thickness of the waterproofing layer depends on the depth of the base pour (see table).
Table. The ratio of the thickness of the bitumen layer to the depth of the foundation
Stage 4. After drying, the bitumen should be protected, since it can be damaged when backfilled with soil containing debris. To do this, you can use rolled geotextiles or EPPS insulation.
Prices for bituminous mastic
bituminous mastic
Video - Insulation of the EPPS foundation
Reinforcement
Bituminous insulation needs reinforcement on:
- cold seams;
- junction of surfaces;
- cracks in concrete, etc.
Often, fiberglass and fiberglass are used for reinforcement.

The fiberglass material must be sunk into the first layer of bitumen and rolled with a roller - this will provide a tighter abutment. As soon as the mastic dries, the next layer is applied. It is important that the fiberglass material is laid with an overlap of 10 cm on both sides.

Reinforcement will provide a more uniform distribution of the load on the entire insulation strip, minimize the elongation of bitumen in the places of cracks and, as a result, significantly extend the service life.

fiberglass prices
fiberglass
It can serve as both the main protection and addition to the applied bituminous mastic. Usually ruberoid is used for this.

Among the advantages of the method should be highlighted:
- low cost;
- availability;
- good service life (about 50 years).
As for the shortcomings, this can only be attributed to the fact that one cannot cope with the work alone. The algorithm of actions should be as follows.
Stage 1.

Unlike the previous method, there is no need to carefully apply the material, since the mastic is needed solely for attaching the rolled waterproofing to the base.
Stage 2. Using a burner, the roofing material is slightly heated from below, after which it is superimposed on a layer of hot bitumen. Sheets of roofing material are joined with an overlap of 10-15 cm, all joints are processed with a burner.

Stage 3. After fixing the roofing material, you can fill up the foundation, because additional protection is not required here.

Important information! Roofing material can be replaced with more modern materials that are welded onto the base. These can be polymer films or canvases with bitumen-polymer coating (for example, Izoelast, Technoelast, etc.).
Prices for roofing material
ruberoid
Video - Waterproofing with roofing material


This method is extremely simple to perform and is used for waterproofing and leveling the foundation surface. Here advantages of plaster waterproofing:
- simplicity;
- high speed of work;
- affordable cost of materials.
Disadvantages:
- low water resistance;
- short service life (about 15 years);
- possible cracks.


There is nothing complicated in the application process. First, with the help of dowels, a putty mesh is attached to the foundation, then it is prepared plaster mixture with waterproof components. The mixture is applied to the foundation with a spatula. After the plaster has dried, the soil is poured.
In fact, this is a dispersion of polymer-modified bitumen particles in water. The composition is sprayed onto the base, providing high-quality waterproofing. Advantages this method are as follows:
- high quality waterproofing;
- no need for special skills;
- durability.

But there is also limitations:
- high cost of the composition;
- low speed of operation in the absence of a sprayer.
In addition, liquid rubber is not available everywhere. For the foundation, the same type of composition, which can be of two types, is quite suitable.

- Elastomix - applied in 1 layer, hardens for about 2 hours. Further storage after opening the package is not subject to.
- Elastopaz is a cheaper option, but it is already applied in 2 layers. What is characteristic, Elastopaz is subject to storage even after opening the package.

Stage 1. The surface is cleaned of dirt and debris.
Stage 2. The foundation is covered with a special primer. Alternatively, a mixture of liquid rubber and water (1:1 ratio) can be used.
Stage 3. After an hour, when the primer dries, a waterproofing material is applied (one or two layers, depending on the type of composition). It is advisable to use a sprayer for this, but you can use a roller or brush instead.

liquid rubber prices
liquid rubber
Video - Processing the base with liquid rubber
Penetrating insulation
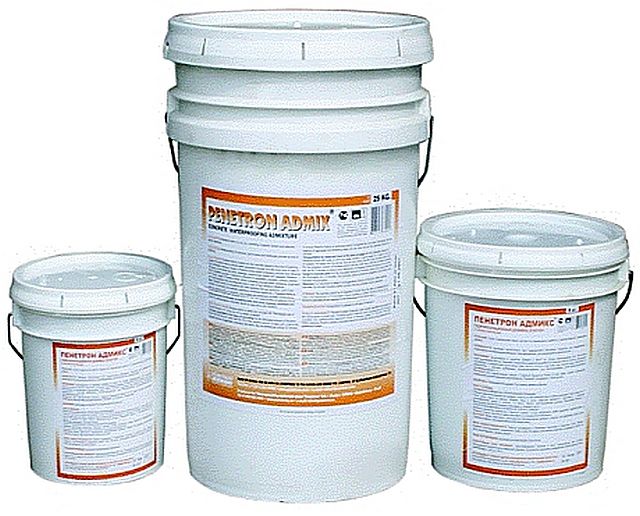
On the base, previously cleaned of dirt and slightly moistened with water, a special mixture (Penetron, Aquatro, etc.) is applied with a sprayer, penetrating into the structure by about 150 mm. It is important that the solution is applied in two or three layers.

Main Benefits:
- effective protection;
- the possibility of processing surfaces inside the building;
- ease of operation;
- long operational period.
Disadvantages:
- low prevalence of such solutions;
- high price.

Making a clay castle
A simple, but at the same time effective way to protect the base from moisture. First, a foundation pit is dug around the foundation with a depth of 0.5-0.6 m, then the bottom is covered with a 5-centimeter gravel or crushed stone "cushion". After that, clay is poured in several stages (each layer is carefully compacted). The clay itself will act as a buffer against moisture.

The only advantage of the method is the ease of implementation.
Clay castle is suitable only for wells and household facilities. If, for example, we are talking about a residential building, then this method can only be used as an addition to the already existing waterproofing.
This method of protecting the base appeared relatively recently and is as follows: to the cleaned surface of the foundation using mounting gun or dowels are nailed mats that are filled with clay. The laying of mats should overlap, by about 12-15 cm. Sometimes special clay concrete panels are used instead of mats, in which case the joints must be further processed.

 Overlap - photo
In principle, screen insulation is an improved version of a clay castle, therefore it can only be used for household structures.
Summing up. Which option to choose?
The optimal option for waterproofing a strip foundation should include both horizontal and vertical waterproofing. If, for one reason or another, horizontal insulation was not laid during construction, it is better to resort to bituminous mastic or special plaster. But, we repeat, it will be most effective only in combination with horizontal type protection.
The foundation is the foundation of any building or structure. It, like any building structure, needs protection. Waterproofing a strip foundation is a set of works that protects the foundation from the negative effects of a humid environment. Consider the most common types of waterproofing, as well as how and from what to make it.
Foundation waterproofing of any type is a necessary technological process production of works, which protects the foundation from the negative effects of moisture. This work is of two types:
- Vertical waterproofing - protection of the walls of the foundation itself.
- Horizontal waterproofing is the isolation of one building material from another, with different water resistance coefficients.
The drainage system also applies to horizontal waterproofing, but this separate view construction works so we'll talk about it later.
Waterproofing the strip foundation can be done in several ways, some of them can be done independently without involving additional work force. And some - only in an industrial way, using specialized equipment.
Consider all types of waterproofing devices in order.
Bituminous coating
The cheapest, fastest and most common method, which consists in the complete processing of the foundation walls with special bituminous mastic. Due to its properties, the mastic fills all the microcracks and chips, preventing the penetration of moisture into the body of the foundation.

Bituminous coating waterproofing, as a building material, can be one-component (ordinary bituminous bar, requires heating), and sold in buckets, with special additives ( liquid state obtained by chemical reaction, when mixed).
Waterproofing of strip foundations, in this way, is carried out by applying the composition to the surface to be treated with brushes. Before starting work, the surface must be dusted and dirt removed using brushes.
Advantages:
- does not require special skills;
- speed of work;
- cheapness.
Disadvantages:
- re-treatment of surfaces, after 5-7 years;
- with multi-layer processing, it requires a long drying time of the previous layer;
- the possibility of damage to the layer, when backfilling the foundation.
The use of roll building materials - can serve as a separate type of construction work, and additional protection the method described above.
Waterproofing the foundation with rolled materials is carried out according to the following technology - sheets of rolled building material, cut to size (with a small margin), are applied to the surface covered with mastic. The work is done top-down.

Cut sheets, before installation, must be rolled up, leaving the top edge for heating. With the help of a burner (flute), the edge of the roofing material is heated and glued to the surface of the foundation. Further, gradually unwinding the roll and heating it, we paste the entire sheet, smoothing it from the center to the edges. The next sheet is glued with an overlap of 7 - 15 cm, on a previously installed sheet.
When gluing two or more layers, the rule of ligation of building materials is observed - the seam (joint) of each subsequent layer must be 20-40 cm from the seam (joint) of the underlying layer.
All corners of the foundation are additionally armored with strips of the same rolled material, the sides of which go 20-30 cm from each side of the corner.
Waterproofing the strip foundation in this way requires the use of an open flame, therefore, it requires compliance with safety precautions: the use of a special burner, a proven propane gas cylinder, the use of personal protection(glasses, overalls, gloves and shoes).
Advantages:
- durability, up to 60 years;
- availability;
- easy maintainability;
- cheapness.
Disadvantages:
- not performed individually (requires a team of 2 - 3 people);
- work with an open flame.

The plaster mixture, which includes hydro-resistant substances and components, should be diluted strictly according to the instructions placed on the package or issued by the seller. Using a conventional spatula, the composition is applied to the surface of the foundation being processed. Before applying the solution, the entire surface must be covered with a special plastic mesh. The mesh is fixed with dowels.
- not expensive materials;
- speed of work.
- coating durability 10 - 15 years;
- the possibility of microcracks;
- not high water resistance.
The use of liquid rubber
Waterproofing, using liquid rubber, is carried out by applying it to a primed surface, using brushes, rollers or a sprayer. Since liquid rubber is a ready-made building material, it does not require preliminary preparation, except when several components are used that are mixed before work.

When using such compounds, you need to carefully consult with the seller, since some types of these building materials cannot be stored. That is, after opening the package, you must use the entire volume.
- durability, over 50 years;
- ease of production work;
- high waterproofing qualities.
- high cost;
- to speed up the production process, a special sprayer is required.
Penetrating waterproofing

Using a sprayer, a special composition is applied to the primed surface, penetrating into the concrete body to a depth of 10-20 cm. The composition is applied to the concrete in several layers.
- durability 50-70 years;
- simple production process;
- high waterproofing properties.
- high price.
Screened waterproofing

Waterproofing a strip foundation of this kind is very rare. The production process consists in the fact that special mats are attached to the surface of the foundation (using a mounting gun) or panels (inserted into locks located along the edges). On our own it is not possible to perform, licensed specialists are required.
Horizontal waterproofing
Waterproofing with roll materials

It is used to protect the foundation and buildings from the negative effects of capillary moisture.
A tape of material is laid on the surface of concrete, with a protrusion beyond the edges of the walls of structures standing on it, by 5 - 15 cm. The tape can be laid as a second layer of mastic or as separate element, without base and fasteners.
drainage system

Serves for removal of ground or thawed snow, from the base.
Along the perimeter of the foundation, a separate trench is dug, with a deepening, below the bottom of the foundation, by 20-30 cm and a slope towards the water collector or technical well. If necessary, sand is laid in the drainage trench. After that, geotextiles are spread, with an approach, on the walls of the trenches by 50-70 cm. The next layer is 5-10 cm of gravel (do not tamp!), On which the drainage pipe will lie, with a slope of 5-6 mm / 1m of the drainage pipe.
The required slope is formed by the layout of the previously laid gravel. Then, a layer of gravel 20-40 cm is added, on which the edges of the geotextile are wrapped (overlapped). After the trench is covered with soil.
Horizontal waterproofing of the strip foundation, made using this technology, will freely pass water to the pipe, for its subsequent removal, without clogging it.
If there is no water collector, then it needs to be done - for example, by installing a well of concrete rings or a container of a suitable volume.
Conclusion
Before choosing the type of waterproofing, it is necessary to consult a specialist, provided that it is not specified in the project documentation. Waterproofing performed in compliance with the technology will reliably protect not only the foundation itself, but also the structure built on it. And an accurate calculation of building material will help save money and minimize future repair costs.
The strip foundation of your house should be “dressed” in waterproofing materials. correct and reliable waterproofing the strip foundation of your house is one of the priorities that you must definitely solve.
Tape is a reinforced concrete strip. It goes along all the external dimensions of the structure and along the load-bearing internal walls.
From life experience we know that in order to maintain our health, we put on warm clothes in cold weather, we put on shoes accordingly in wet weather. We go fishing and hunting in special wading boots so as not to get our feet wet and not get sick. But many unfortunate builders think that the built house, in particular, its foundation, can be located in a rather damp and cold environment - in the ground - without protection from this aggressive environment.
Therefore, in order for the house you built:
- pleased you and more than one generation of your descendants;
- was a “long-liver”, for which you need to preserve the “health” of your home;
- did not cause trouble from frequent repairs, alterations, reconstructions due to illiterate construction and subsequent operation,
definitely needed modern technology for isolation from groundwater.
This is an important issue that we must deal with.

Strip foundations (scheme).
To create a waterproofing that will last you for many years, you need to use a high-quality, specially designed material with certain properties and characteristics.
The material used must be:

Modern materials have these properties and differ only in a greater or lesser degree of their manifestation.
good drainage
Light soils - sands and sandy loams - are able to easily pass the emerging moisture into the lower layers of the soil. Water does not stagnate near the erected foundation, and therefore waterproofing can be a little easier compared to the waterproofing device, standing on heavy, heaving soils - clay, loam.
As a rule, on heaving soils they arrange a drainage system for collecting and removing moisture from concrete foundation. For this, special drainage membranes are used, which are placed under a monolithic slab on which a strip foundation stands.

Scheme of the device of the drainage system.
Under the sole of the reinforced concrete foundation strip, carried out in a trench (house without a basement) along all external and internal bearing walls at home, with a depth of the base of the foundation 20-30 cm below the freezing point of the soil, a sand-gravel or sand-gravel cushion must be built. Such drainage is able to divert moisture to the lower layers of the earth. The width of the bulk and compacted cushion should be 20 cm greater than the width of the strip foundation. The cushion prevents water stagnation and silt or clay from being drawn in when the groundwater level rises on the foundation surface and damage vertical waterproofing. A vertically installed drainage membrane helps to drain excess water away from the building, preventing it from exerting pressure on the waterproofing itself and looking for weaknesses in it.
Horizontal and vertical insulation

Scheme of the horizontal waterproofing device
Horizontal waterproofing is carried out under a monolithic slab by laying a drainage membrane on a monolithic layer of lean concrete with a slope into the outlet pipeline, followed by installation reinforced mesh and pouring monolithic foundation slab, on which a strip foundation is assembled or poured around the perimeter of the house.
Horizontal waterproofing is also done to separate the upper plane of the strip foundation and the starting wall. It is carried out by spraying the appropriate material or laying rolled hydro insulating materials.
All vertical planes of the strip foundation from top to bottom are covered with modern materials specially designed for this.
Several types of waterproofing
Non-pressure waterproofing protects the strip foundation from external atmospheric precipitation penetrating the soil, and from the spring and autumn temporary rise in the groundwater level.

For reliable anti-pressure waterproofing of the basement, it is better to apply three layers of slurry.
After the vertical waterproofing is completed, the foundation is backfilled. The best result is achieved with layer-by-layer backfilling with inert, well-conducting water materials, such as quartz (river) sand with the least clay impurities, gravel mass or earth. Backfilling with construction debris is undesirable, since it is after this operation that the integrity of the waterproofing of the strip foundation can be damaged. On the surface of the earth around the entire perimeter of the building, a blind area 1 m wide is made of concrete or asphalt.
Anti-pressure insulation, in turn, protects the foundation of the house from contact with permanent nearby groundwater in the foundation area. Coating, spraying, painting materials are used for such purposes. After applying such insulating materials, a continuous layer of insulation is formed without joints and seams with good repulsive properties.
Capillary waterproofing prevents moisture droplets from entering the concrete monolith. It gives the best results when concrete is impregnated with compositions both from the inside and from the outside of the foundation tape. Impregnating compositions penetrate deep into the concrete for several centimeters, filling the smallest pores in the concrete, making the strip foundation practically airtight and able to withstand external moisture.

Scheme of junction of horizontal and vertical waterproofing.
Sequence of work
Work on the isolation of the strip foundation from the external influence of the environment should take place on a surface cleaned of dirt.
First of all, it is necessary to choose the method of application, and at the same time the insulating material itself.
Coating waterproofing is carried out with mastic, bituminous compounds, liquid glass. In most cases, it is used as the first layer of insulation and as a bonding layer for gluing rolled materials.
After this layer, the foundation is covered with roofing felt or other rolled materials in two layers, gluing the layers onto the mastic. The joints are made with an overlap of 20 cm.
Waterproofing is also possible with the use of spraying with special compositions using a sprayer.
After performing any type of waterproofing, it is advisable to mount a special roll profiled membrane, which will protect the waterproofing from damage and help drain excess water from the foundation. The membrane is also rolled out with an overlap at the joints of 15-20 cm.
The strength and durability of the foundation directly depend on the stability, integrity of the structures of the entire erected on this basis of the building, and even, to a certain extent, the safety of the people living in it. That is why special attention is always riveted to the process of constructing the foundation part of the structure, and only the best building materials are used for this.
However, no matter what high-strength materials neither used on the "zero cycle", they all have a common ruthless "enemy" - water, in one state or another. Moisture can reduce the strength of the structure being created in a relatively short time, so do-it-yourself waterproofing is the most important stage in the independent construction of your own house, which should never be overlooked.
What is dangerous moisture for the foundation
Water familiar to all of us, completely seemingly harmless to an amateurish look, can cause a lot of trouble to the foundation of a building:

- Firstly, the property of water is known to increase significantly in volume when it passes into a solid state - when it freezes. Penetrating into micropores and cracks of even the most durable structure when temperatures drop below 0º C, it is able to expand them, increase in size, and sometimes literally break them into separate fragments.

- Secondly, water on the surface of the earth, contained in the upper layers of the soil and even dropdown in the form of precipitation is never pure. It is always saturated in one or another concentration with very aggressive chemical compounds - industrial emissions, agricultural chemicals, oil waste, automobile exhaust, etc. Such substances cause surface erosion of concrete, from which it loses its strength and begins to crumble.

- Thirdly, these same chemical compounds plus dissolved in water, oxygen activates corrosion processes on the reinforcement grid. Not only does the inherent strength of the entire reinforced structure decrease, but this leads to the formation of internal cavities in the thickness of the material and eventually ends with delamination of the upper layers of concrete.
- And fourthly, we must not forget that what water has a pronounced leaching property (how not to remember the proverb - « water wears away the stone). Constant exposure to even chemically pure water is always associated with a gradual washing off of the particles of the foundation material from the surface, the formation of surface shells, cavities, etc.
Water in the soil adjacent to the foundation can be in different layers and in different states:
- The upper, so-called, filtration layer is water falling from precipitation, formed from melting snow or simply from an external spill (usage water for domestic and agricultural purposes, accidental gusts of highways, etc.). Sometimes, if a high-lying waterproof layer comes across on the path of absorption, then a fairly stable horizon - perched water - can form in a certain limited area.
The saturation of the upper filtration layer of water is always strongly dependent on the time of year, the steady weather, the amount of precipitation and is not a constant value. An important role in reducing the impact of the moisture of this layer on the foundation of the building will be played, in addition to high-quality waterproofing, by a well-thought-out storm sewer system.
- The upper layers of the soil always contain soil ( ground) moisture, which is constantly retained there due to capillarity or adhesive properties of the soil. Its concentration is quite constant and depends very little on the level of precipitation, season and etc.. It does not exert any dynamic, washing out loads on the foundation, and its negative impact is limited to capillary penetration into materials and chemical "aggression".
To counteract ground moisture, a waterproof layer of waterproofing is sufficient. True, in excessively wet areas of the area, with a tendency to waterlogging, it will be necessary to provide a drainage system for water drainage.
- Underground groundwater - upper aquifers characteristic of a particular area and its relief. The depth of their occurrence depends on the location of the water-resistant layers of the soil, and the seasonal factors strongly influence the occupancy - heavy snowmelt, prolonged rains, or, conversely, an established drought.
Elegantly, the depth of these aquifers and its seasonal fluctuations can be observed in the nearest well - a conventional or technological drainage one. In addition to direct penetration into the thickness of the foundation material, these waters can also exert hydrostatic pressure on the buried part of the structure. With a high occurrence of such layers, the maximum amount of work on waterproofing will be required with the mandatory installation of an effective drainage sewer around the building.
What types of waterproofing are used to protect the foundation
In order to prevent the negative impact of moisture on the foundation, use the following types waterproofing and other construction and installation works:
- Giving structural materials of additional water-repellent properties.
- Creation waterproof coatings on the vertical walls of the foundation, from its sole to the upper edge of the base.
- Reliable waterproofing of horizontal interlevel seams, preventing capillary penetration of moisture upwards.
- Reliable protection of the waterproofing itself from external mechanical influences.
- Measures to reduce negative impact negative temperatures.
- The device of the drainage system around the house.
- Creation of a reliable system for the removal of rain and melt water - a drain and storm sewer.
- Ensuring reliable ventilation of basements and basements.
In the proposed figure, as an example, a possible general scheme building foundation waterproofing:
On the diagram, the numbers are marked:

1 - the sole of the foundation, which usually rests on a compacted sand and gravel cushion. Between it and the vertical wall of the foundation (2) there must be a cut-off horizontal waterproofing (4), which overlaps with an insulating layer arranged in basement floor space (4) between the base and the screed.
The outer vertical wall has a coated waterproofing coating (5), additionally protected by a waterproof membrane (7) and covered with a layer of geotextile (8), which protects against abrasive and other mechanical impact.
The upper edge of the basement (foundation wall) is also necessarily covered with waterproofing roll material (6), on top of which further construction of the walls and ceilings of the building will be carried out.
To remove moisture, a drainage system is provided - pipes (9) laid along the perimeter at the level of the base of the foundation in a gravel cage. For more reliable protection from the ingress of water from atmospheric precipitation into the depths of the soil, it is advisable to arrange a clay castle around the house (10).
In areas with a harsh climate, severe freezing of the upper layers of the soil, or in the case when it is planned to place residential or utility premises in the basement or basement, the foundation and basement waterproofing system is supplemented by their insulation system:
The scheme in general terms repeats the one posted above, so the main numbering of parts and assemblies is preserved. In addition, it shows:

1.1 - sand and gravel pad under the footing of the foundation. This layer can also be made of lean concrete with large fractional filling.
12 - insulating panels made of extruded polystyrene foam, installed outside on top of rolled waterproofing along the entire height of the foundation and basement walls.
13 - plaster layer of the basement finish. Currently, instead of it, special basement thermal panels are often used - they provide both insulation and reliable cover from direct exposure to water.
14 - the wall of the building being erected. The figure clearly shows that it begins to fit necessarily from the layer of horizontal cut-off waterproofing of the foundation.
The choice of a specific type of waterproofing, and hence the materials used for it, largely depends on the specific purpose of the room located in ground floor. The existing classification (according to BS 8102 standards adopted in Europe) divides them into four classes:
- The first, lower class is utility or technical premises that are not equipped with electrical networks. Wet spots or even small leaks are allowed in them. The wall thickness must be at least 150 mm.
- The second class also includes technical or utility rooms, but already equipped with ventilation, in which only moist evaporation is allowed, without the formation of damp spots, with a wall thickness of at least 200 mm. It is already allowed to install electrical appliances of standard mains voltage here.
- Third grade is the most common, and most of all of interest to individual developers. It includes all residential buildings, offices, outlets, objects of the social sphere. The thickness of the walls should not be less than 250 mm, a system of natural or forced ventilation is required. No moisture penetration is allowed.
- As a rule, you don’t have to deal with the fourth class of premises when building your own house - these are objects with a specially created microclimate - archival storages, libraries, laboratories and others, where special requirements are imposed on a constant, clearly established level of humidity.
The table below shows the recommended types of waterproofing and the materials used for its installation, indicating its degree of strength, the protection created from one or another impact of groundwater and compatibility with the classes of equipped premises:
| Type of waterproofing and materials used | crack resistance | degree of protection against water | room class | |||||
|---|---|---|---|---|---|---|---|---|
| perch | soil moisture | ground aquifer | 1 | 2 | 3
| 4 | ||
| Modern pasting waterproofing using bituminous membranes based on polyester | high | Yes | Yes | Yes | Yes | Yes | Yes | No |
| Waterproofing installed using polymer waterproof membranes | high | Yes | Yes | Yes | Yes | Yes | Yes | Yes |
| Coating waterproofing using polymer or bitumen-polymer mastics | average | Yes | Yes | Yes | Yes | Yes | Yes | No |
| Flexible coating waterproofing using polymer-cement compositions | average | Yes | No | Yes | Yes | Yes | Yes | No |
| Rigid coating waterproofing based on cement compositions | low | Yes | not | Yes | Yes | Yes | No | No |
| Impregnating waterproofing that increases the water repellency of concrete | low | Yes | Yes | Yes | Yes | Yes | Yes | No |
After viewing the table, one can make a very erroneous conclusion that, for example, for a residential building, only one type of insulation will be enough. Practice shows that this may obviously not be enough, and most often used A complex approach when one type, combined with another, creates a truly reliable waterproof barrier for the foundation.
Horizontal foundation waterproofing
It is advisable to start the review with horizontal waterproofing. The fact is that it can be carried out exclusively in the process of building a building. If the vertical one can be carried out even on a fully constructed building, for example, after acquiring a finished house, then it is almost impossible to carry out the horizontal one that has been overlooked - it is always planned in advance. True, there are modern methods of injection waterproofing, but they are very expensive and still remain only a half measure aimed at minimizing previously made miscalculations.
- The first kind of waterproofing level is a compacted sand and gravel pad under the foundation soles being laid or under the poured monolithic structure.
- If it is planned to pour a concrete tie in the basement or basement, then its first layer is also carried out according to such a backfill, so that the level is equal in height to the upper edge of the laid soles or the first layer of the “tape”. Made from lean concrete. This is where the first layer of horizontal waterproofing is laid - the room is completely covered from below from the penetration of soil water. In addition, a barrier is created from the capillary rise of moisture along the walls of the future foundation.

- Waterproofing is carried out - with roofing material, the adjacent sheets of which are laid with overlaps of 100 - 150 mm with their obligatory "boiling" with the help of gas burner. If the layers of roofing material laid on the floor and on the platforms for further pouring of the foundation tape are combined, then the overlaps are increased to 250 — 300 mm.
- It is recommended to spare no expense and perform such insulation even in two layers. In this case, the stripes of the second layer should be oriented perpendicular to the first.
The second "line of defense" from the capillary spread of moisture should be organized at the transition point monolithic foundation(after pouring it) into the basement, if it is provided for by the project. The importance of this waterproofing layer is clearly demonstrated in the diagram below:
 The location of the "boundaries" of the cut-off horizontal waterproofing
 For such waterproofing, the same roofing material is used, laid on a completely frozen and hardened concrete base, cleaned of dirt and dust and carefully primed tar mastic. The material is laid in at least two layers by gluing them together with mastic or by thermal method (welding).
If the project does not provide for a separate base, and the protruding above-ground part of the monolithic foundation will play its role, then this step is understandably skipped. But in any case, exactly the same actions are taken on the upper edge of the foundation or basement, regardless of whether floor slabs are laid on this basis or walls are erected from any material.

Sometimes work on waterproofing the upper horizontal plane of the foundation is combined with similar operations on vertical walls, thereby obtaining one monolithic surface of the insulator.
Vertical waterproofing of foundation walls and plinth
Vertical waterproofing of the foundation walls is a prerequisite for long-term trouble-free operation of the building. When building a new house, it is thought out in advance. It is also carried out on houses that have been built for a long time - with clear signs that the old waterproofing clearly does not cope with its functions - there are pronounced traces of moisture penetration into the premises, or if when buying a house there is no certainty that such work was carried out earlier.
 Spots like these are a clear warning sign
 - To carry out such waterproofing work, it will be necessary to expose the walls of the foundation to the maximum possible depth - up to its sole. During construction, this factor is usually taken into account immediately, leaving the necessary trench around the perimeter - it will be required both for waterproofing and for installing a drainage system.
- On the old building have to start with earthworks. First dismantled concrete blind area around the plinth - with a puncher or manually. Then they dig a trench, deepening to the bottom of the foundation. The width of the trench can be any - the main thing is that it allows you to freely perform all the necessary actions. Usually a width of up to 1 meter is sufficient.
- The walls are carefully cleaned from the remnants of the soil, their revision is carried out.
- All loose places, delaminations, unstable areas must be unconditionally removed. The surface must be cleaned to a monolithic structure.
- If a layer of waterproofing is applied to the walls, but its functionality is doubtful, then it is also better to completely remove it.
Repair of the wall surface and their impregnating (penetrating) waterproofing
- All cracks and cracks on the surface are cut into rectangular grooves 25 × 25 mm in size along the entire length. Similar operations are carried out in places of vertical and horizontal joints of reinforced concrete blocks with the removal of the old mortar. If the foundation is block or made of bricks, the seams are cleaned to the same depth - up to 25 mm.

- As a repair composition, we can recommend a specialized waterproofing dry building mix "Penecrete", which is used in combination with a deep penetration primer "Penetron".
- "Penecrete" has a good plasticity, high adhesion to almost all building materials, and after complete solidification it becomes reliable waterproofing, firmly "sealing" the seams and cracks. It is important that after filling the seams the material does not shrink.

- Penetron or other primers of similar action penetrate deep into the thickness of concrete, forming additional crystalline bonds there, which significantly strengthens the material, and firmly closing the pores, preventing capillary penetration of moisture.
The advantage of these materials is also that they are applied to wet surface, thereby reducing the time of work - during construction there is no need to wait for the concrete to dry completely.
Penekrit is prepared in the usual way - like any dry mortar, with the help of construction mixer or drill with a nozzle, in strict accordance with the instructions attached to it. Penetron is sold in a ready-to-use form.
- So, all cut cracks, joints and seams are first moistened with ordinary water, and then primed"penetron".
- Then, as tightly as possible, without leaving air "pockets", they are filled with a repair compound - "penecrite" to the general level of the wall.
- After setting of the repair mortar the entire surface the outer wall of the foundation must be moistened (you can use a hose with a spray nozzle) and covered in two layers with the same deep penetration primer.
- If possible, then then Exactly the same operations are carried out on the inner walls of the foundation.

The created system of protection against moisture penetration is quite effective. There is even an opinion that she alone can cope with the tasks of waterproofing the foundation, and drawn even on one side of the wall. Nevertheless, it is better to use such an impregnating technology as the main one only from the inside and on the part of the foundation or base protruding above the ground. Outside, it is still worth making sure and protecting the walls in the area of their direct contact with the ground with additional waterproof layers.
Video: the use of penetrating waterproofing system "Penetrat"
Coating vertical waterproofing of the foundation
Coating waterproofing of foundation walls is perhaps the most widespread technology among private developers. It is quite simple to perform - almost everyone can carry it out, does not require excessively high material costs, and does not take much time.
For work you will need:
- Bituminous primer - it can be purchased at the store in ready-made(bituminous primers). It is easy to make it yourself - the bitumen heated to a fluid state is mixed with a solvent, which is most often used as gasoline. The weight ratio of gasoline to bitumen should be approximately 1:3 ÷ 1:4. Important - when preparing the primer, bitumen is poured into gasoline, and not vice versa. The composition should have a smooth liquid consistency, similar to ordinary paint.

Foundation waterproofing prices
Foundation waterproofing
Step-by-step instructions for waterproofing the foundation with self-adhesive bitumen-polymer material "Technoelast-Barrier (BO)"
The table below will provide an illustrated step-by-step instruction for performing waterproofing work on the foundation using a rolled self-adhesive material on a bitumen-polymer basis "Technoelast-Barrier (BO)" known Russian manufacturer"TechnoNIKOL".

This roll material ( standard form release - a roll of 20 × 1 m) is designed for waterproofing concrete slab bases, floors, and plinths, with a depth of up to 3 meters from the ground surface, and the absence of high-lying groundwater. The convenience of "Technoelast-Barrier (BO)" is that its use does not require additional equipment, is not associated with "hot" processes, that is, there is no melting stage using a gas burner - work can be carried out even on a combustible base, indoors and limited spaces.
Prices for Technoelast-Barrier
TechnoNIKOL technoelast
| Illustration | Brief description of the operation to be performed. |
|---|---|
 | The material itself is a baseless structure, consisting of the top layer - a dense polymer film with the TechnoNIKOL logo applied to it, and the second layer - a bitumen-polymer viscous composite material with excellent adhesion to prepared substrates. Prior to installation of the material, this adhesive layer is covered with a special protective film substrate, which is removed immediately before laying. |
 | Thermally affected adhesive bituminous polymer layer no need to expose - the material is simply glued to the treated surface, and then straightened and rolled with wide brushes, rubber or silicone rollers, hand rollers. Of the other tools, you will need a knife for cutting the material, a tape measure, a ruler, a square - for taking measurements, marking and cutting, a roller and a brush - for pre-priming the surface. |
 | Let's start with horizontal waterproofing. As already mentioned in the article, this can be, for example, a slab foundation or a floor in a basement or basement. First of all, you need to make sure once again that there are no gross defects- potholes, cracks, influx of frozen mortar and other serious flaws. All this must be eliminated - removed or repaired, achieving flat surface otherwise the selected waterproofing method may become ineffective. The rolled material must adhere tightly to the surface over its entire area. |
 | It is easy to check the evenness of the surface for waterproofing by attaching a long rule to it. |
 | Perfect evenness is not required - it is quite enough if the differences on a two-meter section are no more than 5 millimeters. |
 | In order for the primer to lay well and evenly on the surface, it must be cleaned of small debris and dust. To do this, she carefully swept ... |
 | … and ideally, it is best to clean it and completely dedust it with a powerful construction vacuum cleaner. |
 | The next step is the application of a primer, that is, a special bituminous composition - a primer. However, there are certain restrictions on the use of different primers - depending on the moisture level of the concrete surface. Residual moisture is measured using a special device - a moisture meter. It is clear that not everyone has such a device. Can do more simple solution- put a polyethylene film 1000 × 1000 mm in size on a fully matured concrete surface, gluing it around the perimeter with adhesive tape. If after a day there are no drops of condensate on the film, then the concrete can be considered dry, with a residual moisture content of less than 4% by weight. |
 | Under such conditions, primers "TechnoNIKOL" No. 01 and No. 03 on an organic basis can be used. |
 | If the residual moisture content of concrete exceeds 4%, then you can use the water-soluble primer "TechnoNIKOL" No. 04. But even at the same time, the humidity cannot be more than 8%, that is, the concrete must fully gain strength and mature. On the ground that has not been sustained for the entire period set for maturation, it makes no sense to carry out any waterproofing work. |
 | The primer is thickly, not particularly stinting, distributed over the surface with a roller. Normal consumption is 300÷350 ml per square meter. |
 | It is necessary to ensure that the distribution of the primer over the surface is uniform, without "bald spots". In hard-to-reach places, especially along the line of intersections of vertical and horizontal surfaces, one cannot do without the use of a brush. |
 | It is recommended, after applying the primer, not to make a long pause before laying the main waterproofing material. The only thing you need to wait for is the complete drying of the applied soil. It is not difficult to check this - to the treated surface, which already seems dry, they press the usual paper napkin. If black marks remain on it, it is too early to proceed to further operations. |
 | But if the napkin remains clean after such an “experiment”, we can assume that the concrete surface is ready for basic waterproofing work |
 | A roll of waterproofing was delivered to the place of work. On a horizontal surface, you can mark a line along which the first strip of material will be laid. |
 | The outer packaging of the roll is opened and removed as unnecessary. |
 | In the next step, the roll of "Technoelast-Barrier (BO)" is rolled out along the entire length of the area to be waterproofed. At the same time, it is necessary to adjust its position, so that the spread sheet lies exactly along the intended line. Naturally, the rolling is carried out in such a way that the polymer layer with the logo is at the top, and the protective film substrate is at the bottom. |
 | After rolling, the sheet is cut in place. It is best to do this on a ruler, wielding a sharp construction knife. |
 | After trimming, the canvas spread along the entire length must be carefully, without shifting its position, rolled up from both sides to the center. It is more convenient, of course, to perform this and all further operations together, together with an assistant. |
 | In order to prevent distortions in the direction and creases of the waterproofing material itself during rolling, it is recommended to use old cardboard sleeves as coils for these purposes. |
 | Now the final laying of the material begins. To begin with, it is necessary to cut the film substrate of the material along the transverse line along the entire width of the roll. This must be done carefully, without pressing on the knife, so as not to accidentally cut through the canvas. |
 | After that, along the incision made, the substrate is separated by a narrow strip from the adhesive surface of the waterproofing, also along the entire width of the roll. |
 | Now, gradually stretching the film-substrate, the roll is finally laid from the center in one direction. The adhesive bitumen-polymer layer comes into adhesive contact with the concrete surface coated with the bitumen primer. |
 | It is more expedient to perform the work together: one worker, pulling out the film substrate, gradually unfolds the roll. The second, without delay, immediately smoothes the laid canvas, expelling possible air bubbles from under it. The best way to do this is to use a wide brush on long handle as shown in the illustration. Then the same operation is repeated on the other side of the center. As a result - the first sheet is laid. For the central areas of the glued web, pressing with a brush (with a well-prepared concrete surface) is sufficient. But the edges, in a strip of about 150 mm on each side, it is also desirable to roll with a heavy metal or rubber roller. |
 | When gluing the next canvas, which lies parallel to the first, observe next rule- the overlap must be at least 100 millimeters. The overlap strip is rolled by a roller to ensure complete sealing of the sheet joint. |
 | Of course, when laying waterproofing, they try to use whole sheets along the entire length. But sooner or later a situation arises when you have to join two strips along the end edge. There are also certain rules here. |
 | Even at the stage of “trying on” the next canvas, the necessary margin for overlap is immediately laid. |
 | The minimum width of the overlap strip must be 150 millimeters. |
 | But that's not all. If a T-shaped joint is obtained, that is, two sheets laid and connected along the end side are simultaneously overlapped along their long side with the previously laid sheet, it is recommended to perform one more operation. On the canvas that turns out to be in the middle (that is, it lies with the edge on the previously laid sheet, and then overlaps along the end with the next one), it is necessary to cut off the corner. |
 | The dimensions of the legs of this removed triangle correspond to the above parameters of overlapping of the sheets along the length and along the end. A rigid lining is substituted under the edge of the sheet, and the corner is cut off with a knife. |
 | After that, the final “assembly” of this connecting unit is carried out, which is then necessarily rolled with a heavy roller for reliable sealing. The cut of the middle sheet in the connection is “packed” between the top and bottom sheets, so that the tightness is fully ensured. |
 | If similar T-shaped connecting nodes come across on adjacent lanes, then the distance between them must be at least 500 millimeters. By the way, in this illustration, the very cut corner is clearly visible, covered with the upper canvas and rolled with a skating rink (shown by a red arrow). |
 | In the same order, work continues further until the entire horizontal surface requiring waterproofing is covered. The waterproofing layer itself also needs protection. If it is not supposed to be backfilled with soil (for example, this is the floor of the basement or basement floor, or monolithic slab foundation), then a reinforced concrete screed (the so-called screed without connection to the base, on a separating layer) with a thickness of at least 50 millimeters is necessarily arranged on such waterproofing. |
 | Now we turn to the vertical waterproofing of the foundation. This is usually a more complex operation, since the surface often has many plane intersections both vertically and horizontally. The work is always carried out in sections from the bottom up, that is, the upper sheets overlap the lower ones, giving a free drain for moisture (the sequence and direction are schematically shown in the illustration). But before that, it is necessary to carry out a number of preliminary operations - preparing surfaces, forming transitional fillets, priming and creating a reinforcement belt. About everything - in order. |
 | Begin again with checking the condition of the waterproofed surface. There should be no high influxes, bumps, dips, cracks and crevices, that is, everything that can interfere with the snug fit of the Technoelast-Barrier (BO) sheets over their entire area, without leaving air voids. |
 | The requirements for level differences are the same as on a horizontal surface, that is, within 5 millimeters in a two-meter section. |
 | With vertical waterproofing of the foundation, sharp fractures from top to bottom, that is, pronounced horizontal internal angles, which can become an area of moisture accumulation, are completely unacceptable. That is, along the line of intersection of the vertical and horizontal planes, it is necessary to take measures to straighten the fracture as much as possible. This is done by laying out the so-called transitional fillets. The section and dimensions of such a fillet in cross section (at least 100 millimeters for each of the legs) are shown in the illustration. |
 | For laying out fillets, you can use the usual cement-sand mortar, for example, in a ratio of 1:3. But at the same time, you will have to wait for the complete solidification of the concrete “in full”, that is, within 4 weeks. So it is better to lay out the fillets immediately after removing the formwork from the foundation slab and discarding the soil from it. The best solution would be to use a special polymer-cement-based building mixture designed specifically for waterproofing work - it will create a reliable barrier against moisture in this vulnerable spot, and it hardens and gains strength very quickly. The composition is diluted and kneaded in accordance with the instructions attached to it. |
 | The dry mixture is poured into the required measured volume of water and mixed until fully prepared - obtaining a homogeneous plastic consistency. |
 | Then, using a conventional spatula, fillets are formed, adhering to the dimensions indicated above. |
 | The laid out fillets are left until completely dry and cured. |
 | In this illustration, it is well demonstrated that the fillets are laid out at all internal corners of the transition from the vertical to the horizontal plane. After the complete readiness of the fillets, they proceed to the next stage of work. |
 | The next step - the entire surface for waterproofing is densely covered with a primer. On large areas it will be more convenient to work with a roller. |
 | But all complex areas of the surface - external and internal corners and fillets, are necessarily smeared with a brush, so that there is not the slightest gap untreated with a primer. They proceed to subsequent operations after the primer has completely dried - how to check this has already been described above. |
 | This is followed by the most important stage - the creation of the so-called reinforcement belt. Its essence lies in the fact that without exception, all “problem” areas are initially pasted over with strips of material, and only then, on top of the reinforcement, will the installation of the main waterproofing layer be carried out. As already mentioned, the work is carried out from the bottom up. It often happens that work starts from an already waterproofed horizontal base. Another option - the lower part of the structure is a concrete preparation of the foundation. It will have to be pasted over with material over its entire width, while adhering to the rules that apply on horizontal surfaces (see above). In the illustration, just for example, a horizontal waterproofing belt 300 mm wide is shown - it is understood that the surface of the concrete preparation of the foundation has been pasted over. In the event that such a structural element is not provided (the tape was poured directly on the sand and gravel cushion), then the task is simplified. In our example, probably the most complex option is shown, with two fractures of the waterproofed surface at different levels. |
 | When creating reinforcement on any of the fillets, a canvas of such a width is cut out so that from above, on vertical plane, and from below, on the horizontal, there was a strip with a width of at least 100 mm. |
 | As a rule, all elements are cut and tried on by hand, directly at the place of future installation. After fitting, the fragment is immediately glued to the specified area. |
 | The scheme of actions is simple: the protective substrate is removed sequentially from the cut-out fragment, as it is glued. Any glued element of the reinforcement belt is immediately rolled with a rubber or silicone roller. |
 | Further, the illustrations show some methods for gluing waterproofing on various parts of the reinforcement belt. The strip is glued to the outer vertical corner. The rule is observed all the same - when moving to different planes minimum width stripes on each of them should be 100 mm. |
 | "Sole" of the outer corner. |
 | The inner vertical corner is pasted over. Naturally, work on creating reinforcement from below should already be completed. |
 | The upper protruding part of the strip, covering the inner corner, is cut in two, and the "petals" are parted to the sides. |
 | The gap remaining between them is sealed from above with a small square fragment of waterproofing. |
 | Observing the basic rules, all “problem” areas are pasted with waterproofing. Of course, a certain ingenuity will be required, making decisions applicable to the specific conditions of the work. In this example, the finished reinforcement belt looks like this. |
 | After that, they proceed to the sticker of the main layer of waterproofing. It is recommended to follow the rule - no glued canvas should have more than one change of direction, otherwise it may be deformed with the appearance of voids. The work is carried out according to the same principle - from the lower sections to the upper ones: they try on, cut, and then - the final gluing of the fragment. The overlap on the end part of any fragments should be, as with horizontal waterproofing, at least 150 mm, on the side - 100 mm. |
 | With all this, the lines of vertical joints at adjacent levels must be spaced at a distance of at least 300 mm. |
 | The illustrations below will show examples of gluing the main waterproofing. The sheet is fitted and trimmed to close the horizontal "step" and the one below vertical wall base plate. |
 | In contrast to the technology of gluing waterproofing by fusing, in this case, each of the canvases will be attached after trying on from top to bottom. In the upper part, the protective substrate is removed, and the canvas is fixed on the surface. |
 | For reliable fixation, the upper part can be immediately rolled with a roller. |
 | Then, carefully sequentially removing the protective film, the rest of the cut fragment is pasted. |
 | They go to the next section of the same level - and continue in the same sequence. |
 | In areas of a large overlap of sheets at the bottom at the inner corners, the top sheet is trimmed diagonally, as shown in the illustration. |
 | Then this assembly is sized, followed by roller rolling. |
 | After the completion of work at this level, they move higher - to a vertical straight section of the foundation tape. Waterproofing is carried out in compliance with all the same rules and technological methods. |
 | The glued sheets of waterproofing must be fixed along the upper edge. For this, an aluminum fixing profile is used, which is attached to the foundation strip with dowels through the holes on it. There is a bend on the profile - it should be located on top in the direction from the wall. |
 | The profile is tried on, cut to the desired size, then holes are drilled in the wall, dowels are hammered and screwed in. Two dowels are placed along the edges of the profile, that is, in the first two holes in a row. Further installation goes in increments through one hole. |
 | If it is necessary to join two profiles, then a compensation gap of the order of 8 ÷ 10 mm must be left between them. |
 | After all the strips along the perimeter of the foundation are fixed, the gap between the bent edge and the profile wall is tightly filled with a polyurethane sealant using a construction syringe. |
 | As a result, a completely waterproofed surface of the strip foundation looks like this. However, it must be protected from mechanical damage when backfilling the soil. |
 | Extruded polystyrene foam boards can be used for this. It is rigid and strong enough to withstand mechanical stress, and the foundation tape, among other things, also receives good insulation. |
 | Another option, when insulation is not required, is the use of a special profiled membrane "PLANTER - standard". It is distinguished by high strength, elasticity, and embossed "bosses" provide the necessary damping effect when backfilling the soil. |
 | This membrane is attached to the vertical surface of the foundation strip directly in front of backfill excavation. At the same time, its relief protrusions should be turned towards the waterproofed surface. On this, the work on waterproofing the strip foundation can be considered completed. |
There are other ways to waterproof the walls of the foundation - cement-polymer plasters or coating compositions, solid polymer membranes, bentonite mats, similar in principle to the "clay castle", fusing. However, under the conditions individual construction those mentioned in the publication are more often used.
Video: foundation waterproofing by fusing roll materials
And the last thing - waterproofing the foundation will be effective only in those conditions when thoughtful storm and melt water is provided - drains from the roof, low tides on the basement, ground or underground storm water inlets and drainage channels, etc. If water has direct access under the walls of the building, then sooner or later it will “do its job” and the reliability of the waterproofing of the foundation will be compromised.
A strip foundation is often used to ensure the stability of buildings on dry and heaving soils. It is a strip of concrete poured around the perimeter of the future building. Since the material from which such a base is made can quickly collapse under the influence of water, waterproofing a strip foundation is a top priority for the builder. There are several types and ways of doing this work that are worth considering.
What to consider before choosing the type of foundation waterproofing
If in the process of designing a house the choice fell on pouring a strip foundation, the craftsmen should conduct a series of studies in order to do their job correctly:
- the foundation itself should be below the freezing level of the earth;
- it is important to take into account the level of groundwater;
- waterproofing requirements may vary depending on the purpose of the future building;
- it is worth exploring the area for a sharp rise in water after floods and heavy rainfall;
- an important factor will be the force of swelling of the soil, which affects changes in the level of the soil.
All these factors can affect the depth of the trench that will have to be dug under the foundation, and the means of protection against water used. According to the type of location of the foundation waterproofing from FBS blocks, it is divided into horizontal and vertical, which have several options for execution.
Horizontal waterproofing

This type of waterproofing is carried out before the foundation is started in order to prevent capillary water from entering from below. For the full implementation of the tasks set, it must be a special foundation, possibly larger than the perimeter of the future house. For a small building, a screed of cement and sand in a ratio of 1: 2 will be enough.
When building a residential building, more serious preparation will be required:
- a layer of sand 20-30 cm thick is laid and compacted at the bottom of the pit;
- clay can be used instead of sand to get started;
- applied over the first layer cement strainer 6-8 cm thick;
- then you need to wait until the cement dries, which takes up to 14 days;
- then the first screed is covered with bituminous mastic and roofing material is placed;
- on top, a layer of roofing material is closed with another layer of mastic;
- a second stitch is made.
After the material has completely dried, the manufacture of the foundation begins.
If the proposed structure is made of wood, it is worthwhile to perform the upper horizontal waterproofing of the strip foundation. Otherwise, water will flow to the wood, causing it to rot.
How can you perform upper layer horizontal waterproofing and at the same time it is easier to cut the roll of roofing material, can be seen in the following video:
Vertical waterproofing
Unlike horizontal waterproofing, this type of work can be performed not only during the construction process, but also when protecting already finished building from exposure to moisture. At the disposal of the masters, there are several options for materials used for waterproofing FBS blocks:
- polyurethane mastic;
- bitumen in rolls;
- polymer membranes.
All these tools differ in strength, durability, elasticity, installation methods and cost, so before choosing one of the proposed methods, the master should determine the difference between waterproofing materials, their strengths and weaknesses.
bitumen insulation
This method is considered the most common due to the low cost of the material, its elasticity and ease of application. Liquid mastic fills all the formed cracks and voids in the foundation, preventing the penetration of moisture inside. Do-it-yourself waterproofing of a strip foundation can be done by the efforts of one person.
The compositions of bituminous mastic differ in heat resistance, so when choosing, you should pay attention to the marking. Its last two digits indicate the maximum allowable temperature at which the composition retains its properties.
However, the method also has its drawbacks. The composition is applied in several layers, which increases the duration of work. It does not guarantee 100% protection and requires reprocessing foundation after 10 years.
Before applying a layer of mastic, surface preparation is required. It should be solid, with rounded corners, without sharp protrusions, with maximum smooth transitions from horizontal to vertical. If there are traces of air bubbles in the foundation, they should be wiped with a fine-grained cement mortar. Also, the surface must be cleaned of dust and dirt. All this will affect the evenness and integrity of the applied composition.
Be sure to check the surface for moisture. If the indicator is more than 4%, the bitumen will not form a strong layer, but will begin to exfoliate a short time after application.

The next stage of work is the primer. It is performed either with a bituminous primer, or with a mixture of bitumen BN70/30 with gasoline in a ratio of 1:3.
To apply the mixture, you will need a roller or brush. In places where the base has joints or irregularities, it is necessary to apply 2 coats of primer. After that, you can start covering the foundation with mastic.
To prepare it, large pieces of bitumen are crushed and melted in a bucket. Since the composition already partially loses its properties during the first heating, it is worth using the mixture before it cools down.
To ensure more reliable insulation, it is worth applying 3-4 layers. For protection, the mastic is covered from above with geotextile or a heat-insulating layer. In problem areas, the mastic needs to be reinforced with fiberglass or fiberglass.
Roll waterproofing
This type of FBS waterproofing can be used as an addition to the mastic, but as an independent way to protect the foundation from moisture. Roofing material is most often used as a material, which is characterized by low cost and availability. Compared to mastic, it protects the base from moisture much longer (up to 50 years). At the same time, it will be impossible to do this work alone.

To cover the foundation or plinth with roofing material, you first need to prepare the surface and cover it with bituminous mastic. In this case, you should not worry about the thoroughness of applying the layer, since it will perform the function of attaching the roofing material to the surface.
The sheets of the main coating must first be slightly heated from below with a burner, and then laid on a layer of bitumen. The roofing material is overlapped with an allowance of 10-15 cm. For additional fixation, all joints are also heated. After fastening, the foundation is simply covered with soil without additional protection.
Instead of roofing felt, more modern materials can be used, such as polymer films with bitumen-polymer coating. The principle of operation will remain the same. The difference will be in the service life of the coating and in price.
Other methods of waterproofing
In modern construction practice, along with the methods described above, there are a number of alternative methods:
- As a waterproofing, you can use an ordinary layer of plaster. The service life of such a coating will not be long due to the low water resistance of the material (no more than 15 years), but it is not difficult to apply it again.
- To protect against liquid, the strip foundation can be coated with a composition based on liquid rubber. The quality of waterproofing in this case will be high. The disadvantages of such a solution will be the high cost of materials, including a special primer, the presence of a sprayer or low speed due to its absence.
- Penetrating waterproofing based on special compositions can be used both for external and for internal processing buildings. The difficulty for the master in this case will be the low prevalence and high cost of such a method.
- Craftsmen may be asked to create a clay castle. To do this, a trench is dug around the perimeter around the foundation, the bottom of which is covered with a mixture of sand and gravel, and on top the remaining space is covered with a layer of clay, which becomes a reliable barrier to groundwater or heavy rainfall.
Foundation waterproofing is an important part of the design and construction of any building. This is the main defense of any wall structure. Depending on the type of waterproofing, it can be carried out either before the foundation is made, or after the construction is completed. The complexity of manufacturing, cost and service life depend on the selected material and the correctness of its application.


