Sometimes the interior looks beautiful, but it seems that something is still missing. In our article we will tell you how to make it truly cozy and harmonious. So, meet our original ideas!
Designers claim that in order for the interior to look cozy and harmonious, you need to add decorative items to it. In our article we will tell you how to decorate a room without resorting to significant financial costs?

How can you decorate a room?
Sometimes you want to revive even a room that was recently renovated. Accessories play a big role in shaping the interior. Small stylish things, such as figurines, as well as compositions of dried flowers, paintings, vases, mirrors, original rare items, will certainly add interesting notes to the atmosphere. In general, accessories, according to designers, can tell a lot about their owners. It is important that the items you choose, be it lamps or coffee tables, books, dishes or souvenirs, served as a reflection of your inner world.


Pillows
One of the simplest and economical ways decorate the room - use sofa cushions. They can fit into the main color scheme premises or be contrasting. Think about what you would like to add to the interior? A joyful, major note? Choose the brightest pillows different forms. Do you want something strict and concise? Use round or traditional square pillows in a consistent color scheme.


At first glance, it would seem that this technique will not allow you to enliven the interior, but this is not so. The main thing is to choose the right pillow design. Can be used various types fabrics, shapes and patterns. Pillows with multi-colored prints look very original.

Flowers
An excellent solution for interior decoration is phytodesign. It represents a direction in decoration in which various compositions of flowers and plants are purposefully used. The purpose of photo design is to decorate the room, as well as improve the air and microclimate in the room. Indeed, nothing brings a room to life more than fresh flowers! Closeness to nature creates a special, incomparable comfort. Green will please the eye, it will create a unique atmosphere of warmth and tranquility in your room. You can choose different flowers depending on your tastes and preferences.

Please note that in order for a plant to feel comfortable in your home, you need to create suitable conditions. For example, you should not put light-loving plants to places where light does not penetrate, etc. In addition, the pot in which the flower is planted can also serve as decoration.

You can create a real “garden” in your home by choosing furniture for plants, for example, shelves for flowers. Harmonious combination blooming, spreading, climbing plants will decorate and enliven your room.
Ekibans look very nice. Try your hand at this art by creating interesting floral arrangements from dried plants. A bouquet collected in summer can decorate a room for a whole year. Try to collect a bouquet of wildflowers, decorate them using, for example, bamboo or other “greenery”.

You can decorate the room with fresh cut flowers. A bouquet in a vase can serve as an inexpensive and spectacular decoration for the room. Today there are interesting and beautiful artificial flowers that are very similar to natural ones. Arrange these flowers in a beautiful porcelain or wicker vase. You can also use artificial flowers to create flower arrangements in combination with dried plants.

Lighting
You can decorate a room by choosing the right lighting. Modern designers It is advised to use as much light as possible to create the interior. Choose beautiful sconces, replace the old chandelier with a new one, and your room will become completely new look. Can also be used spot lighting along the perimeter of the ceiling of the room. It is not at all necessary that the chandelier strictly correspond general style premises. If your room is designed in the spirit of minimalism, brighten up the interior classic chandelier or a chandelier with oriental motifs.


Paintings, panels, photos, mirrors, wall clocks
Paintings, panels and, of course, photographs can become successful decorations for a room. Place on your walls or shelves photos that capture joyful moments from your life, and then the emanation from them positive energy will flow into your home.

We must not forget that panels and paintings should hang approximately at eye level (not too high, but not too low).
Photo wallpaper is another option for decorating a room. Today, photo wallpapers are very different from those with which we have been familiar since our childhood. Today's covers are a beautiful, high-quality photograph printed in large format and designed as a sticker.

A mirror can be a wonderful decoration for a room, especially if it reflects photo wallpapers, paintings or fresh flowers.
Windows, curtains
If you want to change your usual interior, add a new touch to it, replace the old curtains! Even if you are completely satisfied with them, go to a textile store. You won’t find any kind of curtains there! Choose new curtains and you will see how your room will come to life and “bloom”!
When choosing, you need to focus on the color of the walls. The curtains should be at least a little, but brighter tone wallpaper Decorate the curtains beautiful decorative butterflies or ladybugs.

To make the interior look harmonious, you can use the following design technique. Every surface should be decorated. This is not to say that your entire home should be turned into a gift shop. The main thing is to choose the right “decorations”. So, for example, you can use paintings to decorate the walls, a carpet to decorate the floor, and flowers in pots for the windowsill. The main thing here is a sense of proportion.
You can also decorate the floor using floor vases, floor lamps, compositions made of stone and wood. It must be remembered that the number of “decorations” should be directly dependent on the size of the room.

Painting on the walls
If you dream of an original, unique decoration, decide to paint the walls! Hand painting will allow you to create a unique drawing. The flight of fancy is not limited! You can recreate it on the walls with a work of art or decorate it in the form of a mosaic. In the children's room you can draw characters from your favorite cartoons. Try making it yourself!

When the room is designed in a strict style, use classic lines. Make a few identical drawings or a stencil prepared in advance will help with inscriptions.

Decorative plates
The use of such a decoration element allows you to make the room truly unique and cozy. We often bring decorative plates from our trips. So, you can create a memorial wall that will bring back pleasant memories. For harmony on the wall, choose to hang plates on the wall in the same tone.

Today it is easy to create a collage from family photos on plates. Any printing house does such work to order.

May peace, love and beauty always reign in your soul and in your home! How do you decorate your home? Share your ideas with us!
How to decorate a room. Photo


All parents want to make a room for their child that resembles a fairy tale, pursuing one single goal - the comfort and well-being of their child. People begin to think about the design of a children's room during pregnancy. But when the child begins to play, consider interesting elements of your home, you need to select decorations and toys that will not only please your baby, but will also be safe. You can create a unique piece of jewelry with your own hands, putting all your love and care into it.
The main thing in the article
What decorations to choose for a children's room?
All decorations in a children's room should not just be trinkets, but also elements that will develop in your child:
- sense of style;
- talents;
- artistic taste;
- desire for order and cleanliness.
Important! Any element of the room, be it a toy, furniture, a craft, a lamp - everything should be, first of all, safe for the baby!
When choosing wallpaper, glue, toys, materials for crafts, you should definitely ask the seller or read it yourself first, what material was used for production, is it toxic? After all, children, especially small ones, learn about the world through touch and often taste it.
Origami crafts They will perfectly decorate the walls of the room, making them more voluminous. Various pockets on the walls will arouse considerable interest of the young researcher. For girls - colorful flowers, for boys - beautiful boats and cars.

Photo wallpaper will allow the child not to part with his favorite cartoon characters or will take him to a fairy forest, to a green meadow with a large number small animals.
Multi-colored pom-poms will make the room colorful and airy. It will take little time to create them, but there will be a lot of joy and happiness!

Bright rug , made by mother’s hands, will always remind you of the care and love of your parents.
Varied applications and drawings You can do it on the wall with your child. The main thing is that your creation personifies the interests and hobbies of the baby. Don’t forget about the interior of the room; all crafts should fit harmoniously.
Garlands to your taste will not only be a decoration, but also an object of play. The elements can be hearts, stars, flowers, leaves, in a word - anything that will attract attention. It is better to make garlands multi-colored so that specific color didn't bother me.

Accessories for your favorite toys . Updates for dolls, little people for cars or a garage - all this will delight the child.
It is very important to take part in games, help create new elements, then your baby will not feel lonely and attract your attention by any means. For example, throwing away old toys and demanding new ones.
The problem of disorder can be solved by literally, with your own hands. An inconvenient toy basket can be turned into a small ottoman or easy chair. But you still need to teach your baby to be in order, then in the future you won’t find crumpled books and notebooks on the floor.
When the child gets older, a problem arises: where to put the books? To solve this issue It’s better to involve dad, who can easily make shelves, and mom will decorate them. They should be hung at a height accessible to the child.
The list of decorations for a children's room can be continued for a very long time, the main thing is that there is a desire! It is important not to clutter the space and follow basic color schemes.

Photo wallpaper for children's rooms: cheap decoration for a fairy-tale room
Popular are photo wallpapers that are available to everyone. With their help you can recreate fairy world. The main condition is the child’s consent: thus, you should choose wallpaper together.
This wall decoration is very simple - every adult can put a picture assembled from individual elements on glue. Available on the market huge selection photo wallpaper. With their help, you can not only please your baby, but also revive the interior colors for a small amount.

DIY bottle crafts
Bottles are a unique material for creating crafts. What they don’t do with them! There is no need to spend special money: this is what we constantly throw in the trash. So why not please your child by showing a little resourcefulness and imagination?
You can make a lot of crafts from bottles, both for a boy’s and a girl’s room. Jewelry boxes, funny penguins, hanging toys, snowflakes, flying bees, airplanes - incredibly, but all this is made from different plastic bottles.
Below we present to your attention several options for crafts.


DIY frame: frames for drawings from candy boxes and rolled cork
Very easy to assemble beautiful frame for a drawing or photo from a candy box that we usually used to throw away. To do this, you will need exactly the tray in which the candies are located. Most often, it has bulges along the edges, which will be the edges of the frame. In its pure form, the pallet is not suitable for a frame, but if you decorate it - stick on gift paper or paint it, you will get a unique frame for the creations of a little artist.

From rolled cork, which has long become a canvas for creation unique interior, you can create a very beautiful frame. In this case, it is better to use this material of different colors, cutting out figures to decorate the frame. Also, the rolled cork is treated with varnish, which will only enrich it appearance and will make the frame durable.

DIY pillows for the nursery
The child moves a lot and often moves around the room, changing his place of play. Small pillows can create comfort, softness and warmth in any corner of the room. They can also be used for games, if made, for example, with eyes, in the shape of animals or sea inhabitants.
For sewing such decorative pillows It is worth choosing dense fabrics. For example, linen or cotton. You can choose holofiber or synthetic fluff as a filler. This pillow can be washed constantly, maintaining its appearance and shape.
Sewing does not require any special skills; the main thing here is to use your imagination. You should not choose dark and dull colors; the brighter, the more beautiful and interesting.


DIY hanger
Is a hanger even necessary in a child’s bedroom? It is necessary, but small, literally for 2-3 hooks. The most convenient and high-quality hanger - on wooden base with several hooks. How to attract a child's attention so that he wants to hang his things on a hanger and not throw them on the bed?
The age of the child plays a huge role; if he is very small, then images of animals above each hook are ideal. If you already have a schoolchild, then you can use a tree branch, which will need to be pre-treated and varnished for strength. Ask dad to firmly attach it to the wall at a height that the child can reach. After this, you can make a wall applique in the form of a tree, the continuation of which will be our branch hanger. This original solution will not only please your child, but will also teach him to hang his things in place.

Letters made of fabric and paper
At the age of 5 years, you should start learning the alphabet in a playful way. Children quickly get bored with cubes with letters, and each cube has several letters, which often confuses them.
You can help your child by making letters with your own hands. In what ways?
- Sew soft letters from dense fabrics, enliven them with eyes and mouth.
- Make paper letters from cardboard, make them multi-colored, which will allow you to repeat colors in parallel.
- Volumetric cardboard letters. An activity for the diligent and creative people. It will take a lot of time, but it’s not a pity for the child...


Glowing paint: safe paints for children's rooms
On modern market paints with fluorescent and luminescent effects are presented, which glow when certain conditions are met.
Luminescent paints . They can be applied with a special brush, but during the day your design will not be visible. And in the light of a special ultraviolet lamp it will shine in all colors.
Fluorescent paints. The design created with this paint will glow for some time after the light is turned off.
When purchasing glowing paint, you should consult with the seller unless you are an expert yourself. After all, it is very important to choose a safe option that will not harm your child.
Your little one will definitely be delighted by decorating a room with glowing paint!

Original do-it-yourself stadiometer
Absolutely all children love to watch their growth, and it is also important for parents to know that the child is developing physically within normal limits. Previously, many people made marks on doors and walls, but taking into account good repair, I don’t really want to spoil it. A stadiometer, which you can make yourself, will help you with this control.
A height meter can be made using an appliqué with markings in centimeters, or by hanging a ribbon on which the height will be marked with beautiful hairpins. Hairpins can be made from ordinary bobby pins by attaching a bow or a bird figurine to them.

Dollhouse or garage for cars made from scrap materials
To create such a house or garage you will need carton. It is advisable to choose a voluminous and durable one. Partitions are made from cardboard, windows and doors are cut out. After this, everything needs to be painted or covered with colored cardboard.
You can make small tables, chairs, and cribs out of cardboard into a dollhouse. You won't be able to put your little girl to sleep with these toys!
If you are making a garage for cars, then you should choose the size of the box, taking into account the size of the toys. It is not necessary to make a gate if the garage itself is large.

Such parental participation in the child’s life usually bears fruit - the child grows up cheerful, develops normally and communicates with pleasure, easily joins the team and, of course, knows that he is madly loved!
A video will show you how to make an original book shelf with your own hands.
What to do if there is an empty wall in the house and how to decorate it and what decoration to hang on the wall - read the article!
Here we have collected the basic methods on how to decorate a wall on a budget with your own hands! FROM the most basic ideas that even a child can repeat, to more complex ones, such as painting walls - you choose any one!

Hanging large mirror on the wall!
Mirrors not only look beautiful on the wall and give you the opportunity to admire yourself, but also visually increase the size of the room. We have adopted mostly standard mirrors and for everyone they are basically located in approximately the same place: the bathroom and the corridor.
Designer mirrors are very expensive, just last week I was convinced of this hardware store. But even an ordinary mirror can be transformed and decorated in this way that neither him nor the walls will be recognizable.


Figured mirrors on the wall are at the peak of popularity

The feather mirror is a great accent on the wall!
Decorating the wall with wallpaper
Ideal option registration empty wall for those who, for example, have old wallpaper on the wall or need to cover or disguise something.
- We buy a roll of wallpaper in a contrasting color or take scraps of old wallpaper.
- We lay out the collage on the floor first so that we can understand what will happen in the end.
- AND wallpaper glue glue it to the top of the old wallpaper.

Wallpaper accent wall
ATTENTION: You can glue over old ones only if they stick well!
Paint with patterns and drawings
The most expensive, but very nice method transform and decorate an empty wall in the apartment - applying a pattern with paint under a stencil or masking tape. The advantage of this method is that it is durable and can be applied to any room: bathroom, kitchen and bedroom.


Colored tape or self-adhesive paper
If you don’t want to spend a lot of time fiddling with paint, a simple way to decorate a wall is with colored tape or self-adhesive paper. We cut out crosses, circles or hearts - now it’s like this minimalist and geometric print on the wall is in fashion and it looks very stylish!

Small crosses on the wall

Decoration with adhesive tape

wall decoration with children's adhesive tape
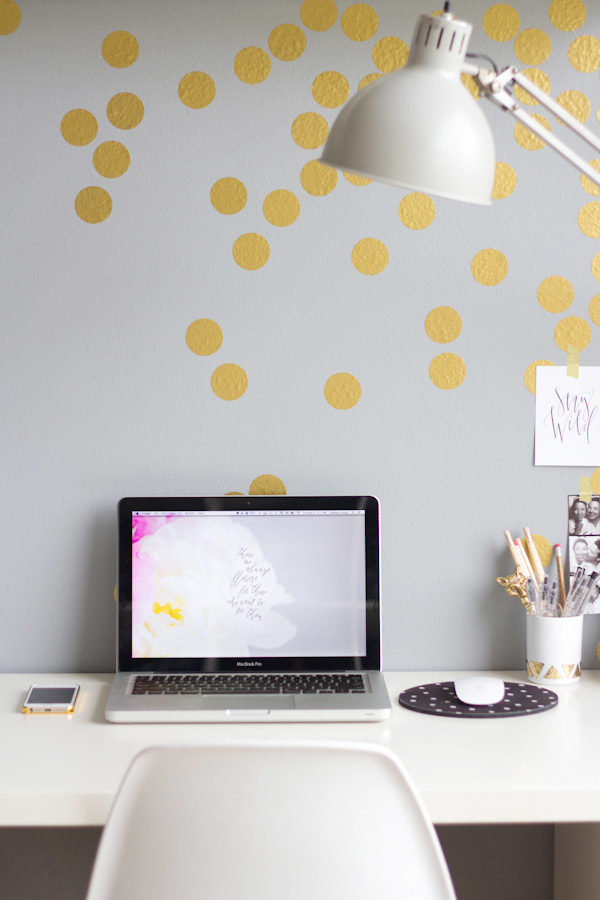
Decoration above the desktop with gold self-adhesive circles

Fabric panel
Such fabric paintings are an excellent wall decoration for both the bedroom and living room. They will look great at the head of the bed or near the TV.
The principle of creating panels from fabric:
- Required wooden subframe, its cost is about 1-2 dollars. And you can order it at any framing workshop.
- Choose any piece of fabric that matches the color. Can be used, for example, from an old dress or curtains.
- Using a wood stapler or furniture stapler pull it onto the subframe. This process will take no more than 10-20 minutes.


Branches
Create a corner in your home wildlife. Place the branches in frames and attach them to the wall. The photo shows options on how this can be done, you can use them, or your own on this basis. You can use both processed and rough branches.


Vertical mini garden
Green up your home without crowding your tables and window sills. Small, lightweight pots or vases, made in the same style and attached to the wall as a display, will help you do this. You can buy pots in a store, or make your own from wood or cans.

How - in this master class!


Shelves
This method will help not only decorate the wall, but also make it more functional, place those important things that you would like to have quick access or just admire: books, flowerpots, souvenirs. Make (or buy) a shelf of an original shape and it will not just be furniture, but a real element of apartment decor.


Paper crafts
Paper is inexpensive, can come in a variety of colors and densities, and you can do just about anything with it. Since the field for action is really wide, let’s break this point into sub-points:

Cut out figures
Butterflies, hearts, flowers and the like - for all this you only need scissors, paper and a little free time. You can cut it out using a ready-made stencil or draw it yourself; the figures can be flat or curved, creating volume.


Paper crafts with 3D effect
Here you already need to show painstakingness and endurance, but the result is worth it.

Stickers
Ordinary white stickers, folded several times, turn into original wall decor. Colored stickers look great even if you just hang them in smooth color transitions; you can also use the simplest origami techniques.


Paper panel
You can cut the paper into small pieces, rounded on one side, and hang them so that each one overlaps the previous one a little, thus creating a panel. At the end, you can spray paint it all or leave it in its original color.


Paper cupcake baskets
Thanks to their shape, size and reliefs on the sides, they are suitable not only for baking, but also for decoration: they can easily be formed into flowers or simply an interesting abstraction.


Other photo wall decoration ideas
Even things like wine corks, pencils, pebbles, spoons and other “ordinary” things can appear in a completely new light. Take a closer look at the things around you, turn on your imagination and think about how else they can be used, besides the usual functions, and you will undoubtedly see many various options for decorating an empty wall, which you never even thought about before.


2 ratings, average: 3,50
out of 5)
For a truly festive spirit to be felt on a birthday, it is not enough delicious cake and gifts. The type of room where the celebration will take place also plays a very important role. Therefore, to make this day truly unforgettable, we offer you several ways to decorate the room for your birthday with your own hands.
It's pretty quick, easy and original way for your birthday. Materials you will need:
- rolls of colored paper,
- Whatman paper sheets (preferably thick),
- stationery knife, scissors and tape.


Now let's look at the manufacturing steps.
- You must decide on the color scheme. Sketch the design which you want to do.
- Of course, you can fix or change something later, but having a sketch will give you an idea of how it will ultimately look and will significantly speed up your work.

- Lay out whatman paper - this is the base on which you will work. Depending on the size of the embroidery you plan to make, you can take one sheet of whatman paper, or glue several together (with the edges to increase the area). It will be much easier to work with thick paper, since it will remain strong when you cut it and weave ribbons.
- Place the base from sheets of whatman paper so that it is convenient for you to work with both sides of the paper. You can place two chairs at a distance from each other so that you place the ends of the Whatman paper on the chairs, weighing them down with books or something heavy so that the Whatman paper does not fall.
- You can also hang whatman paper in doorway. But do not lay it out on the floor or table, as in this case you will only be able to comfortably reach the front side.

- Using a utility knife make two cuts in the paper, thread a ribbon into each of them so that a strip of ribbon remains on the front side, and both ends are on the wrong side: leave one end small and attach it to the paper (with glue or double-sided tape), the other one is longer if you want to continue this weaving, or fasten it too if this pattern is finished.
- Repeat the previous steps until Do not fill the entire Whatman paper with paper embroidery patterns. In this case, the cuts do not have to be strictly opposite each other, and the lines do not have to be even. Take the ribbons different widths and make your own design.
- Hang your creation on the wall and enjoy the work done and the festive mood!

We decorate a large room for little money
If you need to quickly decorate a large, spacious room, using a minimum of money and effort, this method is just for you. All you need is color corrugated paper in rolls.


Then everything depends on the room you will decorate. Strips of paper can be pulled from the cornice, pipes, chandeliers, cabinets or shelving, in general, anything that will be there. Moreover, you can pull the paper with different forces so that the sagging is greater in some places and less in others.


TIP: You can also twist the ribbons. Hang colors in a random order.
You will definitely be able to create a joyful and festive atmosphere! Don't forget - there are a lot of ideas in the link
Idea: walls with balls!
Both children and adults are all crazy about balloons. So, by choosing this method of decorating a room, you will definitely cheer up everyone present!

For this you will need the following materials:

Follow these steps and you'll soon be admiring colored ball powder on your walls:
- Divide the ball into 6 equal parts, tying knots on it.
- Using a pump, inflate the first part of the balloon until you get an inflated sausage, tie a knot at the end. Then trim the inflated part of the balloon as close to the knot as possible. Then do the same with the next part of the ball, and so on until you get six small balls.
- Cover the knots with tape so that they don't stick out.
- Repeat the first three steps until you have hundreds of colorful balls.
- Attach the balls to the wall with small pieces of double-sided tape.

This decoration is perfect for original party– photo sessions. And don’t forget to stock up on enough sweets, since the appearance of the room will definitely encourage you to eat something tasty.

Here are some more great ideas for decorating with balloons.


Decorating the walls with large homemade “lollipops”
Beautiful colored lollipops are not inferior to balls in their ability to create a great mood. With their help you can decorate a party or birthday and provide original photo– area for those present.


To create a festive atmosphere with your own hands you will need:
- wooden dowels measuring 12" x 1/2" (30 cm x 1.25 cm),
- acrylic paint (must be a wide range of colors: white, purple, dark blue, light blue, green, yellow, orange, red, pink, etc.),
- brush, stand for dowels (a glass or cup will do),
- palette, 4 sheets of A4 paper, scissors, pencil, foam disks measuring 10″ x 1″,
- glue gun, tape (regular or double-sided).
Assembly technique:
- Apply white acrylic paint on wooden dowels I. It's best to paint one half first and let it dry (in a container with the painted side facing up), then paint and dry the other side. While the dowels are drying, start making the candy itself.
- Cut out 8 identical curls from paper-stencils and place them on the foam disk as shown in the figure. Next, lightly trace the stencils with a pencil.
- Choose a paint color and use a brush to decorate with it. curls every other. First trace the outlines so as not to go beyond the edges. You can do several layers to make the color look more saturated.
- By this time your dowels should be dry. Use glue gun onto the end of the dowel and quickly press it onto the foam disk, holding it a little to fix it.
- Do the same with other disks using different colors for coloring.
- Glue the finished candies to the wall. You can stick it with tape on the leg, or with double-sided tape on the lollipop itself.

That's all done, enjoy the beautiful background!
Make a volumetric figure
The big number will not only remain as a keepsake, but will also become the central photo area of the party. Detailed master classes


Fan garland for birthday
On hot days you crave coolness, and on cold days you crave reminders of warm days. This garland, which consists of many fans, will wonderfully help cope with both of these desires! Having made one, you will be transported to a fairy tale! And surprise everyone!


Materials:
- colored paper for scrapbooking,
- scissors, tape,
- colored cardboard, glue stick,
- ruler, stationery knife.
Steps for making a garland:
- If you bought immediately decorative paper, folded like an accordion, you can skip this step. If not, fold the paper into even accordion shapes.
- Form semicircles from accordions.
- Cut out strips, circles, triangles or some other figures made of colored cardboard - you will need them to decorate fans.

- Cut out semicircles from cardboard(size should be smaller than fans). Attach them to some fans using a glue stick. They will perform two functions at once - decorative and strengthening, that is, they will not allow the fan to curl up.
- Stick on fans shaped cardboard molds by combining colors and creating your own own designs patterns. You can take the drawing as an example.
- Connect the fans together to form a garland. To do this, stick them all on tape. You can first fasten the joints of the fans with a stapler to strengthen the structure.
- Hang a garland and cheer up!


Making large paper Martenitsas
These decorations are made very simply and quickly with your own hands. You will need two A4 sheets - red and white, scissors and glue stick. If you want to make a lot of decorations, then take more paper, the main thing is that both colors are in the same quantity.

The products have this color scheme, since Martenitsa comes from Bulgaria and there is a ritual there to welcome spring with similar products in exactly these colors, since it is a talisman for good health the whole family. But if you don’t delve into this folklore, you can take paper in the colors you like.
Let's now look at the manufacturing steps:


- Fold each sheet of paper in half (lengthwise).
- On each sheet, draw 10-12 straight lines, as shown in the picture.
- Make cuts along the marked lines with scissors.
- Unfold the leaves and glue their ends together, there should be glue on both ends.
- Form circles, securing them with glue.
- In the middle of the circles you can also attach strips of paper that differ in color from the circles themselves.
- Hang items around the room.

Garlands without using glue
Even a child who knows how to use scissors can make such a decoration, since the pattern is very simple. You will need: A4 paper (calculating one sheet of paper for 4 elements of the garland), scissors, pencil.


The order of assembling the garland:
- Cut a sheet of paper into 4 even pieces.
- Take one part, fold it in half (across), and then in half again (also across).
- Draw with a pencil the shape you will use to cut out.
- Cut out the shape and carefully unfold it.
- Connect together individual elements garlands (as shown in the picture), alternating colors.
- Hang the garland.


We offer you several alternative options sketches for this garland.

A little holiday in a box
On cold autumn and winter days, such a box of positivity will be just a great gift and will definitely create a sunny mood! You will need: a box, small helium balloons, as well as paints (or ribbons, colored paper) to decorate the box.


How to make it yourself:
- Paint or paste over box with rainbow stripes, flowers or any other joyful patterns that come to your mind.
- Place small helium balloons in a box(the quantity depends on the size of the box. The ends of the ribbons tied to the balls can be attached to the bottom of the box if you want the balls to jump out to the length of the ribbon when opening the box, or not attached if you want them to effectively fly to the ceiling or into the sky.
- Close the box.
- Give a gift and watch carefully the surprise recipient's amazement!

IMPORTANT: It is important to remember that small helium balloons lose their ability to fly after about three hours. Keep this in mind when preparing a gift.


Having learned how to decorate a room with your own hands, you can do so much unusual decor, which is not inferior to expensive designer items from the salon. With all this, the cost will also be minimal, which may make you more determined to master one of our crafts today.
How to decorate a room with your own hands for a child
There are complex compositions, colorful canvases, furniture - everything that makes our interiors unique and gives them a special character. And sometimes you just need to find out how to decorate a room with your own hands for a child, if you organize in it children's party or you post it. Such elements should be easy to manufacture, install, and, what is very important, they should be dismantled without a trace at the end of the holiday. Plus, it should be a decoration that is safe for active children's games, that is, it should not be brittle, fragile, and, if possible, expensive. The ideal option, which meets absolutely all of the above criteria, is colored paper lanterns hung like garlands.
To fold such paper elements you will need plain paper napkins, preferably bright colors. We bend each of them like an accordion so that we end up with a strip one centimeter wide. Then we unfold the paper, and collect the ends with an accordion again and stitch them with several stitches of thread. We ended up with a paper boat like this. In order to close the octahedron, we need to connect the sides of our boat and the easiest way to do this is to stick a small square on one side double sided tape, and then connect the paper edges. We hang the elements by threads from the ceiling, cornice or arch of the interior door.

An Andy Warhol style panel that would be a great example contemporary art in your home, will bring a lot of bright colors, you can create in just five minutes. The essence of such work is a reflection of the principle of antiherbarium, that is, it is not the leaf or branch of the plant itself that is preserved, but its imprint, if you like, its image. To work we will need frames in the right amount, watercolor paper, spray paints and a brush, as well as a set of templates that you can only find in a home greenhouse or in a city park. Apply masking tape around the perimeter of a piece of paper. It is needed so that the edges have a more neat, finished look. Attach the template so that it fits as closely as possible to the base, perhaps even using a press under which the item needs to lie for a while. When the template is completely ready, place it in the center and begin to carefully spray paint. Fix the finished dried work in damask, choosing a light background that will contrast perfectly with the colorful elements. With this technique you can both bring a garden into your child's room.

Children remember autumn for the beauty of falling leaves; there is little that compares to the pleasure of throwing different sides golden foliage, collect it in bouquets and armfuls, weave wreaths. We offer you eternally golden leaves, because they are made of soft felt with filler. Leaf fall can continue in the nursery until you get tired of it. Felt is famous for the fact that it does not need additional processing on the cuts; it will be enough to just cut it out and decorate it with decor. So we draw our leaves on the surface of the fabric using a template, and then cut them out with scissors. Using thread stitches we “draw” veins on the surface of each leaf. If you want to make them even more elegant, you can make two layers so that one is smaller than the other, which will create a beautiful contrasting border around the perimeter of the sheet. You can hang the sheets as curtains, you can sew two identical sheets, insert a wooden skewer inside and place this decor in a small vase.
How to decorate a room with your own hands: photo
If you are young parents, you have probably encountered the high cost of educational mobiles for children. Plus, the appearance of these products is very rarely truly stylish. We offer you the option how to decorate a room with your own hands, photo which is located below. For the craft, we will also use our favorite felt, and will also learn how to sew bright pom-poms from woolen threads.

We will make the flowers three-dimensional, which means that for each we need to make three or four elements, slightly different in size and different (or alternating) colors. You can use the same templates, or you can come up with different ones each time so that all the flowers turn out different from each other. The center of the flowers will be large buttons. The next stage is making pompoms. We take two bagels from cardboard, make a small cut on them - cut out a narrow sector. We wind the threads around the donut, then cut the threads between the cardboards with a knife, tie the middle with threads or a thin elastic band and fluff the resulting pom-pom. We string it on a fishing line random order blankets, flowers, beads, all these garlands are attached to a used carousel mechanism or to a self-made mount. By the way, if you replace the flowers with Christmas trees or snowmen, you will get great option, even if the children have grown up long ago.

The eco-theme has gained incredible popularity these days, so all kinds of eco-crafts will be perceived as a fashionable design trend. Even if we are talking about a children's mobile. Ideal material for this particular product is a sheet of veneer - a decorative overlay that covers the surface furniture material. It has color natural wood, and is processed using the most ordinary scissors. Take several sheets of veneer different shades, onto them we transfer the image of Christmas trees, stylized as you please. We cut out these elements with scissors, and make a hole on the upper narrow part of each using a hole punch or a thick gypsy needle. We tie pieces of fishing line to the rim of the hoop, and thread the other end into the holes on the tree. We fix the finished mobile under a chandelier or in any other place. These will create the appropriate mood long before the holiday itself and the appearance of a real live Christmas tree in the house.
How to decorate a room with your own hands - master class
There is one excellent material that is worthy of widespread use in in a variety of ways, . We are talking about bright and white, glossy and matte, large and small buttons. Usually there is enough of this goodness in any home, so you will not experience a shortage of materials. But, if for any of the options, how to decorate a room with your own hands, master class which you like, you don’t have enough accessories, you can always buy more in the right quantity.

Let's start with a voluminous wire figure, which is decorated with buttons. To make it as soft and pastel as in the photo example, you need to choose the color of the buttons as much as possible. No, they should not be the same in color or size, but the shades should be light and clean. First, make a sketch - lay out all the elements on a sheet of paper in the order in which you will string them. Undesirable for beautiful effect alternate the size of buttons, it is better to go incrementally, and then gradually return to small ones.
We take the wire, bend it in half, put it on a sheet of paper on which a heart is drawn, this will be our template. We string the buttons one by one, each time checking the shape with the template and adjusting if it deviates from the border. At the very end, bring the two ends of the wire together and weave them together to form a loop. You can use it to hang your button decoration. Another good thing about wire is that you can bend it into any shape, for example, as an option you can make this decor for a fence or front door in the form of deer, Santa Claus or Christmas tree.

Applications based on buttons can look very attractive and this can be proven by next job. On it you can depict the monograms of all residents of the house or specifically the owner of a given room. To work you will need large number bright buttons, as well as thick cardboard and glue. We place large buttons in a row on a cardboard base so that they form the outline of the future letter. Then complete the rows with medium-sized buttons, and close the empty spaces with small ones along with beads and beads; you can also arrange the decor in two rows.

Such a jewelry organizer can be a useful item, and not just an elegant decoration. To build it, you will need to knock down a wooden box in which thick wire is stretched. You can provide a glass door, or you can get by with an open system.
How to decorate a room with your own hands: step by step instructions
Textile decorations always add coziness to an apartment and create a soulful atmosphere. Let's see what we can make from pieces of bright fabric, how to decorate a room with your own hands. Step by step mk weaving such a nice rug for the floor will be completely simple, you just need to stock up on a dozen strips of thick fabric 3 meters long.

We lay them out in a row and secure them with transparent tape. Take the outermost strip, tie a knot around the adjacent strip, then around the next one and so on until you reach the center. WITH opposite side We move towards the second ribbon, in the middle we tie them together with an ordinary knot. Then we do the same with the second line of ribbons, etc.

Textile pumpkins are generally absolutely simple to make. For them you need a piece of bright fabric - cut out a rectangle whose length is twice the width. On one side we sew it into a bag with threads, turn it inside out and stuff the entire “pillowcase” with any filling, and sew it up with threads on top. Pierce the pumpkin from the bottom up with a needle and thread, and secure its flattened shape with a knot. Take threads that match the fabric and tie the bag in sections, as shown in the photo. All that remains is to sew on the stem from contrasting fabric.
How to decorate a room with your own hands: ideas

Finally, let's look at a few more examples of how how to decorate a room with your own hands. Ideas these are different and the first of them is candlesticks made of thick paper, on which medieval castles are depicted. An electric candle placed inside creates a truly magical glow of these lamps.

While subordinating, we should not forget that it is, first and foremost, a family affair. Eat great idea– be sure to set up an original stand with photographs of your family in the happiest moments of the outgoing year.


