Flooring PVC or natural roll coverings they look presentable and are characterized by good resistance to compression and abrasion loads. But if the installation and operating conditions are violated, it is easy to make a hole or a cut in the linoleum, burn it, or even “decorate” it with difficult-to-remove stains. Any defects can be dealt with at home with your own hands.
For the home, buyers most often choose inexpensive household or semi-commercial series of 21-23 and 31 wear resistance classes. Although linoleum is an elastic flooring material, the surface of natural and PVC products is quite resistant to abrasive effects, and some collections can even withstand furniture rollers and sharp heels women's shoes and animal claws.
But, unfortunately, buyers do not always listen to manufacturers’ recommendations or do not have the financial means. Therefore, a coating that does not correspond to the load class of the room is chosen. For example, for a hallway or kitchen in a house with small children and pets, they buy economy series 21 classes. Or even worse - due to limited budgets, schools and kindergartens use material of category 21-22 from the household series with the minimum possible protective layer on the floor. And you shouldn’t be surprised that the linoleum tore so quickly, bunched up like an accordion, or lost its luster. For such rather harsh conditions, completely different coatings are designed - from class 31 and above.
Accusing manufacturers of producing low-quality flooring products, buyers forget about another important factor - correct installation. Factories Tarkett, DWL, Juteks, Grabo, Forbo and others strongly recommend that you carefully read the instructions before installing the coating. It states in black and white that:

If mistakes are made and the surface of the linoleum is damaged, then do not despair. With desire and some skill, almost any defect can be corrected.
DIY linoleum repair
One of the characteristics of rolled marmoleum and PVC coating is partial repairability. This means that, for example, a small cut or bulge can be easily repaired - just carefully seal the torn linoleum using special compounds. But the burnt area and other types of holes are more difficult to eliminate. We will tell you about everything in order below.
Difficult to remove stains, traces of rubber, glue, varnish

Tough stains.
Such contaminants are classified as complex, so special household chemicals are used to remove them. For example, Forbo and Wicanders have a whole series of products for the care, cleaning and protection of natural coatings (marmoleum, cork, parquet). And Dr. Schutz, InterCHIM and Tarkett produce professional cleaning and care chemicals for vinyl flooring materials. Including:

Advice! To clean PVC roll coverings, marmoleum and cork, it is not recommended to use products containing chlorine, abrasive powder cleaners, solvents and petroleum products.
Of course, the above list is far from complete. The assortment is huge, so choosing what you need won’t be difficult. But listen to the advice of would-be experts and worsen the condition of the coating by sandpaper, abrasive powders are not worth it. This will not restore a burned or contaminated area. On the contrary, the wear-resistant top layer will be removed, and the area with the defect will be irrevocably damaged.
Minor defects associated with a violation of the integrity of the coating
Cuts, punctures, lacerations

What to do if you accidentally cut or torn linoleum? Everything is very simple - fix it by gluing using PVA or “cold welding”. The last one is a series of adhesive polymer compositions, which not only connect, but fuse parts of the fabric, forming a durable, almost invisible seam. Available in three variations:

To glue the parts as accurately as possible, the tube with the adhesive composition comes with special needle-shaped tips with a standard or C-, T-shaped nozzle.
“Cold welding” refers to slightly toxic and flammable building materials, so you need to work with it carefully, preferably using personal protection(glasses, gloves)
Before work, the linoleum elements to be glued must be cleaned of dirt, mastic residues, torn felt or pieces of foam base, and dust. If there are recesses in the base, they must be filled with quick-drying cement and vacuumed. Protect the cut or torn fabric from excess glue protruding onto the surface with a piece of masking tape, insert a needle into the joint or puncture, squeeze out a little adhesive mass and leave to dry. After a few hours (the exact period is indicated in the instructions), you can load the coating as usual.
Formation of waves on the surface

Wave-like swellings on the surface almost always appear due to improper, glue-free installation. Less often - because high humidity grounds (dampness, etc.). In the first case, you need to remove the furniture from the room, remove the baseboards, heat the linoleum with a hairdryer and carefully smooth it out. It is advisable to load the surface for several days to fix the coating in the desired position.
But dampness and its consequences will have to be dealt with seriously. First you need to eliminate the source of high humidity, dry the base, and, if possible, waterproof it. Only after this can linoleum be laid using adhesive compounds.
Blistering, separation at seams
Locally swollen areas can be eliminated using PVA glue or “cold welding”: we pierce the bubble or make a cross-shaped incision, introduce the composition under the canvas and glue the linoleum to the base.
“Raised” edges of linoleum can be easily repaired using the same adhesives - welding or polyvinyl acetate. But you must strictly follow the instructions.

If the joints in doorways or in the middle of the room are separated by more than 4 mm, or the edges are frayed, then it is better to use metal or PVC thresholds to connect them. The range of products is wide: with open or hidden fastenings, painted with a polymer powder composition or laminated to match the color and texture of linoleum. We believe that choosing the right one will not be difficult.
How to seal punched holes, blackened or peeling areas
In this case, local replacement of the damaged piece is carried out. To do this, select a piece of coating of the same color and design as possible. The defective area is removed, the remains of old glue or mastic are removed from the base, and, if necessary, leveling and cleaning from dust and dirt are carried out. Next, fresh adhesive is applied to the base floor with a brush, a patch is inserted, and carefully smoothed. You can place a weight on the surface for several days.

In conclusion, I would like to note that any repair of linoleum should be carried out immediately upon detection of defects. Otherwise, the damaged area will increase day by day, and the possibilities for repairing it will decrease.
Advice! If you need repairmen, there is a very convenient service for selecting them. Just submit in the form below detailed description work that needs to be done and you will receive offers with prices from construction teams and companies by email. You can see reviews about each of them and photographs with examples of work. It's FREE and there's no obligation.
What to do if the linoleum is torn? Changing the coating is too troublesome and expensive, but you can’t leave it with damage: not only does such a floor look sloppy, it will also accumulate dirt. Repairing the coating will help solve the problem, and it will not require any special expenses, and the result will be excellent. Tears, burns, holes in the canvas, unraveling seams - all this can be eliminated almost without a trace, and the floor will look like new again.
Let's look at how to seal linoleum and what you will need for this.
The main tool when working with linoleum is a knife. It must be durable, very sharp, with comfortable handle. Although linoleum is a fairly thin and flexible material, cutting it will require some effort, and you won’t be able to cut it quickly and accurately with a dull knife. Now on sale there are special knives for linoleum, which are very convenient to work with.
| Type of knife | Description |
|---|---|
| This knife is intended for cutting fabric in a straight line. With its help, it is easy to trim frayed edges and cut out patches of the correct shape for large holes. Replaceable blades are highly durable; they do not bend or break. A special screw holds the blade tightly, preventing it from moving. This knife is perfect for multi-layered fabric and gives an absolutely even cut. |
| The knife is equipped with a strong blade that does not bend and a durable ergonomic handle. The tool easily cuts thick multi-layer linoleum, not only straight, but also at an angle. Well suited for cutting blades in hard-to-reach places, for example, under a heating radiator and around the outlet of communication pipes |
| A very practical tool with a sharp round blade. Allows you to cut the blade straight and along curved markings. It is convenient to use when making patches irregular shape, trimming the coating at thresholds, communication exits, around ledges and niches |
| The curved blade allows you to carefully remove dried glue from the surface, correct cuts, and remove burrs on the edges of the canvas. With the help of such a knife it is convenient to repair minor damage and smooth out loose seams on old linoleum |


In addition to the knife you will also need:
- spatula for applying glue;
- metal ruler or rod;
- marker;
- roller
To seal large holes, you will need patches made of linoleum of the same type that is laid on the floor. This is why it is recommended to purchase a new covering with a reserve: the cuttings of the canvas do not take up much space, and in case of damage they will help to patch holes unnoticed. It is difficult to find exactly the same material separately: the range of linoleum is constantly changing, and even if a similar pattern was found, the samples may not match in color.

To fix patches and join separated panels, you will need tape (double-sided and regular masking tape) and glue.

For such coatings there are special adhesives - water-dispersion, on acrylic base, two-component on epoxy resin, as well as adhesives " cold welding».
| Glue name | Purpose |
|---|---|
| Used for PVC linoleum on fabric and felt base. Suitable for gluing sheets to wood and concrete floors, plywood and other absorbent substrates |
| Used for PVC linoleum with or without a base, suitable for any absorbent base: plank floor, screed, chipboard or fiberboard |
| The composition is specially created for PVC coatings on various types bases - fabric, pile, foam. Suitable for absorbent substrates: concrete screed and TsPS, wooden floor, plywood, fiberboard |
| This is a polyurethane reaction composition, which is intended for attaching PVC coatings to absorbent and non-absorbent substrates. Suitable for rooms with high humidity |
| Transparent compound used for sealing connections PVC sheets coverings. Can be used to seal minor damage to linoleum - punctures, small cuts with smooth edges |


To eliminate minor scratches, burns and punctures, use mastic or polymer putty. To ensure that the repair composition matches the color of the coating, fine crumbs scraped from a piece of linoleum are added to it. Special repair kits are also produced, consisting of mastic, solvent and colored pigment. Using these products, you can carefully repair small defects in linoleum so that no traces of damage remain.
Prices for Bustilat glue
Bustilat glue

Repair of holes and tears in the canvas
This type of damage is the most serious, and therefore repairs will take longer. If a large hole has formed in the canvas, fix it with a patch.
Step 1. Select a piece of linoleum for the patch. It should perfectly match the color and pattern so that the repaired area does not stand out on the floor. The piece is laid over the hole on the covering and the lines of the pattern are aligned with the main fabric.


Step 2. The material is fixed with masking tape on all sides to avoid displacement. If the piece is small, it is enough to secure it with tape at the corners.


Step 3. Take a knife and very carefully cut both layers of linoleum along the lines of the pattern. It is advisable to cut the patch in the shape of a square or rectangle - this way it is more convenient to attach it and the joints will not be noticeable.

Step 4. Remove the tape, remove the linoleum scraps, and put the patch aside. Now you need to remove the damaged piece of linoleum: pry it up with a knife and open it from the base over the entire area. The remains of the adhesive layer are also cleaned up so that they do not interfere with the adhesion of the canvas to the base.

Step 5. Next, take the glue and apply it in an even layer onto the cleaned surface with a spatula. If the edges of the fabric around the cutout are not glued, you also need to coat the surface under them with glue - this will allow the edges to be secured more securely.


Step 6. After waiting a few minutes, place a patch on the glue and smooth it thoroughly over the entire area so that there are no air bubbles left under the linoleum. Make sure the patch is laid correctly and all lines match.

Step 7 The glued piece is rolled with a roller for reliability, and then wiped with a clean damp cloth, removing excess adhesive mixture.
Step 8 Joint glue is applied in a thin strip along the seams on each side of the patch, and the excess is removed. After the glue has set, wipe the joints with a thick cloth or sponge.


Advice. During the day you should avoid mechanical influences onto the repaired area until the glue is completely dry. After this, the coating is ready for full use.
If instead of a hole there is a partially torn flap on the linoleum, you can do without a patch. To do this, the flap is first straightened (you can iron it through thick fabric), clean dirt and dust from under it, and then apply a layer of glue to the base. After this, all that remains is to place the flap on the glue, align the edges and press with something heavy for a day.
Joint repair
Loose joints are one of the most pressing problems for floors covered with linoleum.

Sometimes the edges of the canvases only slightly move away from the base, in other cases they swell noticeably and diverge to the sides, exposing the subfloor to view. This kind of problem cannot be left unchecked: debris accumulates in the seams, water gets in during cleaning, mold starts to grow, and the protruding edges become frayed and torn, making it difficult to walk around the room. Let's look at how to connect joints with the greatest efficiency.
Fast way
Step 1. The edges of the canvases are folded outward and all the dust is thoroughly cleaned from under the coating.
Step 2. Prime the floor using a small brush and leave until completely dry.
Step 3. Place in the gap between the sheets double sided tape so that the middle of the tape is located exactly along the seam.

Step 4. remove the protective layer from the adhesive surface and press the edges to the floor.
Step 5. Carefully straighten the edges, press and smooth the seam with your hands. Next, it is advisable to roll this area with a roller to finally level the joint.

If the linoleum sheets have shifted during operation and the joint has separated by several millimeters, there is a simple and cheap way eliminating the gap. To do this, you need to clean the seam from dust, degrease it, and dry it thoroughly. Next, you should take a wax candle, melt it and carefully pour the wax into the gap between the canvases. After this, the remaining wax is easily removed with a spatula blade or knife, and the surface of the seam is polished with a soft cloth.
Advice. This method is only suitable for dry rooms with low traffic, since under intense load the wax will come off the edge of the canvas and a gap will form again.
Cold welding of joints
For high-quality sealing of separated seams, it is best to use C-type cold welding. This glue has a thick consistency and perfectly fills seams up to 3 mm wide. In addition, it melts the sections of the canvas and forms a monolithic surface, impermeable to moisture and dust. But for new linoleum they use A-type glue, which is more liquid and reacts faster with PVC. Let's look at how to do this in detail.

Step 1. The coating strips are laid on the prepared floor with an overlap of 5-6 cm.
Step 2. Mark the cutting line exactly in the center of the overlap, measuring the required distance with a ruler. A line is drawn with a pencil along the entire length of the joint.
Step 3. Apply a ruler or metal strip to the marking and sharp knife cut through both sheets.


Step 4. Remove the cut strips to the side and straighten the edges of the canvases.

Step 5. Painting tape is applied to the joint along its entire length. This is necessary so as not to stain the front surface of the coating with glue.

Step 6. Using the tip of a knife, carefully cut the tape along the joint line.

Step 7 Take the glue, put a cap with a needle on the tube, and screw it tightly. Next, insert the tip of the needle into the gap and lightly press the tube until a spot of glue up to 4 mm wide forms on the tape. After this, you need to smoothly move the needle along the seam, evenly filling it with adhesive.


Advice. The width of the adhesive strip during application should not exceed 3-4 mm. You will still have to wipe off the excess glue, and this will not make the seam stronger. But you shouldn’t save too much either: a lack of glue will make the seam less airtight and reliable.
Step 8 After about 15 minutes, when the glue has set, the tape is carefully removed from the linoleum.

You can walk on the coating after the glue has completely cured. Exact time The manufacturer indicates drying time in the instructions on the tube, so before work, carefully study all the information about the composition.

Eliminating blisters on linoleum
Often, swellings appear on the coating, which increase over time, interfere with walking, and then tear. This happens for various reasons, but such defects must be eliminated as early as possible so that the linoleum does not have to be replaced.

Removing bubbles is not difficult, the main thing is to know how
Small bubbles can be easily removed using heat. Can be applied household hair dryer or a bag of hot sand, but it is more convenient to use an iron. To do this, cover the problem area with a clean rag or piece of parchment and smooth it with an iron in steam mode.

Large swellings are eliminated differently. A cross-shaped incision is made in the center of the bubble, after which the resulting flaps are folded together and the excess is cut off at the edges. After making sure that all the parts fit together smoothly, they are bent outward and the base is cleaned of old glue and dust. Now all that remains is to apply fresh glue and press the flaps to the floor. You can put some weight on top so that the linoleum sticks better.

If the linoleum was originally laid without glue, the swelling can be eliminated without cutting the fabric. First you need to loosen the baseboards on the wall closest to the bubble. Next, they begin to smooth the surface towards the wall, expelling air from under the linoleum. If necessary, the edge of the canvas can be trimmed to leave a temperature gap between the wall and the floor.

Video - How to glue linoleum
Tsugunov Anton Valerievich
Reading time: 4 minutes
When laying new linoleum, it is not necessary to contact specialists; you can handle this work yourself. The main difficulty lies in joining several strips in a large room, the size of which exceeds the width of the canvas, or at the border of rooms. If you do not pay due attention to the seams, dirt and moisture will get into them, the material will rise, and appearance the floor will deteriorate. But if you know how to glue linoleum together, this problem will be solved once and for all.
Using double-sided tape
Gluing linoleum joints with double-sided tape is a quick, simple and cheap way, but with a short-lived effect. This option is suitable for lightly loaded or temporary connections. It will not be possible to reliably join a felt or fabric-based coating using this method.
A seam glued with tape will most likely not last long; the main danger for it is moisture, which will get into the joint when washing the floor.
Procedure:
- The base is cleaned of dirt and dust and treated with strengthening primer.
- The parts of the coating are carefully joined.
- Tape is glued to the floor along the joint line. Then the top protective film is removed from it and covered with linoleum.
- The edges of the material must be pressed tightly, and then the seam should be rolled with a hard roller.
Overhead connection
Joining linoleum at home can be done using overhead thresholds. They have an affordable price, they are easy to choose by color and composition (there are plastic and hardware). The thresholds have ready-made holes for self-tapping screws. The connection is reliable and durable.
The process consists of several stages:
- Using a jigsaw or a metal file, cut the strip to the required length and apply it to the joint of the linoleum. Holding the threshold, mark the exit points of the screws.
- A 6mm drill is inserted into the drill and holes are made according to the markings. Dowels must be inserted into them immediately.
- The threshold is applied to the surface and secured with self-tapping screws.
Bonding with mastic
Mastic is one of the most popular adhesives. It makes it easy to glue linoleum at home. The method is reliable, it connects “tightly”, but if you need to remove the coating for a while, then the linoleum will tear in the place where the mastic was used. It is also easy to attach the raised piece this way.
Work order:
- Before gluing the joints, prime the base.
- The edges of the coating are degreased with any alcohol-containing product. Acetone or solvents cannot be used, as they can corrode the linoleum.
- As soon as the base has dried, you need to apply a small amount of mastic to it with a spatula.
- Then the edges of the linoleum are applied to the surface and pressed tightly. The joint must be carefully rolled with a hard roller.
The mastic dries for about a day, so during this time the area where the coating has been treated should be pressed firmly with something heavy. A board is placed on the joined edges, and a load is placed on it.
You can glue linoleum joints using. This is very reliable way, which allows you to create a sealed seam that practically does not stand out against the background of the surface, but it is not suitable for all types flooring material. Hot welding can only be used for high strength coatings, conventional household linoleum it will just melt.
Hot welding is performed only on coverings that are firmly glued to the floor.
Gluing procedure:
- A special polymer cord (welding rod) is inserted into the hot air gun, which will fill the seam as the material melts.
- The edges of the linoleum are firmly joined, a small V-shaped groove is cut along the entire joint, a few millimeters smaller than the cross-section of the cord.
- The resulting gap must be cleared of debris and the edges of the linoleum must be degreased with an alcohol-containing solution.
- The hot air gun is heated to the temperature specified in the instructions (usually it ranges from 300 to 500 C°).
- The tip is placed at the beginning of the groove and slowly moves along it.
- The seam is completely filled with liquid polymer, which should protrude slightly above the edges. If the cord does not melt well, the temperature increases.
- After welding, the polymer is left in the seam until it hardens completely. Then the protruding excess is removed. While the cord is still liquid, this cannot be done, since the material shrinks. If you hurry, the seam will end up with a depression. Excess polymer is removed at the joints while the product is still warm.
Cold welding
- This is a method of gluing surfaces with special compounds. The technology eliminates processing with hot air. This is the optimal method for joining the edges of linoleum in an apartment. The compositions that are used for this (“A”, “C” and “T”) are selected in accordance with the type of material being joined and the size of the gap.
- If you need to glue a new coating immediately after installation, then type “A” glue is used. It has a liquid consistency, making it ideal for tight joints and combines well with soft coating. It is inserted with a needle that comes with the tube. The seam is almost invisible.
- If the linoleum was laid a long time ago, then the edges are connected with type “C” glue. He has more thick consistency than composition type “A”. The glue, filling the voids, reliably holds the seams together, preventing them from coming apart in the future.
- Type “T” glue is used to glue insulated PVC coverings on a felt or polyester base. It is toxic and difficult to use, used by professionals.
The gluing method using cold welding is very simple:
- The seam line is sealed with masking tape.
- Using a sharp knife, cut the tape exactly along the joint.
- Using a nozzle, glue is introduced into the gap between the edges of the coating.
- Excess welding is cut off after it has hardened.

Linoleum does not have sufficient resistance to mechanical damage. It can be damaged by moving furniture or dropping a sharp object, or burned with a match or cigarette butt. There are many ways to seal a hole in linoleum so that it is not visible.
We choose the repair method depending on the size of the damage. In this article we will look at various technologies recovery flooring for cuts, tears and swelling.
Methods for repairing linoleum

Large tears are patched
Linoleum can tear due to various reasons, but there is no need to rush to replace the floor covering with a new one. You can carry out repairs yourself without seeking help from specialists. Let's look at ways to seal linoleum with your own hands:
- small gaps are glued together;
- cuts and joining seams can be sealed with cold welding or mastic;
- Fill small scratches with wax, sealant, mastic;
- We rub away abrasions with wax, selecting a suitable shade;
- To repair large damages, we use a linoleum patch of the same color.
If the linoleum is torn, you need to choose the most suitable restoration method for each case. There are many compositions on sale that allow you to repair the coating so that the damaged area is invisible.
Minor repairs

Sealants will help eliminate minor scratches and chips
Let's look at how to seal torn linoleum in case of minor mechanical damage to the surface. You can repair linoleum using the following compounds:
- Sealants for woodworking. They are able to eliminate minor damage and abrasions.
- Mastics various shades, we select the most suitable color, repairing the damage on the linoleum.
- Cold welding for linoleum is available in the form of polyvinyl chloride-based adhesive, which is capable of sealing gaps up to 2 mm thick.
- To eliminate small cuts, nail polish, thin layer finishing coating the same structure.
Before starting restoration work, we remove debris and dust from under the covering, and degrease the area on the flooring that will be repaired.
Restoring scuffs
Damage to the top layer of linoleum, its abrasions and minor scratches can be eliminated using:
- polishes to match the color of the coating, rub the damaged areas;
- Small abrasions are rubbed with furniture wax, precisely selecting the shade.
If the work is carried out carefully and the color of the grout is precisely selected, the repaired area will not differ from the main area of the coating.
Cover the burned area

Burnt areas can only be masked with a patch
We repair linoleum with a hole burned through careless handling of fire. To do this, seal the hole using a patch made of the same material.
Repair sequence:
- We design the damaged area in the form of a geometric figure of the correct shape (circle, square).
- We clean the edges, degrease, and remove dust from under the coating with a vacuum cleaner.
- We select a patch so that the pattern matches, apply it to the damaged area, and cut out a piece of the desired shape.
- Spread the patch with adhesive on the bottom and along the edges. We insert it into the hole, press it down, and leave it under pressure for 48 hours.
Using the principle described above, large torn holes can be repaired. If the edges of the tear are even, you can glue them together using the jointing method; if they are torn, then you will have to look for a patch made of material with the same structure and pattern.
After completing the repair, there is no need to throw away the remaining materials used; they may be needed to restore damaged areas of the coating.
If the joining seams come apart
You can seal the joints of the coating strips using the “hot” or “cold” method.

The joints are “welded” hot and cold
Step by step instructions cold joining seams:
- we stretch the two strips to create an overlap of 2 mm, put a metal strip under it for ease of cutting. In the middle of the overlap we cut both strips;
- we throw away the cut strips, stick masking tape along the entire length to the joint, and cut it at the joint;
- We fill the seam with PVC glue using a glue gun or a thin tip, after half an hour we peel off the tape and wait until the glue has completely hardened.

Using the hot method, we glue the linoleum joints using a construction hair dryer with special nozzle. To do this, you need to purchase a special cord in advance and expand the joining area to 5 mm.
At the same time, we warm up the cord and quickly (before it cools down) place it inside the seam. The gluing of the ends occurs by vulcanization of the joints, thanks to which the strips form one whole. This method is more reliable, but requires special skills in working with a hair dryer.
Joints sealed using hot method will be properly fastened for a long time. There is no need to neglect repairs, as dirt will get under the covering and moisture will get in, which will lead to the formation of mold and an unpleasant odor in the room.
Eliminating waves
If the linoleum swells, it means that the technology for laying it was violated. If waves form along the edges of the flooring, the size of the covering should be reduced, leaving a compensation gap between the flooring and the wall. To learn how to get rid of bloating, watch this video:
Steps to eliminate bloating:
- We remove the baseboards along the walls of the room, trim the covering to the required size.
- We leave the material in a straightened form for 2-3 days so that it can rest.
- After the covering has straightened, we glue it or fix it with skirting boards.

Having pierced the bulge and released the air, pump glue under the coating.
Sometimes swelling occurs due to the fact that the coating is overstretched due to its insignificant thickness.
When waves form in the center of the room, there are several options for restoring the surface:
- We pierce the small swelling with a needle, release the air from it, smooth it with our hands, fill the hole with glue through a syringe, and press down on the flooring with pressure.
- We cut large waves in the middle with a blade, sometimes you will need to cut off the excess stretched material, release the air, and glue it with masking tape so as not to stain the surface with glue. We apply glue to the joints and fill the seam, then press it down and leave it under the load until it dries completely. For more information about repairing your coating, watch this video:
In order for the floor covering to serve for a long time, it is necessary to choose material of the appropriate quality during the repair work. The characteristics depending on the coating class can be studied based on the attached table:

By showing skill and accuracy, you can easily restore linoleum so that it will be completely unnoticeable and will save a lot of money cash due to the absence of the need to purchase new flooring materials.
Linoleum is a coating that must be handled quite carefully, so over time, many people face the question: how and what is the best way to seal torn linoleum. There are several possible answers, but the most common is to use cold welding for linoleum.
Which cold welding method is best for gluing linoleum?
Cold welding is a special liquid or gel based on polyvinyl chloride and various solvents. It slightly dissolves the touching edges of the linoleum and thus fuses them.
It is usually supplied in small tubes and comes in three types: A (liquid form for gluing joints), C (thicker, for repairing and filling narrow cracks) and T (for gluing multi-component linoleums based on polyester and PVC). Most often, tubes are equipped with a screw-on spout or a needle for applying glue. The needle is convenient for gluing straight joints, but any tip will do for repairing a tear.
You should not rush to buy expensive glue, for example Werner Muller at a price of 450 rubles per tube. In terms of their composition, they are almost all the same. You can easily purchase any other one three times cheaper than the above.
How to glue
So, before starting, you need to prepare the seam or gap for gluing. Remove dirt and wipe. The areas to be glued must be dry.
For gluing we need a tube of cold welding, masking tape and a knife.

After cleaning the linoleum, the tears should be sealed with strips of masking tape.

Then carefully cut the tape along the tear line with a knife.

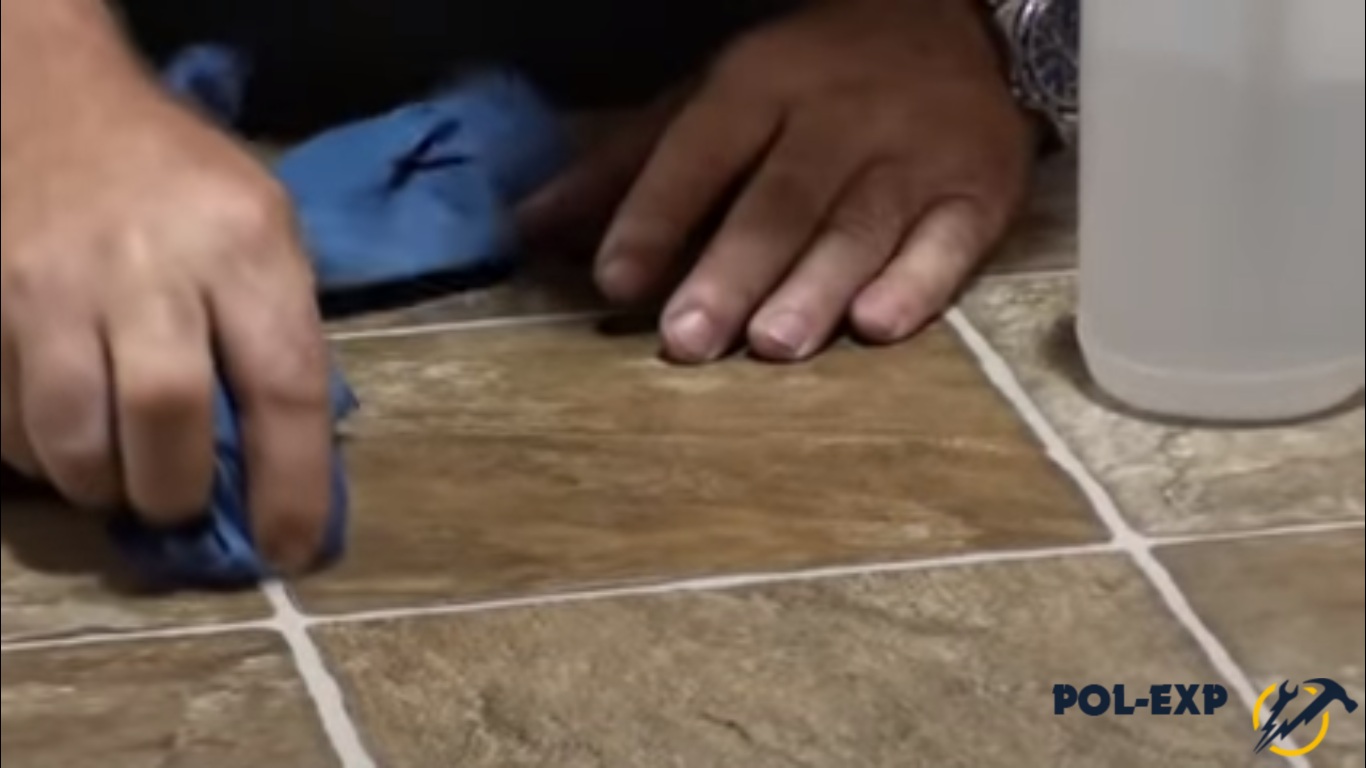
And lifting the edge of the linoleum, apply glue. It can be applied not only to the joint, but also a little in excess to the lower part. Then the seam will be glued to the surface on which the linoleum is laid, even if it is concrete.


If you bought a tube of cold welding to seal only one gap, you don’t have to skimp and apply a little more, but don’t overdo it. The glue should not get on the surface of the linoleum. And if this happens, then it must be removed with a dry cloth.
After applying the glue, the gap should be closed by ironing the surface of the tape with the same cloth. After 15 minutes, the tape can be removed.

You can walk on linoleum within an hour, but wet cleaning is recommended no earlier than after 24 hours.
Of all the floor coverings that can be found on sale today, linoleum is the easiest to damage. Trouble can happen while moving furniture or as a result of careless handling. In any case, damaged linoleum needs repair. Surprisingly, fixing linoleum is not difficult. The main thing is to find a suitable fragment for the patch.
Patch material
As a rule, all materials for flooring (however, this applies to all finishing materials), they buy with some reserve. This stock is then stored on the balcony or in the pantry. If such a supply of linoleum has been preserved, then this is an ideal case and you can get to work.
If there was no extra piece of linoleum, then a problem arose - where to get it?
First, you can look for it on sale. For example, in markets and online stores.
Secondly, the patch can be made from similar linoleum. There is also an option when the patch is cut out of linoleum, which is located somewhere under massive, stationary furniture. After all, the floor in this place is hidden from view anyway.
How to glue damaged linoleum
In addition to the material for sealing damaged linoleum, you will need glue. PVA or Moment glue is quite suitable. You can also try other types of glue. The most important thing is that they are not too aggressive and do not melt the material.
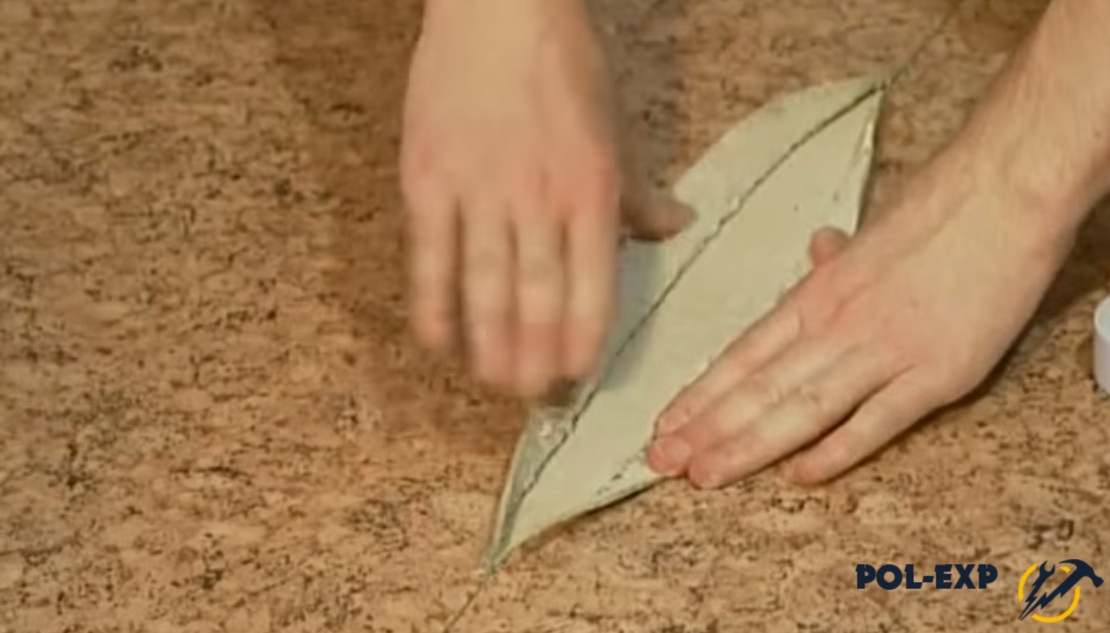
How to correctly cut a patch from linoleum
To ensure the best results, it is important to cut the workpiece correctly. There is only one way to do this efficiently and accurately. First, place on top of the damaged linoleum new material, and then using a blade or a sharp wallpaper knife, cut out a circle or some other geometric shape through two layers of linoleum at once. This is the only way the patch will fit perfectly into place, without the slightest gap.
To make the patch invisible, you need to take into account the pattern on the linoleum. It should match perfectly on the patch and on the linoleum. In addition, you can try cutting the patch itself along the lines of the ornament. In this case, the patch will be truly invisible. Of course, this will still depend on the design or design, however in most cases, cut out the patch complex shape, focusing on the lines of the ornament - the ideal choice.
How to glue a patch to a damaged area on linoleum
After this part is completed, the old, damaged piece of linoleum is removed and the patch is set aside for a while. It is necessary to wash and scrub the floor under the linoleum so that the grip is as good as possible. Glue is applied to the clean floor. The glue is spread well over the entire surface, after which the patch is carefully inserted and pressed.
In order for the patch to stick properly, you need to place a weight on top of it for two days. To do this, you can take a bucket of water or a large saucepan. A large stack of books and, in general, any massive load that can be found at hand will also do.
The main thing is that this load is installed on flat surface. That is, first you need to put a large book, fiberboard or plywood on the patch, and then the load itself is placed on this base. After two days, the load can be removed, and the linoleum will be ready for subsequent use.
Conclusions
As you can see, making a patch is not at all difficult. Moreover, the patch should not be conspicuous. If the work is done carefully, it will hardly be noticed unless you know exactly where it is. The main difficulty in this work is to find suitable material for the patch and carefully cut the linoleum patch itself with a sharp knife.
Damage to linoleum is a very unpleasant, but easily fixable thing. Repairs to torn or cut areas must be carried out immediately and without delay, as the edges will dry out and the width of the hole will increase. A variety of debris and water can easily get under the flooring, creating all the conditions for mold and mildew.
If the linoleum is torn, what to do?
How to repair torn linoleum depends on the type and size of the tears and cuts. The work involves different approaches, which in turn depend on the installation option.
If you have an idea how to repair torn linoleum, you need to have a special set of necessary things:
- patches;
- a knife with a very sharp blade;
- metal corner;
- processing agents;
- glue;
- scotch;
- spatula;
- plywood sheet, thick cardboard.
With the help of these tools and parts, you can safely carry out the restoration of the required area. The main defects are: hole, cut, docking. Moreover, the severity of the situation is influenced by the size of the incision itself.
If the linoleum is torn, instructions from professional craftsmen will help you fix it, as well as video reviews from step by step tips. For small cracks or holes, as well as significant abrasions, it will be enough to use putty to seal. After which it is recommended to sand it with glass sandpaper.
How to repair torn linoleum
How to seal torn linoleum with large gaps is more complex and time-consuming. The patch should not stand out from the overall pattern, so if there are pieces left after a previously laid sheet, it is advisable to use them. How to glue torn linoleum quickly and without difficulty? The main thing is to choose the most suitable piece that can be adjusted to required sizes a knife with a very sharp blade.
The basic scheme for repairing glued linoleum looks like this:- thorough initial processing with removal of debris and other foreign materials;
- base primer;
- applying special glue to the patch and installation;
- pressing with a sheet of plywood or thick cardboard;
- press down with a heavy weight and, if necessary, putty.
- the linoleum sheet is rolled up and the torn area is processed;
- the defect should be covered with a patch;
- you can use double-sided or masking tape and glue;
- If necessary, it is worth putting cold welding into the seam.
If you follow the technology and working methods correctly, the restoration of cuts or other defects will go well and without difficulty. If any difficulties arise, highly qualified specialists can help.
Linoleum often gets damaged during use. To restore it, you do not need to call specialists. There are several ways to seal linoleum if it is torn. This will help you save a lot of money and time, because you won’t have to completely change the flooring.
Types and causes of damage to linoleum
Linoleum - pretty soft material: despite its thickness, it is prone to mechanical damage. Usually holes, tears, abrasions and other defects are formed if the coating is laid according to uneven floor. Linoleum cannot fill all the pores and voids, so when walking on it in problem areas, the material becomes thinner. While PVC linoleum can “resist” tearing longer, thin natural flooring breaks faster.

Tears and torn holes can also appear under the following conditions:
- piercing the heel of a shoe;
- gradual wear and tear from furniture legs near the walls or in the middle of the room;
- cutting with a knife due to careless actions.
Violation of the coating laying technology makes damage to its surface even more likely. When gluing onto a layer of glue that is too thin or thick, the latter will turn out uneven and insufficiently elastic, and defects may appear in some places. If the flooring is laid on a damp base, it quickly peels off and becomes damaged, swelling with waves. The appearance of folds inevitably provokes cracks.
Another option for damage to linoleum is the divergence of seams if the material was laid in several strips. This usually happens when joints are sealed poorly. The coating can also be burned through - this is usually observed when a cigarette or coal from a hookah falls. Burns can be superficial or through; the latter are more difficult to repair at home.

Tools and materials for work
To repair cuts and holes, you will need a number of tools. The main one is a knife. It should be sharp, durable, you can take a stationery or painter's one. There are also special knives for linoleum on sale:
- universal - used for cutting fabric in a straight line, easily straightens frayed edges, edges, cuts even round patches, can have replaceable blades;
- retractable reinforced - equipped with a non-bending blade, a reliable and comfortable handle, it cuts multi-layer coatings well straight and at an angle;
- disc - has a sharp round blade, cuts straight and curved, helps to make patches of irregular shape;
- month-shaped - thanks to the curved blade, it corrects cuts and removes hangnails, trims seams.
You may also need other tools for repairs - a spatula or glue brush, a roller (rubber, thick), a pencil or marker, an iron ruler. From consumables Pieces of material with the same pattern, the same color (for cutting out patches), and special glue help to repair the torn area. When purchasing, be sure to save pieces of linoleum - this will help make repairs without problems. In addition, to fix the canvas you will need double-sided masking tape or stickers; for gluing with hot-melt adhesive - construction hair dryer. The following types of adhesives are used in linoleum repair:
- boostilate;
- acrylate;
- polyurethane reaction;
- cold welding;
- mastic;
- polymer putty.

In order for the glue to color the linoleum, the latter is cut into crumbs, having first removed the backing. Pour the material into glue, after dissolution the product will serve as a pigment. You can also buy a suitable pigment in the store and paint the glue yourself.
Repairing minor defects
Small cuts and cracks are the easiest to repair, but many people choose not to do this. Indeed, they are almost invisible on the surface, do not stand out, and do not interfere. But over time, dirt and dust will begin to clog in them, the edges will begin to fray, and the hole will expand. Therefore, you must immediately choose the appropriate method and seal the hole.
How to eliminate a minor defect in the coating? Here is a list of suitable funds:
- Mastic. Sold in the form of paste, pencil, and a variety of colors.
- Cold welding. Reaction glue allows you to quickly and reliably eliminate any defect. Melts the PVC coating, creating an even, invisible seam.
- Sealant. It is advisable to purchase a woodworking product by selecting desired color, it will eliminate minor defects.
Scuff marks can be removed using linoleum wax. Shallow damage can be easily rubbed off with this composition. This should be done with the edge of a coin, then treated with a cloth until a glossy surface is obtained. You can also cover up scuffs with mastic or polish. Before repairs, be sure to clean the floor covering from dirt and debris and dry it well. If necessary, degrease the area.
How to seal a small through hole? It is best to carry out repairs by cold welding; this method is suitable for gluing gaps up to 3–4 mm, but there are compositions on sale for larger large cracks. Painting tape is glued to the area around the defect for protection, then glue is applied using a thin spout. Once the surface melts, the hole will disappear. Once it has completely hardened, remove the tape and cut off excess glue with a sharp knife. You must work with cold welding carefully, such products are toxic. It is necessary to use a respirator, gloves, and ventilate the room well.

You can also glue small cuts and tears with a homemade product:
- melt half a kilogram of rosin powder in a water bath;
- cool the mass to 50 degrees, add 150 ml of alcohol, 100 g of castor oil;
- tint the mixture with pigment;
- using a syringe with a needle, inject glue into the defect area and wait until it hardens completely.
Repair of a burnt area
U smoking people, hookah owners often encounter similar problems with linoleum. It is imperative to determine how deep the burn has spread. Here is the repair procedure depending on the complexity of the damage:
- A hole in the protective (top) layer. Clean the stain area by removing burnt particles. Take a coin, carefully apply mastic and smooth it with its edge.
- Burn through the pattern and PVC layer. If there are dark edges and white, macular spot in the center you need to use cold welding. If the coating is new, type A adhesives are used; with an old coating, type C glue is used. Carefully lubricate the burn area with the product and wait until it melts.
- Through-burn. In this case, stickers on linoleum from burns or patches are used. They are fastened using cold welding in the same way.

Repairing large gaps
If it happens that the material is severely torn, cut, or drilled (for example, your hand trembles while assembling furniture), you will have to carry out more serious repairs. Sealing with mastic will not help when the holes are larger than 1 square meter. see. You will have to glue the damaged area with a patch. Step-by-step instructions are given below:
- Select a piece of flooring that matches the pattern. The pattern should match what was in the hole area. Before attaching, the patch is carefully measured, aligning it with the main fabric.
- Place the patch on top of the hole so that its edges are slightly larger size defect, attach with masking tape on all sides for reliable fixation.
- Use a sharp knife to cut through both layers of material; it is advisable to do this in the shape of a square or rectangle.
- Remove the tape, remove all trimmings, and remove the patch. The damaged and cut piece of linoleum can also be removed by tearing it off from the base.
- Apply cold welding to the cleaned surface and lay the patch. Iron it well so that there are no air bubbles left. You need to glue the patch, finally aligning the pattern.
- Roll the set piece with a roller, then remove the remaining glue with a damp cloth.

Do not walk on this flooring area for 24 hours. Then it will be ready for use. What if a piece is partially torn out, but retains its adhesion to the main fabric? In this case, repairs are easier to carry out. It is necessary to straighten the flap (iron it through the fabric), clean it from dirt, and apply a layer of glue to the base. Next, glue the flap using cold welding in the same way. You can also use gluing liquid nails, bustylate, special glue for PVC linoleum.
Restoration of joining seams
It happens that the seams between layers of material diverge. If such a joint is located in the area of a door, against a wall or under furniture, it can be easily closed decorative strip(threshold). Sometimes this is not possible - for example, when the seam runs in the center of the room.
Sealing of seams is possible using hot and cold welding. Hot way can only be carried out by professionals; its implementation requires special equipment and skills. A special PVC cord is heated and applied to the joint. Even beginners use cold welding at home:
- pull one strip of material as far as possible so that it overlaps (at least 2 mm);
- attach a metal ruler or bar, draw a line with a pencil;
- make a cut along the strip;
- fill the seam with glue using a thin tip or syringe;
- After the cold weld has hardened, cut off the remaining glue.

Removing waves and swelling
Swelling of linoleum always means a violation of its laying technology. The easiest way to get rid of waves along the edges of the material is to remove the baseboard, move the layer, reducing the gap between the wall and the flooring. The coating can also be trimmed from the appropriate side to required size. The material should be left without fastening for 2 days, and after straightening it, fasten it again with the plinth.
If you find swelling in other places, you will have to pierce the bubble. They do this with a needle, then release the air and smooth it with their hand. The hole must be filled with linoleum glue through a syringe, and press the area with a weight. If the bubbles have large size, you have to cut through the material with a blade, remove its excess, and then seal the seam with cold welding. It is better to immediately devote time to the quality of laying linoleum, so as not to carry out renovation work. If such a need arises, problems can be solved quickly and inexpensively.
When the old floor covering wears out, replacing it is necessary to give the room an attractive appearance. Linoleum is often used as a floor covering, as it is the most practical, beautiful and abrasion-resistant material. During the installation process, the problem arises of how to glue the linoleum so that the joints are completely sealed and invisible. Regular glue will not work for these purposes.
How and with what to glue linoleum joints
There are several ways to glue linoleum end-to-end at home. Each of them has its own disadvantages and advantages; which one to choose depends on your financial capabilities and the type of linoleum.
Ways to seal joints:
- masking tape (adhesive tape);
- welding (cold or hot);
- thresholds;
- soldering iron
To glue with tape or masking tape, align the joints, apply double-sided tape to the floor underneath and peel off the protective layer. Connect the edges of the linoleum and glue.

Advice! The connection of the joints must be very precise.
The disadvantage of this method is that when water gets between the joints, they separate, so such gluing is unreliable.
Advantages:
- cheap;
- easily.
Cold welding
The use of cold welding is one of the simplest and most reliable ways to join the edges of linoleum.
You will need:
- colorless glue for welding (can be bought in tubes, inexpensive);
- stationery knife;
- masking tape.

When gluing, the type of linoleum is decisive. Based on this, glue is selected:
- “A” is liquid and is an ideal option for joining the joints of hard linoleum, fresh polyvinyl chloride flooring; the consistency allows you to remove the smallest cracks.
- “C” - glues joints with a maximum thickness of 5 mm, forms a special layer on the surface of the seam, securely fastens the canvases and fills even wide cracks.
- “T” - used for gluing linoleum on a thick felt base, forms an elastic transparent seam, and is used more often by professionals.
Adjust the covering sheets as accurately as possible, the seam should be perfectly even. If necessary, trim and straighten the edges.
Advice! Bonding will be better if before the procedure the linoleum lies on the floor for a while and straightens out well.

Apply masking tape to the front and back surfaces of the linoleum. This allows you to protect the coating from contamination by the adhesive composition and marks the place of gluing. Connect the joints and fill the seam with glue along the entire length - after spreading, a thin strip should remain.
Important! Avoid getting the adhesive on the front surface of the floor covering, as it is impossible to remove the stains that appear.
Leave the glue to dry for 10 minutes, then remove the masking tape. The adhesive composition will dry completely after 2 hours.
Disadvantages: not suitable for linoleum with insulation or a soft base, since precise joining of such material cannot be achieved, the seams are noticeable and look ugly.
Advantages:
- you get invisible seams that can even be made curly;
- anyone can master the cold welding method; it’s not difficult at all;
- relatively inexpensive method.
If the procedure is carried out correctly, the seam will not be noticeable.
Another way to glue linoleum together is hot welding. The method is used in most cases for bonding joints of commercial flooring. This is explained by the fact that it is problematic to reliably connect the edges of such thick multi-component linoleum.

You will need:
- a construction hair dryer with a special nozzle that allows you to heat the desired areas;
- hand cutters or a special milling machine (for cutting grooves);
- cords that are the same color as the floor covering;
- a special knife for removing excess protruding cord material.
Advice! The hair dryer must be quite powerful, since the canvas must be heated to 500-600 ° C. Good equipment is equipped with a special sensor, and the heating temperature can be adjusted based on what material is being bonded.
Before you start welding the joints, you need to glue the linoleum itself to the base with PVA glue, which will ensure the immobility of the canvases. Heat the coating sheets with a hairdryer - the joints become airtight when the polymer compounds harden.

Advantages:
- the result is seams with ideal density that are difficult to damage mechanically or chemically, using detergents;
- Such joints look very aesthetically pleasing.
Flaws:
- very rarely used at home, as they are necessary special tools and materials;
- ordinary household linoleum can be damaged by exposure high temperature construction hair dryer;
- Experience with tools and materials is required.
Advice! It is better to entrust hot welding to professionals.
Glue gun
A similar tool can be bought in a store. Glue gun connects to electrical network, which ensures heating of the adhesive composition.
Cut the edges of the linoleum to the base, clean from dust, dirt and material residues. Then fill the gun with adhesive. Plug the tool into a power outlet and fill the joints with heated glue. While the glue has not cooled down, its excess can be removed; after it has completely hardened, this will be very difficult to do.
Types of glue:
- “A” - suitable for sealing seams on all types of coatings;
- “B” - used to restore old linoleum, as it perfectly joins the recesses and levels the surface;
- “C” - connects polyester materials, used, in most cases, by professionals.

Thresholds
Metal thresholds are usually used to make the joint between two materials of different structure more aesthetically pleasing. For example, laminate and linoleum.
Advice! In order to qualitatively join two floor coverings of different thicknesses using a threshold, it is necessary to install them at the same level. To do this, place a backing or ordinary plywood under the one below, then attach the threshold.

If it is not possible to set two different coatings to the same level, then you can use special thresholds designed for such cases. They can be plastic, metal or wood.
Advantages:
- inexpensive;
- Easy to install, no professional knowledge required.
Flaws:
- the threshold will protrude;
- It is impossible to connect two canvases several meters long.
Most often, the method is used to connect linoleum sheets in a doorway.

This method of gluing joints is considered outdated, but some still use it to connect small pieces of linoleum. It is advisable to use a soldering iron if the room area is small and there are few joints on the floor covering and they are almost invisible.
The essence of using a soldering iron is that it heats the edges of the linoleum, as a result of which they melt and join together. After hardening, the resulting seam is trimmed, if necessary. The joint location may differ from the rest of the coating texture. To smooth the surface, run a rubber roller along the still soft seam. Press down on the joint.

Advantages:
- simplicity of the method;
- availability.
Flaws:
- the joints are not very beautiful;
- the seams are fragile, so in places where people often walk, it is not recommended to connect the joints in this way;
- not all modern varieties linoleum can melt under the action of a soldering iron.
A soldering iron designed specifically for linoleum may differ in size and design.

How to glue linoleum end-to-end at home and make the seams flawless? The following recommendations will help:
- When cold welding, the needle should deliver the compound as deep as possible into the seam.
- The adhesive composition used for cold welding is very aggressive, for this reason you should work with it extremely carefully.
- The adhesive layer should be applied evenly along the entire length of the seam. It should be no higher than 4 mm.
- It is not recommended to rush to remove excess adhesive. Wait until it is completely dry to avoid the adhesive peeling off from the edges of the linoleum.
- Fresh cold welding is elastic and can spring back; if it is stretched and the excess is removed, a depression will remain.
- Carry out work wearing rubber gloves.
- Be sure to secure the linoleum by gluing it to the base before connecting the joints if the room area is more than 20 square meters. m.
- Before and after gluing, clean the surfaces from dirt and dust, since only clean and dry joints can be properly joined.
- Protect the surface of the linoleum by sticking masking tape (scotch tape) on it, as adhesives act as solvents and can ruin the floor covering.

The edges of linoleum, connected by welding, look much better than joints glued together with ordinary double-sided tape.
The best option for combining two flooring sheets at home would be, since it does not require special skills, and also professional equipment, tools and materials. It is important to choose the most suitable adhesive composition based on the surface material.
Hot welding should not be used at home. For high-quality connection of joints you will need lore and experience with equipment and materials.
Cold and hot welding will perfectly connect the two canvases. An almost invisible seam is formed that is resistant to mechanical damage, moisture and household chemicals which is used for cleaning the floor.


