Whatever technological innovations and design solutions neither offered us modern manufacturers furniture, shelving for many years have been one of the most best solutions For . Moreover, we are talking not only about convenience, but also about the aesthetic component, because they can fit into the interior of any apartment, house or even garage. If you want to create an unusual and practical stand for flowers or books with your own hands, then you don’t have to have any carpentry skills. Enough to cook necessary materials, and also be patient.
Experienced furniture makers know firsthand that, in fact, any cabinet is a shelving unit with a back wall and doors. Therefore, having mastered simple technology Assembling flower racks, you can easily make a full-fledged cabinet of any size.
How to determine dimensions
To create a flower rack, chipboard, MDF or plywood up to 20 mm thick are most often used. The boards that were used for... are also quite suitable. By the way, natural wooden boards will be much better compared to plywood or chipboard.

The width of the shelves must be selected based on what you plan to store on them. So, shelves 250–300 mm wide are quite suitable for books or flowers. But for car tires or, for example, tools, the width should be larger - up to 700 mm.
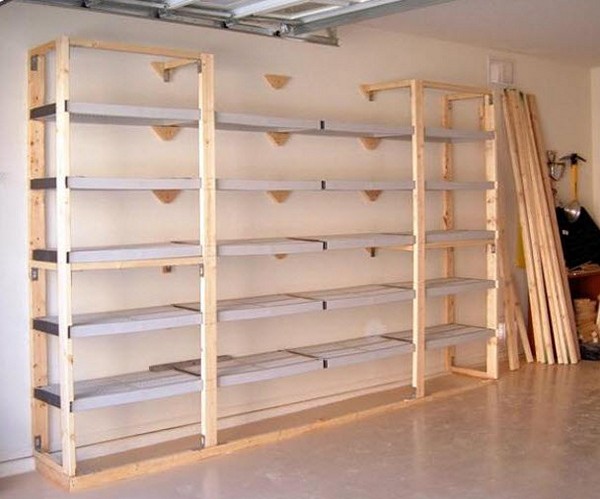
As for the length of future shelves, the choice here also depends on what you plan to store on them. For light items (for example, souvenirs or soft toys) a wooden shelf up to 1500 mm long is suitable. But to store volumes of books, you will have to reduce the length of the shelf to 80 cm. Otherwise, the shelf may bend under the weight of things. If you plan to place the future shelving in the garage to accommodate heavy objects, then it is better to strengthen the shelves metal corners or other amplifiers.
The size of the future rack, as well as the expected load on the shelves, determines the set of necessary fasteners. Thus, self-tapping screws for concrete up to 90 mm long are suitable for light structures. For brickwork It is best to use dowels with self-tapping screws up to 52 mm long. But for large and heavy shelving in the garage, it is necessary to additionally strengthen the structure with anchors or hooks.

How to make a rack with your own hands
- Screwdriver (ideally a screwdriver);
- Dowels, self-tapping screws (length depends on the type of wall);
- The shelves themselves ( suitable material described above, we will give an example of creating a wooden rack with shelves measuring 19x305x183 mm);
- Support beam measuring 38x89x390 mm;
- Slats 19x38x1830 mm in the amount of 10 pieces - necessary for creating crossbars and slats;
- Rails 19x38x203 mm - necessary for creating racks.

Rack with shelves
Creating a rack with your own hands begins with the installation of planks, to which fasteners will be made. It starts with markings on the wall. You need to draw five horizontal lines 183 cm long on the wall. The lowest one should be at a height of 39 cm from the floor level. The distance between the others should be 41 cm. This will be a sketch of the location of future shelves for flowers.

If your garage or room is made of plasterboard, then you need to determine the location of the main profile in order to attach the entire structure to it. Use a special search engine or a simple magnet for this. Then mark the wall where the profile will intersect with the shelves.

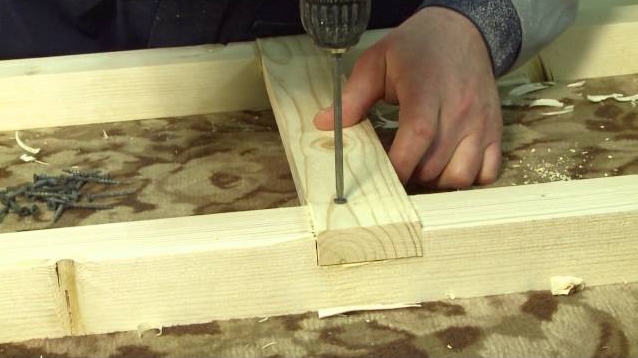
Now cut the slats and crossbars to the required size. There will be five of them in total. Now each plank must be secured in the place where you have already placed a mark (they are mounted on a drywall profile). To secure the crossbars in the places where the slats pass, drill holes and secure the structure with self-tapping screws.

When the installation of the “skeleton” of the rack is completed, proceed to assembling the shelves. First, cut out three posts and prepare a support beam (you can remove it later). Now you need to calculate the length of the slats that will connect the edge of the shelf to the wall. This can be done using the formula a2 = b2 + c2, where a is the length of the crossbar itself, b and c are the height and width of the shelf itself. If you plan to make a rack of the same dimensions as in our example, then the rail will be 511 mm in length.

Secure the resulting rail in the place where the crossbar and the stand intersect. Use self-tapping screws for this. To increase the strength of the structure, professionals recommend additionally treating all parts with glue.
Now all that remains is to secure the shelf. For this you will also need screws and glue. Please note that when using boards, it is recommended to drill holes of a smaller diameter than self-tapping screws. This will allow you to avoid splitting the material or deforming it. Repeat the procedure for everyone and your design will be ready.

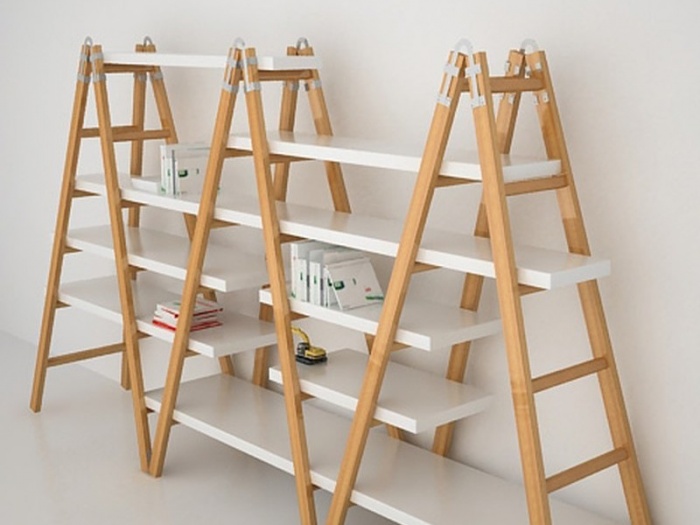
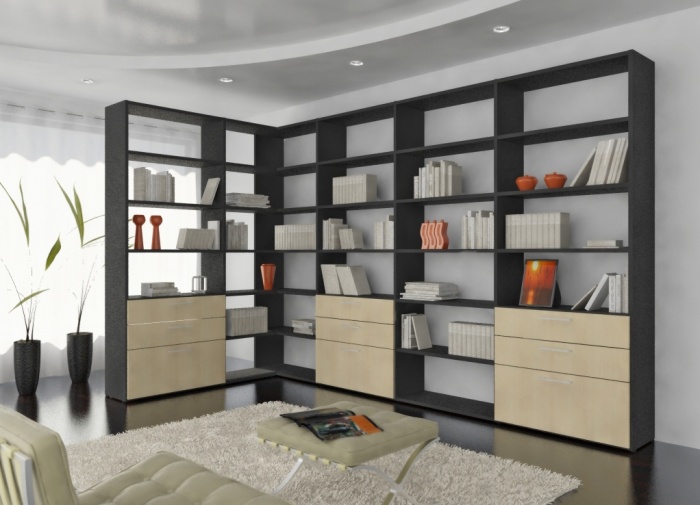
There are other types of racks. For example, a rack with side walls. Such designs resemble bookcases. They differ from ordinary racks in their greater strength and the ability to store heavier items. Also, designers often use such pieces of furniture to separate zones or in large rooms.

For a rack made of wood, you will have to additionally prepare a roller or brush, a sander and a spatula - this is necessary for additional painting work.
The shelving unit with side walls is attached to a base (use boards up to 50 mm thick), which also needs to be attached to the wall. Since the walls in our houses are not always even, measurements should be taken at the bottom, top, and also in the middle of the wall.

After installing the base, begin assembling the rack. To do this, prepare the side walls, install shelves in them, and then mount the structure on the base. As a result, you will end up with a cabinet without doors.
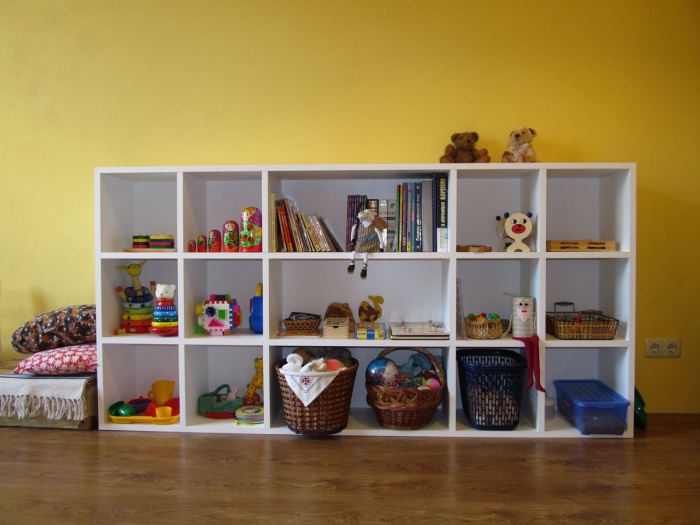
Regular cantilever shelving is suitable for a garage, kitchen or pantry as it provides open access to the items stored there. with side walls will be an excellent solution for a living room or children's room. You can store books, souvenirs, toys or boxes of small items in it.

As you can see, making a rack with your own hands is not so difficult. It is enough to prepare all the necessary materials. If you already have experience creating such structures, please share your comments under this article.
In apartments small size I want to use the space in the most functional way; some layouts imply the presence of ledges and niches. You can fill the resulting space using shelving. The design of the shelf frame itself is not that complicated, so it is easy to find instructions in response to a request on how to make a rack with your own hands.
All you need to assemble the structure are materials, tools and some free time. Photos of DIY shelving will help you decide on the dimensions and options of the shelving, and it will not necessarily be a banal set of boards.

Where to start
Of course, the size of the shelving depends on the available space, but if you are not limited by the existing walls, it is better to build a structure of a certain size. The boards used should be no thinner than 20 millimeters; the width of the shelf depends on what will be stored on it.

For books or flower pots A width of 30 centimeters is quite sufficient; the length of the shelf should not exceed one meter. If the length is longer, the shelf will simply sag under the load, and such a product will not have longevity.

If the rack is needed to store tools, tires or something else, the width of the shelf should increase. In addition to the width of the shelf, the need to determine the intended purpose of the structure is necessary to calculate the load on the fastenings.

Lightweight structures are secured using conventional self-tapping screws, but heavier structures require the use of anchors and hooks.

Rack location
Most usual place Location: near the wall or under the stairs. Usually these places are used for the functional placement of structures. The rack can be up to the ceiling; in this case, access to the shelves is provided by pull-out steps in the form of lower shelves.


No one has canceled the outside help of a stool if you are doing a hanging or ceiling structure rack, be guided by the available stepladders, otherwise you will not be able to fully use your creation.

The corner location of the shelving is no less convenient; this location makes the space that usually remains empty work.

Rack made of metal profile
To assemble this option, it is better to use welding; otherwise, you will have to resort to using an electric drill. To collect you will need
- electric drill
- chipboard slabs or boards with a thickness of at least thirty millimeters
- profile pipes with a cross-section of twenty-five millimeters
- corners 40 millimeters

Using a drill and pipes, you need to make frames; they need to be leveled using a level. If the thickness of the shelves is sufficient, there is no need to further strengthen the base, but when the load is very large, it is still worth strengthening the base of the shelves with an additional angle of rigidity, simply install the profile fragment in an angular direction.


Wooden rack
The material used is chipboard, boards or slats. If the material is not further processed, it will be useful grinder, roller and brush. Take the necessary measurements at three levels - bottom, top and middle; the walls in houses are not always even, this way you can avoid mismatches.

After taking the measurements, make a drawing; shelving drawings do not require any special skills, just with their presence you will not be mistaken with the dimensions. Prepare the parts according to the required dimensions - base, side walls, shelves.


For the base, you should choose a thick board, and then move on to the side walls. So that the cost of the final design does not exceed family budget, the side walls can be made of plywood.

Mark chipboard sheets along the width of the base, length in accordance with the height of the rack. On the inside, mark future shelves in increments of one meter, and the corners will be strengthened with beams.

Now it’s worth taking care of the shelves if you will be storing large items, a full wooden shelf can be replaced with slats; the weight of the storage object in this case should not be very large. It is possible to increase the mass of the possible load due to the same sheets of plywood that are laid on top of the slats.

If a full-fledged board is used for a shelf, its thickness should be two and a half centimeters, the load on such a shelf does not have great restrictions.


The back wall is not required to be installed; it serves more of a decorative function. If appearance the walls are satisfied, there is no need to install the back wall. If there is still a need for installation, you can make a wall using a sheet of plywood.

All parts of the future rack are ready and you can proceed to assembly. Install the base to which you attach the side bars. If there is no back wall and the rack is attached to the wall, you can immediately install it to the wall.

Once the frame is assembled, begin installing the shelves. There are two options: either the shelves are attached with self-tapping screws to the side walls, or they are installed on holders. Can be used as holders wooden blocks cut to the width of the side wall.

The instructions on how to properly make a rack are very simple and accessible, as is the material from which it can be made.
Photos of DIY shelving


IN small apartments Very often the problem of lack of space to store certain items arises. If in a large living space it is possible to arrange a storage room or closet, then a small apartment excludes this possibility. The most simple solution will be the installation of a wooden rack.
But it will become useful not only in the apartment, but also on the balcony, where a lot of things are often stored, and in the garage, where car accessories and tools must be placed in their places so as not to waste time constantly searching for them. It is very interesting to fit in a shelving structure for zoning space, for example, in a studio apartment.
Despite the fact that even a beginner can make a shelving unit, there are still some nuances that, when observed, will help create a high-quality piece of furniture at a minimum cost.
Types of wooden shelving
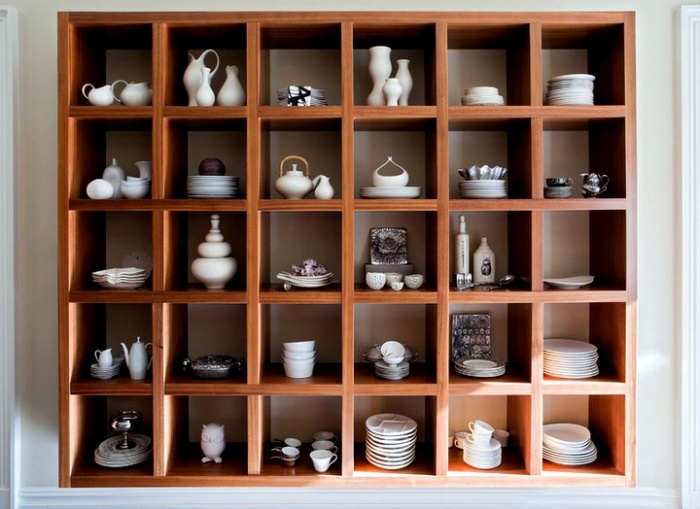
Wooden rack- this is a structure consisting of several shelves attached to support board. Their number depends only on the desires and capabilities of the owner. Prefabricated wooden shelving will fit perfectly into any interior and will help you store various items, such as books, dishes, souvenirs, etc.
The functionality of the rooms where this piece of furniture can be placed is very diverse.
It is very convenient to install shelving in the nursery, where, thanks to the presence free space and the openness of the shelves, the child will be able to place all his toys and get them out without the participation of adults.
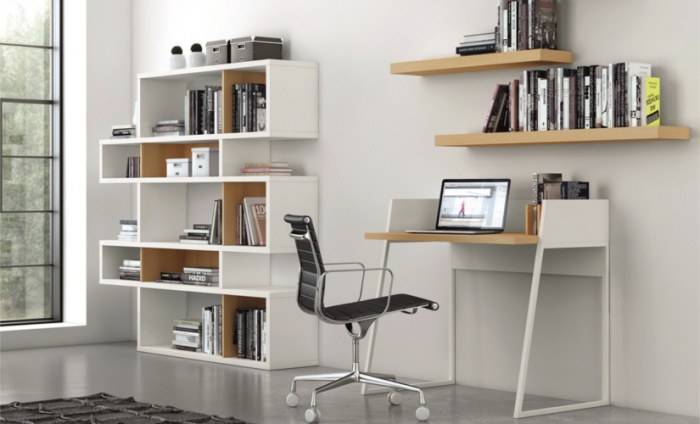
In the office, the structure will serve not only as a place for storing documents, but will also become a wonderful decorative element workplace.
For a kitchen, a shelving unit is a must. Dishes can be stored there, as well as neatly arranged containers with bulk products.

On the balcony, a wooden rack is used to place seedlings or indoor plants V warm time year. Everyone knows that plants generally need a little heating. Nowadays you can purchase special pieces of furniture with heated shelves, but self-made ones can also perform this function if each shelf is covered with foam plastic. This material accumulates heat and transfers it to plants.

Depending on the design, a suitable option can also be selected:
Original shelving
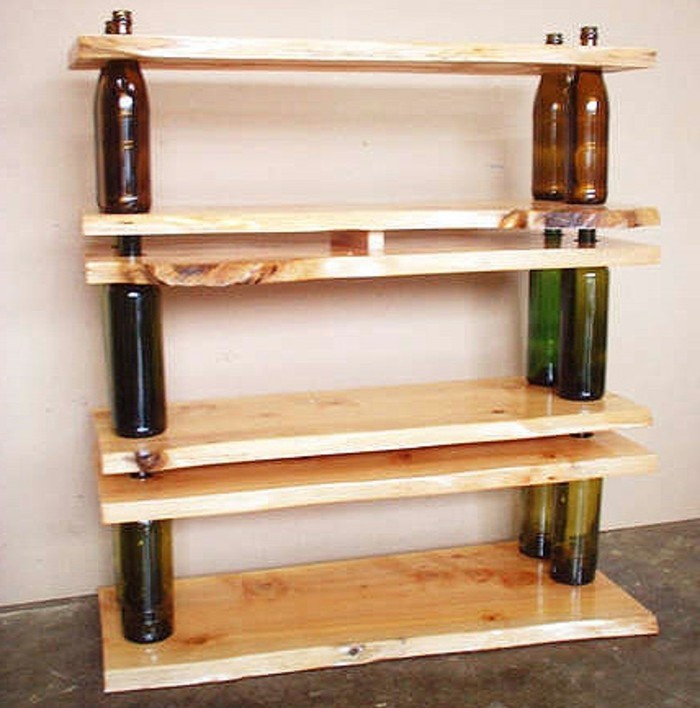
Such pieces of furniture should be given special attention, since they are created in accordance with individual project, which is suitable for a specific interior. Ordinary rough wooden structures with your own hands are suitable only for balconies or garages, but for decoration living space It's better to use something more original. For example, the rack with bottles in the form of racks shown in the photo will fit perfectly into the living room or kitchen. Despite its external instability, books and even collectible bottles of wine can be stored on it.
Interesting in the interior, especially nautical style Look like rope structures of wooden shelving for the home, which are attached to the wall using massive hooks. Of course, it’s unlikely that you’ll be able to store something heavy on such racks, but small souvenirs or photo frames are fine. This design is very simple to make; all you need is a thick rope and a few scraps of wood. Shelves can also be made from leftover laminate flooring.

For interior in modern style designs using metal are suitable. One of these is the design of a rack with many shelves in a chaotic order, which are interconnected metal tubes. Due to the fact that the metal elements create rigidity, the back wall can be dispensed with.
If you plan to create a shelving unit in a private house, then you can arrange it in the space under the stairs, as shown in the photo.

Making your own shelving
Making a wooden rack with your own hands is quite simple if you study all the nuances of the work in advance and thoroughly prepare for it.
Project development
Creating a Project future design- Very important stage, which must under no circumstances be missed. First of all, measurements are taken of the place where it is planned to place the rack. If the rack will not be intended for decorative purposes, but will be used only in accordance with the storage function, then it makes sense to carry it out in a simple form. To do this, measure the height of the wall near which the furniture will be located and calculate the indicator that suits the owner.
Important! In a garage, the shelving is best made to cover the entire height of the wall.
The parameters of the shelves for the design, both in length and width, deserve special attention. Long shelves of 1.5 meters are ideal for storing light items, for example, souvenirs and toys, but jars with blanks and books require shorter ones - about 90 cm, so that there is no sagging. As for the width, shelves with a width of 25 - 40 cm will be suitable for storing books and cans, as well as growing seedlings, and for tools or larger items, those that will correspond to their size are arranged.
In general, the dimensions of the shelves completely depend on what will be placed on the rack, so first you should estimate the approximate location of the items and add 10 - 15 cm to the calculated figures so that you can easily put and remove the item.
Necessary tools
Professionals advise for self-made For shelving structures, use only strong and solid wood. It could be pine, mahogany or oak. Materials made from pressed sawdust are not suitable for installation, as they are quite short-lived.
Important! The moisture content of wood for shelving should not exceed 12%.
The boards are impregnated in advance antiseptic impregnations and leave for several days for the solution to be absorbed.
In addition to boards, you will also need to make a rack:
- Metal corners
- Shelf holders
- Bars for stuffing them into the bottom of the shelf
- Furniture legs or wheels
- Self-tapping screws
- Wood glue
- Varnish or other paint material, which will be used for finishing
- Jigsaw and sander
- Hammer
- Drill with matching drill bit set
- Tape measure, level and pencil

Algorithm for making a wooden rack
To begin with, prepare all the parts necessary to assemble the rack.
Prefabricated wooden racks are manufactured starting from the bottom. For the bottom shelf, the thickest board should be selected, into which a 3 cm self-tapping screw can easily fit. The shelf parameters are selected depending on the project, which describes all the dimensions of the future structure. Also, if the length of the shelf is large, then it is better to mount transverse bars in its lower part to add rigidity.
The next step is the installation of the side walls. For them, not solid wood can be used, but thick plywood. They cut it out required sizes side walls, with their inside The location of future shelves is noted. It is worth remembering that the most commonly used height of the shelves in the design is 42 and 21 cm. These indicators can be alternated to get a neat and functional rack.
Cutting shelves from wood. Their size must correspond to the rack and be such that the owner can install and remove the shelf without restrictions.
Important! The thickness of the shelves should be at least 2.5 cm, but to give strength they can be equipped with transverse bars at the bottom.
The next step is optional and is performed only at the discretion of the master. If the wall against which the shelving structure will stand completely suits the owner, then the back wall need not be mounted to it. If it is customary to mount the back wall, then it is cut to the size of the plywood rack and nailed to it with small nails.
All the parts are prepared, now you can start assembling the entire structure:
- Screwed to the bottom shelf, which is the base, with self-tapping screws back wall. If it is not there, then you can immediately attach the side ones.
- But before installing the side walls, you need to install holders, which can be metal or plastic, in the places marked for the shelves.
- Afterwards, the side walls are attached to the base with self-tapping screws. If necessary, a metal corner can be used.
- Also, shelves can be supported not on special elements, but attached directly to the side walls. To do this, the shelf is held inside the rack by an assistant, and the second master screws in the screws with outside. To increase strength, the shelves can be supported by metal corners.
Advice! At all stages of rack assembly, it is mandatory to use building level, which will eliminate any distortions.
To create quality construction shelving there are several tips that are optional, but very desirable:
- The main structure of the rack can end top cover. This is very convenient due to the fact that the rack will become stronger, and top shelf no dust will get in.
- For additional strength, the holes are coated with wood glue after drilling.
- If you use wheels instead of regular legs, the rack can be moved. Also, installing these elements will help prevent the structure from distorting under heavy loads.
- If chipboard or MDF were used to make the rack, then their ends are treated with melamine film, which is easily glued with an iron. Such a strip is laid on the end treated with sandpaper and processed with a hot iron. Thus, the end will close and acquire an aesthetic appearance.
- For greater decorativeness, the rack can be supplemented with doors or other elements that will only decorate it.

Conclusion
A shelving unit for your apartment will be a very functional addition that can be used to display memorabilia or other items. It is possible to make this piece of furniture yourself, which will allow you to save money and get exactly the design that is needed. This is not difficult to do, just read this article, which contains detailed instructions on installation.
Owners of small apartments often wonder if it is possible to use the balcony as a storage area for necessary and not so necessary items?
Certainly. If you make convenient rack, suppose, for a balcony where you can store tools and other things unnecessary in the apartment. You can order wooden shelves for your balcony from specialists, or you can make a rack yourself. It won't be difficult and, of course, it will be cheaper.
Racks can be made:
- from metal profile And chipboards;
- wooden beam and plywood;
- boards and chipboard;
- beams, with plasterboard shelves;
- in other variations.
A do-it-yourself rack, if it is wooden, will require the purchase of pine boards, the width of which can be from 240 mm, and the thickness from 200 mm. They should be even, dry and smoothly planed. You will also need screws and metal corners to fasten the shelves.
PVA glue is useful for gluing wood. And when you paint the rack (if it is for a balcony), it will be more profitable to do the painting yourself. You will have to purchase PF-115 enamel for exterior use. But you can also buy stain and alkyd varnish.
What tools will you need?
- saw or jigsaw;
- screwdriver or screwdriver;
- square, tape measure, sandpaper;
- brush for painting.
 Self-tapping screws and screws for fastening
 As you can see: the material for wooden shelving will be inexpensive, and simple carpentry tool can be found in any home.
How will we do it?
Let's get acquainted with the wooden structure. As you can see, it consists of three standard elements installed one above the other. Thus, you can improvise and make a rack, preferably wooden, of any height and width.

The dimensions can be calculated by arbitrarily changing the dimensions of the shelf and the number of racks. We will connect them together with self-tapping screws and metal corners. For greater stability, we can additionally attach the shelves with corners to the wall of the balcony.

It is necessary to take into account that the length of the shelves should not exceed 80 cm so that the shelves do not sag. If you want to make the length longer, then insert reinforcing supports from boards in the middle of the rack, securing them at the top and bottom with self-tapping screws.
First, mark all the elements on the boards using a square. Carefully cut the boards to size and assemble them by gluing the PVA joints and screwing in the screws. Each structure should consist of a load-bearing shelf and two supports in the shape of the letter “L”. For strength, you need to strengthen the rack if it is wooden. It can be supplemented at the bottom with its own metal corners for strength.

Below are possible options making such racks on the balcony with your own hands.

We will need:
- pine planed timber 50 to 50;
- boards (any thickness, depending on the purpose of the shelves);
- screws, dowels, screwdriver, saw, hammer, jigsaw, tape measure, square, plumb line;
- paint, stain, varnish, brushes.
We measure the timber, saw off the wooden risers and crossbars with a jigsaw or saw. On the floor we assemble a frame with crossbars, like a ladder. We check them with a square. We fasten with self-tapping screws.

We drill holes in the balcony wall with a hammer drill. Insert the dowels. We place our “ladder” against the wall and screw the screws through the bars.
We install the same “ladder” No. 2 near the window, with the difference that the length of this structure should rest against the ceiling. We drill holes on the ceiling with a hammer drill and strengthen two parallel bars, to which the “ladder” will be attached.

We plumb the “ladder” and, holding it with our hands, screw it to the beams on the ceiling with self-tapping screws. On the resulting crossbars we nail the shelves from the boards.

We paint the resulting structures with paint or stain. If necessary, open with varnish.
Those who like durability will love metal shelving, which may only be suitable for a balcony. You can also design them and make a rack yourself. It will be a little more difficult than wooden ones, but it is quite possible. You can calculate how many pipes you will need yourself based on the size of your loggia.

For production you will need:
- metal pipes square section for racks 20 by 50 mm;
- corner for the shelf frame 15 by 25;
- welding machine, electrodes;
- pine board, 20 mm thick and 240 mm wide;
- wood saw, grinder, tape measure, level;
- PF-115 enamel – one can and a brush.
If you don’t have the device, or don’t know how to use it, then you can order separate parts from a welder to make a rack for the balcony. And with bolts it will be easy to assemble it at home with your own skillful hands.

Sequence of work
Mark with chalk all the elements on the profile and corner. We cut it with a grinder. Then we weld the side racks with the machine, checking them with a level so that our rack, which is intended for the balcony, does not warp. Then we weld a quadrangular frame from the corner for each shelf.

Then, on the side posts of the structure, we will make chalk marks for the shelves, using our hands to apply a level horizontally.
We weld the frame of the shelves. After this, we cut the boards to the size of the shelves. It is better to lay the boards crosswise, this will be better for the strength of the shelves. Then we drill holes around the perimeter of the frame and fasten the boards with self-tapping screws.

At the end, with our skillful hands, we paint the rack that we have for the balcony with PF enamel and leave it until dry.
I repeat that the racks can be made by specialists, but assembled by hand at home, using bolts. This will be easier and will save your budget a little.
Now, after getting acquainted with the process of making shelving, we know that making them on our own is not at all difficult.
All photos from the article
Sooner or later, many owners of garages, workshops, sheds and basements make straight and corner shelving made of wood with their own hands. And this is not surprising, since such shelves are great solution, which allows you to place tools, various things, winter supplies, crops and other supplies in the required order.
Of course, you can purchase ready-made bookcases or order their production from special organizations, but the price is independent assembled structures will be an order of magnitude lower. Moreover, homemade shelving can be adapted to the characteristics of the room in which they will be placed.

So, let’s try to assemble a garage rack from wood with our own hands, but before that we will decide on the choice of lumber that is advisable to use during assembly.
Selection of materials

The basis of any rack, regardless of where it will be located, are shelves. It is on them that the payload that is usually stored in various utility rooms will be placed.
Shelves are subject to requirements such as fracture strength, resistance to excess humidity And low temperatures, characteristic of utility rooms in the cold season. On the other hand, shelves intended for use in residential premises must also be beautiful.
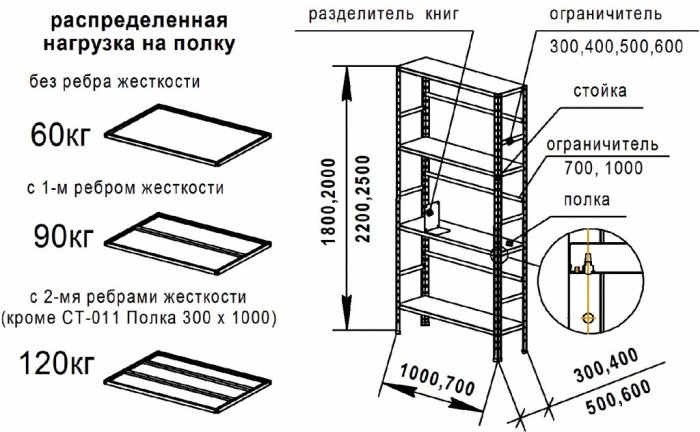
That's why the best material To make full-wall bookcases, use an edged board. Characteristics edged boards are presented in the following table.
| Type of wood used in production |
|
| with GOST 8486-86 and application |
|
| Humidity of edged boards |
|
| Standard sizes |
|
To make a rack, you should use dry boards with the maximum width that is commercially available and with a thickness of at least 3 cm.
Advice: It is better to purchase unsanded lumber, since their price is much more affordable than the cost of prepared lumber.
You can sand and properly process the wood yourself.
So, we have decided on the choice of lumber, all that remains is to select suitable drawings of the rack with your own hands and use them to make the necessary structure from wood.
Shelving projects that you can assemble yourself

In this article we will look at the features of assembling several types of bookcases, namely:
- modifications with metal sides(relevant for garages and basements, where increased structural strength is important);
- modifications with wooden sides(can be used both in utility and residential premises;
- modifications, where the function supporting structure perform metal brackets, fixed on the wall.
The drawings proposed in the article show design features structures indicating the main standard sizes. Let's take a closer look at how to make shelves for storing various things using these schemes.


, Islam, Judaism How do temples of different religions differ")


