We all love to be surrounded by beautiful things at home. However, as the years go by, the interior begins to go out of fashion. Very often it is impossible to say goodbye to your favorite objects, because so many happy moments happened with them! And sometimes there is simply no money to buy new furniture. The way out of this situation is very simple - you can update coffee table IR with your own hands. This way, money will be saved, and the interior will become more modern. In addition, many people like restoring things. Some interesting ideas you will find in this article.
Removing old coating
Before you start restoring the table, you need to remove the old varnish.
Important! You can use a sander, but be careful, otherwise damage may occur. wooden surface.
Restoring a coffee table with your own hands begins with preparing the necessary tools:
- Grinders or cycles;
- Sandpaper;
- Wood putties;
- Spatula.
Special solvents can be used. It is very important to calculate the thickness of the layer, because the varnish must dissolve without damaging the wood.
Important! If solvent absorption occurs into the stage surface, there may be a problem between the materials during future processing. As a result, the coating may swell, peel or crack.
If the old varnish has not been removed, but cracks and abrasions appear on it, we get rid of them using sandpaper:
- Moisten medium-grain paper.
- We wrap the paper around the block.
- We process the surface.
Important! If the sandpaper is clogged with dust, you can simply wash it and continue working.
After removing the varnish, the surface is sanded with fine-grained sandpaper. Then, using putty, cracks and scratches are eliminated:
- Using a spatula, putty is applied and leveled.
- After the putty has dried, it is leveled using fine sandpaper.
Important! In case of further processing of the table using stain, putty is purchased to match the color of the wood.
Decorating a table with wallpaper
So, how to restore a coffee table with your own hands? First of all, you should acquire the following materials:
- Vinyl wallpaper;
- Glue;
- Transparent acrylic varnish or special silicone sealant;
- Scissors;
- Decorative nails;
- Hammer;
- Roulette;
- With a simple pencil;
- With a ruler.
Important! Before updating the table, you should make sure that the table top is clean and dry and free of grease.
So, how to restore an old coffee table with your own hands? To do this, follow the instructions:
- We measure and cut required quantity wallpaper They should be enough to cover the length of the tabletop and bend downwards.
- Use your finger to press the edge of the wallpaper along the tabletop - this will make it easier to glue.
- Apply glue to the countertop on all sides.
- We start wallpapering from the corner, gently press it and smooth it with our hands in order to remove air bubbles.
- Using a dry cloth, smooth the wallpaper.
- For normal gluing of the edges and turns, we apply glue to them. When it dries a little, the wallpaper is pressed tightly and smoothed.
Important! When using spray adhesive, newspaper and masking tape are used to protect the rest of the surface.
- We apply two or three layers of a special transparent sealant or transparent acrylic varnish. Thanks to this, scratches and damage will not appear on the wallpaper.
- We hammer in beautiful nails for the aesthetic appearance of the product.
Decorating a table with mosaics
If you're looking for a way to update your coffee table, consider decorating with mosaics. This will require preparation. the following materials and tools:
- Spray paints;
- Sandpaper;
- Mesh mosaic tiles;
- Glue;
- Grout;
- Brushes;
- Spatula;
- Scissors.
- Apply paint to the table and let it dry.
- Apply glue to the place where the tile pattern will be glued.
- Apply the tiles, press and let dry.
- We treat the space between the tiles using grout, the excess of which is then washed off.
As a result of these simple steps, you will become the owner of an original and practical table.
Decorating a table using decoupage technique
Typically, furniture that is to be decorated using the decoupage technique requires preliminary painting. The most commonly used colors are white, light blue and light green. To do this, use acrylic paint, which is applied in two or three layers. Then varnish is applied to the surface, and then it needs to be processed using fine sandpaper.
- Set for decoupage or disposable napkins with drawings;
- Polyethylene;
- Wide paint brush with dense bristles;
- Strong tea;
- Varnish.
Important! To ensure that the edges of the napkins do not stand out too much on the tabletop, they should not be cut, but torn off. Moreover, you need to try to make sure that the edge is uneven.
In addition, if you use napkins, the surface may turn out too white. Therefore, the napkins need to be dipped into the tea for a couple of seconds. In addition, you can choose other colors for painting, for which you use a solution of watercolor paints.
Old-made furniture should not be scrapped if it is damaged or has minor defects. It would be better to undergo restoration, which will allow it to serve for a very long time. for many years. Let's look at how to restore an old table at home without high costs and effort. Naturally, the types restoration work will depend on the original quality of the product, its design and your designer's imagination, therefore it is impossible to foresee absolutely all the details of future activities. Therefore, we will limit ourselves to a description of the most common restoration techniques.
To cover the table you will need a solvent-based enamel of two different colors and clear varnish.
Required materials and tools
To hold everyone necessary procedures you may need:
- sandpaper of different types;
- paint brushes;
- furniture varnish;
- polish or furniture mastic;
- stain or stain;
- impregnation for wood;
- felt;
- wood putty;
- rubber spatula;
- wood glue;
- jigsaw;
- veneer.
It should be recalled that restoration implies bringing the product to a condition as close as possible to the original version. This is where it comes from main principle restoration, prohibiting changes in design and color scheme products.

Before starting restoration work old table has to be disassembled (although many restorers do not resort to such an operation, citing the fact that reassembly will lead to a violation of the integrity of the table and will certainly harm its strength). Each part must be cleaned of the old coating (veneered products are cleaned only from varnish application). Cleaning is carried out using normal sandpaper circular movements along the surface of the part. Rough processing is done with paper with a coarse abrasive. Fine cleaning is done with a “zero” (paper with the finest abrasive layer). Next, you need to thoroughly clean all elements of the table from wood dust and thoroughly ventilate the room. This measure is necessary because the dust settles gradually and during further actions may fall on the varnish that has not yet hardened, which is extremely undesirable. Restoration does not tolerate a superficial attitude to work, so the little things cannot be neglected.
Return to contents
You might be interested in: How to make a folding table?
Preliminary work, primary impregnation
The prepared parts must be soaked special solution, which will significantly extend the service life of the entire product and protect it from wood pests and fungal diseases. The impregnation should dry in a darkened and well-ventilated area for at least 24 hours.

Impregnation will protect the surface wooden table from rotting and various types mold.
After this, the parts undergo a thorough visual inspection to identify damage to the wood or veneer. Cracks up to 3 mm are sealed with a special putty. If damage is found large sizes they need to be sealed with veneer. To do this, apply a thin layer of any watercolor paint around the damage and place a sheet of paper on top. That part of the sheet that remains unpainted will be the ideal stencil for the “patch.” It will have to be glued to a sheet of veneer and cut along the resulting contour using a jigsaw.
We carry out a control measurement to determine the compatibility of the resulting veneer part and the location of the damage. If they match, then you can start gluing the part using wood glue. It is better not to use modern adhesives, as this will ruin the effect of real antiquity. We remind you that the parts should be pressed tightly against each other and left in this position for gluing for 10-12 hours. After gluing, you will have to sand the joints of the parts with the same fine sandpaper. Using the method described above, you can even restore a table that has veneer inlay on the surface.
We will assume that small cosmetic repairs All details have been completed, but the restoration is not yet complete. The table must be assembled into its original state and the strength of its position on a horizontal surface must be checked. For this we use the old grandfather’s method: threads are pulled onto the opposite legs of an inverted table. For the stability of the table, it is necessary that these threads touch each other (but do not have deflections at the points of contact!).

The varnish should be applied only after the previous layer has completely dried.
By aligning the table legs into one plane, you can continue to restore the product. Restoring an old table involves varnishing it. But first you need to cover all the parts and the entire surface with stain.
You might be interested in: Connecting a gas stove
You will have to tinker with the choice of color, as to achieve original color I want it, but the range coloring pigments not wide enough to satisfy the desires of all consumers. There is an opinion that you should first experiment with different shades on any wooden surface. Through trial and error, you can achieve a color close to the desired one, although it will take a lot of time. For this reason, restoring an old table is a lengthy process.
If you have an old one dining table, which is dear to you as a memory, or you just want to save wisely on buying new furniture, then you have to interesting work as a restorer or decorator.
Keep in mind that restoring a kitchen table with your own hands is not the easiest thing and, in some cases, not justified, because not every table can be repaired, and it is better to entrust antiques to professionals. But more often than not, the right “upgrade” can bring your old friend back to life and transform him beyond recognition.
In what ways can you update your table?
To update kitchen table with your own hands, you can use one of the following proven technologies:
- Traditional painting – we will look at this method in detail in a step-by-step master class.
- An interesting way to decorate and paint furniture is to paint through tulle - the tabletop is painted through it, and a lace pattern is formed using the principle of a stencil.
- Ceramic tiles will allow you to decorate a dilapidated, badly damaged tabletop and make it more practical - you can put hot items on such a surface and wash it in any way.
- You can update an old table using the decoupage technique. We will also talk about it in more detail.
- An easy way to modify a table with your own hands quickly and on a budget is to cover it with self-adhesive film.
- Burning will renew an undamaged wooden surface.
Master class – 6 steps on the path to a new life
In this tutorial on how to easily restore a dining table with your own hands, we will update, repair and repaint an old veneer table with a moderate number of defects.
So, to update your kitchen table you will need:
- a sander or sandpaper of coarse, medium and fine grain, as well as glasses, a respirator and gloves;
- alkyd enamel paint desired color(or other desired finish, such as stain), and a flat, non-fading paint or art brush;
- wood primer and a small roller/brush for priming;
- wax paste or varnish.
Step 1. Inspect and repair parts
We carefully inspect all fasteners in the structure and defects of the tabletop - how much the veneer has delaminated or the wood has been damaged.
If the table is a little loose, you just need to tighten all the screws. If it requires a more serious restoration, then you need to completely disassemble the table, re-fasten all the parts, or clean and sand all the grooves and joints so that the new glue adheres better, fix the glued parts with clamps or self-tapping screws, and then remove them after 15 hours. when the glue is completely dry.
- Sometimes the base needs to be replaced, not only because its parts are very worn out, but also because the legs can completely transform your old table. For example, if previously the legs were simple, now you can replace them with beautiful carved balusters.
- When disassembling furniture, do not forget to mark the installation location of each of the parts, this way you will not get confused and will complete the task faster.
Step 2. Remove the old coating
Now put on safety glasses and prepare 2 types of sandpaper: coarse-grained for initial processing and fine-grained for smoothness. Get ready for long and labor-intensive work - removing old paint or varnish is not a simple matter.
Step 3. Repair cracks and chips
After sanding, thoroughly clean the table from dust, inspect the tabletop and look for defects. Keep in mind that even the smallest damage will be visible after painting. All chips and cracks must be locally repaired with wood putty or polyester putty, and then the entire surface must be sanded again when the “patches” have dried.
Note: covering the table with stain:
- if the countertop is not severely damaged, then you don’t have to hide natural beauty wood and cover it with stain, and then varnish, shellac or wax. The photo below is an example of a restored table with a stained top in the color “Bleached Oak”.
Step 4: Prime and sand again
We continue to work. Now we need to not only clean the table, but also degrease it. And after the table has dried, we proceed with the primer. This stage is required, because without it paint coating It will lie unevenly and quickly get damaged. You can use an alkyd or shellac wood primer. In this master class we used a universal alkyd primer Zinsser Cover Stain (pictured below), which dries in just 1 hour, protects the wood well and prepares it for painting. It costs about 500-600 rubles, but is not sold everywhere. The table can be primed in 1-2 layers using a small sponge roller, and each layer must dry completely.
Once the primer has dried (1 day), sand the countertop again with a medium-grit sandpaper or sponge to smooth the primed surface and prepare it for painting. And don't forget to put your respirator back on!
Step 5. Now let's start painting.

It is very important to choose the right paint and its color. Avoid cheap paints, this is a dining table, which means the table top should hold up well frequent washing, rubbing, hitting, etc. IN in this case premium enamel alkyd paint is used on water based with a satin finish, but you can choose a more environmentally friendly enamel at acrylic base. Also, be careful to choose a high-quality brush so that it does not fade in the process. Not a paint brush, but a large flat art brush is perfect.
The paint must be applied in 2 thin layers, while finishing layer It is better to leave it to dry for 3-4 days.
- If you have chosen dark color paint, it is better to apply it in 3 thin layers;
- To create scuffs in the shabby chic style, the paint can be sanded in some places, for example, on the ends of the table;
- Also, to create an antique effect, the table can be patinated.
Step 6. Apply a protective coating
As we already said, you can protect the surface of the table with a varnish, for example, a matte water-based polyurethane (the photo on the left is an excellent varnish from Varathane). It should be applied evenly in 2-3 thin layers, lightly sanding each layer before applying the next layer of varnish. Of course, all layers must be completely dry (4 hours) before sanding.
The second option is protection with wax, which will make the countertop matte and can be rubbed to shine. To do this, rub the wax gently into the wood with a cotton cloth, then allow the first layer to dry for at least 1 hour. After this, polish the surface in a circular motion, and repeat the procedure 2 more times within one day. Well, now be patient and leave the table for 1 week so that the surface acquires the necessary performance properties.
Well, that's all - the restoration is complete, and the old table has been restored new life in fashionable white color.
And here's another interesting video from the program “Cheap and Cheap” on the topic of restoring countertops at home using improvised means.
Updating the tabletop using decoupage
If you don’t want to stop there or your table does not have serious damage, but just needs a little updating, then you can decorate the table with drawings: paint it with acrylic paints by hand, use stencils and stamps, or update the table using decoupage. Perhaps, we will consider this decorative technique, which is popular today, in more detail, because decoupage will not only allow you to quickly and inexpensively transform a table or, for example, stylize it as Shabby chic (as in the photo below), but also hide some defects of a dilapidated surface.
Many people have it stored at home or somewhere in the country. old furniture. And most often these are not expensive antiques from tsarist times, but the most ordinary cabinets, chests of drawers, tables and chairs. At first glance, it may seem that most of these things are high time to throw away, but take a closer look - often these are high-quality products made of solid wood or maybe even forged metal, which will last for many more years if they are beautifully restored. In this article we will talk about ways to decorate tables - kitchen, dining, coffee, work - of different sizes and shapes.
However, many of the presented options are equally suitable for other interior items. Perhaps these examples will inspire you to turn nondescript, shabby furniture into a real work of art, because it’s so nice to contemplate the beauty made by yourself!
12 ways to give new life to an old table
1. Painting
The best way to update a worn-out table is to paint it, but first you need to prepare the surface. A paint remover will help remove the previous finish from the product.
If on metal legs or the fittings have rust, they should be soaked generously with vinegar, Coca-Cola or special means, and after 15-20 minutes wipe with a hard scraper.
The wood is sanded with sandpaper, dust is removed, then impregnated with an antiseptic and a primer is applied. All chips, cracks and irregularities are rubbed over with acrylic wood putty.
Can be used for coloring alkyd enamel, acrylic or epoxy paints, varnishes, aerosol compositions for metal. You will also need painting tools - brush, roller, sponge, sprayer.
To give the table a more impressive look, you can paint it not entirely, but only individual parts. For this you will need masking tape or stencils.


2. Artistic painting
If a plain cover seems too boring, try decorating an old table with patterns. Drawings can be applied with a brush and acrylic paints - manually, through a stencil or according to outlines made using tracing paper.
Table with artistic painting will perfectly complement the interior in ethnic or rustic style, and children will like images of animals, fairy-tale and cartoon characters.


3. Decoupage
For this decor you will need a brush, paper napkins with a pattern, PVA glue and transparent furniture varnish.
The pictures are carefully torn off or cut out with scissors, the bottom layers of paper are removed, then the resulting thin appliqués are placed in the designated place and coated with glue on top, trying to avoid folds and tears.
If any element cannot be attached the first time, it must be immediately wiped with a sponge dampened warm water, and try again with a similar fragment.
The dried decoupage is covered clear varnish for furniture in several layers, otherwise the paper decor will quickly be erased.


4. Craquelure
Craquelure is a cracking varnish that is used to deliberately give a product a look that imitates the texture of antique paintings. It can be one-step (the composition is applied in one layer and cracks as it dries) and two-step (two mixtures are used - one based on epoxy resins, the second is water-based, they interact and a characteristic texture is obtained). The color of the veins is determined by the bottom layer acrylic paint, as well as the shade of the grout. Most often, powdered golden pigment or pastel is used for this purpose.
Two-step craquelure is usually used to complement decoupage or hand painting to achieve the effect of an aged painting. One-step is more suitable for products without patterns.

5. Tiles
It happens that after repair there is a small supply left ceramic tiles. It can be used to decorate an old table - just tile it wooden base. The installation technology in this case is practically no different from finishing walls or floors.
The ceramic surface is ideal for a table in the kitchen, terrace, veranda, gazebo or even outside.
To give the table an attractive look, in addition to plain tiles, you should use patterned borders, decorative panels(possibly even with some plots) or a stylish patchwork.

6. Mosaic
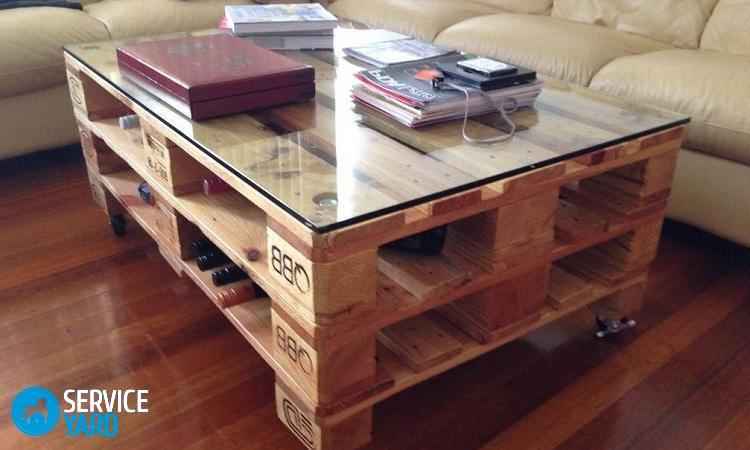
Paintings from small fragments decorate many galleries, temples and palaces. They will look just as elegant in the home, for example, on the surface of coffee tables.
Mosaic elements can be ceramic (even broken tiles will do), glass or acrylic.
From available materials, small round cuts of wood, cut CDs, and colored pebbles are suitable. You just need to come up with an interesting pattern and attach the pieces to the table using glue or liquid nails.


7. Self-adhesive film
The simplest and nice option decor of an old table that does not require fiddling with paints - gluing film.
This available material can imitate any coating - from rare wood to marble, it can have any designs, patterns and textures.
Self-adhesive film is sold in rolls, and it is easy and pleasant to use.


8. Decorative tape
In stationery and creative supply stores in lately presented wide choice decorative self-adhesive tapes. It will take you no more than 30-40 minutes to decorate an old table with multi-colored tape and a new bright thing will appear in your interior.
If you want to change the finish, the adhesive strips can be removed just as quickly, and if there is any glue left somewhere, acetone will easily dissolve it.


9. Epoxy resin
Epoxy resin is a liquid substance that hardens quickly on outdoors, turning into hard transparent plastic.
Cracks in wood filled in this way look very unusual, and if luminescent powder is added to the liquid phase, they will glow brightly in the dark.
Also in epoxy resin You can place dried flowers, leaves, shells, coins, and thanks to the transparency of the substance, you get the effect of ice or amber.
If a table that has served faithfully for many years has become completely old, you should not rush to throw it away. There are many ways to decorate an old table with your own hands and give it new life. Below is a master class on how to do this.

If the table itself is still strong, but there is simply a loss appearance, then it can be updated and turned into a real source of pride for the owners. Because today handmade is valued more than ever. There are a lot of ways to decorate an old table. These include:
- tiling;
- painting;
- wood painting;
- pasting with film;
- decoupage;
Decoupage - a new look from napkins
You can update your table using decoupage even without any special skills. You can learn how to use this technique with your own hands by studying any master class.

Materials

To work you will need:
- pictures for decoupage - you can replace them with ordinary napkins with pictures you like and even images from magazines;
- acrylic varnish - it is best to purchase varnish in a can;
- pva glue;
- brush;
- napkin.
Instructions

Work progress:
- Clean the table from old layers, paint, dirt. Degrease the table surface by wiping it with a cloth and alcohol. If the surface is not completely cleaned, the decoupage will turn out sloppy.
- Select pictures and make a composition out of them. Any pictures will do - for the kitchen table you can choose motifs of fruits and vegetables, various colors. A table made by yourself with motifs of ancient buildings will look very original.
Important : if special pictures are used for decoupage, then you don’t need to do anything with them - just glue them. If pictures are cut out from napkins, then the two-layer napkins must be divided into layers. If a picture is cut out from a magazine, then its bottom layer must be removed by wetting the picture and removing the layer with your own hands. Then the restoration of the table will be more accurate.
- Place the cut out pictures on the table. Mix PVA glue with water in a 1:1 ratio and glue the pictures to the table in the selected places. To prevent bubbles from forming, iron the pictures with a napkin, expelling excess bubbles. Next, the pictures should dry.
- After the decoupage has dried, the surface of the table with pictures must be varnished. Varnish is applied to decoupage in several stages. Each layer of varnish must dry well. The better this operation is carried out, the more resistant the table surface will be to moisture. Do-it-yourself decoupage is ready - such restoration will not cost much, and the table will look very stylish. If the decoupage is done carefully, then such a table can become a real decoration of the home.
Painting the surface


The surface of an old kitchen table can be painted. This restoration is more suitable for an old wooden table. Painting does not always require special artistic skills and talents. Detailed wizard The class will show that even a beginner in this matter can do it.
Materials
To work you will need:
- paints are best acrylic, resistant to sun and water;
- brushes;
- stencils;
- foam sponge;
Stages of work
Restoration begins with cleaning the table surface. If necessary, it must be sanded. Next, the surface is washed and degreased.
Drawings for painting can be found on the Internet or made yourself. The master class advises to print out the drawing and make a stencil out of it, carefully cutting out the outlines of the elements with a stationery knife. When making a stencil, you must remember to leave bridges between the paper elements. Then drawing will be easy. If you want to update your table, but you don’t have any drawing skills or you don’t want to make a stencil, you can buy ready-made stencils in stores finishing materials or art goods.


You can update the table by applying a pattern in the form of a border around the edges or by making a complex composition from individual elements, scattered on the surface of the table.
Further restoration of the table includes applying paint using a stencil. There are subtleties here. To prevent the stencil from moving during operation, it is better to glue it around the perimeter with masking tape. You need to put a little paint on the brush, otherwise the paint will spread and penetrate under the stencil, ruining the design.
Important : Instead of a brush, a sponge is often used to pick up paint. The pattern applied with a sponge looks smoother and more uniform. With this method of application, paint practically does not flow and the risk of ruining the work is minimal.
After the painting has dried, the surface of the table is varnished. The varnish is applied in several layers - it protects the painting from exposure to water and makes the surface more durable. The restoration of the table with your own hands is now complete.
Paint and only paint


You can update the table quite simply by painting it entirely. To do this, select:
- acrylic paints;
- alkyd paints;
- epoxy paints.
All of them are resistant to water and do not require additional protection surfaces in the form of varnish.
Important : If the table surface is large, then it is best to paint it with a roller. This will give a homogeneous, smooth, “factory” surface. Such a restoration will be almost invisible to prying eyes.
Self-adhesive film - the laziest way
The paint can be replaced with self-adhesive film. Today there is large number film colors, so you can make any table design.


Before pasting the table, the surface must be thoroughly cleaned, rinsed and degreased. Next, the film is carefully glued to the surface and leveled - care must be taken to ensure that no bubbles form. This is where the restoration ends.
Decorating with tiles
You can update your table with your own hands if you decorate it with tiles. To do this you can choose:
- ceramic tiles;
- mosaic tiles;
- tiles made of composite plastic materials.
Important : It is convenient to work with mosaic tiles. It is easy to cut such tiles with a knife, cutting off the excess parts.

Restoration begins with cleaning and degreasing the surface. Then, using a special glue, the tiles are glued to the surface. After a few hours, you can grout the joints between the tiles with grout or special paint for joints. A master class on this topic can be viewed on the Internet.
How to decorate a kitchen table with your own hands (video)
Updating the table yourself is not at all difficult. To do this you just need to apply a little imagination and patience.


, Islam, Judaism How do temples of different religions differ")


