Most interior designers consider interior arches to be a well-established classic of the genre, the arched vaults of doorways have long and seriously pressed the slightly angular rectangle of a classic door. Passages and openings between the rooms remain a kind of bridges that unite islands of living quarters, different in meaning and content, with no less important kitchen, bathroom and toilet. If possible, why not make interior openings no less beautiful and comfortable.
How practical are interior arches
Often, everyone who wants to build interior arches has a doubt about how practical and convenient such designs are in everyday use. The idea of \u200b\u200bbuilding arched arched openings existed for several hundred years, back in the 50s of the last century, many interior and corridor openings with arches of various configurations were built, until the fashion for savings and a utilitarian approach to interior design finally buried a wonderful idea.
The manufacture of interior arches will require certain financial and time costs in connection with the alteration of part of the doorway. But most often, the owners decide to remake, since the end result fully justifies the costs:
The appearance is significantly improved, even the simplest interior arch looks much more attractive and interesting than the official version of a rectangular door hatch;
The space of an apartment or house visually becomes more spacious, even in small apartments with miniature kitchens and tiny corridors, the room becomes brighter;
An order of magnitude improves heat transfer and air movement between rooms. Fresh air does not seep through the ventilation ducts, moves without interference and restrictions along the shortest path.
In most cases, the owners decide to change the shape and size of the interior opening, the equipment of the arch above the doorway in order to improve the appearance inner space living rooms. Only a few years later, it is discovered that the installation of an arch and the modification of an interior opening can improve the conditions for distributing heat throughout the house in winter time and coolness in summer heat. And most importantly - without laying additional complex system pipes.
Types of arches
One of the most valuable qualities of the interior arch is the good adaptability of the updated doorway to any interior of rooms and corridors. Door arches are made in the form of frames from a steel profile and wooden slats, bricks and gypsum blocks. For external finishing of the surface of the walls and ceiling adjacent to the arch and the box of the interior opening, plasterboard sheets, panels, mounting foam, plywood and fiberboard sheets.
For doorways and interior aisles of standard width, up to 90 cm inclusive, an arch with a support frame can be purchased at a specialized salon. Such standard arched vaults are most often cast from polypropylene or hand-assembled from wooden blanks.
round arches
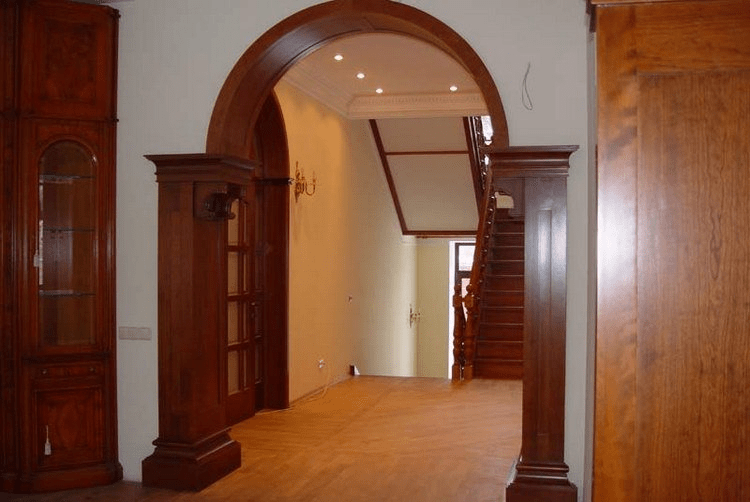
Most often, the arched vault above the interior doorway is associated with the classic round arch, the most common in the architecture of stone buildings and structures. It is the round arch that is most often chosen for the doorway.
Artists-designers and interior designers of residential premises use about a dozen basic configurations of round interior arches with supports on the frame of the doorway.
To get the perfect arc of the interior arch, the galvanized profile is divided into sectors, the side shelf is cut and the metal bar is bent according to a pre-planned pattern.
Note! The round arch is very popular, primarily because of the simple installation technology.

In the classic version, a round interior arch is made in the form of a sector in ¾ of a circle or ½ of a circle, often the shape and curvature of its arc can be supplemented with side elements of arbitrary shape and configuration, but always symmetrical.
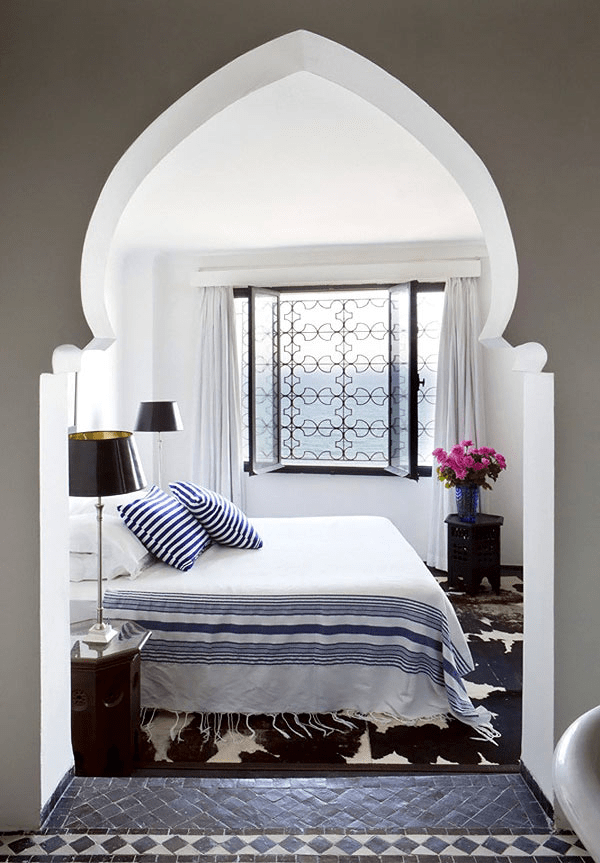
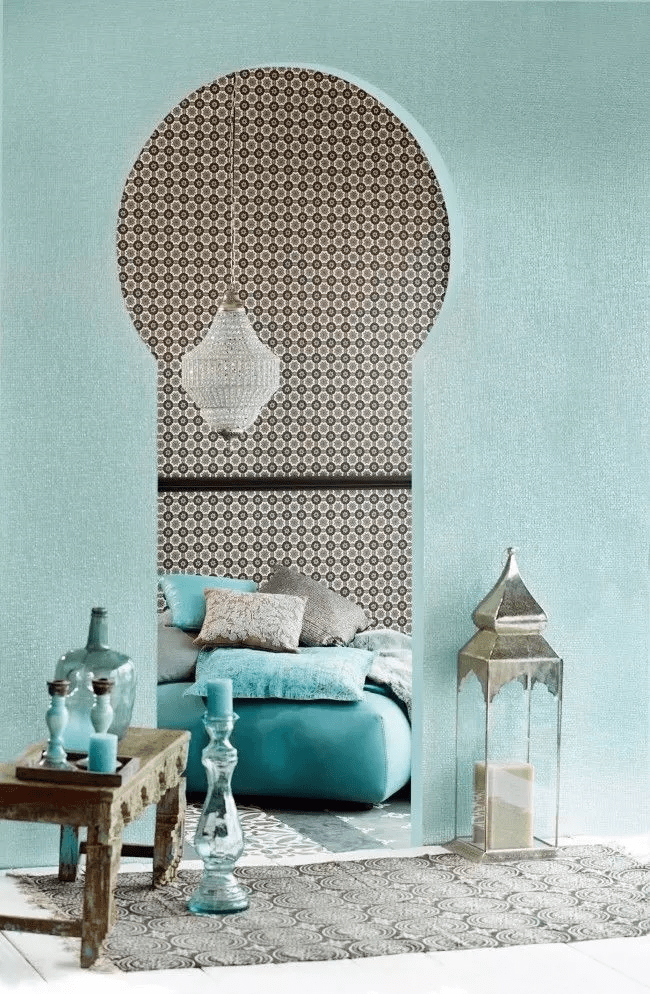
If it is necessary to add oriental motifs to the design of the interior arch, then the profile of the arched ceiling of the span is made in the form of two intersecting arcs. In this design, the interior arch acquires an almond-shaped profile.
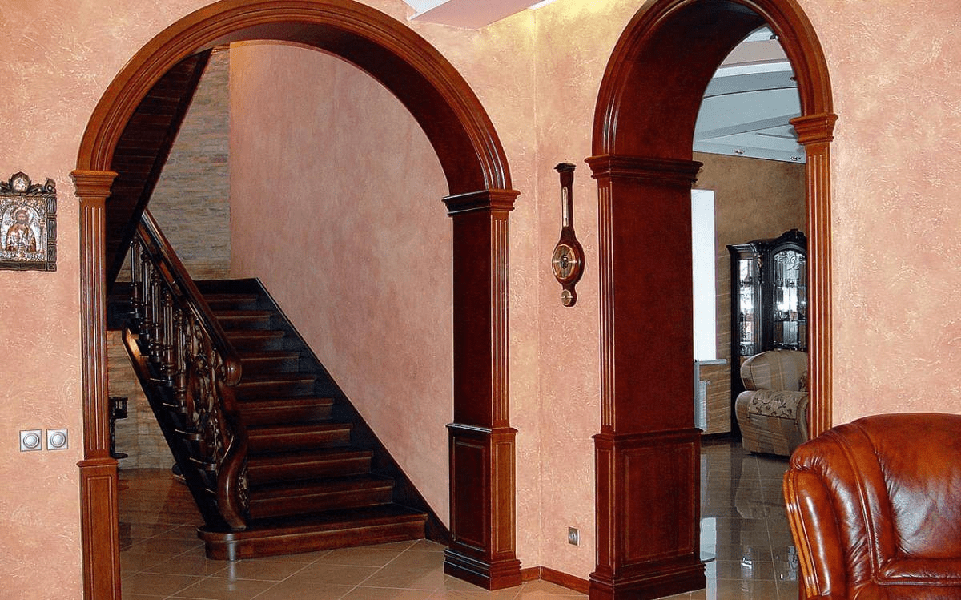
The interior arch can be combined with supporting columns, most often with stucco elements or imitation of the Victorian era style.
If necessary, for example, if the size of the doorway is relatively small, the arch can be decorated without any columns and unnecessary decor. It is enough to emphasize the line of the arched arc and close the transition plane to the walls with decorative overlays.

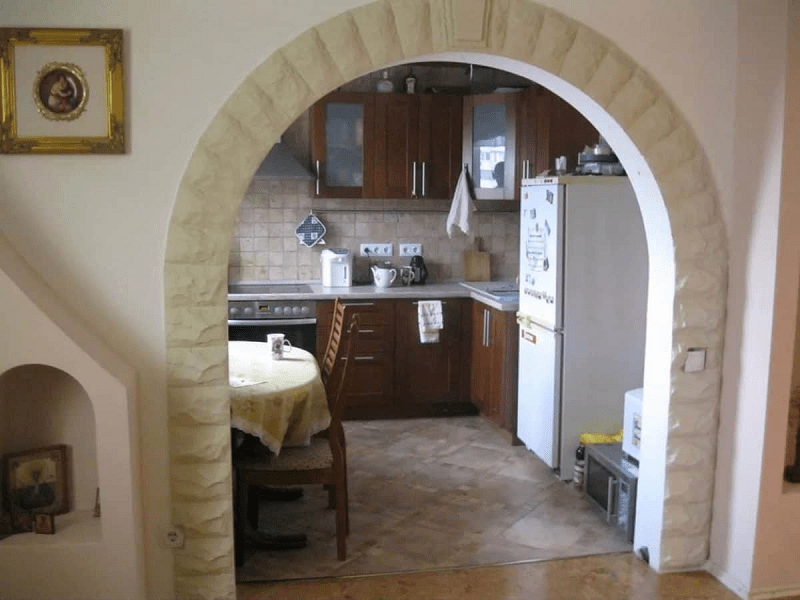
In the event that the dimensions of the corridor allow, the design of the interior doorway can be arranged in the form of one round arch. Instead of a standard rectangular door frame, only a small rounded outline remains, marking the border between the kitchen, living rooms and a corridor.
Round arches are used in cases where an apartment or living space a private house was built in the form of several small rooms. Full-sized rounded arches very successfully visually combine the rooms into one studio apartment. To keep behind the bedroom, kitchen or personal account private character, the interior opening with an arch is closed with double doors or a light sliding canvas.
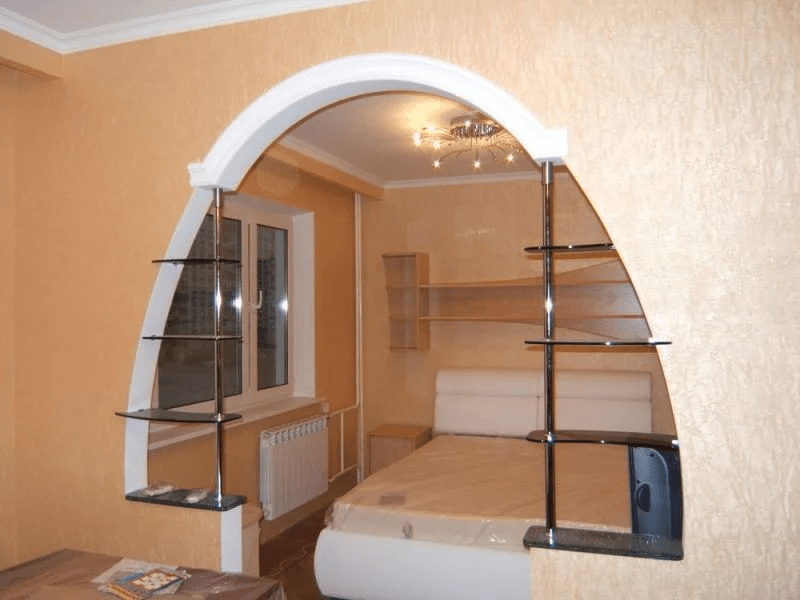
A rather interesting solution is shown in the photo below.
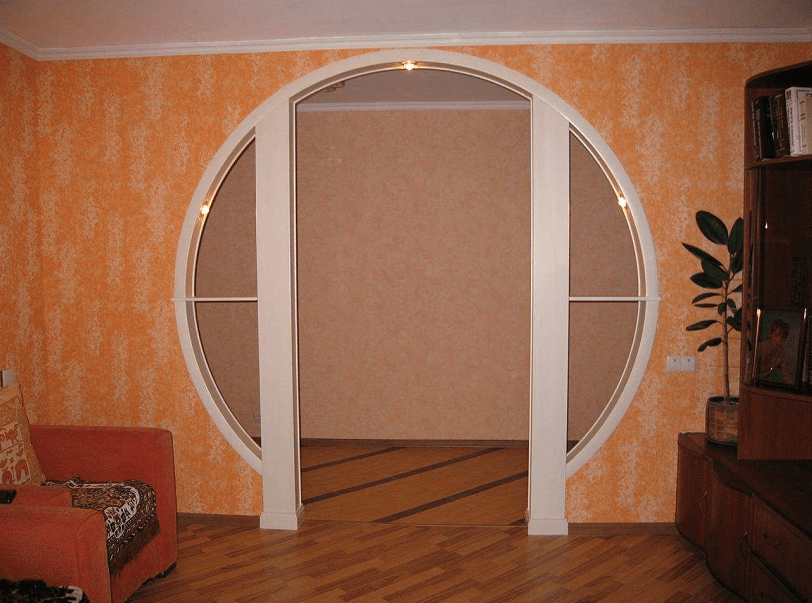
In one design of the interior opening, a round or annular arch and a rectangular box are used. A stylish doorway makes it possible to add some very necessary details to the interior of the room and open an adjacent room or corridor for light and air.
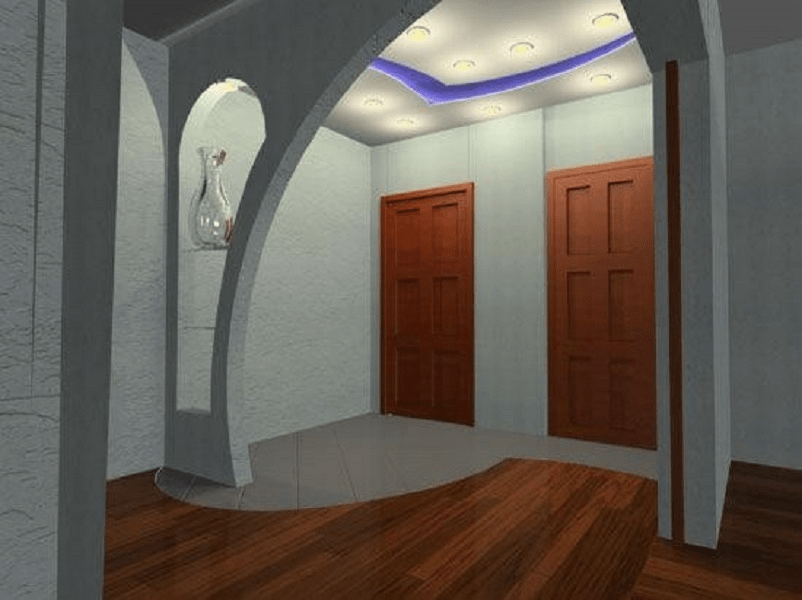
If the ceiling height is more than 2.5 m, and the dimensions of the interior passage are more than two meters, you can use the widespread technique of dividing the space into several sectors.

In this case, the design of the interior opening in the form of two small-sized arches of a classical shape with an intermediate column provides best quality ventilation and lighting.
For low ceilings, a round arch is broken into several elements or replaced with a rectangular doorway.
Rectangular arches
Arched structures of a rectangular or square shape in their characteristics and functions are no different from the classic round arch. A rectangular shape is resorted to if the interior of the apartment contains a significant number of objects and details with straight lines.

In the vast majority of cases, a rectangular shape for an interior arch is chosen in a situation where precious woods, plastic and a monotonous rectilinear design are actively used in interior decoration.

For example, an interior doorway between the corridor and the living room can be designed as wooden panels assembled in one arched structure. On the one hand, there is enough air and light, on the other hand, the boundary between two rooms that are completely different in meaning and functions is clearly marked.

Rectangular arches are simpler and more technologically advanced to manufacture; installation does not require the use of special marking devices, as in the case of semicircular and round arched structures.
Ellipse arches
It is not always possible to build a doorway with an arch in the form of an ideal semicircle or circle segment. There are certain restrictions on the distance from the ceiling to the top point of the arched arc; for the premises of the apartment, this distance should be at least 40 cm.
In such cases, the arch arch is made in the form of a horizontal semi-ellipse. The excess of the arched arc turns out to be less, and the entire design of the fashionable interior opening fits freely in the dimensions of the rooms and the height of the ceilings of a standard-plan apartment.
According to the scheme with a horizontal ellipse, it is possible to build a fairly wide passage between adjacent rooms according to the scheme shown in the photo.
The ellipse is ideal as a profile for building an interior passage. For example, you can form an opening in the form of a vertical ellipse with truncated edges.

The passage itself turns out to be wide enough to use it, but due to the narrowing of the sidewalls to the top and bottom, the section is smaller than that of a standard rectangular profile or arch of a classical shape. Therefore, in order to increase the amount of air and light through the interior opening, the passage contour is supplemented with side windows.
Trapezoidal arches
The device of the arch in the form of a trapezoid can be considered a natural continuation of the rectangular scheme. Traditionally, door and interior openings with a trapezoidal top used in attic rooms, especially if the ceiling of the room is made with side bevels.
Trapezoidal shape for improved upper stability cross beam openings, so such structures are widely used in houses made of timber and rounded logs.
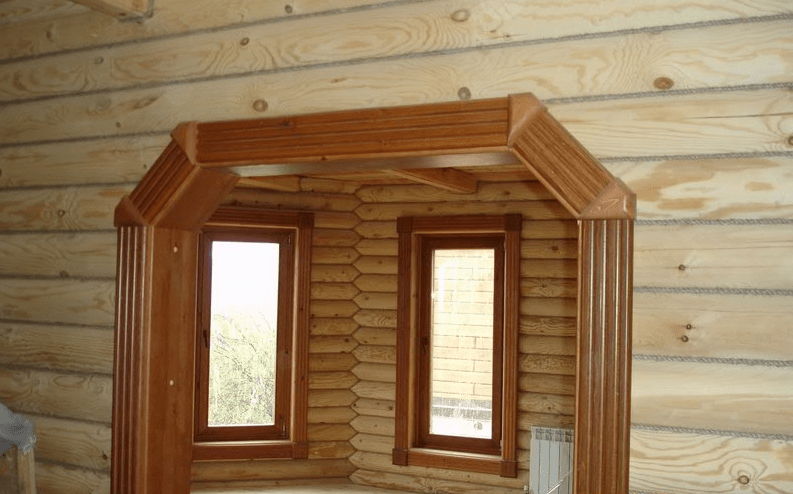
The decorative qualities of a trapezoid are lower than those of interior openings with an arch in the form of an ellipse or rectangle. However, there is a demand for a trapezoid arch passage, especially in panel projects for suburban and country houses. In any case, an interior doorway with a trapezoid-shaped arch looks much more interesting than a boring rectangular design.
curly arches
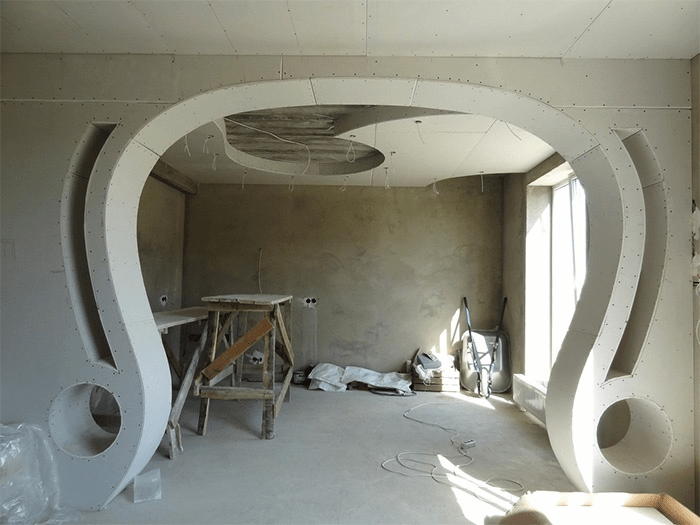
Making an arched vault complex shape is a good way to show the talents of an interior designer, fantasy and fiction. by the most in a simple way build original arch non-standard shape what remains is the addition of several curved lines and surfaces to the classic arched arc.
For example, if you add a couple of side arches to a simple symmetrical arch, you can get a fairly expressive line of the arched vault for an interior wall.

A small addition to the standard arc or semi-ellipse of several asymmetric elements turns the arch into a stylish interior opening.
Figured arches, as a rule, are made according to complex curvilinear patterns, for example:


The process of designing and manufacturing a figured interior arch is quite complicated for an amateur level, so even the simplest multi-level openings, as a rule, require the knowledge and skills of a professional artist-designer.

Drywall interior arches
In the process of planning a curly arch, you always have to look for a suitable assembly method and material from which it is easiest to assemble a rather complex arched structure.
Most of the home arched interior openings are built of wood and drywall. Sheets of pressed gypsum are perfectly processed, cut, drilled, painted and puttied.
The basis of the plasterboard arch is assembled in the form of a galvanized profile frame. A strong corner and U-shaped sheet metal profile can be used as load-bearing element a solid frame or bend an arc of any curvature.
The manufacturing process of the interior arch is as follows:
- The frame is assembled with rivets and attached to the walls and ceiling of the interior opening;
- The base is sewn up with sheets of drywall;
- Seams and cracks are rubbed with gypsum putty;
- Curved surfaces are sanded, painted and finished.
The arched interior opening turns out to be light, durable and arbitrarily complex design and design.

Interior arches made of wood
Arched interior openings made of wood and its imitations firmly occupy the second place in popularity of the design. Beam and rail from valuable breeds it is very difficult to technologically bend wood with the desired radius, therefore almost all interior arched openings made of wood are built in a rectangular shape.
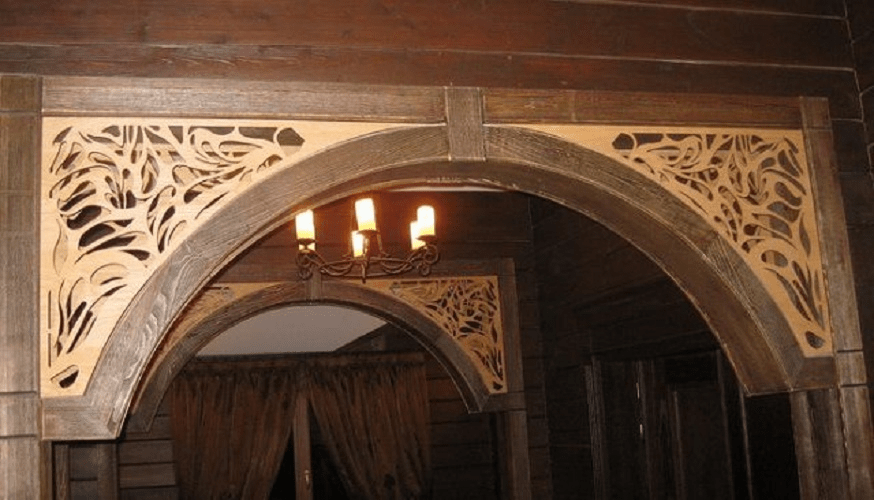
The exception is wooden arches. self made, very beautiful, with carvings and elements of furniture decor. Often, the arc is cut from a solid array of wood and veneered with fine wood veneer.

Note! A handmade arch is easy to distinguish by surface microdefects and a characteristic veneer texture, while cheap interior arches made of polypropylene look perfectly smooth and one-color.

Arches
Depending on the materials used to build the frame of the interior opening, choose the most appropriate type of finish. Drywall constructions must be primed and puttied, after which the surface of the arch can be pasted over with PVC film with a texture like wood, red brick or natural stone.

A simpler way of finishing involved the use of decorative plaster or wall graphics. Corner joints of interior arches can be pasted over with polyurethane tiles under an artificial stone.
Wooden arches are finished using furniture technology:
- The surface of the wood is primed, tinted and varnished;
- The final coating is applied to match the colors of the walls and ceiling of the rooms adjacent to the interior opening;
- Veneered surfaces of doorways with arches are always varnished with subsequent polishing of the decorative layer of wood.
If a finishing operations made in accordance with polishing standards, the decorative layer of wood can last at least 20 years, while the plasterboard finish will last a maximum of 10-15 years.
Illuminated arch
Installing flashlights and backlighting remains one of the most popular ways to amplify decorative effect from the arch.

Lanterns can be installed along the contour of the arch, or placed at the top of the arched arc and covered with translucent polycarbonate.
Instead of spotlights, you can use led strip, monochrome or color.
Interior of interior arches
The most difficult stage in planning an interior arch is the development general style, because the doorway must correspond to at least two rooms at the same time. For example, the passage from the living room to the kitchen is best designed in light colors. White, cream and beige shades are considered universal, able to be combined with almost any style of the interior of the hall and kitchen.
Arch in the living room
All other interior arches leading from the living room to other rooms are designed in the style of the interior of the main space of the apartment.
Before planning the shape and dimensions of the arched structure, you will need to take into account the color and texture of the furniture in the living room, the pattern of the flooring.
The concept of arch design in the living room is extremely simple - interior openings should visually expand the size of the room, even if this requires removing half of the internal adjacent wall.
Arch in the hallway and corridor
A similar technique is used when planning arched openings in the hallway. The corridor room experiences the greatest load from dust and dirt brought into the apartment from the street or entrance.
Therefore, the entrance part of the apartment is planned in more muted colors, respectively, arched structures are made with minimal space absorption.

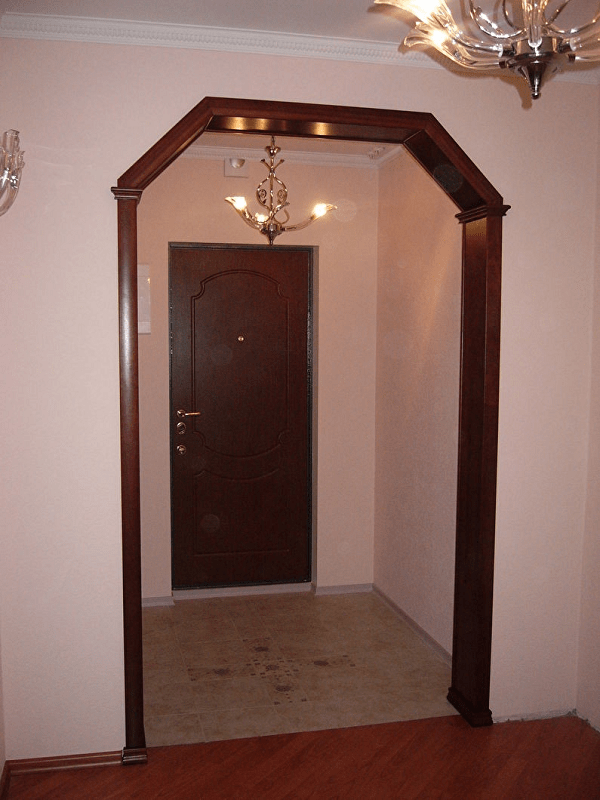
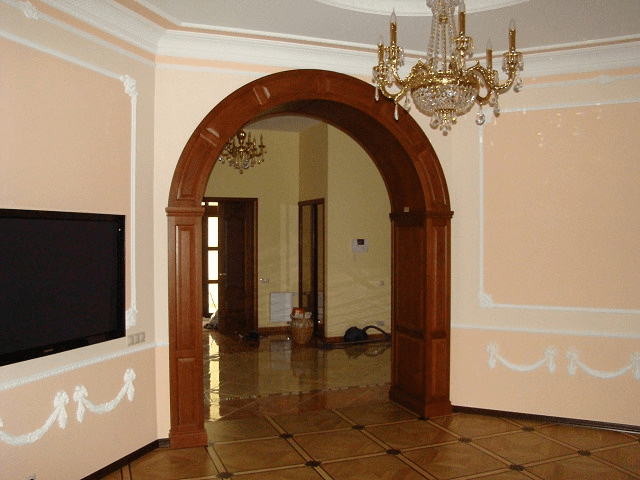
An exception may be interiors with extensive use of wood paneling, parquet and fine wood finishes. In this case, a massive interior arch, decorated in mahogany, can serve as a kind of bridge from a more utilitarian and stuffed hallway to the central part of an apartment or house.
Arch to the kitchen instead of a door
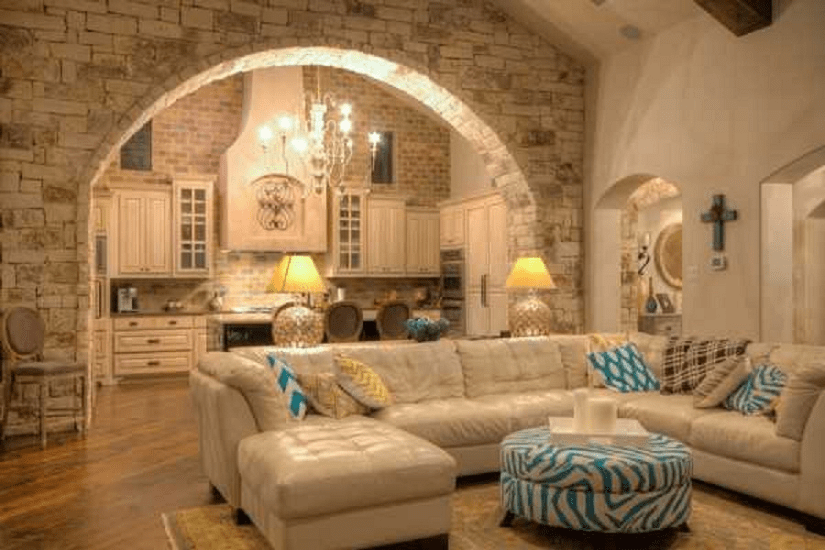
To date, interior openings between the kitchen and the living room firmly occupy the first place in the list of the most popular solutions for redevelopment of old apartments. It so happened that in the vast majority of apartments old building the hall is connected to the kitchen by a long and narrow corridor.
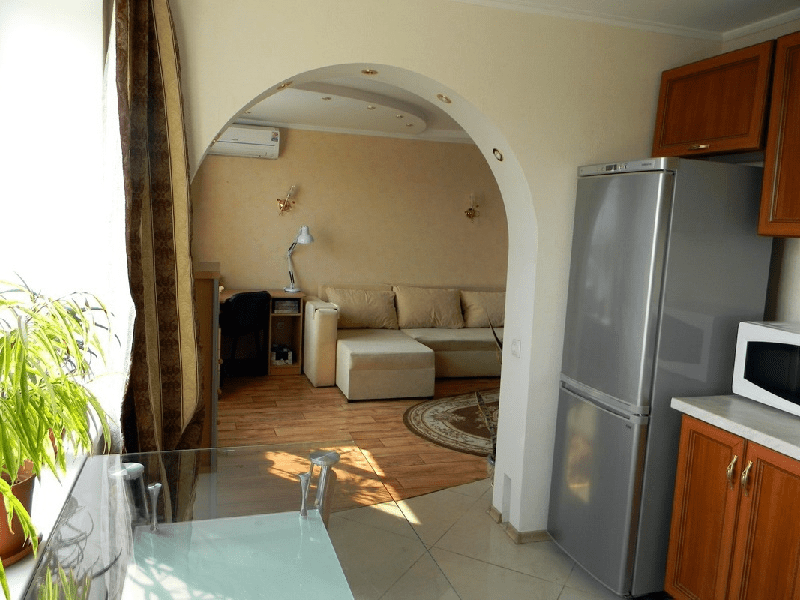
It is very inconvenient, so the hall is connected to the kitchen by a wide and spacious opening with a round arch. AT budget option interior arch can be made from plasterboard sheets with decorative plaster finish.
A more complex and at the same time non-standard option for arranging an interior opening is shown in the photo below.

Instead of one passage in the adjacent wall, two symmetrical figured passages were built with round arches and asymmetric shape of the opening. High ceilings allow you to make the arched part with a certain degree of broadening. As a result, the central part of the wall remains used for the installation of a TV and furniture, while the side sectors are “donated” for arranging the arch.
Arch in the children's room
In apartments with a small living area, with the help of an interior arch, the problem of dividing and delimiting space into the territory of adults and children is solved.

If the room is allocated for several children, then with the help of the arch it is possible to resolve most of the disputes related to the division of the territory. For arranging a doorway, arched structures are used quite rarely.
Arch in the bedroom
For the rest room and bedroom, the color of the walls, the shape and style of the arch are chosen in strict adherence interior decoration and interior space.
As a rule, double doors with an arched vault or small-sized interior arches with a monotonous decoration of the walls and the ceiling space are used for the bedroom.
Conclusion
Arched structures have long won the hearts of apartment and house owners seeking to improve and improve the layout and interior of their home. The interior arch remains one of the most affordable, simple and at the same time very effective ways make the interior of the rooms brighter and fresher. Moreover, the manufacturing process is not so complicated and intricate, and most of the work can be done with minimal cost. Only a small skill of an artist-designer is required, the rest must be entrusted to design professionals.
arches in doorway is a popular solution modern apartments and houses. They not only serve as decoration, but also add free space by dismantling the door panels. You can make an arch yourself, using ready-made drawings or attracting imagination and coming up with your own version.
Arch configurations for doorways - classic, modern or portal?
The form door arch matched to the overall design of the room. Each side can be framed differently. The height and purpose of the communicating premises, the width of the doorway should be taken into account. There are a large number of arch configuration options: from a regular semicircle to a rectangular shape, with various variations of side elements.
Let's consider some of them:
- The classic version is suitable for high rooms, the height of which exceeds 3 meters. The bending angle of the classic arch is 45 degrees.
- In Art Nouveau arches, the radius of the bend exceeds the size of the doorway, so there are corners between the arc and the vertical elements that can be made sharp, rounded or given a different shape. The modern option is often used in typical apartments.
- Romantic style is suitable for wide doorways. You can install a horizontal insert between rounded corners.
- The rectangular portal option is more suitable for rooms with clear vertical and horizontal lines. This option should be chosen for houses made of timber and logs, in which it fits perfectly into the interior.
The popular high-tech style welcomes clear forms, minimalism and modern materials. Door arches in this style are rarely used. But if there is a desire to have an arched opening, then it is better to make an arch-portal with rounded corners and a horizontal top. You can make an arched opening of an irregular original shape. A high-tech arch does not require special design; it is enough to paint it to match the color of the walls. Built-in lamps will look good in the arched opening.

What can the arch be made of - metal or wood?
In construction, arched structures must withstand the load from higher structures and walls. Doorways are not load-bearing structures. If in the first case it is necessary to select a material that can withstand serious external loads, then for the door arch it must withstand its weight along with the finish.
The arch, installed instead of the door, is an element of the interior, performs a decorative function, the lintel above the opening and the wall experience load-bearing loads. The easiest way to make a door arch is to buy a ready-made set of typesetting elements from laminated chipboard or plastic. The elements of the kit should be adjusted to the dimensions of the opening and assembled according to the instructions. Cons of this method:
- dimensions may not fit the opening;
- arched structures are standard;
- high set cost.
For an arched opening, you can use light and heavy materials. If you make an arch of stone, brick or concrete, you need to take into account their weight. For such structures, a foundation device and a reinforced bond with the walls of the opening are necessary.
A metal arch is suitable for any style, but for these purposes, material should be selected carefully. Stainless steel is expensive, galvanized iron inside the premises does not look very aesthetically pleasing. Decorate the arch with curly metal parts difficult, therefore metal arches rarely used for internal openings.

Beautiful wooden arch. Natural wood looks harmonious and almost does not require additional finishing. Materials such as fiberboard, chipboard, plywood and drywall can be processed well, they are used for sheathing. Structures made of these materials can be painted, covered with decorative plaster, tiled or natural stone, wallpaper. The frame is best made from a metal profile or wooden bars with a section of 20x20, 30x30 mm.
Preparing the opening and materials - what will you need?
Before you make an arch in the doorway, we carry out a number of preparatory work. First, remove the doors and dismantle door frame. Then we expand the doorway to the planned dimensions. It is not worth tidying the cut corners, as they will be covered by the frame. It is important that the supporting profile can be securely fastened to the walls in a strictly vertical position. If necessary, you need to level the surface of the walls with plaster. If backlighting is expected, wire in advance.
In order not to make a mistake with the dimensions, we make measurements in several places of the opening. If the walls are different thickness, we make the width of the arch racks along the thickest wall. To make it easier to cut out details from sheet finishing material, it is advisable to make a full-size template, its manufacture will allow you to avoid possible mistakes and see how the future arch will look.
For work you will need the following materials:
- drywall (GKL);
- guide and rack profile;
- dowels;
- self-tapping screws;
- putty;
- needle roller.
From the tools you should prepare a drill or a puncher, an electric jigsaw, metal shears, a pencil, a rope, a hacksaw, building level, a screwdriver, a clerical knife or an ordinary sharp knife and other tools, the choice of which depends on the material of manufacture of the arch.
Before installation, we make two front parts of the arch from GKL. They must be exactly the same. First, cut a sheet of drywall to the width of the doorway. Marking for a semicircle can be done using improvised means. We tie a rope to a pencil, measure a radius equal to half the width of the arched opening. With a homemade compass we make an even semicircle. Next, with an electric jigsaw or a clerical knife, we cut out a semicircle according to the marking and get a rectangular part with a cut out semicircle.
Making a frame - work in 10 steps
The first stage in the manufacture of an arch is to create a supporting arched frame.

When using a profile, we act according to the following algorithm:
- 1. First, along the perimeter of the opening, we create a contour, which we attach to the wall.
- 2. Then we will attach the upper curved part of the frame to the contour. If the vertical slopes are perfectly even, it is enough to attach the top.
- 3. We measure two vertical guides and fasten them with an indent equal to the thickness of the drywall and the layer of plaster, which is applied to the plasterboard with a thickness of about 2 mm. After applying the plaster, the surface of the arch should be flush with the wall.
- 4. Now we fasten the side parts of the frame on each side of the opening. If the walls are wooden, we use self-tapping screws as fasteners, if the walls are brick, concrete or stone - dowels-screws. The distance between the fasteners should not be more than 30 cm.
- 5. At the next stage, we create the end part of the arch. First, we make, on which we will fix the curved strip.
- 6. To make a curved part, on the side walls of the profile we make cuts every 5-6 cm with metal scissors. Thanks to the cuts, it is easy to give the profile the desired shape. We make two such parts for each contour of the guides.
- 7. We fasten the bent profile to the main frame.
- 8. To make the design reliable, we fix the curved arcs with several suspensions to the horizontal part of the frame. The number of hangers depends on the width of the opening. Usually 2-3 pieces are enough.
- 9. Next, on the guides fixed along the perimeter of the frame of both contours, we fasten the reinforcing crossbars from the rack profile. The step between them should be 40-60 cm.
- 10. If lighting is planned, you need to make the appropriate wiring.
As a result, we get a reliable arched frame made of a metal profile, which we will sheathe with drywall.
Rough lining and leveling with plaster
At the next stage, we mount drywall sheets on the frame. It is more convenient to work with a special arched drywall, which is reinforced with non-woven fiberglass. To make it take the desired shape, it is enough to knead it. There are two ways to shape ordinary drywall sheets:
- According to wet method, GKL sheets need to be moistened with water, and then bent according to the template, fixing them on it. To speed up the process, we use a spiked roller. Sheets must be folded carefully so that there are no gaps. We fix the sheets on the frame only after complete drying. It is possible to fasten the GKL strips to the frame immediately after wetting, fixing with self-tapping screws.
- With the dry method, on one side of the drywall, we make parallel cuts that affect the outer layer of cardboard and gypsum. After fixing on the frame, the bend is of the correct shape and even, while the front part remains intact.
Next, we fasten the prepared front parts of the arch with the help of self-tapping screws in increments of 5-6 cm. When the skin is fixed, we sand the edges of the plasterboard. To protect them from chips, we attach perforated to the curved edge. Now we proceed to the priming and puttying work. First, coat the surface with a deep penetration primer. We wait 30-40 minutes for the primer to dry. To reinforce the second layer and reinforce the corners, we use a fiberglass mesh.

When applying plaster, we make sure that the edges are even and the mortar lies flush with the wall. At the final stage of the rough finish, we apply the third, finishing layer. When the putty hardens, grind the surface with sandpaper to make it perfectly smooth. It should not have any protrusions from the caps of the screws.
Bringing beauty - decorating with wallpaper
Decorative finishing depends on the tastes of the owner, his financial capabilities and the style in which the room is decorated. The following options are possible:
- painting to match the color of the walls;
- pasting with veneer or wallpaper;
- decorating with mirrors, tiles, mosaics;
- sheathing with wood, plastic;
- decoration with columns or molding.
You can decorate the opening with polyurethane stucco and textiles, it is important that the arch is in harmony with overall design premises. Sometimes it is enough to paint the arch in white or Brown color to make it look classy and elegant. Lighting has become a fashionable element of decoration.

The framing of the columns from decorative stone and clinker. it original solution will make the apartment unique and please the owner. True, the work will require a lot of time and effort, but the result is worth it. Solidity and comfort will give the house decoration natural wood. If you come up with an interesting mosaic pattern, this can become a highlight of the decor. It is important not to overdo it with decoration. Do not use items from different styles, it will look tasteless. All details should look harmonious, complementing each other, giving the room a certain style.
The simplest and cheapest finishing option is wallpapering the arched opening. Despite the simplicity of the solution, you need to choose the right wallpaper and adhere to the gluing technology, so that in the end the work is pleasing to the eye. Due to the curved details, it is almost impossible to match the wallpaper according to the pattern, so you should choose canvases either with an abstract pattern that does not require alignment, or plain without a pattern. You can glue wallpaper with a pattern on the front side, and make the end part plain or striped.
When choosing wallpaper Special attention focus on their quality. They must be resistant to mechanical impact, give in to cleaning, as they constantly experience a large load. paper wallpaper in this case are not suitable, as an option, glue vinyl or non-woven wallpaper, which can be cleaned with a damp cloth or sponge. Bamboo wallpaper or glass wallpaper is best suited.
When sticking wallpaper, you should adhere to the following rules:
- 1. When starting to glue a wall with an arched structure, we expect that the outermost canvas is not very close to the opening. It is more convenient to glue wide canvases.
- 2. We glue the last canvas, as usual, cutting it out along the contour of the arch. We cut off the part of the canvas protruding beyond the contours with sharp scissors, but not along the very edge, but retreating 2 cm.
- 3. We cut the resulting strip perpendicular to the opening line after 3 cm, wrap the resulting tongues inward and glue.
- 4. Similarly, paste over the top and the second half of the arch.
- 5. For gluing the inside of the arched opening, cut out a strip along the length of the arch from the bottom point to the opposite one and a width less than the width of the arch by 2 mm. For convenience, the strip can be cut lengthwise into two parts. Glue the strip from bottom to top.
With thick wallpaper, the gluing technique is slightly different along the edge of the opening. Before sticking the wallpaper, paint the edges of the arch with paint to match the color of the wallpaper. When the wallpaper is glued along the facade, we do not glue the wallpaper inside the opening, but wait for it to dry, and then carefully cut off the excess along the edge of the opening. We cut the inner strip a little wider than the depth of the opening. We glue the strip, combining the edge of the wallpaper and the edge. When the canvas is dry, cut off the excess part.
With the help of drywall, you can create an arch of any shape, which will give the room a personality. Thus, you can decorate any room with your own hands and increase its area by eliminating doors. In the inner part of the arch, you can mount shelves on which flowers in pots or figurines will be placed. House and apartment with interior arches look more attractive and original.
Arches for the doorway have been used since ancient times. The arch is very aesthetic, today it is not only beautiful, but also allows you to save space, complement the interior and do the work yourself, with your own hands.
As a rule, drywall is used, it is not expensive, it is easy to work with it and you can make any arched opening. The framing of the arches can be anything, you can put a platband and a variety of finishing materials.
Shape selection
The type of arch can be any, even from several levels, with different side by side and functionality, initially the correct measurement of the door opening is made. The main types of arches are presented in the table:
| arch type: | Description: |
|---|---|
| Parabolic arch: | Beautiful and easy to make arch. It is made of flexible plastic, for example, a threshold. A mark is made in the middle, which will be the top point of the arch. Further, the material bends in the form of an arc. The arc is applied to a plaster or other sheet and a template is made, on which the arch blank will be ready. |
| Circular arch: | It is necessary to fasten a self-tapping screw into a wooden material (bar) and tie a twine to make a compass. They can make an arch template. Next, with a compass, you need to draw a circle of the arch on the sheet. |
When the outlines of the arch are drawn, cut out the shape using a jigsaw or ordinary knife. All cuts are made exactly along the lines, the quality of the arched opening depends on this. The classic version of the arches is made according to the following principle:
- It is necessary to measure the doorway and calculate the material.
- The instrument is being prepared.
- A template of arches is cut out, a semicircular view, round, oval and others.
- The frame is mounted in the opening using metallic profile or a tree.
- Polyurethane, drywall, plywood, fiberboard, chipboard, foam plastic or other selected material is installed.
- The bottom of the arch is cut out and screwed to the side parts.
- Puttying and finishing, decoration of the arch is carried out.
Important! When deciding on the type of arches, it is necessary to pay attention to the height of the ceiling and the width of the doorway. Some types are suitable for a wide but low opening, the other vice versa.
The main forms are as follows:
- Portal - U-shaped arch, according to the device it can be in the form of waves or with many angles, one of the most popular types of opening.
- Classic arch - recommended for ceilings from 3 m, with a passage width of 90 cm.
- Romance - it is recommended to set if the width of the opening is large, but the height to the ceiling is small.
- Modern - an alternative to any type of arches, can be used in Khrushchev, where every centimeter of space is important. The corners of the arch are made sharp or rounded.
- Semiarka - perfect arch for zoning rooms.
- Straight arch - suitable for loft, hi-tech, modern style.
The photo shows ready-made false arches from the company Leroy Merlin that do not need to be framed:
Knowing what types of ready-made arches for doorways exist, you need to decide on the materials and start working with your own hands.
Do-it-yourself drywall arch (video)
Work materials
You can’t just build an arch, you need to choose the material and prepare all the inventory. More commonly used drywall sheet, it is easy to use, if desired, you can redo the arch, its cost is low. Therefore, an example of working with GCR will be described step by step below. Arched interior opening requires:
- GKL 9.5 mm.
- Profiles 27x28 mm and 60x27 mm.
- Self-tapping screws to fix drywall 3.5x25 mm.
- Dowels to fix the frame in the opening 6x60 mm. Used for brick or concrete.
- Self-tapping screws with a press washer 4.2x12 mm.
- If the doorway is made of timber, then wood screws are needed.
- Putties for GKL.
- Needle roller.
- Perforated corners.
- spatula.
- Pencil and tape measure to measure and make a drawing.
- Screwdriver.
Having prepared the material, you need to mark and measure everything.
measurements

Before , how to make a drywall arch in doorways measurements are taken. The size of the opening itself is taken in height and width. When there is a width, it is divided in two to create a perfect semi-circle arch. The shape of the arch is determined, for classic version you will need to additionally level the walls using putty and beacons. Naturally, the opening must be completely disassembled, prepared, removing dirt and dust from it, and, if necessary, seal cracks and voids with mortar. When the opening is ready, you can proceed to the next steps.
Installation of an interior arch
On the GKL, an arch design is made for a private house or apartment, the necessary picture is drawn, and then cut out with a knife, strictly along the lines. When one piece is cut correctly, a new side is drawn along its contours and another piece is cut out. Having prepared both pieces, you can mount them on the frame, but before that, construction is carried out correct framework. Step by step, the work will look like this:
- At the top of the opening, profiles are fastened using dowels if the opening is brick. After that, the profile must be installed on the walls of the opening. The frame is mounted at two points in the doorway.
- Next, a profile is made in the form of an arc. Scissors need to cut through the metal every 5-10 cm, after which the metal is bent in the desired shape. For the template, previously cut pieces of drywall are used. Installation is carried out with dowels, and the frame is sheathed with drywall using self-tapping screws. For arches you need 2 arcs.

- In order for the frame to turn out to be strong, bars or profile pieces are installed between the arcs.
- The frame is ready, but the arch itself has not yet been made. You will need to bend drywall for installation at the bottom of the arch or make a typesetting element, the prefabricated bottom is made from pieces of drywall, and when bending, you need to cut off a piece, adding 10 cm in size from the sides. So that the material does not crack, it is moistened with a little water, passed with a needle roller and left for a couple of hours so that it is flexible. After that, you can bend the material and attach it to the frame, using initially adhesive tape, and then self-tapping screws.
- After 12 hours, a beautiful arched opening will be ready and it remains to decorate and decorate the arch.
Here's how easy it is to install an arch in a doorway with your own hands. Using these tips, the production of arches will be fast. All voids in the arch can be left unchanged, or you can use mounting foam, pouring it inside, according to the instructions. Next, you need to veneer your creation.
Decoration of the doorway
It is known from what to make arches in the doorway, but how to finish the arch in the doorways? You can decorate the finished structure with different materials. Often the design is done with using MDF, you can finish with modern material, for example, artificial stone, wood, wallpaper, paint and apply an array. When the arch enters the kitchen, it is recommended to fix the curtain by installing fasteners in the arch immediately. Before sheathing and decorating the arch, you need to do a number of works, step by step instruction below:
- The surface of the arch is sanded with sandpaper, removing irregularities, creating a rounded edging.
- Seams, joints and places of self-tapping screws must be sealed with putties, but before that it is placed on a perforated corner plastic corner, you need to fix it directly into the putty.

- When the putty dries, everything is sanded again with sandpaper to remove irregularities.
- The arch is smeared with a primer and when it dries, it is applied finishing putty and polished for the last time.
The arrangement of the arch is completed, you need to pick up the finish and put it on the finished opening. As you can see, it’s easy to make a home-made arched opening, anyone can assemble the frame and fix drywall, not necessarily a master, even if the work experience is small. It is recommended to make an arch, the same as the window in shape, so that the interior is uniform, although the opening itself can be modernized so that the house or cottage is transformed and functional. Finally, a video showing the process of work, how much material is needed and how a rectangular arched opening with a rounded top is made:
Photo gallery of finished works
Related materials on the topic:
 Step-by-step instruction for the installation of a drywall arch with your own hands
 Arches in the apartment: what is it, varieties, advantages
 Interior arches to the kitchen: varieties and design
Do you dream of creating an original interior on your residential squares and bringing some zest to this space? Pay attention to the design of interior openings, which can become the central object that sets the tone for the entire design. Arches with different shapes and decor are becoming very popular.
The arch in the apartment creates beauty, comfort, emphasizes the refined taste of the owner.
If your apartment has openings of at least 1000 mm and you do not want to hide the room behind interior doors, then we will tell you how to make an arch in the apartment. At first glance, it seems that this activity is not for an amateur. But having studied the features of arched openings, the possibilities of modern finishing materials and detailed instructions for mounting the arch, you decide to do it yourself.
 The correct shape of the arch will emphasize the dignity of the apartment.
This is, of course, a rhetorical question. Many people who are interested in art are familiar with the arch, they have been in beautiful buildings with high ceilings and large aisles, examined the interiors country houses on the picture. In many places it is a subject of admiration and a connecting element of the interior. The shape and size of the arch depends on the opening in which it is created:
- semicircular;
- elliptical;
- rectangular with small rounded edges;
- rounded on one side of the passage.
The list is endless, because each passage and room is individual. But there are certain arch standards that have a certain shape and name:
- classic;
- modern;
- ellipse;
- romance;
- portal;
- trapezoid;
- transom;
- arch with top elements.
We offer you to see a photo of the listed elements:
 Choose the shape of the arch that is appropriate for your apartment. Consider the features of the room, especially the height.
 For yourself, you can choose a ready-made option on how to make an arch in an apartment with your own hands or turn on your imagination, take into account the features of the opening and create your own template.
 You can come up with your own design of the arched structure by viewing already ready-made options.
 Just remember one nuance - in apartments with low ceiling you can choose more elongated shapes so that the arch does not give the impression that your ceilings are lower than they really are. Otherwise, the arch helps to expand the space, eliminate the overlap of rooms door leaf. But you can’t make an arch in an apartment if the design doesn’t match this. Before making a decision, we advise you to review different photos how to make an arch in an apartment and what form to prefer.
Arched structures are appropriate not only in interior aisles, but also in the design of the walls, where a beautiful baguette or vase will be located.
Often there are fireplaces, the upper part of which is made in the shape of an arch. Perhaps in your apartment you can make such elements so that the interior arch does not look lonely.
Having talked about what an arch is, let's move on to the practical part of our conversation, namely how to make an interior arch in an apartment, what material can be used for this.
How to make an arch in an apartment: choose the material, prepare the opening
To properly make an arch in an apartment with your own hands, study the interior opening. It should be smooth, without holes, distortions, reliable. If in doubt, clean and level the surface with plaster, primer. Decide what the wall is made of - brick, blocks, wood. This is important, because you can fasten the arched structure with different fasteners, depending on the material of the walls.
Materials for arched structures in the apartment
You can make an arch with your own hands from different finishing materials available to you at a price:
- drywall (GKL);
- plywood;
- fiberboard;
- board;
- brick;
- stone;
- plastic (for example, wall panels);
- stucco;
- finished arched structures.
Perhaps, after studying the information, you will have your own ideas of what to make an interior arch in the house with your own hands.
The easiest to work, affordable is drywall.
 Drywall is better than other materials for making an arch with your own hands. The material is easy to cut and bend in skilled hands.
 In skillful hands, you can make any design object with it, including an interior arch. It can be bent to the desired shape, and this is important for the arch, because the lower part of the portal will be exactly curved. Sheet area allows you to cut a semicircle big size. This is also very convenient. GKL is sawn with a jigsaw or a clerical knife, leaving no dirt in the room. Other materials are also available for self use in creating an arch, but will require more skill, time, tools. For example, a brick must be laid out beautifully, after taking care of a reinforced metal frame. The weight of the structure is large and can threaten to collapse if improperly laid.
Wood has the property of drying out, arching, which also affects the quality of the final result. It will take the skills of a carpenter to make an arch with your own hands from an array.
 Finished arches from the array look perfect, but require careful preparation of the doorway.
 It will be more affordable to buy a ready-made arched opening from an array, if funds allow. But even here there are some nuances - the interior opening may not correspond to the factory set. Then you have to adjust the opening for the finished product.
What is required to create an arch in the apartment
The success of any business depends on pre-training all you need is measurements of the object. We will need:
- dimensions of the doorway;
- future arch template;
- GKL sheets;
- metallic profile;
- fasteners for wood / metal (depending on the walls);
- roulette;
- level;
- drill;
- jigsaw or stationery knife;
- metal scissors;
- screwdriver;
- roller with spikes;
- primer;
- putty;
- decorative finish for an arched structure.
Having decided on the shape of the arch, it is necessary to make the correct measurements of the arched structure in the apartment. The main parameters are the width and depth of the interior opening. With a sufficient height of the ceilings in the apartment, there is no need to particularly think about the height of the arched rounding. Here the size will be dictated by the shape of the arch and the width of the passage.
 Even the most simple arch requires the correct measurement of the interior opening.
 Having received the dimensions, transfer them to a sheet of drywall. It is necessary to make a template on cardboard so as not to spoil the main material.
- Draw the shape of the front part of the arch. To do this, you can use a compass made by yourself. Take a simple pencil and a tight rope that does not stretch. The length of the rope must correspond to the radius, which corresponds to the size of the arch. Tie a string to a pencil. Set the stylus in the center of the sheet and draw a line of a semicircle or other chosen shape. The facade template is ready.
- One more detail is needed - the lower part of the arch, covering the wall along its depth. The width of the part is important here. It corresponds to the distance from the wall of one room to the wall of an adjacent room. Take the length with a margin, because only a specialist can accurately calculate the size of the arc. And then we cut off the excess.
- We transfer the template to the drywall sheets - the facades of the arch are two pieces, the bottom bar is in one copy.
We assemble a metal frame for a beautiful arch in the apartment
The metal profile must be prepared before installation in the interior opening. Scissors for metal will help to give the desired bend. It is necessary to make small cuts along the entire length of the profile. Consider the step from the shape of the arch. You can attach the profile to the front part of the arch and bend it along the contour of the part, making cuts at the bends. There should be two such elements, on both sides of the interior passage.
We fix the radius profile to the wall with self-tapping screws for metal or wood. You can pre-screw the dowel into the wall for better adhesion of the profile.
 Mount a metal frame from a profile to secure the drywall arch elements into the opening.
 Now we need to strengthen the structure. This will require a straight profile, which is set according to the depth of the arch. How to make a frame for beautiful arch in the apartment you can see in the photo:
We collect the interior arch in the apartment
It remains quite a bit before the logical conclusion of the process - to fix the details to metal frame and decorate the surface of the walls.
- Let's take one front part of the arch and fix it to the wall and metal profile. It is more convenient and faster to screw screws into the arch frame with a screwdriver. It's good if you have an assistant. It is very difficult to keep the parts even and tighten the fasteners alone. There shouldn't be any twists. The beauty of the future arch in the apartment depends on this.
- We do the same with the second part of the arch, fixing it on the back of the opening.
- Now we will install the lower bar of the arched structure. This is a little more difficult because the drywall needs to be curved. To do this, the GKL should be wetted with a damp cloth along the entire length and left for a while near the wall. The sheet will begin to bend forward, then you can take the part and carefully begin mounting it on the wall. A roller with spikes is also used to smoothly bend the sheet. Pass them over the entire area of the plasterboard, the plaster will begin to take the desired shape. Fix the part in the opening with self-tapping screws and cut off the excess, if any.
- The vertical walls of the interior opening can also be decorated with drywall, if no other finish is provided.
- Check your result before finishing. The caps of the self-tapping screws should be slightly recessed into the GKL so as not to interfere with further finishing.

Surface ready for decorative trim to match the rest of the walls or something else.
Arches have been used in architecture since the second millennium BC. At the dawn of history, they were given a special sacred meaning: to pass through the arch meant to be born again.
Today, arches are gaining popularity in interior design.
The interior arch performs the same functions as several thousand years ago: it gives originality and visually divides the space, at the same time combining two rooms together.
Arches are most actively used in a wooden private house or in an apartment, they are usually mounted in a corridor or connect a kitchen and a living room.
Varieties
Arches are a symbiosis of elegance and versatility, fit into any interior, ennoble the doorway.
The variety of forms of arched structures classified as follows:
In addition, the arches can be made according to individual sketches and have a bizarre shape, depending on the customer's imagination.
Interior arches are made from the following materials:
- Wooden – practical material creating an atmosphere of comfort and warmth. Arches made of wood fit into any type of opening.
- Drywall- Differs in plasticity, ease of installation.
- Plastic(pvc) - easy to care for, moisture resistant, durable.
- mdf-aesthetic, big choice colors and textures, affordable price.
Do you know how to fix drywall on a wall without a frame? Read in this article.
Decorative finishes

Interior arches made of mdf, plastic or wood are usually left in original condition.
In turn, drywall structures require additional decor.
Finishing performs the following functions:
- camouflage - allows you to hide installation defects;
- technical - adjustment of dimensions using decorative elements;
- decorative - gives the arch a final look in the theme of the chosen style.
A huge number of modern finishing materials allows for individuality and combinations with other components of the interior.
Consider the most common options decorative finishes:
- Plaster- a simple method, while the choice of textures and colors will satisfy the most demanding taste. The surface is preliminarily puttied and primed, they are allowed to dry completely and decorative plaster is applied. If a relief is provided, then a drawing is made on a fresh leveled layer.
- Cork wallpaper- presented in the form of rolls or tiles made of veneer or cork chips. They are light, elastic, durable, mounted on a leveled surface with glue. Finishing the arch itself with cork wallpaper is quite easy and does not take much time.
- Painting. The pre-leveled drywall construction is covered with acrylic or water-based paint, wooden - varnished.
- Decorative rock- durable, resistant to external influences, but not cheap material. Installation is laborious, requires certain skills. The stone must be glued to the cement base after preliminary filling and priming of the vault and walls.
- Mosaic. It is made from pieces of ceramics, glass, stone, pvc panels with a wide range of shades. Based on the material used, the elements can be square, round, oval, rectangular, triangular, arbitrary shape. Decorating the arch with mosaic drawings is quite easy, you just need to turn on your imagination. Mosaic drawings are original and unique.
As you know, modern design ideas are constantly presenting us with new solutions. Finishing with mirrors or textiles looks original. Frescoes will give the status to the interior– hand-painted with paints on wet plaster.
Design experts experimenting with shapes, creating arches with through niches or bar counters. In recent years, stucco, columns and gilded details have returned to fashion.
Do-it-yourself arch in the hallway
Making an arch at home - not hard work, requiring minimal experience in the area of home renovation. Consider the technique of erecting a simple semicircular plasterboard arch in the hallway. Note that the process may differ slightly depending on the thickness and material of the walls.
We buy materials and prepare tools
Measure the opening, make a sketch, indicating the height of the beginning of the rounding and the radius.

Best option - moisture-resistant, fire-resistant drywall. It is desirable to choose a wall with a thickness of 12 mm, arched - 6.5 mm. Straight frame elements require a rack metal profile, and a contour guide profile.
You will need short self-tapping screws for metal, special for drywall, as well as wood screws.
From the tools we prepare:
- roulette;
- perforator;
- level;
- jigsaw;
- putty;
- pencil;
- metal scissors.
Preparatory work
Clear the opening of paint, wallpaper, expand the opening or increase in height, if necessary. Level the side walls using putty, make marks with a pencil.
Cut out two rectangles from drywall. Apply an arc shape to the drywall using a nail or pencil tied to a thread.
Do not make an unnecessarily steep arc, especially for a narrow opening.
Then cut the arch electric jigsaw
, or with a hacksaw, repeat the procedure with the second rectangle. (see photo) 
Frame installation
cut four vertical element coinciding in length with the height of the workpiece and two horizontal, equal to the width. Next, you need to install the profiles and attach them with self-tapping screws. 40-50 cm long to the walls of the opening, leaving about 1.5 cm deep on both sides.

Consider the thickness of drywall to the design coincided with the plane of the wall. Start with the horizontal guide.
You may be interested in information on how to putty drywall for painting. Read this one.
Assembly
Fasten drywall sheets to both sides of the frame using a screwdriver. Leave the heads of the screws flush with the surface. Then measure the length of the arc and separate the section of the profile with metal shears.

To bend a profile need to make a few cuts around the edges, the more often - the stronger the bend will be. Fix the resulting arc with self-tapping screws at the bottom of the metal frame. Connect the guide and drywall with self-tapping screws in increments of 10-15 cm.

Lightly dampen the drywall before bending. Now attach the resulting element to the arches (the cuts should be inside the structure), attach with self-tapping screws. Achieve maximum fit of the frame to the structure.
Finishing
At this stage, it is necessary to sheathe the edges of the drywall and joints with fiberglass mesh or paper tape, wait for it to dry. Apply a layer of putty and after drying sand the surface. Repeat the procedure twice for perfect smoothness.

Decorate according to your taste. As an example, let's take most simple and economical way - pasting the arch with wallpaper with further finishing of the edges with a plastic corner.
Wallpaper should be chosen easy to care for (vinyl, bamboo, non-woven), monophonic or with a small complex pattern are recommended. It is necessary to glue the walls on both sides of the opening, leaving a margin of 2-2.5 cm, cut off the excess, fold the edge into inner part arches.
Cut a strip of suitable width and glue inside the opening.
The joint will look more aesthetically pleasing if you use a plastic corner.
Preferably before installation degrease the inside corner, then apply a thin layer of sealant, liquid nails or special glue, press firmly to the installation site. fix, wait for the glue to set.
The work is completed, you can enjoy the result.
Do-it-yourself drywall arch: video instruction.


