03.09.2016 76960
It is not enough to establish a high-quality finish of openings. This task is not so difficult as to not cope with it on your own.
Finishing Requirements
Before proceeding, you should study the requirements for the job.
They must be followed if you want to get decorative and durable slopes that will not lose their visual appeal for many years.
The rules are:
- The installation of suitable door and opening fasteners is an important step in the work to increase the safety, strength and aesthetic appeal of the structure.
- It is advisable to choose the same material from which the door is made. In any case, it should be in harmony with the situation and contribute to the creation of a single image.
- It is important to determine the appropriate mounting method. So, the decorative stone is attached by gluing to the wall, and sheathed only after the installation of the crate.
- Pay attention to sound insulation and the ability to save heat.
- Finishing the doorway ends with the installation of platbands.
- Sometimes different materials are used for interior and exterior decoration.
What materials are used?
Finishing the doorway after installation is carried out with the following materials:
- cement-sand mortars;
- drywall, acting as an independent option or the basis for subsequent finishing (for example, you can use wallpaper);
- plastic, wood panels, laminate, veneer;
- decorative stone, natural or artificial.
If you decide not to call the master, select the material and get to work.
However, it is important to learn in advance about the nuances of finishing and correctly assess your strengths.
Stucco doorway
Plaster is considered a classic option. This method is used in non-residential premises or where additional finishing is expected in the future. Plastering should be done with care and attention, and then carefully handle the doorway, because it will become difficult to care for it. But the method also has advantages: strength, durability, resistance to adverse environmental factors, the ability to easily repair in case of damage, cost-effectiveness (30 kg of plaster mixture costs 200-300 r).
The finishing process looks like this:
- The surface is cleaned and then primed.
- After drying, guide beacons are installed. The evenness of the position is determined by the building level, and fixation is carried out with a solution.
- A reinforced mesh is attached to the surface. The door frame and walls that are not to be lined are covered with masking tape.
- Holes and voids are filled with the solution, after which it is applied to the entire surface.
- The resulting cracks are eliminated with putty.
The doorway is ready for painting or installing other facing materials.
Drywall finishing
It can also become the basis for the subsequent transformation or an independent option. Drywall is not as durable as plaster, but it looks attractive, strict and stylish, and it is also easy to install. Another important advantage of drywall sheets, located in the range of 200-400 r.
Finishing the front door openings is carried out as follows:
- Measurements are being taken.
- Plasterboard sheets are cut into fragments. The resulting parts must completely cover the slopes and fit snugly against each other.
- Damage to the surface is repaired with mounting foam.
- Foam is also used to fix the finishing material. To do this, it is applied in a zigzag pattern to the wall, after which the drywall is pressed for several minutes. It remains to wait 10 minutes and press the material again. In this way, fast and strong bonding is achieved.
- The gaps remaining after the end of the work are sealed, excess drywall and foam are cut off.
- The voids at the edges are puttied.
Finishing with MDF panels
MDF is used for interior cladding of entrance doors in residential buildings and office premises. The material is characterized by durability, hygiene and aesthetics, provides good sound and heat insulation, and tolerates moisture well. Panels cost 150-250 rubles. per square meter. The tree will cost more: 300-700 r. Serious disadvantages of the material include its easy flammability and the fact that cladding is possible only after the installation of the frame.
An expensive purchase also includes the purchase of veneer - a wood material characterized by high strength and aesthetic appeal. True, direct sunlight is fatal for him. The price per square meter is up to 5,000 rubles.
To decorate a doorway with wood, veneer or MDF panels, you need:
- Using self-tapping screws and dowels, install guides from wooden slats. The frame slats are treated with an antiseptic before starting work.
- Adjust the panels to the desired size.
- Attach the first part with screws or nails to the guides, continue cladding, completely covering the slope in width.
- Mount corners and side panels to the guides.
- Mask the fasteners with adhesive, install a decorative rail.
- Attach platbands around the perimeter of the door.
plastic finish
A popular material, environmentally friendly, budget and unpretentious in care. Manufacturers offer a wide color palette, which makes it easy to match the plastic to the texture of the door leaf. A square meter costs no more than 200 rubles. But the material does not differ in special strength and is not suitable for every door.
The entrance opening is according to the same principle as MDF: first, the surface is prepared, then the crate of the rails is attached, and plastic panels are already attached to it.
Sheathing with laminate
Such a finish usually does not raise questions even among inexperienced builders. This is due to the special flexibility of the laminate, its ability to take various forms. The material looks advantageous, does not harm the environment, but it does not tolerate high humidity well, so you should not use it from the outside of the opening. The price of sheets is 300-3000 rubles.
Finishing a doorway with a laminate differs little from facing with MDF panels. But it is not necessary to mount the frame: another finishing method, suitable for smooth walls without flaws, involves gluing the material with mounting foam immediately to the surface.
Finishing with decorative stone
Ideal for public places, although it is easy to decorate a cottage with stone. But this option is not cheap: the price of a natural or artificial decorative stone is set in the range of 200-1500 rubles. per square meter. The material is reliable, durable, tolerates temperature extremes and high humidity, and is suitable for both external and internal work.
Finishing is done like this:
- The material is laid out on the floor, forming a pattern. If necessary, the edges are trimmed and sanded.
- The opening under the door is cleaned, the damage is rubbed and eliminated with putty. After that, the surface is primed. Platbands and plinths are removed.
- With the help of glue or “liquid nails”, the stone is attached to the walls, starting from the bottom from the corner. Gaps are either not left or filled with a sealing compound.
- After drying, the adhesive that has fallen on the front side of the stone is removed. The composition that gives shine is applied.
- The details of the opening are put in place.
It is important to know that a rectangular structure is lined with stone according to this principle: there is always more material at the bottom than at the top. The pattern is located symmetrically, taking into account vertical and horizontal seams, a good solution is the “torn” edges of the finish. drawn strictly along the contour.
Having understood the peculiarities of working with various materials, you can ennoble the doorway of the front door to your liking.
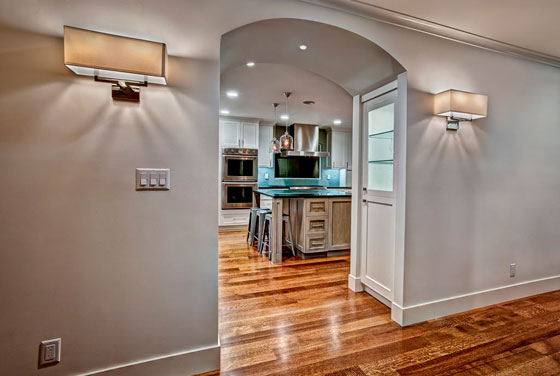
Making a doorway in a kitchen without a door is a popular design technique that implies not only savings, but also the original appearance of the interior, as well as the absence of the need for complex maintenance.
In the case of the kitchen, the latter is especially important - the room in which they cook is filled with steam and food smells for a long time, it has high humidity.
This makes the room quickly polluted. Just imagine how burdensome it will be to take care of the doors if they are made, for example, from precious woods.
The issue of saving money is joined by the question of saving space - why reduce the already small area of \u200b\u200bthe kitchen by installing doors in it. Especially a lot of space will be “eaten up” by a standard swing design - professional designers say that about one square meter.
Whereas a free doorway will visually expand the room and unite a functionally divided space: for example, a kitchen and a living room or a kitchen with a dining room.

Let us consider in more detail the advantages and disadvantages of a kitchen doorway without a door, what materials can be used, finishing options and some decoration features.
| The main advantages of open doorways: | |
|---|---|
| Saving money | Regardless of what materials and finishes are used, they will cost less than installing interior doors. |
| Visual union of adjacent spaces | If it is extremely important to separate rooms such as a toilet or bathroom from other rooms, then the kitchen will not suffer from the absence of a door. Moreover, there are others. |
| Aesthetic appeal | The non-standard appearance of open doorways, with proper design, looks extremely impressive and original. |
| Wide range of materials and decoration methods | The design allows you to use almost any materials for decoration and decoration. Plus, the geometric shape of the opening is also limited solely by your imagination. |
| Good room ventilation | The absence of obstacles in the form of a door leaf will allow air to circulate freely. |
5 best materials for decorating the doorway to the kitchen
In deciding how to arrange a doorway to a kitchen without a door, the finishing method is of great importance. Theoretically, almost any material can be used. But practice confirms that the choice of finishes must be consistent with the rest of the interior.
If the design of the opening does not harmonize with the overall design of the room, the perception of the room will be irrevocably damaged.
Another important nuance is not to forget that the kitchen is a realm of high humidity and temperature. Plus, the doorway is a high-risk place, it is often subjected to friction and shock. Therefore, it is more reasonable to use high-strength wear-resistant materials here.

1. Stucco
Unfortunately, not very popular, but extremely attractive and original finishing material. You can use both natural gypsum and polyurethane. The second one has a number of advantages - it is not heavy, unlike gypsum, it is easily glued and firmly adheres to any surface. Initially, polyurethane stucco molding has a snow-white color, but it can be easily painted in any chosen shade.
This design is perfect for the Venetian style, baroque, rococo, classics or similar stylistic solutions. In the case of choosing discreet design styles, it is better to refuse stucco molding.

2. Artificial or natural decorative stone
It is more difficult to work with natural stone than with artificial, and it is much higher in cost. Artificial is also made from natural rocks, but with the addition of various dyes and polymers.
The shades and texture of this material are quite diverse - you can choose an option for almost any interior. To finish the doorway, it is better to select medium-sized stone elements.

Decorative stone is perfect for a Provence, country or oriental style kitchen. The design of the doorway can be arranged both in the form of smooth borders and using the “torn edge” technique.
It is quite difficult for a non-professional to do this type of finish with his own hands - the stone is quite capricious in laying. To ensure the adhesion of the stone to the surface, the walls are pre-treated with several layers of primer. Each element should be held for some time during gluing for a stronger connection.
The tree does not lose its popularity due to its environmental friendliness and relative cheapness. Inexpensive wood can be processed in such a way that it is indistinguishable from expensive species.

The choice of the shape of the doorway - an eternal classic or an original bend?
The classic shape for the construction of a doorway is a regular rectangle. But since the door is not needed, you can beat this moment in a more original way.
At the peak of the popularity of the arched design. They are versatile and easy to adapt to any interior style.
Oval, trapezoidal, domed, triangular arch - the choice is yours. Arched structures are usually made of drywall, under which a metal base is hidden. We should not forget that arches with a rounded or oval vault require partial dismantling of the wall.
For other complex forms of arches, drywall is also used. In open openings of this type, you can even organize shelves, rods or other decorative details.

The paramount principle that should be followed when choosing the shape of a doorway for a house or apartment is compatibility with the general style of the room:
| Compatibility of finishing with the general style of the room | |
|---|---|
| Baroque, Rococo and Empire | They gravitate towards symmetrical lines, replete with decorative elements. Gilding, stucco molding, complex reliefs in the upper part of arched openings are at your service. |
| Classic style | It implies the use of arches of a three-center, semicircular or oval shape. |
| East style | His favorites are arches of the most unusual and original form: keeled, in the form of arrows, hearts, etc. |
| Romantic | Chooses the restraint of materials and forms: gentle or semicircular arches. |
| Techno, hi-tech, minimalism | Geometric and strictly symmetrical lines. |
| Modern, pop art | They prefer brighter and more relaxed solutions and sinuous outlines. |
Another important nuance when choosing the shape of the opening is taking into account the features and disadvantages of the room:
- For low ceilings, a more profitable option is when the radius of the corner of the arch exceeds one second of the doorway. Thus, the ceiling will visually look higher.
- If the ceilings are high, then the best solution for the "door without doors" design would be to use an arch, the radius of which is equal to half the doorway.


Making a doorway with textiles
As a finishing touch, you can arrange a doorway without a door with screens or curtains. This will give the room a touch of comfort and completeness. Plus, it will protect the space from prying eyes, completely hiding the doorway, if necessary.
If there is no need to isolate the room, you can fix classic fabric curtains with beautiful ribbons, hairpins or special cords.

Textile looks equally good both on a classic opening in the form of the letter P, and on an arched structure. The curtains that replace the door should stylistically match the curtains on the kitchen windows.
An interesting technique is the use of hanging curtains instead of fabric products. They can be purchased ready-made or made by hand from the following material:
- plastic;
- glass;
- beads;
- shells;
- pebbles;
- bamboo;
- cords, including hand-tied;
- sequins;
- wooden elements.


You should not try to introduce curtains with vertical closures such as Roman, French, Japanese or English into the decor of the kitchen. They will prevent the free passage from one room to another.
There are a huge number of different options for a doorway without the presence of the doors themselves. You can design such a design both independently and entrusting a professional designer. The main thing is that the doorway does not violate the overall style of the interior, but organically fits into it.
Finishing the doorway is carried out with various materials, each of which has a number of features. In this case, it is important to take into account the presence or absence of a door leaf, which will affect the procedure for carrying out work and the method of installation. Due to the variety of finishing materials, you can choose those that harmoniously fit into the design of the room.
Finishing doorways without doors is carried out in the following ways:
- Standard. In this case, the installation of various materials is performed without changing the design of the opening.
- Arched. Completely or partially change the configuration of the opening, and then make the cladding.
The easiest way to finish the passage of a rectangular shape. This is a classic option that will suit any home design. Arches require the creation of broken or smoothly merging shapes. They are created mainly in spacious rooms.
As a facing material, the following are chosen:
- plastic;
- laminate;
- wood;
- stone;
- plaster;
- moldings;
- tiles, etc.

plastic or laminate
The most popular is the finishing of the doorway with plastic panels. This is due to the high strength of the material, the variety of shapes and colors of the product, the ability to imitate different textures, affordable product prices. Plastic is quite practical, since dust and dirt do not settle on its surface, and it is easy to wash the opening trimmed with plastic. Installation of panels is simple, and it can be done independently.
The laminate has high wear resistance and resistance to mechanical damage. It is also protected from ultraviolet radiation, which prevents the material from fading if it is in the path of sunlight. The strength of the material allows you to attach various decorative elements to it, and the surface is easy to clean. The main condition is the selection of laminate to match the interior.
Installation of extensions

Dobors are boards made of MDF or wood of various widths. This indicator varies between 10-20 cm, which allows you to install the product in various doorways. Extras can be simple or adjustable. The first rests against the L-shaped cutout in the door frame, and the second is connected by entering the spike groove. Adjustable extensions allow you to fine-tune the protrusion after taking measurements. The connections make the installation process quick and speed up the foaming process.
tiling

Finishing doorways with tiles requires that the surface be as even as possible. Otherwise, the design will have an unattractive appearance. A wide range of products on the market allows you to choose the material for any design of the room, and ease of installation does not require the involvement of specialists for laying tiles.
The material goes well with stone and plaster, which allows it to be used in loft-style living spaces.
stone

In the decoration of the interior passage, natural or artificial stone is increasingly used. It is a stylish decor and allows you to give the room an unusual look. The cost of the material is high, but the design gives respectability to the room. The stone has the following advantages:
- spectacular look;
- strength;
- ease of operation;
- compatibility with other materials.
In order not to overload the interior, a stone of medium or small size is used. The edges are specially made uneven.
Plaster

If you plan to paint or wallpaper on the slopes of the doorway, plaster is used. She prepares the base and levels the wall. You can also use decorative plaster, which creates an unusual relief or pattern. The advantage of this finishing method is that, if desired, it can be repainted while maintaining the same structure.
Drywall

To make the interior of the room special, the owners remake rectangular interior passages into arched ones. In this case, finishing doorways without doors is best done with drywall, since it is easier to create curved shapes with it. Thanks to the frame, any bend can be made, and the filling material has a smooth, even surface. This allows you to paint the opening or paste it with wallpaper.
Step by step instructions for each type of finish
Installation of all the materials listed above can be done by hand. This will require some tools and basic building skills. Finishing doorways without doors with plastic can be made from ready-made sandwich panels or PVC. The first product is cut in width and height, leveled, fixed with spacers, and then mounted on mounting foam.
To install PVC, you need to create a frame from a profile. For these purposes, you can use aluminum guides for drywall. A frame is made along the perimeter of the passage, then the front finishing of the opening is performed. The plastic is fixed with self-tapping screws, and the corners are closed with special PVC corners, which are attached to the glue.
Extras are set according to the following algorithm:
- Make accurate measurements of the opening with a square or ruler.
- Cut boards with a jigsaw or saw. It is advisable to do this with a power tool, using high engine speeds. This will avoid chipping.
- In places of fasteners, hidden holes are made for the hat of self-tapping screws and guides. It is necessary to hold the drill strictly perpendicular to the floor so that the recesses are even. The holes must match the length of the screws.
- First, vertical extensions are installed, then horizontal ones. There should be no gaps between boards.
- Fixation is made on the mounting foam. To prevent bending of the extensions, spacers are installed.
- After a day, excess foam is removed and platbands are mounted.

So you can ennoble not only the passage without a partition, but also with a door.
To complete the tiling, you need to follow these points:
- clean and plaster the walls;
- prepare glue or liquid nails;
- apply glue with a spatula or comb on the back of the tile, spread it over the surface and remove the excess;
- firmly press the material against the wall and press down with force for several seconds.
Finishing with stone is carried out in the same way as with tiles.
For plaster, a cement-sand mortar is used. Cement must be taken grades not lower than M 300. For 1 part of it, 3 parts of sand are taken and mixed with water. You need to achieve the consistency of thick cream. After removing all protruding elements from the wall surface, the plaster is applied with a wide spatula. Evenness is checked by a building level or a rule. The corners are formed with metal corners.

The use of drywall is the solution for an arched opening. First, a rigid aluminum profile frame is made around the perimeter of the passage. UW and CW guides are used. Then drywall is cut and fixed with special screws. At the end of the installation of the material in the opening, all joints are sealed with sickle tape or covered with putty. The surface is primed.
Design solutions
When ennobling the doorway of the front door, various design solutions can be used. You can change the shape, combine finishing materials, complement existing ones with various decorative elements. Everything is limited only by the imagination of the performer or customer.
It is enough to figure out what materials and how to ennoble the doorway after installing the metal entrance structure, so that this operation can be performed by yourself, saving on expensive services of craftsmen.
The face of a modern building or dwelling is the front door. The attractiveness of the external appearance of the building depends on the quality of its manufacture and installation. In most cases, the owners of apartments, offices, houses today install iron structures that are durable, reliable in operation, and easy to maintain. It is easy for the consumer to choose the ideal door in all respects. You can purchase a product of the most unpretentious design or a truly spectacular design with original decorative inserts and elements.
Plastering is the easiest way to finish door slopes
At the same time, regardless of the type of door, care should be taken to properly ennoble the opening after its installation. Only in this case the entrance to the house will look perfect. Finishing a doorway after installing a particular iron door is often trusted to specialists. But their services cost a lot of money. Any home master can avoid financial expenses. To do this, you just need to figure out how the ennoblement of the doorway is performed. Most often, the design of the entrance group is carried out in the following ways:
- 1. Plastering with compositions based on sand and cement. Well known finish. It is optimal for decorating doors in household and utility buildings, baths, garages. If you use plaster mixes to decorate the entrance to a residential building, you need to additionally decorate the opening with suitable finishing materials with high decorative characteristics.
- 2. Improvement of slopes with wood-fiber (MDF) boards. These products are inexpensive, their use allows you to perform high-quality thermal insulation of the doorway and at the same time give it an aesthetic appearance.
- 3. Finishing with sheets of drywall (gypsum plasterboard). An affordable way to decorate a door. It is actively used by owners of commercial and residential premises.
Also, PVC panels and decorative stone are used for decoration.
Finishing with plaster - ready for the hard work?
If the repair measures in the room are not completed, you can finish the opening of the metal structure with a plaster mixture. This work, let's say right away, requires a considerable amount of physical strength, as well as knowledge of the basic rules for the preparation and use of cement-sand compositions. The procedure is performed according to the following scheme:
- Remove the old plaster mixture, thoroughly clean the opening from dirt and debris.
- Apply the primer to the cleaned substrate. We recommend using for concrete and brick surfaces.
- Place the beacons using the building level, and fix them with cement mortar.
- Cover the door frame and areas around it with masking tape.
- Install a reinforcing fiberglass mesh on the surface to be improved.
- Add water to the plaster. It is better to purchase ready-made mixtures in a hardware store, not so much material is required, it makes no sense to mix sand and cement on your own. The required amount of liquid is indicated on the package with plaster.
Now proceed to the main stage of the operation. First, fill with plaster voids in the wall surface, large potholes. And then press the rule to the beacons and treat the surface with the composition as evenly as possible. You will have to wait until the mixture hardens, after which you should evaluate the results of your work. Often, bumps and small cracks appear on the plastered dried areas. Of course they need to be removed. This can be done by puttying (use finishing mixtures) and painting the leveled surface with a suitable color paint.
It takes 2-3 days for the plaster to dry completely. It is best to take acrylic paint, intended for decorating facades. She is not afraid of low temperatures and moisture. The plastered and painted doorway visually looks very neat. It can then be further ennobled with the finishing material you like. But do not forget that not every home craftsman will be able to beautifully finish the slopes with plaster. If you are not confident in your abilities, it is better to abandon this venture.
Finishing the front door opening with wood-fiber products is relatively simple. You will need to purchase three pieces of a bending decorative corner, platbands and MDF panels, about 9 meters of guide rails, dowels, self-tapping screws, liquid nails, a jigsaw saw, mounting foam, cement mortar, a chisel, a brace, a chisel, a tape measure, a construction knife, a simple pencil . Immediately select the type of finishing products. They are painted, laminated and veneered.
The first type of wood fiber panels is not suitable for finishing a metal structure (they have low strength). Laminated material is very beautiful in appearance, has good strength characteristics. Veneered products are considered the most reliable. Now we will describe in detail how to decorate the doorway of the front door with MDF panels as competently as possible. But first, let's give some important tips. Firstly, you need to very accurately determine the parameters of the door leaf (up to a millimeter). Secondly, the distance between the internal slopes of the structure is always taken less than the distance between the external ones. It is important. Thirdly, in relation to the level of the box, the slopes should be mounted 15–20 mm lower.

With the help of MDF panels, you can perform high-quality thermal insulation of the doorway and give it an aesthetic appearance.
The finishing process itself is as follows. Remove old paint, whitewash, plaster from the slopes, seal the gaps between the door and the wall surface with foam, as well as the holes on the surface. After hardening, cut off excess mounting material with a construction knife. Treat the slopes with a primer, level them with cement mortar or plaster. Press (carefully) the mounting profile into the corners of the surface to be treated. These guides will become the basis for decorating the slopes.
Then cut out the top and two side elements from the MDF panels, focusing on the dimensions of the door. Treat the upper part of the slope with adhesive and press the prepared part to it. Do the same with the side elements. You need to press the panels hard enough and hold them until you feel that the glue has completely seized. After that, the gaps between the wall and MDF products are closed with a plastic corner (such material is easy to find in any hardware store), which is fixed. The outer parts of the slopes can be ennobled with cashing (nailed with nails of suitable size) or with the same decorative corner.
Some self-taught masters do not pre-level the slopes. They simply nail the guide rails, and then mount MDF products on them. You can try to trim the front door opening in a similar way.
GKL are suitable for refining surfaces adjacent to doors from the side of the room (from the inside). In this case, wall drywall is used. Also, prepare in advance a bucket for mixing plaster, a hammer, a tape measure, metal screws, 6x60 mm mushroom dowels, an adhesive for plasterboard, a perforator, plastic guide and starting profiles, a spatula, a screwdriver, stationery or special knife.

GKL are suitable for refining surfaces adjacent to doors from the side of the room (from the inside).
Algorithm for designing slopes from the inside:
- 1. Blow the mounting foam into the gaps and recesses on the surface. Cut off (after hardening) excess pieces with a knife or spatula.
- 2. Every 0.2 m, drill holes along the perimeter of the slopes with a puncher. Install dowels with screws. It is not necessary to tighten the hardware until it stops.
- 3. On three sides of the opening, measure the dimensions of the profile (starting). Mount the latter, fix it with metal screws.
- 4. Cut the plasterboard into three parts according to the required dimensions. The width of the opening and the slope from above should be the same.
- 5. Prepare the adhesive according to the manufacturer's instructions. Stir the composition thoroughly (the presence of lumps in the composition is not allowed).
- 6. Lubricate the plasterboard strips and the areas where the dowels are mounted with glue.
- 7. Get the edge of the drywall strip into the guide from above, press it. Put spacers and wait 2-3 hours. During this time, the adhesive will seize tightly.
Then install the side strips in the same way. Be sure to check the accuracy of installation with a building level. Glue protruding onto the surface of the drywall should be wiped off with a rag without delay. If you leave it, the GKL is guaranteed to bend, and instead of a beautiful decorative finish, you will get unattractive curved slopes.
After completing all the described procedures, wait 12 hours and proceed to puttying the slopes. And then paint the opening in the desired color and enjoy the impeccable look of the door structure.


