The rocking horse has always been a favorite toy for children. Even now big variety games cannot replace it. You can also make a horse out of wood with your own hands. To do this, you need to find a suitable template and prepare tools and materials for the rocking chair and its subsequent finishing.
Necessary materials
The list will depend to a greater extent on the chosen template and the type of rocking chair, but most often you need to prepare:
- a photocopy of the selected template;
- pencil and carbon paper - with its help, the drawing will be transferred to plywood;
- sawing table and jigsaw;
- awl;
- glue with a brush;
- paint and brushes for finishing.
The rocking horse has a good effect on the vestibular apparatus of the child, contributing to his proper development. For the manufacture of children's toys, you need to use only eco-friendly and hypoallergenic materials. Fur upholstery will help to add naturalness to the horse, it is advisable to first place foam rubber or other soft material under it.
A carefully thought-out design will create a high-quality, safe and durable toy on which the child will enjoy spending time.
simulation toy
The rocking horse, despite its popularity, has a small number of ready-made drawings. It's easier to buy now finished model for a large sum, rather than make it yourself and create a unique toy.
If preference is given to the second option, then you need to seriously think about modeling the structure. To do this, you can use special computer programs. But it’s easier and more convenient to sketch a drawing on a piece of paper, and then create your own template.

With it, you can transfer the contours of parts to plywood or cut necessary elements constructions from unplaned boards (their thickness must be at least two centimeters, otherwise the strength of the rocking chair will be insufficient).
The rocking horse must have an appropriate finish. There are practically no restrictions on this issue. The main thing is that it looks natural and does not irritate the eyes of the child.
The main components of the toy
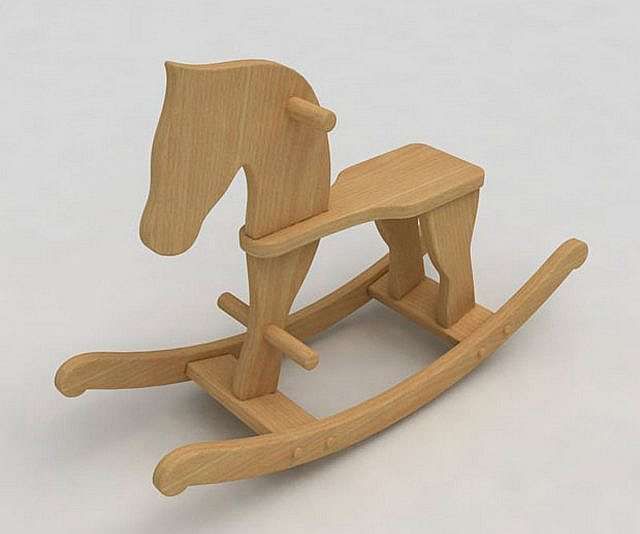
Wooden rocking horse includes several parts, which, when proper manufacture ensure the strength and stability of the structure.
- Lateral parts - are made in two copies. They look like flat rounded elements resembling the body of a horse.
- Intermediate boards - it is also necessary to make two pieces. One of them is fixed on top, between the two sidewalls, and the other is lower (it provides strength).
- The horse's head is cut from wood and carefully polished.
- Saddle. It can be represented by simple plywood. It can also be made soft - using foam rubber and upholstery.
- Reiki - they are made in the amount of four copies: two are set for the legs and two for the hands (reminiscent of horse reins).
The main task of creating a design is to ensure comfortable use of the toy and its safety for the child.
Construction steps
To simplify the manufacturing process, it is necessary to perform all steps sequentially. Then nothing important will be missed and much less time will be spent. A wooden rocking horse is made quite simply and quickly.
- All parts are transferred to plywood individually in required quantity. This is done with a carbon paper and a pencil.
- After marking, all elements are cut with a jigsaw.
- The cut parts are tried on. If necessary, some parts can be trimmed or edited so that the rocking horse is strong and all holes fit perfectly into the elements.
- First, parts of the body, back and saddle of the horse are connected.
- Then assembled structure attached to the prolegs and firmly fastened with spiked holes.
- The last step is finishing. Here you can show your imagination with might and main. There can be many options: painting, upholstery, pasting, painting, burning. It all depends on the possibilities and wishes.
If desired, you can change the number and type of main elements. But first you need to think carefully about the design so that it is comfortable for the child and stable.
Finishing options for the finished toy
After the rocking chair is fully ready, you can start painting or painting it. In this matter, it is important to take into account the age of the child and his interests. For example, a cowboy horse can be made for a boy, and a rocking horse intended for a girl can be painted in White color and trimmed with a colored mane and a long tail.
For the little ones suitable option with a horse in the meadow. The runners in this case are painted green, imitating grass, and several flowers can also be drawn in the area of the horse's mouth.
The general style of construction should be natural, then even the smallest will soon begin to recognize the horse and will study and master it with interest.
Photo store options
See photos for inspiration various designs which are presented in children's stores. Often the same toy is easy to make at home. Children's rocking horses made of wood will always be in demand among buyers.
1. Classic model, for middle-aged children. Made from durable wood. Perfectly fit into the classic interior of the room. 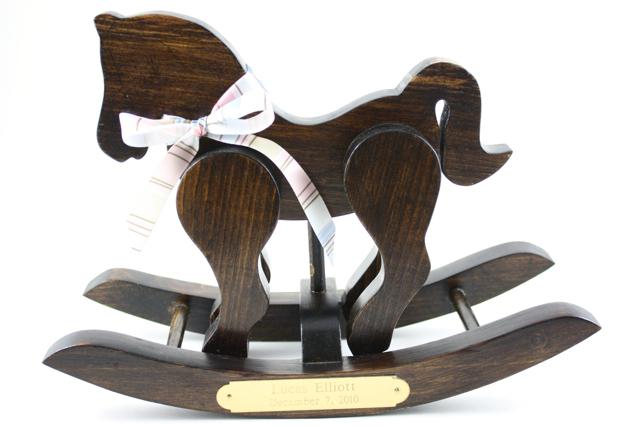
2. The model is suitable for children of the youngest age. It has comfortable back and restraints to prevent the child from falling. When the child grows up, they can be removed, and the baby will be able to swing independently on this convenient toy. 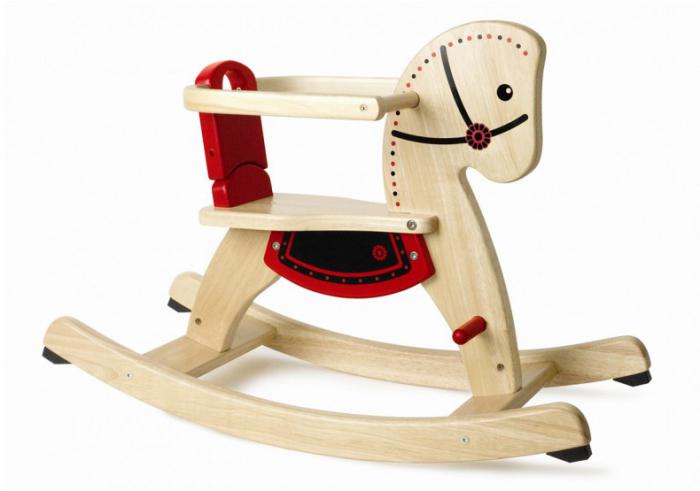 3. An amazing horse for little princesses. The soft seat resembling a throne will impress any girl.
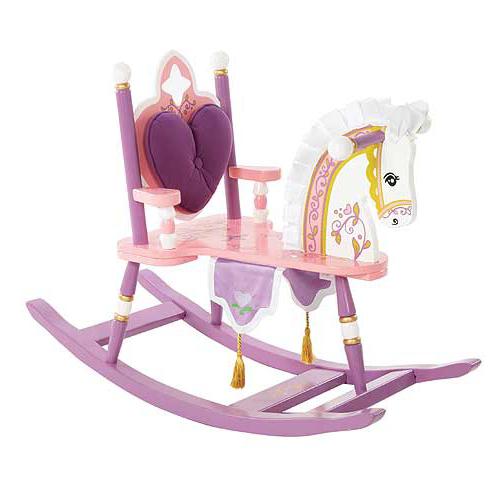
A handmade rocking horse will be a great gift for a child. It is possible that his future children will also like to play with this toy. Therefore, a horse is a universal gift in any childhood and for any holiday.
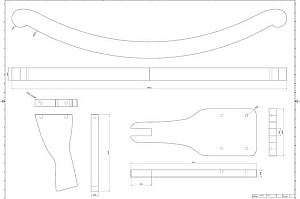
The wooden horse is being made from four main elements: from two flatly rounded sidewalls and two intermediate boards (the upper part and the part that serves to strengthen the structure).
In addition, a horse needs a head, and a small rider needs a saddle, a support back and two slats on which you can put your feet.
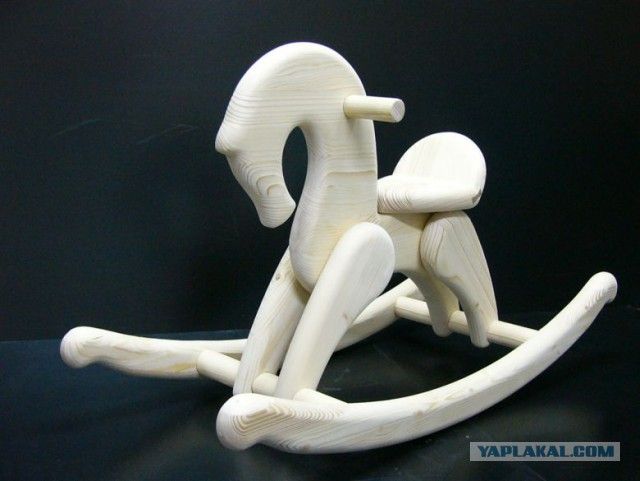
As a material, we use planed boards (at least 2 cm thick) made of pine or spruce.
The dimensions should be such that the child can sit comfortably and swing easily.
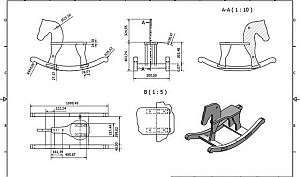
The main dimensions of the horse can be taken as follows: length - 110 cm, height - 60 cm and width 25-30 cm. It should be emphasized once again that the rounding should not form a semicircle, but correspond to a more elongated figure (like an ellipse) so that our horse does not roll over during an intense jump.
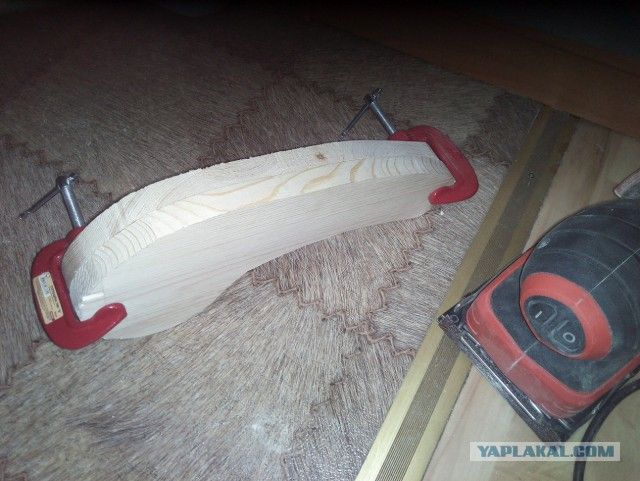
For board sides are interconnected and glued together with cold curing glue (this happens under pressure using large clamps or special linings). For rigid fixation, after cutting the sidewalls, screw to internal parties cross rails as shown in the figure, i.e. middle - straight and both external obliquely. The thickness corresponds to the thickness of the boards, and the width should be approximately 8-12 cm. support board cut out at the intersection in accordance with the size of the rails.
The top and base boards are lubricated at the edges with cold curing glue and connected to the sidewalls with nails or screws.
Leg slats (length - approximately 40 cm, width - 5-6 cm, thickness - 3-4 cm) are glued to the sidewalls in accordance with the intended distance from the seat board and, for greater strength, screw them with additional screws (it is more expedient to do this before joining) .
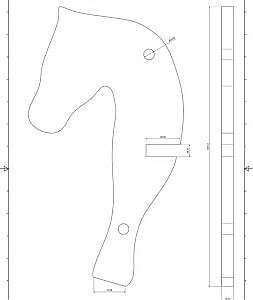
Horse's head it is made from a board 3 cm thick and, depending on artistic abilities and skills, it is decoratively decorated by additional gluing of individual parts, for example, eyes and ears, as well as a mane made of leather, ropes, bast brushes for whitewashing, etc.
The support for the hands is made from a round stick 2 cm thick, which is inserted into a hole drilled in the horse's head and placed there with glue. Saddle carved from wood 2 cm thick and rounded at the top (can also be supplied upholstered). It is nailed or screwed, and attention is paid to the fact that the nails and screws are recessed.
Boards for the back are taken of the same thickness. The head and back boards are attached to the top board with dowels.
In order not to spoil the lawn, it is also recommended shoe our horse. To do this, you can use soft plastic, rubber strips or thick foam strips. Depending on the load, these "horseshoes" should be updated from time to time.
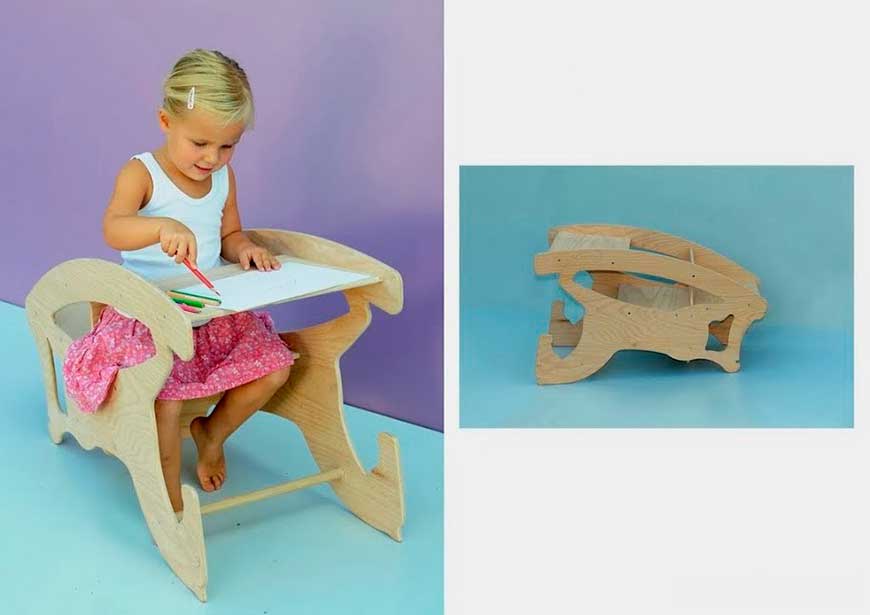
How to make a plywood rocking horse from Kata Toth studio at home
Do you want to make a rocking chair, a high chair and a desk for your child in one product? And do it quickly and cheaply? Then you should read our article in detail. You can be sure that your product will bring a lot of joy to the child, he will use it constantly and with great pleasure.
What you need to prepare for work
The list of materials and tools will not scare you; to make a three-in-one rocking chair, you will need:
- Plywood sheet standard size, about 20 mm thick. You can buy plywood of ordinary quality. Of course, pay attention to appearance. The better condition the exterior veneers are, the less time you have to spend on finishing.
- Joiner's glue, a set of sanding skins of various numbers.
- Clear varnish, stain or oil paint.
- Manual electric jigsaw, measuring tools.
To make a drawing, you need to have some skills in transferring a drawing to paper or plywood, we will tell you about this in more detail.
Drawing development
Our tips for creating an outline on plywood do not apply only to this product, they apply to everything else. So how do you create a drawing? Enlarge the photos on the printer, while you should choose those positions in which the individual parts of the product can be seen in the most detail and without distortion. On the resulting image, apply a grid with a pencil, try to maximize the number of cells, this will help transfer the image more accurately. Then take a sheet of graph paper and count the same number of cells on it horizontally and vertically. On a graph paper, the size of the cells must be increased to real sizes details.
Carefully and if possible, transfer the drawing to graph paper in the same way, observe the direction of the lines in each square. Now you can cut out the resulting drawing from graph paper and transfer the outline of the part to a sheet of plywood. As you can see, there is nothing complicated. And this means that you can make any product even from several photos from the Internet, the presence of detailed drawings is not at all necessary.
Cut out the details
Before you start cutting out the details - check technical condition tool, it required condition to perform any work. The better the tool, the easier and safer it is to work with, the better the cut will turn out, the less time you will have to spend on final grinding afterwards. The jigsaw should not have a runout, the file should be in order, the cutting mode should correspond to the power electric motor jigsaw and plywood thickness.
If “strange” sounds appear during cutting, it means that you do not follow the rules of cutting, and this is in without fail most negatively affect the quality. Unpleasant sounds or vibrations can be the result of such violations:
- The place of the lower stop of plywood is at a great distance from the cutting point. Try to hold the plywood in such a way that the jigsaw file is as close as possible to the bottom stop.
- The plywood sheet takes root with insufficient effort. The pressing force must ensure the stability of the plywood.
- Faulty jigsaw or nail file blunt
Correct all oversights immediately, do not work in such conditions.
Preparing parts for assembly
Our universal rocking chair consists of two sidewalls-horses, a footrest (it also serves as a desk), a seat, a limiter (it is inserted only when turning the horse into a high chair) and a handle to stop during rocking. After cutting out all the details, you need to carefully sand them, remove all sharp corners. Do not forget that this is furniture for children, it must be safe to use. Children should not be injured, completely exclude the possibility of injury by splinters.
Polished parts must be coated with a layer of varnish, the coating will have to be done at least twice. If you wish, you can cover the rocking chair with stain or opaque paints, but we would advise using clear nail polish. By the way, rocking horse designers also cover it with transparent varnish.
Choose a varnish taking into account the characteristics of plywood, it should not raise the pile during drying. If you apply varnish with a brush, then before starting work, work a little with this brush on unnecessary scraps of plywood. This way you will kill two birds with one stone.
- The brush will be cleared of "unnecessary" villi, they will no longer stick to finished parts.
- Find out about the quality of the varnish, if necessary, dilute it with a solvent. Too thick varnish in any case will not hide the traces of the brush, there will always be stripes from the villi. Too thin varnish will not provide a uniform coating layer.
If you applied the first coat of varnish along the fibers, then the second should be applied across the fibers. This way you will be able to achieve more flat surface blanks.
Assembly of a universal rocking chair
We recommend assembling individual parts on self-tapping screws, the joints should be coated with carpentry glue. Be sure to drown the heads of the self-tapping screws, if necessary, sand the places around them again and re-varnish. During assembly, control the position of each part, all angles should be exactly 90 °. The glue must dry for at least 24 hours, do not rush to put your product into operation.
|
In the presented master class from the author, you will learn how to make a children's rocking horse with your own hands, and at the same time it's good to save money, because today you know what prices for children's toys are, and wooden ones are generally impregnable. Our decided to help people and prove own example that you can make great toys for your children with your own hands. And so let's look at how the master managed to make a horse for his child.
materials
1. furniture board
2. handle (from a shovel)
3. wooden chopsticks (sticks)
4. wood glue
5. pattern
Instruments
1. jigsaw
2. drill
3. sandpaper
4. pencil
5. ruler
6. router
7. brush
The process of creating a rocking horse with your own hands.
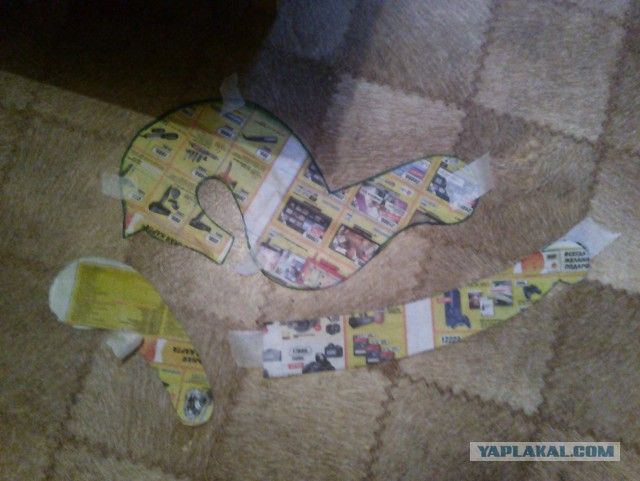
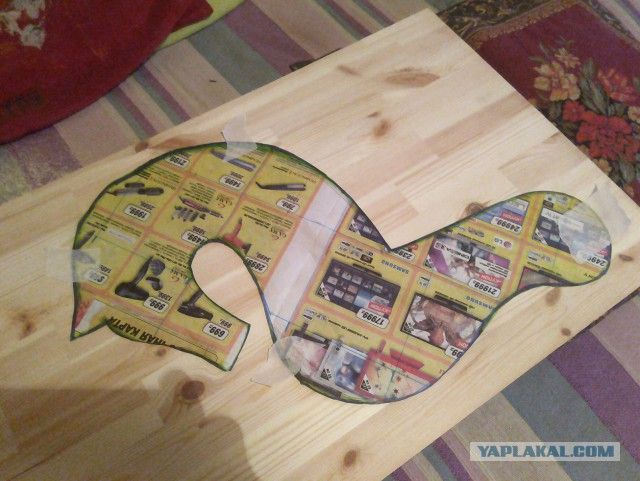
And so, it was mentioned above that you can save a lot of money when making a rocking chair, here is the author’s estimate for which he made the purchase: furniture board 650 rubles, wood glue 100 r, handle 50 r, total 800 r at the minimum price for the finished product in stores about 3000 r. Agree, a good savings is despite the fact that the author had to buy all the materials, and if you have a sheet of plywood in the trunk, and a good owner will always have a handle from a shovel, but glue should always be available. If there are all the components, then the toy for the child will be made free of charge. According to the author, he chose and searched for a sample on the Internet for a long time, finding a pattern made directly from a computer monitor, then he scaled them and transferred them to a newspaper.
To simplify this process you can use drawings.

Then the master proceeds to the manufacture of a pattern, for this he uses an ordinary newspaper, that's what he got out of it.
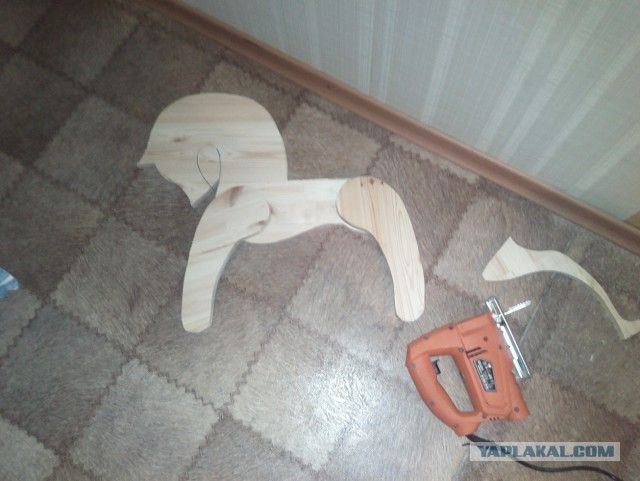
After the contour is applied to the surface, the author takes a jigsaw and cuts out the blanks.
Holes should be drilled in the received parts, which the master does.
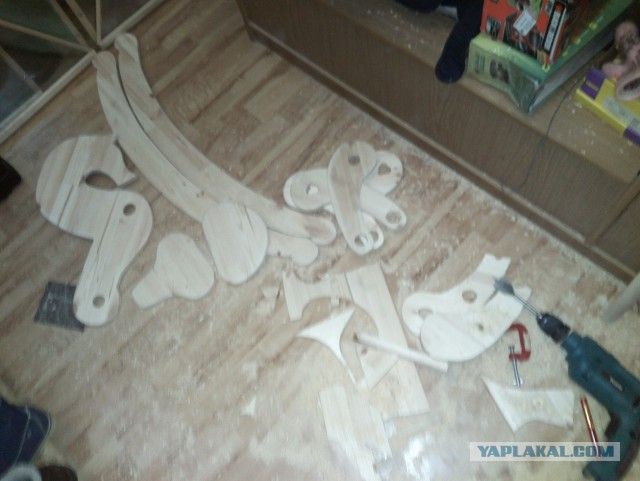
And now all the details are cut out, they lie in one place.
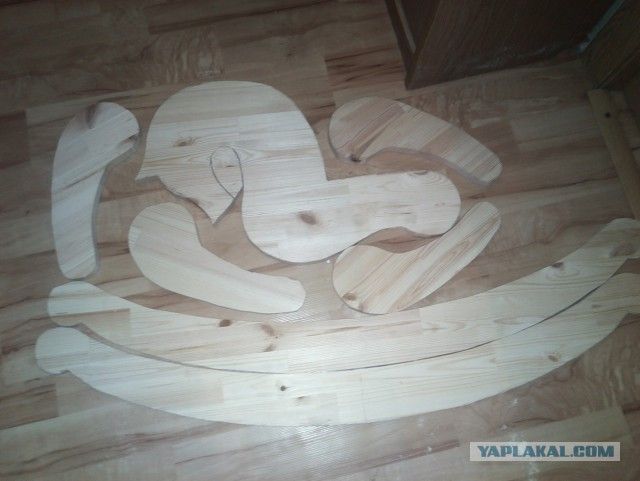
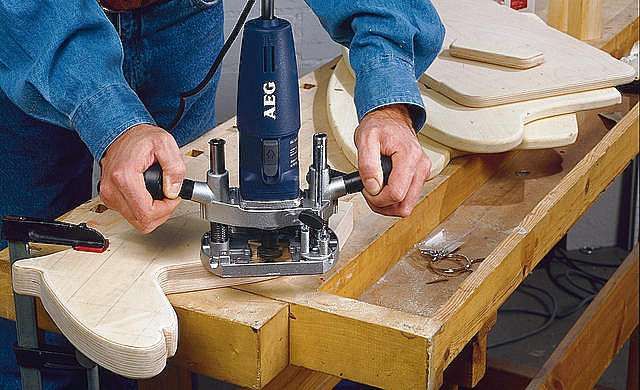
You can also use a milling cutter to round sharp corners and protect the child from splinters.
When all the parts are prepared, you can proceed to the assembly in general design. Here the author saws the stalk into pieces and inserts it in advance drilled holes, pre-lubricating the joints with carpentry glue. And so the build process.
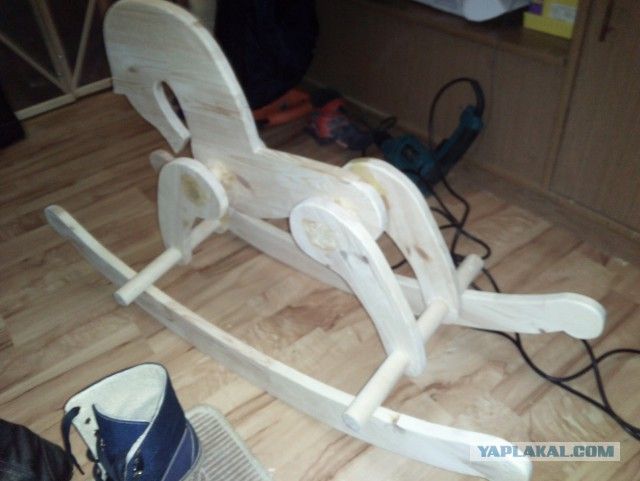
Here is such a rocking horse turned out by our author, which he is very happy about, because he saved some money for family budget and the child is wildly delighted with his new toy. This concludes the article. Thank you for your attention! Come visit more often, do not miss the news in the world of homemade products! The article is presented for informational purposes only!


