In this article, I want to tell you how you can independently assemble a small autonomous power plant on solar panels, what you need for this, and why the choice fell on certain components of the power plant. Let's say we need to make electricity in (a country house, a security trailer, in a garage, etc.), but the budget is limited, and we want to get at least something for a minimum of money. And at a minimum, we need light, power and charging of small electronics, and sometimes we also want to use an electric tool, for example.
solar power plant
Photo of solar panels on the roof of the house, two panels of 100 wattsTo do this, at a minimum, we need solar panels for 200-300 watts, of course, you can use 100 watts in total, and even less if you need very little energy. But it is better to take it with a margin, and it will immediately be determined at what voltage to build the system. For example, if you want to power everything from a voltage of 12 volts, then it is better to buy panels for 12 volts, and if everything is powered through an inverter, then the system can be priced at 24/48 volts. For example, two panels of 100 watts each, which can give 700-800 watts of energy per daylight hours. When there is sun here and there is a lot of energy from one panel, but it’s better to take 2-3 pieces at once so that in cloudy weather and in winter there is also energy, since in cloudy weather the output drops by 5-20 times and the more panels will be the better.
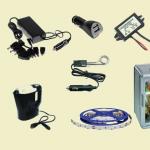
There are a lot of electronics and various chargers for 12 volts, most of our cars have a 12v on-board network and there is almost everything for this voltage, and it is available. For example, LED strips work from 12v, which are well suited for lighting, there are 12v LED bulbs in any store. There are also car adapters for charging phones and tablets, which make 5v from 12 / 24v. Such adapters have either one or two or more USB outputs, or with a wire for a specific phone or tablet model; in general, there are no problems charging electronics from 12 volts.
If you need to power a laptop from 12 volts, then there are also car charging adapters for this, which make 19v from 12v. In general, almost everything is there to be powered by twelve volts, even boilers, refrigerators and electric kettles. There are also 12-volt TVs, which are 15-19 inches in diagonal and are usually placed in the kitchen. But of course, if the power of solar panels is small and the battery capacity is also small, then you can’t rely on powerful consumers all the time, except perhaps in summer. photo consumers for 12v
Devices and adapters for 12v
 For example, some types of converters operate on 12 volts, and some devices operate on 12 volts, such as a kettle, boiler, refrigerator. 12 volt lighting
If everything is done on 12v, then there is an advantage in saving electricity, since a 12/220 volt inverter also has its efficiency of about 85-90%, and cheap inverters consume 0.2-0.5 A at idle, which is 3 -6 watts/hour, or 70-150 watts per day. Agree that you don’t want to spend 70-150 watts of energy per day just like that, for example, this is enough for an LED light to shine for a few more hours, the TV worked for 5-7 hours, you can charge your phone twenty times with this energy. Plus, even when working on the inverter, 10-15% of the energy is lost, and as a result, the total amount of energy lost on the inverter is significant. And this is especially not rational when we make 220 volts from 12 volts, and then plug in a 12 volt or 5 volt power supply into the outlet. In this case, the efficiency of the entire system is very low, since a lot of energy is wasted on the converters.
The only inconvenience is that there are few power tools at 12 volts, and it is not common, it is also difficult to find refrigerators, pumps, etc. on sale. Therefore, if you need to power something else from your autonomy other than any small electronics, then without an inverter 12/220 volts is indispensable. And here it is necessary to take into account that the inverter itself has an efficiency factor, and some devices are not particularly economical. All this entails the need to increase the capacity of the batteries in proportion to the consumption, and the power of the solar panels.
There are, as it were, two options, either to optimize everything for a low voltage of 12 volts, or then immediately transfer everything to 220 volts. Well, you can also just install an inverter and use it when you need it, and power everything that works constantly (light, TV, chargers) from 12 volts. In this case, even a cheap inverter with a modified sine wave may be suitable.
Pumps and refrigerators often refuse to work through modified sine inverters, since the frequency and voltage shape are not suitable for demanding equipment. But through such inverters, any 220-volt light bulbs, power tools (drills, grinders, etc.), and electronics with switching power supplies (modern TVs and other electronics) work normally. In general, in order to definitely not have problems, it is better to immediately take an inverter with a pure sine wave at the output, otherwise if something fails due to the inverter, then there will be more loss than savings.
Battery charge controller, inverters
Despite the fact that, for example, we have a small capacity of solar panels, it is better to take the controller with a double power reserve, especially if you buy a cheap controller. The failure of the controller can lead to many more problems, it can ruin the batteries, or charge them incorrectly, from which they will quickly lose capacity. Also, if the controller supplies all the voltage from the joint venture to the network, then the electronics powered by 12v may deteriorate, since the joint venture gives up to 20 volts at idle. More about controllers - Controllers for solar panelsBy the way, if you feed everything through an inverter, then the system can be built not only at 12 volts, but also, for example, at 24 or 48 volts. The main difference in this case is that the thickness of the wires is required much less, since the current through the wires will be less. For example, if we have a 12-volt system, then the charging current through the wires will reach up to 12 Amperes, and if through an MPPT controller, then up to 18A. And so that the wires do not heat up and there are no losses, the wire section must be thick, and the farther the solar panels are from the batteries, the wire must be thicker.
So, for example, for a current of 6 Amperes, the wire section should be 4-6kv. and if we have a current of 12A, then we already need a wire of 10-12kv. And if we have 50 Amperes, then the wires should be thicker than welding ones (50 sq.) So that they don’t heat up and there are no losses. Here, in order to save on thickness and not lose energy, the system is built on 24v 48v. In the case of 48 volts, the thickness of the wire can be reduced by a factor of four and save a lot of money on this. There are inverters for both 24v and 48v. There are also controllers, I think you understand, the main point is saving in wires and less loss in the transmission of electricity from solar panels to batteries.
There are two types of controllers, these are MPPT and PWM controllers. The first type can squeeze up to 98% of power from solar panels, but it costs more. And PWM controllers are simple and charge with the current that is, that is, with them, the power from solar panels is only 60-70%. The MPPT controller works better in bright sunlight and from the high voltage of the joint venture it makes a lower 14v and more current. And ordinary PWM cannot convert, but in cloudy weather, when the current from the panels is very small, such controllers give a little more energy to the batteries.
I don’t think it’s possible to clearly define which controller to buy here, someone needs to take all the energy from the sun, while someone in the sun already has energy with a margin, but in cloudy weather I want at least a little, but more. In principle, if you buy another solar panel instead of an expensive MPPT, then the advantage of MPPT will be compensated for, and there will be more sense in cloudy weather. I personally lean more towards conventional controllers, because when there is sun, there is nowhere to put energy, and when it is not there, then an extra solar panel will help a lot. For example, three panels of 100 watts each will give 18A with a conventional controller, and 27A with an MPPT. But when the weather is cloudy, then three panels through MPPT will give, for example, 3A, and with a conventional controller it’s already about 3.6A, and if you buy a fourth panel instead of MPPT, then 4.8A.
I give all this as an example, of course, the difference for a sunny day of 18 and 27 A is big, but if even at 18A the batteries are charged during the day, then why then more power, anyway, when the controller is charged, the panels will turn off and they will just be illuminated the sun. But when there is no sun, then you rejoice at the extra ampere, so more panels are better than an expensive controller.
About batteries for autonomous systems
Batteries are probably the most expensive and important part of the system, they are very capricious and deteriorate quickly, there are many types of them and you need to treat them gently, otherwise they quickly lose capacity and deteriorate. Therefore, you need to buy a smart controller so that it can be configured for different types, or there should already be pre-installed settings for working with different types of batteries.For example, car starter batteries lose capacity very quickly in autonomous systems, only 1-2 years and they already lose 90% of their capacity. This is due to deep discharges, since cheap controllers turn off consumers at 10 volts, and car batteries are not designed for this, so if you use them, then do not discharge them more than 110.8-12.0 volts.
Alkaline batteries are very durable, but also very expensive. And if lead batteries have an efficiency of 85-90%, then alkaline batteries lose a little here, and if they are operated by charging and discharging with high currents, then their efficiency deteriorates noticeably. Such batteries are not profitable, especially in winter, here and so there is little energy, and even the batteries give 30% less energy than they receive from solar panels. Although alkaline batteries with improved efficiency seem to have appeared now, the general picture is this.
Lithium-iron-phosphate batteries are the most promising for autonomous systems, they have a high efficiency of 95-98%, and at the same time they are not at all afraid of undercharges, deep discharges, and high discharge-charge currents. But they are also expensive and require an additional BMS cell condition monitoring system. If such a battery is charged or discharged below the prescribed level, then it irrevocably loses its capacity or the cell stops working altogether. But the BMS monitors the state of the battery and it also balances the battery charge, so if something goes wrong, it will protect the battery and turn everything off, and it will not deteriorate.
You can’t describe everything in one article, but I tried to mention and describe the main thing so that it would be clear to those who are completely unfamiliar with this. More details can be found in other articles from the section. But in general, at the moment, judging by my experience, it is more profitable to build a small power plant without an inverter and power all electronics from 12 volts, and if everything is transferred to 220 volts, then build a 48v system. Especially in winter, even a little extra energy is very necessary. Also, my batteries this winter are lithium-iron-phosphate (lifepo4), and obviously there is noticeably more energy in general than when using car batteries, plus lifepo4 did not deteriorate at all and there was no loss of capacity, although they had not been charged for a whole month before end and constantly discharged to shutdown.
Installing solar photocells on the roof, which will charge the batteries in a day, and use free energy in the evening - this is the way to complete independence from the state electricity supply, gas prices, and so on.
The advantages of a home solar power plant abound:
- Easy to install and connect. There is no need to build a high tower, as for a wind farm, to concrete the foundation.
- Large areas are not needed for construction. Many lay light-active sheets on the roof of a private house.
- Simple and cost-effective installation greatly reduces costs.
- It is possible, as funds are accumulated, to add new ones to the existing panels, increasing the capacity of the installation as a whole, which cannot be done for a wind farm.
- There are no rotating parts that need to be lubricated, tightened. Experts recommend preventive inspection of solar cells every 1-2 years.
- Can be operated without major repairs up to 25 years.
- All components of the electrical installation are transported to the installation site assembled.
- Solar stations are silent, safe for people, do not interfere with birds. They are the most environmentally friendly among green technologies.
Let's move on to the disadvantages:
- Limited use in some regions by the number of sunny days.
- They have low efficiency and weak power, especially on gloomy winter days, compared to other energy sources.
Selection of PV elements
Black photovoltaic panels, photovoltaic PV cells, which are rare to see on the roofs of Russian houses, completely cover any buildings in Japan. And the Japanese are very practical and will not fence what is of little use. The main task is to choose the right type of solar cell.
Four types of photovoltaic cells are on sale:
- monocrystalline;
- polycrystalline;
- amorphous;
- thin-film.
- Monocrystalline made from polished silicon sheet. Approximately 1 kW of energy from such products can be obtained from an area of 7 square meters.
- Polycrystalline silicon ones are less productive than the first ones. To get 1 kW, you will already need to occupy an area of \u200b\u200bmore than 8 square meters. meters.
- amorphous are the most economical in manufacturing: amorphous silicon is deposited in a thin layer on a substrate and is consumed much less. These batteries have the lowest wattage and are relatively cheap.
- Thin film have the highest efficiency of 25 percent, compared with 12-17 for the first three types. They can generate energy in low light, even in cloudy weather in winter. Such films are produced at several American factories for industrial use. They are very expensive.
The best option for the southern strip: Odessa - Rostov-on-Don - Astrakhan - the northern coast of the Caspian Sea are single-crystal elements. You can assemble an efficient solar installation with a capacity of up to 500 kW / h per month.
Other Solar Power Plant Components
- inverter, which converts direct current to alternating current. Photovoltaic cells generate low voltage direct current, while most household appliances operate on high voltage alternating voltage.
- Batteries conserving energy for the night.
- Controller– a charger that does not allow batteries to be recharged and protects against leakage of reverse current to PV cells at night.
- Automatic relay, which, when the batteries are completely discharged, switches the power of home appliances to a common network.
- electricity meter, remains to control the consumed energy.
Solar Installation Price
It is convenient to buy a turnkey solar power plant, for example, SES-5, because the specialists of the manufacturing company themselves will bring everything, assemble, connect, check and give a guarantee.

The cost of SES-5, together with installation, is 8250, 9100 dollars. Such a system is remarkable in that the surplus of generated energy can be sold to the general grid at a feed-in tariff. The installation consists of 25 photovoltaic cells, with an average monthly output of 521 kWh. There are installations of equal capacity at a price of $15,000. If in your house all household appliances consume about 10 kW / h per day, then this power plant is quite enough to make everything glow and spin. Apart from heating, of course.
Heating a house in winter, such a power plant will not pull. It is necessary to increase the number of solar cells and batteries at least twice, respectively, and the price will double.
If you complete the home power plant yourself, then the assembled installation will cost $ 8,032. Calculating if each component will cost:
- PV cells Yabang Solar YBP 250-60 (250 W, 24 V), 20 pieces - $4250;
- controller (charger) - $25;
- accumulators SIAP PzS 4 APH 420 (2 V, 420 A), 24 pcs. - 3624 dollars;
- inverter - $69;
- automatic relay - $33;
- electricity meter - $31.
Total: if he manages to get a power plant for the house, then you can save only 218 dollars.
DIY solar battery Step 14: Web Application and Phone Interface - Self-Guided Solar Panels Controlled by Mobile Phone Self-Guided Mobile Solar Panels - Step 13: Configure Electric Imp Module for HTTP Connection
Own power supply will help out both in the absence of a centralized network (in remote and hard-to-reach regions, in the country, on a hike), and when building a more environmentally friendly approach to the consumption of natural resources.
It is not difficult to assemble your own solar station, it contains only four components:
- solar panels;
- battery charge;
- controller;
- inverter.
All of them are easy to find and order through online stores. But how to make a solar power plant with your own hands in order to create a full-fledged autonomous power supply system at home? First you need to collect information about your needs, the possibilities of the area where the solar station will operate, and make all the necessary calculations for the selection of components.
How to calculate the number of solar panels
Choosing a solar station begins with finding information on insolation in your area - the amount of solar energy that hits the earth's surface (measured in watts per square meter). These data can be found in special weather reference books or the Internet. Usually insolation is indicated separately for each month, because the level is highly dependent on the season. If you plan to use the solar station all year round, then you need to navigate by the months with the lowest rates.
Next, you need to calculate your electricity needs for each month. Remember that for an autonomous power supply system, not only the efficiency of energy storage, but also its economical use plays a role. Smaller needs will significantly save when buying solar panels and creating a budget version of a solar power plant with your own hands.
Compare your electricity needs with the insolation level in your area and you will find out the area of solar panels that is needed for your solar station. Please note that the efficiency of the panels is only 12-14%. Always go for the lowest score.
Thus, if the level of insolation in the most unfavorable month in your area is 20 kWh / m², then with an efficiency of 12%, one panel of 0.7 m² will generate 1.68 kWh. Your energy demand, for example, is 80 kWh/month. This means that in the most non-solar month, 48 panels (80/1.68) will be able to satisfy this need. You can read more about how to choose solar panels in our previous one.
How to install a solar panel
For best efficiency, install the solar panel so that the sun's rays fall on it at an angle of 90 degrees. Since the sun is constantly moving across the sky, there are two solutions here:
- Dynamic setup. Use a servo to turn the solar panel as the sun moves across the sky. The servo drive will allow you to collect 50% more energy than a static installation.
- Stationary installation. To get the maximum benefit from the fixed position of the solar panel, it is necessary to find the installation angle at which the panel will collect the maximum possible amount of sun rays. For year-round operation, this angle is calculated using the formula +15 degrees to the latitude of the area. For the summer months, this is -15 degrees to the latitude of the area.
How to choose a charge controller
Another way to assemble a solar power plant yourself in order to make it work efficiently is to use it, which allows you to track maximum power points (eng. MPPT). Such a controller can accumulate energy even during low light conditions and continues to supply it to the battery in an optimal way.
So, from the solar panels, energy is supplied to the battery. This allows energy to be stored so that it can be used even in the absence of sunlight. In addition, the batteries smooth out uneven power supply, for example, in strong winds or cloudy conditions.

To choose and install a battery for a home solar power station with your own hands, you need to consider two parameters:
- It is very important that the charging current (from the panels) does not exceed 10% of the rated capacity level for acid batteries and 30% for alkaline devices.
- Inverter design with voltage on the low side.
Consider battery self-discharge indicators (not always indicated by manufacturers). For example, acid devices are recharged every six months to avoid breakage.
How to choose an inverter
Description of the parameters and mandatory functions of the ideal inverter:
- sinusoidal signal with distortion not higher than three percent;
- when the load is connected, the voltage amplitude changes by no more than ten percent;
- double current conversion - direct and alternating;
- analog AC conversion part with good transformer;
- short circuit protection;
- overload reserve.
When modeling your home's electrical system, group the loads so that different types of loads are powered by different inverters.
Heliostations are a working alternative way of supplying the house with energy. But not in all regions, insolation is sufficient for the payback of solar equipment and for the full supply of electricity. Sometimes you should pay attention to hybrid solar power plants, which can also be built with your own hands, but where, in addition to solar panels, there can be windmills, as well as diesel or even gasoline generators.

If you just want to try to “tame” solar energy, but are not ready to completely change the power supply of your home, make a mini solar power station with your own hands. It will consist of several solar panels, a battery and a controller. All this will fit in a suitcase, but will provide you with energy in case of a sudden power outage, a trip to the country or to nature. Calculations and selection of components are carried out according to the same principle as for a full-fledged home station.
Let's try to understand the approach to choice autonomous solar system, which factors are more important and which are less important.
First of all, you need to determine how much energy you need per month, and so that the cost of a solar power plant does not become fantastically high, reduce the requirements as far as possible. Then it is necessary to determine how much solar energy can be obtained in the area where the solar installation will work. Approximate data are given in meteorological guides, some information on solar insolation can be found on the Internet. Usually the level of solar insolation is expressed in Watts / m2, broken down by months. Moreover, seasonal fluctuations can be very significant.
How to choose a solar battery?
If you intend to use solar power plant year-round, the calculation must be made by months with the worst insolation parameters (of course, if only solar energy is supposed to be used). efficiency solar panels for calculations it is necessary to take no higher than 14% (or better 12%), because, despite the efficiency of the elements of 16 or even 17% (and more often elements with an efficiency of 14-15% are used), part of the radiation will be reflected from the surface of the glass covering the elements (even if anti-reflective glass is used), part of the radiation will be extinguished in the thickness of the glass , because not the entire surface of the solar battery is covered with silicon plates (there are gaps of 2-3 mm between them). In addition, some elements have cut corners, which also reduces the usable area. Some manufacturers give approximate monthly energy yields at various levels of solar radiation.

Now to quantify solar panels, it is necessary to divide the desired energy demand by the possible energy production of one battery in the months when the solar power plant will be used. Naturally, the calculation is carried out according to the worst parameters for insolation.
For example, the installation will be operated year-round, the energy demand is 100 kWh/month, one battery of your choice will produce no more than 2 kWh of energy in December, 100: 2 = 50 batteries. Under the same conditions, but with unknown battery performance, and its known area of 0.7 m², we determine that approximately 20 x 0.7 x 0.12 (efficiency) = 1.68 kWh of energy will be produced per month (insolation in December is about 20 kWh/m²). To determine the number of solar panels, it is necessary to divide the desired amount of energy into the production of one battery: 100: 1.68 \u003d 59.5 pieces, round up 60 pieces.
It should be noted that all these calculations are approximate, indicative, because. The number of sunny days can vary greatly from year to year. It should always be taken into account that the margin only improves the parameters of the system.
Increasing the performance of solar panels is a separate big topic. There are only a few ways to increase productivity:

Choosing the optimal installation angle. It is desirable that the surface of the solar battery is located perpendicular to the rays of the sun, with a maximum deviation in one direction or another by no more than 15 °. Due to the fact that the sun constantly changes its height above the horizon throughout the year, it is advisable to install solar panels at the angle that provides the maximum gain in performance at the right time. For example, if it is supposed to use a solar power plant year-round, then the batteries are installed at an angle of + 15 ° to the latitude of the area, and if only in the summer months, then at an angle of - 15 ° from the latitude of the area.
Rotation of the solar panel following the sun during the day(applicable only for small systems), thus it is possible to increase the energy output up to 50% of the output in a stationary position.
A couple of decades ago, solar power plants for the home were considered as something out of the realm of fantasy. Now this direction is actively developing and surprises no one. Despite the decent cost, such energy carriers are in demand because they allow you to save money and create your own autonomous energy source. Consider the features of these installations, their manufacture and installation by hand.
Peculiarities
Solar power plants for the home in the kit are beneficial in that they do not require additional calculations. The design is provided in finished form with a certain output power, which must be correctly selected during installation. Such systems are an order of magnitude more expensive than similar components separately, but do not require much effort during installation. In any case, you will have to choose between several modifications.
It is better to do this with knowledge of the matter, without blindly trusting the seller. When choosing a solar power plant for your home, there are not too many factors to consider. In general, there are four main aspects. Let's take a closer look at these metrics below.
Power and type of panels
Determining the power indicator is quite simple. It is calculated taking into account the most powerful consumer in the home (rarely household appliances consume more than 3 kW). A small margin is added to the selected value, the required indicator is ready. To take a good example, on a sunny day it will be possible to turn on the washing machine and refrigerator. As a result, a power plant with an output power of about 3 kW is enough for a small house.

The second criterion for choosing a solar power plant for a private house is the type of panels. There are three types of modern designs: film, single-crystal and polycrystalline models. The film version is considered the weakest in quality, it is gradually leaving the market. The choice between mono and polycrystalline panels depends on the average cloudiness of the region. The second modification in conditions of weak sunlight works more efficiently.
inverter and controller
The next element that you should pay attention to when choosing solar power plants for your home is the inverter. The device is designed to increase the voltage of 6, 12 or 24 volts, which is issued by standard panels. The output is the usual figure of 220 volts. The choice of this device is influenced by two main factors:
- Power. It should be able to withstand the required load with a margin.
- Output signal type.
To avoid breakdowns of household appliances, it is necessary to choose panels with a pure, rather than modified, sine wave at the output.
Another working element of the design is the controller. The device distributes electricity and monitors the charging of batteries. If there is no direct distribution of electricity from the panels or all the energy is used, the controller gives a charge to the batteries. In case of shortage of solar energy, the device takes energy from the containers. In fact, the device does a monotonous, but important job, without which the entire system cannot work.

How to make a solar power plant at home with your own hands?
For self-production of the structure, the above materials and some additional devices (special wiring with connectors and connectors, helium batteries, installation parts) will be required.
The assembly of a homemade solar station begins with the installation of installation elements. They represent a rigid frame from a profile pipe. The design of this part depends on the installation site, but the general configuration has a standard layout. The element is a rectangle, with special clamps attached to it with a rubber cushion. The structure can be assembled directly on the roof or on the ground.
main stage
At the next stage of building an autonomous solar power plant for the house, you will need to mount the panels. There is nothing difficult in this. Each element is fixed with screws. The main thing is not to show excessive zeal so as not to deform the panel.

Then the fixed parts are switched into a single circuit. To do this, the panel elements are connected in series with each other. Tees with connectors are installed at the fixation points. It must be remembered that after exposure to sunlight, the structure begins to generate energy. To avoid injury from electric discharge, the assembly sequence must be strictly followed. The connection starts from the controller, and an automatic switch is mounted in front of it. The first step is to lay the main line with the installation of tees in the right places. Only after completion of these works, short cables with connectors are mounted, through which the panels are connected to the tees.
Final work
At the final stage of installing a solar power plant for the home, a battery pack is connected to the controller. The more of them in a bunch, the better (this will allow you to make a significant supply of energy). Batteries should be purchased special (car low-capacity counterparts are not suitable). They are electrical tanks with a capacity of at least 150 Ah. The best option would be helium models, which are interconnected in parallel. By connecting plus to plus and minus to minus, you can save voltage, while increasing the total capacitance.

Further, the inverter is connected directly to the batteries according to the same principle. Otherwise, the element will not function. An inverter output with a voltage of 220 volts is connected through a circuit breaker to the home network. This is the whole process of creating a solar power plant for the home (6 kW). The main thing is to plan the process correctly and understand the principle of the structure.
It should be noted that so far in the domestic space, the calculations of the profitability of the energy sources under consideration are not very rosy. If excess energy is not sold to neighbors at an adequate price, the system does not fully pay off. The classical form of supplying unused energy to the city network for a penny does not bring any positive results.
The state does not prohibit the use of ready-made solar power plants for the home, although it does not encourage it in any way. For this reason, the installation of such structures is optimal where there is no mains electricity at all.

The described steps for installing and assembling a solar power plant are quite enough to choose the right modification. You can additionally save if you do the assembly yourself from separate parts. Power calculations are also not a problem. In extreme cases, you can hire a specialist who, for a moderate fee, will draw up all the drawings and diagrams.
Solar power plants for home: reviews
According to the responses of the owners, solar power plants are easy to install. They can be installed not only on the roof, but also on the walls from the sunny side. In a couple of days, the entire structure can be assembled and mounted by one person. The kit comes with mounting hardware that allows you to mount the panels in various positions.
If the energy supply system is mixed (network plus solar option), mark those sockets and appliances that operate from panels, and after a month calculate the savings. As the owners note, despite the fact that at first they will have to make a decent financial investment in the project, the result will not be long in coming, given that autonomous energy does not have to be paid for. On the contrary, it can be sold.

Consumers note that if there are not enough batteries to store energy, do not rush to completely abandon the central connection. Since the resource of solar stations is at least 20 years, the payback will be significant, albeit long-term.
