Do-it-yourself topiary is becoming increasingly popular among decorators, interior designers and simple needlewomen.
Initially, topiary was a garden with decorative trimmed plants and sculptures created from artistically trimmed trees. The art of topiary has a long history. Thus, even in Ancient Egypt and Persia, the ability to give geometric shapes to bushes and trees was valued. And the most famous example of a topiary garden is the Hanging Gardens of Babylon in Babylon - one of the Seven Wonders of the World.
And now topiary (or European tree) is the name for small original trees, for the production of which natural and artificial materials are used. Topiary is decorative in nature, and what it will be made of depends only on the author’s imagination. And the size of topiary can be from 10-15 centimeters to half a meter.

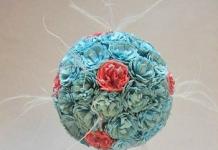
Small topiary made of paper flowers

Large topiary made of artificial flowers (Author - Anna Assonova)
Topiary can be a wonderful gift for a wedding or housewarming.

What is topiary made from?
So, if you decide to make a topiary with your own hands, then you should know that the tree consists of several elements:
- the basis
- trunk
- crown
- pot or stand
Moreover, for each of these elements there are different forms and materials.
Topiary base
The base can be of different shapes. Most often, a ball is used when making topiary.

Ball-shaped topiary
But there are topiaries in the shape of a heart, as well as in the form of various figures. Experienced needlewomen create blanks in the form of numbers (if the tree is intended as a gift for a birthday or memorable date), as well as in the form of letters.

Topiary - heart
As a basis for a ball or heart, you can use a foam blank, polyurethane foam or a papier-mâché ball. Figured bases are thick wire, polystyrene foam or cardboard.

Base for topiary - foam ball
topiary trunk
The trunk can be a thick wire wrapped in twine, floral tape or covered with plastic.

You can also use an ordinary wooden branch (to be safe, it is better to peel it from the bark and cover it with stain and varnish).

A short, straight trunk is obtained from several sushi sticks or wooden skewers connected together.

Topiary crown
The topiary crown is a huge space for imagination. You can use absolutely anything: paper (paper napkins, cut out flowers, corrugated paper, quilling paper or folded origami - kusudama), flowers made of cold porcelain or polymer clay, satin and nylon ribbons, felt or cotton, buttons and beads, coffee, shells , dried leaves and other natural materials, and much, much more.


Topiary using the Kanzashi technique from remnants of fabric (author - Tatyana Babikova)


Topiary made of corrugated paper and natural materials

Corrugated paper and organza topiary (author - Tatyana Kovaleva)


Topiary from natural materials (leaves, apples, acorns)


Topiary of flowers (origami - kusudama)
Topiary stand
Depending on the idea and size of the tree, the stand can be an ordinary flower pot, an iron bucket (painted or decorated using the decoupage technique), a beautiful flat stone or a shell. You can decorate the stand with fabric or lace. Or maybe it will be a nice cup? You decide.

Shell topiary stand

Topiary stand decorated with fabric and cinnamon sticks

Topiary stands (from left to right): flower pot, crocheted jar, fabric covered bowl

Stand for topiary from a ceramic mug
Preparation of the necessary materials
Before you start working on your topiary, carefully consider the idea and all the materials you will use. The idea will depend on the purpose of the tree and the hobbies of its future owner. Gather materials. Attach the elements of the crown to the workpiece. Decide what decorative items you will take.


Beads of different sizes and decorative dragonflies were used as topiary decor.

Beads, braid, sisal and decorative watering can were used as topiary decor.
Making a trunk
The next step is to prepare the trunk. As already mentioned, depending on the material, it must be wrapped with twine or varnished.
We attach the base of the tree to one end of the trunk. The ball can be simply inserted, and it is better to fix some curly base with glue.
The other end of the barrel is inserted into the prepared vessel. It is usually secured with polystyrene foam, which is then filled with alabaster or cement.

The trunk of the topiary is glued to the foam
At first it will be difficult to guess the consistency: if the solution is too liquid, it will take a very long time to dry. And if you make it thick, it will not fill all the empty space between the pot and the foam.
Experienced needlewomen are advised to achieve the consistency of store-bought sour cream: not very liquid, but slipping off a spoon and easily changing shape.
Pour the solution into the prepared form, smooth the top and leave to dry completely.
Decorating the crown
While the base is drying, you can make crown elements: leaves, flowers.
Let me remind you once again that they must be fastened after the base has completely dried.
Depending on the base material, the flowers can be attached with hot glue or stuck in with small skewers or wire.
Irina Borisova
Topiary- this is a decoration from the hand-made series, which is an artificial, somewhat fantastic tree. After all, for its manufacture, for example, coffee beans, a herbarium, Swarovski stones or just scraps of fabric can be used. The main thing is that you need to do it yourself. Meaning of the word « topiary» taken from the Greek language, where it literally means "tree of happiness". Their sizes can be very different. Most often they are made small, but they are known masters, which topiary they made it simply gigantic, several meters high
A charming tree can be made from different materials. Pliable tulle is perfect for this purpose. And time to create topiary You don’t need much from DIY tulle. In addition, all the materials for creating this craft will always be at hand. So in this in the master class you will learn how to make a tree from tulle DIY topiary.
We will need:
foam ball;
flower pot;
colirus (wooden stick)
green gouache;
glue gun;
decorative elements.

1. Paint the foam ball with green gouache.


2. When the ball is dry, put it on the colirus (wooden stick).


4. Then we cut the tulle into 5x5 cm squares and fold it as shown in the photo and glue it with a hot glue gun onto a painted foam ball.


5. Decorate with decorative elements. This is what happened!
Publications on the topic:
 Topiary of maple roses. Autumn has come. Bright colorful leaves flew. I really like making crafts and paintings from autumn leaves.
 Master class for the New Year topiary "Tree in Silver" In December, in December All trees are in silver. We will need: Flower pot, plaster.
 Good evening, everyone, everyone, everyone! Well, winter has come. And most recently, the most wonderful, kindest and most wonderful holiday has passed.
 Master class "Autumn fantasies - horse chestnut topiary" Dear colleagues, dear friends and guests of my page, good.
Easter topiary in the shape of an egg. Dear colleagues and just guests, I offer you my craft for Easter. It is done very simply, but if.
 The last month of autumn has arrived, the rains have become more frequent, the temperature has dropped, and people have warmed themselves. And how good it was in the summer-sun, sea, beauty.
Do you want to get a decorative element that will remind you of summer? In this case, we recommend that you think about making your own fruit topiary. This craft will definitely decorate any type of interior, and the colorful design will delight all your guests.
In addition, these masterpieces can be presented to someone as a gift, which makes them truly practical. In this article we will look at how to make topiary from fruits and berries and what materials can be used.
Popular options
If you wish, you can create crafts of the following variations:
- from fruits and vegetables;
- from fruits and flowers;
- pure berry topiary;
- trees from nuts (peanut, pistachio);
- creations that imitate full-fledged fruit trees (apple, orange).
As for the material, as a rule, fruit topiary is made from artificial “ingredients” (i.e. decorative apples, oranges, lemons, grape bunches, etc. are used). Preference is given to such materials because of their durability. Of course, you can use real fruit if you wish. For example, you can create an apple tree for a children's party (provided that the children eat these apples).
Remember! On the one hand, living creations are more practical, but on the other hand, their coverings are disposable, and after each holiday the crown has to be decorated in a new way.
As you can see, there are a huge number of creation options. It all depends on your preferences and the intended purpose of the craft. In this article we will look at two practical examples that will explain in detail how to make topiary from fruits with your own hands.
Creating an apple tree
First of all, it should be taken into account that we will be making topiaries from artificial fruits (that is, we will create durable interior decorations). To make the next tree of happiness, you will need to stock up on the following “ingredients”:
- decorative apples and leaves;
- newspaper sheets (4-5 pcs.);
- flower pot;
- twine;
- piaflor;
- foil;
- tape;
- satin ribbons;
- green or light green sisal;
- a tree branch (you can use either a straight or curved branch);
- food skewers or toothpicks;
- glue gun.

When you create this fruit topiary with your own hands, the master class will require you to do the following:
- First, crumple up the prepared newspaper sheets to make a ball;
- wrap the resulting ball with foil;
- wrap tape over the foil layer;
- wrap the twine over the tape (try to wind the twine in different directions so that the threads overlap each other);
- make sure that there is a little unaffected space left at the bottom of the ball (here you will connect the crown and trunk of the future apple tree);
- after preparing the crown, wrap the prepared pot with satin ribbon;
- place the piaflor at the bottom of the pot (try to fit the piece of piaflor exactly to the diameter of the pot);
- then insert the tree branch into the piaflor (this material is pliable, so there will not be any difficulties);
- Place the tree crown on this branch;
- then cut each decorative apple in half;
- put the top of the apple on a toothpick;
- after that, insert each apple into the crown (skewers or toothpicks are sharp enough for this job to go smoothly);
- Glue decorative leaves between the apples (use a glue gun for this);
- cover the surface of the piaflora with prepared sisal (it will imitate grass for your tree);
- if desired, wrap the barrel with a satin ribbon;
- place whole artificial apples on top of the sisal.
That's all! After completing the last step, you will finish creating a wonderful fruit topiary; the photos below will help you appreciate the beauty of this handmade creation.
If desired, you can make combined versions of such crafts. For example, you can make a topiary with apples and oranges, with apples and berries, etc. Choose any option you like and get to work.
We make a tree with grapes
Before starting work, please note that grape topiary is more complex than an apple tree. Therefore, it is recommended that people who already have some handicraft experience take on the creation of such crafts. So, for work you will need the following materials and tools:
- decorative bunches of grapes in light green and dark purple (one of each color);
- foam ball;
- stationery knife;
- small stilettos;
- wine corks (about 6-7 pieces);
- glue gun;
- decorative leaves;
- live grape branches, twisted into a spiral (they are quite easy to find);
- two simple grape sprigs (one thin and one thicker);
- any container in which the future tree will be located (either a flower pot or an empty shampoo bottle will do);
- sackcloth;
- tape measure;
- gypsum;
- dark brown crepe paper strip.

When you make such a fruit topiary with your own hands, the master class will require you to consistently perform the following steps:
- using a utility knife, make a small hole in the foam ball (bottom center);
- place the foam ball on a large grape branch (for a more secure fixation, treat the joint with glue);
- Glue two bunches of grapes to the side of the future crown;
- To keep the bunches securely, pierce them in some places with pins;
- stick wine corks around grapes;
- cover the gaps between the corks with decorative leaves (try to use leaves of different sizes);
- glue the other part of the leaves under the corks, and the “point” of the leaves should face the corks;
- if you want to give the finished craft more splendor, glue another row of sheets under the corks in a checkerboard pattern;
- Also cover the rest of the crown with artificial leaves, and glue the leaves so that they look at each other (try to place these elements as tightly as possible so that they cover the foam base);
- after that, glue spiral branches on the sides of the bunches;
- further, measure the diameter of the prepared container for the topiary and its height;
- add 3 cm to the resulting diameter, and 10 cm to the height;
- cut a piece of the desired size from the burlap;
- sew a piece of burlap (side and bottom sections);
- direct the seams inward;
- wrap the container with the resulting cover;
- turn the edges of the cover inside out and start preparing the “foundation”;
- dilute the gypsum solution in a separate container;
- pour this solution into the container in which the craft will be located;
- insert a structure from the trunk and crown into the solution;
- also, insert a smaller grape twig into the solution;
- turn the edges of the burlap back, wrap it around the lower part of the trunk and tie the burlap with crepe paper.
So you have finished creating a unique fruit topiary; the photos attached below will help you enjoy the beauty of this creation.
It is fruit topiary that is a symbol of prosperity and wealth. To make topiary with artificial fruits, you can use not only fake fruits, but also fresh vegetables and fruits. Making such an unusual tree with your own hands is not at all difficult; the master class below will help you. You will make a great accessory for your home or a wonderful gift for your loved ones.
Topiary made of fruits and vegetables is a small piece of comfort in a home environment. Also, such a tree of happiness can be presented to someone as a gift. To create such crafts, various materials are used. Our master class will tell you how to make a tree from artificial fruits and vegetables with your own hands.


For production we will need:
- Pot;
- Newspapers;
- Threads;
- Floral sponge;
- Foil;
- Scotch;
- Wooden stick;
- Wooden skewers;
- Artificial fruits, vegetables
Do-it-yourself fruit topiary: master class, preparing the base
The necessary materials are ready, now let’s start making topiary from fruits and vegetables, which the next master class will talk about.

Master class on making the base of fruit and vegetable topiary:
- Let's start the master class with how to make your own base for topiary from decorative fruits and vegetables. To do this, you need to crumple up several pairs of newspapers and wrap them in foil.
- Now wrap this newspaper ball tightly with masking tape. It is better to do one or two more layers so that the base does not lose its shape.
- A wooden stick will serve as a trunk, which we will attach to the resulting ball.
- Next, wrap the ball with threads or twine, constantly changing the direction so that the turns intersect. After wrapping the ball, begin wrapping the trunk of the future tree, moving from top to bottom.

To ensure that the twine fits tightly to the trunk, you need to apply a thin layer of glue to it and wait until it dries completely.
DIY fruit topiary (video)
DIY fruit topiary: preparing the pot
Next, the master class will tell you how to decorate the pot. If you don’t have a pot, you can make one from thick cardboard by gluing the shape together. Then wrap thread or twine around the pot and cover its surface with clear glue. Next, place a floral sponge at the bottom of the pot and stick the tree trunk into it.

You can combine any fruits and details, making them a “highlight”
You may need weighting agents to make the vegetable topiary more stable.
Fill the pot with foam or plaster. If you choose polyurethane foam, then after drying, be sure to cut off the excess.
Decorating a fruit topiary with your own hands
Now the master class will show you how to decorate topiary with your own hands. You need to prepare the required amount of vegetables, fruits, flowers. To make it more interesting, you can cut them in half.

MK step by step:
- Use an awl to make a small hole in the ball. Then we pierce the fruit with a stick pointed at the ends and fix it on the ball.
- In the same way, place the remaining fruits and vegetables over the entire surface of the ball.
Our fruit and vegetable topiary is almost ready. All that remains is to make further decoration.
Decorate the tree with ribbons, leaves, and also add a few berries and flowers for brightness.

We really hope that our DIY master class will be very useful to you in creating an unusual fruit tree. This topiary will fit harmoniously into any interior. And even in the coldest frosts it will remind you of the warm summer.
Do-it-yourself dummies of fruits and vegetables: master class
We present to your attention 4 ways to create dummies.
Fruit dummies: method 1
You will need foil, newspaper, tape, colored paper and glue.
Crumple the newspaper and create the shape of the item you want to make. Next, secure the newspaper form with foil, securing with tape. Then apply layers of newspaper and glue, then leave the finished form to dry.

To make it more convenient, pierce the dummy with a thin wooden stick and, holding it in your hands, continue to apply layers of newspaper and glue.
Once the form is ready, start gluing layers of colored paper onto it until you get the desired color.
The second method of making artificial fruits
You will need a model of a fruit or vegetable, glue, brushes and paints (gouache).

This method repeats the process of the first option, only we will use the vegetable or fruit itself to ensure the accuracy of the desired shape. For example, to make a banana, you need to take a real banana and apply layers of newspaper and glue on it. After drying, cut the shape with a sharp knife and remove the fruit from the middle and glue the edges. All that remains is to color the resulting dummy as desired.
Method – 3
As a base, take a foam frame and apply layers of colored paper and glue, leaving it until completely dry.

Method - 4
A great opportunity to keep yourself and your children busy creating artificial vegetables and fruits, which you can then simply play with or make various crafts with. Such fruits will never wither and will always delight you. This option for creating a dummy involves drying in the literal sense. It is better suited for vegetables such as pumpkin, squash and others. To do this, wash the vegetables thoroughly and place them in the sun. Be sure to turn the vegetables once a day. This dummy will be ready in two weeks.
Fruit topiary for beginners (video)
If the question arises about where to get or buy beautiful artificial fruits or vegetables for crafts, there is a solution - make them yourself! In the future, you can use decorative figures to decorate any room or play with children.
Fruit topiary (photo)


.jpg)


These small interior trees are the great-great-grandchildren of the large ones that grew in Europe during the Renaissance. The garden fashion for fruit trees with crowns in the form of a ball or a pyramid was very common in Holland, England and France.
Bright fruits acted as decoration and were arranged according to the gardener’s plans. And those who did not grow up as they should went to the kitchen faster than others. 🙂
Today, small topiary is a friend of florists and they make it using a variety of materials. However, fruit trees - both live and artificial fruits - are still the most decorative.
Topiary is called the tree of happiness, this is a kind of reference to Feng Shui. The rounded shape of the crown saturates the atmosphere of the house with positive energy, and the roots absorb negative energy. 🙂
Technical nuances
To make the topiary beautiful and harmonious, you need to follow the rules for its assembly and storage.
- Crown. Actually, the decorative part of topiary, and its design is limited only by imagination. The basis for it is a technical ball made of polystyrene foam, papier-mâché or a wad of paper.
- Trunk. The base for the tree can be made from a branch, special sticks, pencils, or thin dense rolls.

- Tree pot It can be anything, the main thing is to maintain the proportions so that the tree is stable.
- Topiary made from living material is not very durable, because the integrity of the fruit will be compromised. Flower topiaries live longer, they are in a floral sponge. But still, if you are planning a gift and make a tree in advance, store it in the refrigerator.
- The heavier the decor, the more stable the pot should be. The best material - ceramics, and you can additionally weigh it down with pebbles or sand.

- In order for an artificial tree to retain its shape and color, you need to keep it away from sunlight and excessive humidity, and clean it from dust with a soft brush.
Apple topiary
Apple topiary will become a table decoration and is done very quickly.

We will need:
- apples 15 pcs.
- round foam mold
- sprigs of ruscus or other greens
- thick, medium-length wooden skewers
- ceramic pot
- scissors
- glue gun
We secure the shape in the pot, securing it with glue for stability. Insert the skewers with the sharp side out, leaving about 4 cm on the surface. Place the apples. We fill all the gaps with greenery, securing the branches at the base.
Topiary “Autumn Fruits”

We will need:
- pot
- foam ball
- floral sponge for dried and artificial flowers
- decorative thick branch or wooden stick
- raffia
- organza ribbon
- artificial fruit
- artificial greenery
- glue gun
We fix a dry floral sponge in the pot, and in it the trunk of our topiary. We place a foam base on the trunk. We glue the fruits onto the base, and fill the gaps between them with artificial foliage or pieces of tape. We decorate the trunk with ribbon, and cover all technical areas with colored raffia. For classic topiary, it is customary to leave one of the crown elements at the base of the tree, but this is not necessary.
Hurry up to make an autumn tree of happiness before the end of the month, because there are Christmas trees ahead! 🙂
Updated: April 20, 2019 by: Olga Fomina


