In all houses of believers, icons occupy a special place. Most often, an iconostasis or a special shelf for icons is used to place them, on which there are also other religious paraphernalia and symbols. Another option for the use of such shelves is the storage of literary books and magazines not only of a religious nature.
Where are the icons located?
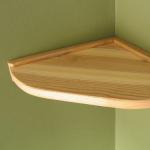
Very often one has to see that the icon is located in some corner of the room. It is rational to use a corner shelf as a stand for these religious objects. This is the most inexpensive and convenient product that will easily fit into any interior. In addition, such a shelf will not take away the usable space of the living space.
This piece of furniture can be easily purchased at any furniture store or ordered to be made according to an individual sketch. But a do-it-yourself shelf for icons is also made without much labor and expense. This will require a minimum of materials and special tools.
Shelves from the store
The corner shelf for icons, the variants of which are on sale, is not particularly practical. Parts and fasteners may not be of the highest quality. The complete set of this product from the store is sometimes not enough to make its high-quality installation. This leads to the need to buy additional elements.

What to make a shelf for icons
Having a small piece of chipboard, plywood or boards available, you can make a shelf at home. To do this, you need a minimum of tools: a hacksaw, screws, sandpaper and metal corners. Next, you should decide on the dimensions and mark the drawing of the future product on the workpiece. After the workpiece is cut to the required size, its edges should be processed with sandpaper until there are no irregularities and notches.
According to the chosen design, the shelf can be decorated or painted depending on individual preferences. A colorful pattern can be made on its surface or, if it is made of solid wood, a carved ornament is applied.
Shelf installation
Corner shelf mounting options can also be different.
For these purposes, you can use metal corners that are attached to the wall and at the same time to the outer surface of the product. To do this, it is best to use self-tapping screws with a length of 2/3 of the thickness of the workpiece. For a more durable attachment to the wall surface, it is best to use dowel-nails.

At the final installation, it is possible to manufacture hidden fasteners. To do this, in the end part of the workpiece, you need to drill several holes of a certain size and place previously acquired grippers in them. They will hold the shelf on fasteners firmly fixed in the wall.
If free space allows, then more than one shelf for icons can be located in one corner. Their number depends on individual preferences, and sizes can also vary widely.
In any case, a do-it-yourself shelf for icons will easily cope with its main function.
The icon shelf is an ideal place to store the faces of saints and other paraphernalia of the Orthodox faith. With its help, you can compactly arrange images, candles, lamps and prayer books, allocating a separate place for these items that will not interfere with the household and take up the missing space. There are different shelves for icons, they differ from each other in configuration, size, capacity and material from which they are made.
Do you need an iconostasis at home?
Of course, believers need it, because they probably have images of various saints, but it is not always possible to allocate a worthy place for such relics. Icons most often stand in sideboards, on shelves with books, or are completely hidden in a closet. The shelf for icons is not something new and unprecedented for parishioners of churches. Our great-grandfathers also equipped a small prayer space in their homes. The icons were placed in the corners, decorated with embroidered towels, bouquets of dry ears and flowers.
In the access zone of any member of the family, there were always small shrines, on which they placed miniature images and a bible, prayer books, candles or bottles of water consecrated in the church. There is nothing strange in this, because in the old days people prayed every morning and evening, and it was important for them to have a separate cozy corner for this, where they could concentrate entirely on communion with God. This special place was a shelf for icons: angular, straight or kiot. Nowadays, more and more people are converting, so these light traditions have become popular again.

What are shelves for icons?
There are two fundamental differences between the deities. They can be straight or angled. A straight shelf for icons is hung on a flat wall, it takes up quite a lot of space, and this must be taken into account when choosing a location for it. Corner, as the name implies, is attached at the junction of the walls. This makes the shelf as compact as possible, but at the same time very roomy.
Iconostases also differ in the number of tiers. Shelves can consist not only of one plank - they are two-, three- and even four-tiered. The height between the “floors” is usually different, which makes it possible to place faces of different sizes on the shrine. The icon shelf is usually made of several types of wood: the body is made of alder or linden, and the sculptures are made of oak and ash. The color of the iconostasis directly depends on the type of material from which it is made, as well as on its outer covering.

Where can I get a goddess?
Families whose members managed to keep the custom of visiting churches on holidays and weekends probably left not only various ancient church attributes, but also ancient shelves for icons. A photo of one of them is presented a little higher. This deity was made by real craftsmen several hundred years ago and clearly demonstrates the religious and cultural heritage of our ancestors. Now these are no longer produced, they can only be bought from someone. But modern masters also make real masterpieces, which are in no way inferior to their ancient counterparts in quality and aesthetics.
The easiest way to buy a goddess is in specialized stores located at churches. There you can also purchase various ritual accessories made according to all Orthodox canons. The corner shelf for icons among believers is in greatest demand because of its compactness, although other types of them also find a worthy place in the homes of parishioners.
There is another option - making a deity according to individual parameters. Such work can be done by a person who is well versed in carpentry. The end result depends on his skill and ability, as well as on the availability of special tools for woodworking.

Self-manufacturing - is it possible?
In fact, a shelf for icons can be anything. This is not necessarily a multi-tiered product with carvings, bas-reliefs and turned balusters. As a goddess, it is quite acceptable to use the simplest wooden hinged shelf, which almost any man can cut out on his own.
Such a product consists of guides that are attached with dowels and screws to the wall, and directly to the shelf itself. Guides are two strips with grooves, connected by an angle. They can be cut with a circular saw - this is the fastest and most convenient way. But if there is no such mechanism at hand, an ordinary hand file will fit. The junction of the planks with grooves is made either smooth, then the parts are cut at the right angle using a miter box, or studded.

The very same corner shelf for icons can be made of glued boards, MDF or chipboard with a thickness of 12 to 20 mm. Experts recommend cutting it out not by eye, strictly maintaining a right angle in the bow of the canvas, but by making preliminary measurements, since the walls in houses do not always converge at an angle of 90 degrees. When the required dimensions are determined, they must be transferred to the workpiece and cut out the shelf with a jigsaw, after which it can be inserted into the guides.
How to decorate a shelf?
The corner shelf for icons often contains a variety of decorative elements and additions. If the master can make them, then his product will turn not just into a convenient and practical place for storing religious paraphernalia, but will become its worthy frame.

The most logical and simple design option for a shelf is carving. Craftsmen use a variety of religious symbols for cutting:
- crosses;
- letter designations;
- floral ornaments;
- geometric drawings.
Another method of decoration is the finishing of blanks with metal plates, on which patterns are applied using a special embossing technique (basma). It is very problematic to make such a decor on your own. Most often, the basis for basma is a straight shelf for icons. Corner iconostases are also decorated in this way, but selectively and only in small fragments.

Differences of corner shelves, their sizes
There are several variants of such iconostases. They differ in height, design and additional attributes. A standard corner shelf for icons has a width of 63 cm and a depth of 33 cm. The height directly depends on the number of tiers in the product and its decor.
Usually the goddesses are open to the eye, but there are models equipped with small ones. They can store miniature items, such as pectoral crosses or small icons inlaid with precious metals. There are also completely closed iconostases, the shelves of which are hidden behind hinged doors.

The right place to retire
Where is the best place to place a deity? A straight shelf for icons will not fit into every interior, because it will catch the eye of everyone in the room. If there is not a lot of space in the house and its owner does not have the opportunity to allocate a separate room for prayers, it is better to opt for a corner iconostasis. You can hang it in the bedroom, in the living room and even in the kitchen, because people often pray before eating. The shelf itself is attached high enough, but not under the very ceiling, but so that you can easily take something from it.
Home iconostasis made of natural wood with carved patterns
The tradition of arranging a home iconostasis has existed for more than one century. Although in modern homes icons are often placed on bookcase shelves or hung on the wall, it is best to equip a separate special place for them.

Single-tier straight rack - shelf for icons
A good option would be a hanging shelf, which according to the canon should be placed on the eastern wall of the house. Often such a shelf is made angular, two or three tiers high.

Beautiful wooden shelf for icons in the corner of the room in three tiers

Corner shelf for icons with a candlestick

Shelf for icons “Home mini corner iconostasis”
In the workshops, you can order a stand for home icons of any size and configuration, but this is quite an expensive job.

Corner shelf made of fiberboard, made in three tiers
An easier option is to use a regular corner shelf from a hardware store, but in this case there may be sizing issues. In addition, you will have to look for a model that will better "fit" into the interior. All these difficulties can be avoided if you make a shelf for icons yourself - this is quite feasible even with little experience in carpentry.

Hinged corner shelf for wooden icons
Do-it-yourself icon shelf can have any convenient design. Corner shelves are made single-level or in several tiers. To connect several levels, supports carved from wood are usually used. The finished shelf is often decorated with carvings, openwork overlays, covered with special carpentry varnish, wax.

Small corner shelf for icons two tiers

Do-it-yourself home iconostasis
Necessary materials and tools
For the manufacture of the corner shelf, wood of various decorative species is used - for example, oak or cherry. A less expensive material would be a pine board. In addition to wood, you can also use plywood or chipboard. The thickness of the board can vary from 1.5cm to 2.5cm. You will also need boards of small width in order to carve the supports.
To work, you will need the following tools:
- tape measure or ruler;
- hacksaw;
- sandpaper for wood;
- electric jigsaw;
- electric drill;
- self-tapping screws;
- wood glue;
- varnish for wood.

Required Tools
To attach the finished shelf to the wall, you will also need stone drills, metal corners or hinges, self-tapping screws with dowels.
Manufacturing steps

Carved corner shelf for handmade icons with drawing
Before starting work, you should make a project drawing. The size and number of shelves depend on the type of icons that will be placed on the finished home iconostasis. To make a simple bunk shelf, you will need two 1.5 cm thick pine boards, as well as four supports.
- Using a marker or pencil, the drawing is transferred from paper to wood. The sides adjacent to the wall should be located relative to each other at a right angle. The outer edge can be straight, semicircular or curly.
- Using a saw and a jigsaw, the details of the future product are cut out according to the drawing.

We cut three parts with a jigsaw according to the template - sidewall, side and bottom
- The edges and surfaces of the parts are polished with sandpaper.
- The supports can be made simple in the form of flat planks, or they can be shaped with a jigsaw.

The blank is milled according to a stencil on special equipment
- If necessary, shelves for shelves are cut out of a thinner board.

To turn decorative parts, you need a lathe or they are taken ready
- With the help of self-tapping screws, the shelves are attached to the supports, then interconnected.

We assemble the shelf - the bottoms are screwed to the turned elements with the help of self-tapping screws
- Joiner's glue is used to strengthen the joints, as well as to attach the sides.

When connecting the sidewalls to the bottoms, the screws must fall into the middle of the ends of the bottoms
- Metal hinges are attached to the back of the shelf or to the supports.

The sides are screwed with the help of cylinders - self-tapping screws are inserted into the holes from the bottom side, the cylinders are put on, the hardware is twisted into the side
- Holes are drilled in the wall for the dowels of the mounting bolts on which the product will hang. It is necessary to make sure that the fasteners can withstand the weight of the shelves with icons.

The final stage is the coating of the finished product with drying oil and attaching it to the brackets in the corner
After completion of work, the finished shelf is treated with stain and varnish. Both colorless varnishes and those that give the board the color of various types of wood are suitable. When choosing a quick-drying varnish, the product is ready for use in a few hours.

Small shelves for icons of different colors - pine, walnut, mahogany
decoration

Depending on the complexity of the elements of decorating the shelf for icons, they can be made by hand or purchased in a ready-made version.
The most common way to decorate a home icon case is woodcarving. You can do it yourself with a jigsaw. If there is no necessary experience, carved elements can be bought at a hardware store, ordered in a workshop. Finished carved plates are attached to the shelf with wood glue.

For carving, soft wood is selected: birch, spruce, pine, aspen or juniper
Another way to decorate is to burn the ornament with a special device - for this, the pattern is first applied to the tree with a pencil. The shelf can also be painted - special wood paints are sold in the building departments. An alternative to a strict monophonic coloring would be to apply a pattern to the enamel with paint of a different color.

It is possible to burn out the ornament, followed by enamel opening of individual fragments of the image on the shelf
To further strengthen and decorate the shelf, its back walls are covered with a wooden panel. It can also be decorated with carvings, painted with varnish, enamel.

Shelf for icons with a beautiful back wall

To decorate the upper part of the shelf for icons, you can choose the outlines of an Orthodox church
When using a plywood board, these methods will not work - but on such a panel painting with acrylic paint with the addition of gilding will look spectacular.

Small figured shelf for icons with candlesticks and a lamp
Video: Do-it-yourself iconostasis shelf Woodcarving DIY
Home iconostases are a kind of small church for a believing Orthodox Christian. They should be given a special place in their dwelling where they can calmly pray in front of the images.
Home iconostases appeared in Ancient Rus'. For them, a whole corner was assigned, which was called red (i.e. beautiful). Icons were placed in this place, candles and lamps were lit. In the morning and evening, as well as during hours of special spiritual need, the household members said their prayers here.
The iconostasis of those times was a multi-tiered shelf on which the god was hung - a small curtain that covered the images of the saints and the Savior on the sides. The icons were hidden under the gospel - a special cloth, which was pulled back only during prayer. This tradition appeared in Rus' not by chance. It is known that the first image of the Savior would have been created by Himself, according to His will of God: after Jesus sprinkled his face with water and wiped it with a robe (cloth), His face remained on this canvas. He sent this canvas to the ailing ruler of Asia Minor - Avgar, thanks to which he was healed. After that, the prince gave the order to nail the sacred board over the gates of the city. After 900 years, the sacred image was transferred to Constantinople. Now, every year on August 29, Orthodox Christians celebrate the feast of finding the image of the Savior Not Made by Hands and consecrate hand-woven canvases.
What else was placed on the shelf for images?

Home iconostases of those times were also intended to store holy water and prosphora. The household members hid the gospel and commemorations (special books in which the names of all the dead and living Orthodox of this family were kept) behind the god. Particularly skilled needlewomen created doves (as a symbol of the Holy Spirit) from improvised materials and hung them on the iconostasis. In the red corner, it was obligatory to have lamps and candles that were lit during home service.
Such a small church was in every Orthodox house until the revolution of 1917. After the Bolsheviks came to power, people continued to pray, but they did it in secret. Therefore, from the richly decorated home iconostases, only a few images remained, which people carefully hid from prying eyes, fearing persecution. The modern red corner is somewhat different from the one that our ancestors created, since many of the traditions of its creation are simply forgotten.
Create your own red corner
The way the home iconostasis will be depends only on the owners of the house. However, remember to follow the following rules:

- Holy images must be installed away from technology (TV, computer, etc.) - the farther from everything mundane, the better.
- There should be enough space in front of the icons so that the worshipers do not feel cramped. And during prayer, church books (prayer books, the Gospel) are best placed on a folding lectern (stand).
- You should not place icons one by one on bookshelves, in lockers, while forcing these images with other worldly objects: souvenirs, pictures, etc. This is strictly forbidden, because by doing so we show disrespect for God. Indeed, for some reason, photographs of people we love and care about, especially those who have left this world, are put by many in the most prominent place, without cluttering them with unnecessary objects. The same should be done with icons, showing love and respect for the holy images.
The difference between icons and paintings

If you have reproductions of paintings at home that reflect biblical scenes, they should not be installed on the iconostasis.
The main difference between a holy image and painting is that in the first case, through icons, we communicate with the Lord. And since the iconostasis is a sacred place intended for solitude in prayers, the inclusion of reproductions in it would simply be inappropriate.
Icons should not be hung on the wall next to the posters of celebrities - by doing this we offend the holy images, putting them on a par with earthly idols.
Home iconostases are best placed in the eastern part of the house, since this part of the world is of particular importance in Orthodoxy.
For example, from the Old Testament it is known that the Lord created a paradise for people in the eastern part of Eden. And the Gospel says that as lightning comes from the east to the very west, so the Lord comes from Heaven. The church altar is also located in the eastern part. If windows face this side, the home iconostasis, the photo of which you will find in this article, is installed in any other place suitable for it.
What shelf to buy?
Whether you will create homemade iconostases with your own hands from wood or purchase them at a furniture store or church shop is completely up to you. If you want to buy a shelf, do it in specialized Orthodox stores. There is a wider range of iconostases, and the sellers will always prompt and help with the choice. According to the material, wooden and plywood shelves for icons are distinguished. They can be single-tier and multi-tier, straight and angular. There are even solid iconostases, which already have holy images. But such shelves are mostly made only to order. To understand what such a home iconostasis looks like, the photo is presented in this article.
If you decide to create a real red corner, choose multi-tiered shelves. On them it will be much easier to recreate a majestic wall with holy images, like those installed in temples. What will be your home iconostasis - corner or straight depends on where it will be placed (on the wall or in the corner of the room).
What icons are needed?

First of all, in every home there should be images of the Savior, the Mother of God and St. Nicholas the Wonderworker. Of all the icons of Our Lord, the waist-length Image of the Almighty is most preferable for home prayer. On such an icon, Jesus Christ holds in his left hand an open book, in which it is written "I give you a new commandment: love one another." With the right hand, the Lord baptizes the one who prays.
Of the images of the Mother of God, the Russian people especially fell in love with icons such as "Tenderness" and "Hodegetria" (Guide). In the first image, the Virgin Mary holds a baby in her arms, who gently hugs her neck and presses against her cheek. The most famous icon of this type is the Vladimir Icon of the Mother of God. Its distinctive feature is that the left heel of the baby is completely turned outward. On the image of Hodegetria, the Mother of God is depicted with a baby, who holds a bundle in his right hand, and with his left overshadows all those who pray with the sign of the cross. A vivid example of this image is the Kazan icon, "Soon to hearken", "Sinner's guarantor".
Additional images

In addition to these main icons, on the home iconostasis it is necessary to put images of saints, after whom members of your family are named. It is also desirable to purchase an icon of the healer Panteleimon, a healer of mental and physical illnesses. The choice of other images depends entirely on the needs of the household. For example, you can purchase the image of Peter and Fevronia, who are praying for family well-being. Before the icon of Sergius of Radonezh, they ask for help in teaching and good undertakings. Unmarried women can pray before the image of Xenia of St. Petersburg, who, by the will of God, became an assistant to people in matters of marriage.
Recently, in many homes, the image of the blessed old woman Matrona of Moscow has become one of the central icons. Even after her earthly death, she helps in everything those who come to her in the Intercession Church or to the grave at the Danilovskoye cemetery, or simply turn to Matrona in prayers at home. Many people have already received healing and help from her. No wonder she said: "Come to me and tell me everything, as if alive." By this, Matrona meant that her earthly death does not mean a spiritual death: after all, she is still with us.
home iconostasis. How to arrange icons
It is very important to correctly place the images in the space allotted for them. Above the iconostasis is the Crucifixion. It can be purchased at a church shop or made from wood yourself. The icon of the Holy Trinity is placed on the next tier. On the bottom shelf there should be images of the Savior, the Mother of God and Nicholas the Wonderworker. At the same time, the image of the Lord should be in the middle, the right hand (right) - the Virgin Mary, and the left (left) - Nicholas the Pleasant.
A little lower are icons of saints revered by the family. On the last tier you can put a bottle of holy water, candles and the Gospel.
Making the corner red
You can decorate the home iconostasis with fresh flowers, willow branches after the twelfth feast - the Entry of the Lord into Jerusalem. And on the day of the Descent of the Holy Spirit, the shelves with images are framed with birch branches, as a symbol of the grace of the power of God.
On the shelf for icons, you can also install reproductions of images. They must first be consecrated and then added to the home iconostasis. Embroider a kiot (frame) for them with beads, and then they will look harmoniously with other icons.
We make a shelf

If you do not have the opportunity to purchase a stand for images, or all the models that you have met, you did not like or do not fit (for example, a small number of tiers, limited space, etc.), then do-it-yourself home iconostasis, photos of which are presented in the article , you can make your own. For a standard three-tier iconostasis, you will need wooden boards, a drill and screws. In order to assemble it, you need to create drawings of the home iconostasis. Using them, you can easily calculate the dimensions of the wooden panels, which will depend on the number of icons located on the iconostasis.
Uncomplicated process
The most elementary stand for holy images can be made from plywood. First, you need to attach icons to it with screws in accordance with the heavenly hierarchy. After that, you should make a riza for icons - this is a special salary that frames the images. It can be created from embroidered fabric or from beads and beads. This will give the icon shelf a festive and solemn look. This is how you can make a home iconostasis with your own hands. Photos of similar works in this article will help you in its design.
Thus, the creation of a small church at home is not so much a prerequisite for the life of an Orthodox Christian, but rather his spiritual impulse and desire. After all, the one who believes and loves the Lord always wants to turn to him in prayers both during the liturgy and at home service. It does not matter whether your iconostasis is made of expensive materials and lined with gilded images, or you yourself created it by hand, collecting holy images. The main value is your faith and desire for spiritual perfection.
The Orthodox traditions of the Slavs involve the use of icons to decorate living space. This tradition means people's desire to get closer to religion, to show deep respect for the church. The device at home of a reduced copy of the iconostasis is the placement of icons and church items on a special shelf. According to the canons of Orthodoxy, a shelf for icons is placed on the eastern wall or in a corner oriented to the east. At the same time, it is not recommended to place anything other than Orthodox paraphernalia on it.
Consider what the corner shelf for icons consists of, how to assemble it with your own hands.
Making a shelf for icons
In order to make a shelf with your own hands, you will need wood tools: a jigsaw, a milling cutter, a lathe, a drill.
Materials:
- A board of any type of wood (from the list of construction lumber); thickness 15 mm.
- Pieces of chipboard, LDF or MDF in different sizes.
- PVA or any wood glue.
- Lacquer or wax.
- Black, golden, silver paint.
Accessories and hardware:
- Carved slats, racks in the form of balusters.
- Crucifix made of wood or metal.
- Self-tapping screws 27 and 41 mm long.
- Plugs.
- Loops.
- Wall dowels.

Where to get carved elements?
Some elements of individual production (balusters, candlesticks or carved slats) can be made independently. The crucifix crowning the shelf must also be carved. All these elements are sold by craftsmen, woodworking enterprises, you can also find them in a church shop. In addition to these details, the corner shelf for icons can have a back wall in the form of an iconostasis with carvings on plant themes, birds, and figures of the holy apostles. The top of the shelf can be designed in the likeness of the outline of an Orthodox church.
How to make bas-reliefs and balusters with your own hands
Bas-reliefs are cut out with their own hands, as well as complex patterns. To cut a crucifix, it is recommended to choose a suitable sketch. Soft wood is used for carving: juniper, pine, spruce, aspen, birch. As tools use a set of incisors. On a solid board, 15 mm thick, using a paper sketch, transfer paper, we outline the outlines and main contours of the convex parts. Now we cut out the crucifix with a jigsaw. Cutters make concave elements. The carving is carried out in layers, carefully highlighting the inner corners with a thin cutter. After everything is ready, we take the smallest abrasive mesh, skin the product, bringing it to the ideal. If you have to make bas-reliefs in segments, you need to fasten them to each other with an MDF sheet on the back side. We apply the resulting parts to the panel, draw a general outline, then cut out the margin along the edge (0.5 cm). We glue the parts of the decor close to each other, to the MDF sheet. Then carefully cut off the remains with a cutter or jigsaw. We grind the side with sandpaper.
Do-it-yourself balusters are made using a lathe. In the same way, products after carving must be sanded.
Parts manufacturing
The shelf consists of several parts: side panels, racks, shelves, sides. We take a board 125 * 15 mm. Cut out templates from pieces of MDF or chipboard. It is not recommended to use plywood, as it needs to be finalized after cutting. The following parts are needed: side panels (2 pieces), shelves, sides, fasteners.
First, we attach ready-made templates to the board. We form a detail with an electric jigsaw. We process the edges with a cutter, grind with abrasive paper. Fastening holes are pre-marked with a pencil, drilled. The side panels are done in the same way. The assembly of the shelf begins after all the details are ready, polished. As a result, the shelf should be varnished.
wall mount

The corner shelf is attached with dowels. First we attach the loops to the product. Then we attach the shelf to the wall and mark the attachment points. We drill holes with a drill and screw in the dowels.
How is the finished shelf attached?
Location requirements:
- The shelf should hang at or above the person's eye level.
- There should be no paintings or other decorative items near the icons.
- When using candlesticks, there should be no flammable and combustible materials (cloths, curtains, paper) nearby.
Additional ways to decorate

