I do not think that when we decide to make a crossbow, we will have at hand all the tools that we want, and a lot of raw materials. Therefore, it is difficult to predict what our crossbow will be made of, so let's just consider the main components made with minimal complexity. And also, if possible, we will refuse metal parts.
In order to present a general view of what should happen, I will give a picture from the site www.daslife.ru.
Naturally, I'm not suggesting to do everything in size, just take into account the overall device.
One of the most important parts of the crossbow is the arc. As you might guess, it has a decisive influence on the speed of the arrow, and therefore on the combat power of the crossbow. You can make an arc from both wood and metal. A wooden arc can be either from a single piece of wood or combined.
The option using one type of wood is the simplest, but also the most underpowered. Almost any type of wood is suitable for manufacturing: ash, maple, hazel, juniper, birch, oak, yew, elm, white acacia. You can use both thick branches and trunks of young trees. Ideally, take the harvest in the winter when there is no sap flow, the worst thing is naturally in the spring. As it is not difficult to guess, a blank with knots is a completely inappropriate option. In general, making an arc is in many ways similar to making a bow and you can read about it on the Hobbit's blog.
Making a composite arc is not a cheap pleasure, because pasting the arc with tendons and horn plates is required. Most likely, neither one nor the other, nor glue will be at hand =)
Although we agreed to use wood, it is worth noting that the springs of Soviet cars will make very powerful arches, and if possible, they should be used.
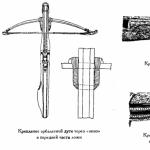
The fastening of the arc to the stock is usually carried out to the end of the crossbow with ropes, through a window 10-15 centimeters from the arc. The picture shows examples of fastening the arc, as you can see, wooden wedges can be used to fix the arc. 
Another important element is the trigger mechanism. Consider the simplest option - a pin lock. 
When erecting, the bowstring is hooked on the ledge, under it there is a pin (1), of a cylindrical shape, resting against the body of the trigger lever (2).
Also, in order for the arrow not to leave the crossbow before the shot, it is recommended to make a small clamp. Similar to what is shown in the photo. 
The crossbow stock, the recess in which the arrow is located, is perhaps the most time-consuming and filigree part of the crossbow. If we do not have a metal bed processed on a milling machine (and we do not have one), we can replace it with a carefully sanded wooden one. Do not forget that the advantage of a combat crossbow over a wooden bow is not only in the power of shooting (although a homemade crossbow without rollers and a system of blocks is unlikely to exceed the bow in this indicator), but first of all in the convenience of design and the ability to conduct aimed fire. To do this, it is necessary, taking into account the trajectory of the flight of the arrow, to adjust the bed so that it is located at an angle. The average value is 5, 6 degrees, but we advise you to decide on the distance at which you will send arrows, and what is called “shooting” the finished product, after each series of shots changing the angle of the bed until your homemade crossbow starts sending arrows exactly at target.
Well, the last moment, this is a bowstring tension device. Since the tension force of the crossbow arc can exceed 100 kg, at least the simplest device for tensioning the crossbow should be brought. 
And finally, a photo of a homemade crossbow. 
Making a string for a crossbow(taken from www.turmaster.com/)
The bowstring during the shot receives significant tension and rupture pressure; therefore, one of the conditions for it is its ability to withstand a large number of shots, i.e. to have durability, "survivability". In addition, the bowstring should be light and slightly stretchable.
For the manufacture of bowstrings, threads are used: lavsan, dacron, kevlar, deinema, CBM, fastflight and other synthetic fiber threads.
In this case, you need to have a simple device.
As can be seen from the figure, it consists of a wooden plank, in which on one side there is a slot and a moving threaded rod that allows you to install and fix it in various places, on the other end of the plank on the axis there is a V-shaped part made of plywood or wood with a thickness of about 10 mm. Two rods are permanently fixed at the ends of the part. The V-shaped part is fixed in two positions. The first position is shown in the figure, in the second position the two rods are in line with the moving rod.
In the absence of such or similar device, the winding of the bowstring can be done between two nails driven in at the required distance along the length of the bowstring. The winding of the thread is carried out with a circular motion of the hand with a uniform tension of the thread. The number of strands depends on the strength of the bow.
After the bowstring is wound, a safety winding of the loops and its middle is made.
The safety winding is made with twisted silk thread, kapron, nylon, cotton bobbin thread. When making a bowstring from Kevlar threads, it is necessary to strengthen the loop, either by making an additional lining of threads and weaving them into the bowstring, or by doubling the number of threads in the loop. After winding the middle of the loop, the V-shaped plate is rotated to its original position and the winding of the end of the bowstring is made.
Thus, the second loop is also wrapped. In this case, it is necessary to accurately maintain the middle of the winding. The bowstring worn on the bow should not have sagging threads, their presence indicates poor-quality manufacture of the bowstring. As a rule, this happens if the windings are not produced with the same tension.
The safety winding in the middle of the bowstring is done at the moment when it is put on the bow. The safety winding should not be made too tight: this significantly lengthens the life of the bowstring.
To protect the bowstring from moisture, it is lightly rubbed with beeswax. Rub the wax carefully so that the threads of the bowstring do not break or deform. It must be remembered that lubrication increases the weight of the bowstring and leads to a decrease in the speed of the arrow, so it should be lubricated with a small amount of wax.
The threads from which the bowstring is made, under the condition created by the work of the shoulders, lengthen (from lavsan or dacron by 2-3%, from kevlar by 0.8%). In this regard, when making a bowstring from Kevlar, it is recommended to make it a little longer than from lavsan and dacron.
The practice of shooting involves the replacement of bowstrings after 5000-10000 shots. Kevlar strings last much less and withstand about 2000-5000 shots.
By twisting the bowstring, you can change its size until the accuracy of fire is satisfactory. The maximum number of turns to change the length of the bowstring is 30. If more turns are required, then the bowstring is too long and a new one should be made.
Making a string for a crossbow 
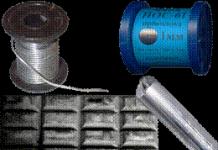
Metal cable string
A cable with a thickness of 1.5 - 2.5 mm is suitable for making a crossbow bowstring. But it has a number of features that must be taken into account. In general, a string made of synthetic threads is more preferable.
Features of using a metal cable:
Structurally, the cable is designed for static loads. Under dynamic loads, it collapses much faster.
Over time, the cable will stretch and, accordingly, the bowstring will weaken.
The mass of a bowstring from a cable significantly exceeds the mass of the same bowstring made of synthetic materials. This indirectly affects the speed of the arrow, since the arms require more energy to accelerate the massive cable.
When grinding, excessive stresses, the cable, as a rule, breaks in places of kinks, tied knots, fasteners
You can get loops at the ends of the cable by tying it with an ordinary oak loop. Soldering, as a way of connecting the ends of the cable, is less reliable in operation. The riveting of the ends of the cable in a copper or brass tube has proven itself well. 
Loops for attaching a bowstring to a crossbow.
Some examples of more complex triggers 


Before proceeding with the independent manufacture of a crossbow, you should decide on the device of this type of weapon. Its main structural elements are: a trigger, a bowstring, a bow with a bowstring, a sight, a tension mechanism and a wooden base, which is commonly called a bed.
Of course, a crossbow made will be very different from the factory design. But the principle of operation will be the same. First you need to make the base of the crossbow. The base is the main element of such a weapon. It can be made from wood such as birch or walnut. The thickness of the workpiece must be at least three centimeters. After creating the blank, you will need to project the shape of the future base onto it, and then cut it out.
As for the bow itself, you can use arches from an old sports bow (if you have one) to make it. To connect the crossbow bed and the bow, you will need to connect the bow to the base. True, you can use another option. It involves the manufacture of a metal frame. It will have a bed and a bow.
How to make a string
The bowstring should not have a high degree of extensibility. Otherwise, a homemade crossbow will very quickly cease to fulfill its functions. So, the best material for creating a bowstring will be lavsan or fastflight. Wrap the threads, after pulling them between the nails. Do not forget to make loops for putting on a bowstring. It will not work to pull the bowstring without a stirrup, which in turn can be made of steel wire or cable.
Attach one end of the rope or wire to the base of the crossbow. And at the other end, fix the handles. You will also need to adjust the tension level of the bowstring after it is fixed. You can do this directly on .
Trigger and arrows
After adjusting the tension of the bowstring, you can proceed to the manufacture of the trigger mechanism. The role of such a mechanism will be a wooden lever, which will need to be carefully built into the crossbow. Then you need to mount the sighting device. Front sights can be used for a mechanical sight.
Arrows for a homemade crossbow can be made from ordinary boards, and then planed. If you want arrows to be strong, you should not drive nails into them. Otherwise, when reaching the target, the arrow may break.
We suggest that lovers of homemade weapons sit comfortably, because in this material we will present an overview of the manufacture of a reverse design crossbow. First of all, let's explain why the design of this crossbow is called reverse: the fact is that its bowstring is pulled in the opposite direction, which allows you to get much more power.
What do we need to make such a crossbow:
- wooden plank 15 mm thick and 28 mm wide;
- ruler;
- pencil;
- hacksaw;
- drill;
- bolts, washers and nuts;
- two rollers;
- spring;
- two metal corners;
- kapron rope;
- door hinge;
- metal plate.

We take the bar, which must be used to cut four blanks. The length of the first blank should be 43 cm, the second - 31 cm. The remaining two blanks should be 15 cm.


Next, take two short blanks and make marks of 1 cm from each edge. Also, from one edge of both blanks, we make one mark of 5 cm.

The next step is to take the middle bar and make marks 1.5 cm from both edges.

We make holes in the marked places.

At the edges of the short strips, we make through holes that go to the holes drilled in the previous stage.

Next, to the very length of the bar at around 25 cm, we fix the middle bar. We will do this with bolts, washers and nuts.


For greater reliability, the author of the idea applies a layer of glue between the two planks.


Now we take two rollers, which were also used to make a compound bow, and fasten with bolts next to the middle bar, as shown in the figure below.


After that, we take a spring, which can also be purchased at the car market, and fix it on the crossbow using a metal corner.


The corner should be installed on the edge of the long bar with self-tapping screws, however, it will prevent the arrow from reaching. To avoid this, we make a small indentation on the bar.


The next step is to take short strips, which we fix on the basis of our crossbow of the topic with the same bolts.


We take a piece of nylon rope and fix it on the shoulders of the crossbow using through holes. Thus, we connect the shoulders to each other.


Next, we take another piece of rope, attach it to one of the shoulders, thread it through the roller, then through the spring, through the second roller, attaching it to the second shoulder at the end. The length of the rope should be such that it is difficult for the spring to reach its middle.


Let's move on to the manufacture of the trigger mechanism. To do this, fully stretch the bowstring of the crossbow and make a mark at the end point.

We make a hole according to the mark.
We take a metal plate and cut out a blank from it, similar to the one that can be seen in the figure below.

We fix the plate so that the hole on it coincides with the hole on the crossbow.

We take the door hinge and connect it to the metal corner with a bolt.
A hunting crossbow is an excellent weapon for hunting food in the forest, as well as a means of survival in extreme conditions. It differs from a conventional bow in more accurate aiming, better striking power and ease of use due to the presence of a trigger mechanism. The advantage of such a weapon compared to the rest is that it can be made independently, it does not need to obtain a special permit, like a gun, and the simplest do-it-yourself crossbow can be made in a matter of minutes if time does not endure. Among the shortcomings can be noted the time spent on reloading, as well as a small distance for the sight on the target.
A homemade crossbow allows you to hunt any game, from small to large animals. The hunting crossbow has the following design:
- The base to which the rest of the elements with the guide bar will be attached. This bar determines the flight path of the bolt (arrow).
- Shoulders, or bow: determines the strength of the shot.
- The block that attaches the base to the bow.
- Trigger mechanism.
- Bowstring.
The base is carved from solid wood, but not heavy, so that the hands do not get tired of carrying weapons. The ideal options for the base material are beech and walnut. In the wild, there is no time to carve a beautiful base, but you need to try to make it as convenient as possible for yourself. The guide bar is a groove where the arrow will be placed. It should not create friction when the bolt (arrow) moves, therefore, after fixing it, it is necessary to go over it with sandpaper or a polishing wheel to grind its surface. You can make it separately using a metal tube cut in half, but in field conditions it is easier to cut a deep groove at the base of the structure. It is better if the bed and the guide are separated from each other.
Crossbow shoulders are an important structural part. A simple do-it-yourself crossbow has a classic bow design: the bowstring is statically attached to the shoulders, transferring the force of the shot from them to the arrow. To make a bow, you need to use flexible wood that will keep its shape without breaking from numerous bends: ash, maple, acacia. The shoulders are hewn symmetrically with a knife and in such a way that their base has a larger diameter in girth than the edges. At the edges you need to cut out fasteners for the bowstring. To attach the bow to the base, you need to make a block.
Usually the block for attaching the base and the bow is made of metal. In field conditions there is no such possibility, therefore the simplest model of a hunting crossbow may have a wooden block. To do this, you need a durable tree, ideally - oak. The block is attached to the base, then the bow is attached. Everything is connected into a single structure using self-tapping screws, nails, or a strong rope.
To carry out a shot, you need to make a trigger mechanism. In order to embed the trigger, you need to make a vertical slot in the base. A restraining bar should be attached above this slot to prevent accidental slipping of the bowstring.
For the bowstring, you need to use a durable, but not too elastic material. For this, fabric, wire, fibrous plants, bark, horsehair, tendons or animal skin are suitable. Using these materials, you need to weave the bowstring using the pigtail method, hair, skin and tendons can be used in their original form. After the bowstring is put in place, the homemade crossbow for hunting is ready.
Instead of arrows, like a bow, bolts are used here, which have a greater striking ability. They are made from durable and resilient material. The bolt must have a perfect shape, and the center of gravity should be in the first third of the shaft. All bolts must have the same length and weight, otherwise the result of the shots will always be different. Good bolts are made from fiberglass telescopic rods. The tip is made from a metal sheet cut with metal scissors. The tip is lubricated with epoxy glue and inserted into the cut at the end of the shaft.
Homemade speargun for spearfishing
There is an opinion that what is often erroneously called the "underwater crossbow" is rather a weapon that operates on the principle of a slingshot for fishing under water. The crossbow is not suitable for spearfishing, because the resistance of the water will not allow you to make a successful shot. However, it is possible to build a homemade speargun in the sense that it can be used to shoot fish from above, in shallow water, and underwater.
 Homemade underwater crossbow (in progress)
 A homemade underwater crossbow is, in fact, a rubber battle gun. There is also a pneumatic weapon, but it is difficult to assemble it yourself, special skills and abilities will be required.
Underwater weapon consists of the following structural elements:
- Lever
- The basis
- trigger mechanism
- headband
- Rubber bands and hook
The principle of operation of the device is that the projectile pushes the harpoon and returns it back by means of rubber bands. The trunk is cylindrical or irregular in shape. Its task is not only to hold the guide, but also to resist the bending loads created by the rubber bands.
The underwater crossbow guide serves to stabilize the position of the harpoon. It is better to make it from an aluminum pipe, divided into two parts. One of them needs to be attached at the head of the gun, the second - at a distance of about 10 cm from it. The harpoon must pass freely through them. The headband is open or closed. In the first case, ring strands are attached, in the second, paired ones. When using ring rubber bands, the acceleration of the harpoon will be greater than with paired ones. An unbalanced rod power will either not generate enough force to project the spear, or it will put too much stress on the bow of the barrel. The strands must be attached on each side to the coil holder, secured with clamps. The second end of the strands must be passed through a special ring, it will be more convenient to shoot with it.
Depending on the size and power of the gun, the harpoon has a different length and thickness. The hooks on it are of the type propyl or sharpfin. The dihedral shape of the harpoon blunts less, and the trihedral one has a higher penetrating power. The device of the handle on a homemade crossbow is an individual matter, it may not be. If hunting for large fish is supposed, there must be a reel. It is most convenient to install the coil in the front end of the barrel.

The spring crossbow differs from the usual one in that the shot from it is carried out due to the elasticity of the bow. For the manufacture of such a model, you can use improvised materials: a spring mesh from an old bed, a spring processed by a grinder, shock absorbers from bicycle wheels. The spring of this type of crossbow can be located inside the bed, there can be two of them for each shoulder or one for both shoulders. The spring inside the stock is small in size, it is convenient to carry and use such a weapon in the forest. The spring can be used not only for tension, but also for compression, and by increasing the number of turns, you can adjust the tension of the bowstring. A spring projectile can be crafted by modifying your crossbow slightly with a normal device.
Despite its age, the crossbow is still able to compete well with some types of weapons. Unlike its progenitor, the bow, this design has an automatic arrow release system, thanks to which the shooter can concentrate on aiming without wasting energy on pulling the bowstring. Given the popularity of this weapon, many craftsmen are interested in how to make a crossbow with their own hands. To do this, one should take into account many nuances, know the design features of a modern crossbow, the types of such guns, factors affecting the range of a shot, etc.
Before you make a crossbow with your own hands, you need to understand the features of this weapon. It is also called a crossbow or arrow thrower, which perfectly characterizes the features of its design. In simple terms, this is a bow equipped with a special mechanism for cocking and lowering the bowstring.
There is a full-fledged trigger - a trigger, through which a shot is fired. Thanks to this innovation, the crossbow surpasses the traditional bow in many ways, namely:
- lethal force;
- shot range;
- shooting accuracy.
However, in most cases, the crossbow loses to the bow in terms of rate of fire. To level this shortcoming, special shortened arrows or bolts were used, and sometimes bullets.
When the crossbow was used as a military weapon, there were enlarged prototypes that were installed on special machines. They were called arcbalists. At the moment, crossbows are used mainly in sports and hunting, being compact and easy to use.
Device Features
 For the manufacture of the stock, it is recommended to use wood material: ash, beech, birch, walnut, rosewood and even oak
 The main part of the crossbow is the stock in which the arrow is laid. It is combined with the trigger mechanism.
A guide groove for bolts is installed in the upper part of the bed. At the end of the bed there is a stirrup and a cross. On the latter, wooden or steel shoulders are fixed.
The traditional trigger mechanism is a lever, a washer with a slot for the arrow shank and a fixing spring. Thus, when the trigger was pressed, the bowstring was released from the hook, transferring energy to the arrow.
At the moment, there are several types of triggers used in crossbows. The most popular of these is the pistol-type design.
What is a crossbow made of?
Compared to the traditional bow, several elements have been added to the design of the crossbow. This weapon consists of the following parts:
- bed;
- trigger mechanism;
- string.
If we are talking about a block crossbow, then its design also implies the presence of blocks - rollers designed to tension the bowstring.
 On the left - a classic crossbow, on the right - a block model
 To date, there are several varieties of crossbows. Regarding the purpose, such structures are divided into:
- Sports. The appearance and characteristics of such weapons directly depend on the sports discipline in which they are used. As a rule, such structures are equipped with special aiming systems and various attachments designed to improve shooting accuracy.
- Hunting. For such crossbows, relative compactness with high power is required. Therefore, most often for hunting they acquire block-type models.
- Amateur. These are light guns that are designed for target shooting and have relatively little power. Exact copies of ancient crossbows are also produced, which, although they are military prototypes, are most often used to decorate interiors and replenish collections.
Regarding the design, there are:
- classic models. In this case, energy is accumulated directly in the arcs, after which it is transferred to the bowstring. The principle of operation of such crossbows is similar to the simplest bow models.
- Block. This is the most advanced type of this weapon. A special system of blocks in this case contributes to the competent distribution of the load between the elements of the system. Thus, the power of such a crossbow increases, and the dimensions decrease.
The design of a block crossbow is particularly complex. Even the banal process of replacing the bowstring in this case requires professional intervention.
According to the type of shells used, crossbows can be:
- Classic. In this case, we are talking about the use of special crossbow arrows or shortened "bolts" that increase the rate of fire of the weapon.
- Schneppers or balestras. A typical projectile in such a weapon is a metal ball.
Model manufacturing technology
 For the manufacture of the bow, an automobile spring is taken, and rollers (blocks) are used as a fastening system for the bowstring (cable)
 Making a crossbow with your own hands will be somewhat more difficult than a bow. The fundamental difference in this case is the presence of a bed and a trigger mechanism. However, if you have the skills to work with a hand tool, then you should not have any particular difficulties.
Material selection
Before you make a crossbow out of wood, you need to learn how to choose and prepare the material correctly.
Wood has the best properties for making a crossbow. It is an indispensable material for creating a stock and a bow, since the wood is easy to work, has good flexibility and is very durable. In addition to wood, various composites and spring metal are used today in the manufacture of arches. However, for hand-made production, it will be easiest to use wood.
Of course, something more reliable and wear-resistant should be used for the trigger mechanism. Therefore, it is made of iron.
If it is planned to manufacture a crossbow, the tension force of which does not exceed 20 kg, then it is quite possible to use beech or other hardwoods for turning trigger parts.
For the manufacture of the body of the crossbow, it is best to use the following types of wood:
- poplar;
- ash;
- maple;
- acacia.
The density of these rocks is quite enough to withstand the significant loads exerted on the bed and bow of a crossbow. Such soft types of wood as pine and linden are absolutely not suitable for the manufacture of these parts.
Material preparation
 A wooden blank for a crossbow must be dried for a year
 In view of the significant loads on the elements of the crossbow, it is not surprising that sooner or later they will fail. To prevent this from happening soon, it is necessary to use pre-prepared material in the production of a crossbow.
Wood should be harvested raw and dried for a year. For the manufacture of a bow and a bed, it is necessary to choose branches that correspond to the following characteristics:
- For a one-piece design of the stock with a butt, you should choose a branch at least a meter long. For the manufacture of arcs, the length of the branch must be at least 180 cm.
- The diameter of the blanks must be at least 10 cm.
Advice! Before drying raw materials, cuts should be protected with paint or varnish. Also, any glue can be used for this. This approach is necessary in order for the tree to dry more slowly and more evenly. This will protect the workpiece from the appearance of internal cracks, which will greatly extend the life of the crossbow.
After protecting the cut points, do the following:
- The workpiece is sent to a dry place, protected from sunlight.
- It is desirable that the raw materials lie here for at least a year.
- Next, you should clean the workpiece from the bark, after which it should be in a dry place for another week.
- Now the log can be cut in half, drying for about a week.
Shoulder making
 The easiest way is to use ready-made bows for shooting sports
 On the workpiece, you should choose the side that is characterized by thinner annual rings. As a rule, this is the north side, the fibers on which are denser than in other parts. From this part, a bow or shoulders is made.
Shoulders are produced as follows:
- First, the middle is outlined, from which 2 cm should be measured in each direction to install the crossbow bed. This place on the bow should have a maximum thickness.
- From the middle, we begin to gradually cut off the excess material, moving towards the edges. The workpiece should be thinned in this way on both sides.
- From time to time it is necessary to check the bending of the arcs using a test bowstring. It is a strong rope on which there are many loops. Putting a bowstring on the bow, you can determine the degree of deflection and its uniformity. In this way, places are identified where excess material should be removed. This process continues until the product bends evenly on both sides.
How to handle knots
When harvesting material, it is advisable to choose those branches that are devoid of knots and other defects to the maximum. It should be understood that any large knot is a weak point in the design. However, if you could not find a workpiece that is completely devoid of defects, this does not matter.
Important! Under no circumstances should knots be cut before drying the material! Otherwise, the raw material may crack.
The removal of knots must be carried out already in the process of shaping the shoulders of the crossbow. For this, a well-sharpened knife is used. They should be cut in such a way that a protrusion remains above the surface of the workpiece, about 1 mm high. Next, the defect is polished with sandpaper.
Stock making
 The bed is made for you - for maximum comfort
 After the shoulders of the weapon are ready, you should proceed to the manufacture of the bed. To do this, follow these instructions:
- Initially, we select the location of the chute along which the arrow will move during the shot. This place should be perfectly flat. Any notches or irregularities can knock down the trajectory of the arrow, extinguish some of the inertia, or even make the weapon unusable.
- Typically, the gutter is about 30 cm long. It should be carefully hollowed out and sanded.
- Behind the chute, it is necessary to cut a recess for the trigger mechanism. In the front, grooves are created for installing the shoulders.
All wood cutting work should be done with a special carpentry knife or chisel.
Trigger mechanism
To understand how to make a trigger for a crossbow, you first need to understand the features of its design.
If you do not plan to make a powerful weapon, but want to create a light and compact crossbow, then the arrow release mechanism can be made of wood. For this, beech or oak wood is used. If we are talking about weapons with a tension force of more than 20 kg, then the details of this mechanism should be made of metal.
The most primitive trigger mechanism is called a "nut". Its design is extremely simple. This element is a cylinder and consists of the following elements:
- on the one hand there is a trigger stop;
- at the opposite end is the bowstring hook.
Powerful crossbows use an advanced trigger system. It provides an easy trigger pull under high loads.
Assembling a crossbow
 Tip: don't bother making arrows, they are much easier to buy
 It remains only to connect the manufactured elements together. Initially, you need to install the trigger mechanism in the box. To do this, a seat of a certain size must be machined in it. Next, the shoulders are set. They can be either a solid arc or two separate elements. Their fastening to the base is carried out by means of a special furniture adhesive, which will ensure reliable adhesion of the elements.
At the last stage, a bowstring is pulled over the shoulders. A strong nylon rope is most often used as a bowstring. It is attached to the ends of the bow, and the crossbow is ready for its first shot.
Manufacturing of fiberglass arms
If you want to make a really powerful crossbow, then the shoulders of this design would be best made from fiberglass. Such a bow will not only be stronger, but also more durable than a wooden one. The manufacturing instructions are extremely simple:
- We take Kevlar or fiberglass, cutting it into strips. For the manufacture of shoulders for a medium crossbow, about 40 strips are required.
- We glue the resulting elements with epoxy resin, tightly connecting them to each other.
- After gluing, it is necessary to lay the resulting workpiece under the press. The best option for this is flat boards, between which the shoulders are placed, clamped with clamps.
- The design hardens in 24 hours, provided that the workpiece is in a warm room.
- After the final solidification of the shoulders, their protruding edges should be cut with a knife and sanded with emery.
Epoxy adhesive should be prepared in such a way that the thickener content in it is minimal. Experts advise using no more than 10% thickener.
To make curly arcs, you should make a special mold for the press. It is made from plywood, which is bent after pre-soaking.
How to make a mini crossbow?
 Shooting with a mini-crossbow will be quite interesting, because. as arrows, you can use sharp bamboo skewers that can even pierce cardboard
 To shoot a crossbow, it is not at all necessary to acquire skills in working with wood, purchase the necessary tools and procure raw materials, waiting for a year to start work. The current model can be made from ordinary corrugated cardboard. Naturally, such a crossbow is not suitable for sports or hunting purposes, but it will be just right for target shooting.
The production of such a prototype involves several stages:
- First we make the shoulders. To do this, it is necessary to cut several identical blanks from corrugated cardboard, which are fastened together into a single structure. Thus, the necessary rigidity is created, because this part of the crossbow will have the maximum load.
- Then the trigger and locking mechanism should be cut out of cardboard. They are also made from several layers glued together. To create additional rigidity, it is necessary to strengthen these structures with ice cream sticks.
- The main part of the crossbow is represented by a stock, exactly like in its combat prototypes. This design consists of two identical parts that are connected to each other by means of jumpers.
- We insert the trigger mechanism inside the stock and glue the main part of the crossbow.
- Now you need to attach the shoulders to the base. This should be done very carefully to avoid skew, otherwise the accuracy of a shot from such a crossbow will be a big question.
- At the last stage, you need to pull the bowstring. For this, stationery gum is used, which are intertwined with each other. The more rubber bands you use, the more powerful your crossbow will be. However, one should not overdo it here - three or four layers will be enough.
As arrows for such a crossbow, you can use ordinary ballpoint pens. They are quite heavy for targeted flight, while the inertia of the gum will be more than enough to launch such a projectile.
