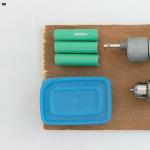
Cordless screwdriver is used everywhere in workshops and households. Such a tool is valued for not being tied to a 220 V household network. It is compact, does not take up much space and is able to replace a drill in simple jobs that are sometimes found around the house.
In building stores and on the market, such equipment can be found in a wide range. Its cost sometimes makes you think, and sometimes even makes you want to save. What if you make it yourself? Today we will support this quite reasonable idea with a master class from one of the lovers of tinkering.
Necessary resources for homemade
Materials:Tools:

We assemble a screwdriver with our own hands
Stage one - preparing the handle for a screwdriver
The shape of the handle should be comfortable for the hand, and functional for filling the screwdriver. We make it from two pieces of plywood 10 mm. Cut out the template from a piece of cardboard.We transfer the contour of the handle to the plywood with a marker and cut out both parts with an electric jigsaw.


We connect them with PVA glue. Gluing will be better if you put the workpiece under a press, clamp it in clamps or a vice.
We drill a through hole in the middle of the handle with a 3 mm drill. It is necessary for the engine mounting plate.


We make the next hole for the button from the side edge. We drill it first with a 3 mm drill, and then expand it by 8-10 mm. Depth of expansion - about 15 mm.
We clean the edges of the plywood with sandpaper, and cover the part with paint for moisture protection.


Stage two - install and connect the engine
We cut a strip 20-25 mm wide from a piece of galvanized steel with scissors for metal. This will be the clamp for the engine.
We mark the holes on both sides of it and drill it with a thin drill. We bend the plate with an arc, and fix the engine on a thin bolt with a lock nut.


We fix the drill chuck through the clamping adapter, and fix it with a hexagon bolt.


We put the power button into the hole on the handle, and place the wires on its reverse side. We solder the wires to the engine and the charging socket, insulating the connections with heat shrink.


Stage three - we mount the batteries
In a plastic container, we make four holes with a 3 mm drill, and one with 10 mm for the charging socket.

We fix the connector with the outgoing wiring with a clamping nut on the container body. We fix the container on the end of the handle with several screws.


We wrap three batteries with tape or cling film. We combine their contacts sequentially.
We combine the supply wires from the batteries with the outputs from the connector, twist and wrap with electrical tape. Connection for reliability can be soldered with a soldering iron.


We pack the resulting power supply into a container, and close the lid.
A cordless screwdriver is a great helper in the household. The tool, together with the master, works in the house and in the garden, works in the garage or in the field. Until the battery runs out. The number of charge-discharge cycles of the battery is limited, the battery also deteriorates from idleness: self-discharge destroys the elements. On average, the battery lasts 3 years, after which it has to be replaced. You can save the tool by converting it to a network one. The conversion is done in different ways.
Is it really worth redoing?
Without batteries, a screwdriver turns into a piece of iron. When the batteries stop holding a charge, you have to look for new batteries. Firstly, it is expensive - the price of batteries is up to 80% of the cost of a screwdriver, it is more efficient to buy a new tool. Secondly, batteries are not always on sale, for example, if the model is discontinued. Thirdly, a prudent owner seeks to use all opportunities to save money.
Converting a cordless screwdriver to work from the mains is a good way out. What does it give:
- The tool gets a new life.
- No more batteries needing to be charged.
- Tool torque is independent of battery power.
The disadvantage of the converted design is the dependence on the outlet and the length of the network cable.
Attention! Work at a height exceeding two meters with a converted screwdriver is not allowed.
How to convert a cordless screwdriver to work from a 220 volt network
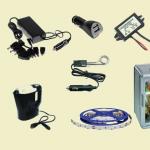
The craftsmen came up with several ways to convert a screwdriver to work from the mains. All of them are to provide the motor with the required supply voltage using an intermediate source or converter.
Table: power supply options for corded screwdriver
| Power supply | Advantages | Flaws |
| Complete screwdriver charger. |
| The charger takes up space on the table. |
| A ready-made power supply placed in the case of an old battery. |
|
|
| A homemade power supply placed in the case of an old battery. |
|
|
| External power supply | An easy makeover. |
|
| Power supply from the computer |
|
|
Connecting the screwdriver to the charger
Attention! At low voltage, there are high losses in the wire, so the cable between the charger and the tool should be no longer than 1 meter, with a cross section of at least 2.5 square meters. mm.
Sequencing:
- Disassemble the old battery and remove the dead cells from it.
- Drill a hole for the cable in the battery case, thread the cable through the hole. It is advisable to seal the connection with electrical tape or heat shrink tubing so that the wire does not break out of the housing.
- The elements removed from the battery will violate the weight distribution of the screwdriver - the hand will get tired. To restore balance, a weight should be placed in the body - it can be a dense tree or a piece of rubber.
- Solder the cable to the terminals of the former battery connected to the screwdriver.
- Assemble the battery case.
- It remains to test the updated tool in operation.
Solder or attach two wires to the charger terminals with crocodile clips.
Installation of a ready-made power supply in the case of an old battery
Attention! In a closed case, the power supply does not cool well. It is recommended to make holes in the walls of the case. Do not operate the tool without interruption for more than 15 minutes.
Procedure:
- Disassemble the old battery and remove the non-working elements from it.
- Install the power supply into the battery case. Connect high voltage contacts and low voltage terminals.
- Assemble and close the battery case.
- Install the battery in the screwdriver.
- Connect the power supply plug to the socket and check the updated network tool in operation.
Homemade power supply
Attention! Follow the rules of electrical safety. Soldering and connection should be carried out with the device de-energized.
Step-by-step instruction:
- Disassemble the case of the old battery, remove the dead batteries from it.
- Install the elements of the electrical circuit of the power supply on the circuit board, solder the contacts.
- Install the assembled board into the case. Check the tester for the presence of voltage at the output.
Power supply in the case
- Connect the low voltage wires to the terminals of the old battery. Assemble the body.
It remains only to assemble the battery case
Connect the screwdriver to the mains and check its operation.
Video: homemade lithium battery for a screwdriver
Connecting to an external power supply
Attention! In the process of refinement, you will need to disassemble the body of the screwdriver and intervene in the electrical circuit. Remember the disassembly sequence to assemble all parts in reverse order.
What to do:

Connecting to a power supply from a computer
Instruction:
- Find or buy a power supply from a computer with a power of at least 300 watts.
- Disassemble the screwdriver body. Find the motor power wires inside. Solder the connectors for the computer power supply to the wires.
- Remove the connectors for connecting the computer power supply from the case.
- Connect the screwdriver to the new power supply.
- Connect the power supply to the network and check the operation of the device.
Video: power supply for a screwdriver from a computer PSU
How to power a screwdriver while maintaining its autonomy
If the master works in a building that is not connected to electricity, and the batteries have already deteriorated, there are ways to power the screwdriver:
- replace old battery banks with new ones;
- connect the screwdriver to the car battery;
- connect the tool to another battery, for example, taken from an uninterruptible power supply.
Replacing old elements
Attention! When replacing batteries, pay attention to the correct polarity of the cells.
Procedure:

Attention! Charge the converted battery only with a specially selected charger.
Connecting to an external battery
Sequencing:
- Buy or find an external battery, for example, take it from an unnecessary uninterruptible power supply.
- Take a wire with a cross section of at least 2.5 square meters. mm. Remove the insulation and install clamp terminals suitable for fastening to the battery on the copper ends.
- Place the other end of the cable into the case of the old battery and solder to the terminals inserted into the screwdriver.
- Insert the battery case into the screwdriver, connect the cable with terminals to the battery.
- Test the restored tool in operation.
An electric cordless tool lasts several times longer than the batteries that power it. Throwing a screwdriver with unusable elements into the trash is unreasonable. The real owner will be able to repair the device by transferring it to another power source, thereby giving it a new life.
In shaggy 1997, dad brought a solid cordless screwdriver from a trip.
Since then, the machine has helped to screw together an unmeasured amount of Ikea furniture, hang a lot of paintings and photographs on the walls, and so on and so forth. The unit was modestly displayed Made in USA; This is not your current China.
Already, the Deutschmarks, for which the machine was bought, went out of circulation, and it went into its second decade - and age still took its toll, the battery capacity dropped sharply. I went shopping, made sure that on the shelves today is either frank Mr., or Bosch with Makita for obscene money and was upset.
An autopsy showed that there were 12 Ni-Cd SubC batteries in the screwdriver. There was no such non-standard on Ali, but on eBay there were several sellers who had them. Arrived just in time right there. As a result, the batteries were taken from the seller who had a lot with the right number of batteries. Including the eBay promotion, the batteries cost me a ridiculous $2.88 for the whole dozen.
The product was purchased on November 9 and without a track. numbers arrived from Hong Kong to Moscow only on December 21 - the new year is affecting. The parcel was in a tight envelope and "pimple" and at first caused a desire to write an angry review to the seller.
How wrong I was, I made sure, having killed at least a quarter of an hour to unpack: the batteries were soldered in pairs with a dense film, each contact was in a dense shrink film:

The screwdriver used to have 1200 mAh batteries, the new clothes turned out to be 2500 mAh, moreover, they arrived immediately charged:

(there is no desire to double-check the actual capacity, and there is nothing special, I only have a multimeter from the equipment ..)
My experience in soldering is a triple with a minus, and I immediately realized that there was nothing for me to catch, it would not work to solder the elements in series, ordinary solder would not hold on to such surfaces. The “classic of taj repair” came to the rescue - a hot glue gun. With its help, it was possible to fix all 12 elements in the desired sequence and tightly close the conclusions to each other. Since batteries live in a screwed box, such an installation is quite reliable:

The terminals of the batteries turned out to be thin, but extremely durable. Holes are punched at the ends in case you need to attach a wire to them.
As a result, for about 100 rubles, the old faithful assistant began to live a new life, and I saved on buying a new Bosch. The game is definitely worth the candle, so if you have an aging unit, feel free to experiment.
P.S. Do not throw away used cadmium batteries in the trash! Cadmium is another poison, it knows how to get into groundwater and dissolve there. It is better to hand over the used ones to the same place where used car batteries are accepted.
I plan to buy +56 Add to favorites Liked the review +50 +106Those who used a cordless screwdriver appreciated its convenience. At any time, without getting confused in the wires, you can crawl into hard-to-reach niches. Until it's depleted.
This is the first drawback - it needs regular recharging. Sooner or later recharge cycles.
This is the second drawback. This moment will come the earlier, the cheaper your tool. Saving money when buying, we most often purchase inexpensive Chinese “no-name” devices.
There is nothing shameful in this, but you should be aware that the manufacturer saves just as much as you do. Consequently, the most expensive unit (namely, the battery) will be the cheapest when assembled. As a result, we get an excellent tool with a serviceable engine and an unworn gearbox that does not work due to a poor-quality battery.
There is an option to purchase a new set of batteries, or replace faulty ones in the unit. However, this is a budget event. The cost is comparable to the purchase.

The second option is to use a spare or old car battery (if you have one). But the starter battery is heavy, and using such a tandem is not very comfortable.
IMPORTANT! Many screwdrivers have an operating voltage of 16-19 volts. Even a fully charged car battery will not provide this voltage. And we mean the use of a used battery, where the terminals can have a maximum of 10.5-11.5 volts.
There is a way out - converting a screwdriver into a network
Yes, this loses one of the advantages of a cordless tool - mobility. But for work in rooms with access to a 220 volt network, this is an excellent way out. Especially since you are giving new life to a broken instrument.
There are two concepts on how to make a network screwdriver out of a cordless screwdriver:
- External power supply. The idea is not as absurd as it might seem. Even a large and heavy step-down rectifier can simply stand near the outlet. You are equally attached to the power supply, and to the plugged power plug. A low-voltage cord can be made of any length;
- Power supply in a battery case. Mobility is preserved, you are limited only by the length of the network cable. The only problem is how to squeeze a sufficiently powerful transformer into a small case. Questions about how a compact store screwdriver works from the network - you can not ask. A 220 volt motor was originally installed there. Again, we recall Ohm's law, and we understand that a powerful 220 volt electric motor can be compact.
IMPORTANT! Ohm's law says - at the same power, reducing the voltage - we increase the current strength!
Accordingly, the power cord for 12-19 volts should be with a larger cross section than for 220 volts.
Everyone is familiar with a screwdriver. This is a hand-held power tool designed for twisting and unwinding a variety of fasteners. This is the main direction of its application, but not the only one. With the help of a screwdriver, you can create a great many useful and necessary things.
Screwdriver as a generator
A screwdriver can be used as a generator. It is very easy to do this. It is necessary to remove the battery, connect the wires to the terminals using alligator clips and connect them to the consumer. Be sure to first check the polarity with a multimeter. You need to insert and clamp the hex wrench into the cartridge to assemble the furniture. By rotating the spindle, a current will be generated that will go to the consumer. True, it is worth noting that the voltage generated by this electric machine is only enough to charge a mobile phone or operate a small LED lamp.
Using wind energy with a screwdriver
According to this principle, wind turbines are built from a screwdriver, but the generated current is so small that the game is not worth the candle. Its installation is more effective in areas of high wind load, although the result does not justify itself there.
Carpentry equipment
A few more interesting suggestions on how to make equipment for home carpentry based on a conventional screwdriver.
Wood lathe
When making wood products, it is difficult to do without a lathe. It can be built with your own hands. A flat wooden workbench is ideal for the bed. A screwdriver can be used as a headstock and rotation drive. In a wooden bed made of a bar in the shape of a screwdriver, you need to lay the tool and fix it with a clamp. The bar can be fixed with a clamp, and with constant use of the machine, fastened with self-tapping screws. A tooth mandrel must be inserted into the chuck. The tailstock is made of two bars with an adjusting screw, which is sharpened to a cone. It is installed opposite the fixed screwdriver so that the axis of the tool coincides with the axis of the tailstock adjusting screw. The design of the back stop is fixed with a clamp. If you plan to process large parts, then the fastening should be more reliable. A handguard can also be made from a bar by attaching it to a workbench with a clamp. A primitive lathe for the home workshop is ready.
Table drilling machine
Another equally important piece of equipment is the drill. It can also be made from a screwdriver. To do this, you will need a used screwdriver. It is necessary to take an engine with a gearbox and a cartridge from it. Now you need to make two clamps from textolite, which will perform the function of fixing the drilling head of the machine. To achieve maximum alignment of all holes on the clamps, it is better to process them together, in one set. Then it will be possible to avoid distortions.
Sleeves with internal thread are used as limiting posts. They must be the same size, corresponding to the distance between the clamps. After that, another clamp is made from textolite and two bosses from caprolon. They are drilled off-center, getting two eccentric bushings. The clamp is installed on the bar and the backlash is selected with the help of eccentrics. After that, a wooden lever is installed on a spring so that the drilling head returns to its original position. To supply power, you must use a transformer with a power of more than 150 watts and an output voltage like that of the screwdriver used. After that, you need to put a diode bridge and a capacitor, install the drilling head on the bed.
Manual milling cutter from a screwdriver: step by step instructions
It can be converted into a manual router. For this, you do not need to purchase expensive materials. Everything you need can be found in the workshop or garage almost under your feet. To equip a manual milling cutter from a screwdriver, you will need pieces of thick plywood or chipboard, a tool clamp, fasteners in the form of bolts and self-tapping screws, a plumbing tool and a feather drill for wood. In the latter case, you can use a drill bit.
Assembling a homemade router is quite easy. For this you need: 
- From pieces of the selected material, cut out the base, a vertical stand, on which a screwdriver will be fixed with a clamp, an emphasis and a scarf to stiffen the structure. The dimensions of the parts are chosen arbitrarily, in relation to the dimensions of the power tool.
- Drill a Ø 40 mm hole in the base using a drill bit for free access of the cutting tool to the processing area.
- Make a clamp according to the diameter of the hand tool.
- Fasten the screwdriver on a vertical stand with a clamp so that its cartridge is a few millimeters from the base.
- Install stiffener.
- Fix the screwdriver on a vertical stand with an emphasis.
- Install the cutter in the tool chuck.
Screwdriver cutter is ready for use. Such a machine cannot become a full-fledged replacement for a manual router due to its low power and low spindle speed, but it will solve the issue of milling small parts in a home workshop.
Circular Saw
In addition, for your carpentry workshop, you can make a circular from a screwdriver. To do this, you need to make a work surface using a chipboard sheet or thick plywood. In the countertop, you need to make a cut for the exit of the circular saw. The screwdriver must be securely fastened to the underside of the work surface using metal or wooden clamps. In the same way, it is necessary to mount the shaft. It is important that the saw blade extends no more than a third of its diameter above the working surface of the table.
Modernization of children's vehicles
And of course, all the best goes to the children. On the basis of a screwdriver, you can upgrade many children's vehicles. For example, convert a children's pedal car into an electric car.
electric car
To make an electric car you will need:
- Frame from a steel profile pipe. It can be made by hand.
- Wheels can be used from a garden trolley with rubber running.
- The body can be taken from an old pedal car or come up with some creative solution. For example, to solder from plastic pipes.
- As an electric drive, it is necessary to use two motors from screwdrivers and a gearbox from the same power tool. Separate housings are made for them, in which the output shaft is mounted on 201 bearings.
- Battery. You can use a regular car 6ST60.
After all the components are prepared, it remains to assemble the electric car. This process is simple and within the power of every man who has even a superficial idea of \u200b\u200bplumbing.
Electric scooter and electric bike
Another use of a screwdriver in the creation of vehicles can be called an electric scooter or an electric bike. The principle of such modernization is based on the installation of a chain transmission between the wheel sprocket and the sprocket of an electric motor with a screwdriver gearbox. This device is powered by the battery of the hand tool. Such a solution does not require large expenditures. As a result of the improvement, a vehicle is obtained with a speed of 5 to 15 km/h.
Electric snowmobile
Using a screwdriver, you can make not only vehicles on wheels, but also a real snowmobile. To use for this you need an electric car, having carried out a number of appropriate upgrades. It is necessary to improve the frame of the electric vehicle to install the drive wheel on it. Instead of driven wheels, you need to install skis, replace the plastic steering wheel of the car with a metal bicycle steering wheel. The drive of the drive wheel is carried out through a chain transmission from a screwdriver.
The assembly of such a miracle technique will not take much time, and most importantly, money. All costs will pay off with the joy of the child, for whom the electric vehicle will be a real gift.
Cool ideas and tricks for using a screwdriver in the household
In addition to these mechanisms, a screwdriver can also be used to implement other ideas in the household. This hand-held power tool will help you automate the opening of the entrance gate, make a winch for a car or scissors for cutting metal. If you attach a nozzle for cutting tin to it, you can turn an ordinary rubber boat into a motor boat, modernize the process of drilling holes in ice fishing. In addition, everyone knows that a screwdriver is used as a drive to a mixer, meat grinder or juicer.
After reading the article, the reader has gained knowledge about the non-traditional use of a screwdriver. Now he can use this hand tool to create carpentry equipment, upgrade children's vehicles, and other useful household items.
