A motion sensor is an electronic infrared device that detects the movement of living beings and turns on the power of lighting and other electronic devices. Most often, such sensors are mounted for lighting, but can be used for other purposes, for example, turning on an audible alarm.
The motion sensor operates on the principle of an electrical switch. We turn the usual one on and off mechanically by hand, and the motion sensor turns on automatically, reacting to movement, and turns off automatically when the movement stops.
The motion sensor is used in conjunction with lighting, as well as for turning on an audible alarm, for opening doors, such as supermarket doors, etc.
Types of motion sensors
By location:
- Perimetric, used on the street.
- Peripheral.
- Internal.
According to the principle of action:
- Ultrasonic - a reaction to sound waves of increased frequency.
- Microwave - respond to high frequency radio waves.
- Infrared - use the radiation of heat.
- Active - equipped with a receiver and transmitter.
- Passive - without a transmitter.
By type of action:
- Thermal - work when the temperature changes.
- Sound - act on air vibrations.
- Oscillatory - triggered by the action of a magnetic field.
By design:
- 1-position - equipped with a transmitter and receiver in one housing.
- 2-position - receiver and transmitter in different cases.
- Multi-position - equipped with several blocks.
By installation type:
- Multifunctional.
- Room.
- Outdoor.
- Overhead (wall).
- Ceiling (for false ceiling).
- Mortise (for offices).
Operating principle
The principle of operation does not cause difficulties for understanding, and is simple. The detector detects an object, sends a signal to the relay, which closes the circuit, the light turns on.
Connecting motion sensors by example
To better understand how the motion sensor works, let's experiment with connecting to a light bulb. For this we need:
- Motion Sensor.
- Electrical plug.
- Indicator screwdriver for phase search.
- Electric cartridge.
- Bulb.
- Screw clamp.
- The wire.
- Cleaning tool.
First, we will connect the light bulb directly to the outlet, and then we will connect the motion sensor to the break in the circuit in order to understand the operation of the sensor.
We take an electrical wire and connect the ends to the plug. To strip the wire, we use a special stripping tool that is convenient to use. On the opposite side, install the cartridge. We turn on the light bulb.
Using an indicator screwdriver, we determine where the phase is in the outlet. We insert the plug into the socket and make sure that the light is on. Now you need to install a motion sensor in the wire break. Turn off the power and cut both wires. We clean the ends of the wires.
Now our task is to install the sensor in the break of the supply wire. It is necessary to bring to the sensor according to the instructions, zero to power it, and pass the phase through the sensor to the light bulb. The phase will go into the brown wire, out of the red wire and go to the light bulb. We connect according to this scheme. Take a screw clamp and connect.
There are two rheostats on the sensor itself. One rheostat is responsible for the time of day. It can be used not only for lighting, but also for turning on other devices. On the left slider, the sun is drawn to the left of it, and the moon is drawn to the right. That is, in order to use the sensor during daylight hours, set the switch to the mode where the sun is indicated. If we use the sensor at night for lighting, then we switch the sensor to the dark time of the day.

For our test experience, we will turn on the daylight mode, since we are doing the test in the light. The second sensor is responsible for the shutdown time. We can set it to the minimum and it will turn off after 5 seconds, or set it to the maximum, that is, increase the time since the movement stopped. Now we turn on the plug in the socket, according to the previously established polarity. We make a movement with our hand, the sensor turns on the lamp. Now we do not make any movements, a few seconds pass, the sensor turns off. Motion sensors are connected in a similar way.
Wiring diagrams
The connection of motion sensors is carried out according to the usual scheme for closing and opening the circuit of light bulbs. If constant lighting is needed, but nothing moves, then a conventional switch is included in the circuit in parallel with the motion sensor. When the switch is turned on, the light will be lit by the bypass circuit. When the switch is turned off, the light control will switch to the motion sensor.

Connecting motion sensors (several)
Most often it happens that the shape of the room does not allow covering all its space with one sensor, for example, around the corner in the corridor. In this case, several sensors are located and connected in parallel. As a result of the operation of any sensor, the circuit is closed, and voltage is supplied to the lighting devices. With this connection method, one must not forget that lighting lamps and sensors must be connected from the same phase. Otherwise, a short circuit will occur.

Motion sensors are positioned in such a way that the viewing angle is formed as large as possible in the direction of the intended area of movement of objects. At the same time, windows, doors and the interior of the room should not shield and interfere with the operation of the sensor.

Motion sensors have the property of a permissible continuous power value from 500 to 1000 watts. Therefore, they are limited to use with a high load.

If it is necessary to turn on many powerful lighting devices, the connection of motion sensors is made through .
When purchasing a sensor, in its kit, see the instructions for installation and configuration. Usually, the device diagram is indicated on the case. Under the sensor cover there is a block for connection, and three contacts are visible by color. The wires are connected using clamps. If the cable is stranded, then sleeve lugs are used.
Connection Features
Electric current is supplied to the sensor through two conductors: brown - phase, and blue - zero. From the sensor, the phase goes to one contact of the light bulb. The other end of the lamp is connected to the zero terminal.
When movement occurs in the control place, the sensor is triggered and closes the contacts of the relay, which supplies the phase to the lamp.

The terminal block has screw terminals, so the wires are connected with lugs. The phase wire is recommended to be connected according to the scheme specified in the instructions.
Connecting motion sensors is accompanied by some features:
- After connecting the wiring, close the cover and proceed to connecting the wires in the junction box.
- 9 wires are brought into the box: 2 - from the lamp, 3 - from the sensor, 2 - from the switch, 2 - zero and phase.
- Wires on the sensor: brown (white) - phase, blue (green) - zero, red - network connection.
- The wires are connected as follows: the phase wire (brown) is connected to the brown (white) wire of the sensor phase and the wire from the switch. The zero wire of the supply cable is connected to the zero of the sensor and the zero of the lighting lamp.
- There are three wires left - red from the sensor, brown from the lamp and the second wire from the switch. They are connected.
The sensor is connected to the lighting. After power is applied, the sensor shows its response to movement, thereby closing the lighting circuit.
Installation instructions
We figured out the connection diagram and the principle of operation. Now the important and last stage of work remains - to deal with the installation of the motion sensor.

To independently carry out the installation and connection of motion sensors to the mains, you must follow a certain order:
- Select the connection scheme (one sensor, or several, with or without a switch, etc.).
- Determine the most suitable place and direction for mounting the motion sensor. Usually the sensor is fixed on the ceiling or in the corner of the room. When installing outdoors, you need to look at the situation. The main parameter is the viewing angle of the sensor. It is necessary to choose the most suitable place for the location of the sensor housing so that there are no dead zones (places that the sensor does not cover with its action). To do this, it is recommended to use lamp supports or a load-bearing wall of the building.
- In the switchboard, turn off the electricity in order to ensure safety when connecting the wires.
- According to the selected circuit variant, connect three wires to the contacts of the sensor housing and in the housing of the lighting device. At the same time, one should not forget about observing the markings for the colors of the wires and the designations of the connectors, in order to avoid confusion. If you connect the zero and phase incorrectly, you endanger yourself and also damage the electrical wiring, so you need to work carefully and carefully when connecting.
- On the sensor body, you need to adjust the regulators, select their optimal settings. There can be several common controls on the sensor body: Lux - light level for triggering, Time - time delay for turning off the light, Sens - sensor sensor sensitivity, Mic - noise level for sensor triggering. These settings are individual in each case.

- Apply power to the switchboard and test the operation of the motion sensor. If necessary, change the location of the sensor, or readjust the sensitivity and other settings.
When connecting the sensor in the garden, it is better to place it further away from bushes, trees and other objects that cause interference.
You don't need specialized knowledge or professional experience to install a motion detector. It is enough to understand simple wiring diagrams and correctly connect the cables to each other. This article simply and clearly explains how to connect a motion sensor with your own hands, as well as recommendations for choosing a device and solving possible problems during installation.
Wiring diagrams
If you open the box near the motion sensor, 3 wires will be found inside with different designations on the terminal block: red (A - load), blue (N - zero), brown or black (L - phase). Connection of wires is carried out using terminal clamps. Connection diagrams are also described in detail in the instructions for the device or on the case.
Connecting one device in a chain
The easiest option is to connect the detector directly to the lamp. This scheme is suitable for closed dark rooms without windows, where more complex lighting logic is not required.
To do this, you need a three-wire wire to connect to the sensor, a screwdriver, NShVI lugs and terminal blocks (two pieces for 2 pins and 1 piece for 3 pins).
- Remove the instrument cover. Connect the three-wire wire to the block. If the colors of the wires in the three-wire wire match the colors of the wires in the sensor, it is advisable to distribute them as a continuation of each other: red to red, blue to blue, etc. using NSHVI lugs. Close the lid.
- Connect the three-wire wire to the junction box, in which you need to combine 7 wires with each other: 2 from the lamp, 2 from the electrical panel, 3 from the motion sensor. Now you need to connect together the phase (L) cables from the sensor (brown or black) and the shield (brown) using the terminal blocks. Then neutral (N) cables from the sensor, shield and lamp (blue). And finally, the remaining two: sensor load (A) - red and lamp phase (L) - brown.
- Apply power and check the operation of the sensor.
Connection via switch
Sometimes you need to add a switch to the circuit. This is done in order to be able to forcibly turn on the light, regardless of the movement in the field of view. This can be realized by adding a switch with one key in parallel to the motion sensor in the electrical circuit.
For this task, in addition to NShVI tips, a three-wire wire and a screwdriver, you will need three terminal blocks for 3 contacts.
- Disconnect the network and check the absence of voltage.
- Connect the three-core wire to the device block and lead it to the junction box. Also bring the cable from the switch here.
- There are now 9 wires inside the junction box: 2 each from the lamp, switch and shield, plus 3 from the sensor. We connect the phase (L) cables from the sensor, electrical panel and switch (brown). Zero (N) from the sensor, electrical panel and lamp (blue). And the remaining wires: load from the sensor (A, red), zero from the switch (N, blue) and phase from the lamp (L, brown).
- Apply power and check operation.
Connecting multiple devices in a chain
It is recommended to connect sensors in this way mainly for long corridors and stairwells. This is due to the short range of the sensors or the unusual layout of the room. In this case, two or more sensors are connected to the same phase in parallel. If you make a connection to different phases, a short circuit will occur.
- Turn off the power and check the absence of voltage.
- Connect the phases (L, brown) at the sensors and the switchboard. Then the load (A, red) is connected at the sensors and the phase (L, brown) at the lamp. It remains to combine the zero cables (N, blue) between the sensors, the lamp and the electrical panel.
- Turn on the power and check the operation of all devices.
Since no household motion sensor is designed for high power spotlights, you may have to connect them to the circuit through a contactor with a 220 V coil. Unlike the previous circuit, the phase (L, brown) wire goes to the contactor from the sensor and shield. And the load (A, red) of the sensor goes not to the lamp, but to the contactor coil. In this case the lamp is controlled via a contactor and not directly.
 Scheme of connection to the spotlight
 Video instruction
Checking the installation
To check if the sensor is working, you need to set the LUX parameter to the maximum, and the TIME setting, on the contrary, to the very minimum. If the LED indicator lights up after the power supply, it means that the load has been turned on. If the diode did not light up immediately, this does not mean that the device is faulty. You need to wait half a minute so that he can get ready for work. This allows you to check the device before connecting other devices, saving time on finding a place to install the sensor.
Setting
After installing the device, you need to adjust it for more accurate operation. The number of settings depends on the device model. In cheap options, you can only influence the time the light is turned on and the level of illumination. In more expensive models, the sensitivity setting of the sensor is added, and the ability to move the viewing angle of the sensor.
Viewing angle
The listening area of the device can only be calculated approximately. Therefore, situations may arise when the sensor does not work as expected during installation. One reason could be choosing the wrong direction of the viewing angle. Therefore, if the device model allows you to change this parameter, you should use it.
 Setting to cover the maximum area
 Sensitivity (SENS)
This setting allows you to reduce the number of false positives from animals and other factors. It copes with the identification of cats and small dogs, with large animals the effect may not be at all. It is better to start setting from the minimum value, gradually increasing to the desired values.
Switch-off delay (TIME)
Depending on the detector model, the parameter can vary from 3 sec to 15 min. This means that after movement has been detected, the light will stay on for that amount of time. At the same time, if the time is up, but the person is still in the visibility zone of the device, the light will be on. The timer starts counting down until the lamp turns off after the movement has stopped. Start setting from the minimum value.
Light level (LUX/DAY LIGHT)
This parameter sets the lighting conditions in which the device will operate. That is, so that it does not work in the daytime, but begins to act only with the onset of twilight or darkness. To adjust, you need to turn the indicator to the maximum, gradually reducing it to the desired sensitivity.
Possible problems and solutions
A situation may arise when the light does not turn off, although the device is working properly. Here it is worth checking the setting for the duration of operation (TIME), which can be turned to the maximum position. The light remains on for so long that it simply does not have time to go out. In this case, you need to reduce this interval to an acceptable result.
The problem may be in other settings: too low sensitivity (SENS) or incorrect light threshold (LUX). Check the operation of the sensor by turning the knobs to the maximum to exclude these options.
 Sensors have their own characteristics of the detection zone
 Suboptimal installation location
Perhaps the device is blocked by a cabinet or cabinet. Or the coverage area is located too far from the person and does not see movement. Or the lamp to which it is connected is so close that it causes false alarms. It is also possible that the angle of view of the device is not directed where it should be. These shortcomings are corrected easily and quickly. You can remove the furniture or put the detector in another place. To select the optimal installation location, it is necessary to understand the principle of operation of the sensor. Microwave and ultrasonic sensors like movement towards or away from the sensor. And infrared - movement past the sensor. If you move towards the pyro sensor ideally along the center line, then it may not work. Understanding these features will help to avoid dead zones and false positives. As you can see, the viewing angle indicated in the description by the manufacturer does not indicate in which plane - this is not complete information, but the manufacturer's tricks. The infrared sensor can be triggered if there are objects with different temperatures in its field of view, even without the movement of these objects. Therefore, they are also called presence sensors.
Lamp burnout
Before installing a new lamp, check its operation. This is also done with a voltmeter, although the method is not the most accurate. You can also screw the lamp into another lamp, which previously worked with another lamp.
Wiring fault
If you suspect a wiring malfunction, you need to call the wizard or ring it with a multimeter yourself. Another reason lies in the incorrect connection of the zero cable to the motion sensor. Often, construction debris gets into the junction with the block, after which a layer of soot and oxidation of the metal forms. In this case, the contact no longer passes, and the sensor stops working. To fix this, you need to check the wires for damage, and thoroughly clean the oxidized place and squeeze the NSHVI with tips.
Marriage and improper operating conditions
Unfortunately, no one is safe from manufacturing defects and improper transportation of the device. Often this applies to cheap models with a low level of protection. Or, for example, a powerful lamp was connected to the sensor that exceeded the recommended values, and it could not cope with the load. Water or dust may have entered the case. Before buying, do not forget to check the health of the device.
Working principle and use
The essence of the operation of all sensors is to track moving objects, and close the electrical circuit if movements are detected. The circuit opens when no movement has been noticed in the field of view for a certain time.
Types of motion sensors
The technologies by which sensors realize their direct duty may differ. In total, there are 5 types of detection:
- Infrared(IR). Such sensors respond to changes in thermal radiation in the field of view. Among the advantages, one can single out convenience for outdoor installation, complete safety for households, as well as the ability to adjust the response range and very low power consumption. These devices passively listen to the surrounding space, radiating nothing. Due to the peculiarities of the technology, false positives on animals and other extraneous movements can occur, especially on the street. In addition, the device can be easily fooled by wearing IR-blocking material.
 The design of the IR motion sensor
 - Ultrasonic(UZ). With the help of sound waves, the sensor listens to the environment at a frequency of 20-60 kHz, which are not audible to the human ear. If the reflected signal has changed frequency, the device understands that there is movement in the coverage area and works properly. They are unpretentious to operating conditions, work well in damp and dusty rooms, regardless of temperature. They are relatively inexpensive. However, if there are animals in the house, it is better to opt for another device. Also, among the shortcomings, one can single out a small scope of action and indifference to a smooth gait and movements.
- Microwave(microwave). The device emits electromagnetic waves with a frequency of about 5.8 GHz, registering surrounding objects. This type is mainly used by security systems. It is not suitable for installation in a residential area, since microwave radiation is unsafe for humans.
- Acoustic. The detector reacts to a sharp noise, does not emit anything. Most often used in basements and stairwells.
- Combined(dual). These sensors combine several technologies to refine the result. They can be more precisely tuned, which reduces the number of false positives.
Each technology has its own advantages and disadvantages, which affect the choice of the installation location of the device. For home use, IR and ultrasonic sensors, or a combination of both, are most suitable.
Each device has a number of characteristics that you should be aware of when buying a device.
Degree of protection
In other words, the strength of the device case. It is measured in IP: the higher the indicator, the more durable the shell of the device. For outdoor use, you must choose models with IP 55 and above. IP 22+ is enough for home use.
Power type
There are wired and wireless motion sensors. Accordingly, wired ones are powered from a standard 220 V network, and wireless ones are powered by batteries, including solar ones, and accumulators. The latter are more often used when it is necessary to turn on the light or other devices from low-voltage sources (for example, from a 12 V emergency network). They are used if after renovation it is not possible to lay a wire for transmitting information.
 Important Features of the Motion Sensor
 Action angle
One of the key characteristics that directly affects the operation of the sensor and the installation location. Most often, the numbers vary from 90 to 360° horizontally and from 15 to 180° vertically.
Range
This parameter determines at what distance a person will be detected from the device. It is measured in meters and is determined by three planes:
- Perpendicular, when a person moves along a tangent circle, where the center is the motion sensor.
- Frontally, when a person moves towards the device.
- The presence of a person near the device.
The fundamental difference from the viewing angle is that the range is measured here, and not the viewing angle.
Maximum connected power
Most sensors are designed for low power devices: from 500 to 1000 watts. If you want to connect powerful lamps, you need to add a magnetic starter to the circuit between the lamp and the sensor phase, and its coil on the other side of the lamp.
Use cases
There are many alternative uses other than turning the lights on and off in a room:
- Security systems and alarms.
- Illumination of gates and paths near the house.
- Establish control over the operation of fountains.
- Pool lighting installation.
- Lighting stairs and corridors.
- Lighting for basements and utility rooms.
- Activation of the toilet flush and the inclusion of the hood.
- Light-emitting diode (LED) tape for.
 The main area of use is street lighting
 Where to install?
Without experience in installing such devices, it is quite difficult to choose the optimal location for the sensor. Therefore, it is worth spending a little time testing different corners in the apartment or in the yard. There are a few general guidelines to help you through this process:
- In the field of view of the device there should be no obstacles such as trees, bushes and other randomly moving objects.
- It is not recommended to install the device near other lighting fixtures, microwave ovens, fans, air conditioners and batteries.
- Minimize exposure to water, sun, dirt and dust. If the sensor is installed, for example, in the yard, it makes sense to attach a canopy or other protection from bad weather and directed sunlight above it.
- The sensor must cover the maximum viewing angle, while any large objects in the field of view are not allowed. Their presence makes the sensor ineffective.
Installation locations
The technical characteristics and appearance of the device directly affect the installation location. Household motion sensors are usually mounted on the ceiling or walls. The first option is convenient to install in a room with several doors, where it is not known from which side a person will enter. Ceiling sensors most often have a 360° viewing angle and are installed in the middle of the room. But for different sensors, the direction of movement is important, and in which plane they work.
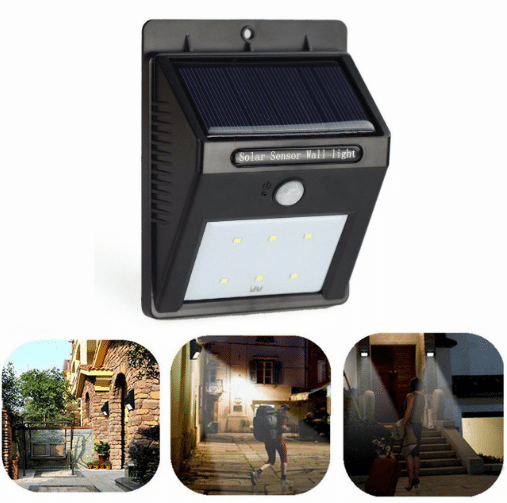
 Version of the wall motion sensor
 Automatic devices, electronic devices and "smart" devices are increasingly entering the daily life of a modern person. They control and manage many processes and tasks in automatic mode.
Many of these devices simplify the economic activity of a person, others free him from performing routine and annoying monotonous operations, others increase the comfort of living, and some can even increase the safety of housing.
One such useful and often indispensable device is a motion sensor (sometimes also called a presence sensor). The main task of such electronics is the detection in the zone of its control of the presence of a person (an animal, as a special case) or his movement. When detected, the device sends a control signal to another device - it can be an audible alarm system, launching a computer program (when connected to a computer), turning the power on or off (when using a relay). That is, any other electronic device can serve as a "receiver" of the signal.
Motion sensors are very widespread in security systems of enterprises and organizations, and on an individual basis, the motion sensor connection scheme is most often used for lighting or, a little less often, for opening and closing automatic locks. However, other applications at the household level are also very effective - for example, to ensure the safety of your home or garage.

The use of motion sensors in domestic buildings is most effective for organizing automatic lighting, which will turn on in the presence of people and turn off when they leave the premises. Stairs, pantries, utility rooms equipped with such systems become more convenient, since most often people stay there for a short time, and forgotten light can burn for days without any need for it.
The device itself has a simple principle of operation: the sensor captures an object located in its sensitivity field, which should not usually be there, and, reacting to this, closes the electrical circuit. When the object disappears from the "field of view" of the sensor, the electrical circuit opens again.
Varieties of presence and motion sensors
Despite the simplicity of the principle of operation, motion sensors differ in a variety of parameters. To better understand the picture of the range of products on the market, you need to know about them at least in general terms. This will allow you to optimally select an electronic device for your purposes.

Differences in the location of the device:
- internal location - as the name implies, it is used to control the presence of a person in the room;
- peripheral location - used for objects remote from the house (as an example, turning on the lights on the walking path as a person moves along it or highlighting the water in the pool when swimming at night);
- perimeter location - most often located on fence posts and are triggered when people or cars approach (convenient for lighting a garage area).
Differences according to the principle of operation:
- active type - the design has a transmitter and a signal receiver, when a person appears in the signal zone, the signal enters the receiver, and it works;
- passive type - a receiver and a transmitter in one housing, when the transmitter signal hits an object that has appeared, it is reflected and returned to the receiver, which is triggered by this.
Differences by signal type:
- ultrasound - the sound of high, inaudible frequencies is used;
- microwaves - radio waves of superhigh frequencies are used;
- infrared radiation - the use of thermal waves (light of the infrared spectrum), it is these sensors that are the most simple and therefore common.

Differences in trigger source:
- thermal type - triggering occurs when the temperature changes on the sensor sensor (the reflected infrared beam of the transmitter or the thermal radiation of a living object hits);
- sound type - triggering occurs when the sensor detects air vibrations at sound frequencies;
- frequency-oscillatory type - the sensor of the sensor responds to frequency fluctuations and changes in the magnetic field caused by movement in the area of the device.
Differences in the design of elements:
- monoblock - the electronic device is made in the form of one monolithic case;
- double-case - with this design, the receiver and transmitter are separated into different cases and are installed at a distance from each other;
- multiblock - the device includes a whole complex of receivers and transmitters (sometimes even of different types), which works in a single bundle.

Differences by mount type:
- overhead type - mounted on the vertical surface of the walls;
- ceiling type - mounted on horizontal surfaces of the ceiling from below;
- mortise type - mounting inside the surfaces of walls or ceilings.
Motion sensor connection diagrams for lighting
For domestic use, the industry produces presence sensors in the form of ready-made blocks, making it easy for anyone who is not afraid to mount a socket or switch on their own to do all the connection work.
Such blocks are necessarily completed with documentation - a connection diagram or several of its variants, which will not allow even an inexperienced master to make a mistake when connecting the sensor to the electrical network.
The design of household motion detectors provides for a simple adjustment of the three main settings using separate step or smooth controls (knobs, levers or sliders).
The parameters required after connecting the detector are:
- distance to the trigger point;
- signal delay duration (how long the signal will last from the moment the sensor is triggered);
- capture area angle - adjusts the width of the cone-shaped area in which the presence or presence of an object will be detected.
To connect to the network with your own hands, household sensors have three terminal leads - zero, input and output to the lamp (or other connected device).
Important! In theory, there is not much difference when connecting power to a zero or phase output, but in practice, if connected incorrectly, the sensor will regularly produce false positives, although its operation will not change otherwise.

Due to the presence of a signal duration regulator in the design of household detectors, the motion sensor circuit for lighting can be used completely independently, without additional electrical switches. However, in practice it is more common to use them together. There are three main ways to connect presence detectors to the electrical network:

Some nuances
When mounting motion sensors into a home lighting system with your own hands, in addition to following the connection diagram that is attached to the documentation from the device manufacturer, you should take into account some not-so-obvious features and use the developed recommendations in practice:

Important! When using several detectors operating in parallel, they must be connected to the same phase, otherwise, if more than one detector is triggered, a short circuit will occur.
Often, the clutter of the room with furniture or its non-standard shape, the presence of niches or vestibules does not allow one sensor to cover the entire area, which means that the efficiency will be low.

In such cases, several detectors are used, which must be connected in parallel with each other by hand - this ensures that the lighting is turned on when any of the installed motion detectors is triggered. It is necessary to arrange several devices so that their sensitivity zone covers the entire area of the room.
Motion detection settings
When the question of how to connect a motion sensor with your own hands is resolved, one more mandatory procedure should be performed. Like any technical device, a motion sensor for lighting requires, after its installation, to be configured for maximum efficiency.
To adjust, manufacturers usually install three knobs (or levers) on the body of the device with the markings “TIME”, “LUX” and “SENS”.
Each of the knobs is designed to control one of the motion detector parameters:

From all of the above, it is easy to conclude that connecting a motion sensor to the lighting system of the premises of a private house or apartment is a very effective and convenient way to improve comfort. In addition, the introduction of such a device into your home can quite significantly save the budget by reducing the consumption of electricity, which will not be spent on lighting rooms where there is no one.
Motion detectors are becoming more and more commonplace in the electrical systems of our homes. Most often, they are used for convenient control of the lighting system, the competent use of motion detectors can significantly reduce energy overruns.
Instruments: Drill (perforator), a set of drills (drills), a dielectric screwdriver, a voltage indicator, a construction knife, wire cutters, pliers
Before buying a sensor, decide on its main characteristic - the coverage angle that determines the detection zone (Fig. 1), the way the sensor is placed also depends on the coverage angle.
ceiling motion detectors have a coverage angle of 360 degrees, but, as the name implies, require placement in a conspicuous place - on the ceiling;
wall motion sensors have smaller detection angles (110-270 degrees), however, they can be placed in less visible places (as in our example).
Preparation for work
In our example, the detector controls the dressing room lighting and is installed instead of a conventional key switch - therefore, the electrical communications are already placed in the wall, and the wire is led out of the installation box in which the switch mechanism was previously installed. If you have planned the installation of the motion detector in advance, you do not need to mount the installation box into the wall, since the detector is an external mounting device (switching is performed directly in the device case). It is enough to remove the wire from the wall at the location where the motion detector is installed.
Selecting an installation site
When determining the location of the device, consider the principle of its operation. Infrared motion detectors generate radiation in the form of stripes, a change in the position of objects in the space intersected by these stripes leads to a circuit in the detector and its activation (lighting on) after a certain time, if there is no movement in the controlled area, the circuit opens (lighting off). The location of the infrared bands, as well as the range of the detector and the angle of coverage of space, as a rule, are indicated in the technical description of the device, along with a description of its installation, connection and configuration.
IMPORTANT: Motion sensors can be placed far from everywhere. Their work can be affected by radiation (thermal, electromagnetic), temperature effects (air conditioners), as well as the presence of moving objects in the controlled area (fans, etc.). Be sure to check the supplier's recommendations.
When choosing a position for placement, keep in mind that overlapping the beams of the device will lead to loss of its functionality. However, at the same time, do not forget about the aesthetic perception of the interior - a device located in the middle of the wall or in another fairly noticeable place will look very out of place. In order to correctly place the detector and not spoil the look of the interior, follow the simple rules:
- Decide how, in principle, you need such a device. Will it help you make the interior more functional, or vice versa, will it cause difficulties with connection and use. Do not forget that the device turns off when there is no movement in the monitored area for a long time. Installing a motion detector to control the lighting of large rooms or recreation areas may not be practical. Motion detectors can be effectively used to control the lighting of small rooms, utility rooms, as well as auxiliary lighting (in front of the front door, in the corridors on the street, etc.).
- Find those places in the interior where the location of the detector will not be too noticeable, but do not forget that the detection zone of the device should not be blocked by furniture, shelves and other interior elements.
- If you need to provide illumination of the room during the entire time of your stay in it, place the detector in a place where your movements can be constantly recognized. Keep in mind that if you do not move for a long time, or if you are outside the detection zone, the device will turn off the lighting. Think things through beforehand. In special cases, you can use several motion detectors by connecting them in parallel.
In our example, the motion detector is placed in a small dressing room - in a niche between the shelves. Thus, the device recognizes movement within the entire perimeter of the room.
Connecting a motion detector
The motion sensor can be connected in two ways:
- Immediate connection. Connection without using additional equipment- the lighting is controlled exclusively by the motion sensor (Fig. 2).

2. Connecting using a keyboard switch. You can also control the lighting on and off using a conventional key switch. If the switch closes the circuit, the lighting will work regardless of the motion detector triggering (Figure 3).

IMPORTANT: Before performing any work on installing a motion detector, regardless of whether it is fitting or switching, be sure to de-energize the power supply line to which the device will be connected.
Using a small flat , separate the supporting back wall of the detector, after which, install and align it, attaching it to the wall in the right place (in our case, the detector should cover the installation box of the old switch). Mark the fixing points of the device with a simple pencil. Remove the base of the detector, then drill holes for the screws and drive plastic dowels into them using a hammer and punch to avoid damaging the wall finish. Mounts are supplied with the detector, but you may need to replace them with more reliable ones. Pass the wire through the hole in the rear support wall of the device and place the conductors in the detector terminal block according to the marking: L - phase, N - neutral, A - load (switched with the lighting device). Fix the contacts with screws using a small screwdriver. After that, carefully assemble and fix the detector, install and fix it on the installation box with screws.


Adjust the device by setting the controls on the case to the desired position. The setup procedure is specified in the manual for the motion detector. As a rule, three types of controllers are used to set up motion detectors:
TIME - determines the delay time after turning on the light, after which the device opens the circuit.
LUX - determines the level of illumination, i.e. the level of general illumination at which the device starts to work.
The third type of regulator (SENS) determines the sensitivity of the device - i.e. the intensity of movement required to activate the detector.


")


