Pay attention to paving slabs. This material proved to be excellent, it is strong, durable, beautiful. Now there are many types of paving slabs and everyone will be able to choose the right one for the facade of the house or just liked it for him. Laying paving slabs with your own hands may seem like a very difficult and troublesome task, but in fact everything is extremely simple. Paths in the garden can be paved with paving slabs over the weekend, and it takes about two weeks and a helper to cover a large yard.
Before proceeding with laying, you need to understand the main types of paving slabs. The main types of paving slabs are stamped and vibrocast. It is better to stop your choice on vibrocast paving slabs, which more than pays for a little more cost with a beautiful appearance and durability.
The thickness of paving slabs may vary. Usually the thickness of paving slabs varies between 20-60 mm. 20mm paving slabs are suitable for garden paths or areas that are guaranteed not to be driven by cars. In the yard, paving slabs with a thickness of 40-45 mm are most often laid. 60 mm tiles are laid where multi-ton trucks will drive.
The pattern of the tile can be anything, but it is not recommended for beginners to take on the laying of tiles such as "rhombus", "brick" and "paving stones". It is more difficult to lay such a tile, the masters ask more for working with it.
The color of the tiles can also be almost any, but it is worth considering that colored tiles are more expensive than gray ones.
This article discusses the technology of laying paving slabs with your own hands.
Materials and tools for laying paving slabs
- Sand. You will need quite a lot of sand (several tons), its amount depends on the area of \u200b\u200bthe yard, as well as landscape features.
- Paving slabs (the quantity is calculated by the manufacturer by quadrature).

- Border
- Cement

- Strong elastic thread
- metal pegs
- A hammer
- rubber mallet

- Shovel
- long rule
- Two steel pipes about an inch in diameter
- Rammer
- Wheelbarrow
- Level
- Master OK
- Buckets
- Broom
- Bulgarian with a diamond blade for cutting concrete

- knee pads

Laying paving slabs with your own hands
Decide on the slope of the site. A slope of several degrees must be present, otherwise, after rain, the water will stand in the yard. The slope is best done towards the street. If you decide to follow this advice, then the street level is taken as the zero point.
Drive two metal pegs into the ground along the zero line (the line to which the site will be inclined) and pull a thread between them. Check the levelness with a level. It is better to apply the level to the thread from below.

Tie another thread to one of the pegs and pull it perpendicular to the first. Tie the free end of the thread to a new peg and drive it into the ground so that the other end is slightly above the zero line. This can be controlled using a level (the angle of inclination should be a few degrees).

Tie another thread to the last hammered peg at the same level as the previous one and pull it parallel to the zero line, check the horizontal position with the level. Tie the free end to the fourth peg.

Connect the first and last pegs with a thread. As a result, you will get a rectangle marked with threads and lying in the plane of the future site with laid paving slabs.

Now we need to divide our surface into stripes. The width of the stripes is selected based on the length of your rule (the strip should be several tens of centimeters narrower than the rule). Set aside the selected distance from the zero line and drive a peg into the ground. Do the same on the opposite side. Connect the pegs with a thread, equalizing its height along the sides of the rectangle, perpendicular to the zero line. In the same way, divide the entire area into strips.
Now you need to align the site with respect to the markup. Where the thread is too close to the ground, the soil must be removed, and where the pits are too large, sprinkle. The gap between the soil and the threads should be approximately two tile thicknesses. All this is done by eye, no special precision is required.


The soil, especially where it was poured, must be carefully compacted. For this, a rammer is used. In our case, the rammer was made independently from a paw from a crane with a welded handle.

When the site is leveled, you can start laying paving slabs.
Prepare the sand-cement mixture. To do this, pour a bunch of sand right on the ground, gradually mixing cement there in a ratio of about 6 to 1. It is desirable that the sand be wet, so it is better to lay paving slabs in spring or autumn, when it is not very hot and rather damp.

Distribute the prepared mixture evenly over one of the strips.

Tamp thoroughly.


Under the threads marking the borders of the strip, lay the steel pipes. The gap between the pipe and the thread should be approximately one centimeter less than the thickness of the tile. The pipes must be strictly parallel to the threads and be at the same height.


Put on shoes and pants that you don't mind ruining, don't forget about knee pads. Kneel between the threads, pass the rule under them and draw along the surface of the pipes. You will see where you need to add the cement-sand mixture.


Pour the right amount of cement-sand mixture. Start tamping it with your hands while stretching out the rule. You will have a flat strip, ready for laying. You can pick up some cement-sand mixture and sprinkle over the leveled area.


Prepare and carefully inspect the tiles, lay them in piles near the prepared area. The tile is basically all flat, but there are also defects. Some tiles can be convex (tortoise), concave (plate) and curved (propeller). It is better not to use such a tile and put it aside as a last resort.

Lay one tile, carefully leveling it along the marking axes.

Tap the tile with a rubber mallet, sinking it into the ground to the marking level.

Do the same with the next tile. The sequence of laying tiles is selected depending on the tile pattern.


Start laying paving slabs away from you. So, gradually moving forward, you will walk on a newly laid tile.

In the same way, prepare the base and lay the next strip of paving slabs.

If there are any obstacles on the way (in our case, a gas pipe and a sewer manhole), they need to be bypassed with whole tiles. The final trimming and fitting is best done at the end.


Tiles need to be swept after every working day. When laying between the tiles, gaps are formed that need to be filled. It is the process of filling the gaps that is called sweeping. For sweeping, we need dry sand and cement. They need to be mixed in a ratio of 1 to 6. Sprinkle the mixture evenly over the tile, and then swept it several times with a broom, filling the cracks.
Attention: sometimes when using a sand-cement mixture for sweeping, a white coating from the cement may remain on the colored tiles. This may be due to the quality of the tile, or the peculiarities of its production. Conscientious tile manufacturers in such cases are advised to sweep with clean sand. If in doubt, you can refuse to use a mixture of sand and cement, use only sand.


It is unlikely that your site will be perfectly rectangular, so you will not be able to do without pruning. Where to cut is determined locally. Trimming tiles is done using a grinder with a diamond disc for concrete.

If you want to make flower beds, mark them out with threads or chisels. Saw off the excess tile protruding beyond the borders of the flower beds.


Flowerbeds and edges of the site with laid tiles should be framed with a border. To do this, dig a trench along the edge with a trowel or a small spatula. The depth of the trench is selected based on the depth of the curb.


Install the curb sections and secure them to the screed with a thick mortar.


Near the curbs you will have cells where you need to lay the trimmed tiles. The soil in these places must be especially carefully compacted, as it could crumble when digging a trench.

Trim the rest of the tiles needed to fill in the gaps left by avoiding obstacles.
Where the tile comes close to the gate, it is better to lay it not on a cement-sand mixture, but on a mortar, since in this place the load on the tile will be maximum.


This article discusses the process of laying tiles in the yard, but in the case of garden paths and a blind area, everything is much simpler and does not require such careful preparation.
Paving slabs are an aesthetic and functional decor for a personal plot. It allows you to give a well-groomed appearance to the garden space and facilitates the movement of people and equipment. Attractive price, ease of use and ease of installation have made it a popular material among developers. Such paths and platforms look very attractive. The market provides a wide range of types of paving slabs from various materials, various shapes and colors. A variety of textures will allow you to choose the material for any design and landscape.
Paving slabs are very popular because they have a number of positive qualities. In addition to its low price and ease of installation, it is environmentally friendly and has durable properties. If necessary, you can always replace the damaged area without violating the integrity of the entire coating.
Main advantages:
- You can lay paths and platforms of any shape and configuration;
- It is possible to remove the cover and shift to another place;
- Environmentally friendly material;
- Does not injure the roots of trees, allowing moisture and air to pass through;
- No evaporation occurs in hot weather;
- Resistance to sudden changes in temperature;
- Strength and wear resistance.

The disadvantages include sliding on the tile during frost. To avoid an undesirable effect, acquire a material with a rough surface. When choosing a coating, it is necessary to decide for what purposes the tile will be used. There are 2 types of material that differ in the method of production: vibropressed and vibrocast. The first option is purchased for sites with increased load. Vibrocasting is suitable for laying paved paths in the garden.
Depending on the design fantasy and preferences of the owners, tiling can be done in several ways:
- in a checkerboard pattern;
- herringbone;
- braided;
- In the circle version;
- Chaotic pattern.
A beautifully laid project will add zest to the site and emphasize the individuality of the owners.
What is the best way to lay paving slabs
Laying of paving slabs can be done on a bed of wet sand, a mixture of sand and cement, on a concrete base. The first 2 options involve easy dismantling of paving stones. Installing the material on concrete will make the site stationary.
Sand is considered the easiest and most popular laying option in summer cottages and garden plots.
The advantage of this paving is the passage of moisture into the ground through layers of sand. It is sometimes mixed with gravel and pieces of brick to compact the substrate. On such a layer, you can put any paving stones, ceramics or bricks. A mixture of cement and sand is pre-prepared based on the proportions of 1: 5, and distributed over the prepared surface. Then they spill water and begin to lay the tiles. This method allows you to firmly strengthen the coating and, if necessary, easily dismantle it. It is recommended to lay the material on a concrete base in cases of high loads on the surface. Such a coating is used in parking lots and as a garage area.

The advantages of the screed include:
- Strength;
- Evenness of laying;
- No shrinkage during operation.
Cement, sand and water are mixed in a concrete mixer, then the mixture is poured and rammed. It is necessary to take care of the drainage of water before laying, after hardening it will be problematic to remove the stationary coating. Depending on the purpose of operation, the owner of the personal plot chooses the appropriate version of the base for the tile.
Paving slab device: work performance technology
There are various ways to lay tiles, but experts recommend sticking to the general sequence.
Stages of work:
- Site clearing. Hemp is uprooted, plants are removed, soil is removed from 15 to 20 cm.
- The surface of the earth is treated with a herbicide.
- Along the length of the track or the perimeter of the site, markings are made using pegs and beacons.
- Form slopes for water flow.
- Install curbs.
- Fill the work surface with a layer for laying tiles.
- Tamp and level the mixture.
- Lay tiles.
- Close up the seams.
These principles apply during installation, regardless of what the source material will be laid on. Consistent actions will help to properly lay the sidewalk.
Tools for laying paving slabs
Laying out a beautiful path is not difficult even for a beginner, the main thing is to have desire, patience and accuracy. In order to start construction work, it is necessary to prepare materials and tools. Draw up a drawing with a sidewalk plan, then calculate the required number of tiles, depending on its size and configuration.
Necessary materials:
- Tiles or paving stones;
- side stones;
- crushed stone;
- Sand;
- Cement;
- Waterproof film.

Tools for work: grinder for cutting tiles, shovel, rammer, trowel, mallet, hammer, broom, building level, tape measure, pegs, cord or rope. For work it is desirable to have gloves and special knee pads. Access to water and electricity must be provided.
How to lay out a sand-based paving slab track
You can lay out the track with your own hands by following the step-by-step instructions. The main thing is that during its arrangement a good drainage system is provided. This will not allow water to stagnate and destroy the structure. To do this, make a small slope of 5 mm every 1 - 1.5 meters.
The first step is to prepare the work surface. Unnecessary plants are removed and a layer of soil is removed, clearing the area for future laying. They level the ground with a rake and set pegs at the nodal marks, between which they pull the cord. The marking should pass every 1 - 1.5 meters. The distance between the ground and the marking should be equal to the thickness of 2 tiles put together. Further, a slight slope is provided for the flow of water towards the street.
On the sides of the paths it is necessary to make trenches for the installation of a curbstone.
The second stage of work will be the preparation of the layer. To do this, you need to lay geotextiles, which will prevent the growth of grass through the tile and will not allow the coating to sag. Crushed stone is poured on top over the entire surface of the track and rammed so that the layer does not exceed 15 cm.

The third stage is the installation of the side stone. Pre-dug trenches are filled with cement mortar, then a curb is installed. Its height may be flush with the track or protrude slightly. This design will hold the entire array and emphasize geometric shapes. Next, a wet sand cushion is poured, leveled with a rake and tamped again. If the owner wishes to further strengthen the structure, at the next stage a mixture of cement and sand is applied, leveled and rammed.
Tiles begin to be laid from the curb, according to the scheme. In order not to damage the leveled surface, work is carried out away from you, moving gradually forward. The intermediate distance between tiles should not exceed 3 mm. Beginners can use special crosses. With the help of a mallet, each element is sunk, focusing on the level.
First, the main area is laid, then all other details that need to be adjusted to size. After paving the path, you can additionally walk with a vibrating plate for perfect compaction and a flat surface. Next, the seams are filled with wet sand and passed with a broom to fill all the holes. Laying out the track yourself is not a difficult and exciting process that will make the owner proud and create the necessary aesthetic appearance for the backyard.
How to make a platform of paving slabs on a concrete basis
You can arrange a stationary platform on a concrete base for a car or for other significant loads yourself. So that the water does not stagnate, the concrete surface of the site will need to be made with a slight slope.
Step-by-step instruction:
- Prepare the surface for the site, remove debris and plants.
- Highlight its borders with pegs and pull the twine between them.
- Remove the top soil 20 cm, spill it with water and tamp the designated place.
- Dig a trench for the curb stone along the width and length, fill it with cement and place the curb stone.
- Put a waterproofing film on the ground, which will not allow moisture to rise to the top.
- Pour crushed stone over the film and fill the voids between it with sand. Everything is well tamped.
- Fasten the prepared reinforcement or mesh between each other and the side rods.
- Make a cement mixture in a ratio of 1:3:2 cement, sand, gravel. Then mix it with water to a homogeneous consistency and pour it onto the prepared surface. Align the level, not forgetting the slope, and leave to dry for a few days.

Laying tiles is carried out only after the complete drying of the cement base. Its installation is carried out using a cement-sand mortar, some craftsmen use glue. The concrete base is moistened, the mortar is applied with a trowel in a small layer of 2-3 cm and the tiles are laid.
Paving slabs
If a decision is made to independently pave the coating on the site, then you need to know which technology is best suited for the selected option. Competent arrangement of sidewalks, design schemes and some instructions are reflected in the technological map for laying paving slabs.

Regardless of which installation method is chosen, it is necessary to adhere to the general rules of paving.:
- Masonry is done in dry, better cloudy weather;
- Do not use sawdust to fill the seams;
- If large loads are expected on the laid surface, the pillow is made of concrete with reinforcement;
- Soils with a complex structure require strengthening with concrete at 80 cm, and then a mixture of cement and sand at 40 cm, in order to prevent site displacement;
- At the porch, it is better to lay tiles on a cement base, since the daily load is increased;
- Be sure to make a slope of 5 about, for the outflow of water.
Proper laying of paving slabs (video)
A high-quality arrangement of paths and sidewalks with proper drainage and runoff will allow the structure to last for many years, while maintaining its original aesthetic appearance.
Landscaping is a very important process. And the maximum attention here should be paid not only to green spaces, but also to footpaths, which will not only improve the external aesthetics of the site, but also make it more comfortable in all respects. Recently, special tiles have been used as a material for footpaths - the material is reliable and practical, and also quite easy to install.
Choosing paving slabs
Paving slabs are distinguished by high quality characteristics - they are much stronger than concrete, and under intensive use and heavy loads, unlike other materials, they do not crumble and do not lose their attractiveness.
Laying tiles is a process, although not fast, but simple enough to do it without the involvement of specialists. It is enough to purchase a sufficient amount of paving slabs in advance, prepare the necessary tools and consumables, and you can begin to arrange the courtyard area. If you do not have construction experience and do not know how to lay paving slabs, a video on the Internet will help you understand the details in more detail.
If you are interested in how to properly lay paving slabs with your own hands, then first you need to learn how to choose tiles so that the end result does not disappoint you. On the modern market there is a huge variety of samples of paving slabs, different in:
- size
- volume
- pattern
- quality characteristics
Before purchasing the material, it is necessary to carefully measure the area of \u200b\u200bthe sidewalk, and calculate the number of tiles based on its size. The most difficult thing is to buy tiles with curly elements or a complex pattern. Here you need not only to calculate its amount, but also to approximately determine its consumption, taking into account undercuts. Since its drawing will need to be combined, a lot of scrap is formed in the process, which can also be used in the future.
When calculating the number of paving slabs, the method of laying must be taken into account. For example, with a diagonal technique, material consumption increases significantly. Therefore, it is much easier and more profitable to install the sidewalk in the traditional way.
When choosing paving slabs, the main criterion is its strength, determined by its thickness. For example, forty millimeters thick tiles are quite suitable for a footpath. And if you plan to pave a path to the garage, along which passenger vehicles will drive, then it is better to choose tiles at least five centimeters thick.
What is required for tile installation?
Before you study the instructions on how to properly lay paving slabs, you need to prepare the tools that you will definitely need in the process. Their list is quite long:
- building level(you can use modern laser models that allow you to make markings as evenly as possible)
- rubber mallet- necessary for fitting the tiles to each other during the laying process
- wooden pegs(spacers) and kapron thread - with their help marking is done
- Master OK- necessary for leveling the sand layer
- rammer- necessary for compaction of layers
- sand and small stone- from them it will be necessary to make a mixture that performs the function of a "pillow"
- angle grinder- tool for adjusting the size of paving slabs
Also, do not forget to prepare the paving slabs and the curb itself - with its help it will be possible to design the path in a better way.
How to lay paving slabs evenly?
When all the necessary tools and supplies are ready, you can proceed with the installation of the sidewalk. But, even if you have an idea about the procedure itself, still look on the Internet for at least one video on how to lay paving slabs - the video will be your best assistant. By the way, about how to properly lay paving slabs, there are a lot of literary sources and visual aids that you can also use.
So, laying paving slabs with your own hands begins with preliminary preparation of the territory. Professional craftsmen usually draw up a plan of the territory, measure out all the dimensions, transfer them to paper, and only after that they start work.
- kapron thread
- pegs
- a hammer
With their help, you will need to mark the boundaries of the territory where you plan to lay paving slabs. Within the designated boundaries, you need to carefully remove the sod to a depth of approximately twenty centimeters, and then remove the soil. Make sure that the prepared area is free of debris and grass residues.
After the soil is evenly removed, it is necessary to make a pillow of small stone, which is filled up, leveled and carefully rammed. Then you need to start laying the next layer of sand or sand-cement mixture. Sand is laid up to a thickness of forty centimeters. If you are laying a sand-cement mixture, then a layer of twenty or thirty centimeters will suffice. Sand is mixed with cement in proportions of 3:1. To make the layer dense, you can slightly moisten the mixture of sand and cement with water. If you want paving slabs to last their maximum life, you need to make sure that plants do not sprout from the ground. This can be done using a layer of geotextile, which is placed between the paving slab itself and a pillow of sand and cement.
We mark the area
If you are interested in how to properly lay paving slabs, you should know that paving slabs must be laid strictly according to the markings. To do this, you need to measure the level of the slope of the territory where the path will be equipped. It is better to do this in the direction from the house to the street.
Drive in two pegs along the line and pull a nylon thread between them. Make sure the thread is lying flat on a horizontal plane. You can do this with a level. Next, tie the free end of the thread to the third peg and stretch it perpendicular to the first. The third peg must be driven in above the first two. Then the fourth peg is driven in, the thread is pulled, as a result of which a rectangle is formed - this is the platform for laying paving slabs with your own hands.
Paving slabs
After the preparatory work is completed, you can proceed to the direct laying of paving slabs. You can lay tiles with your own hands in several ways, for example:
- traditional
- diagonal
- combined
If you are not a professional, then it is better to use the traditional one. First, prepare a solution - mix six parts of sand with one part of cement. It is important that the sand is sufficiently wet. If the sand is dry, moisten it a little and spread the mixture on the prepared area for laying paving slabs.
Tamp down the layer carefully. Lay two pipes on the sides - at this stage they will play the role of limiters. To make sure that the layer is absolutely even, take a fishing line or thread, pull it over the pipes and draw it a little to the side - this way you will see where you need to remove a little, and where, on the contrary, add.
How to lay paving slabs correctly with your own hands: tile inspection and installation
Before laying the tiles with your own hands, you should carefully examine the material itself. Take the tiles and carefully check that they do not have cracks, chips and other defects that may adversely affect the final result and the quality of the pavement.
Laying tiles correctly is not difficult. Just lay them on the prepared base with a minimum gap. Use a rubber mallet to push the tiles closer together. Do not forget that paving slabs, although durable, are prone to defects, so tapping with a rubber mallet should be light.
If tiles need to be cut, use an angle grinder. For this you need:
- make a mark
- saw the tile
- lay the tiles flush with the rest
Periodically check the level of the masonry - the tiles should be even and in line.
After you have laid all the tiles yourself, you need to sprinkle the paths with fine gravel and rub it thoroughly with a stiff broom or brush. Then you can start grouting the seams. To do this, it is better to use special grouts that are sold in stores. On this, the process of installing a paving slab with tiles can be considered completed. The only thing you will need to do next is to install the curb.
Installation of curb plates
It has already become clear how to lay paving slabs correctly. Now you need to figure out how to install the border. Here you should pay attention to the fact that you can lay the curb flush with paving slabs, or raise it a little.
The main task of the curb is not the aesthetic appeal of the path, as many people think, but the prevention of tiles from spreading on soft ground. To install them, you need to dig special trenches, the width of which will be slightly larger than the size of the curb itself. Next, in the trenches, you need to lay a pillow of sand. A layer of five centimeters will be enough. The sand is carefully compacted and a slab is installed on top, which must be leveled and fixed.
Publication date: 21-05-2015
- Drawing up a plan-scheme of the site and selection of the necessary materials and tools
- Site layout
- Necessary tools and materials
- The technology of laying paving slabs
- Paving slabs
Ennobling the courtyard area in their private households, the owners are increasingly using material such as paving slabs. On the one hand, properly laid, it looks very aesthetically pleasing and helps to keep the yard clean, and on the other hand, the technology of laying paving slabs with your own hands is not so complicated. Having correctly determined the location of the site on which paving will be carried out, as well as having prepared all the required materials and tools, you can quickly and beautifully decorate your yard with decorative paving stones on your own.
Recently, paving stones have become a very popular material for laying on the ground. This is due not only to its high wear resistance, but also to the fact that paving stones can give a special architectural sophistication and a certain character to the surface.
When planning to lay part of your yard with paving slabs, you first need to decide what area and where to decorate with this paving slab. It is very important to rationally approach the issue of the advisability of laying decorative paving stones in the yard of a private household.
Back to index

When choosing a site for paving slabs, try to choose a flat place, make the site the correct geometric shape and think about where the sedimentary water will drain.
When planning the location of the site, which will be framed with paving or paving slabs, it is necessary to take into account some factors. The most important among them are the following:
- The ground must be fairly level. In the case of a strong slope, it is possible to make a multi-level paved area, but in no case should laying be allowed at a significant angle of inclination;
- It is desirable to make a platform of the correct geometric shape. On the one hand, it will look aesthetically pleasing, and on the other hand, the paving process itself will be easier. Having no experience in laying paving slabs, it is best to start by laying a rectangular area;
- It is not necessary to cover the entire yard space with tiles. It is possible to lay a paved area of the correct geometric shape in the central part of the yard or on the territory adjacent to the entrance to the house, and from it to lay cobbled paths to various important points on the territory of the infield;
- When planning the location of a paved area, one should foresee where the sedimentary water will flow. If necessary, the installation of an artificial drainage system should also be planned;

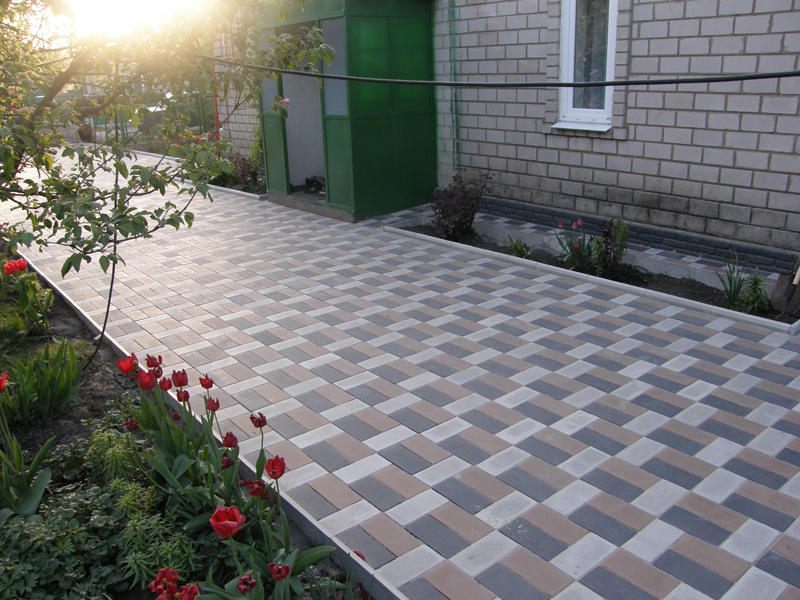
An example of how paving slabs harmonize with the courtyard space, complementing and ennobling it.
The most important thing is that the site being laid is in harmony with the common courtyard space, visually organizing and ennobling it.
In general, the plan for creating a platform from paving slabs completely depends on the fantasies and wishes of the owners. Depending on the total area of the territory intended for paving, as well as on the specifics of the landscape of the yard, the necessary materials are counted and the tools that are needed for paving to take place without delay are taken into account.
Back to index
Depending on the individual characteristics of each site to be laid, the selection and quantity of materials may vary. Here we offer a standard set, which is necessary when paving a regular rectangular area. The materials listed below are quite inexpensive and available at any hardware store. So, what materials and tools will you definitely need?

Here you can see the necessary tools for laying paving slabs, such as a trowel; shovel; Bulgarian; rope; rangefinder; mallet; level; brush.
- Paving slabs (the calculation is made by footage; curly paving slabs are usually sold per running m);
- Sand;
- Cement (best grade M400);
- Concrete slabs for laying the curb around the perimeter;
- A shovel, a container for mixing cement mortar and for preparing a carving (a mixture that will include cement and sand);
- Mallet with rubber knob, smooth wooden plank, spirit level, lacing;
- To cut tiles, it is best to use a circular machine with a diamond disc. However, such a machine may not be in the household or summer cottage. Therefore, instead of it, the grinder is most often used. When using a hand-held circular saw to cut tiles, extreme care must be taken to avoid injury;
Thus, having drawn up a rational and aesthetic plan for laying a courtyard area of paving slabs, as well as selecting and preparing all materials and tools, you can proceed directly to the work process. The stages, rules and technology of such work require strict adherence to certain norms and standards.
Back to index

When laying paving slabs, sand will serve as a tile adhesive that will fill the gaps between the individual components of the mosaic.
The self-laying technology of paving slabs may seem quite simple and affordable, but it is very important to follow all the procedural steps and recommendations so that the paving is not done in vain and the site does not crack, deform or fall apart in the shortest possible time. You need to start with careful preparation of the place reserved for paving.
Preparing the base for laying A very important step, which will largely determine the success of the whole work, is the preparation of the base for direct laying of tiles. Such preparation is carried out in the following sequence:
The basis for high-quality laying of paving slabs (paving stones) is a carefully prepared base.
- We outline the perimeter of the site in accordance with the previously drawn up plan-scheme. For marking it is convenient to use tension lacing and pegs. Along the cord and inside the intended site, we remove the sod, the top layer of soil. If necessary, you can dig a small hole. It depends on the thickness of the selected type of paving slabs and on how much higher the ground level will be the platform plane. The general outline of the recess should be 10-15 cm wider than the intended perimeter of the site (this is necessary for the correct laying of curb slabs.
- Pour sand over the entire area of the formed recess and tamp it down, forming a sand cushion about 5 cm thick. To create such a cushion, you can use both sand and granite screenings.
- Now you can start laying curb concrete tiles. They are laid around the perimeter on a thick cement mortar, which is prepared in a ratio of 1/3 - cement / sand. It is very important to install all curbstones evenly. They are placed along a stretched cord that controls the perimeter line, and the upper horizontal plane of the plates is controlled using a level or spirit level.
- If it is assumed that the future site will have a slight slope for water flow, then it is the curb slabs that should be laid under the appropriate slope. To create such a slope, pegs can be driven in along the edges of the site, with the help of a hydrostatic level, mark zero (single-level) marks on them, tie the cord on one peg a little above this mark, and on the other - a little lower. This cord will adjust the horizontal slope of the curb slabs.
- In the end, you should get a platform closed around the perimeter with concrete curbs, which will be laid inside with paving slabs.
http://youtu.be/M3H9d0Uryw0
After the mortar, on which the curb slabs are laid, has completely hardened, you can proceed to the most important stage of work, which is the laying of paving slabs.
Back to index
Paving tiles on the prepared site is carried out according to the following technology:

Paving stones, laid according to the correct technology, can be used in a day.
- First, you should prepare a carving - a backfill mixture, which includes cement and sand in a ratio of 1/6. It is advisable to sift the sand before use. Mix cement with sand very carefully so that the mixture is fairly uniform. There is no need to add water to this cement-sand mixture.
- We fill the carving into the space between the curb plates and carefully level it. For this alignment of the backfill, it is best to use a long bar, the cut corners of which are installed on opposite curb slabs. We fill the gartsovka to such a level that the tile just laid on it, not tamped down, protrudes 5-10 cm above the curb slabs (depending on the thickness of the paving slab itself). Subsequently, it will be necessary to pour the carving in some places, level it if the stacker will stand on it during the paving process. Perhaps it is more convenient to sit on an already laid tile, moving forward in the process of work.
- After falling asleep and carefully leveling the carving, you can start laying the tiles. This is done from one edge of the site to the other. When applying one tile to another, it is important to leave a uniform gap between them. This is usually obtained automatically, since a technological protrusion is made on the side surfaces of the tile during its factory production. It also helps to make uniform gaps between individual tiles.
- The most important and difficult part of the entire laying process is to tamp the tiles into the cut to create a perfectly flat outer surface.

The most difficult thing in the process of laying tiles is to tamp the tile into the carving evenly, for this, use a mallet and a small wooden beam.
To do this, you can use a flat bar or bar laid on opposite curb plates. Between such plates, you can pull the cord and focus on it. It is enough for experienced craftsmen to have a small bar for mutual alignment of nearby tiles. The ramming itself and the alignment of each tile are made with a mallet with a rubber knob. A mallet should be hit on a wooden block attached to the tile.
- To form the first row along the curb slab, curly paving slabs often have to be cut. The safest and easiest way to do this is on a circular machine. In the absence of such, a grinder with a diamond disc blade is used. Most often, the tiles in the last laying row also have to be cut.
- After the completion of dry laying, the resulting area is watered with water, which penetrates inside, under the tile, thanks to the remaining gaps. The cement-sand mixture wetted in this way hardens, forming a solid base under the tile. The strength of such a base largely depends on how evenly the laying of the tile material itself was carried out.
- After a while, you can fill up the gaps between the tiles with garco or just sand (the first option is more reliable). The tile is watered again. After the carving has dried in the inter-tile gaps, the area is washed with water from a hose. All dirt and residues of used materials are washed off. Now the site is completely ready for operation.
http://youtu.be/atoQtLiFUFs
Thus, adhering to all technological standards and recommendations, it is possible, using affordable and inexpensive materials, to ennoble the yard in front of your house. A platform paved with paving slabs will not only look aesthetically pleasing, but also simply sweep or even wash with water under pressure. And having laid tiled paths to various important objects in the backyard, you can perfectly organize the entire territory.
1stones.ru
Do-it-yourself paving stone laying: step-by-step instructions for paving paths
This article will introduce you to such a procedure as laying paving stones with your own hands: step-by-step instructions for paving sites and paths, supported by photos and videos, will include a complete overview of recommendations for choosing materials, planning future construction and its implementation. The specificity and advantages of using materials such as paving stones and paving slabs will be considered in detail.
The area in front of the entrance to the house is paved with paving slabs
In the photo, paving stones in the courtyard of private houses can be seen as decoration:
- tracks;
- areas for summer recreation;
- barbecue areas;
- courtyard and entrance to the house;
- areas for placing a car in front of the house;
- areas around the gazebo, shed or bench;
- carport areas, etc.
Paving stone belongs to the category of reliable materials with a high level of strength and wear resistance. It has one indisputable advantage. Looking at the asphalt roads and the state in which they are, it immediately becomes clear that the old streets, paved with paving stones, benefit in many ways. Even after 100 years of use, this antique coating retains its strength without repair.
Note! Paving stones will provide similar quality and durability in your yard, but only if the right choice of materials and full compliance with the requirements of paving technology.
The summer patio is decorated with paving stones laid out in a circular way.
Before starting work, you should take care of preparing the necessary materials and tools.
- before you go to buy consumables, you should carefully measure the area for laying the coating, figure out the patterns and patterns, and also calculate the required amount of paving stones with a small margin in case damage occurs during the work;
- along with the material, you should purchase a dry mix for paving. If you intend to lay paving stones on concrete, as a rule, such paths can last for several decades. Or purchase other components for work on a sandy surface;
- if necessary, you need to buy or rent the missing equipment and tools;
- enlist the help of an assistant, since it is quite difficult to lay the sidewalk on your own, or call specialists. It will be problematic to cope with such a large array of works alone, especially if you do not have enough experience and knowledge.
A neat garden path paved with your own hands
Paving stones are small products made of natural stone. Most often, this type of coating is found on pavements, but due to its natural origin, which ensures the preservation of its shape for a long time, it is often used for paving paths in the yards of private houses.
Features of choosing paving stones for paths in the country, prices for concrete material
Concrete paving stones are among the most commonly used materials for paving platforms and sidewalks. In production, concrete is used for the manufacture of blanks. Special plasticizers are added to this mixture, as well as pigments of various colors.
Note! Concrete tiles can be created using different technologies - vibropress or vibrocasting. In each case, the coating acquires special properties and advantages.

The cost of concrete tiles ranges from 300 to 500 rubles per square meter
The production process, during which concrete pavers are created, is as follows:
- preparation of concrete mix;
- filling forms;
- special processing of the mixture;
- drying stage.
After the concrete has completely dried, the finished blanks are removed from the molds. During the drying period, the concrete mixture hardens and gains strength.
If you want to buy concrete pavers for work, along with a low and affordable cost, you get quite acceptable performance properties. This material option is suitable if the construction budget is limited.
Prices for paving stones based on gray cement:
| Product shape | Grade of cement | Dimensional parameters, cm | Price, rub./m² |
| paving stones | M400 | 20x10x4 | 325 |
| Rectangle | M400 | 20x10x4 | 346 |
| paving stones | M300 | 20x10x5 | 352 |
| paving stones | M400 | 24.3x12x7 | 357 |
| Brick | M400 | 20x10x6 | 358 |
| Brick | M400 | 20x12x6 | 362 |
| paving stones | M200 | 20x10x5 | 374 |
| paving stones | M300 | 20x10x4 | 380 |
| paving stones | M400 | 20x10x7 | 387 |
| paving stones | M300 | 20x10x6 | 440 |
Features of other types of paving stones
In addition to concrete paving stones, there are also other types of coating. Clinker material is made on the basis of clay. Blanks are a kind of bricks used for paving sites. Clinker pavement has a different shape and color. This type of material is distinguished by an increased indicator of strength, durability and resistance to low temperatures.
Stone paving for platforms and sidewalks is considered by developers as a classic option for covering. The material for its manufacture are natural rocks, mainly:
Basalt tiles are often used to decorate the local area.
There are many ways to lay stone paving stones, which makes it possible to make a pavement that can last more than a century. The modern assortment offers several varieties of this material. The classification is based on the external characteristics of the blanks, which can be:
- sawn;
- stab;
- stab-sawn.
Useful advice! Use special types of paving stones to cover walkways and terraces. For these purposes, products made of high quality colored concrete or ceramics are provided.
Granite paving stones: material features
Granite paving stones belong to the coatings of natural origin. Its uniqueness lies in the fact that in the conditions of advanced technological progress, specialists have not yet been able to create a technology for obtaining an artificial analogue of this stone, which has the same service life, strength level, and resistance to atmospheric phenomena.

Chipped granite paving stones
A chipped version of the material is used in a classic design. The coating is able to withstand significant operational loads, so it can be called almost eternal. While the budget cement pavers can last no more than 20 years.
Granite is extremely stable, so it is best suited for paving:
- sidewalks;
- sites;
- highways;
- park paths.
During the period of long-term operation, the stone practically does not undergo external changes, it retains its properties.
The process of paving the sidewalk with granite tiles
Benefits of using granite paving stones:
- stone blanks have an increased strength index, due to which the entire coating is also durable;
- due to its dense structure, granite acquires moisture resistant properties. Moisture cannot penetrate into the deep layers of the material, so the paving stones are not afraid of severe frosts and rains;
- stable structure protects granite from the damaging effects of chemicals. The same property provides the material with excellent performance characteristics;
- natural destruction of the material is very slow. The stone is not subject to cracks, burnout, does not show vulnerability to the impact of putrefactive processes and atmospheric phenomena. The natural pattern of the rock is preserved almost in its original form;
- split paving stones do not absorb dirt particles, self-clean in the rain, and do not contribute to the accumulation of moisture on the coating. Granite is not afraid of ultraviolet radiation;
- paving stones are easy to repair, and the blanks themselves can be used for re-paving. Reusable use of the material does not affect the quality of the tracks.
A path made of granite paving stones will last more than a dozen years.
Note! Chipped granite has a fairly high strength index. The stone is able to withstand high pressure, strong impacts, high traffic conditions (the surface is not erased), the impact of static loads.
Modern paving stones and tiles have many different shapes and colors. Thanks to this, it becomes possible to make an interesting design decision in the courtyard of your house. These coatings are excellent tools in relation to the arrangement of the local area. They are characterized by reliability and practicality, which allows you to operate paths and platforms for many years.
Even the usual form of tiles or paving stones in the form of a brick can be used to create various patterns. To do this, it is enough to choose an interesting scheme and purchase material of the appropriate colors. Thanks to this, you can improve the aesthetics of the coating and even maintain the style in which the design of your suburban area is made.
Combination of circular and classic paving stones
Based on several varieties of tiles, you can create interesting patterns by laying the coating in a certain pattern. You can develop a drawing yourself or use ready-made options for laying paving slabs:
- geometric shapes, for example, colored diamonds on a plain background. To give the image a finished look, you can use a third color to create a kind of border around the edge of the track;
- zigzags resembling the letter "M". In work, you can use 2-3 colors and paving stones of various widths. The drawing will turn out dynamic;
- complex geometric patterns look no less impressive. To work, it will be enough to choose two colors that contrast with each other. You can create something like a maze or decorate the path with twisted spirals in the form of a Greek pattern;
- the staggered order of placing paving stones or diagonally is very often used in the design of paths and playgrounds. Two-tone colors can be varied by using lines of various thicknesses and sizes;
- strict design can be achieved by repeating geometric shapes of the same size, for example, rhombuses, squares, rectangles.

Examples of simple paving slab laying patterns: 1 - herringbone, 2 - spiral, 3 - ladder, 4 - checkerboard
Useful advice! If you are using repeating geometric shapes, be sure to eliminate any irregularities. Carefully prepare the substrate before laying so that the pattern does not look crooked. Paving in this case should also be given increased attention.
Even the simplest patterns will effectively decorate any yard. Using curly or straight types of paving stones, you can emphasize and highlight certain advantages of the local area.
Simple at first glance, two-color patterns will look pretty decent if you do the work step by step and carefully. At the same time, it is worth following the advice of specialists in order to achieve the most accurate and even surface. Otherwise, even the highest quality and most expensive material, which will be laid in intricate patterns and patterns, will have a sloppy and cheap appearance. Neglect of technology leads to the formation of irregularities and height differences on the surface of the coating.
Figured paving using paving stones of different colors
Coating in the form of pavers has many advantages. Among them, the following qualities stand out:
- compressive strength;
- long service life;
- attractive appearance;
- abrasion resistance;
- a wide range of applications, including paths, recreation areas, pedestrian walkways, parking areas and areas for traffic;
- high level of resistance to temperatures, both low and high.
Useful advice! If the pavement will be subjected to serious loads in the future, it is recommended to pave sidewalks over a concrete base. A sand cushion is not suitable for these purposes.
The recreation area is made of cement paving slabs
Before laying paving stones, preparatory work must be done. The list of these works includes the following procedures:
- Determine the condition of the pavement for paving the sidewalk.
- Choose a scheme in accordance with the planned loads.
- Prepare the surface for work.
To carry out the work, you will need to prepare the appropriate tools and additional materials:
- paving stones or paving slabs;
- a mallet with rubber pads or a hammer with a similar coating;
- building level;
- grinder with sets of discs for cutting tiles;
- tape measure, shovel, brush, rake;
- container (metal);
- a block of wood;
- watering can, wheelbarrow;
- sand and a special sieve for sifting it;
- protective gloves for hands and goggles.
Before you start laying tiles, you need to prepare all the necessary tools and materials
If you correctly calculate and design a site or a path, in the future you will insure yourself against rework, and therefore from additional costs for the purchase of material. At this stage, the shape of the paving stones is selected. How to properly lay this coating option will also depend on other factors: paving patterns, mosaics, color schemes, the surrounding landscape, as well as the base.
Using a tape measure, a set of wooden pegs, construction cord, and a level, mark out the area for laying out the site or paths. Instead of a building level, you can use a level.
Useful advice! Be sure to walk around the area allotted for paving the sidewalk, and check how convenient the location you have chosen, whether the paths interfere with the passage of vehicles. This stage of work still allows you to make changes without compromising your project.

In the process of paving, you can not do without a rubber mallet and a building level
After that, it is necessary to calculate consumables:
- cement;
- paving stones;
- borders;
- crushed stone;
- gravel;
- sand.
Related article:
Paving slabs for paths in the country. Prices, types and styles. Paths in the country, paved with paving slabs. Proper selection and installation of paving slabs. Photos of finished tracks and platforms.
Substrate preparation: how to lay paving stones on sand and gravel
The quality of the future coating is largely determined by how carefully you think over and prepare the base.
The first step is to prepare the soil. To do this, the top layer (turf) should be removed from the surface of the earth. After that, you will need to remove a layer of soil 20 cm thick. Pipes can be placed under the base of the future coating, which will subsequently be used to lay elements of communication systems. Thus, you do not have to break tracks to lay communications.
Site preparation for paving slabs
Then the resulting recess is filled with gravel with large fractions or crushed stone. This is done in order to form a cushion for laying paving stones. Depending on the purpose of the tracks, a certain thickness of this layer is selected. It is recommended to take a thickness of 10-15 cm for laying the footpath. If it is planned to build a parking area and driveway for cars, then this figure should be increased to 15-20 cm.
To shrink the crushed stone cushion, you can use a vibrator or a conventional rammer. An intermediate layer of sand is poured on top of it, after which it is leveled with a rake and compacted a little. It is allowed to use a dry sand-cement mixture with a ratio of these components of 1:5, respectively.
Useful advice! The height of the layer should be about 3-5 cm, so that as a result the surface of the tiled surface rises 1 cm above the planned laying level. Over time, the paving stones gradually shrink, so this gap is designed to compensate for the height difference that forms during operation.
Leveling the base with a cement-sand mixture
In order for the base to turn out to be correct and well planned, it is recommended to install guides that will eliminate irregularities. For these purposes, it is best to take slats or pipes, they will be used to screed excess material from the upper layer.
Geotextiles are laid on top of the rubble. This type of material should be laid in 2 layers for greater efficiency. Benefits of using geotextiles:
- the material does not allow interlayers of crushed stone and sand to mix;
- a normal outflow of water is ensured;
- the base is durable and more durable;
- the possibility of weed germination between the paving stones is excluded (plants contribute to the destruction of the paved surface, reducing its service life).
If you follow all the recommendations for the formation of the base, this area will be an excellent basis for laying tiles or paving stones. Thanks to the exact observance of technology, the platform or paved path will turn out to be durable, it will not sag over time.
The final result will directly depend on the quality of the base preparation.
There is no more suitable material for paving paths in the yard of a country house than paving stones. Many owners of such cottages know how to lay this type of coating with their own hands. After all, this is a great way to save on the arrangement of the local area and make it comfortable and beautiful. In order for the paths to have a complete appearance, curbs should be installed before paving the paving stones.
The border will perform several functions at once:
- decorative (the coating gets a beautiful frame and a harmonious appearance);
- limiting (paving stones will not spread on the sides due to the outflow of water);
- strengthening (the base becomes more durable and stable).
Before installing the curbs, model the area or path that you are going to make using wooden pegs. Label all bends, turns and intersections.
Useful advice! In places where the path bends, trim the corners of adjacent curbs. Use a grinder for these purposes.
Pathway with curbs looks neater
Next, all the pegs must be connected to each other with a rope or cord. Be sure to use a building level or level. Dig a groove in such a way that the curb mounted on the pillow rises about 1-2 cm above the rope. Concrete mixture should be placed at the bottom of this groove.
The curb is installed on the prepared cushion, after which it should be hammered with light taps with a rubber mallet or mallet until the surface is equal to the level of rope tension.
When installing the curb, its position should be controlled. Each element is necessarily checked for verticality, which it must strictly comply with. After that, the gaps between the elements of the curb are controlled. These parts should be installed as closely as possible to each other. The groove itself from the outside should be covered with sand and carefully rammed.
In some cases, designers do without the use of curbs during the installation of paving stones. A video on how to properly lay the material in such conditions can be easily found on the Internet. In fact, paving is carried out flush with the lawn or 1-2 cm above it.
We do the laying of paving slabs with our own hands: step by step instructions, video
Laying paving slabs as a covering is carried out manually diagonally. The workpieces are placed on the surface of the base in the direction "away from you". This is done in order not to violate the integrity of the prepared and even top layer. Make sure that there is a gap of about 1-2 mm between the blanks.
Useful advice! The simplest in terms of installation is the "Old Town" tile. Its blanks have special protrusions that prevent the elements from fitting tightly to each other.
In the future, these gaps will be filled with sand or a special dry mix. This procedure is performed in order to fix the tiles in the desired position. Sand during the operation of the coating will not allow the workpieces to move from their places.
After the tile is laid on the surface of the base, it should be tamped. This must be done very carefully so as not to spoil the workpiece. Use a rubber mallet or wooden mallet for this. Perform visual control of the placement of each element in accordance with your chosen laying pattern.
For even laying of tiles along and across the rows, a rope is pulled
If it was not possible to install the tile as expected, the workpiece should be lifted, the amount of sand under it adjusted (removed or, conversely, added), level the surface with a rammer and try again to install the element correctly.
If the project involves the creation of an irregularly shaped platform or path, with turns or roundings, you will need to cut the material. Any variant of the tiled coating lends itself well enough to cutting. For these purposes, it is better to use a grinder. Stock up on a set of discs designed to work with a stone surface.
Before proceeding with the cutting of the material, the tile should be applied to the intended installation site and marked in the form of a line. An unnecessary part that goes beyond the border will be cut off along it. To avoid wastage of material, it is recommended that you cut the tiles last, when the solid blanks have already been laid.
Pavement paving with installed curbs
When the rough laying is completed, a control check of the placement of the tiles is carried out using a rule or building level for the presence of defects in the coating:
- irregularities;
- depressions;
- bulges.
After all defects are eliminated, the coating is covered with river sand with a fine fraction or a mixture of sand and cement. Use a mop, broom or brush to remove excess. Spray the coating with water from a hose. This completes the coating work.
Use the video material to visually see how the tiling is laid. With the observance of technology and the selection of high-quality materials, pavement paths will decorate your country yard for a very long time.
REMOO IN YOUR MAIL
remoo.ru
Do-it-yourself technology for laying paving slabs on sand and on a concrete base
The paving slabs laid on the territory of the site have not only an aesthetic, but also a utilitarian function. Such tiles can significantly improve the aesthetic appearance of the yard, as well as provide comfort while being on the site. There are several technologies for laying paving slabs, thanks to which you can do the work yourself.
This material is chosen by most of the owners of private and country houses with the aim of arranging the backyard territory. With the help of paving slabs, you can lay out paths in the yard, playgrounds or parking spaces, as well as make a blind area. It is this material that has all the necessary qualities to perform such work. This tile has an affordable cost, easy installation and easy maintenance. Also, this material is characterized by high performance characteristics, wear resistance and resistance to frost. At the same time, in the modern market of building materials you can find the widest choice of textures, colors and patterns of paving slabs. All this determines the wide popularity that this material has received in recent years. 
Types of paving slabs
New types of rubber-based paving slabs, tiles with textured, three-dimensional patterns and polymer sand tiles are constantly appearing on the building materials market. Laying paving slabs with your own hands should begin with the choice of tiles, depending on the purpose for which it will be laid and in what way.
To date, tiles are produced in two ways:
- vibrocasting method;
- vibrocompression method.
The vibrocasting method has certain advantages. Tiles produced in this way are presented on the market in a large assortment, in different colors and shapes. Also, this method of manufacturing involves the production of custom-made tiles according to individual parameters. An important point: vibrocast paving slabs have a short service life (no more than seven years). In addition, this type of tile is not suitable for arranging paths and areas that will be heavily loaded, therefore, for paving, for example, car parking, it is best to use vibropressed tiles. 
The tile produced by the vibropressing method is stronger and more reliable, therefore it is used for any purpose. It is used for laying parking areas, paths in the yard, as well as access roads. Vibrocompression paving slabs include granite paving stones, which are actively used for laying roads. This is due to the fact that such material can withstand heavy loads without problems. In addition, it is worth noting that tiles produced in this way have high frost resistance, long service life and resistance to stress.
In view of this, it should be noted that for paving sites or more expensive in the courtyard of a private house, vibrocast tiles are quite suitable if they are not subjected to a strong impact. It should also be noted that in such a process as laying paving slabs, the price per square meter of this material is not the last value. In this regard, vibrocast tiles will cost much less. 
Preparing the site for laying paving slabs - marking the tracks
Despite the fact that there are different ways of laying paving slabs, they all begin with site planning and marking in areas that will be finished with material. First of all, it is necessary to prepare a site plan and designate on it those paths and sections on which paving slabs will be laid. After preparing the project of work, in the selected areas for paving by means of a tape measure, stakes and a cord, appropriate measurements should be made and markings should be made. The width of the paths is determined depending on the size of the territory.
During marking, it should be remembered that during the laying of tiles it will be necessary to equip a slight slope in order to ensure the drainage of rainwater. 
We prepare the base
After the marking on the site has been completed, you should begin to prepare the base. This is done in several stages:

At the stage of preparing the surface of the path for laying paving slabs, you should also take care of draining the water from the yard. To do this, you should dig a trench next to the curb and lay the pipe in it, after wrapping it in a layer of geotextile. It helps to prevent sand and earth particles from entering the pipe, thereby avoiding clogging of the pipe and drainage well. In the process of laying the pipe, a slight slope should be made in the direction where the melt water will flow. 
Do-it-yourself paving slab laying step-by-step instructions for sand
The technology of laying paving slabs on sand involves the creation of a sand cushion, which must be carefully compacted and its surface leveled. After creating such a pillow, you should lay out the tile to see how it will fit. The laying process should start from the curb stone and move away from you.
The tile should be driven into the sand and with the help of a mallet (made of wood) you need to level its position. Specialists use vibrating plates for this. Therefore, if the amount of work is quite significant and at the same time everything is done independently, then it would be quite justified to rent a vibrating plate. In the process of work, you need to constantly monitor the level of the tile. Periodically, you need to use the building level to see how the tile lies evenly. One of the sides of the path, parallel to which the drainage pipe is laid to drain the water, should be at an angle of about three degrees to the adjacent side. 
After the first two rows of material have been laid, a rule should be applied and, by tapping with a mallet, it is necessary to make the gaps even. Upon completion of the paving process, all gaps should be covered with plaster mortar (dry) and moistened with plenty of water. At the same time, it is desirable to water using hoses with a diffuser, so that during irrigation, a plentiful stream of water does not wash the solution out of the gaps. Before pouring water on the tile, you need to get rid of small debris from the surface. Now you need to leave the surface for a while so that the tile grabs. At the same time, it is not necessary to allow loads on the tile for this time.
An important point: material consumption depends on the installation technology, for example, during diagonal laying, tiles will take much more. In addition, it is very important to ensure that the base for the tiles is well prepared, since the duration of the life of the paved path or site depends on this.

How to lay tiles on a concrete base
Paving slabs are laid on a concrete base only if significant, constant loads are placed on the surface. To lay tiles using this technology, you can make a cushion of crushed stone and fill it with a cement solution, then level the surface, wait until it dries and the base for laying is ready. In the event that the base requires reinforcement, then in the trench, after the crushed stone cushion has been laid, formwork should be made and a layer of concrete (about ten centimeters) should be poured into it and a reinforced mesh should be laid. To do this, you can use a grid with cells ten by ten centimeters. To prevent cracking, you will need wooden slats that are installed across the trench. 
When laying paving slabs on a concrete base, you will need a mixture of M150. On top of the concrete you need to pour cement and use a trowel to level the layer. Next, the surface must be covered with a film and sprinkled with a small amount of water from time to time. Laying such tiles on a concrete surface should be done using a conventional mortar of cement and sand. Before proceeding with laying, it is advisable to lay out all the tiles in the correct order on the surface in order to form a pattern and understand in what sequence they should be laid.
After that, the entire tile is removed, and a solution must be applied to the surface, with a layer of about three centimeters. Next, you can proceed directly to the installation. Crosses are needed to correctly determine the width of the gaps. In the process of work, it is necessary to constantly check the evenness of the masonry and do not forget about the necessary slope of the surface for water flow.
Laying paving slabs video
remontidei.ru
Paving slabs - beauty underfoot: 50 best photo ideas for your site
Paving slabs are one of the most popular coatings for decorating paths, yards and adjacent territories, squares and sidewalks. It is easy to install or dismantle, you can create a unique mosaic pattern from it, while the composition will not be limited either in shape or in color. To get an idea of how it looks, look at the photo of paving slabs.
Not only the term of its operation, but also its appearance depends on the quality of paving slabs. If you compare its quality with asphalt, then you should pay special attention to such properties of the material as:
- Price. Despite the fact that one square meter of this material is cheaper than asphalt, it is not inferior in terms of its quality characteristics.
- Frost resistance. Unlike asphalt, tiles do not break down under the influence of low or high temperatures. Its structure remains the same: it does not acquire that fragility, due to which the asphalt road surface is destroyed so quickly in winter.
- aesthetic qualities. With the help of this building material, any design idea can be realized. The richness of colors and the small size of the bar allow you to lay out a pattern of any complexity.
How original the design of the courtyard with this building material is, look at the paving slabs in the courtyard of a private house in the photo:

Production methods
The main elements from which paving slabs are made are sand and cement. Also in the solution can be added:
- granite chips;
- marble chips;
- pigment.
The quality and technical characteristics of the material depend not so much on the composition and proportions of its components, but on the production technology.

Vibrocompression
The mold for making tiles is located on a vibrating frame. Due to vibrations, the dry mixture in the mold is compacted. To speed up the process and improve quality, force is applied to the mass. This is done using a vibrating punch until the required density is reached. After the process is completed, the punch and the mold are removed, and the finished product remains on the frame. The products obtained in this way are of high quality and have a service life of about 25 years.

Hyperpressing
This method is used in accelerated production. With this manufacturing method, the vibrating process is replaced by a high-pressure pressing process. The result is a homogeneous mixture. This method of production is considered one of the most expensive, as it requires special high-quality equipment.

vibrocasting
The cheapest way to make paving. On a vibrating table, molds are placed into which the liquid solution is poured. A vibrating tabletop is needed in order to partially separate the solution into fractions. Cement milk is formed on the surface, after which the blanks are removed from the table, covered with a special film and placed to dry in a separate room. Drying lasts about a day, but in order for the material to acquire the desired level of strength, it must lie in the warehouse for about a month. Look at examples of photos of paving slabs in the yard.

Dimensions
Tiles are produced in the following formats:
- 50 by 50 cm. This size is used not only for decorating paths or large areas. Often used as a blind area around the perimeter of the building. To avoid cracking, the surface for laying this coating must be well prepared, otherwise it may burst.
- 40 by 40 cm. Used mainly for decorating paths and surrounding areas.
- 10 by 20 cm or 10 by 10 cm. Imitation of paving stones. It is mainly used for the design of sidewalks and squares. Can be used instead of asphalt pavement on roads and parking lots.
- The height varies from 5 to 12 cm. It all depends on the production technology. The higher the height, the stronger the material, but the price is higher.
Below you can see how the paving stones lie in the courtyard of a private house in the photo below.

Types of paving slabs
Paving slabs differ not only in manufacturing technology, but also in the composition and shape of the bar. Often, patterns are applied to the surface that imitate various materials. From marbled imitation to parquet board texture. Below are the main types of this building material. For possible options for laying such paving stones, see the photo in our gallery.

clover shape
The material from which bars of this shape are made is concrete, which contains small granite gravel. Has a smooth surface. Easy to wash, moisture resistant. Drawings of laying paving stones are obtained in a very beautiful form.

English cobblestone
Obtained in the process of vibrocasting a concrete solution. It is very similar, in shape and color, to natural stone. Usually gray or brown in color. It turns out beautiful paving slabs.

Wave
A bar of an elongated shape, having a bend similar to a wave or lightning, due to which the probability of shifting the bars in the horizontal direction is minimal.
Look at the original design of paving slabs in a private house in the photo.

brick
As the name implies, the bar is very similar to a brick. The same elongated and regular shape. The most popular and cheapest type. It has high strength and long service life. Below you can see a picture of brick paving stones.

Tumbled
Tiles with rounded edges. Although the construction of such plates is not high in terms of assembly strength, design possibilities are limited, it is still very popular. The very shape of the plates is very aesthetic and the design turns out to be very original in appearance. Often, this material is applied with a paving stone pattern with imitation of marble.
See the photo for the types of laying such paving stones.
Styling options
Laying begins with the choice of paving stone pattern and laying method. There are many options for laying paving slabs, while the composition must be harmonious and meet accepted aesthetic rules. So that there is no overspending of the material, at the preliminary stage of preparation, the design of the coating is carefully worked out, then the material of the desired shape and quantity is acquired. See examples of laying paving slabs in the photo in our article.

There are several styling options, below are only those that are most often used. They do not require any special skills, they are easy to mount even with the help of improvised means. See the options for laying paving slabs in the photo.

Tile
The material is laid either along or across. As a result, a surface with regular geometric shapes should be formed. Installation is carried out in a special trench with concrete pouring. The following shows how to lay paving slabs in the photo.

Network
Classic way. The elements are laid like this: they start from the corner - two tiles are laid around the perimeter, then two are laid next to each other - perpendicular to them. Lay the next row in the same way. Wicker usually decorate straight paths and sidewalks. Especially original in appearance is the pattern of laying paving stones of two colors. Look at the paving slab laying pictures.

Zigzag
A complex design that requires certain skills. A brick-shaped tile is usually used, from the bars of which a zigzag S-shaped pattern is laid out. Often this method is used to decorate private courtyards or city squares. Below is a photo of this type of laying paving slabs.

Herringbone
The bars are laid relative to each other at an angle of 45° or 90°. This method is used most often, since such laying gives the structure a high level of stability. With this method of laying, mainly brick tiles are used. See examples of laying paving slabs in the photo.

random mix
Difficult installation method. Patterns of paving slabs are laid without any particular order. Often, with this method, tiles of various shapes and colors are used. Below is what paving slabs look like in the courtyard of a private house in the photo.

Photo gallery
In our photo gallery you can see 37 more ways of laying paving slabs in the photo.


 How to make a vibrating table for paving slabs
 How to lay paving slabs with your own hands without any problems so that it lasts for more than one year? There are generally accepted guidelines that everyone should follow. In this case, it is not difficult to achieve high quality with a minimum amount of effort.
Material Advantages
Paving slabs are considered a popular material that is used to form walkways and playgrounds.
Walkway from paving slabs
It has numerous advantages:
- a wide selection of shapes, colors, textures of the material, which allows you to realize any design solution;
- paving slabs are made from environmentally friendly materials, which prevents harm to the environment;
- the coating does not change color and does not change shape when exposed to high or low temperatures;
- laying street tiles involves the formation of drainage, which prevents the accumulation of water on the surface;
- characterized by high strength to various types of loads and wear resistance;
- the operation of the finished coating is easy, since caring for it does not cause difficulties;
- paving stone laying is carried out quickly and does not require the involvement of specialists.
Plot marking
At the planning stage, it is necessary to carefully consider where the pavement paths will be placed, how they will be laid. It is best to draw a site plan, which will allow you to calculate all the necessary areas.
After calculating the required volume of materials, 10-15% should be added to the resulting number. Laying paving slabs may not be so easy, so a supply is needed if it is damaged during installation.
When planning paths, one should also not forget that curbs are installed along its edges. They should be much thicker than paving stones. The border will help maintain the integrity of the coating and give it a complete appearance.
To lay paving slabs with your own hands, use the following tools:
- shovel (it is desirable to use a shovel and a bayonet);
- rubber or wooden hammer;
- building level;
- Bulgarian;
- a set of spatulas of different widths;
- rule;
- twine or cord;
- roulette;
- Master OK;
- a container suitable for the preparation of building mixtures;
- rake.

A rake will help spread the material evenly
Foundation preparation
Before laying paving stones, you need to take care of. First, markings are carried out on the territory of the site, hammering wooden pegs along the edges of the tracks. A cord or twine is pulled over them.
The resulting site must be carefully leveled. In the process of carrying out the work, all the hills are removed and the pits are filled up. The technology of laying paving slabs implies the presence of a slope (transverse, longitudinal, transverse-longitudinal). When it rains, it will allow water to run off and prevent puddles from forming on the surface.
After leveling the site, it is carefully rammed.

Various types of hand rammers
This prevents uneven shrinkage of the coating during operation. It must be remembered that the entire installed paving structure will have a thickness of 20 to 30 cm. Therefore, in many cases it is recommended to remove the top vegetation layer of the soil and deepen the coating.
Laying paving stones on a concrete base
Can paving slabs be laid on a concrete base? This should be done if the coating will be placed on weak soils. Such actions will prevent premature destruction of the tracks. You can lay out all the layers of the structure in the following sequence:
- A layer of screed formed from is poured onto a compacted base.
- The surface is carefully leveled and compacted to remove air bubbles.
- It is necessary to lay the curbs, falling asleep on both sides of fine gravel.
- Curbs are installed taking into account the fact that paving stones will be located on their inner side (there is a gap of 2-3 mm).
- Borders are concreted with a mortar prepared using a 1:2 ratio.
- The rules imply the use of a cement-sand mortar as an adhesive.
- Spacers made of wood are installed in the gaps between the individual elements of the coating to form seams.
- After mounting the entire track, the remaining solution is carefully removed from the surface.

The process of removing mortar residue from paving stones
Sand base application
How to lay paving slabs on sand so that the resulting coating lasts more than one year? This foundation is the most successful, since it plays the role of a drainage system. Sand several times increases the stability of the structure and prevents its premature destruction.
How to lay paving slabs in this case:
- A sand cushion 50-60 mm thick is arranged over the entire surface.
- Bulk material is carefully leveled with a rake.
- The sandy base is watered with water until puddles form.
- After 3-4 hours (in sunny weather), the pillow is given the desired shape.
- An ordinary pipe or bar is used as a guide profile.
- The pipes are placed at a distance of 2-3 m, and the sand in the interval between them is leveled by the rule.
Paving slabs
Installation on a cement-sand mixture
How to lay paving slabs correctly if a heavy load is expected on it? The following recommendations should be followed:
- A powder of sand 3-4 cm thick is made on the prepared base.
- Install a reinforcing mesh, which will significantly increase the strength of the coating.
- It is necessary to mix fine dry sand with cement in a ratio of 4: 1 (you can buy a special tile composition in the store).
- The finished mixture is leveled on the surface (the maximum thickness of the preparation is 4 cm).
- To facilitate the performance of all operations, guides from reinforcement bars or pipes are used.
Popular schemes for laying paving stones
How to lay paving slabs so that it looks beautiful? There are several popular schemes.

Classic order
For a beginner, laying tiles in the yard is easiest using the classic scheme. It involves the placement of individual elements of the coating one after another. In this case, it is best to use paving stones of the correct shape - rectangular or square. It is easy to install without professional skills.
To improve the appearance of this coating during the formation of the track, it is recommended to use paving stones of different colors and textures. In this way, it is possible to implement various design solutions.
Laying scheme "with offset"
This technology of laying paving slabs also belongs to the traditional ones. It involves the installation of individual elements in such a way as to avoid overlapping joints.
To achieve a good quality coating, it is recommended to use paving stones of the same shape. There are no restrictions regarding the color and texture of the material.
Herringbone pattern
You can even lay paving slabs in a herringbone pattern, which means mounting each coating element at an angle of 45 or 90 degrees.

In this case, the paving stones can have a rectangular or curly shape.
An improved version of the "herringbone" is considered to be "wicker". It implies the alternation of longitudinally and transversely placed coating elements. To ensure that the resulting pattern is clear and aesthetically pleasing, it is recommended to use materials of only two colors during installation.
Other schemes
There are other ways to lay paving slabs:
- chess order. It is recommended to combine several colors;
- diagonal layout. The longitudinal seam of the coating is displaced relative to the axis of human movement by 30-60 degrees;
- geometry. We put tiles of the same size, but different colors (different patterns are formed in the form of geometric shapes).

Rules for laying paving stones
It is necessary to start laying paving slabs in the direction away from you. In this case, the coating is not deformed under the weight of a person. Laying of paving slabs on sand occurs according to the chosen scheme. Each element is carefully leveled and fixed with a mallet.
Subsequent rows of coating are also installed with a 2 mm gap. During installation, the evenness of the pavers is checked all the time. When a marriage is detected, the tile is dismantled and installed in a new way.
After the laying of paving stones is completed, they begin to fill the joints. For this purpose, sand or a sand-cement mixture is used.

At the final stage of work, excess grout is removed, checking the quality of filling the seams. They are also thoroughly moistened with water. The seams must be tight, as they take on some of the load.
Some nuances of installation
The existing methods of laying paving slabs are implemented in compliance with the following rules:
- paving stones are installed from the lowest point to the top;
- when mounting in a circular way, work starts from the center of the picture;
- during operation, the horizontal is checked by the level every 2-3 rows;
- when installing paving stones on sand, the gap near the curb is not concreted;
- to better fill the joints with sand, it is recommended to tamp the surface with an areal vibrator.

Care and maintenance of the coating
It is allowed to walk on the laid paving stones only 2-3 days after the final sealing of the seams. To clean the surface of dirt, use a broom or wash it with a stream of water from a hose. You should constantly monitor the safety of the seams. Over time, the sand is washed out, so it must be periodically poured.
Paving stones must not be cleaned with abrasive powders. To do this, it is better to use sifted river sand. If necessary, the surface can also be washed with a mild soap solution.
Laying paving slabs with your own hands, the step-by-step instructions of which are presented above, are carried out without difficulty. The main thing is to follow the recommendations of experienced professionals.


