Modern human life cannot be comfortable without electricity at all. When it is absent, it seems that life has stopped, because any household appliance or electric tool requires connection to the mains. Sometimes without electricity it will not even be possible to cook food, not to mention the normal lighting of the home. Therefore, if you are thinking of building, then the wiring diagram in a private house should be a priority issue that should be given special attention. It is necessary to think over and calculate everything to the smallest detail so that not the slightest mistake or inaccuracy in laying and connecting the power supply network will lead to a breakdown of household appliances in the future, or, even worse, to fire and fire.
What is the need for a schema?

The wiring diagram in a private house is a drawing on which all the main power supply units are applied:
- An introductory line, which is carried out by a branch from the main power line to the house itself.
- Location of the switchboard.
- Protective devices and electricity meter.
- Places for installing junction boxes, switches and sockets in rooms and premises.
- Wiring paths from junction boxes to switching devices.
- Places for installing elements of the lighting network (chandeliers, sconces, lamps).
By the time you do the wiring in the house, it is advisable to clearly define where the main household appliances will be located - a refrigerator, air conditioning, a washing machine, a water heater, a dishwasher. This is necessary in order to immediately mount the sockets next to the equipment, and not later stretch it through the entire carrying room.

If your building belongs to a typical one, which was erected by a construction company (this is how entire cottage villages are being built now), then you should be provided with a building project and a wiring diagram. In the case when the construction is carried out independently, for each house they develop their own personal scheme. But in both versions, the main purposes of the circuit are the same:
- If you have a ready-made schematic drawing, you can make a list of materials that will be needed to complete the wiring in the house. This will help save money. That is, having a list in hand, you can go through different outlets, calmly decide, choose the most high-quality and suitable for the price of electrical goods. You will not buy anything superfluous and at the same time save yourself from the situation when the installation is already being done, and some materials are not enough, and you urgently run to the first store you come across to buy them at any price.
- The wiring diagram will make it possible to determine the maximum load of each electrical unit, which will allow you to correctly select the wire cross-section, calculate the total power, select the necessary protective devices and input cable.
- Also, the scheme will help you competently and rationally plan the sequence of work.
Paperwork

Be prepared for the fact that electrical wiring in a private house will also require your nerves, because in order to obtain a permit to perform work, you will need:
- Contact the organization that has a power line on its balance sheet, from which it is planned to connect the input. They must issue technical conditions (TU) for this connection.
- The next will be an organization or a commercial firm, which, according to the issued specifications, will draw up a project.
- Again, the energy supply organization will need to agree on the project, and write an application for connection (on the main line, this must be done by their electricians).
- The made input line must be tested by a special electrical laboratory, after which a protocol is issued stating that the input has passed the test and is suitable for operation.
- Now the input cable is brought into the switchboard and connected to the input of the electricity meter, which must be sealed by representatives of the energy sales. After the meter, do-it-yourself electrical wiring is done in the house, or you can invite specialists, you will no longer need any other organizations.
- The last thing left for you is to conclude an agreement with the energy supply organization for the supply of electricity from their side, and for the timely payment of consumed kilowatt-hours from your side.
Entry planning

The most important thing that distinguishes an electrician in an apartment and in a private house is the input. In multi-storey buildings, the input comes to the switchboard, and from there the wiring to the apartments is already going on. And for a private house, it is necessary to carry out layering from the main line passing nearby. The reliability, quality and safety of power supply depends on how competently and correctly you do this. There are two ways:
- Installation of air inlet with cable or insulated wire.
- Underground cable entry.
Before you draw an introductory line for a private house, it is very important to think over and plan it so that it is resistant to strong winds, and also does not carry the risk of electric shock to a person in rainy, snowy or wet weather.
Air entry

Such air entry involves pulling a wire or cable from the nearest support of the main power line to the housing construction.
I want to warn you right away that air input will be rational if the distance from the support to the house is less than 20 m. In the case when the span is more than 20 m, you will need to install another additional support, which may be on the territory of your site. Such a measure is necessary in order to reduce the mechanical load on the wire. When the span is very large, there is a possibility that the wire may break under the influence of strong winds or under its own weight.
How to make an air entry?
- It is necessary to drill a hole in the wall of housing construction and insert a piece of metal pipe or a special plastic corrugation into it (the diameter of the hole and pipe will depend on the cross section of the input wire).
- A bracket with an insulator installed on it is fixed on the wall outside the house.
- Now it is necessary to stretch the steel cable between two insulators (one is on the bracket, the second is on the traverse of the support from which the layers are made).
- The lead wire or cable on the pole is connected to the line wires. Then it is laid along the cable to the house, where it is pulled through the hole made into the building. Every 0.5-0.6 m, it is desirable to fix the wire to a stretched steel cable with plastic or metal clamps.

That's all, the input cable went into the building, where it will already be wound up in the switchboard. As you can see, nothing complicated, but some nuances should be taken into account here:
- It is very important to ensure sufficient tension on the steel cable.
- The wire should be attached to the cable freely, without tension.
- The distance from the ground to the wire should not be less than 3.5 m.
- The cable and the lead wire attached to it along its entire length should not touch any outbuildings, trees or tall shrubs.
- The place where the wire enters directly into the house must be sealed. After it is stretched into the pipe, all the remaining space must be filled with mounting foam. You can apply another option - tightly tamp with mineral wool from a non-combustible material.
The best option for air entry to the house is the SIP brand wire (self-supporting insulated wire). Firstly, its insulation is made of materials that are suitable for operation in conditions of sunlight and precipitation, and also withstand significant temperature fluctuations. Secondly, under the insulating layer, in addition to aluminum conductors, there is a steel cable. That is, when installing such a wire, there is no need to stretch a separate carrier cable.
If a single-phase voltage (220 V) is required for private housing construction, then a two-wire wire is required. In the case when a three-phase voltage (380 V) is needed, a four-core wire is required. The minimum cross section of SIP wires is 16 mm 2.
How the installation of air input of electricity is carried out, you can see in this video:
underground input

Laying an introductory cable in the ground has a number of advantages compared to the air method:
- Reliability increases due to the fact that the cable is not exposed to sudden temperature changes, precipitation, strong winds.
- The style and architectural design of the site has a complete look, that is, they are not spoiled by a stretched cable with a fixed wire or additional support. As a rule, it is for this reason that all fashionable cottages and country houses have an underground entrance.
- If this is a summer cottage, where people live only in the summer, and in the winter the housing construction is empty, there is a possibility that hooligans or vandals will cut out and steal the air inlet. With underground laying, this situation is unlikely.
- In the event of a short circuit and an electric arc during an underground entry, there is practically no chance that property and people may be affected. And with air input, the fire that occurred can spread to buildings. So high fire safety when laying cables in the ground is a very important advantage, especially for houses made of wood.
But not everything is so perfect, the soil is also quite an aggressive environment. The chemical composition of the soil over time can cause corrosion processes, which will render the cable sheath unusable. At the same time, the soil itself can sag and swell, move and freeze. Groundwater, rodents and microorganisms, as well as pressure from the roots of large trees, will also have their effect. Therefore, if you decide to bring electricity to the house underground, take care to protect the cable, lay it in a plastic or metal pipe.

Well, the main disadvantage of underground input is earthworks. Firstly, they must be coordinated with a bunch of various organizations that can have something laid in this land - water, gas or sewer pipes; heating mains; main cable power lines; telephone lines. Secondly, to lay the cable in the ground, you will need to dig a trench, and this is an additional (and decent) cost. If you do it yourself, spend a lot of time and effort. If you hire someone to carry out earthworks, spend money in terms of money.
In order to better understand the scope of work, we recommend watching the following video:
So before you do the wiring in the house, first weigh the pros and cons, consider the advantages and disadvantages, choose the appropriate input option for yourself. And when you are finished with the external power supply, you can safely proceed to the installation of the internal one.
Load calculation

Installing electrical wiring in a private house with your own hands requires preliminary work with your head, that is, mental work, namely, you need to calculate what kind of load your home electrical network will have. To make it easier for you, break all electricity consumers into groups:
- Lighting elements.
- Kitchen appliances (refrigerator, extractor hood, bread maker, electric stove and oven, electric kettle and coffee maker, multicooker and microwave, etc.).
- Low-power household appliances and electrical appliances (computer, TV, music center, etc.).
- Conditioners.
- Electric heating.
- Bathroom equipment (water heater, hair dryer and washing machine).
- Power tools that are used in utility rooms (hammer drill, electric drill, electric lawn mower, pump, etc.).
Sum up the power of all appliances. Correct the resulting figure by multiplying by 0.7 (this is the generally accepted coefficient for switching on devices at the same time). Please note that the power of each group should not exceed 4.5 kW. Based on the calculated load, determine the cross section and brand of wires. Wiring in a private house is carried out with copper wires. For hidden laying, choose the brands VVGng, PUNP, VVG, for open laying - PUGVP, PUGNP. Wiring made in a private house with such wires will have a decent service life (about 10 years), minimal losses and safe operation.
Distribution board

Normatively, the place where the shield can be installed is not standardized in any way. The only condition is that it must be located no closer than 1 m from the pipelines (meaning any pipes - gas, water, sewer).
In which room it is better to mount the shield, it is also not specified anywhere. Many people prefer to install it in some utility rooms, where it will be convenient to perform switching, or located at the entrance to the house. In any case, try to follow these simple rules:
- This room should not be a fire hazard (such as a boiler room). It is forbidden to store gas cylinders and flammable substances near the switchboard.
- It is necessary that the room where the shield is located is dry, that is, it is undesirable to install it next to the bathroom.
- There must be free access to the shield, do not arrange a warehouse from the room where it is located.

In the shield itself are mounted:
- electricity meter;
- introductory machine, it is responsible for the power supply of the whole house;
- several automata for connecting outgoing pantographs according to their breakdown into groups;
- residual current device (RCD), which is paired with an introductory machine.
The shield can be installed in a niche specially made for it, or simply hung on a wall surface.
If the house is huge on several floors with baths, saunas, garages, then one shield is not enough. In such cases, one introductory shield is mounted and additional ones on each floor.
Layout of internal power supply
There are two ways to conduct electrical wiring in a private house - open and hidden. Let's briefly consider each of them separately.
open wiring

The open method of laying wires is also called outdoor, most often used in wooden houses.
Wires can be laid:
- in special plastic boxes;
- on porcelain insulators using a special cable (the so-called retro style).
The diagram should show which route you are going to route the cables and mark the places where the fixing elements (insulators) will be installed.
For open wiring, special outdoor switching devices (sockets, switches) are used.
Hidden wiring

If the structure is concrete, with many technological voids, a hidden method of laying wires is used. It is more difficult, since you first need to make special grooves in the walls, called strobes, into which the wire or cable will be laid. And after that, the laid conductors will still have to be fixed with alabaster or gypsum mortar.
You will also need indoor switches and sockets. Before installing them, holes are made in the walls, socket boxes are also fixed in them with the help of a solution, and only then switching devices are mounted.
Do-it-yourself hidden wiring is easy to do, the only thing that can cause difficulties, take a lot of time and effort is making strobes and holes.

Everything related to electrical work is regulated by the set of Rules for the installation of electrical installations (PUE). Those who are seriously involved in the installation of electrical wiring, it is useful to get acquainted at your leisure with this book. Here we will give the most basic and important points that you should definitely consider before you do the wiring in the house with your own hands:
- All junction boxes, sockets and switches should be easily accessible (not covered with wallpaper, not hidden under plasterboard, not cluttered with bulky furniture that cannot be moved).
- The grounding conductor must be attached to household appliances with a bolted connection.
- The switches are mounted at a height of 60-150 cm from the floor level, the wires are brought to them from top to bottom.
- All wiring connections should be made in junction boxes. Connecting nodes must be securely insulated, it is forbidden to connect copper conductors with aluminum.
- Sockets are mounted at a height of 50-80 cm from the floor level. The distance between sockets and gas stoves, pipes, heating radiators should not be less than 50 cm.
- Electrical wiring wires should not touch the metal building structures of the building (this is especially true for hidden wiring, be sure to consider this point when you lay wires in strobes).
- The number of sockets per room is taken into account at the rate of 1 switching device per 6 m 2 of area. The exception is the kitchen, where you can mount as many sockets as you need to connect all household appliances.
- Horizontal wiring is carried out no closer than 15 cm to the ceiling and floor. Vertically, the wires are placed at a distance of 10 cm from door and window openings. The wires of the electrical network should not be brought closer than 40 cm to the gas pipes.
We hope that all this conversation was not in vain. Installation of external and internal power supply of your home, you will definitely start by drawing up a diagram. Think with the whole family where and what kind of equipment you want to place, put everything on paper, draw all the switching devices and wiring paths. So it will be much easier for you to calculate the amount of materials needed. Then it remains only to transfer your scheme from paper to real walls and do the installation work.
Recently, capital and suburban construction has become very popular. Many homeowners prefer to create their dream home with their own hands, without resorting to the services of firms.
Without electricity, the life of modern man is unthinkable. Therefore, the electrical supply of the home is a top priority for the homeowner.
People who decide to build a house with their own hands are faced with the need to electrify it. It also happens that in an existing home, the electrical wiring is in very poor condition and needs to be replaced.
We will consider all the nuances of connecting a home to the mains, installing electrical wiring of various types, we will study in detail common mistakes in order to avoid them in practice. Also in the article there will be instructions for commissioning wiring and recommendations on popular issues.
Regardless of whether you want to connect a new house to the network, or restore power supply in an old one (for example, with a complete change in wiring), you will have to undergo a lot of bureaucratic procedures. To obtain a permit, you need:
Drawing up a wiring diagram
It is best to start wiring in a private house with your own hands with a basic electrical one. This will greatly facilitate further calculations of consumables and determination of the installation locations for power elements.
The wiring diagram must include the following elements:
- Supply from the nearest support to the introductory electrical panel
- Introductory /
- Internal electrical panel with consumer groups:
- Rosette group
- Lighting
- Power group (high-current household appliances (boiler, washing machine, machine tools)
- Hozblok (garage, basement)
A diagram of how to properly conduct and make electrical wiring in a private house with your own hands:

Separate RCDs / automata are installed for each of these groups.
Also, when drawing up a diagram, you need to have a general plan of the house, on which to mark the direction of cable laying and the installation location of sockets and switches.
Well, if the wiring will have two separate circuits. Then it will be possible to turn off one for repair, and power the necessary lighting or soldering equipment from the second.Based on these data, a schematic diagram is built, the total cable length required in each case, the placement of power elements, metering devices, and the entry point for power cables are calculated.
What will be required
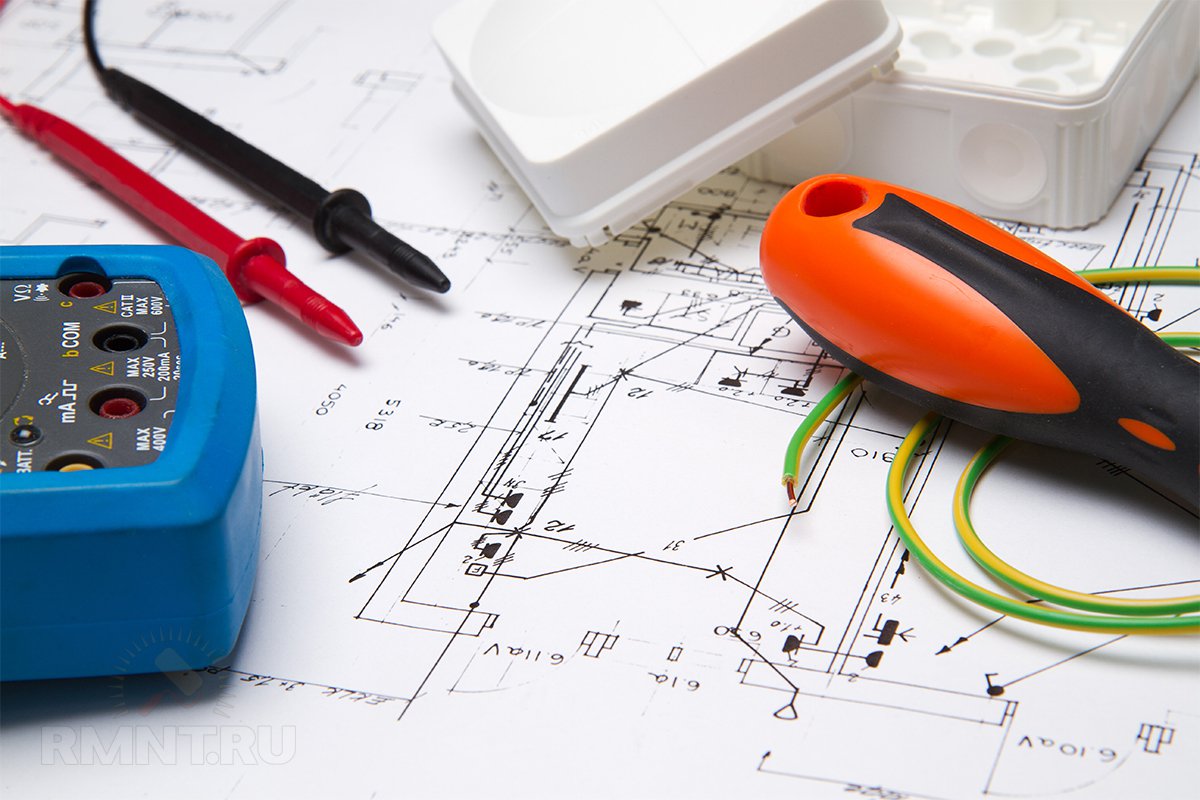
Let's try to figure out how to make and conduct electrical wiring in a private house. In order to conduct high-quality electrical wiring in the house that meets all SNIPs and safety standards, the following materials and tools will be required.
Expendable materials

Required Tools
- (Bulgarian with diamond discs)
- Mounting chisel
- A hammer
- Cable cutters
- Putty knife
- emery grater
- pliers
- Roulette
- screwdriver
It is selected based on the total load. On average, this is 0.5-0.9 square millimeters per 1 kW of power. It is best to use copper stranded wire. He is better twistable, elastic, stable for short term loads.
The number of sockets, switches and other elements is calculated when drawing up the circuit diagram. Boxes and boxes are best taken from self-extinguishing or non-combustible materials.Hidden wiring is best done under the plinth, and not in a groove. This position of the cable prevents a drill or a nail from getting into it during repair work, there is access to it and it is possible to check or reconnect.
Video on how to properly make and conduct electrical wiring in a private house with your own hands:
Step by step installation instructions
Different homes recommend different types of wiring. It is most often done in wood, and hidden in concrete buildings with many technological voids. Consider the nuances of installing and conducting electrical wiring in a private house with your own hands.
Open (outdoor)
Often used in country wooden houses. It can be made both in special boxes, under skirting boards, and in, from a special cable and on porcelain insulators-fasteners that fix vertical elements.
To conduct open wiring in the house, you need:

Closed
Mounting is somewhat more difficult. To hide the cables in the walls, you need:
- Mark the walls with a marking cord
- Using a grinder, cut grooves 2x2 cm in the walls
- With a wall chaser, cut out places for the installation of junction boxes, switches and sockets
- Install boxes and sockets. Fix them with asbestos or screws with a dowel
- Prime the grooves
- Lay the cable in them. First, it must be cut into pieces of the desired length.
- Fix it in the groove with plaster. Mounting step - about 40 cm
- After 20-25 hours, when the plaster is completely dry, clean it
- Install switches and sockets
That's all the simple steps required for hand-made electrification of the home.
Step-by-step video instruction on how to conduct electrical wiring in a private house with your own hands:
Hardware installation
In the now fashionable retro wiring of an open type, fittings can be very diverse. In addition to switches and sockets, porcelain insulator rollers are used there. Each of the fittings should be fixed at a distance:
- Insulator rollers: 10-12 centimeters apart
- Twisted single-core wire - 1 centimeter from the wall
- Sockets: no lower than 35-40 centimeters from the floor and no lower than 15 cm from the kitchen table
- Switches - from 50 to 150 centimeters from the floor
Safety rules, errors and ways to avoid them
Sometimes homeowners neglect some of the nuances or make inadvertent mistakes that can seriously affect fire safety. We will look at the most popular of these mistakes and how to avoid them.
- aluminum wires. Under no circumstances should they be used. They are fragile and can break off when replacing an outlet or switch. It is better to pay more, but take copper ones.
- It is forbidden to use stranded wires in hidden wiring. The terminal does not hold such a cable very well, so a constant heating point is created. Doing so may damage the socket/switch or cause a fire.
- Do not connect wires of different metals directly to each other. To avoid oxides, do this only through the terminal to eliminate possible metal contact.
- Waterproofing. You can not neglect it in rooms with high humidity: bathrooms, kitchens, pantries, terraces. Failure to do so may result in electric shock.
- Mark the length of the wire with maximum precision. It is strictly forbidden to put twists on straight sections, especially if 10-15 centimeters are not enough!
- Groove groove. Its depth should be 2-2.5 centimeters. It makes no sense to run the cable deeper, and it is difficult to plaster a shallower groove.
- . They should be located almost under the ceiling. This is done for the convenience of wiring maintenance and to avoid confusion of cables for various purposes.
- Cuts for wire. They must be strictly vertical or horizontal. Possible cable savings with diagonal laying can lead to a drill or a nail getting into it during repair or finishing work in the house.
- Wire section. It shouldn't be too thin. Thin wires cannot withstand the increased load and burn out. For the socket group, the optimal cross section is 2-2.5 mm, for the lighting group - 1.3-1.5 mm.
And a little about safety. Work with home electricians only when plugs are turned off. Electric shock can lead to the most unfortunate consequences.
Checking and commissioning
After complete installation of electrical wiring, you need to install all planned machines, RCDs and electrical appliances. After that, feel free to invite a specialist from the energy supervision to check and commission the electrical equipment of your home.
Acceptance testing of your facility must end with the issuance of a positive conclusion on the safety of the electrical installation, the possibility of further use of equipment. With the "Act of admission to connection" you should contact the power supply organization. On this basis, she must connect your object to the support and draw up a service agreement.
You should not save on consumables and tools - after all, in the future, high-quality work will become the key to your peace of mind and comfort.Make electrical wiring in the house on your own - It is a simple matter, but it requires care and scrupulousness.. If you approach this matter responsibly, the wiring will serve you for many years and will be guaranteed to be safe.
The article is intended for the average developer who is puzzled by eternal questions: where to start this complex and incomprehensible electrician, how it will all happen, when you can start, where to look, who to invite ...
The arrangement of electrical communications is the most important stage in the construction of a private house. It is quite obvious that it is impossible to start the installation of electrical wiring without detailed design, and this statement applies not only to buildings under construction, but also to those that are being reconstructed and overhauled. Not only the functionality of all volatile devices and household appliances depends on the quality of planning and execution of electrical work, but also the safety of people. The owner, like no one else, is interested in thorough preparation, so saving here is not worth either time or money.
The most optimal solution, of course, would be to order a project from a specialized organization, especially since well-designed documentation will help you calmly carry on a conversation with Rostekhnadzor and business entities, and put the facility into operation. The power supply project is the only document according to which electrical installation can be carried out, its main purpose is to ensure the safety and efficiency of wiring already at the development stage. In fact, this is a whole package of documents containing the full amount of necessary information:
- wiring diagrams, characteristics of conductors;
- installation methods and types of connection of all elements;
- indication of all equipment, specification of consumers;
- location and features of wiring products;
- load calculations...

Even if the owner of the dwelling turned to professionals, he must provide the engineers with a technical task, which means that he must first sort out many issues on his own. Now we will not try to make an “official” electrical project of a country house on our own, but we will try to outline all the main points, the systematization of which will help you:
- competently answer the questions of designers;
- calculate the required power, redistribute the limited energy resource;
- plan the order of electrical work and synchronize them with general construction;
- predict your expenses;
- competently inspect hired specialists, or set to work yourself.
In general, our task is to completely eliminate the possibility of unpleasant surprises and to keep everything under our control in any situation.
Terms of Reference - the starting point of design
Conventionally, the power supply of a country house is divided into three main parts: wiring in a residential building, organization of communications on the street, connection of outbuildings. Each of these directions should be considered separately and have its own electrical circuit, its own working drawings. To solve this problem, it is necessary to set yourself (or designers) a technical task. This is the original plan, which shows all the power consumers of the house and outbuildings, lighting devices, simplified routes for communications. As a rule, the preparation of the terms of reference is the result of the joint work of the designer, the customer and the contractor performing electrical work.
Drawing up a technical task and a project on it will allow:
- take into account all points of electrical outlets so that every household appliance or unit is powered;
- arrange sockets and switches in convenient places for use, and junction boxes in places accessible for maintenance;
- calculate the total power consumption.

We need to first create separate drawings of each floor of the house and each room, where all partitions, door blocks with the opening direction of the canvas, furniture elements, large stationary appliances (TVs, a computer, an electric fireplace, a refrigerator, indoor units of split systems, a boiler, a jacuzzi) are schematically depicted. etc.). A prerequisite is the binding of consumers to the building envelope, so you should either complete the construction of internal partitions, or make an accurate and final layout of the layout directly on the site, determine the level of the finished floor. Only after that it is possible to take measurements and make complete plans for the premises, where we will mark all the outputs, each socket, switch, lamp.
Special attention is paid to low-voltage networks - high-frequency TV, the Internet, video surveillance, motion and presence sensors, stationary audio systems.

In some cases, local drawings are made for units that are especially loaded in design and electrical terms (concrete walls, multi-level ceilings in separate rooms).
A very important point. For the correct preparation of the terms of reference, it is necessary to have passports for all major consumers, this is the only way to get reliable information about the dimensions of the products, how they are connected, power, etc. For example, you should know in advance how many switching positions the chandelier in the living room will have (determines the number of conductor), or, for example, the specification of the hob (determines the cable cross-section, type and location of the terminal).
At this stage, it is necessary to take care not only of internal communications. We must not forget about: pumping stations; systems of cleaning, conditioning, ventilation; street lighting and outdoor sockets; anti-icing systems for gutters, steps; control and automation systems; backup/autonomous power supply.

When all consumers are known, the total load is calculated by simply summing the capacities. If the allocated energy resources are not enough, it is necessary to review the equipment of the house, to choose more economical appliances. In extreme cases, you can continue to develop the project, and on its basis, ask the electricity supplier for a larger limit.
Based on the terms of reference, you can make a list of the necessary sockets, switches, multi-post frames. We recommend creating a general list by product type, and several smaller lists for each room.
Once again, we note that the terms of reference cannot be drawn up while sitting at the table, more than half of this work is done by the homeowner "in the field" - with a tape measure in his hands, and the whole family over his shoulder.
We make a circuit diagram of the power supply
The circuit diagram is a very important and very complex part of the project, which is developed by specialists from electrical laboratories. This document is fundamental in planning and conducting electrical work, in the preparation of working drawings.
Our task is to create a simplified power supply scheme that will help us see the big picture of the power supply at home. In fact, it can be a visual drawing, a drawing with symbols, which will resemble a tree with a root in the form of a main switchboard and branches ending in separate sockets or lamps. The trunk is a highway, where the branches are disconnected - these will be additional shields or distribution (junction) boxes. Cables that go directly from the shield to the device can be knocked out of the common canvas. You can include circuit breakers and residual current devices in the circuit, then it will look something like this:

If the electrics at home are very complex, then it makes sense to make a power circuit diagram and your own lighting circuit, since they are always bred separately in the house.
If the power supply of the cottage is three-phase, then we make three different schemes. At the same time, in order to achieve a power balance, on the basis of the terms of reference (capacity of consumers), it is necessary to evenly distribute the load on each of the phases - proportionally group devices and units.
Making working drawings
A working drawing is a document according to which an electrician at the facility performs cabling. If the project is more focused on justifying the choice and agreeing on certain technical solutions, then working documents are intended for the implementation of this project. This is a hybrid of technical specifications drawings and a schematic diagram. The working drawing is developed on the basis of the technical design and with strict observance of the requirements of the EMP.
Here you need maximum detail for each room, sometimes they create their own working drawing for a specific wall. Separately, it is necessary to depict a working floor plan, which shows highways and inputs to specific rooms.
What should be indicated in the drawing:
- Output points with reference to walls, floor, ceiling; single and multi-gang sockets; switches, lamps.
- The lines indicate which lighting groups a particular switch key is responsible for.
- Locations of junction boxes and trunk points, group shields.
- Wire paths.
- Mark and section of conductors.
- Connecting a group to a particular phase.
- Arrangement of low-current circuits.


Do not forget to give the exact name of the room or node for which the plan was made.
When making a working drawing, apply color highlighting, mark groups and individual consumers with numbers, make notes and explanations. Network lines are applied to the plan with thicker lines than for drawing building elements and stationary equipment. The number of conductors in one line is indicated by short oblique serif strokes right on it. There is a generally accepted set of symbols, as well as established requirements for numbers and inscriptions used in electrical drawings. They are displayed in GOST 21.614-88.
We determine the methods of laying cables
Depending on the structure of the building and the types of finishes, it is necessary to determine the methods of laying cables. For a private house, there are two main options:
- by gender
- along the ceiling

Wiring in the floor is possible if the screed has not yet been poured. The method has a number of advantages, among which we can note a more economical consumption of cables. Ceiling mounting is possible if suspended structures are used. This wiring option allows for future general construction work to carry out safe drilling of floors, makes it possible to perform installation regardless of the type and condition of the floor. For wooden houses, open wiring is often used in channels or on insulators, including along walls.

To select the route for each line, you must:
- conduct a thorough inspection of the structure and technical condition of the building;
- plan ways to bypass / cross obstacles and technical communications;
- develop ways to move to different rooms/floors/outdoors.
We count the power cable
Now that we have the exact location and specifics of the electrical outlets, the communication routes have been determined, a decision has been made on the laying method, we have a schematic diagram and a working drawing on hand (which means we know where the junction boxes will be and which consumers are powered from them) – we can accurately calculate the required amount of each type of cable.

In a private house, there must be grounding - therefore, it is necessary to use a three-core wire with a soft copper conductor in double insulation. For sockets, wires with a core cross section of 2.5 mm 2 are suitable, 1.5 squares are used for lighting, for powerful consumers (with connection to terminals) and powering intermediate shields (floor, for separate buildings), cables of 4 mm 2 or even by 6 mm 2. Note that the following consumers are traditionally connected directly to the shields, bypassing the boxes:
- engineering units and systems (pumping stations, air conditioners, heated floors, cleaning and anti-icing systems);
- powerful household appliances (oven, hob, boiler, washing machine, dishwasher, electric boilers and heaters).
Using a tape measure, measure the length of each conductor:
- from the shield to the junction box;
- from the shield to the consumer (with direct connection);
- from the box to the power consumer, to the switch, to the lighting device.

You should take into account the supply of wire for output from walls and junction boxes - from 15 to 25 cm, and the supply of wire near the electrical panel - up to 1 meter (with a large number of wires, some of them have to be run into the box from below, and some - from above).
We compile a list of all wires for each room, give the name of the group or device in numbers, designate them in accordance with the markings specified in the working draft. The work seems unnecessary and tedious, but it still has to be done at the stage of preparation and cabling.
Summing up the indicators, we get the need for cable and wire products of various types. The same figures show how much protective corrugation, insulating pipes or cable ducts will need to be bought.
Planning a switchboard
As we have already said, there can be several shields in a private house, this is the main input and distribution device, as well as simplified shields for floors and auxiliary buildings. Each of them is assembled according to approximately the same principle, contains a similar set of elements.

The number of installation products here can be very diverse, but you should always give preference to boxes with several spare "places".
For high-quality arrangement of shields, their design should be carefully worked out. To do this, a special wiring diagram is created for each input-distribution device. The procedure is as follows:
- We make a list of all incoming wires.
- We indicate the load and the maximum current strength for each of them.
- We select for all positions of the list the automatic protection device corresponding to the characteristics.
- For several consumer groups, we select residual current devices, but a fire protection RCD is installed on the entire system.
- We make a working drawing.
- We make a list of necessary protection devices and components.
Examples of electrical panel diagrams:
 1 - introductory machine; 2 - counter; 3 - zero bus; 4 - ground bus; 5-9 - differential automata; 10 - automatic for lighting
 1 - introductory machine; 2 - counter; 3 - fire RCD; 4 - common zero bus; 5, 6, 12 - automata for lighting; 7 - RCD for consumers 2, 3, 4; 8, 9, 10 - machines for consumers 2, 3, 4; 11 - additional zero bus; 13 - differential machine; 14 - RCD for circuits 5, 6, 7; 15, 16, 17 - machines for consumers 5, 6, 7; 18 - additional zero bus; 19 - ground bus (conductors from lighting can also come here)
Attention! Switching of low-voltage networks cannot be carried out in power panels; separate boxes must be used for them.
We plan to install electrical wiring
The main task of this stage is to coordinate the arrangement of power supply with other construction works. The second point is to logically organize the activities of the installer; optimize the supply of materials, the use of special tools and fixtures; properly prepare the workplace.
Electrical work begins at the stage of rough general construction operations, as a rule, in parallel with them. For example, the wiring of cables on the floor is carried out before the installation of screeds, but on the walls that are plastered, it would be more rational to finish the rough finish, cut the strobes - then run the wires and fix the sockets. When sheathing walls and ceilings using frames, the cables are carried out before the installation of the cladding and remain in the cavity, and then holes are cut out for the installation boxes, and the ends are pulled out. Open wiring is made over the finishes. The mechanisms of electrical installation products are mounted after the main painting and facing works; frames of sockets and switches, lighting fixtures are installed after finishing.

Electrical work is the least mechanized in construction, but some points can be optimized. For example, you can order a factory-made complete input-distribution device, carry out a number of preparatory works in advance (marking, cutting and marking cables, pulling conductors into a protective corrugation, making strobes, installing line fastening elements in place, installing installation boxes, stripping and crimp ends). Many of these jobs can be outsourced to less qualified personnel.
In capital construction, measured pieces of wires from one box are switched on a special preparation line, and then they are dragged to the installation boxes (nodal method). The second option is “beam”, when an electrical installation product is connected to the prepared wire (cut off, stripped and crimped) at the stand, and then the cable is pulled to the junction box. In low-rise individual construction, due to the relatively small amount of work, these operations are not subject to industrialization, however, all of them must be carried out in accordance with applicable regulatory documents, such as PUE or SNiP 3.05.06-85 "Electrical devices".

In a private house, manipulations to organize input will be mandatory. The developer has a lot of questions about the arrangement of grounding. We list the stages of installation of the "internal" in chronological order (some operations can be performed simultaneously), for auxiliary buildings and street consumers, the order of their implementation does not change:
- Marking the locations of installation products and the paths of the lines.
- Cutting strobes and niches for installation and distribution boxes, preparing channels.
- Making passages to various rooms.
- Installation of boxes, socket boxes, boxes for ASU.
- Preparing cables for installation.
- Wiring and fixing power wires along their routes, marking conductors.
- Installation of lighting circuits.
- Wiring of low-voltage networks.
- Preparation, switching of conductors in junction boxes.
- Assembly of switchboards, switching.
- System health check.
- Installation of electroadjusting mechanisms.
- The second check, commissioning.
- Installation of facades for sockets and switches.
- Installation and connection of lighting devices, household appliances.
- Connection of various power units, autonomous power supply devices and ATS.
- Connection of low-current consumers (antennas, fire and security sensors, routers and modems, elements of audio systems).
This is how we saw the planning of work on the design and installation of electrical networks of a country house. Of course, we were not able to cover all the nuances, but we hope that you were able to gather some useful information. In subsequent publications, we will continue the "electric" theme.
Installing wiring in a private house is a laborious process, but nevertheless, even a novice electrician can do it! If you are determined to do all the calculation work yourself and have all the necessary tools at hand, or just want to control a working electrician, then we will look at the whole process from A to Z. To make the technology understandable even for beginners (dummies, so to speak), we will consider step by step how to do the wiring in the house with your own hands.
The process consists of several main steps:
- choice of laying method (open, hidden);
- creating a schema;
- marking work;
- choice of constituent elements;
- direct wiring;
- obtaining permission to connect to the local power grid.
Using the example of a new house, consider how to independently conduct electrical wiring.
Selecting the type of electrical installation
The first thing to start with is to decide on the method of mounting the line. Today, open and hidden type wiring is used. it is a fastening of all constituent elements over finished walls (routes are laid in special cable channels).
The advantage is:
- the damaged area can be repaired without any problems (no need to cut the wallpaper, destroy the plastered walls, etc.);
- simpler installation and preparatory work (not needed in the house);
- convenient to add new branching points.
The disadvantages of this installation method are one - very often it does not fit into the overall interior of the rooms, since the cable channels do not have a very attractive appearance.
In places for installing junction boxes, switches and sockets, we make round recesses with a puncher with a crown (we select the depth and diameter of the strobe in accordance with the dimensions of the products). Depending on the type of walls, we choose a diamond or pobedit crown (for concrete) or a crown for wood and drywall.

You can see how to make strobes for electrical wiring in the house in the video below:
Step 2 - Attaching Junction Boxes
Boxes and socket boxes are installed in wells (the so-called round strobes). For their installation, it is recommended to use screws with dowels or a layer of asbestos (about 2 mm). After securely fixing the boxes, we move on.

You can clearly see the process of installing the socket box in the following video:
Step 3 - Installing the cable
The gate is cleaned from the remnants of dust, stones and other foreign objects, primed or spilled with water, after which it is necessary to lay the cable in it. For fixing electrical wiring, it is recommended to use plaster or alabaster. Those who do not want to deal with the solution can fix the wire with dowel clamps.
The tacking step is about 40 cm. We talked about the rest in the corresponding article, which we strongly recommend reading!

Step 4 - Connecting outlets and switches
As soon as the plaster completely hardens (in about a day), it must be carefully rubbed with a grater. After that, you can proceed to the installation of sockets and switches.
Obtaining permission to connect to the local power grid
First you need to pass acceptance tests (technical inspection of the facility where the electrical installation was carried out). If the result turns out to be positive, you will be issued a “Connection Permission Certificate”, on the basis of which the Electricity Owner must connect your residential facility.
The rules for connecting to the network are described in RF PP 861 of December 27, 2004 and its numerous editions (updated until 2015).
The power supply company is obliged to connect to the power grid for objects with a capacity of up to 15 kW, regardless of whether it has such an opportunity. Connection with a dedicated power of up to 15 kW, and a line length of not more than 500 meters costs 550 rubles. For this money you will receive
In the article we will talk about how an electrician is made in a house with our own hands, wiring diagrams will also be considered. If a couple of decades ago, the loads on the electrical networks of cities and even villages were insignificant, but today the picture is the opposite. A lot of high-power household appliances - washing machines, multicookers, split systems and more.
The load on the electrical networks has increased many times over. And if the city has some reserve, then there is no such thing in the wiring of a private house, therefore, an increase in the load leads to the fact that the wires do not withstand and begin to collapse. Therefore, the question is that the electrician in the apartment and the house with their own hands should not only be repaired, but also completely changed.
Previously, they did wiring in houses according to the simplest scheme - a switch and an outlet for each room, but in modern conditions this turns out to be too little - you want to turn on three chargers, and a laptop, and a TV, and so on. To independently make wiring in the house, you need to know certain rules and standards that should be followed during installation. You will also learn how the wiring diagram is made, how to breed it correctly with your own hands and the requirements for it.
Regulations
Building materials and all activities of builders are regulated by certain rules and requirements, they are called GOST and SNiP. The Electrical Installation Rules (hereinafter PUE) also apply to electrical wiring in houses and structures. It is this regulatory document that prescribes all the requirements for electrical equipment, thoroughly indicating what to do with it and how. All electrics in the apartment and house are connected to the voltage with their own hands only after all checks for a short circuit have been carried out.
Requirements for electrical wiring in private houses and apartments

In the event that you decide to independently make electrical wiring in your home, you must carefully study all the requirements for it. But the main attention should be paid to the following points:
- The main components of electrical wiring (distribution boxes, switches, sockets, meters) must be made easily accessible. It is quite simple to install the wiring in the house with your own hands. Electricity, however, is demanding in terms of safety. But all the rules can be easily observed.
- Switches according to the PUE must be performed at a level of 0.6-1.5 meters from the floor surface. And you need to pay attention to the fact that when opening the doors they should not create an obstacle. For example, if the door opens to the right, then the switch must be located on the left. And if the door opens to the left, then the switch is mounted on the right. The cable must be laid to the switch from above.
- Sockets are mounted at a level of 0.5-0.8 meters from the floor surface. The fact is that at this level it is necessary to have it for safety purposes when the house is flooded. Moreover, a distance of at least 0.5 m must be maintained from a gas or electric stove, heating radiators, pipes (and other grounded items). Wires go to all sockets from the bottom up. This is how it is done by hand. Wiring diagrams are given in the article.
- For every 6 sq. m. area of the room should be one outlet. An exception is the kitchen, in which as many sockets are mounted as necessary (based on the number of household appliances located in it). It is forbidden to install sockets in the toilet, but it is allowed in the bathroom, only if there is an isolation through a transformer (220 volts are supplied to the primary winding, the same amount is removed from the secondary). The transformer is installed outside the bathroom.
- Before starting work, you need to make a wiring plan, clearly indicate its location in the walls. Please note that all wires must be either horizontal or vertical - but not diagonally or in a broken line. So the wiring in the house should not be done with your own hands. The wiring diagram of all devices must take this feature into account.
- There must be a certain distance from ceilings, pipes and other obstacles. For example, from the beams you need to maintain a distance of 5-10 cm, from the cornices - the same amount. About 15 cm must be maintained from the ceiling, and 15-20 cm from the floor. If we are talking about vertical surfaces, then there should be at least 10 cm from door and window openings. But between the gas pipe and the wiring, it is necessary to maintain a distance of more than 0.4 m.
- External or hidden wiring should not touch the metal parts of any structures.
- If several wires run in parallel, the distance must be maintained between them over three millimeters. An alternative option is to hide each wire in a protective box or corrugation. So the electrician is mounted in the house with his own hands. Schemes should be designed with this in mind.
- Connecting and distributing wires should be in special junction boxes. All joints must be carefully insulated, and one feature must be taken into account - it is forbidden to connect copper and aluminum wires. If you make wiring from copper wire, then you make it all out of it, there should not be any sections of aluminum.
- Grounding (including zero wires) must be fixed to all devices using bolted connections.
These are the requirements that all electricians ask for. You can draw up wiring diagrams with your own hands only if you take into account all these rules and regulations.
house wiring project

First of all, you need to create a wiring project, it all starts with it. From it will be repelled in the future during the installation. Of course, it will be much better if it is made for you by experienced technicians who have been doing this for more than one year. But if you have experience, go for it.
But keep in mind that your own safety depends on how the project is made. You definitely need to know what symbols are used when drawing up diagrams and projects. It is worth noting that Russian standards are quite different from European or American ones, so you should not use foreign schemes in our country. All the electrics in the house are designed with their own hands (the diagrams are given in the article) at the initial stage.

Draw a plan of a house or apartment, mark on it the places where sockets, switches, chandeliers, etc. will be installed. The number of electrical appliances was mentioned a little lower. At this stage, the main goal is to create a diagram on which all the places for mounting devices will be indicated. The second part is to outline the places for laying wires around the apartment. Of course, you need to know where the household appliances will be.
Wiring
Then make the wiring of all wires. And if creating a scheme with the location of consumers is a simple matter, at this stage of work it is worth dwelling in more detail. Three types of connections and wiring can be used:
- Consistent.
- Parallel.
- Mixed.
The third one is considered the most attractive from the point of view of saving materials.

An electrician is made in the house with his own hands (mixed-type circuits) with the highest possible efficiency. To make your work easier, ungroup:
- Lighting corridors, residential premises, kitchens.
- Bathroom and toilet (lighting).
- Sockets in living rooms, corridors.
- Sockets in the kitchen.
- Electric stove socket (if necessary).
Please note that this is the simplest option for grouping electricity consumers. The fewer groups, the less materials will be used up. The above example is the simplest and most economical. It can be complicated: literally to every outlet, for example, to bring electrical wiring. You begin to realize a little about how to conduct an electrician in a private house with your own hands.

To simplify the laying of electrical wiring, it can be mounted under the floor (for sockets). In the case of overhead lighting, installation in floor slabs can be carried out. Ideal for the "lazy" way - there is no need to ditch the walls and ceiling. Moreover, on the plan diagram, this type of wiring must be marked with dotted lines.
Current consumption calculation
Be sure to take into account the strength of the current that will flow through the network. There is a simple formula for this: current strength is the ratio of the total power of all consumers to voltage (we can say that this is a constant, since the voltage standard in our country is 220 Volts). Let's say you have the following consumers:
- 2000W electric kettle.
- A dozen incandescent lamps, each 60 watts (600 watts in total).
- 1000W microwave oven.
- Refrigerator with a power of 400 W.

The voltage in the network is 220 V, the total power is 2000 + 600 + 1000 + 400, that is, 4000 watts. Dividing this value by the voltage in the network, we get 16.5 A. But if you look at the practical data, then in apartments and houses the maximum current consumption rarely reaches 25 Amperes.
According to this parameter, it is necessary to select all materials for installation. In particular, it depends on the strength of the current Please note that you must always take a margin of 25%. In other words, if you calculated a current consumption of 16 A, you cannot install a fuse with the same tripping current value. It is necessary to choose a standard value greater than the calculated one.
Wire brands for use in homes

Now about how the electrician is mounted in the house. The cable (PUE rules regulate all its parameters) must be selected based on current characteristics. It is desirable that the wiring in the house or apartment be made of the following materials:
- Wire brand VVG-5X6. This wire consists of five cores, each has a cross section of 6 square meters. mm. It is widely used for houses that have a three-phase network to connect the light box to the main one.
- VVG-2X6 has two cores with a cross section of 6 square meters. mm. It is widely used for single-phase power houses to connect the light box and the main one.
- The wire brand VVG-3X2.5 has three cores, each with a cross section of 2.5 square meters. mm. It is used to connect lighting boards with junction boxes. Also from boxes to sockets.
- Brand VVG-3X1.5 has three cores, each with a cross section of 1.5 square meters. mm. It is used to connect switches and lighting lamps.
- The brand is three-core, the cross section of each core is 4 square meters. mm. It is used to connect electric stoves.
Material counts

Now consider what components (including small ones) the electrical wiring in the house consists of. Do-it-yourself project, wiring, installation, is carried out quickly enough. True, you will have to try pretty hard to count the number of wires as accurately as possible. To do this, according to the plan, go through the apartment with a tape measure. After taking measurements, add four meters on top - the stock will not be superfluous.
At the entrance to the house, all the wires from the house are placed to it. It installs automatic switches. Please note that the machines must have a maximum tripping current of 16 or 20 Amps. must be connected via a separate circuit breaker. With a power of up to 7 kW, a 32 A automatic machine is used, with a larger one - by 63 A.
After counting the number of junction boxes and sockets, there is nothing complicated in this matter, this is done according to the scheme drawn up earlier. In the future, you will need various "little things", for example, insulating tape, lugs, tubes, cable channels, boxes, thermal insulation, and others. Now it’s worth talking about what tools do the wiring in the house with your own hands. The scheme is considered in some detail.
Work tools

When carrying out, always follow the safety rules. In order not to get confused, it is better to do it yourself, but if you have a partner, then help should be minimal - give, bring, do not interfere. You will need the following tool:
- Multimeter.
- Perforator.
- Bulgarian.
- Screwdriver.
- Pliers.
- Wire cutters.
- Curly and flat screwdrivers.
- Level.
If you are doing repairs in an old apartment and changing the wiring at the same time, you need to pull out all the cables so that they do not interfere. For this work, a special electrical wiring detection sensor is useful.
Marking the location of the wires
On the wall, put marks along which you will lay the wires. Pay attention to whether the position of the wires complies with the rules. After the places for the passage of electrical cables have been marked, sockets, boxes, shields and switches can be marked. Please note that in new apartments there is a niche for installing a shield. And in old houses, shields are simply attached to the wall.
Wall chasing

First of all, install a special nozzle on the puncher and drill holes for installing junction boxes, switches and sockets. To lay wires, it is necessary to make grooves in the walls - strobes. They are made using a grinder or a perforator. Whichever method you choose, dirt and dust will suffice. The groove should have a depth of 2 cm. As for the width, it should be enough to lay all the wires. As you understand, do-it-yourself wiring is a simple matter, it is more difficult to make installation from a physical point of view.
Separate story with the ceiling. If you plan to make a hinged one, then simply install all the wires on the floor. This is the easiest way. A little more difficult is to make a shallow strobe. And one more - to hide in the ceiling. For example, in panel houses, such ceilings are used in which there are internal voids. Therefore, two holes are enough to lay the wires. And the last thing is punching holes in the corners of the rooms to bring the wires to the central shield. After proceeding to closed (you will have to ditch the walls) or open methods.
Conclusion

The most important thing in the installation of electrical wiring in houses and apartments is to adhere to all the rules and regulations in accordance with GOST, SNiP, PUE. So you can not only achieve maximum efficiency from electrical wiring, but also reliability, durability, and most importantly - safety. And try to use only high-quality materials during installation. For example, it is desirable to use copper wires - they have a much longer service life (better conductivity, they heat up less).


