Today we will tell you which insulation is best for the ceiling in a brick house. Although, in principle, it does not play a special role what material the house is built from. Our advice will also be useful to those who have a house made of other materials.
What is the best way to insulate the ceiling of a brick house: from the outside or from the inside?
At all, It is best to insulate the ceiling from above, from the attic side. This is both more economical and simpler, since you do not need to spend money on external finishing.
Although, in principle, it is still necessary somehow, and if you asked this question at the construction stage, then you can choose both options.
But if you decide to insulate it later, when the ceiling is already ready, then it’s better to focus on insulating the attic.
The material you choose should match the thickness of the walls.
For example, the same clay or a 20 cm layer of earth is an excellent insulator and you can walk on it, but not every wall can withstand such weight. It seems, at first glance, that the layer is small, but in reality, it will weigh a couple of tons, no less!
Therefore, for brickwork, one and a half bricks thick, This option is definitely not suitable, since the walls will begin to shrink and cracks will form on them over time. So, let's look at the best way to insulate an attic in a brick house, so that later you don't have to reinforce the walls with reinforcement and don't have unnecessary problems.
What materials are suitable for external insulation?

For an attic, the ideal material would be one that you can walk on without resorting to additional flooring.
So, what material does not require additional paving with boards?
This is expanded clay, filled with a thin screed on top. There are no other options.
But in order to fill the floor, there are many options:
- Sawdust
- Straw
- Reed slabs
- Kostra (flax waste)
- Seaweed blocks
There are also synthetic materials:
- Styrofoam
- Foam granules
- Mineral wool
- Extruded polystyrene foam
As you can see, there is a wide choice. In the next block we will look in detail at the pros and cons of these materials, and you will already have a rough idea of what is what and what to give preference to.
Please note that any of the methods described below are quite suitable for doing it yourself. There are absolutely no difficulties in technology.
Pros and cons of materials for ceiling insulation from above
Expanded clay

As we already wrote above, this material does not need to be covered with anything on top. It will be enough to simply fill the expanded clay in a layer of about 2-3 centimeters, and make a small screed on top, with an exceptionally thick solution, so as not to fill the air gap between the granules.
It must be poured between the joists, having previously coated the base of the floor with clay mortar, a layer of 3-4 centimeters. You can, of course, put in sheets of craft paper, but don’t forget about mice: clay is more “inedible” for them and they won’t be able to damage it quickly.
Expanded clay is a good and light material. It retains heat thanks to its porous structure, as well as the air between the granules themselves. And such material is relatively inexpensive.
The only problem the fact that it is now very difficult to find high-quality expanded clay that will not crumble over time into ordinary sand-clay chips. Choose it carefully and look at the composition. The one that is more durable is a little more expensive, but worth it.
Still, an attic is an attic and it will be damp there, which means that the expanded clay will gradually deteriorate. But do you need the insulation to be durable? Therefore, do not skimp on this moment, it will reward you later.
Here is a good thematic video that talks in more detail about the use of expanded clay as insulation in a private home. Be sure to check it out.
Sawdust
It makes sense to fill up with sawdust only when you can get it for free. By the way, this is not at all difficult to organize by agreeing with some nearby sawmill.

They should be filled with a layer of 15-20 cm, also between the logs, having previously coated the base of the floor with a clay mixture.
Also, we highly recommend you treat sawdust with special mixtures, which will repel mice. In addition, there are mixtures that make wood fireproof. And, in general, it is better to cover the place that will be near the chimney pipe (on top of sawdust and flooring) with sheets of iron, in order to prevent fire from an accidental spark.
Anything can happen, sometimes there are even cracks in the pipe, and a stray ember may well fly out of them. And the sawdust will quickly blaze, no matter how you soak it...
Therefore, if you have decided to insulate this way, then do not forget about the boardwalk on top. But here it is very important to make the floor not continuous, but with gaps, otherwise the sawdust will become damp and begin to rot. Be sure to leave gaps, and plenty of them, for the material to “breathe.”
And so, sawdust is a warm and environmentally friendly option. Pretty good.
Sawdust can also be mixed with thin cement mortar. Then they will not exactly light up, but the thermal conductivity will also decrease significantly, since the material will already be deprived of air.
Straw

Straw can also be obtained for free, if desired. If it is not available just like that, then there is no reason for such a technique. It’s better to buy expanded clay and make insulation “forever.”
And, if there is free straw, then it is laid in the same way as sawdust. Be sure to put it on the clay layer, be sure to soak it in an anti-fire and “anti-mouse” solution and, of course, be sure to cover it with something on top.
In general, even if we assume that the most inexpensive boards will be used for flooring, then all the same, the amount will be significant. Wood is an expensive material... Therefore, no matter how much you save on filler, you will still have to fork out for all sorts of impregnations and the floor on top.
No, of course, you don’t have to cover the straw with anything, but mice will quickly render it unusable... And walking on straw if you climb into the attic is not so pleasant. On the other hand: why do you need to walk around there? If you don’t have a warehouse of unnecessary things there, then you don’t have to make any “platforms” out of wood. Or, if it is done, then in the form of a lattice, and not a solid coating.
Reed slabs

They are not cheap. But it is environmentally friendly... There are no other advantages to this technology, really. True, these slabs are quite hard and it is quite possible to walk on them.
You can use not slabs, but cuts from ordinary reeds, which you make yourself. The installation technology is identical to all the others described above. A clay base, impregnation and, preferably, filling with liquid cement are required.
Kostra (flax waste)
And here everything is the same. There is simply nothing to add. If you have such materials nearby for free, insulate them! In terms of operational characteristics, flax waste is no different from other natural materials.
Mineral wool

But here, obviously, you can’t do without a boardwalk on top. In general, mineral wool is not a cheap pleasure, but it serves faithfully for decades. Mice don’t “like” it, it is environmentally friendly and very light.
It can also be placed between the lags, but in addition to this, it is advisable to put a film or vapor barrier on top to protect the material from dampness.
There is no need to impregnate this cotton wool with anything; it is already impregnated with everything possible. Not a bad option, but expensive.
Glass wool

But this method is cheaper than insulation with mineral wool, but in terms of operating properties and characteristics, the result is the same.
What’s most pleasing about this is that mice won’t be able to get into such an attic. But laying glass wool is quite unpleasant. You definitely need to wear a special mask and goggles, since this material can penetrate the respiratory tract very easily, and this is another pleasure.
But, if you do not neglect safety precautions, you will get an excellent result: inexpensive, also completely environmentally friendly, durable, no load on the brick walls...
Styrofoam

But mice respect polystyrene foam so much! They are able to gnaw even the walls of a house that are decorated with this material, and there’s no need to talk about the attic! There they will simply reign, constantly spoil it and rustle it mercilessly.
Although, you can, of course, spread the poison in time and prevent invasions. But it doesn’t change from year to year, and today you can do this, but tomorrow, let’s say, you leave and leave the house unattended. And then the mice run wild...
But, on the other hand, it’s not really a pity. Polystyrene foam is an inexpensive material and can always be replaced with a new one.
Foam granules

You can make the ceiling even warmer if you do not decorate it with ready-made sheets, but pour polystyrene foam in bulk, in a layer of 25-30 centimeters.
By the way, in this case the mice will have less peace of mind, since it is simply impossible to build a hole in such bulk material.
You can simply pour granules, or you can fill them with a small screed on top, literally 1-2 cm deep. But you still need boards on top, since you can’t step on a floor made of foam granules, it will fall through.
Expanded polystyrene

This is an option for the ages! Polystyrene is a great option. Very durable, strong, holds heat well, and is absolutely not afraid of fire. For example, compared to mineral wool, it retains heat 40% better.
True, it is very expensive, so not everyone can afford it. But, if this is acceptable for you, then don’t hesitate to choose this thermal insulation material, you definitely won’t regret it.
By the way, here are some reviews from the Internet (forums) about some insulation materials.
How to insulate the ceiling from the inside?

If for some reason you cannot insulate the ceiling from above, then you need to cover it with something from the inside.
For these purposes, the most ideal option is, again, slabs expanded polystyrene. To lay them, you need to make a lattice from profiles, stick sheets into the cells, and cover everything on top with sheets of plasterboard. Well, putty on top, of course.
Using the same technology, you can use mineral wool or regular foam.
We told you about all the insulation options that are considered more acceptable. And that means you already have an idea of what is best to choose. But you can read separately how to attach all this correctly, since these are topics for separate reviews.
Brick is a universal and affordable building material, and it is very popular in the construction of both multi-storey residential buildings and private country houses. There are a variety of types, designed for the construction of houses in different climatic conditions. However, with all its advantages, it is not able to completely solve the problem of thermal insulation.
Therefore, a brick house needs high-quality insulation.
Features of a brick building
Many factors are important to resolve this issue.
Brick parameters - hollow, solid, silicate, clay - each type of product is characterized by a certain thermal conductivity indicator. The lower it is, the less thick the insulation layer will be required.
The nature of the masonry is that solid masonry does not have high thermal insulation properties, but, for example, well masonry, with an air pocket between two walls, is itself a good heat insulator, and also allows the use of intra-wall insulation.
Climatic conditions - it is obvious that a brick house built in northern latitudes needs more serious insulation than a building located on the shore of a warm sea. However, this work is necessary in all cases, and both the walls and the ceiling of the building should be insulated.
Insulation materials
The most common materials are the following.
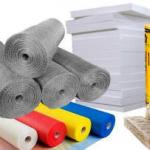
Mineral wool - has high heat and sound insulation properties, does not support combustion at all, is resistant to fungi and is very affordable. The disadvantages include low moisture resistance - it absorbs moisture and loses its properties.

Fiberglass is used less frequently, since despite its high moisture resistance, it is fragile and crumbles during installation and operation. And glass chips greatly irritate the mucous membranes and respiratory tract.

Expanded polystyrene - regular and extruded. Thermal insulation properties are even higher than those of mineral fiber, and moisture resistance is excellent. However, the material belongs to the flammable group, its cost is higher.

Expanded clay is an excellent way to insulate a brick house, and is very affordable, but it is a bulk material, and therefore its use is limited.

How to insulate a ceiling
When choosing the appropriate material, the main issues are the presence or absence of an attic and the parameters of the heat insulator. The nature of the future ceiling is also important - suspended, suspended, made of plasterboard and the like.
External insulation - used in private brick houses with an attic. In this case, thermal insulation can be done from the floor of the attic and thereby maintain the height of the living rooms. As a rule, this method of insulating a building is cheaper, since it allows the use of bulk materials, the cost of which is much lower. Installation is also much easier, since all work is carried out on the floor.

The principle of operation is simple: if the ceiling is concrete, then wooden logs are laid on it, if the base ceiling is beamed, then the space between the beams can be used. The first layer is a waterproofing material - glassine, isolon or even roofing felt, and then insulation - polystyrene foam, penoplex, mineral wool - is placed very tightly between the joists. Then a plank floor is laid on top. Expanded clay or even clay with sawdust can be used as a heat insulator. The photo shows loose insulation in the attic.
Internal - if there is no attic, the ceiling should be insulated from the inside. The surface is glued with glassine, and slabs of mineral wool or penoplex are fixed on top. The plates are installed in a spacer, the foam is glued, and the mineral wool is fixed with dowels. It is recommended to lay another layer of vapor barrier. and then decide how to make a finishing ceiling surface.
If the base floor is beam-based, then the heat insulator is placed between the beams; if it is concrete, it is necessary to make a sheathing. The material of the latter depends on the nature of the finishing coating: for wooden lining, plywood, OSB boards, it is recommended to construct a wooden sheathing. For plastic finishing or plasterboard structures - metal.
How to finish a ceiling in a brick house
Unlike the requirements for heat insulators, there are no restrictions on facing materials for a brick house. Therefore, the choice depends on the personal preferences of the owner, interior requirements and financial capabilities.
Plastering and painting - implemented in the case of concrete floors and external insulation. This is a simple and accessible way to decorate the ceiling.

Ceiling slabs - can be fixed directly to the ceiling surface if it is made of concrete. With a beam ceiling, it is better to use slab cladding for internal insulation.
Suspended systems are used regardless of the nature of the floors and insulation. Of course, preference is given to plasterboard options, since this is a lighter structure and can be finished in a very varied way. It should be taken into account that cassette systems with mirror or glass slabs have a very large mass, and, for example, it is impossible to install them on a beam floor.

A suspended ceiling in a brick house is also a very welcome guest. Firstly, the canvas is fixed to the walls and does not depend on the condition of the base floor. Secondly, installing it is much easier than hanging one. The photo shows a stretch ceiling option.
A ceiling is a horizontal load-bearing structure that divides a building vertically. Its upper surface, as a rule, is the floor of the overlying floor, and the lower side is the ceiling of the underlying one. This article selects ceilings for a one-story house.
Conventionally, floors are divided into:
- Attics separating the attic and the floor;
- Attic, separating the attic from the floor;
- Interfloor, separating adjacent floors;
- Basement, separating the first floor from the basement.
Requirements for floor structures
Since these structural elements are one of the most critical components of the entire building, there are a number of requirements for them, the fulfillment of which is mandatory:
- Load-bearing capacity must meet operational loads;
- The structure must have the necessary rigidity and minimal deflection;
- Availability of sound and heat insulation characteristics, in accordance with current building codes;
- The fire resistance of the ceiling must correspond to the class of the building.

Choosing the type of floor for a one-story house
The type of floor depends on its location in the structural scheme and the type of building. For a one-story house with floors on the ground, only attic floors are made. If there is a basement or attic in such a building, interfloor ceilings are made that carry a large load.
Often, when constructing one-story country houses, a system of wooden beams and flooring is used to cover the attic and basement spans. In more permanent structures, as a rule, floors for a one-story house are made of monolithic or precast reinforced concrete.

Each type of floor is suitable for a certain type of structure. Wooden structures are the most inexpensive and least labor-intensive. They can be used for any type of vertical separation exclusively in wooden houses and small cottages.
Monolithic reinforced concrete can be used in almost all buildings, except wooden ones. Such floors are stronger, fire-resistant and durable than wooden structures. But they are also more expensive. Their installation requires significantly more labor. In one-story houses, this technology is used to install basement and attic floors.

The easiest to implement, but also the most expensive type of flooring is prefabricated reinforced concrete slabs. In addition, they cannot be used in wooden buildings and buildings with a load-bearing structure thickness of less than 200 mm. They are used in one-story construction mainly for basement and attic floors.
The improvement of private houses makes it possible to implement a non-standard approach and create a ceiling so that it complements and emphasizes the style of the premises and landscape created by the owners. What is possible for private properties is impossible for apartments. Therefore, the modern owner always has a desire to move away from standard solutions.
Options for installing a ceiling in a private house
- rough ceiling;
- vapor barrier;
- waterproofing;
- insulation (often also a sound insulator);
- finished ceiling.


Regardless of the type of floor, wooden or concrete, the ceiling is installed using the same methods. The only difference is the method of joining the materials. In the case of a concrete slab, pre-drilling holes and installing dowels are necessary. With a wooden floor, everything is much simpler: self-tapping screws and a screwdriver, nails and a hammer are used for fastening.
There are three options for installing a ceiling in a private house:
- hemmed;
- grazing;
- panel.

When choosing an installation option, you need to decide whether the ceiling will be additionally sheathed with finishing materials, or those that are guaranteed to provide the room with aesthetic appeal will be immediately used. In the second case, we are talking about wood: boards, beams, slats. It can highlight the special flavor of a private home and is suitable for any type of floor.

Choosing wood
When choosing wood, you should not focus on its strength. Oak boards are good for flooring. Inexpensive conifers with a beautiful texture are optimal for the ceiling. Others are also suitable: birch, poplar, maple, ash. It is important to pay attention to the type and class of wood.
- Class "A" or selected grade. The material is without visible flaws, the surface is smooth and even, a small number of knots is acceptable;
- Class "B" or 1st grade. Wood of this class has small but visually noticeable defects: knots, cracks, gouges;
- Class "C" or 2nd grade. The surface is rough, there are knots with a diameter of up to 2 cm, cracks up to 1/3 of the length of the lumber are acceptable;
- Class "D" or 3rd grade. Wood of this class is of low quality and is not considered as a material for ceiling construction in a private home.


If there is a need to save money, you can do the following: purchase wood of a lower grade (but not lower than 2nd grade), apply several layers of an antiseptic solution to it, and cover it with a tinting compound. This approach will increase the service life of the wood, emphasize its texture and partially hide imperfections. The type and quantity of lumber (boards, timber) is chosen depending on which ceiling installation option will be used.
| Type of wood | Tensile strength, MPa | Compressive strength limits, MPa | Average density, (kg/m3) |
|---|---|---|---|
| Spruce | 125 | 44 | 550 |
| Larch | 120 | 62 | 660 |
| Pine | 110 | 48 | 500 |
| Birch | 125 | 55 | 630 |
| Beech | 130 | 56 | 670 |
| Oak | 130 | 68 | 700 |
| Aspen | 120 | 42 | 480 |
false ceiling easier and faster to do than floor and panel ones. Devices of this design will require boards and timber. The latter will act as beams to which the finished finishing ceiling will be attached. The wider the boards, the more brutal the ceiling will look. Knots and natural protrusions of wood will give the room a special “rustic” flavor.

For an economical option for hemming, an edged board 25-30 cm wide is suitable. Such lumber will not sag even if the step between the beams is more than 2 m. Any wood tends to accumulate moisture, which inevitably increases the weight of the hemming. This is taken into account when choosing lumber and do not buy boards thicker than 4 cm.

The section of the beam is chosen depending on what is located above the ceiling: an attic, a residential attic or a room.
The decisive factor is the need for insulation. If there is an unheated attic space above the ceiling, for regions with cold winters a layer of insulation of at least 20 cm is required. For southern regions, 10 cm is sufficient.

Mineral wool or polystyrene foam is traditionally chosen as a heat insulator. Bulk materials are not suitable for installing a ceiling from inside a living space. Expanded clay, sawdust, and foam granules can only be used if the floor insulation is done from the attic side. But the technology for installing a false ceiling does not provide for such actions.

Instead of boards, you can use moisture-resistant plywood or OSB boards. However, such a ceiling will be more expensive, since it will require the purchase of finishing materials.


Rules for installing a suspended ceiling
- Beams can be an integral element of a wooden upper floor or installed on an already formed surface. In the second case, the timber is fastened using metal corners, studs and staples.


- The optimal pitch between beams is 2 m.

- The boards are alternately attached to the timber using long nails or wood screws.
- The fasteners are installed “in space”: at an angle of 45° to the edge of the board.


- The insulation is placed in the openings between the beams on the laid vapor barrier layer.
- After laying the insulation, stretch the vapor barrier membrane and secure it with staples and a construction stapler.


The gap between the insulation and waterproofing will improve the characteristics of the insulation pie
- If there is an attic above the top floor, it is recommended to use a vapor barrier with a foil layer: Penofol, Armofol, Alucraft. These materials provide the effect of reflecting heat and returning it back to the living space.
If the boards are laid on top of the floor beams, the timber will remain visible. This is a spectacular, often used technique for decorating a ceiling in a private home. In such a room there is a special flavor of a solid and stylish structure. This design is fully consistent with rustic, hunting or Scandinavian styles.


Installation of a flat ceiling
Flat ceilings are suitable for landscaping small rooms. The reason is in the design features, the load-bearing elements of which are attached not to the upper ceiling, but to the walls of the room. Since a supporting frame is not provided, there are restrictions on the distance between the supporting beams of no more than 2.5 m. Therefore, flat ceilings are the best choice for the improvement of bathhouses, utility rooms, and small-sized living rooms.


“Pie” of the floor ceiling (from top to bottom):
- Rough ceiling.
- Thermal insulator (mineral wool or polystyrene foam).
- Foil vapor barrier.
- Clean ceiling.
An important point: if two-layer polypropylene vapor barrier membranes such as “Izospan B” or “Ondutis” are used, these films are laid before laying the heat insulator. When installing a vapor barrier, pay attention to which side to lay it on. The front side is always indicated on the membranes. It can also be distinguished by the fact that it is smoother.

Which side should the Izospan be attached to?
Floor ceiling installation technology
First of all, load-bearing structural elements are installed: beams. Since they bear the main load, lumber is carefully selected. As beams, you can use boards with a thickness of at least 5 cm or timber with a section of 10/10 cm, 10/5 cm, 10/15 cm. Metal corners will be required for fastening to the walls. In addition to the above, you will need the following materials:
- vapor barrier (for small rooms, paper-based aluminum foil, kraft paper, and drying oil-impregnated cardboard are suitable);
- mounting tape, which will be used to glue the joints of the vapor barrier panels;
- heat insulator: fibrous materials (Ursa, Rockwool, Knauf, Izover, Uteplit, Ecowool, etc.) or polystyrene foam;
- slats;
- nails, screws.
Stages of work on installing a flat ceiling
- Determine the height of the finished ceiling and mark the attachment points of the timber on the walls of the room.
- The beams are installed at the required height. For fastening, staples or corners are used.


- At the next stage, two options for installing the ceiling are possible: with the installation of unedged boards along the lines of the beams, or without installing this lumber. If the upper floor requires reinforcement, then installation of intermediate boards is necessary.


- Vapor barrier and insulation are installed.


Insulation of the floor using a vapor barrier layer
- The lining boards are hemmed, which subsequently form the finished ceiling. There must be a ventilation gap of at least 1 cm between the sheathing and the insulation.
Instead of boards, when installing a floor ceiling, wooden lining is often used. This way you get a beautiful modern finish to the room.
Video - Floor ceiling made of unedged boards
Installation of a panel ceiling in a private house
Panel ceiling is a universal design that is suitable for landscaping any type of premises. The name “panel” does not imply the installation of plastic or other panels, but the installation of pre-assembled boards from boards. Placed next to each other, they form the base of the finished ceiling. Such structures also have a second name: “panelboard”.
Before starting work, lumber is prepared. Each beam and board is inspected for rot, treated with an antiseptic and dried well. If there are cracks, they are covered with wood putty.
Panel ceilings are often rough and need to be finished. There is one requirement for such structures: the surface of the boards on the room side must be flat. Panels are assembled in any convenient place, but most often on floor beams during the construction of a house.

With this type of ceiling arrangement, rectangular beams are used as floor beams, to the underside of which cranial bars with a cross section of 4/4 cm or 4/5 cm are nailed. The thickness of the board should correspond to the size of one of the sides of the bar. Each panel is a row of boards, the length of which is equal to the distance between the cranial bars. At the top of the shield, thinner bars are nailed perpendicular to the direction of the boards. The bottom of the panel remains flat and smooth.
Each shield is placed in the openings between the beams so that it is supported by cranial bars. When viewed from above, such a ceiling consists of a series of cells, the recesses of which are filled with thermal insulation material. This can be expanded clay, mineral wool, polystyrene foam, sawdust.
Before laying the heat insulator, all the resulting “boxes” are covered with vapor barrier material so that the floor beams are also covered. In this case, the film sheets (membranes) are laid with an overlap of 10-15 cm.
If the ceiling is interfloor, boards are sewn on top of the beams to form a subfloor. If the ceiling is of the attic type, a backfill heat insulator is most often used and can be left open. The thickness of the backfill depends on how severe the climatic conditions of the region of residence are. Panel ceilings are built not only in private homes, but also in bathhouses, utility rooms, and country houses.
Video - How and with what to insulate a ceiling in a private house
Video - Ceiling installation in a private house
In private construction, situations quite often arise in which it is impossible or not entirely convenient to use reinforced concrete floors. Such cases include installation of ceilings on a frame-panel or wooden house.
Wooden floors are used quite often, even if ordinary building bricks are used as the wall material.

In general terms, a wooden floor consists of bars, inter-beam filling, rolling, and a finishing layer. A wooden floor is much lighter than concrete slabs or monolithic pouring; it can be done with your own hands and does not create a significant load on the foundation and walls.

Types of wooden floors
Quite often, developers build houses with an attic or a basement, houses with several floors. All rooms of the house must be separated from the main living area by a ceiling.
According to its purpose, wooden floors in a brick house are divided into the following types:
- basement or basement. It serves to separate the residential floor from the basement. The main requirement for it is good thermal protection;
- attic, which serves to separate the residential floor from the attic. It should also retain heat and not be affected by condensation. Therefore, when installing thermal insulation for the attic floor, a vapor barrier layer must be used;
- interfloor, which serves to separate residential floors. The main requirement for it is good sound insulation.


Selection of beams for flooring
There are several types of wooden beams:
- from solid timber;

- knocked down from boards;

- from round wood.

Beams made of timber
This building material is used most often; the main advantage is its affordable price and environmental friendliness. The main disadvantage is the fact that most often the timber is made from the core of the tree, which is inferior in density to the outer layers. Because of this, the timber may sag, which is extremely undesirable.

A separate type of timber is laminated veneer lumber. In terms of its load capacity, it is significantly superior to a solid one. The production of such timber is possible according to individual sizes, which can significantly save time on its fitting and installation.

Beams made from boards


Round timber beams

Note! A high-quality wooden floor should be made of dry coniferous wood. Only in this case will you have complete confidence that the ceiling will not be susceptible to rotting if installed and used correctly.

You can find out the cross-section of the beam and the required interaxle distance from the table:
|
Beam dimensions, mm |
Span length |
|||||||
|
Beams for basement and interfloor ceilings |
||||||||
| 140*180 | ||||||||
| 150*200 | ||||||||
| 160*220 | ||||||||
| 50*160 | ||||||||
| 50*200 | ||||||||
| 80*180 | ||||||||
|
Beams for attic floors |
||||||||
| Beams Distance between beam centers | ||||||||
| 140*180 | ||||||||
| 150*200 | ||||||||
| 160*220 | ||||||||
| Boards Distance between beam centers | ||||||||
| 50*160 | ||||||||
| 50*200 | ||||||||
| 80*180 | ||||||||
The procedure for installing floors
Instructions for proper installation are as follows:
- When constructing the external walls of a house, special niches with a depth of 150-200 mm are left in them. Very often, double silicate brick m 150 is chosen as a modern material for walls, which is convenient to work with;

- prepare the beams for laying in niches, treat the ends with bitumen mastic or wrap them in several layers of roofing material;

- the ends of the beams are not treated, this is necessary to remove moisture from the wood;
- if necessary, treat them with a fire-resistant agent and an antiseptic;
- lay the beams in the niches. It should be borne in mind that the supporting part must be 120-180 mm long to ensure a gap between the beam and the wall of 20-30 mm;


- every 3-4 beams are secured from below or to the side with anchors;

- fill the niche with insulation;

- bars 50 by 50 mm or 40 by 40 mm are sewn to the side of the supporting beams;

- wooden panels or light concrete panels are attached to these bars;
- the space below is covered with boards, panels or sheets of plasterboard;
- A layer of insulation is laid on top of the wooden panels. In attics, a clay-sand layer is often used, then a layer of dry sand or slag.

Note! The thickness of the layer of any material for interfloor coverings should be at least 100 mm, and for attic and basement floors it should be about 200-250 mm.
- punch the logs across, at a distance of 50-70 cm;
- planed boards are secured to the joists;
- sometimes, instead of wooden logs and boards, a reinforcing mesh is fixed and a concrete screed is made;
- perform final finishing of the floor and ceiling.

