If there is no possibility of connecting to a centralized water supply on the site, the only way out is to dig a well yourself. Not everyone knows how to dig a well on their own to provide access to drinking water. With proper organization of work and choice of location, you will get a reliable source of spring water. If you follow the basic rules and understand the essence of the process, digging a well with your own hands is quite simple.
What is important to know about digging wells
The drinking water that is expected when constructing a well should be clean and tasty, but this does not always work out that way. The well is made according to all the rules, but the water in it sometimes comes out hard, with a foreign odor or a bitter aftertaste. To ensure that your efforts are not in vain, it is important to know how and where to dig a well for an influx of crystal clear water. Groundwater lies at different levels, and accordingly, the water in them is also different.

Since ancient times, well builders in arid regions have been especially revered by many peoples. It was customary to thank the sky and bless their descendants for their work, collecting water every time. And those who filled up, poisoned or filled up wells with stones were cursed by people until the 7th generation. Nowadays, few people remember the unknown hard workers with kind words, but their careful attitude towards water sources has been preserved to this day.
Today, in private households, many also decide how to find - where to dig a well? In most cases, they try to dig a well as close to the building as possible, but this can negatively affect the foundation of a house or cottage. The optimal distance is about 5-6 meters.
Carrying water far in buckets is also impractical, but there are options for supplying water under pressure or using pumps. In this case, it is easy to organize the water supply to the house. But it is important to think about the drainage of slops so that the water supply and sewage drainage are in different places on the site.
They dig a well themselves, subject to all safety regulations, or entrust this to specialists with equipment. In an area with a low level of groundwater, excavation from a well is carried out by several workers using simple tools or equipment. A good example is a do-it-yourself well video at the end of the article.
Pay attention to your neighbors - are there enough shallow wells in your area? If the water in them tastes great, you can do this on your own site. But it happens that within 2-3 km, water from wells tastes different.
Aquifers lie at different levels, so in some places there are wells up to 25 - 30 m deep. In this case, do not think about how many meters to dig a well - it is advisable to drill an artesian well. It is easiest to work on sandy soil, clay is more difficult to dig, stones are most difficult to remove and winch up. Sometimes the layer of stones is so large, and the rocks are so hard and intractable to extract, that you have to abandon the solution to the question of how to make a well with your own hands.
The easiest way is to start with mechanized excavation with a bucket. Next, manually go deeper until water appears and level the walls for laying concrete rings. However, it is not possible to fit the equipment to all places where they plan to dig a well on the site.
All work can be performed by 2-3 people - with a shovel, crowbar and soil bucket on a winch. But the more people can replace each other when digging a well, the faster and easier it is to complete the main stages of the work. The soil is first broken up with a crowbar or a pick, dug with a shovel and removed with a bucket, which is lifted with various devices.

How to determine the optimal location for a well
It happens that none of the neighbors have wells on their property - it’s worth inquiring about the reason so as not to waste your efforts in vain. The complexity of arranging a source of drinking water depends on many factors, including:
- terrain;
- climatic conditions;
- type of soils and underlying layers;
- hydrogeological conditions;
- inadequate water quality (dirty, cloudy, with a strange taste or tint).
Attention: Do not drink putrefactive and contaminated water (overwater), which can enter the well from swampy areas, nearby cattle burial grounds, cemeteries, chemical waste disposal sites, landfills, car washes, wastewater tanks or sewers. You should not dig a well near a farm or pigsty, especially at the bottom of a noticeable slope. Remember that wells are always dug above the source of pollution.

Golden rule: The well must be at least 30 - 35 m from the toilet cesspool, garbage can, manure heaps, garbage pit or septic tank. Do not place a well next to a sauna or bathhouse and a car wash.
Those who develop uninhabited lands have to drill a special exploration well for preliminary exploration of the aquifer. Although this is a labor-intensive and expensive method, it is the most reliable and accurate.
It is most difficult to dig wells in rocky mountainous areas - it is difficult to determine the level of the aquifer. On the way to it, you may come across large boulders that are difficult to remove and lift out even with a reliable winch. If your neighbors have wells, you can ask them:
- depth of groundwater in the area;
- optimal time for excavation;
- characteristics of local breeds.
To determine where to dig a well and how to determine the groundwater level, they use not only geological exploration, but also other methods. Some look for water using rotating frames, others “call on the spirits,” but it is much easier to trust the instruments. A sensitive barometer detects differences in humidity and atmospheric pressure. In hot weather, the meteorological method shows places with wet soil - water from the nearby layer forms a kind of fog or dew on the ground.
They detect proximity to the surface of groundwater when using exploration by drilling or when properly assessing the relief. In this case, the ratio of lowlands, depressions and hollows that raise groundwater is important. Sorcerers have used this method for a long time to find a good place for a new settlement - with enough drinking water.
Wells are sometimes made on mountain slopes or on the banks of a river. Getting to a source of drinking water on a steep slope is difficult; you need to build reliable steps to raise the water at any time of the year! But this method is used in the mountains and forests, where there is no other way to equip a well. There are many flat areas where wells can be dug almost everywhere, but the depth will vary.
Attention: Unsuitable places for digging wells are slopes of beams, ravines, river banks, gutters and other places where groundwater drains naturally or artificially.

When is the best time to dig a reservoir for a well?
When discussing the question of what time to dig a well, not everyone agrees. It is clear that it is inconvenient to dig through frozen ground, but water does not come from below. During heavy rains and the possibility of landslides, digging the ground is also not advisable - the excavated soil can slide back into the hole with a stream of mud. It is also undesirable to dig wells during floods and spring snow melting, when the ground below is still frozen and the top layer is oversaturated with moisture.
In frozen soil, there is a high probability of missing the depth of the well. But it is at the end of winter that the aquifer is at its lowest level. Experts confirm when it is better to dig a well - in some regions only at the end of winter and before the beginning of autumn there is such an opportunity. Here is a do-it-yourself well diagram:
Types of groundwater:
- untreated perched water is closest to the surface of the earth; it should not fall into the well shaft, otherwise the water will be cloudy, hard and with a taste;
- groundwater, the subject of the search, is shallow and under pressure, often forming springs that can be purified and used instead of a well;
- artesian - lies a deeper layer, more like crystal clear mineral water, comes from a well under high pressure, sometimes like a fountain.
Types of wells
Wells come in different types, taking into account their purpose, method of construction and types of external structure:
- drilling;
- key or spring;
- mine (straight round depression);
- tubular (column, with water carried out).
Each has its own advantages, but installing a pipe well at your dacha with your own hands is more difficult than a regular mine well. The traditional type of well is easier to dig yourself, easier to adjust the depth and width as work progresses, and to arrange the walls and bottom. It is easier to work in a well shaft with a shovel, crowbar or pickaxe - these are the ones that explain the usual dimensions of wells familiar from childhood.
It is most convenient to make a column or tubular type of well in those places where a small-diameter aquifer lies nearby. Usually a pump and a simple water pipeline are used for this. Labor and financial investments in their construction are approximately the same. But you need to have certain hydraulic engineering knowledge so that water from the pump flows into the house directly from the well.
Based on their filling capacity, mine-type wells are divided into:
- deep and shallow;
- full and incomplete (water level fluctuates depending on the season).
Full wells are also equipped with an additional reservoir - a sump, which is designed to ensure that the mine is filled during drought to maintain balance in the flow and use of water.

There are also indoor and open wells - like a purified spring, which can be found in the forest. In the Carpathians, for example, it is customary to regularly clean the spring, put up signs, equip it with a hanging mug or jug for scooping and a bench for rest.
The shaft of a shaft well is reinforced in different ways - with masonry (as in ancient times), concrete rings or a monolithic concrete circle. There are examples lined inside with logs of rotting wood or with brick walls. But for a well in a country house, it is most convenient to make a concrete well with your own hands. After unloading from transport, individual reinforced concrete rings can be rolled to the dug well shaft yourself.
Main structural elements of a mine well:
- the mine shaft is the main underground part, where it is most important to reliably strengthen the walls in order to avoid the collapse of the entire structure and the contamination of groundwater from precipitation and high water;
- sump or water intake - a reservoir for collecting and storing clean water, which also protects from freezing;
- head - an above-ground structure to protect drinking water from external contaminants and facilitate its supply; it involves decorative and purely practical elements.

Safety precautions during well construction
1. All work related to excavation is carried out in special clothing, gloves and a protective helmet.
2. The equipment used is first checked for integrity, the ropes are strong, the bucket is securely fastened, the winch works flawlessly.
3. Do not rush when excavating soil or lifting a bucket of earth or a strap with a stone - carelessness can lead to a breakage and injury.
4. It is better to hang the bucket on a strong rope with a carabiner than to rely on a reliable knot.
5. A person digging at depth has a safety rope attached to his belt in case of injury and methane poisoning.
Digging a very deep well is unsafe or unprofitable. Problems may also arise with methane released from the subsoil, which is difficult to recognize by minor symptoms.
Attention: If even mild dizziness, weakness, nausea, or difficulty breathing occurs while digging a hole, the digger must be immediately lifted to the surface with a winch!
The gas contamination of the mine is checked with a lit candle - it either intensifies the combustion or goes out. The awning stretched over the frame is lowered and raised several times in the shaft for ventilation. You can use construction equipment for blowing and ventilation.
The process of digging a hole and equipping a well shaft
1. The well is dug with a vertical cylinder with a cross-section of about one and a half meters - for ease of working with the tool. For concrete rings, the width of the shaft is calculated based on their diameter. They work in a team of 3 people, where the first one digs, the other takes a bucket of dug earth on a rope, and the third unloads the earth or rests, then they change.
2. It is important to correctly dig a hole for laying the first ring - smooth and rounded walls, the bottom is horizontal. When the first ring is carefully lowered into the future source of water, the earth is taken out inside the rings. As the soil is excavated, they will sag under the weight.
3. When the first ring has deepened to a sufficient level, you can place the next one on top of it and another until the water level is reached. Sometimes they delay shrinkage if they run unevenly, and sandbags can be placed on the sides of the top ring to speed up the process.
4. The rings are fastened with steel rods or plates. The rods are included in the rings in the form of reinforcement and act as loops, and they are connected with bolts, the plates are attached to the rings in prepared holes.
5. The excavation process continues until water appears and then, pumping out the first dirty water with a pump. When the water is actively rising or springing up, they stop digging.
6. Before leaving the well shaft, place clean, large stones on the bottom. The bottom of the well is leveled from above with washed crushed stone or gravel. This layer serves as an infiltrate for small soil particles so that they do not collect in a bucket of water.
7. It is better to pump the first water from the well, and if this is not possible, do not use it for drinking for a couple of weeks. Flushing of the well is completed after 10 - 18 hours of pumping, that is, until complete transparency.
8. It is worth considering the removal of soil removed from the mine, especially when the above-ground part of the structure is not completed. Otherwise, with the first rainfall, dirt may penetrate into the well.
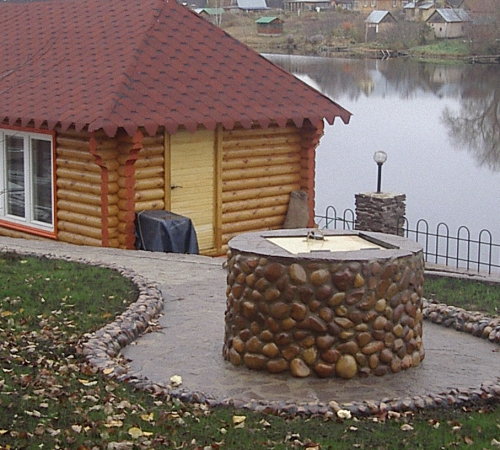
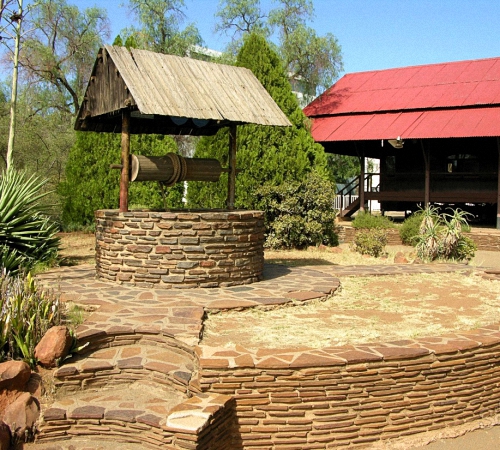
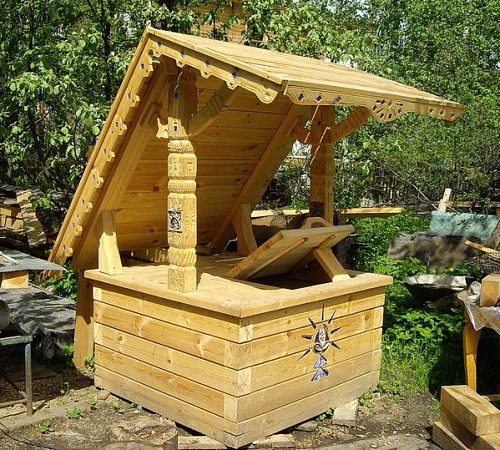
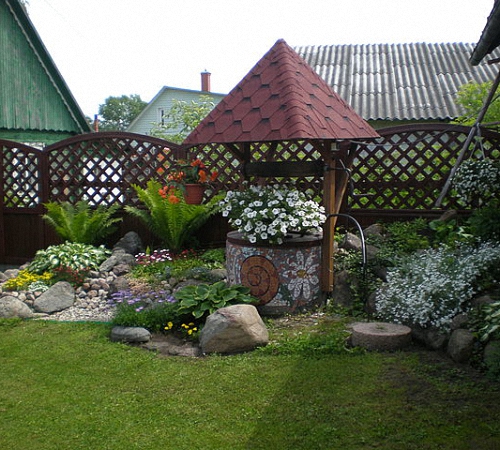
9. The head structure must have a “lock” or a small recess for spilling water, which is covered with a blind area. Upon completion of the work, the head or “top” of the well is made, which can be made modestly and reliably or very beautifully, as an element of landscape design - examples in the photo in this article.
If there is no uninterrupted source of water at the dacha, not only everyday difficulties arise, but also difficulties with watering the plantings. The problem can be solved by installing a well on the site, which will allow access to water of excellent quality in unlimited quantities.
The optimal time for digging a well is summer and early autumn, when groundwater is low. Due to the low water level, the likelihood of making a mistake with the depth of the well is minimized.
How to choose a place for a well
It is necessary to dig a well where deep underground waters come closest to the surface. There are certain methods that will allow you to determine the desired point:
- relief analysis;
- fog monitoring;
- study of vegetation;
- dowsing;
- exploratory well drilling.
Relief analysis
As a rule, groundwater lies closest to the surface in those areas where depressions and lowlands are located. But you shouldn’t dig a well on a hill, since the water at this point is most likely deep. The effectiveness of the method is about 40%.
Fog watching
If thick fog appears in a certain area on hot evenings, this most likely indicates the close occurrence of groundwater. The accuracy of the method is 75%.
Vegetation study
There are certain types of plants that grow in the wettest areas. First of all this:
- coltsfoot;
- whine;
- sedge.
In addition, trees such as:
- alder;
- birch;
Dowsing
 It is necessary to take two half-meter pieces of straight brass wire with a diameter of 2 mm and bend each of them at a right angle, departing 10 cm from the end, thus making handles.
The resulting devices should be picked up without squeezing them tightly, so that the wires can rotate freely, and walk around the area with them. If they move, it means that water is nearby, and if they start to spin, a good place for a well has been found.
Well drilling
A well up to 10 m deep, which can be drilled using an ordinary garden tool.  Borax will help determine whether the water at a given point is close to the surface.
Since none of these methods gives a 100% guarantee, it is better to use several methods in combination. This approach allows you to determine the best place to dig a well with maximum accuracy. You definitely need to know.
You should also remember that you cannot build a well near sewer lines, cesspools, toilets and barnyards. The distance to such objects should be at least 50 meters.
Choosing a well type
There are two main types of wells:
- mine,
- tubular.
A shaft well is dug using a shovel, and a tubular well is drilled using special drilling equipment, which is expensive.
You can only build a shaft well yourself.Construction of a shaft well
Any well consists of three main parts:
- head;
- trunk;
- reservoir (reservoir).
A catch basin is a reservoir located at the bottom of a well in which water is collected.
 The shaft is the well shaft itself, which must be strengthened to prevent the soil from collapsing. In earlier times, trunks were usually made square in cross-section and reinforced with logs; today, round trunks are most often dug and reinforced with concrete rings.
The cap is a structure located at ground level that protects the well from dirt and precipitation, prevents it from freezing, and also makes water intake as convenient as possible.
Preparation
The well must be dug manually.
Required Tools
In order to dig a well, you will need: 
- a shovel with a short handle (you can’t turn around with a long one in a narrow well shaft);
- jackhammer for breaking up hard soil;
- buckets for lifting soil;
- device for lifting buckets to the surface;
- a ladder of sufficient length that will reach the bottom of the well;
- pump for pumping out water during work;
- flashlight (the most convenient is a flashlight that is mounted on your head).
Digging cost calculation
Since all work on digging a mine can be done on your own, the cost of a well consists only of the price of the necessary tools and consumables.
The only major expense may be hiring a crane to install the concrete rings. But with the closed method of digging, the rings can be installed without the use of special equipment, and to lay the rings when digging a well in the open way, you can use a tripod with a winch.
Safety precautions
 You should not dig a well alone. There should always be someone nearby, on the surface, who can help in case of unforeseen complications.
In addition, underground you should be prepared for a variety of surprises, in particular, there is a risk of stumbling upon a gas accumulation. You can check whether the space is too heavily gassed using a torch: if it goes out, it means that the gas level is too high. Using a fan or vacuum cleaner you can organize “ventilation”.
During your stay in the mine, you must wear a protective helmet.Digging a well
Choosing a digging method
In areas with dense soil, digging is carried out using an open method. The open method of digging a mine has a number of advantages:
- provides maximum comfort at work;
- makes it easy to deal with obstacles such as boulders.
But if the soil is loose (contains a lot of sand and crushed stone), the well must be dug using a closed method. Advantages of this type of digging:
- minimum amount of excavation work;
- you can do without a tripod with a winch or the use of special equipment (crane);
- the integrity of the soil is almost not compromised, the walls of the mine cannot crumble.
In order to choose a digging method, it is enough to dig a meter-deep hole at the site of the future well. If its walls hold well, an open method is suitable; if they crumble, a closed method is suitable.
However, if the open method was initially chosen, but after deepening a certain distance the walls began to crumble, it will be difficult and unsafe to continue working. In this case, it will be necessary to switch to a closed method of digging a mine.
Digging a well in an open way
In order to dig a well in an open way, you must:
- dig a shaft of the required depth, its diameter should be 10–20 cm greater than the diameter of the concrete rings to strengthen the walls;
- lower the rings into the shaft and fasten them together;
- fill the gap between the walls of the shaft and the rings with sand;
- seal the seams between the rings.
 in our time and what are its features?
The artificial light of conventional lamps can tire you. Daylight sources are much preferable! They are described in detail.
The release of radioactive substances is a very dangerous industrial disaster. The link contains information that will help you protect yourself from the negative effects of radiation.
Closed digging
The process of digging a well using a closed method is somewhat more complicated: 
- at the site of the future well, it is necessary to dig a hole of the depth that the soil allows (as a rule, this is a depth of 0.5 to 2 m);
- place the first ring in the hole;
- deepen the hole;
- as you deepen, the first ring will fall down under its own weight, the second must be placed on top of it, then the third, fourth, and so on;
- after reaching the aquifer, the last ring should be installed, which will rise above ground level;
- The final stage of the shaft arrangement is sealing the seams between the concrete rings.
With the right approach, setting up a well on your property is not difficult, and anyone can do it on their own. The main thing is to carry out all work, as they say, according to science and strictly observe safety measures. And the finished well should be cleaned periodically so that the water in it remains clean and fresh for many years.
If your summer cottage or place for building a bathhouse is located next to a reservoir, then the problem of water supply disappears by itself. What if there is no river or lake nearby? Then you will need to extract water from underground, for this a skill such as digging a well with your own hands will be useful.
Today we will tell you how to dig a well manually for a summer residence, and you will also learn its features and types. In some cases, a worthy alternative to a well will be a well, which you can also drill with your own hands. The article also contains a video on the topic of digging wells with your own hands.
Borehole or well?
When arranging a source of water supply for a summer residence, many ask this question. However, it all depends on the geological features of your site. For example, if the aquifer level is located at a depth of 5 to 15 meters, then it would be better to dig a well, and if lower, then you will need to drill a well.
Drilling a well is a more progressive phenomenon than digging a well. The work itself does not take much time, and special equipment is used for drilling. But, as was noted earlier, all this automation is appropriate only for deep water deposits. But a homemade well is a slightly different phenomenon, for drilling it a hand drill is used. If you choose between it and a well, then it is better to dig a well. Disadvantages of a homemade well such:
- short service life;
- the difficult process of cleaning the water supply due to the small diameter of the pipes;
- constant clogging;
- limited water supply (up to 200 liters per day).
But if you dig a well with your own hands, then you get the following:
- long-term water source (will last more than 50 years);
- you will have a large supply of water;
- preventive work will be carried out simply thanks to the spacious well shaft.
So, we have decided on the advantages of a well over homemade checks, now we can consider the features of different types of structures.
Classification of wells for summer cottages
Regardless of the type, the well is equipped with a wide shaft that reaches underground water that can be consumed by humans. Most often, a well is dug to a depth of 10 meters, although there are also deeper wells that go 30 meters or more deep.
Wells differ from each other in the placement of water supplies:
The last type of wooden water “house” is the most common among summer residents and owners of country private houses. It is this that we will take as a basis when talking about how to dig a well with your own hands.
The design may have different shapes depending on the material used for the construction of a mine. If a wooden frame or brick is used, then the shape is square; if monolithic concrete or concrete rings are used, then the shape is round.
The simplest option for constructing a shaft in the ground is the use of round concrete blanks connected by connecting brackets that reliably fix adjacent parts to each other.
So, what expenses await us when digging a well 8 meters deep with a diameter of 1 meter:
- 8 pieces of factory concrete rings;
- the cost of the craftsman’s work for inserting rings or doing it yourself;
- cost of cover for well and canopy.
Can save on the work of craftsmen, by watching a special video on the topic of building a structure with your own hands and asking your friends to help you. However, watching the video will not be enough. You need to have at least basic knowledge.
If you have to dig a well at your dacha for the first time, and you want to do it as thoroughly as possible so that there are no problems in the future, Consider these tips:
Preparing for work
All work on digging a well will be done manually, prepare the following tools and items:
- buckets;
- standard and sapper shovels;
- lifting device and tripod;
- rope ladder;
- chain;
- wooden shelf for ring delivery.
Such a shelf is most often installed directly on the spot on the basis of logs, since even physically strong people will not be able to move the concrete parts of the shaft with their own hands.
You will also need the following working materials:
- large and small crushed stone for filters;
- cement with sand for filling joints;
- clay for the blind area.
Safety regulations
 The construction of the structure has some risks to life. In particular, you may come across to the gas pocket, which can poison the room in the mine. To prevent this from happening, always use a burning torch to check the condition of the mine. If the flame burns evenly, then there are no problems, but if the fire quickly goes out when it enters the dungeon, then the mine has a high level of gas contamination.
The well mouth should be constantly ventilated using a fan, vacuum cleaner, or a metal furnace connected to the shaft through a pipeline.
There is also risk of falling load, since during work there is always a need to lift a loaded bucket. To prevent tragedy, when delivering the bucket to the surface, you should pause the digging process and press yourself against the walls of the shaft. Remember to wear a hard hat while working.
When is the best time to work?
Also, many people wonder when is the best time to dig a well? It is best to carry out digging work during the driest time of the year, when groundwater drops to its lowest levels. The best option is the end of summer and the beginning of autumn. If you start working in high water, you will quickly reach the water, its level will not be stable and there will be a risk of completely emptying the mine.
In addition, after you complete all the work, you will need a finished well register with the relevant authorities as a real estate property. If this is not done, the site will be frozen in terms of performing any operations related to it. You will not be able to sell it, rent it out, or indicate it as an inheritance or accept it as an inheritance.
Construction progress
Can start digging a well. The progress of work will be as follows:

Now our well is ready. If you get to work with your own hands and involve a small number of your friends in this, then you complete everything within a week. Of course, specialists will handle this much faster, but their work will cost you a certain amount.
Even if the house has a centralized water supply, a well will not be superfluous: it is too expensive to water the garden or flower beds with tap water, and in case of a power outage it will be very useful. At the dacha, this is generally the main and only source of life-giving moisture. So its value is difficult to overestimate. Building a well with your own hands is not easy, but it is possible. Even if you decide to hire a crew (physically difficult), you will need to supervise them. Not everyone does it the right way. More often, as it is easier and faster. So you need to know how it should be.
How to choose a place
The most reliable way is to order hydrogeological studies. You will get the exact location where you need to dig with an analysis of the water that will be there. But this service is not cheap and is worth it if you plan to use the water for drinking, that is, near your permanent residence. At the dacha, you need it mostly for technical needs, and before drinking water, you can only clean the part that goes into the house.
If you do not order research, be guided by several signs at once:
- position of wells in neighboring areas;
- analysis of growing plants;
- observations of insects and animals;
- traditional methods.
All these methods are only ways to roughly determine where aquifers may lie. None of them gives guarantees, but if as a result of several methods you get a more or less specific place, it makes sense to try to dig a well here.
Wells in neighboring areas
You probably know that rock layers are completely uneven, just like aquifers. If your neighbors have water at a distance of 6 meters, this does not mean that you will have it exactly there. It may be higher or lower, or it may go sharply somewhere to the side. So this is only an approximate “sighting” on the ground.
Plants
This method is suitable if the area has not yet been plowed. You examine the “local” vegetation, identifying islands of characteristic grass. Not single plants (they can be accidentally introduced), but islands, clearings, etc.

Observations of animals and nature
The best predictors are small midges. In the warm season, in calm weather, in the evening, before sunset, look at the site. If there are places where midges “hang” in columns, most likely there is water in this place, and quite close.

To verify this, you can observe this place in the morning. If the water is really close, there will be fog swirling around here.

By the “concentration” of fog you can determine where the water is closest
Traditional methods
We find a clay vessel. Preferably not glazed. But it’s hard to find one now, so any jug or pot will do. Not even this? You can also use a regular pan, just a wide one.
Oven-dried silica gel is poured into the dishes. You don’t have it, don’t know where to get it? Take ceramic bricks, break them into fine crumbs (not flour, but crumbs), and dry them in the oven for a couple of hours. Fill the container to the top, tie it with a dry cotton rag. Just so that it doesn't come undone. Weigh and write down the result.
In the expected location/locations of water, dig a hole 1-1.5 meters deep, place a pan in it and cover it with earth. Leave it for a day. Then you dig it up and weigh it again. The more the mass has changed, the more water there is in a given place (or closer to the surface it is located).
Best time
There are two periods when it is best to dig a well: the second half of August and the middle of winter - after two weeks of frost. At this time, the groundwater level is at its lowest and there is almost no high water. So it will be easy to work and you will not miss the determination of the flow rate - at this time it is minimal and you will not have to suffer from a lack of water in detail.

Winter and late summer are the best times to dig wells
If a team works, they can do it in a few days: two or three, sometimes more. If you plan to work alone, you may not have enough time in August. This is the “border” zone - before the rains. Then we need to start work earlier. Maybe since the beginning of August. At this time, there is already little high water, and by the middle of the month (even if you work alone in the evenings) you will already be near the aquifer. In general, try to time it so that the exit to the aquifer occurs at the most “waterless” time. It is also advisable to complete the waterproofing of the walls.
Type and structure
If you have decided on the location, all that remains is to choose what kind of mine you will make your mine. You can only dig a mine well, and you can drill an Abyssinian well. The technology here is completely different, so what follows will be about the mine well.
Well shaft type
The most common one today is a well made of concrete rings. Common - because it's the easiest way. But it has serious drawbacks: the joints are not at all airtight and through them rain and melt water enters the water, and with it what is dissolved in it and what has drowned.

Of course, they try to seal the joints of the rings, but the methods that will be effective cannot be used: the water must be suitable at least for irrigation. But simply covering the connections with a solution is very short-lived and ineffective. The cracks are constantly increasing, and then through them not only rain or melt water enters, but also animals, insects, worms, etc.
There are rings with a lock. Between them, they say, you can lay rubber gaskets that will ensure tightness. There are rings with locks, but they are more expensive. But gaskets are practically never found, as are wells with them.
The log mine also suffers from the same “disease,” only there are even more cracks. Yes, that's what our grandfathers did. But, firstly, they had no other way, and secondly, they didn’t use so much chemicals in the fields.
From this point of view, a mine made of monolithic concrete is better. It is cast right on site using removable formwork. They poured out the ring, buried it, put up the formwork again, stuck in reinforcement, and poured another one. We waited until the concrete “set”, removed the formwork again, and started digging.

The process is going very slowly. This is the main drawback. Otherwise there are only positives. Firstly, it turns out very cheap. The costs are only for two galvanized sheets, and then for cement, sand, water (proportions 1: 3: 0.6). It's much cheaper than rings. Secondly, it is hermetically sealed. No seams. Filling occurs approximately once a day and due to the uneven upper edge the result is almost a monolith. Just before pouring the next ring, scrape off the surface of the raised and almost set cement laitance (a gray dense film).
How to identify an aquifer
According to the technology, the soil is removed inside the ring and under it. As a result, under its own weight, it settles. This is the soil that you take out and will serve as a guide.
As a rule, water lies between two waterproof layers. Most often it is clay or limestone. The aquifer is usually sand. It can be small, like seaweed, or large interspersed with small pebbles. Often there are several such layers. As the sand goes, it means water will appear soon. Once it appears at the bottom, you need to dig for some more time, removing the already wet soil. If the water is coming actively, you can stop there. The aquifer may not be very large, so there is a risk of going through it. Then you'll have to dig until the next one. The deeper the water will be cleaner, but how much deeper is unknown.
Next, the well is pumped - a submersible pump is inserted and the water is pumped out. This cleans it, deepening it a little, and also determines its flow rate. If the rate at which the water rises suits you, you can stop there. If it’s not enough, you need to quickly go through this layer. With the pump running, they continue to remove soil until they pass through this layer. Then they dig until the next water carrier.
Bottom filter in a well

Bottom filter device for a well
If you are satisfied with the speed of incoming water and its quality, you can make a bottom filter. These are three layers of cameos of different fractions, which are laid on the bottom. They are needed to ensure that as little silt and sand gets into the water as possible. In order for the bottom filter for a well to work, the stones must be laid out correctly:
- Large stones are placed at the very bottom. These should be quite large cobblestones. But in order not to greatly reduce the height of the water column, use a flatter shape. Lay them out in at least two rows, and do not try to have them stand close together, but with gaps.
- The middle fraction is poured in a layer of 10-20 cm. The dimensions are such that stones or pebbles do not fall into the gaps between the lower layer.
- The top, smallest layer. Pebbles or small stones in a layer of 10-15 cm. Sand will settle in them.
With this arrangement of fractions, the water will be cleaner: first, the largest inclusions settle on large stones, then, as you move up, smaller and smaller ones.
Digging methods
There are two technologies used to dig a well. Both methods are used, just at different depths. And both have their drawbacks.
Alternate installation of rings
The first ring is placed on the ground, which is gradually removed from the inside and under the side. Gradually the ring lowers. There is a very important point here: you need to make sure that it goes straight down, without distortions. Otherwise, the shaft will turn out to be inclined and, sooner or later, the settlement of the rings will stop.
To avoid skewing, it is necessary to control the verticality of the walls. This is done by tying a plumb line to a block and placing it on a ring. Additionally, you can control it at the top level.

When the upper edge of the ring is level with the ground level, roll the next one. It is placed strictly on top. The work continues. If on the first ring the soil can be thrown over the side with a shovel with a shortened handle, then on the next ones you have to remove it using a gate or a tripod and a block. In this way, at least two people must work, and at least three, or even four, are needed to move the rings. So it is impossible to dig a well yourself, with one hand. Unless you can adapt a winch.
So, gradually, the depth of the well increases. When the ring is lowered to the ground level, a new one is placed on it. To descend, use driven brackets or ladders (more correctly, brackets).
The advantages of this method of digging a well:
- You can check how tight and even the ring has become.
- You can lay the same rubber gaskets that will ensure tightness or place them on the solution.
- The walls do not crumble.
These are all advantages. Now about the cons. Working inside the ring is inconvenient and physically difficult. Therefore, using this method, they dig mainly to a shallow depth - 7-8 meters. Moreover, they work in the mine in turns.

The structure of the “knife” for easier penetration of soil when digging wells
One more point: when digging a log with rings, you can speed up the subsidence process and facilitate the passage of soil using a knife. It is made of concrete and is poured into the ground at the very beginning. To form it, dig a groove in a circle. In cross-section it has a triangular shape (see picture). Its inner diameter coincides with the inner diameter of the rings used, the outer diameter is slightly larger. After the concrete has gained strength, a “standard” one is placed on this ring and work begins.
Installation of rings after reaching the aquifer
First, a shaft without rings is dug. At the same time, they watch the walls. At the first signs of shedding, they place rings inside and continue to deepen using the first method.
If the soil does not crumble along its entire length, when it reaches the aquifer, they stop. Using a crane or manipulator, rings are placed into the shaft. Then, they deepen it a couple more rings using the first method, increasing the flow rate.

The technique for excavating soil is the same here: as long as the depth allows, it is simply thrown out with a shovel. Then they put up a tripod and a gate and lift it in buckets. After installing the rings, the gap between the walls of the shaft and the ring is filled up and compacted. The top few rings can be sealed from the outside (with bitumen impregnation, for example, or other coating waterproofing).
When working, control of the verticality of the walls is also necessary, but it can be adjusted within certain limits. The control method is similar - a plumb line tied to a block and lowered into the shaft.
Advantages of this method:
- The shaft is wider, it is more convenient to work in it, which allows you to make deeper wells.
- Several upper rings can be sealed externally, which minimizes the possibility of the most contaminated water entering.
There are more disadvantages:
- It is difficult to check the tightness of the joint of the rings: it is prohibited to be in the shaft during installation. It is impossible to move an already installed ring in it. It weighs hundreds of kilograms.
- You can miss a moment, and the mine will crumble.
- The filling density of the gap between the shaft wall and the rings remains less than the “native” soil. As a result, melt and rainwater will seep deeper, where they will get inside through the cracks. To avoid this, make a protective circle around the well made of waterproof material (waterproofing membrane) with a slope away from the walls of the well.
Commissioning
If you think you dug a well and that's the end of it, not at all. You still have a series of daily exercises to do. You can do them yourself, without any help. First you need to waterproof the walls from the outside, then clean and wash the walls from the inside and pump out the water - clean the well.
After the well is dug, it takes a couple of days for the rings to settle and take their places. At this time, nothing needs to be done inside, but you can do external waterproofing.
Waterproofing
If the well was made using the second method - first they dug a shaft, then installed the rings - this stage is a little simpler. You will need to widen the gap slightly to make a waterproof seal. If the rings were installed right away, you will have to dig a decent ditch around. At least until the middle of the second ring. When the soil has been removed, we proceed to waterproofing.
It is best to use a coating. You can use bitumen mastic, you can use other compounds. In principle, you can fuse or glue roll waterproofing, or in the worst case scenario, wrap it in film. Film is the cheapest, but it will last no more than two years, and only if you buy it expensive and reinforced.

Since you dug a well anyway, insulate it. You may not be at your dacha in winter for now, but maybe later the cold weather will come. So make sure you have water in advance.
Cleaning walls and internal sealing of seams
A couple of days after the well has been dug and the glass has sunk, you go down inside with a broom and sweep the walls. Then you wash the walls: you pour them on them and sweep them with a clean broom. Douse it again, then with a broom. The water was pumped out and drained away. The next day the procedure was repeated. So - five, seven, ten days. Until the inside and water become clean.
One more thing. Not all teams immediately coat the joints of the rings. Then after the first cleaning you need to coat the joints with a solution (cement:sand in a ratio of 1:3). To improve the effect, you can add PVA or liquid glass (instead of some of the water, or dilute the PVA with water). It is also advisable to ensure against horizontal shifts of the rings. Especially if they don't have locks. To do this, adjacent rings are fastened with metal plates, which are attached to anchors. This measure is strictly necessary on unstable loose or highly heaving soils.

After the walls are washed, the water is pumped several times, you can use the water. But to prevent anything from attacking inside, it is necessary to close it. ABOUT
For some of the features of digging wells and cleaning them, watch the video.
Safety at work
Digging a well (with your own hands or with a team) is hard and dangerous work, especially after the first three rings have been dug. The buckets have to be pulled out with a winch, a winch or a block, but it is heavy. It may break - or the rope or handle may not hold up. Therefore, it is necessary to comply with safety rules:

Believe me, precautions are not unnecessary. Better to play it safe.
How they dug a well: photo report
We dug using the first method - immediately put rings. Three people worked, taking turns: no one stayed inside longer than “one ring.” This is all the details in a nutshell. The rest is as we go along.
First, they brought the rings and laid them out on the site. A knife was assembled from specially shaped wooden planks.


It turned out to be a ring, according to the size of which they began to dig around the chosen place.


The first concrete ring is laid on this ring. At first, the soil was only discarded - as long as the depth allowed.

We installed the second one, sealed the seams inside and outside, and went on digging.

When the second one went level with the ground, we set up a tripod with a winch and a block. So they lifted and lowered the digger and buckets of rock.

Now: one is digging, the second is “twisting” on the winch, the third is dumping the soil. The same winch was used to lower the well into the shaft.

They buried the sixth ring and after that water appeared. If you look at the soil, it looks like this: black soil, sand, clay, aquifer. This means that the layer where water flows is separated by clay that is poorly conductive. This is very good - the water should be good, as it turned out later.

After this, three more rings are installed. One is left for the end of August, when the water is lower, we will lower the well another meter. Then the procedure is standard - wash the walls, pump out the water. So six times - seven times. Afterwards, we saddled the head on the well and installed all the stuffing - the gate, pulled out the cable from the house, and installed the socket. The plans are to bring water into the house.

This is what a well looks like “in a house”
Having seen how inexperienced summer residents hold a shovel in their hands, we decided to tell everyone how to properly dig in the garden, so as to benefit the soil and not cause harm to themselves.
We are absolutely serious, and this is not a joke, but quite serious material, and even instructions for using a shovel in the country, so to speak. We were prompted to write it literally by the current warm season, when young people were spotted in many suburban areas. Naturally, this is very good, because young people work the land, which means they are busy with useful work. But this is precisely where the positive from what he saw ends, since a shovel in his hands is not yet a reason for applause. At first, you need to learn how to dig properly, and only then can you take up the instrument.
How to properly handle a shovel (video)
How to dig soil in the garden: instructions
Now we will provide you with literally a few points that will tell you in detail how to dig in a vegetable garden or garden.
The most important thing in such a process is the correct choice of tool.
- One hand rests on the edge of the shovel handle, the second - a little further, holding the handle in the palm of your hand, the foot is placed on the top of the shovel tray and pressure is applied downward into the ground, preferably at a slight angle.
- After the blade of the shovel has sunk into the soil, you need to take a more comfortable position for lifting and dumping the soil, which means you need to take a step back, bend a little and put pressure on the handle of the shovel, grabbing one hand even closer to the tray.
- Now, you can bend your knees a little and press as much as possible on the handle, which, with a lever effect, will pull the soil out of the hole.
- Raise the shovel with the soil, turn it over and lower it into the hole, hit the largest lumps of earth with the blade of the shovel several times to break them up.

You see, digging with a shovel is very easy, it’s strange that many people don’t succeed the first time.
We remind you once again that the material on how to properly dig the soil is only for beginners in summer cottages, gardens and vegetable gardens, and in no way concerns experienced summer residents, who themselves are able to give such advice.
How to quickly dig up a garden (video)
How to dig a garden without injuring your legs
It often happens that in a moment of excitement or anger, we forget about safety precautions and want to break a large earthen lump, break the root or stem of a large weed with a shovel blade, and so on. But it often happens that such an action can injure the performer of this work. To prevent this from happening, try to take the process seriously, do not be nervous while working, maintain a safe distance between the shovel and your feet during such actions, and also try to dig in closed shoes, such as boots. Of course, doing this in the summer is not particularly pleasant, but believe me, an injury from a shovel or even drying out the skin of your feet from dust (if you work in slippers) is much more unpleasant.
How to dig a vegetable garden without calluses
To prevent unpleasant marks on your hands while digging the soil, you need to use high-quality rag gloves with rubberized inserts (these are very convenient for such work). Also, try to hold the shovel correctly, do not put too much pressure on the handle with your palm when you can use the strength of your leg for this, and also, do not hold the shovel too tightly with your hands when turning the earth into the hole.
That's all, just a couple of practical tips, and we are back to more serious topics, but we are proud that now many will be able to learn how to dig properly in the garden, without injury and unnecessary fatigue.
How not to dig a garden bed (video)


