A do-it-yourself brick drain pit is a great alternative to central drainage. The daily life of a modern person is not provided without the benefits of civilization. This also applies to countryside recreation and living. Not every village or village has a central sewerage system. But there is an opportunity to equip it yourself.
A drain pit is a special reservoir that is capable of storing sewage. He is arranged to carry out a familiar and convenient sewerage system in a country house. The pit is able to collect and store a certain amount of used dirt, which is subsequently removed using special equipment.
With some frequency, it will be necessary to call services that pump out sewage from a kind of septic tank and dispose of it in a specially designated place. Such a pit is a good alternative for waste collection. In order for it to fulfill its direct duties and not pollute the environment, certain conditions must be observed.
The drain hole is divided into several categories. For example, the material from which it is made plays an important role. It can be wood, car tires, bricks, special reinforced concrete rings, etc. The most economical, reliable and simple installation method is brickwork.
Divided by ground level. For example, equip devices:
- Surface. Such holes are rarely used. Can only be installed for summer use. In this case, the drain points should be above the tank itself. This will ensure natural drainage, stagnation does not form. This method can be applied at high groundwater levels. Also suitable for uneven terrain, if there is a large slope of the earth.
- Underground. This is the most common method of arranging cesspools. They can be either with a sealed bottom or without it. According to the sanitary standards established in Russia, with a daily sewage volume of 1 m³, a pit can be made with a leaky bottom. If there is more drain water, then the tank is made only airtight.
Pros and cons of brick drain pits
A sump made of any material has its advantages and disadvantages.
 Pros of brickwork:
- Environmental friendliness. The waste that is collected in the tank can be easily pumped out and disposed of. For this, a special technique is called.
- Sewage does not pollute the environment and does not penetrate into groundwater.
- A person without special education can do the job. You don't have to be a professional bricklayer. The wall lined with material will not be visible to others.
- The pit does not depend on the condition of the soil and the level of groundwater flow.
Cons of brickwork:
- An unpleasant odor may occur. In this case, special biological products or chemicals help that stimulate the processing process.
- When a brick cesspool is made with your own hands or with the help of a specially trained person, it will last at least 15 years. After this period, due to the constant contact of the masonry with moisture, the wall softens, and subsequently destruction. To extend the life of the pit, it is necessary to periodically carry out repairs. This will increase the period of use to 50 years or more.
- With permanent residence, the cesspool must be emptied quite often. It will take about 2 times a month to call a specialized machine for the removal of waste. If cleaning is carried out less frequently, then there is a possibility that the well will silt up. This will lead to large financial or physical costs.
Choice of location and size
 Before sewerage is carried out, it is necessary to choose a place for a future cesspool. This must be done based on the established SNiP:
- The distance from the house to the well should be at least 5 m.
- The distance from a spring with drinking water with normal soil is from 30 m, with sandy soil - from 50 m.
- The recess should not exceed 3 m. With a deeper hole, the vacuum cleaner will not be able to completely clean the tank. This is due to the weak power of the pump.
- The distance to the neighboring site is at least 1 m.
- For the convenience of accessing a sewage truck, the distance from the road is no more than 3 m.
Determine the size of the required brick pit. To do this, you need to multiply the number of residents by 150 liters - this is the average value of the sewage that 1 person emits. With this calculation, the minimum daily sewage allocation will be obtained.
If a washing machine or other equipment that consumes water is installed in the house, then take into account 200 liters of water for each inhabitant of the premises.
The resulting amount must be multiplied by the number of days through which it is planned to pump out sewage. For example, cesspool trucks will come 2 times a month, then multiply by 15. When using a cesspool for 3 people, 9000 liters come out, that is, 9 m3.
If the well is equipped without a sealed bottom, then some part of the sludge will go into the ground, which means that the volume will decrease. In this case, not 15, but 7 days can be taken for calculation.
When the necessary parameters are known, you can start digging a recess. At the same time, it is important not to forget about SNiPs. There are restrictions that the depth cannot be more than 2.5 m, and the width of one side should not exceed 2 m. This is when calculating that a rectangle-shaped pit is used.
Preparatory work and necessary material
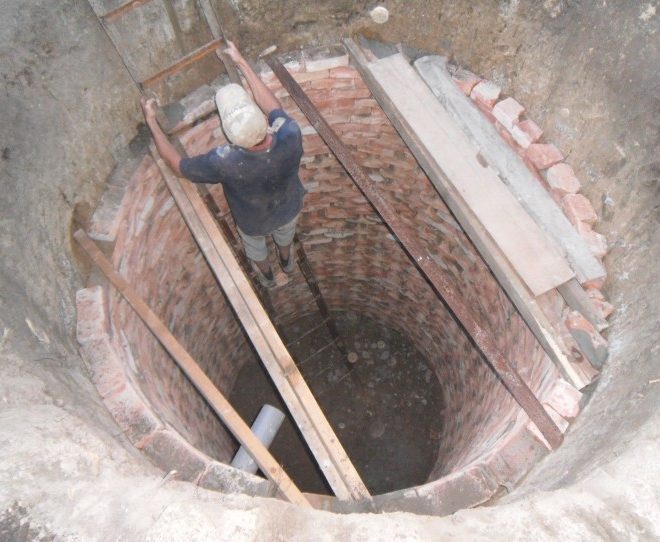
 We decided on the volume of the cesspool, we proceed to the implementation of the plan. To do this, you need to dig a pit. It is desirable to make it round. This form is more resistant to ground pressure, which is evenly distributed on all sides.
You can simplify the work of digging a well with the help of special equipment. To save money (or when it is not possible to use the equipment), the work is carried out independently.
Materials that will be required:
- bayonet shovel, cook with a long and regular handle;
- a shovel should have special sides and an elongated handle;
- ropes and pegs in 2 sets, the first to mark the boundaries of the pit, and the second to fence the structure;
- tape measure at least 5 m;
- a ladder with a height not less than the depth of the pit;
- buckets - 5 pcs.;
- several craftsmen;
- building level;
- sand;
- crushed stone;
- brick, it is advisable to use red ceramic (for calculation, keep in mind that the wall thickness should be 25 cm);
- concrete or slab from it.
We have prepared the materials, we are digging a well. The bottom is made with a slope towards the recess where the hatch will be located. The bottom is lined in several layers. Sand 20 cm thick is laid out first. Compact well. The second layer is made of crushed stone or broken brick. If the cesspool is planned to be leaky, then this layer is made at least 50 cm. With an airtight base, gravel is laid in a layer of 20 cm, and then poured with concrete or a slab is installed.
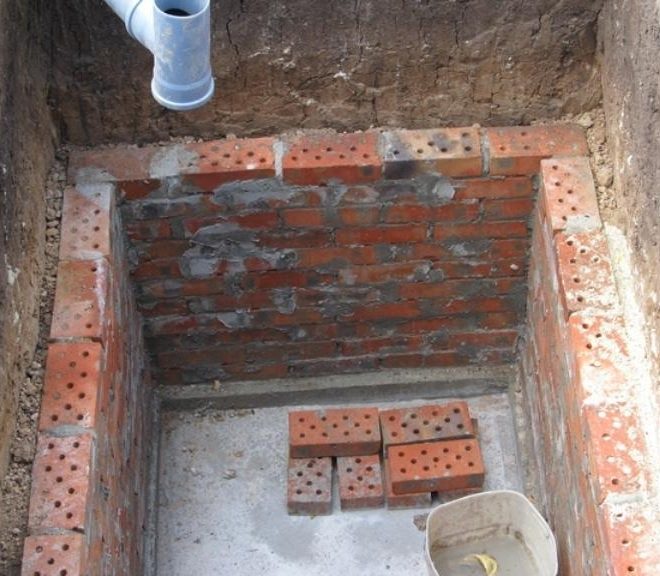
In this case, you need to dig a trench along which the sewer pipe will pass from the room to the tank. The depth of such a ditch should be at least 55 cm. This will prevent the sewage from freezing. It is advisable to wrap the pipe with a special insulation or just roofing material. It is important to remember that communications must be laid with a slope, which provides a natural drain of sewage. The sewers are covered with rubble and sand. They are mixed at a ratio of 2:1, respectively. This laying method will eliminate the possibility of stagnation, and the dirty liquid will not freeze.
Construction stages
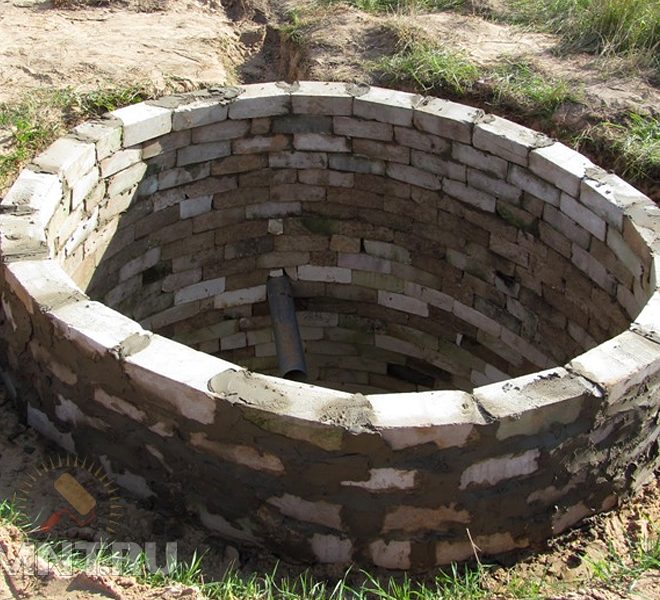
Masonry is performed depending on the preferred shape of the pit. It can be round or rectangular in shape. Apply 0.5 or 0.25 bricks. A stone is laid in a chess layout using a mortar. It is important to use high-quality concrete materials, this will help prevent the rapid destruction of the well. The ratio of sand and cement is taken in a ratio of 3:1, respectively. Water is added as needed for ease of use. Make sure the mixture is not too runny. The layer of cement must be at least 1 cm thick.
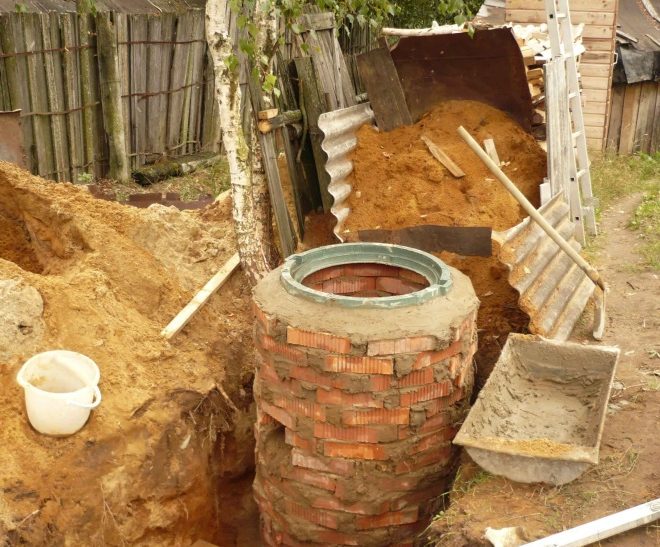
If the masonry is done with a whole brick, then it is placed perpendicular to the bottom of the pit. In this case, the width of the wall is equal to the length of the briquette. When building walls, it is important not to forget to leave a hole for the outlet of the sewer pipe. Laying should be stopped at a distance of at least 30 cm from the ground surface. The remaining space will go under the cover device.
 In order for cesspools to increase their service life, it is best to coat the inner layer of the wall with bituminous mastic. All walls are treated with it, but first it is necessary to melt the substance.
To protect the soil from sewage, you can arrange a clay castle. To do this, you need to dig a hole of a larger diameter. In the gap between the lined wall and the ground, you need to fill in and compact the clay. The work must be done carefully. You can add crushed stone or broken bricks to the mixture. This allows you to increase the waterproofing of the stone filter. Through the barrier thus established, impurities will not pass. The interior wall needs to be plastered. To do this, you need to make a solution of sand and cement at a ratio of 2: 1, respectively. After the layer has completely dried, you can proceed to install the cover and install the sewer pipe.
Any gutter must have its own cover. First, this is an elementary security measure. Secondly, it will limit the flow of excess debris and precipitation. Thirdly, it will get rid of the unpleasant odor throughout the area. For the arrangement, you can use boards that are mounted at a minimum distance from each other, or a concrete floor. Consider the need for a hatch. Its minimum diameter should be 70 cm.
 To insulate the floor, you will need polyethylene, on top - roofing material, which is laid directly on the plane and covered with building material. Slag, soil or clay may be suitable for this. For a warmer device, it is recommended to install a double cover. Lay insulation between the layers and cover with a layer of soil or other material at least 50 cm high on top.
Additionally
There is always an accumulation of explosive gas in the cesspool. To remove it, you need to take care of ventilation. To do this, you can use a pipe that is output through the overlap of the well. The size is determined by construction SNiPs. Diameter - 10 cm, height - at least 60 cm from the ground.
As soon as the number of permanently living people is determined, it's time to think about arranging sewage. You can involve outside forces or do the work yourself. There are many different methods and materials for pit latrines on the market. But it is better to use the option that has been tested by time.


