SITE SEARCH
METAL ENGRAVING
TRANSLATION OF DRAWINGS FOR ENGRAVING ON METAL SURFACES.
We advise you to take a drawing that you want to translate and make a reverse drawing from it (through glass). Then cover the metal surface with a weak aqueous solution of gummigut (yellow watercolor paint), put the reverse pattern on the dry surface and iron it with a smooth object (agate or just your thumbnail). The outline made with a lead pencil is clearly transferred, and the design can be engraved with a needle and
grabshtihel.
CHEMICAL METHODS FOR ETCHING METALS.
Etching is a method of reproducing designs, ornaments, inscriptions, etc. using chemical means. on the surface of metal objects.
Etching is done in two ways: you can cover all the lines and surfaces of the drawing with a substance that is affected by the mordant; You can, on the contrary, protect all spaces from the action of acids, leaving the lines and surfaces of the drawing free. If you then cover the entire surface with acid, then in the first case the pattern will turn out to be slightly embossed, in the second case the pattern will appear in-depth.
No matter how simple the etching operation may seem at first glance, beginners often fail, especially when etching thin and complex designs.
Before applying the protective coating, the surface to be treated should be thoroughly cleaned of any thin deposits of rust, grease and other dirt. Fat adhering to the surface can be removed by washing in alcohol or gasoline, calcining or, finally, boiling in a solution of soda or sodium hydroxide.
The object, cleaned of dirt and grease, is immersed in a 10% solution of sulfuric acid and left in it until the dark coating of rust disappears. After this, the surface to be treated can be polished if the shape of the object allows and its purpose does not contradict this operation. But such pre-polishing is not necessary.
The cleaned surface should not be touched with bare fingers, as there is always a greater or lesser amount of fatty substance on them, and the mordant has no effect on fat.
When the surface to be etched has been cleaned enough to have a fresh metallic sheen, begin applying the protective coating.
A good coating can be prepared as follows: melt 1 part asphalt and 2 parts mastic, mix the mixture and add 2 parts white wax to it. Once cooled, this composition is formed into balls and cones, which are first wrapped in a cloth made of thin dense linen, and on top in dry taffeta. The composition is applied to the surface as follows: the object to be treated is heated and, gently pressing on the surface, the mass wrapped in taffeta is passed over it evenly; in this case, the composition melts and seeps through the rag, covering the rubbed surface with a thin layer. When this coating has hardened, it is covered with a thin layer of white lead, finely ground and dissolved in a solution of gum arabic. Then, using blue paper, the required design or inscription is transferred to a white surface. All places that need to be etched are scraped to the surface of the metal. With a thin and sharp engraving needle you can reproduce even the finest shading of a design.
If you want to etch a simple figure or inscription, then the protective coating can be diluted with some liquid, for example turpentine, to the consistency of thick oil paint. Using this coating, you can reproduce the desired design by hand with a needle or even a steel pen.
When applying a protective coating, you must ensure that the metal surface is completely dry, otherwise the coating will not adhere well in some places, and the acid can then penetrate the metal and etch areas that should remain untouched.
The following mixture is used as a mordant for copper, brass, bronze and silver items: 3 parts of a saturated aqueous solution of copper nitrate and 1 part of a saturated vinegar solution of ammonia.
The object to be etched is lowered into a glazed clay cuvette (bath), into which the appropriate solvent is poured. If the surface to be treated is flat, then you can set it in a horizontal position, sculpt a finger-thick rim of wax around the edges, and pour the appropriate acid into the resulting flat cuvette. When the etching is considered complete, the object is rinsed in clean water, and the protective coating is removed by heating or washed off with turpentine.
If a certain amount of etching remains in the recesses, then over time it will corrode the metal surface in places deeper than required. To avoid this, place the washed item in lime water for a few minutes, which neutralizes the remaining acid.
GALVANIC METHOD FOR ETCHING METALS.
In addition to the chemical etching of metals described above, there is another method of etching using a galvanic battery. This method has many advantages over the chemical one. The galvanic etching operation itself is much faster, and the contours of the etched pattern are sharper and more distinct.
The composition of the mordant does not include caustic acids, as a result of which gases harmful to health are not formed.
If you examine a chemically etched design through a magnifying glass, you will find that the edges of individual recessed lines are uneven and that the deeper the line, the wider the etching. With the galvanic etching method, the edges of individual lines are completely smooth, and the walls of the recesses are vertical.
The method of pre-processing an object described above is also used for galvanic etching. The treated object, which serves as an anode, is suspended in a bath containing a mordant on a wire, which is soldered with tin solder to the uncovered area; The soldering area is varnished. The other end of the wire is connected to a plate of the same metal, which serves as a cathode. Iron sulfate or ammonia solution is used as a mordant for steel and iron; for copper, brass and bronze - a solution of copper sulfate; for zinc - zinc sulfate or a solution of zinc chloride oxide.
If different parts of the design need to be etched to different depths, then after a certain period of time the object is removed from the bath, those places that do not need to be etched deeper are rinsed and a protective coating is applied to them, and then the object is suspended again in the bath and etching continues.
ETCHING COMPOSITIONS:
copper: 1 part alcohol, 1 part chromic acid, 10 parts water.
aluminum: 1 part alcohol, 1.5 parts acetic acid, 1 part antimony chloride (antimony oil), 10 parts water.
lead: 8 parts alcohol, 5 parts stannous chloride, 80 parts water.
STAMPING IRON AND STEEL.
To stamp steel products (tools, etc.), they usually use caustic acids, which, however, presents many inconveniences, not to mention the fact that the mark itself is not entirely elegant.
The following method deserves preference in all respects. First of all, prepare a solution in 400 g of water, table salt (86 g), copper sulfate (86 g), zinc sulfate (24 g) and ordinary alum (12 g). Then they take a piece of simple soap, moisten it with water and rub it on the part of the steel object on which they want to make a mark.
At the same time, pay attention to the fact that the rubbed area is covered with an even and not very thick layer of soap; after this, with some sharp object - an awl, a nail or the tip of a knife - scrape out the required mark on the soap layer so that the surface of the metal is clearly exposed. Now all that remains is to fill the depression formed in the soap layer with a few drops of the above solution and leave the object in this form for several minutes. If you then wash off the layer of soap with water and wipe the object dry, a beautiful copper-colored mark will clearly appear on its steel surface.
For etching inscriptions on iron or steel products, diluted nitric acid (15-20%) is mostly used; To apply acid to a metal object, a rubber stamp is used, but it is made of much harder rubber than ordinary paint stamps, which is achieved through a longer vulcanization process.
In order to obtain a distinct etching of the letter, the stamps should be as clear and thin as possible. Instead of a pillow, a piece of glass is used, on which a piece of linen is placed. So much acid is poured onto the latter so that it is completely saturated, and the stamp is pressed tightly against it. After this, the stamp is lightly applied to the metal to be etched, and the object is left for a long time, and then wiped with kerosene, and to prevent the formation of rust - with bone oil.
BRASS STAMPING.
Usually used stamp inks are not suitable for applying durable inscriptions on a smooth brass surface. For this purpose, so-called “mordants” are needed, which are first applied either to a glass plate or directly to a clean stamp pad. The actual stamping can be done using ordinary rubber stamps.
“Moderants” consist of a solution of a chloride salt of some metal; for example, a mixture of equal parts of copper chloride and bismuth chloride gives a good print. For this purpose, both salts are washed together in a porcelain mortar, diluted with dissolved hydrochloric acid and stored in a tightly sealed bottle.
You can also rub together 1 part sublimate with 2 parts antimony chloride, adding a little hydrochloric acid to the mixture, and the result will be a liquid suitable for stamping.
Hello, dear readers! Today in this article the author of the video will tell us how you can apply any image to metal yourself at home in a fairly simple way.
To begin with, I suggest watching the video of this homemade product, which is presented below (it consists of two parts):
So, as you already understand, today the author will tell us how you can easily apply any image to any metal, which can no longer be removed in any way. We will apply the image to metal using the etching method. This method is similar to the engraving method, but it does not require any attachments or burrs.
So, let's begin.
For ours we will need the following components:
- the metal on which we will apply the image (in our case it is a knife);
- scotch;
- self-adhesive wallpaper or glossy paper;
- plasticine;
- cotton pads;
- saline solution (you can make it yourself very simply: mix one spoon of salt in half a glass of warm water);
- wires with crocodile clips;
- power supply or battery from 8 to 12 volts;
- one sheet of A4 paper;
- iron;
- laser printer.
Let's get to work.
First, take the self-adhesive paper and carefully peel it off from the glossy paper:


Now you need to carefully glue this glossy paper onto an A4 sheet with tape or in our case “self-adhesive” like this:


Now on the computer we select the image that you want to see on the metal and if there is an inscription there, then it should be made in a mirror form. Print the image on a glossy sheet:


Next, using scissors, you need to carefully cut out our drawing, without touching the image itself, so as not to blur or erase it:


Now we apply our stencil to the knife and try to do everything the first time (so that you don’t have to move the stencil), since the image will have streaks:

Now you need to take the iron, having previously set it to the second setting, and very carefully iron our stencil for one minute:

Now, while our knife is still hot, we take cotton pads and gently iron the stencil, thereby “pressing” the paint into the metal:

After the knife has cooled, you can peel off the paper (do this slowly and very carefully):

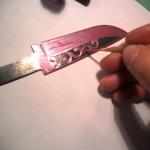
As a result, you should end up with something like this:

Now you need to take tape and paste the knife around the image so that the saline solution does not get on the entire surface of the knife and the etching is neat:


Now we cover the image with plasticine to make a “bath” like this, which will not allow the saline solution to pass through:

Pour a saline solution into our “bath” (about three teaspoons):

Next, we move on to the wires... we connect the “plus” of the battery to the knife:

We connect the second “crocodile” to the “minus” of the battery and now we only need to touch the saline solution:

So let's get started. the saline solution will begin to boil and turn black, which means an etching reaction is in progress. You should keep the wire in the saline solution for no more than 30 seconds, since in the case of prolonged etching, the image will not be clear enough:


Next, you need to disconnect the wires, pour out the black liquid from the “bath” and remove the “bath” itself along with the tape:
Metal engraving! Basic principles.
The basis of the technique is the method of electrochemical etching of metals. Briefly, it is as follows: The part on which the inscription or drawing is made (previously applied with a special varnish) is immersed in an electrolyte solution; it is the anode. That is, the (+) current source is connected to it. The cathode, which is also immersed in the electrolyte solution, is a strip of stainless steel. The (-) current source is connected to it. When the current is turned on, electrochemical etching occurs, that is, the dissolution of the surfaces of the part unprotected by varnish.
The figure schematically shows the principle of the process.
The numbers show:
1. Metal part.
2. Etched area.
3. A layer of varnish keeps the metal unetched.
This is the basis. Now let's look at the whole process in detail.
1. Preparation of the part.
As a rule, it comes down to thoroughly degreasing the surfaces on which the varnish will be applied. Why is this being done? Firstly, the varnish adheres very firmly to the degreased surface, which guarantees that during the etching process it will not be torn off by parts, which will lead to irreparable defects in the form of undesirably etched areas. This can completely ruin the product.
Secondly: if there is a non-greasy area left on the surface to be etched. For example, even your own fingerprint! This fat can act as a layer of varnish, protecting the surface from etching. And then you get an etched fingerprint. This defect is unpleasant, but in most cases it can be eliminated by re-grazing.
And so we will clean the surface from foreign dirt, debris, etc. Be sure to wear rubber gloves so as not to leave fingerprints. And it’s easier to work this way in hot water.

Photo: washing the knife under running water and soap.
Degrease by soaking the part in a solution of soap, washing powder in hot water for some time. Then you need to thoroughly clean the part with a toothbrush (a toothbrush will do) in the same solution. Particular attention to blind (not through) holes. They are very difficult to wash. You can't leave dirt there. Washing is carried out under running water as thoroughly as possible. Don't take off your gloves! From now on, it is generally extremely undesirable to touch the part with hands without gloves, in order to avoid the appearance of the defects described above. If you do touch the part, it is better to repeat the degreasing process. How to check the quality of degreasing? Very simple. Water drains completely from well-degreased metal, leaving no drops or streaks. If drops remain, water sticks to the metal (exact expression), then there is fat in these places. Scrub them with a brush and solution more thoroughly and repeat washing and checking.
Another secret. An ultrasonic bath is used to degrease complex parts that have difficult-to-clean holes, crevices, etc. At home, it can be successfully replaced with a household ultrasonic compact machine. The use of ultrasound significantly reduces degreasing time and improves quality. But in most cases this is not necessary.
Small parts can be degreased by wiping with cotton wool and tooth powder moistened with alcohol. The powder contains soda, which will remove fat. A very quick method of degreasing, but it requires some skill.

Photo: degreasing with alcohol and tooth powder.
2. Preparation of a special varnish.
A special varnish is used to apply inscriptions and designs on metal. The composition and method of preparation have been developed as a result of practical work and, when following these recommendations, guarantee the quality of work. The varnish provides reliable protection of parts of the part from etching and is easily removed at the end of the process. We will need the following ingredients to prepare it:

- Gudron. The substance is black, fragile. Widely used in construction for roof waterproofing and road repairs. Sold in building materials stores in large pieces of 50 kg. For our purposes, such an amount will not be needed. Therefore, it’s easier to look for a piece of tar at construction sites, ask workers pouring roofs or repairing roads. In such cases, as a rule, fragments remain and are simply thrown away. It is important to find a sample that is clean and free of sand and other debris. The content of foreign impurities is highly undesirable and will significantly reduce the quality of the finished varnish. Main component. The required quantity is almost equal to the volume of the finished varnish.

- Rosin. A fragile, amber-colored substance. Made from pine resin. Widely used in soldering electrical products. Inexpensive. Sold in hardware stores, can also be sold as part of soldering kits, together with a soldering iron and tin. The required amount of crushed matchboxes (about 30 cc). Approximately.
- Gum turpentine. A flammable liquid used as a solvent for some paints and varnishes. Sold in hardware departments next to paint. Usually in 0.5 liter bottles. One bottle is enough.
As you can see, all three substances are readily available and inexpensive. Also not hazardous to health.
The tar must be crushed (cracked with a hammer) and placed in a metal container with a lid, in which we will prepare the varnish. Add turpentine there and stir to dissolve. You can leave it for a while to dissolve the tar pieces. Rosin is also crushed and mixed with pieces of tar. Although some sources recommend adding rosin to already dissolved tar. The main thing here is to ensure melting and uniform mixing. It is desirable to obtain the viscosity of liquid sour cream. Now you need to heat the mixture for better mixing.
Heating is carried out on an electric stove, at a low heating setting. It is not recommended to use heat on a gas burner due to the risk of fire. I highlight the most important issue of fire safety separately.
Attention! Varnish and its components are flammable!
Do not use open flame sources to heat the varnish and do not cook the varnish near the fire! Fumes from molten tar are also flammable! If a grayish-white smoke, this is a signal of dangerous overheating. Do not open the lid! Vapors can flare up at any second even from simple stirring. Immediately and carefully, without jerking, remove the container with varnish from the heated stove and cool. Do not cook varnish in residential areas; it is better to do this in well-ventilated places, as a characteristic odor appears. Just in case, prepare a piece of thick fabric. If your polish catches fire, don't panic! Don't put it out with water! Cover the container with a tight lid or cover the fire with a thick cloth. The flame will go out immediately without oxygen. When extinguishing with water, you can be scalded by water vapor, burning splashes of varnish will fall on the body, clothes and objects, and then burns and a fire in the room are inevitable! Never move away from cooking varnish.
The main reason for all fires is that they forgot the varnish on the tiles and went out to drink tea!
If you take reasonable precautions, you will avoid fire. There are practically no cases of fires at work these days.
Heating while stirring is carried out to a temperature of 60-70 degrees. This ensures that the components are mixed and a varnish with the required properties is obtained. Now the varnish can be cooled and stored in a container with a tight lid. The varnish will thicken slightly as it cools.
Simplified preparation of varnish.
You need to purchase ready-made bitumen varnish. It is also freely available in paint and solvent departments. It is used in everyday life to protect water pipes from rust. The varnish is diluted with turpentine and finely ground rosin is added. Approximately a matchbox of rosin for 0.5 liters of varnish. Stir thoroughly under low heat until completely dissolved. Don't forget about fire safety! Cool and pour into a container for storage.
Before direct use, the varnish is diluted with turpentine to the required thickness. The varnish does not deteriorate during storage for a long time. If it thickens, you can always dilute it with turpentine.
3. Applying a design to a knife (another part).
You will say that only an experienced artist can draw a picture or an inscription. But what about someone who doesn’t have the ability to be an artist? The situation here is not at all hopeless. Even experienced artists resort to simple tricks that can significantly improve the quality and speed of drawing. Using this technique, almost any person (of course, if your hands don’t shake!) can successfully achieve good quality. A little practical experience will greatly increase your confidence in your work.
First you need to decide on the future miniature or inscription. Make a preliminary pencil drawing on a scale of 1:1 (it's called a sketch). At the same time, no one forbids you to cut out a suitable design from a magazine, newspaper, etc. with scissors. You can also run it on a computer, if you are familiar with the necessary programs, set the required scale and print it.

Photo: Preparing a sketch on the computer.
Now let's apply the design to the degreased surface of the knife, details using transfer paper! You just need to use a color translation of yellow, red, white (there is one). The transfer of black and purple colors does not leave marks on the metal.

Photo: The knife is inscribed with yellow transfer paper.
Horizontal lines are also marked for writing straight letters.
Advice from an experienced master: To prevent the design from shifting during copying, it and the transfer paper are secured with pieces of tape. Then the drawing is translated using a pencil or pen. The line marks from the transfer paper will allow you to continue varnishing easily and accurately.
4. Painting with varnish.
To draw the future drawing and inscription with prepared varnish, you need to use thin brushes or feathers. By choosing the optimal thickness of the varnish and with a little practice, you can quickly learn how to draw the translated drawing. If you have some experience, you can also freely write with a pen, even without first marking with transfer paper.

Photo: the artist traces the translated inscription with varnish using a brush. Please note: a wooden hand rest is used. A stand in the form of a bench 3 cm high above the table surface. (width 6 cm, length 30 cm). Facilitates precision work and relieves stress, allowing you to work for a long time without fatigue. The stand prevents your hand from touching the grease-free metal surface.
The operation requires some skill and patience. Don't be discouraged if it doesn't work out the first time. You can always easily wash off the varnish using the same turpentine, solvent, gasoline (just use pure unleaded gasoline for nefras or galosh lighters, leaded gasoline is poisonous!) and try again.

Photo: Binocular glasses with 5X magnification.

Photo: The pattern on the knife is painted with varnish. Please note: continuous varnishing of areas not subject to etching has not been completed completely. This is done with the expectation of subsequent surface protection using plasticine!
5. Pre-drying the varnish.
The next technological operation is preliminary drying of the varnish to a semi-solid state. To do this, it is enough to leave the part in a ventilated place for 2-3 hours at room temperature. The varnish will partially dry and thicken.
6. Final elaboration of the drawing.
While applying the drawing with a brush or pen, you may have made some inaccuracies, mistakes and painted over those places that should have been left under the grass. Now you can fix all these defects. Using a sharpened stick made of wood, plexiglass, PCB or a thin metal needle, it is necessary to remove the varnish from excessively painted areas. You also need to clean up the edges of curved lines, making them smoother and more attractive. Trimming the edges of the lines is also important in view of the fact that the layer of varnish at the edge of the drawing is always thinner, and there is the possibility of unwanted etching. By removing varnish from the boundaries of lines, we thereby make the boundary layer of varnish thicker and increase its reliability.

Photo: tools for final elaboration of the drawing. A plexiglass stick, a needle at the end of a stick from an old brush, a fountain pen.
During final processing, an engraving operation is also performed. It involves scratching fine lines using a sharp needle attached to the end of a stick from an old brush. This way you can make very thin etched lines or write an inscription or imitate the knife number.
Removal of grains of excess varnish should be done by blowing off or using cotton wool soaked in alcohol. Alcohol does not dissolve varnish and easily removes debris. If you use turpentine, pure gasoline (galoshes) or any other solvent, the drawing will simply be washed off completely. This way you can delete unsuccessful work results, which is very possible at the initial stage.

Photo: The thin lines scratched with a needle are very clearly visible.
For this operation, it is advisable to use a magnifying glass or binocular glasses.
7. Drying the varnish.
You can finally dry the varnish in various ways. Drying is a very important and responsible operation, the quality of which determines the result of the work.
The most common and reliable way- This is oven drying. Temperature 100-130 degrees. Drying time - 30-40 minutes. Then cool at room temperature. However, this method is used for large volumes of work. At home, we can recommend drying it in an old electric oven set to the lowest heat setting. Do not use ovens that are used for cooking! The remaining smell will linger for a long time and will make cooking impossible! If you forgetfully exceed the drying time, there may be cases of overdrying of the varnish.
Another way- This is natural drying. Just leave the part at room temperature in a ventilated place. Usually the varnish dries completely in 3-4 days. Drying is quite high quality, but very long. To speed up the process, tabletop heat fans are used, with the help of which drying occurs in 1-2 hours.

Photo: Drying varnish using a fan heater.
1 - fan heater.
2 - Details.
Then the cold air flow mode is turned on and the part quickly cools down to room temperature. Perhaps this is the only drying method for parts that have elements that are afraid of heating. For example, writing on a knife that already has a handle assembled. You can’t heat such a knife in a drying cabinet; you can simply burn the handle!
A special warning applies to knives in which the handle is attached to the blade using epoxy resin. When heated to 80-90 degrees, the resin softens and collapses. When it cools, it will not harden again. You can work with such a knife only after disassembling it. How to remove the handle? It’s very simple: heat the blade to 80-90 degrees and pull out the handle!
With natural drying there is practically no danger of over-drying the varnish.
A high-speed drying method is possible using an electric stove. The part is held with the help of a heat-insulating device (you can use pliers) above the heated surface of the electric stove 5-10 cm. The method is quite dangerous due to overheating of the varnish and its fire. The end of heating is considered to be the moment the temperature reaches 100-130 degrees. At this temperature, a drop of water falling on a heated part hisses and rolls along the surface. Which can serve as a simple heating indicator. This is then followed by cooling to room temperature. If you overheat a part, you can very easily dry out the varnish.
A well-dried varnish becomes rigid and does not leave a dent when pressed with the tip of the nail.
8. Danger of overdrying the varnish.
If it overheats or takes too long to dry, the varnish becomes too strong to such an extent that it becomes impossible to remove it with gasoline or any other solvent! This varnish turns into a durable coating, which can only be removed mechanically: by sanding with sandpaper or even using sandpaper!
This can very easily damage a part or a knife. Don't forget about the part located in the drying cabinet or above the tile! Better set a timer for reminders!
Forgetfulness is the main cause of dryness and fires!
Don't forget about fire safety rules! All the above precautions remain relevant during this operation!
Carefully inspect the quality of the dried varnish. It is very possible for bubbles to appear due to very rapid heating. They need to be tinted and dried for a short time.

Photo: part after etching; bubbles that arose during drying led to the appearance of undesirable etched spots (highlighted in red). The defect is irreparable.
9. Operation after drying.
Before subsequent weeding, it is necessary to additionally rinse and degrease the part, which is done by lightly wiping with cotton wool moistened with alcohol and a small amount of regular tooth powder. Then finally with pure alcohol. We have already discussed the need for this in the chapter devoted to surface degreasing. You will also additionally check the strength of the dried varnish.
10. Preparing the part for etching.
It is not at all necessary to paint over all other surfaces with the same varnish. It is enough to limit yourself only to the area around the inscription or drawing. For protection, you can successfully use plasticine, polyethylene and other available materials. Plastic lids and packaging for mayonnaise and other products can be very useful, from which it is convenient to cut out the necessary templates. Carefully wrap the knife handle with plastic wrap, securing it with electrical tape and tape. Plasticine, ordinary, for children, will reliably protect metal surfaces from etching. In general, it is necessary to try, if possible, to protect large painted surfaces with an additional layer of plasticine, which will provide additional protection against unwanted mordants. Looking ahead a little, we note that you immediately need to take care of securing the electrode, and the place of fastening also needs to be protected. At this stage there cannot be any specific recommendations; it all depends on your capabilities and the properties of a particular part. The main requirement is to provide hermetically sealed protection for parts not subject to etching.

Photo: the knife is prepared for etching the inscription. The handle is protected by a layer of polyethylene and tape. The blade is protected with plasticine. Only the etched inscription is left open.

Photo: the part is prepared for etching. Protection with plasticine. The wire for connecting the current is clearly visible.
11. Installation for etching.

The general design of the installation can be seen in detail in the diagram. It consists of a direct current source, a vessel (bath) for etching with electrolyte, stainless steel electrodes (cathodes), the part to be etched and conductors connecting the current source to the electrodes.
Let us explain in more detail.
DC source.
In general, the source must provide a constant current of 3-10 amperes; an ammeter that constantly shows the current is required. It is desirable to have protection against short circuits due to negligence, which can be successfully provided by a fuse of the appropriate rating. In practice, there is no need to purchase an expensive current source with a digital display and a built-in timer. An excellent solution is a device for charging car batteries. It is very possible that you have had it in your garage for a long time. And it's inexpensive to buy. Typically, such devices are equipped with an ammeter, a fuse and a current switch. For craftsmen familiar with electrical circuits, we can recommend assembling a homemade rectifier. I note that smoothing capacitors at the output of the current source are not at all necessary; rectified current with ripple is quite suitable. For pulsed current sources, a capacitor is still needed.
Pickling bath.
It is desirable that the bath be made of non-conducting material. For example: polyethylene, plastics, etc. The main requirement: the part must fit freely in the bath completely immersed in the electrolyte. It is possible to carry out the weeding in a metal container, but it is necessary to isolate both the electrodes (cathodes) and the part from electrical contact with each other. Remember that this significantly increases the risk of electric shock! Do not touch the metal bath while the current is on! Such a bath must be grounded. The safest way is still to use non-metallic utensils. Get creative. For example, to weed long blades of swords, sabers, checkers, use a piece of polyethylene pipe with a diameter of 150-200 mm and the required length as a bath. The bottom of the pipe is, of course, capped. Often, for weeding a single copy of a knife, it is quite possible to use a 1.5 or 2 liter plastic bottle of mineral water or beer, having previously cut off the top part. Although the electrolyte is quite harmless, it is still not recommended to use food utensils for pickling.
Electrolyte composition.
A simple solution of table salt is suitable for weeding most modern stainless steels! For a liter of plain (not distillate) hot water, add 3-5 tablespoons of salt and mix thoroughly. Sometimes it is recommended to add 8-10 milliliters of hydrochloric acid (concentrated) to such an electrolyte. Use extreme caution when handling acid! Although in practice, weed works just fine without it.
To pickle rusting types of steel, copper, brass, aluminum, add a tablespoon of copper sulfate to the salt solution. It is sold in hardware departments, fertilizers (bluish-green powder). I note that aluminum will be etched without any current being connected at all, releasing a large amount of heat. The electrolyte may boil.
The electrolyte is relatively harmless to health, you can work without gloves, but there will be stains that are difficult to wash off. After work, you still need to wash your hands with soap and warm water. It is quite possible to flush the used electrolyte into the city sewer, along with a large amount of water. The electrolyte has a limited service life. That is, during the etching process it is saturated with metal salts and gradually loses its properties. Insoluble brown and green precipitates also accumulate and contaminate the drawing and interfere with observing the process. This electrolyte needs to be replaced. Or let it sit and carefully pour, discarding the sediment.
Previously, solutions of strong acids were used for etching without the use of electric current. We don't recommend doing this. This is a rather dangerous and unhealthy process that requires exhaust ventilation; it is necessary to work with glasses and protective equipment. In addition, modern steels are so resistant to acids that it will take a lot of time with no guarantee of results.
And our simple, safe electrolyte copes with any steel!
Electrodes (cathodes, -).
The most suitable material for manufacturing is mild stainless steel. It is used to make dishes, thermoses, water tanks, spoons, and forks. Most often, the electrodes are strips of sheet steel located on both sides along the walls of the etching bath. If the part has an etched pattern on one side, it is necessary to place the electrode opposite the etched surface, otherwise etching with different (uneven) depths is possible, which is a noticeable defect. Accordingly, if we etch two opposite sides of a part (knife) at once, the electrodes should be on two opposite sides. The size of the electrodes (their surface area) is not particularly critical. The main thing is that the electrode must exceed the area being etched, otherwise an uneven etching depth may be obtained. To etch a small inscription on a knife, the author successfully used an old stainless steel tablespoon. (True, then it took a long time to clean it with sandpaper!) The service life of the cathodes is not limited. They do not dissolve during operation, but only become dirty. Metal salts are deposited on them; when brass is etched, a layer of copper is deposited on them.

Photo: brass etching. A layer of copper appeared on the electrode after 15 minutes from the start of the process, which can be easily removed by washing in hot water. After which the etching continued.
Caring for them consists of rinsing with hot water and sanding a little with emery cloth. The cathode plates must have holes to which the terminals for connecting the conductors are attached. A simple and reliable way is to clamp the wire using a screw with a nut and washers. Ensure reliable contact! A weak contact causes heating, sparking, and the electrode can turn off without you noticing! And then you will wonder why one side of the part was etched well, and the other very poorly.
Conductors.
There are two requirements: they must withstand current up to 10 amperes without heating and have waterproof insulation.
Pickling room
(Click on the picture to enlarge it)

Hidden camera photo: pickling room at the enterprise.
1 - Current sources.
2 - Bath for pickling stainless steels.
3 - Plasticine.
4 - Bath for pickling brass - small. Made from a 50 liter polyethylene tank. Covered with polyethylene.
5 - Bath for pickling brass - large.
6 - Exhaust ventilation. Used for acid etching. Currently not working.
12. Etching process.
We assemble the installation according to the diagram. We pay special attention to correct polarity. We firmly fix the part and electrodes in the bath. Let's check if there is a short circuit between them. The current strength for etching a pattern on one medium-sized knife is about 3 amperes. It is necessary to set the battery charging device to the minimum current value. Increasing the current will lead to faster etching, but is still not recommended due to the possible phenomenon of varnish stripping. Monitor the process constantly. The appearance of pieces of varnish on the surface of the electrolyte indicates a possible partial separation of the varnish. It is necessary to stop the process, remove the part, carefully rinse it under a layer of water and carefully inspect it. Places where the varnish has been torn off must be repainted and dried again. Then continue the process. If you are etching a large drawing or inscription, you will need to increase the current accordingly. The etching time required is 30-60 minutes. On average, in 45 minutes you can achieve a sufficient etching depth. Check the depth visually, removing the part from time to time. To apply a knife number or a thin inscription, a small depth and time of 15-20 minutes are enough. Over time, you will gain experience and be able to accurately determine when to complete the etching.

Photo: etching in a glass jar.
The electrode and the part are secured using clothespins. The electrode is located only on one side, which is not entirely correct. However, the process was surprisingly successful.
13. Washing.
Disconnect the etched part from the electrodes (after turning off the current!), remove the plasticine and other protective equipment. The varnish is washed off with a cloth soaked in turpentine. The final, final rinsing is done with galosh gasoline (for lighters).
The resulting drawing and inscription have a gray-matte background. It should be noted that in the background of the picture there are metal salts and other indelible substances and etching products. They are not harmful to health and this knife can be used to cut food. For most purposes the job can be considered complete.

Photo: Finished drawing on the knife. Etching time 30 minutes. Current strength is 2.5 Amperes. There are no defects.

Photo: Brass part. Etching is complete.

Photo: Same detail. The plasticine was removed, the varnish was washed off with turpentine. The etching depth is clearly visible. Etching time 45 min. Current strength is 1.2 Amperes. The process was successfully completed in a glass jar!
14. Additional operation for processing the background surface of the picture.
With a little work, you can give the background of the picture a metallic shine by clearing it of weed products.

Photo: The polished design has a shiny background and looks more attractive.
This is done by polishing the design, and the rest of the knife does not interfere with bringing it to good condition. Why do we need the following materials:
1. Electric emery or electric drill with a device for attaching to the table.
2. Nap circle with synthetic bristles.
3. Diamond polishing paste. The grain size is 10-40 microns or 7-10 microns. The colors of the pastes correspond to grey, blue and green. Diamond pastes have colors that correspond to the grain size. You can use pastes with a fine grain of 2-3 microns (yellow color), it will give a very good shine, but you will have to work longer.

Photo: Polishing the pattern with diamond paste with a grain size of 7-10 microns (green). Homemade emery is made on the basis of a washing machine motor.
As you probably already guessed, you need to fix the circle on sandpaper or a drill and carefully polish the design using diamond paste. The operation is so simple that it does not require a detailed description. We just need to remind you that you need to wear protective glasses and gloves when working. Hold the knife tightly! There is a great danger of cutting yourself, especially if it is well sharpened! From time to time, wipe the surface with a cloth soaked in gasoline. Quite quickly the background, as well as other surfaces, will acquire a metallic sheen.

Photo: giving final shine using diamond paste with a grain size of 2-3 microns (corresponding to yellow color). Please note: a soft fabric circle is used.
In conclusion, it can be noted that small inscriptions can be polished without using sandpaper, etc. An old toothbrush will successfully replace a polishing wheel. However, such cleaning will require much more time.

Photo: polishing a design with an old toothbrush.
15. Conclusion.
In this guide, we examined only the most important, key points of the method. In each specific case there may be deviations depending on the tasks and your capabilities. Don't be afraid to improvise and experiment! (Of course not on the customer’s things). It's safe to say that a little practice will give you confidence and allow you to achieve excellent results.


Photo: Examples of successfully completed work.
Every buyer of this technology has the right to ask questions that may have arisen while reading the material to the author of the book.
You can also count on my tips in the practical application of this technique.
Questions, suggestions and complaints should be sent to mail to [email protected].
I will try to answer as quickly as possible.
Etching is a process in which part of the metal is removed from the surface by chemical means. This method is used for final processing of a part, when preparing a workpiece before applying a coating (electroplating), as well as for creating all kinds of drawings, ornaments and inscriptions.
The essence of the method
Metal etching involves careful surface treatment. A protective coating is applied to the product, which is erased in the place of the design. Then either acids or an electrolyte bath are used. Unprotected places are destroyed. The longer the exposure time, the deeper the etching of metals occurs. The drawing becomes more expressive and clear. There are various ways to obtain an engraving (inscription): the image itself or the background can be etched directly. Often such processes are combined. Multilayer etching is also used.
Types of etching
Depending on the substance used to destroy the surface of the material, the following etching methods are distinguished.
1. Chemical method (also called liquid method). In this case, special acid-based solutions are used. In this way, ornaments and inscriptions are applied to alloys.
2. Electrochemical etching of metal - involves the use of an electrolyte bath. It is filled with a special solution. Lead salts are also often used to prevent over-etching. This method has a number of advantages. Firstly, the drawing is clearer, and the time required to complete the process is significantly reduced. In addition, this metal processing is economical: the volume of acid used is much less than with the first method. Another undoubted advantage is the absence of harmful gases (the mordant does not contain caustic acids).
3. There is also an ion plasma method (the so-called dry method). In this case, the surface is damaged minimally. This method is used in microelectronics.

Steel pickling
This treatment is mainly used to remove scale and various oxides. This procedure requires careful adherence to technology, since over-etching of the base metal is undesirable. The process uses both chemical methods and electrolyte baths. Hydrochloric and sulfuric acids are used to prepare solutions. All parts require thorough degreasing of the surface. Even a small fingerprint can ruin the workpiece. As a protective coating, varnish based on rosin, turpentine, and tar is used. However, it is worth remembering that the components are flammable substances, so preparing the varnish requires great concentration and caution. After the metal processing is completed, the etching process itself occurs. Upon completion, the part must be cleaned of varnish.

Mordants used for steel
Very often, a solution of nitric acid is used for pickling steel. Salt and tartar are also used (with small additions of nitrogen). Hard steel grades are pickled with a mixture of nitric and acetic acids. Glyphogen is a special liquid based on water, nitric acid and alcohol. The surface is treated with this composition for several minutes. Then they are washed (a solution of wine alcohol in purified water) and quickly dried. This is pre-etching. Only after such manipulations are the workpieces placed in the etching solution. Cast iron pickles well in a sulfuric acid solution.

Pickling of non-ferrous metals
Copper and alloys based on it are etched using sulfuric, hydrochloric, phosphoric or nitric acids. The process is accelerated by solutions of chromates or nitrates. The first stage is the removal of scale, then the brass is directly etched. Aluminum (and its alloys) are etched in a caustic alkali solution. For casting alloys, nitric and hydrofluoric acids are used. Spot welded workpieces are treated with phosphoric acid. Titanium alloys are also etched in two stages. First - in caustic alkali, then in a solution of sulfuric, hydrofluoric, nitric acids. Titanium etching is used to remove the oxide film before electroplating. Molybdenum is treated with a solution based on sodium hydroxide and hydrogen peroxide. In addition, metals (such as nickel, tungsten) are etched using water, hydrogen peroxide and formic acid.

There are several ways to etch boards. In the first case, water and ferric chloride are used. You can make it yourself. To do this, iron filings are dissolved in hydrochloric acid. The mixture is kept for some time. Printed circuit boards are also etched using nitric acid. The whole process lasts about 10 minutes. At the end of the process, the board must be thoroughly wiped with baking soda, as it perfectly neutralizes the remaining caustic substance. Another etching composition includes sulfuric acid, water, hydrogen peroxide (in tablets). Etching boards with the following composition takes much more time: hot water, table salt, copper sulfate. It is worth noting that the solution temperature must be at least 40 degrees. Otherwise, etching will take longer. You can also etch boards using direct current. Glass or plastic containers can be used as dishes for this process (they do not conduct current). Fill the container with a solution of table salt. It is this that is the electrolyte. You can use copper (brass) foil as a cathode.

Etching process for other materials
A type of glass processing called etching is currently widespread. Vapors of hydrofluoric acid and hydrogen fluoride are used. First, the surface is acid polished, then a pattern is applied. After these manipulations, the product is placed in a bath with an etching solution. Then the glass is thoroughly washed and cleared of the protective coating. As the latter, you can use a mixture based on beeswax, rosin, and paraffin. Etching glass with hydrofluoric acid is used to give it a haze. There is also the possibility of color etching. Silver salts give the surface yellow, red, blue shades, copper salts - green, black, red. To obtain a transparent, shiny pattern, sulfuric acid is added to hydrofluoric acid. If deep etching is necessary, the process is repeated several times.

Pickling safety precautions
Metal etching is a rather unsafe activity that requires a lot of concentration. This is due to working with aggressive materials - acids and their mixtures. First of all, for this process it is necessary to wisely choose a room with good ventilation. Ideally, a fume hood will be used for etching. If one is not available, then you need to take care of a respirator to avoid inhaling harmful fumes. When working with acids, you should wear rubber gloves and an apron. You should always have baking soda on hand, which - if necessary - can neutralize the effect of the acid. All etching solutions must be stored in special containers (glass or plastic). Don’t forget about the stickers that will indicate the composition of the mixture and the date of preparation. There is one more rule: jars of acids should not be placed on high shelves. Their fall from a height is fraught with serious consequences. Artistic metal etching is not complete without the use of nitric acid, which is quite caustic. In addition, in some mixtures it can be explosive. Nitric acid is most often used for sterling silver. Etching solutions are prepared by mixing acids with water. It is also worth remembering that in all cases the acid is added to the water, and not vice versa.
Pickling is a metal processing process in which a layer of a certain thickness is removed from the surface under the influence of active chemicals (acids or salts with an acidic reaction), as well as direct current in an electrolyte bath.
Metal etching can serve various purposes and be used in industry and at home. The surface of an item subjected to etching receives a number of technological and decorative properties and allows one to examine its microstructure in a metallographic microscope, remove scale and other non-metallic inclusions from the surface, obtain the necessary jewelry ornament or prepare it for soldering.
Etching, also called electrochemical engraving, is most often used at home or in the garage to obtain relief images on various objects with decorative functions. Most often, it is used on steels with high hardness, the processing of which with conventional engraving tools requires great effort. This process is not very difficult even in the absence of artistic skills, if you follow its technology.
Metal surface preparation
In order for the etching process to proceed at a high speed and the thickness of the removed layer to be the same, all dirt and traces of oils should be removed from the surface of the product. For this purpose, ordinary detergents and cleaning products used for washing dishes and warm water are suitable. After washing and drying, the surface should be wiped with fiber soaked in a solvent, which, in addition to degreasing, helps remove residual moisture.
Separately, it is worth mentioning the quality of surface treatment. Mirror polishing is subsequently guaranteed to give a good contrasting pattern even with a small etching depth. But if its implementation is impossible for some reason, the surface can be treated with sandpaper so that the risks from it go in one direction. This will also give a good optical effect.
Drawing
To apply a design to metal, you can use a lot of different methods that work according to the same mechanism: areas that are not subject to etching are protected from exposure to an aggressive environment or electrolyte.
Method No. 1
The most affordable way is to apply regular nail polish to the protected areas. However, it has a number of significant disadvantages:
- The viscosity of the varnish does not allow the lines to be thin enough to obtain highly complex patterns;
- Good ability in visual arts required;
- Correcting inaccurate lines is difficult.

Method No. 2
First you need to apply a protective layer to the entire surface of the product. To do this, you can use primers GF-021, XV-062 or bitumen varnish, available in auto parts and household goods stores. After the coating has completely dried, you can use a gel pen or a thin marker to draw the contours of the future image. An experienced artist can be hired for this task.
Next, from a copper (or brass) wire or rod, the diameter of which is selected based on the ease of holding in the hand, you need to make a needle with a pointed end and scratch the primer along the image lines to the metal. Harder needle material may damage the polish on the surface of the product.

Already at this stage you can evaluate the relief of the future ornament. To obtain areas with different depths of metal etching, for example, contours and penumbra, this process can be carried out in two or more cycles.
Important! The primer should not chip off during the process. Before applying the design, you should experiment and make sure that it is suitable for the job.
Method No. 3
You will need a laser printer, glossy paper, image processing software and an iron. The selected picture must be formatted (adjusted to size, mirrored) and printed. The most affordable source of glossy paper is women's magazines.
The printed image is applied to the surface, covered with a regular landscape sheet (to protect the iron) and ironed. After cooling, the paper is washed off under running water, and the toner layer remains on the metal surface.

This method is often used for etching printed circuit boards. Its main drawback is that the design is applied only to a straight surface.
Important! The gloss is difficult to see under water. After drying, you need to make sure that it does not remain on the product.
Care must be taken to protect all surfaces of the product. Various substances can be used for this. You can cover the back surface with ordinary plasticine: it is a good dielectric.
Metal etching methods
The choice of a specific method depends on many factors: the chemical reactivity of the metal, the availability of chemical reagents and safety considerations.
Chemical etching
It is performed in a container with the active substance. For carbon steels, solutions of weak acids may be suitable: citric, acetic. Hydrochloric acid works well. Pickling in battery electrolyte, nitric acid and rust converter should be treated very carefully: the process can release toxic gaseous substances, so it is better not to work with such reagents in the absence of a fume hood and good ventilation.
One of the safest substances is a saturated solution of ferric chloride. It can be bought in stores that sell radio components. The advantages of the solution are its almost unlimited service life (when working with iron alloys) and the coloring of the etched surface in an even gray color.

The process time is selected experimentally depending on the concentration of the reagent used and the activity of the metal.
Electrochemical etching
Many stainless and acid-resistant steels, for example, 40Х13, 95Х18, 08Х10Н18, 03Х12Н14М2, do not react to acids, so an electrochemical method is used for etching them.
It will require an electrolyte bath made of plastic or glass, wires, terminals and a direct current source. A saturated solution of table salt will work as an electrolyte. When choosing a container for it, you should remember that the process can proceed quite violently, so its volume should be 2 times larger than that of the electrolyte.
You can use rechargeable batteries as a current source, but it is better to use a charger (3 - 10A) with an ammeter and the ability to adjust the current parameters to select their optimal value. The workpiece is connected to the anode (positive contact) using terminals and a conductor; any stainless plate placed in the bath parallel to the front surface of the workpiece can be used as a cathode. After this, the device is connected to the network.

The entire process can take from two minutes to half an hour, depending on the current strength and the area of the pattern. The etching depth should be controlled by periodically removing the part from the bath. At the same time, do not forget to turn off the power.

At the end of the process, the protective coating can be removed with a suitable solvent and the results of the work can be assessed. Thanks to good adhesion of the etched surface, it is possible to create a colored pattern.

To do this, the entire surface of the product is blown out of a cylinder with nitro enamel, and after it dries, it is wiped with a piece of clean leather, felt or other non-abrasive material. The paint is removed from the polished surface, remaining only in the depressions.
Dear readers, if you have any questions, please ask them using the form below. We will be glad to communicate with you;)
