OSG 06-05-2008 23:18
So we need details! How, what, in what...
Konstantinich 06-05-2008 23:22
Alhim 06-05-2008 23:37
So, can this be done on desktop boxes?
mexanicus 06-05-2008 23:39
Well, not for himself!!!
Technology in the studio. And even better is a worklog.
Vorkuta 06-05-2008 23:45
quote: Originally posted by Konstantinych:
So, can this be done on desktop boxes?
I think it’s possible on anything that is metal.
I did it simply as described on the “help for beginning knife makers” thread.
1. I took a liter jar, poured three heaped tablespoons of salt (you can’t spoil the porridge with oil), and poured hot water from the kettle.
2. Take a regular battery charger, “+” terminal on the blade and “-” on another piece of metal (I took a piece of brass 140X30X1 mm)
3. I set the charger to 6V, the distance between the materials is 4-6 cm, as you like.
But the main thing is not to forget the ink on the blade: what you paint over will remain a drawing!!!
I read a lot about what to paint over, spat, took Tikkurilovsky varnish (urethane-alkyd varnish for wood) and found it in the pantry. And with a brush I applied a design for testing. The jar says it takes 1 day to dry, but I waited 40 minutes (I couldn’t stand it), so I put it in the jar, connected everything, and after 5-10 minutes the result was obvious.
dblsav 06-05-2008 23:50
The pampering was a success, congratulations.
Can't stop now.
Forex 06-05-2008 23:52
Wonderful result!!!
The technology has been mastered...
Kuzya 06-05-2008 23:53
"Congratulations to you, Gleb Georgievich" (C)
In general, a start has been made
Vorkuta 06-05-2008 23:57
quote: Originally posted by Alhim:
Then it will be quite difficult to remove the varnish from all the holes IMHO, but so... why not?
There were no problems with this, I took regular vaporizer and wiped everything off with a cloth, normal. it really stinks of infection.
occasion 07-05-2008 01:26
It turned out fine. I like it....
Nasgul 07-05-2008 06:41
Less stress means better results. To etch small surfaces, you can wrap a piece of cotton wool around the negative electrode, soak it in the same saline solution, and simply wipe the etched area. Pros: it’s fast and you don’t have to bother with banks; it’s easier to control the result. This is how I etch marks on blades using a quick cutter
Vorkuta 07-05-2008 09:13
You can wrap cotton wool around the negative electrode, soak it in the same saline solution and simply wipe the etched area
I tried it, but I didn’t like it. Maybe, of course, I didn’t do it right, well, it took me a long time to wipe it for sure. It was not etched deeply, and then I tried it with a jar
Vorkuta 07-05-2008 09:14
quote: Originally posted by occasion:
Lenin dabbled in boiling water, and Vorkuta dabbled in electricity....
At the age of 5, I put tweezers into a socket and it sparkled like a charm. Since then I have not been friends with electricity.
Serjant 07-05-2008 09:23
I took it to the archives.
Vorkuta 07-05-2008 11:11
Thank you for your attention
Chroniculus 07-05-2008 12:17
inmemories
Nick_Ross 07-05-2008 14:51
In 2004, using a similar technology, I etched inscriptions and logos on anniversary daggers for the 10th anniversary of the office.
I didn’t take any special photos of the etching, but you can see it here.
The drawing was made using photography. Same as for printed circuit boards.
Too small details on the logo...
Truddum 07-05-2008 18:34
quote: Originally posted by Nick_Ross:What is the technology for transferring images, if not a secret?
The drawing was applied by photo method
Nick_Ross 07-05-2008 19:23
I took a can of positive photoresist from a friend (he bought it for circuit boards at the radio market). Sprayed it onto a degreased surface and let it dry in the dark.
I printed the picture onto plain paper and soaked it in paraffin for transparency (this transparency is already enough). Then the picture is placed on a photoresist (press tightly) and exposed to ultraviolet light (I used a currency detector).
It would have been better, of course, on transparent film, but I didn’t have it on hand.
I had to make do with improvised materials...
Unexposed photoresist is washed off with an alkali solution. And then - into the electrolyte.
You just need to select the current so that it etches evenly. And, of course, place the cathode as parallel to the surface of the future picture as possible.
material in the photo - 4X13
serg-pl 07-05-2008 20:00
quote: Originally posted by Nasgul:
Less stress means better results. To etch small surfaces, you can wrap a piece of cotton wool around the negative electrode, soak it in the same saline solution, and simply wipe the etched area. Pros: it’s fast and you don’t have to bother with banks; it’s easier to control the result. This is how I etch marks on blades using a quick cutter
my father always did this and I sometimes, it’s really easier but there is a minus. when you paint a small pattern, the temperature rises in the process and the pattern may float or the varnish may even come off (then the work is all a waste, try sanding it) but this, of course, depends on the varnish. We use our own homemade varnish (resin + rosin), I can’t tell you exactly the proportions, but you can estimate it yourself from the properties of these substances. the blade is heated and coated with this varnish (the varnish in a solid state in the form of a rod melts on a moderately heated blade) then it is advisable to cover the blade on top of the varnish with soot (for example, from a candle or burning petroleum products) so that the wettability of the varnish is poor. Well, of course, the drawing must be scratched with a needle the first time, if it’s ruined, you won’t be able to stick it on (it will probably stick over in the process). They say you can also print a pattern on glossy paper using a laser in the most wasteful version, then glue it to the blade with an iron, soak the paper and remove it. I’ve never done this myself, but I’ve seen other people’s robots, quite neat.
Nick_Ross 07-05-2008 20:17
quote: they say you can also print a pattern on glossy paper using a laser in the most wasteful version, then glue it to the blade with an iron, soak the paper and remove it. I’ve never done this myself, but I’ve seen other people’s robots, quite neat.
I tried this until I learned about photoresist from a friend
But I liked the other method better.
Food-grade aluminum foil is glued onto a sheet of paper (the glue should not float like a fox from the heat.) It is best to wrap the edges of the foil over the front and back edges of the paper.
Then you print and transfer with an iron.
and then just remove the foil.
Toner adheres to steel much better than to aluminum. Probably due to the oxide film
serg-pl 07-05-2008 20:25
Is it normal for small parts to come off the foil?
Nick_Ross 07-05-2008 20:29
Millimeter wide lines are normal.
but less depends on your luck.
That's why I did it using photographs.
I warn you right away.
I played with an aluminum base on pictures 2x2cm and smaller.
I don’t know how it will behave over large areas...
Alhim 07-05-2008 23:11
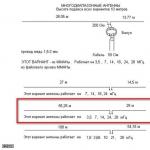
Below is the voltage breakdown at the outputs of standard connectors:
That's all...
Boule 27-08-2009 22:22
quote: Well, in general it’s even simpler: any yellow is +12V, blue is -12V
That's all...
hmm... blue, why touch it? take a lot - black
Volcosob 27-08-2009 22:39
I found a rectifier, took it from the printer, but the bullshit there are three wires at the output and which of them is which?
Kneht33 27-08-2009 22:51
are there red and black? - they are needed, if not, the LED is in your hands!
Volcosob 27-08-2009 23:03
termist 27-08-2009 23:10
There is no black and red - everything is yellow, but I’ll try with a diode.
try it with a tester
Volcosob 28-08-2009 12:44
You can try, but I only have an indicator screwdriver.
termist 28-08-2009 11:51
quote: Originally posted by Volcosob:
, but I only have an indicator screwdriver.
how many volts does it run on?
Volcosob 28-08-2009 14:17
The thing is that from 220.
termist 28-08-2009 15:43
quote: Originally posted by Volcosob:
The thing is that from 220.
then ask your friends for a tester
car-bon 28-12-2009 05:34
On a quick cutter, the pattern turns out black due to the fact that the carbon that is present in the steel remains, but in stainless steel it is absent or small. This carbon can be easily removed with a wire brush on a drill, and then with a polishing attachment. It also gradually wears off naturally, which is why I rip it off right away so that it doesn’t come off in spots later.
Balamutishche 03-01-2010 12:00
and if you poison on Damascus what will happen????????????? who will answer
termist 29-10-2010 22:42
yes, and don’t forget to put the green one on ground to turn it on
hmm which one exactly, I’m sitting with the block in my hands, I don’t know what to do, how to launch it ((((((
termist 29-10-2010 23:51
I’m answering my own question. if you run the block according to advice
quote: Originally posted by Buhl:
Boule
failed, load with 12 volts or 5 volts, or light bulbs from a car, or a cooler (as I did)
Emi1 23-03-2011 06:56
Question about the charger from the printer, there are 3 wires coming from the converter, which ones do we need? The extreme ones?
Drogmoth 23-03-2011 08:00
I did it a little differently. Instead of a jar of electrolyte, a gauze swab was attached to one of the wires, which was periodically moistened in the solution. and led them along the iron.
termist 23-03-2011 09:40
quote: Originally posted by Emi1:
There are 3 wires coming from the converter
black and red are there, they are yours
SH-Andrey 23-03-2011 09:52
4. I used a charger for car batteries as a DC source (produces 12 volts, there are 2 modes: 4 and 6 amperes. I worked at 4 amperes);
5. I used a piece of aluminum as an electrode;
6. Well, then everything is according to the scheme: minus to the electrode, plus to the workpiece (IMPORTANT!!! The electrode and the workpiece must not touch. Maybe this goes without saying for everyone, that’s why they don’t write about this in any instructions on Hansa, but I I didn’t even think about this. I’m an absolute nerd when it comes to electricity and in general I’m terribly afraid of it. Thanks to the kind people for the advice);
7. When everything was finally ready, I turned on the device. The electrolyte immediately began to bubble and some kind of dregs began to stand out. As I understand it, these were particles of varnish. It's a terrible sight, I'll tell you;
8. After 2 minutes I pulled it out, rubbed it with sandpaper and... Oh, miracle! Happened!
9. Inspired by success, I decided to try etching in reverse, that is, etching not the drawing, but the background. The technology is the same. I painted a rectangle with varnish, with the letter “S” in it. The same two minutes of boiling. It worked again.
I came to a conclusion for myself: the most difficult thing in all this is to create a clear drawing. You need to either make a stencil or ask some artist you know (preferably a tattoo artist) to scratch out what you want with a steady hand. Another thought arose: there is such a service as engraving. In our city, I know a couple of places where they do engravings, I even ordered inscriptions on gifts from them a couple of times.
You can ask the engraver to make the desired design on the blade, then cover it with colorless varnish and scratch all the engraving lines with a needle. What will come of this is interesting, considering that engraving already leaves grooves in the metal, albeit not so deep.
three times on 09-04-2012 09:22
quote: Originally posted by sansem80:
I concluded for myself: the most difficult thing in all this is to create a clear drawing
“Ot immanno, oot immanno!” (c) Khryn Morzhov.
A quality drawing is the cornerstone of etching and scrimshaw.
rudy3 28-06-2012 10:23
quote: Originally posted by Ivaldan:
The first experiment in electrochemistry turned out to be shit, but I still want to “brag”
The blade was painted over with spray paint, then the ricun was scratched. Photo after a little cleaning, it was completely scary. There are pores in the paint, the entire blade has spots, especially on the butt. The paint has peeled off in some places. In addition, there was a problem with currents, I had to turn it off after 3 minutes.
It’s not for nothing that I’m afraid of electricity.
rikitikitavi666 29-06-2012 22:13
prim2005 29-11-2013 15:55
quote: The only thing is that it is not clear how a blade with a mixture from “Mole” will behave.
Actually, “Mole” is needed to remove photoresist; it can be removed simply with acetone or solvent
Ulman@Serjan 30-11-2013 13:45
Alyoshenka1986 13-08-2014 20:18
quote: Originally posted by Ulman@Serjan:
Or maybe someone can tell me how to do etching so that it looks like this kind of coating?
I’ll join, I’m very interested too)
Pickling is a metal processing process in which a layer of a certain thickness is removed from the surface under the influence of active chemicals (acids or salts with an acidic reaction), as well as direct current in an electrolyte bath.
Metal etching can serve various purposes and be used in industry and at home. The surface of an item subjected to etching receives a number of technological and decorative properties and allows one to examine its microstructure in a metallographic microscope, remove scale and other non-metallic inclusions from the surface, obtain the necessary jewelry ornament or prepare it for soldering.
Etching, also called electrochemical engraving, is most often used at home or in the garage to obtain relief images on various objects with decorative functions. Most often, it is used on steels with high hardness, the processing of which with conventional engraving tools requires great effort. This process is not very difficult even in the absence of artistic skills, if you follow its technology.
Metal surface preparation
In order for the etching process to proceed at a high speed and the thickness of the removed layer to be the same, all dirt and traces of oils should be removed from the surface of the product. For this purpose, ordinary detergents and cleaning products used for washing dishes and warm water are suitable. After washing and drying, the surface should be wiped with fiber soaked in a solvent, which, in addition to degreasing, helps remove residual moisture.
Separately, it is worth mentioning the quality of surface treatment. Mirror polishing is subsequently guaranteed to give a good contrasting pattern even with a small etching depth. But if its implementation is impossible for some reason, the surface can be treated with sandpaper so that the risks from it go in one direction. This will also give a good optical effect.
Drawing
To apply a design to metal, you can use a lot of different methods that work according to the same mechanism: areas that are not subject to etching are protected from exposure to an aggressive environment or electrolyte.
Method No. 1
The most affordable way is to apply regular nail polish to the protected areas. However, it has a number of significant disadvantages:
- The viscosity of the varnish does not allow the lines to be thin enough to obtain highly complex patterns;
- Good ability in visual arts required;
- Correcting inaccurate lines is difficult.

Method No. 2
First you need to apply a protective layer to the entire surface of the product. To do this, you can use primers GF-021, XV-062 or bitumen varnish, available in auto parts and household goods stores. After the coating has completely dried, you can use a gel pen or a thin marker to draw the contours of the future image. An experienced artist can be hired for this task.
Next, from a copper (or brass) wire or rod, the diameter of which is selected based on the ease of holding in the hand, you need to make a needle with a pointed end and scratch the primer along the image lines to the metal. Harder needle material may damage the polish on the surface of the product.

Already at this stage you can evaluate the relief of the future ornament. To obtain areas with different depths of metal etching, for example, contours and penumbra, this process can be carried out in two or more cycles.
Important! The primer should not chip off during the process. Before applying the design, you should experiment and make sure that it is suitable for the job.
Method No. 3
You will need a laser printer, glossy paper, image processing software and an iron. The selected picture must be formatted (adjusted to size, mirrored) and printed. The most affordable source of glossy paper is women's magazines.
The printed image is applied to the surface, covered with a regular landscape sheet (to protect the iron) and ironed. After cooling, the paper is washed off under running water, and the toner layer remains on the metal surface.

This method is often used for etching printed circuit boards. Its main drawback is that the design is applied only to a straight surface.
Important! The gloss is difficult to see under water. After drying, you need to make sure that it does not remain on the product.
Care must be taken to protect all surfaces of the product. Various substances can be used for this. You can cover the back surface with ordinary plasticine: it is a good dielectric.
Metal etching methods
The choice of a specific method depends on many factors: the chemical reactivity of the metal, the availability of chemical reagents and safety considerations.
Chemical etching
It is performed in a container with the active substance. For carbon steels, solutions of weak acids may be suitable: citric, acetic. Hydrochloric acid works well. Pickling in battery electrolyte, nitric acid and rust converter should be treated very carefully: the process can release toxic gaseous substances, so it is better not to work with such reagents in the absence of a fume hood and good ventilation.
One of the safest substances is a saturated solution of ferric chloride. It can be bought in stores that sell radio components. The advantages of the solution are its almost unlimited service life (when working with iron alloys) and the coloring of the etched surface in an even gray color.

The process time is selected experimentally depending on the concentration of the reagent used and the activity of the metal.
Electrochemical etching
Many stainless and acid-resistant steels, for example, 40Х13, 95Х18, 08Х10Н18, 03Х12Н14М2, do not react to acids, so an electrochemical method is used for etching them.
It will require an electrolyte bath made of plastic or glass, wires, terminals and a direct current source. A saturated solution of table salt will work as an electrolyte. When choosing a container for it, you should remember that the process can proceed quite violently, so its volume should be 2 times larger than that of the electrolyte.
You can use rechargeable batteries as a current source, but it is better to use a charger (3 - 10A) with an ammeter and the ability to adjust the current parameters to select their optimal value. The workpiece is connected to the anode (positive contact) using terminals and a conductor; any stainless plate placed in the bath parallel to the front surface of the workpiece can be used as a cathode. After this, the device is connected to the network.

The entire process can take from two minutes to half an hour, depending on the current strength and the area of the pattern. The etching depth should be controlled by periodically removing the part from the bath. At the same time, do not forget to turn off the power.

At the end of the process, the protective coating can be removed with a suitable solvent and the results of the work can be assessed. Thanks to good adhesion of the etched surface, it is possible to create a colored pattern.

To do this, the entire surface of the product is blown out of a cylinder with nitro enamel, and after it dries, it is wiped with a piece of clean leather, felt or other non-abrasive material. The paint is removed from the polished surface, remaining only in the depressions.
Dear readers, if you have any questions, please ask them using the form below. We will be glad to communicate with you;)
As you know, metal is quite difficult to process at home without special skills and tools, especially if it is such a hard metal as steel. However, you can call on chemistry to help: there is such a chemical process - electrolysis. It flows on the electrodes when an electric current passes through electrolyte solutions. Those. If you take a metal workpiece as an electrode and use ordinary salt water as an electrolyte, then when a current passes through it, the metal will begin to be etched off; in other words, atoms from the surface of the metal will begin to “fly away.” Thus, metal processing does not always require any special skills and tools, because electricity can do everything for us.
In this article we will look at how to etch an inscription or design on a metal plate. For this you will need:
- Plastic or glass container.
- Salt.
- Metal plate.
- Power supply 5 - 12 volts.
- Connecting wires.
Electrochemical engraving on metal
Step 1. Cut out a rectangular piece from a metal plate, on which the inscription will be etched in the future. You can get a metal plate 1-2 mm thick at any hardware store; I bought the cheapest steel eye.
A piece cut from it:

Step 2. Carefully sand the surfaces of the workpiece, first with coarse sandpaper, then with fine sandpaper. The surface should become shiny, covered with many small scratches. You also need to sand the edges and edges of the plate with sandpaper. After sanding, the metal must be degreased with alcohol, solvent, or simply washed thoroughly with hot water and soap. After this, you should not touch surfaces with oily hands.

Step 3. Using a laser printer, print out the design that will be immortalized on the metal and transfer it to the metal using laser-iron technology, which has been described more than once on the Internet. You need to print it in a mirror image. If you don't have a laser printer at hand, you can just as easily draw a design with nail polish or a permanent marker. The painted area will remain untouched, and the bare metal will undergo electrolysis, i.e. it will simply get poisoned.


Step 4. Now that the workpiece is completely ready for etching, you need to take a non-metallic container, pour water into it and add salt. The speed of etching greatly depends on the concentration of salt; the more salt, the faster the process. If the etching speed is too high, there is a risk of damage to the protective layer of varnish or toner from the printer, and the drawing will not be of high quality. The optimal ratio is a tablespoon of salt per glass of water.
The anode must be secured in the container, i.e. the metal workpiece itself and the cathode - a simple piece of metal. The larger its area, the higher the etching rate will be. The etching installation is clearly shown in the picture below:

The plus from the power source (anode) is connected to the workpiece, and the minus (cathode) is connected to the solution. In this case, it is advisable to install several negative contacts on all sides of the workpiece, then the etching will take place evenly on all sides.

A few words about the power source. I use a computer power supply, or rather its 12-volt line. The higher the voltage, the higher the etching speed. You can also use a regular cell phone charger; its output is 5 volts, this voltage will be quite enough. You should not increase the voltage above 12 volts, otherwise the process will be too active, the protective layer of varnish will fall off, and the solution will overheat.
Having correctly connected all the wires, turn on the power supply. Bubbles will immediately start coming from the negative contact (cathode), this means that the process is in progress. If bubbles begin to come from the workpiece, then you need to change the polarity of the power supply.

After several minutes of etching, a nasty yellow-green foam forms on the surface of the solution.

After 30-40 minutes, the workpiece can be removed from the solution, having first turned off the power. It will be completely covered with a black coating, this is normal.

Step 5. Now all that remains is to clean the metal from plaque, wipe off the toner or varnish, and, if desired, sand the surface again. Black deposits can be easily removed under running plain water; the varnish or toner is washed off with acetone or nail polish remover. Now it is clearly visible that the letters on the metal have become embossed, and the metal surface itself has become matte after etching.

Etching is a process in which part of the metal is removed from the surface by chemical means. This method is used for final processing of a part, when preparing a workpiece before applying a coating (electroplating), as well as for creating all kinds of drawings, ornaments and inscriptions.
The essence of the method
Metal etching involves careful surface treatment. A protective coating is applied to the product, which is erased in the place of the design. Then either acids or an electrolyte bath are used. Unprotected places are destroyed. The longer the exposure time, the deeper the etching of metals occurs. The drawing becomes more expressive and clear. There are various ways to obtain an engraving (inscription): the image itself or the background can be etched directly. Often such processes are combined. Multilayer etching is also used.
Types of etching
Depending on the substance used to destroy the surface of the material, the following etching methods are distinguished.
1. Chemical method (also called liquid method). In this case, special acid-based solutions are used. In this way, ornaments and inscriptions are applied to alloys.
2. Electrochemical etching of metal - involves the use of an electrolyte bath. It is filled with a special solution. Lead salts are also often used to prevent over-etching. This method has a number of advantages. Firstly, the drawing is clearer, and the time required to complete the process is significantly reduced. In addition, this metal processing is economical: the volume of acid used is much less than with the first method. Another undoubted advantage is the absence of harmful gases (the mordant does not contain caustic acids).
3. There is also an ion plasma method (the so-called dry method). In this case, the surface is damaged minimally. This method is used in microelectronics.

Steel pickling
This treatment is mainly used to remove scale and various oxides. This procedure requires careful adherence to technology, since over-etching of the base metal is undesirable. The process uses both chemical methods and electrolyte baths. Hydrochloric and sulfuric acids are used to prepare solutions. All parts require thorough degreasing of the surface. Even a small fingerprint can ruin the workpiece. As a protective coating, varnish based on rosin, turpentine, and tar is used. However, it is worth remembering that the components are flammable substances, so preparing the varnish requires great concentration and caution. After the metal processing is completed, the etching process itself occurs. Upon completion, the part must be cleaned of varnish.

Mordants used for steel
Very often, a solution of nitric acid is used for pickling steel. Salt and tartar are also used (with small additions of nitrogen). Hard steel grades are pickled with a mixture of nitric and acetic acids. Glyphogen is a special liquid based on water, nitric acid and alcohol. The surface is treated with this composition for several minutes. Then they are washed (a solution of wine alcohol in purified water) and quickly dried. This is pre-etching. Only after such manipulations are the workpieces placed in the etching solution. Cast iron pickles well in a sulfuric acid solution.

Pickling of non-ferrous metals
Copper and alloys based on it are etched using sulfuric, hydrochloric, phosphoric or nitric acids. The process is accelerated by solutions of chromates or nitrates. The first stage is the removal of scale, then the brass is directly etched. Aluminum (and its alloys) are etched in a caustic alkali solution. For casting alloys, nitric and hydrofluoric acids are used. Spot welded workpieces are treated with phosphoric acid. Titanium alloys are also etched in two stages. First - in caustic alkali, then in a solution of sulfuric, hydrofluoric, nitric acids. Titanium etching is used to remove the oxide film before electroplating. Molybdenum is treated with a solution based on sodium hydroxide and hydrogen peroxide. In addition, metals (such as nickel, tungsten) are etched using water, hydrogen peroxide and formic acid.

There are several ways to etch boards. In the first case, water and ferric chloride are used. You can make it yourself. To do this, iron filings are dissolved in hydrochloric acid. The mixture is kept for some time. Printed circuit boards are also etched using nitric acid. The whole process lasts about 10 minutes. At the end of the process, the board must be thoroughly wiped with baking soda, as it perfectly neutralizes the remaining caustic substance. Another etching composition includes sulfuric acid, water, hydrogen peroxide (in tablets). Etching boards with the following composition takes much more time: hot water, table salt, copper sulfate. It is worth noting that the solution temperature must be at least 40 degrees. Otherwise, etching will take longer. You can also etch boards using direct current. Glass or plastic containers can be used as dishes for this process (they do not conduct current). Fill the container with a solution of table salt. It is this that is the electrolyte. You can use copper (brass) foil as a cathode.

Etching process for other materials
A type of glass processing called etching is currently widespread. Vapors of hydrofluoric acid and hydrogen fluoride are used. First, the surface is acid polished, then a pattern is applied. After these manipulations, the product is placed in a bath with an etching solution. Then the glass is thoroughly washed and cleared of the protective coating. As the latter, you can use a mixture based on beeswax, rosin, and paraffin. Etching glass with hydrofluoric acid is used to give it a haze. There is also the possibility of color etching. Silver salts give the surface yellow, red, blue shades, copper salts - green, black, red. To obtain a transparent, shiny pattern, sulfuric acid is added to hydrofluoric acid. If deep etching is necessary, the process is repeated several times.

Pickling safety precautions
Metal etching is a rather unsafe activity that requires a lot of concentration. This is due to working with aggressive materials - acids and their mixtures. First of all, for this process it is necessary to wisely choose a room with good ventilation. Ideally, a fume hood will be used for etching. If one is not available, then you need to take care of a respirator to avoid inhaling harmful fumes. When working with acids, you should wear rubber gloves and an apron. You should always have baking soda on hand, which - if necessary - can neutralize the effect of the acid. All etching solutions must be stored in special containers (glass or plastic). Don’t forget about the stickers that will indicate the composition of the mixture and the date of preparation. There is one more rule: jars of acids should not be placed on high shelves. Their fall from a height is fraught with serious consequences. Artistic metal etching is not complete without the use of nitric acid, which is quite caustic. In addition, in some mixtures it can be explosive. Nitric acid is most often used for sterling silver. Etching solutions are prepared by mixing acids with water. It is also worth remembering that in all cases the acid is added to the water, and not vice versa.
Hello, dear readers! Today in this article the author of the video will tell us how you can apply any image to metal yourself at home in a fairly simple way.
To begin with, I suggest watching the video of this homemade product, which is presented below (it consists of two parts):
So, as you already understand, today the author will tell us how you can easily apply any image to any metal, which can no longer be removed in any way. We will apply the image to metal using the etching method. This method is similar to the engraving method, but it does not require any attachments or burrs.
So, let's begin.
For ours we will need the following components:
- the metal on which we will apply the image (in our case it is a knife);
- scotch;
- self-adhesive wallpaper or glossy paper;
- plasticine;
- cotton pads;
- saline solution (you can make it yourself very simply: mix one spoon of salt in half a glass of warm water);
- wires with crocodile clips;
- power supply or battery from 8 to 12 volts;
- one sheet of A4 paper;
- iron;
- laser printer.
Let's get to work.
First, take the self-adhesive paper and carefully peel it off from the glossy paper:


Now you need to carefully glue this glossy paper onto an A4 sheet with tape or in our case “self-adhesive” like this:


Now on the computer we select the image that you want to see on the metal and if there is an inscription there, then it should be made in a mirror form. Print the image on a glossy sheet:


Next, using scissors, you need to carefully cut out our drawing, without touching the image itself, so as not to blur or erase it:


Now we apply our stencil to the knife and try to do everything the first time (so that you don’t have to move the stencil), since the image will have streaks:

Now you need to take the iron, having previously set it to the second setting, and very carefully iron our stencil for one minute:

Now, while our knife is still hot, we take cotton pads and gently iron the stencil, thereby “pressing” the paint into the metal:

After the knife has cooled, you can peel off the paper (do this slowly and very carefully):

As a result, you should end up with something like this:

Now you need to take tape and paste the knife around the image so that the saline solution does not get on the entire surface of the knife and the etching is neat:


Now we cover the image with plasticine to make a “bath” like this, which will not allow the saline solution to pass through:

Pour a saline solution into our “bath” (about three teaspoons):

Next, we move on to the wires... we connect the “plus” of the battery to the knife:

We connect the second “crocodile” to the “minus” of the battery and now we only need to touch the saline solution:

So let's get started. the saline solution will begin to boil and turn black, which means an etching reaction is in progress. You should keep the wire in the saline solution for no more than 30 seconds, since in the case of prolonged etching, the image will not be clear enough:


Next, you need to disconnect the wires, pour out the black liquid from the “bath” and remove the “bath” itself along with the tape:
