Easter is approaching, which means there will be a lot of colored eggs in every home. So, it's time to learn a new craft technique: eggshell crafts.
Eggshells are an excellent material for creativity. And we offer you two options for using it:

Materials and tools for crafts made from eggshells
- eggshell
- PVA glue and brush
- thick cardboard or other surface (box, vase, etc.)
- tweezers
- a small wooden stick for pressing shells (a manicure stick is great)
- acrylic paints if the mosaic is made from white shells
- napkin for decoupage (if necessary)
First you need to prepare the material. To do this, the collected eggshells are washed in warm water (and for better degreasing, you can even put them in boiling water with a soda solution). After this, the shell must be dried, the inner film removed from it and arranged by color.
Professionals use shells from raw eggs, because heat-treated shells lose their hardness and their surface becomes more friable. But for children's crafts, you can use any shell, including those left over from boiled Easter eggs.
Eggshell mosaic

To make a mosaic from eggshells with your own hands, you will need a template for the future design. If you have artistic abilities, then simply draw a template on a piece of paper. If not, you can take any drawing intended for children to color. All the contours are clearly drawn there and usually do not require a large number of colors. Glue the sheet with the pattern onto thick cardboard.
Now we begin to glue the shell. To do this, grease a small fragment of the pattern with PVA glue and place a piece of shell on top. If the shell is too large, then you just need to press on top with a stick, the shell will crack and fall apart into several small pieces. Make sure that there is approximately the same distance between the shells.

Having completed one fragment of the picture, we move on to the next.
After filling the entire design, set it aside until the glue dries completely. If you used a white shell, then only after drying can the drawing be painted with acrylic paints.
The finished work must be varnished. The result is a unique version of eggshell appliqué.
Look what wonderful paintings real craftswomen make from eggshells!


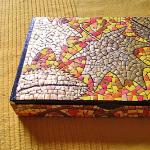
If you decide to do decoupage using eggshells, then first select a blank for the future craft. It could be a box, a key holder, a bottle or even a vase.

Master class on decoupage on eggshell wooden box

This box is wooden, so first we sand the entire surface (both internal and external) with sandpaper. If you started decoupaging a bottle with eggshells, then the surface must first be degreased with alcohol.


It depends only on you how large the shell pieces will be and the distance between them.

We fill the entire surface like this.

And once again we cover everything with a layer of PVA glue.


After this, we cover the entire workpiece in several layers with white acrylic paint.

And we move on to gluing the napkin, i.e. directly to the decoupage itself.

Let me remind you that three-layer napkins are usually used for decoupage. We only need the top layer - the one with the drawing on it. Coat the work surface with PVA glue. If the surface is very large, or you are working with round objects (vases, bottles), then it is better to cut the napkin into two or three fragments. We place the napkin element on the surface and immediately apply PVA glue on top. We brush from the center to the edges to expel the air from under the napkin.
In this way we glue the box on all sides.

Set aside for a while to dry completely.
And then there are two options (depending on your imagination). The finished work can simply be varnished. You can also age the box. To do this, you can paint the shells with silver acrylic paint, and apply black pastel to the edges of the box using a foam sponge.
Eggshells are difficult to scratch with a knife and are close to marble in hardness. It is perfectly sanded and polished, acquiring a pleasant soft shine.
In oriental lacquer painting, eggshells were pasted where it was necessary to depict a stone wall or rock covered with cracks. A scattering of small shells imitated the blooming of spring gardens.
The expressiveness of the "crackle" mosaic is given by the so-called craquelures - cracks that form a bizarre mesh pattern on the surface of various materials.
When straightened, the eggshell breaks into many tiny pieces, which do not disintegrate thanks to the thin film located on the inside. Many of the cracks that form between the shells are almost invisible. But as soon as they are developed with the help of some kind of dye, the mesh pattern of cracks becomes visible, turning an ordinary eggshell into an attractive decorative material.

Preparing eggshells
The collected shells are dipped for two to three minutes in a five percent solution of baking soda, and then thoroughly washed in running water. Usually, shells from raw eggs are used; heat-treated shells lose their hardness, their surface becomes looser and less suitable for further work. (But: for children's mosaics, you can use any shell, including those from boiled eggs, for example, the one left over from Easter eggs.)
To use purely mosaic technologies, that is, creating paintings from pieces of shells, you need to separate the film from the shell. Dry the shells and their parts, paint them entirely (fabric dyes or a range of food dyes are suitable), then store them in a dry, clean container, sorted by color. Typically, the shell is painted unevenly, which creates a large selection of colors and shades for mosaic work.
To create a mosaic or craquelure effect, the shell is not peeled from the film, but rather spread out on a sheet of paper. The inner surface of the shell is lubricated with a thin layer of glue, such as PVA (Fig. 1, a). Then lay out the shells coated with glue on a thin sheet of paper (preferably colored) and press it on top with a flat board (Fig. 1, b). After about a minute, put the board aside and forcefully stroke each shell with a wooden trowel (Fig. 1, c). The smoother is a rod made of hard wood, the oblique cut of which is polished to a shine. Individual pieces of the shell will split into smaller pieces that will adhere tightly to the paper.

After this, a plank is placed on top again and pressed down with a heavy weight (Fig. 1, d). After two or three minutes, when the glue has set, the paper, together with the shell glued to it, is smeared with a thin layer of flour or starch paste. Place tissue paper on the surface of the shell greased with paste and carefully smooth it with your palms (Fig. 1, e). A weight is placed on top and the glue is allowed to dry for several hours (Fig. 1, e).
Having glued all the prepared shells in this way, the sheets are put into a folder. In this form they can be stored for a very long time. The advantage of preparing the shell in this way is the ability to cut out the details of the future image from the sheets using ordinary scissors.
On a colored or dark background, the silhouettes of the glued shells are clearly visible even through tissue paper. This makes it possible to correctly navigate when cutting blanks on which the contours of the mosaic elements are drawn. The silhouette of the pasted shell is unique, it can give impetus to the artist’s imagination. You can fit the contours of various animals, human figures, buildings, cars, plants, and much more into it (Fig. 1, g). Having drawn the contours of a fish found on the shell, for example, they cut the shell with scissors around the silhouette, without trying to work out small details. Using scissors, it is easy to cut the shell along straight and curved lines only from the outside (Fig. 1, h). All kinds of recesses, concave cuts and holes are made with a scalpel or cutter, as well as drills after gluing the shell onto the base-substrate.
You can prepare shells that have different natural color shades. These colors can be used, for example, when working on a mosaic panel based on ancient architecture. Let's say the master has white, brown and cream shells at his disposal. White shell is suitable for simulating snow, white stone walls, brown for fortress walls and towers, and cream for buildings located inside the fortress. This is, of course, an approximate layout.
Shell mosaic by direct set
The painted shell is broken into pieces using tweezers. When developing a skill, the shell can be broken quite accurately, the resulting elements will have a certain shape - triangles, squares, thin strips. Depending on the creative tasks and the scale of the work, sometimes it makes sense to first prepare pieces of the shell, sorted by color, and then start making the mosaic. For small chamber works, breaking off elements can be done directly during the typing process as needed.
Mastic or adhesive is applied to thick cardboard or a sheet of plastic. Then the outline of the picture is drawn. Pieces of shell are placed in place with tweezers in accordance with the picture. The work is dried and then coated with colorless varnish. For quick-drying adhesives, you can use a brush to apply the glue to the shell or directly to the place where the element is glued, but this method is more labor-intensive and time-consuming.
Making a mosaic by removing the shell

All work is carried out on separate boards, which act as the basis of the mosaic set - the backing. The prepared shell is cut into polygons with straight sides (Fig. 2, a). At the same time, they try to ensure that they have right angles whenever possible. This will make it easier to fit them onto the base. One side of the board is completely covered with shell, carefully adjusting the cut out polygons to each other. Each polygon is pressed as tightly as possible to the base with a smoothing iron.
Crackle mosaic technology
Then, on the shell glued to the board, draw the contours of the intended image with a simple pencil (Fig. 2, b). The figure shows the sequence of making a mosaic set with an image of an elephant. In areas where there should be a background, excess shells are removed with various cutting tools. To drill blind holes, use gimlets or a small drill. Carving, as well as chipping of the shell, is done with a scalpel or a blunt knife. The engraving is applied with stichels. The work begins with drilling (Fig. 2, c1), then engraving is carried out along pencil lines (Fig. 2, c2), after which they begin to chip away the shell in the areas reserved for the background. Having completed the mechanical processing, remove the tissue paper glued to it from the surface of the shell. First, the paper is carefully moistened with water using a brush (Fig. 2, d1). After some time, the soaked paper is easily separated from the shell (Fig. 2, d2). Sometimes small seams remain at the joining points, into which small shells are glued.
At the next stage of work on the mosaic set, we begin to identify the craquelures. In this case, the background is painted in some color, for example, black, dark brown, dark blue (Fig. 2, d3). It is convenient to use mascara for these purposes. The mascara contains an alcohol solution of shellac, dyes, glycerin, bile and antiseptics. Thanks to the presence of bile - a surfactant - mascara easily penetrates into the smallest cracks, carrying with it all other components. Having filled the cracks between the individual shells, the ink not only colors them, but also holds them together. This is facilitated by shellac, which after drying does not dissolve even with water.
For reference: Crackle is a network of thin cracks on any surface, a technique for visually aging interior items using special varnishes, additional processing or the use of shells.
Craquelure (French craquelure) is a crack in the paint layer or varnish in a work of painting or the varnish coating of an object of decorative and applied art.
After making sure that the mosaic set is painted evenly, use a slightly damp cloth or swab to remove excess ink from the surface of the shell (Fig. 2, e1). After waiting until the remaining ink has completely dried, they begin sanding the mosaic with fine-grained sandpaper mounted on a wooden block (Fig. 2, e). They sand the surface of the shell very carefully - after all, the eggshell is so thin that in some places it can be easily removed completely. After finishing sanding, replace the sandpaper with regular writing paper. It also has abrasive properties due to the presence of koalin and chalk in it. The polished surface of an eggshell acquires a soft shine and vaguely resembles old ivory or marble. The dark matte background emphasizes and enhances the expressiveness of the mosaic set (Fig. 2, f).
Mosaic set with mastic background

If the background occupies a significant place in the mosaic set, as, for example, in a composition with images of owls, then there is no point in completely covering the surface of the decorated object with the shell (Fig. 3, a). After all, approximately half of the pasted shell will have to be removed later. In this case, it is better to paste over the shell only those areas where the mosaic images will be located directly.
Work on a mosaic set begins with the prepared drawing being transferred to a wooden base. Then they cut out generalized silhouettes from the shell with scissors and paste them onto the base. After the glue has dried, the excess shell (shaded in our figure) is removed with a scalpel or cutter (Fig. 3, b). Typically, cutter marks spoil the surface of the background, and in large areas this is very noticeable. However, flaws can be removed by filling the background with a layer of special mastic flush with the glued shell (Fig. 3, c). The most commonly used mastic is epoxy glue filled with graphite, stone dust, and brick powder. You can paint mastic with any dry pigments, as well as oil paints.
The mastic is carefully applied to the background areas with a wooden spatula or a sculpture stack. Once the mastic has completely hardened, the mosaic set is carefully leveled with a file. The mosaic is then moistened with clean water. Tissue paper pasted onto the shell gets wet and is easily separated from it. All that remains is to use a brush and ink to reveal the craquelure on the surface of the shell. If the mastic is painted, for example, dark blue, then blue ink is used to develop the craquelure (Fig. 3, d). Finally, the set is sanded and polished. The entire surface of the mosaic, including the background, acquires an even soft shine.
Mosaic with multicolor background
The background can not only emphasize the beauty and expressiveness of the material used in the mosaic, but also actively participate in the color scheme of the composition. In this case, the parts made from the shell will serve as partitions, separating one section of the background from another (Fig. 4, a).

Mastic of three colors - brown, black and red - is prepared in different jars. First, fill the background areas with brown (Fig. 4, b) and then with dark red mastic (Fig. 4, c). To obtain a speckled background, black mastic is mixed with shells crushed in a mortar (Fig. 4, d). To prevent the mastic from spreading, edges made of thin cardboard are glued to the edges of the board with the mosaic set. After the mastic has hardened, the sides are removed, the mosaic set is carefully leveled with a file and the remaining tissue paper is removed. The shell is covered with black ink. As soon as it penetrates deep enough into the cracks of the shell, its excess is removed with a slightly damp cloth. After a few minutes the ink has dried and the set is sanded with fine-grit sandpaper mounted on a wooden block and then polished. The black speckled background of the mosaic will appear to be made from many individual shells.
The use of a particular shade of shell will depend on the nature of the image and the task facing the artist.
Mosaic on turning products
Wood products made on a lathe can be successfully decorated with eggshell mosaics (Fig. 6). When turning on workpieces, small recesses of no more than 0.5 mm are selected in advance with a cutter. The mosaic elements are glued onto the surface to be decorated and carefully rubbed onto it with a smoothing iron (Fig. 6, a). Then the product with the mosaic set glued to it is tightly wrapped with some kind of harness (belt or rope), tightly laying the coil to the coil (Fig. 6, b). To prevent the glue protruding from under the shell from sticking to the bundle, the product is wrapped in newsprint in advance.

After the glue has completely dried, the rope is removed, and the areas where the shell is not glued are filled with epoxy mastic (Fig. 6, c). When the mastic has hardened, begin sanding the mosaic set. You can grind directly on a lathe, taking the necessary precautions, or manually, attaching sandpaper to a wooden block with a grooved recess corresponding to the diameter of the workpiece (Fig. 6, d). After identifying the craquelure on the shell and subsequent polishing, the wooden parts of the product are painted dark with stain. Finally, the entire product is rubbed with wax mastic or varnished and polished.
Eggs are a very useful product, but the shells are usually thrown in the trash because they have no worthy use. But creative people differ from everyone else in that they can make a small masterpiece out of the most inappropriate material. We have already written about Gary LeMaster, and today we will tell you about another craftswoman who creates bright, delightful paintings from shells.

The craftswoman's name is Lyuba, she is from Moscow and, perhaps, this is all the information that can be found about a person on the Internet. But Lyubov talks a lot about her work and with pleasure. The girl is engaged in drawing, graphics, embroidery, interior decoration, creating leather accessories and, of course, laying out mosaic paintings from eggshells. Despite all the variety of creative activities, the craftswoman admits that she has an artistic taste by nature, but has no special education.


Let's talk a little about the process of creating paintings from eggshells. Shells should be taken exclusively from raw eggs, and be sure to remove the film from them. Then it needs to be dyed, for which Lyuba uses fabric dyes. After the preparatory stages, the creation of the drawing begins. On black varnished cardboard, the artist draws the contours of the future image with a gold gel pen. Then, using tweezers, the shell is broken into the desired shape, which are then laid like a mosaic. The final result is coated with colorless varnish. The size of the work is about 30x40 cm.


As we can see from the description, anyone can create such a picture. Only Love warns that this work is painstaking and requires patience and perseverance. If this doesn’t scare you, try creating your own mosaic or involving your children in this activity. And ideas for paintings can be found at
There are eggs in every refrigerator, but most people don’t even suspect that you can create a real work of art from their shells. In terms of its hardness, many professionals compare it to marble. The surface of a chicken egg is very difficult to scratch. This is why eggshell mosaics are so highly prized.
Crackle is a technique for creating picturesque paintings from broken shells. In the East, this technique has been used since ancient times. Today, with its help, you can interestingly transform any object. This creates the effect of a cracked varnish coating. Over the years, this technique was forgotten. But long-forgotten old things can be a great way to decorate your new modern home. Children will also love to take part in this process. Be patient and prepare the source material for creativity.
Preparing eggshells
You can make a lot from eggshells with your own hands, but before that you need to prepare the raw materials. Of course, it is not necessary to deliberately beat eggs for creativity. Just collect the shells after preparing the next dish. For example, you boiled eggs for a salad. Clean the surface and place the shell to dry. After it is completely dry, it must be cleaned of the white inner film.

It is better to paint the shell right away using food coloring. Dilute all available colors in different jars. Place the egg peels in there. The dye acts on the material for half an hour. The shade is rich and uniform. After staining, take out the future material and lay it out on sheets of paper. Leave for a day to dry completely.

Shell mosaic: preparatory work
The eggshell mosaic looks very beautiful. The technique is quite simple. To create it, you need to find durable cardboard. It is better to choose PVA glue. To apply it, prepare several brushes. You will also need a pencil, a stationery knife, varnish and sandpaper.

If you decide not to paint the shell in advance, then prepare acrylic paints. They will have to be applied to the finished canvas. This option is more economical, but requires utmost attention and accuracy. After preparation, you can start working. Decide for yourself what your eggshell mosaic will look like.
Surface treatment and mosaic assembly
Be sure to take a responsible approach to preparing the surface for your future masterpiece. The desired image is applied with a very thin layer of pencil. It all depends only on your imagination. If it is difficult to draw on your own, then use modern technologies: select a drawing on the Internet and print it on a printer. Before doing this, mute the colors and contours in the graphics editor.
The finished shell must be crushed into equal pieces. Simply lay out the original material on paper and roll over it with a rolling pin. Just don’t overdo it: pieces that are too small are difficult to place on glue. A large shell looks careless, so find a middle ground.
The glue is applied in parts to the paper. Only after this are pieces of the shell applied. It is necessary to start with the largest particles. There should be space between the pieces, but minimal. Making crafts from eggshells is a long but interesting task. If the pieces don't look nice, use a utility knife. With its help you can give the shell any shape. Take your time creating your mosaic.
Decorate a box or vase with shells
Start exploring other finishing techniques once you have your first eggshell appliqué. The master class can also be found in this article. It doesn't matter what you choose to decorate. The main thing is to prepare the workspace before gluing the egg shell.

The surface of the wooden product must be thoroughly sanded. After this, a primer is applied. It is better to immediately paint the product in the desired color. Only after completing these steps can you start decorating the item. Next, the same points are repeated as in the case of a regular mosaic.
Bottle with eggshell decoration
The bottle can be an addition to any interior. The main thing is to decorate it correctly. An excellent option would be a mosaic made of eggshells on its surface.
- We find the bottle, wash it and degrease it.
- To ensure that the shell adheres well to the glass, you need to use a napkin. It is divided into layers and glued to the walls of the vessel.
- Carefully glue the shell pieces. After drying, another thin layer of napkin is glued on top of the original material.
- Next, the primer is applied and its final drying is expected.
- The drawing is made with paints or using the decoupage technique.
- Don’t forget to secure the finished panel with a layer of varnish. This bottle can be placed in any room or given to a loved one.
These are the crafts you can make from eggshells. Be sure to create with your children, they will appreciate this kind of activity.

For the bravest
Girls can experiment with egg crumbs that remain from decorative work. Everyone knows that eggshell mosaics look good in the interior of a room. But this is not the only option for using this natural material.
All fashionistas take care of their nails. Every week they visit manicure salons to create their next masterpiece. Try to create a very interesting effect on your nails at home.
- treat the surface of the nails and give them the desired shape;
- cover the nail plate with a layer of transparent varnish, now apply crushed eggshell crumbs to the dry surface;
- cover the source material with any color.

This manicure will look interesting on your hands. And it’s very simple to do.
This is how you can use inconspicuous eggshells. Agree, each of these options looks creative and stylish. Experiment and create beautiful things with your own hands. Being original is simple: open up your creativity and you will succeed!
Eggshell mosaic. Master Class
Master Class. Working with natural materials
Eggshell panel "Amanita"
Target: teach how to make a mosaic from eggshells according to plan, and be able to design the work.
Application: The material is designed for children in grade 4, making birthday gifts, decorating the interior of a room, crafts for an exhibition.
Equipment: round board, gouache paints, brush, PVA glue, colorless varnish, gold stained glass outline, toothpick, black marker.
Step-by-step work process
The attractiveness of eggshell mosaic lies in its accessibility: you can achieve excellent results with your own hands, without having any special skills or special devices. You can decorate a variety of objects, decorate any surface
1. I use raw egg shells. For example, I’m preparing an omelette: the contents go into the frying pan, and the shells go into use. Before further use, they must be thoroughly rinsed in cold water, carefully remove the films from the inside and dry.
2. Take a drawing of our future mosaic, printed on a computer. We transfer it to the finished base.
.jpg)
3. The shell is easily glued to PVA. We smear a small area of the design with glue, break it off and lay it down, selecting it by color and shape - as in a regular mosaic.
.jpg)
4. Fill all the empty spaces in the drawing with shells.
.jpg)
5. Lay out the entire pattern with shells.
.jpg)
6. Along the edges of the board we also lay out a pattern of shell pieces.
.jpg)
7. Paint the shell with gouache paints. Using a stained glass gold outline, we draw the tendrils of the spikelets; if desired, we put dots along the edges of the pattern. We outline the entire drawing with a thin black marker. The finished panel must be varnished and your work will sparkle!
* When working with varnish, follow safety precautions. Work in a well-ventilated area.
.jpg)
8. Students’ completed works using this technique.
.jpg)
.jpg)
.jpg)
9. A product made using this technique will decorate the interior of any home; and the creative process will not cause much difficulty, it will only bring a lot of pleasure! Landscape "In the mountains".
.jpg)
I wish you creative success!
