The garland, which is most often used to decorate the New Year tree, can be used as a component for the manufacture of a lighting device. A DIY garland lamp is easy to make.
To make a lamp you will need a garland, a plastic lampshade and a stand.
At the same time, the lighting in the room will be soft. This lamp can be used as a night light. The designs of such homemade lamps can be varied depending on imagination and source materials.
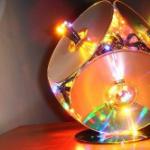
Lamp made of disks and garlands: production
The following materials will be required:
- CDs or DVDs that have no graphics on both sides;
- garland for 15-20 light bulbs;
- glue and a gun for applying it.
The assembly of such a lighting device should begin by making a geometric figure, for example, a cube or a three-dimensional pentagon, which will serve as the basis. To do this, apply glue to the disk and immediately apply another one. The discs are sequentially glued together until the desired shape is obtained. But, in order to make it more convenient to place inside the cube, one of its sides should not be sealed.

To attach the disks you will need a glue gun or wire.
After all the disks are glued together, a garland is placed inside. It is positioned in such a way that the plug and control box are in the window formed by the joint. Several light bulbs come out into the holes. The number of windows placed inside can be from 3 to 5, depending on the size of the light bulb. The luminous elements must completely fill the hole, thereby creating the desired effect. The remaining part of the garland that does not fit into the holes is placed evenly inside the cube. You should leave a few more bulbs in order to thread them through the last line, which is formed after gluing the last disk.
For ease of installation inside the holes, they can be secured together with tape or insulating tape. In addition, the resulting group can be additionally secured with glue or sealant during their placement in the lamp disks.
After all the holes are filled with light bulbs, you should glue the last part of the lamp cube. The light bulbs left for this purpose are threaded into the last disk.
You can use another disk as a stand. The resulting cube is glued onto it using glue, placing it on an edge. This placement will allow the lighting fixture to stand stably in the future. In this case, it should be taken into account that the socket and control box are placed at the bottom, but are not glued.
After the structure is installed on the stand and the glue has completely hardened, the lamp is ready for use.
Return to contents
Lamp made of plastic packaging and garlands

In order to make this model, the following materials and tools are needed:
- The basis. It can be used as a plastic bottle of any size or a plastic packaging box of various shapes, for example, a pyramid-shaped candy box.
- A garland, the number of bulbs in which depends on the size and shape of the chosen base.
- White paint. It is advisable that the paint be in a can. This will allow it to be evenly distributed over the entire surface in an even layer.
- Soldering iron with a sharp tip (or electric drill and drill bit diameter).
- Construction knife.
Before making the slots, markings must be made. They can be placed symmetrically and 1 piece per hole (or in the form of any pattern with several pieces inside). On the base at the bottom it is necessary to make a cut through which a wire with a socket and a control box will subsequently be passed.
If the material from which the base is made allows you to make holes using a soldering iron without damaging it, then it is better to use it. If the integrity of the structure is damaged when exposed to a heated soldering iron, it is necessary to use a drill and a drill for work. According to the markings, holes are made using the tool that is suitable for the selected base.
If, as a result of making holes, sharp edges are formed or part of the plastic remains outside or inside, then these remains must be carefully cut off using a construction knife. This must be done carefully and in such a way as not to damage the rest of the base.
After the processing of the grooves is completed, you can begin painting. The base needs to be painted several times so that a uniform white color is formed over the entire surface.
After the paint has dried, you can place the light bulbs in the holes.
For ease of work, you should start from the top. After all the light bulbs are placed and the wire with the socket and control box are placed in the slot, the base should be covered with a lid. This will allow you to move the lamp around the room. The lamp is ready for use.
It’s completely in vain to remove the glowing garland after the winter holidays. There are many interesting ways to decorate your home interior with it.
1. Place a garland around the edge of the mirror of some interesting shape.

2. Wrap paper lanterns and garland around a branch and hang above your bed.
3. Create a cascading light by decorating the garland with large bulbs.

4. Create an original tree from a garland.


Draw an outline on the wall, drive carnations around the perimeter and wrap a glowing garland around them. As easy as pie!
5. Attach photos to the glowing garland using clothespins.


6. Create your own canvas with a pattern of glowing lights.


7. Thread the garland into flower baskets or place it directly there.

8. Fill wine bottles with lights to effectively illuminate them from the inside.

9. Create an angel wreath using paper napkins.

Using wire cutters, form a round snowflake holder and wrap it with an electric garland with small bulbs. Then glue decorative snowflakes onto the holder.


10. Or use napkins to make a wedding wreath.

Just make small holes in the napkins and thread lights through them.
11. Cover disposable cardboard cups with unusual paper; this will help create interesting light shades using an LED garland.
12. Crochet a glowing rug using rope and garland.

13. Decorate your Christmas garland with tulle bows.

14. To create a festive mood, decorate the garland with old ornaments.

15. Create colorful balls of twine and decorate them with glowing garland.
16. Make flaming snowflakes using store-bought bouquet holders.

17. Intertwine a rope with a garland for a nautical-themed room decor.

18. Create a network of glowing garland in your bedroom.

19. Hang air clouds with a dangling glowing garland.


The photo shows a two-dimensional version of the cloud.
20. You can also use egg cartons to create a floral effect.

21. Write a letter-by-letter message on pendant lights.
Make letters by punching holes in the paper.
22. Create a romantic headboard.

Knock down a simple wooden frame and add crossbars. Drill small holes and insert rosettes into the bottom of each niche. Paint the frame and screw it to the wall. Fill each niche with garland and connect it to the outlets. Cut transparent panels from polycarbonate sheets and attach them to the frame using fasteners.
23. Use glitter wrapping paper to create giant glowing candies.
 Required materials and tools:
- disposable plastic container with lid;
- electric garland;
- scissors;
- wire or pipe cleaners;
- wire cutters;
- multi-colored wrapping paper;
- scotch.
Preparation method:
- Cut a piece of wrapping paper measuring 45x45 cm from the roll.
- Wrap the garland with wrapping paper. Don't forget to leave both ends of the garland outside in order to connect it to the network and connect the element with other candies.
- Place the wrapped garland in a plastic container and seal it. Wrap the container in wrapping paper and secure with tape.
- Using pipe cleaners or wire, shape the container with the garland into a candy shape.
- Decorate the entire garland in this way, leaving free space (20-40 cm) between the links.
- Connect the finished bunch of candies to the network.

24. Insert lanterns into tiny preserving jars.

Take special lids with a hole for the garland. Close each jar with a lid and insert a garland light bulb into it.


25. Insert an LED string light into an old toy.
 You will need:
- old toy (made of cotton fabric);
- PVA glue;
- brush;
- scissors;
- threads;
- light garland.


26. Write a light message.


27. Arrange the glowing garland in a wave-like pattern.

28. Cut out black cat shapes to make this cute garland.

29. Wrap the garland around a wire wreath.

Probably one of the easiest options for creating homemade wreaths.
30. Light up the canopy over the bed with garland.

31. Cut the paper into strips to create the same fringed lanterns.

32. Use foil from a muffin tin as a garland decoration.

This is a great idea for any party.
33. Create sparkly decorations with mirrors and lighting.
 Take:
Take:
- brushed aluminum rod;
- hooks for hanging;
- a garland with mirror pendants;
- electric garland.
Instructions:
- Attach the rod to the wall using two hooks.
- Hang a mirror garland on the barbell. To enhance the visual effect, you can trim some of the threads with pendants so that the finished curtain is of different lengths.
- Stretch a string of lights behind the pendants and connect it to an outlet.

34. Use twigs to create a rustic chandelier.

This idea can easily be implemented with a luminous garland.
Take:- dry branches;
- hemp twine;
- stain (optional to darken the color of the wood);
- wood color paint;
- lamp sockets with a removable cardboard cover for painting;
- plastic ties;
- glue gun;
- electrical cable black and white;
- black electrical wire with plug;
- Branch squeezes "nuts".

35. Make a garland of geometric lanterns.

You can make your own lanterns from black wire or natural straw.
Take:: lampshades, lamps and garlands - this is a selection of simple and understandable master classes on creating beautiful things to decorate your living space.
In this article we will tell you about some useful and interesting DIY handicrafts for the home. We will also prove to you that even novice jacks of all trades can afford to experiment in creating beautiful and practical things for their family nest.
 DIY home crafts - beautiful lampshades for pendant lamps. They are made easily and simply from wool threads soaked in colorless glue or gelatin.
 As part of this article, we have selected for you the most accessible, understandable and easy-to-follow master classes on how to create lampshades with your own hands for a wide variety of lighting fixtures.
 DIY crafts for the home - a lampshade made from starched napkins.
  A lampshade made from a napkin with your own hands looks very unusual in the interior and creates a charming play of light and shadows.
  Another option for a homemade lampshade made from napkins.
  An effective solution is a DIY lampshade made from thread.
  Cheap and easy to make, DIY lampshades made from threads look very beautiful - either singly or in a bundle of three pieces.
  A very effective version of a DIY lampshade made from knitted yarn for a ceiling lamp.
 An interesting DIY craft for the home: balls of yarn or rope can be used not only as lampshades for large lamps.
  You can also “hide” small garland lights in them. This idea is very beautiful and original. It is perfect for both festive and everyday interiors.
 Handmade items are not only exclusive and original handicrafts for the home, which exist in a single copy and for this reason are the pride of the owners of the house.
 DIY lamp made from a glass bottle and garland
 Moreover, doing homemade crafts with your own hands helps save the family budget for the purchase of more expensive analogues. After all, in order to make a lampshade with your own hands, you will need the cheapest and most affordable materials. Perhaps you already have them “on the farm” and you won’t even have to buy anything, all you have to do is put into use what has been lying idle all this time.
Do-it-yourself handicrafts for the home: master classes
How to make a lampshade from threads or yarn

Everything is very simple and shown in detail in the photo. For the lampshade you will need:
- threads or yarn,
- PVA glue (colorless craft glue) or gelatin soaked in water
- form.
An inflatable ball is ideal as a shape (if you want a round lampshade). If you need a lampshade of a different shape, you will have to be smart and find a suitable item.
Next, simply saturate the threads or yarn with glue/gelatin and carefully and evenly wrap them around the form. Let the entire structure dry thoroughly, release the air from the ball, and remove it. Insert the shade into your new lampshade and...you can update your interior!
An interesting DIY craft for the home: we make a lampshade from napkins using exactly the same principle.
Decorative lampshade made of braid or rope: photo MK
Globe lamp: an original craft idea for the home

How to do it: simply paste over a regular paper lampshade with beautiful cutouts from a geographical map.

By the way, interesting DIY handicrafts for the home do not end with such an undertaking. Instead of a geographical map, you can use lace in a contrasting color, decoupage napkins or beautiful vintage pictures, glitter and much more!
DIY crafts: lamp from a bottle

Here, too, everything is clear and simple. Although, unlike the previous options, here you will need a drill or drill and a little more skill.
However, all of these DIY home craft ideas are simple and doable for the most untrained and novice DIYers. Go for it, and you will succeed.
You may also find our impressive selection of a variety of ideas ““ useful.
And we have also previously talked about how this is possible.
Good luck with your creativity and more original ideas!
Many people associate this idea with the New Year, because at this time there are a lot of light bulbs, lights and garlands around. To make such a night light you will need a minimum amount of materials. Just a beautiful glass jar and a garland.
You can also use additional materials to create decor, but a night light in the style of minimalism is more relevant due to the trend of this style in fashion now. So, you need to put the garland in a jar and enjoy the beautiful sight. To make the lamp look more impressive, you can place several jars with lights nearby.

Night light with infinity effect
Such lamps can be found in the store, but we will create them with our own hands. For this you will need:
- Acrylic mirror,
- translucent glass panel,
- strip with LED inserts,
- aluminum strip,
- wooden plank.

Manufacturing plan:
- Make grooves in a block of wood for the mirror and glass panels using special tools.
- The aluminum strip must be folded in the shape of a rectangle and secured to the block using bolts between the cuts made earlier.
- Wrap the aluminum strip with LED strip using glue or wire.
- Insert the mirror and glass panel into the recesses.

Night light - cloud
This lamp is an excellent decor for a small child’s nursery. You just need to take a lamp with a round, oval lampshade and cover it with cotton wool or other fluffiness in the form of a large cloud. The cloud should hang in the air, so you first need to thread a thick thread through the inside of the structure.

LED night light
Such a night light can be made from any material, because diode light bulbs are completely safe (they do not heat up, unlike other light elements). This option is suitable for avid crafters and needlewomen. After all, there is room for your imagination to run wild. Anything, there would be a desire! The LED night light can be made into a wall-mounted or reverse wall-mounted version.

An LED wall night light is made from a straight piece of dense material and the diode strip itself. The base material can be beer cardboard, a thin, not heavy wooden board, and so on. You need to cut out any shape from this material (cats, flowers, butterflies...) and attach an LED strip to the back side. The finished structure can be attached to the wall.

Night light creating stars on the ceiling
This idea of a night light has flashed everywhere: in films, on TV, and so on. No wonder. A night light that creates stars on your ceiling attracts people's attention and makes the room feel magical and cozy. Such a night light will not only create a cozy atmosphere in the room, but will also give pleasant, unforgettable emotions of magic and joy to the child. To make such a night light you will need:
- Small glass jar with lid,
- Thick kitchen foil,
- Felt pen, marker,
- Scissors and awl,
- Board or any other hard surface

Manufacturing sequence:
- Use a marker to transfer the stars onto the foil.
- Place the foil on a hard surface and make holes with an awl, needle,
- Now move the sheet of foil into the jar, pressing it tightly against the walls. You should get a jar with an inner layer of foil walls.
- Place a lantern, or maybe a garland, inside the jar, and close the jar with a lid. Turn the structure upside down.

Paper night light
This version of the product is simple to implement, but requires great care and perseverance. Paper is a pleasant material for needlework. You can make a beautiful night light out of it. To work, you will need thick paper, a stationery knife or awl, and any object that emits light. You just need to create neat holes in the form of some kind of pattern and roll the paper into a cylinder, placing the “light” inside.

Having looked at all kinds of handmade night lights, we can conclude that making beautiful, practical room decor is a pleasant pastime for creative people.

Anyone can create their own night light if they wish. This may seem like a very labor-intensive process, but creating your own decorative element will bring a lot of benefits, subsequently aesthetic pleasure and comfort.

Create beautiful masterpieces of home lighting and delight your loved ones!
Despite the huge range of lighting products available in electrical stores, many people still highly value hand-made products. Firstly, admiring your creation is much more pleasant. Secondly, handmade allows you to create original light sources that can rarely be bought for money.
The approach of the New Year holidays is associated with pleasant chores, including decorating the premises in an apartment or private house. To make the interior more attractive, we suggest you create a lamp from a New Year's garland with your own hands.

Ways to create New Year's lights from garlands
To make devices, you can use any available materials. The main thing is not to forget about fire and electrical safety rules. Below you can see the different lamp options. By following the specified sequence of actions, you will create your own work of art without any problems.
Lamp made of New Year's garlands in a glass bottle or jar
The bottle can be used to create a variety of New Year's lights, but the simplest method is to simply lay an LED garland inside a glass product. The main disadvantage of this method is that the wire will stick out from the neck. To get rid of this defect, you should drill a hole in a bottle or other selected container (this could be a glass jar or vase). The process is painstaking, but if you have a drill, then you won’t be able to find a better alternative.
Necessary materials:
- glass bottle, jar, vase;
- transparent electrical tape or tape;
- a syringe filled with water;
- drill with a special drill bit for glass.
First, decide on the place where the hole will be made, then wrap the bottle with electrical tape (duct tape). Several layers of protective material are required. The hole is best made at the bottom of the container. Mark the location with a marker and begin the drilling process, setting the drill to the minimum speed. Stop from time to time and spray the area under the hole with water from a syringe to cool the glass and prevent chips and cracks.

When the hole is completed, carefully sand the edges if necessary. For this purpose, the drill is equipped with a special attachment. Then all that remains is to remove the tape and use a cloth soaked in alcohol or nail polish remover. It will help remove any remaining traces of adhesive.
Further actions depend on the specific idea. You can create a New Year's lamp from one bottle, or you can make a huge installation from identical or different containers. Do not forget that the capacity is selected depending on the length of the LED garland or vice versa. You should not buy a garland for 200 LEDs if the selected bottle can accommodate flexible boards for a maximum of 50 bulbs.
Now thread one end of the garland through the hole and push most of the product inside, leaving the plug and wire outside the bottle.
To decorate the resulting lamp, you can attach pine cones with sparkles, multi-colored ribbon, rain, beads, and Christmas tree branches to the bottle. Additionally, you can use glass painting, depicting various New Year's motifs on the outside of the bottle, adding sparkles or other improvised means. Inspiration can be drawn from numerous pictures on the Internet.

As for creating a lamp in a jar, you need to proceed in a similar way.
Lamp made from CDs and garlands
To create such a lighting device you will need:
- old double-sided discs of any format (CD/DVD);
- a garland with a length of 20-30 light bulbs;
- glue;
- glue gun.
Before you start assembling a New Year's lamp from disks and garlands, you will need to create a structure of a certain geometric shape. This can be a cube or a three-dimensional polygon used as the base of the device. Apply a thin layer of glue to the surface of the disk and attach a second one to it. Glue the remaining disks together until you create the desired shape. One side of the cube should be unglued, which is important for further actions.
When you complete the process of gluing the disks, place the selected garland inside the geometric volumetric figure. The product must be placed so that the plug and controller for controlling colors are located near the left window formed as a result of the articulation. Some of the light bulbs need to be removed through the holes. In total, there can be from 3 to 5 such windows, which depends on the volume of LEDs.

Light sources must fill the holes completely to achieve the desired special effects. Leave the remainder of the garland that does not fall into the holes inside the cube, placing it evenly over its surface. The outer bulbs need to be pulled through the last side, which will be formed as a result of gluing the last disk.
To make it convenient to install light bulbs in the holes, you can fasten them with adhesive tape (insulating tape). Glue and sealant will allow you to fix the formed group of diodes. After filling each hole with the required number of bulbs, replace the last side of the geometric figure. You need to thread the remaining light bulbs through the last disk.
Another disk can become a stand for a New Year's lamp. Use glue and secure the geometric figure, leaning it against the future base with its edge. As a result of these actions, the lighting device will be as stable as possible. Remember to hide the plug and controller, so make sure they are at the bottom when gluing to the stand. There is no need to glue these elements. Wait for the glue to polymerize, then check the functionality of the lamp.

Lamp made of plastic packaging and garlands
To make the lamp you will need the following materials:
- a plastic bottle or box of any size and shape from which the base of the product will be created;
- a garland for a certain number of light bulbs (the number directly depends on the dimensions of the selected bottle or box);
- white paint in a can for uniform application over the surface of the device;
- soldering iron or electric drill with a drill of the required diameter;
- construction knife.
Before starting work, apply markings to the surface of the base. LEDs can be arranged symmetrically to each other or one per hole. You can create various designs from diodes in the form of a Christmas tree, a snowman, Santa Claus or the Snow Maiden. Make a small slit in the bottom of the bottle or box. It will be needed to thread the wire with the plug and the control unit - a necessary element for the operation of the garland in different modes.
Ideally, you should use a soldering iron with a sharp tip. This will make it much easier to make neat holes in a plastic bottle or box. If the quality of the plastic does not allow making holes and when using a soldering iron the integrity of the product is compromised, then you will have to use a drill with a suitable drill bit. Follow the markings and create holes using the tool that is suitable for a particular case.
Carefully inspect the bottle or box, examining each hole. If you find sharp edges or see that some corners of the plastic are turned inward or outward, use a utility knife and carefully cut off the excess pieces. Be patient and take your time so as not to damage other parts of the workpiece.

Having completed the steps associated with processing the grooves, pick up a can of paint. Apply several coats of paint correctly to the base of the product to ensure a uniform white color over the entire surface of the bottle. Wait for the paint to dry, then place the light bulbs in the holes. To make it more convenient, start the procedure from the top of the bottle.
When you install the LEDs and carefully place the plug with the control unit in the pre-prepared slot, close the base with the lid. Now you can freely move the product around the room and use it wherever you want. The lamp can be supplemented with plastic cups with holes made and individual lanterns installed.
New Year's house made of garland and corrugated cardboard
Corrugated cardboard will serve as the main material for making the New Year's House lamp. In addition to this, you will need a battery-powered garland, PVA glue, clean paper sheets, plain cardboard, acrylic paint and a sharp paper knife.
First, a template is made that will be used to cut out individual parts of the future house. Draw the necessary parts in accordance with the pre-calculated dimensions and cut them out using a stationery knife and a ruler (for convenience). As a result, you should receive several parts for framing, a back and a main wall on which the garlands will be attached.
Inspect the existing garland and measure the diameter of individual light bulbs in order to make a corresponding hole in the main wall of the future house. For example, if there are 12 LEDs on a garland, then they can be arranged either symmetrically or in a checkerboard pattern.

Mark all the points where the light bulbs will be located, then cut a hole on the template using a knife. Next, attach the template to the main wall and draw these holes using a marker, and then cut out with a knife. These manipulations with the template will allow you to avoid erroneous actions and damage to the base material. To give the holes a perfect round shape, insert a round pen or pencil of the appropriate diameter into each hole, and then spin the object.
Now you need to glue the four frame parts together and hide the wavy surface of the corrugated cardboard in the inside of the house. Cut out thick strips from clean paper sheets that will match the width of the future product. Glue them with PVA, then connect this part to the main wall, where there are already holes. Turn the house over and glue the remaining frame pieces to the back side. As a result of these actions, you will receive the basis of the future lamp.
Mask all other unevenness in the same way, but this time use a sheet of regular cardboard. Measure the width and cut strips of the desired size. Don’t rush to cover the house with them, but first secure its upper part using a piece of thick paper. Glue the cardboard strips, starting from the bottom and ending with the walls.
 Next, you need to paint the house with special acrylic paint to make it monotonous and give the appearance of a solid structure. Once the paint has completely dried, begin placing the bulbs by threading them through the holes. It's best to move from top to bottom. To get rid of protruding wires, use tape. Cover the back wall and install the switch. It can be glued with special glue or secured with double-sided tape.
The lamp is ready! Check its functionality. You can leave it in the same color, or decorate it with paper figures in the shape of Christmas trees, snowmen or snowflakes. Beads and “rain” will not be superfluous.
New Year's garland on a branch
First, find a suitable Christmas tree branch on which you will attach the garland. You can use thin wire to secure the light bulbs. If you don’t have one at hand, then buy sparklers. Their metal rods bend well, making them easy to use. To remove the incendiary mixture, you can clean the sparklers with a regular knife.
When choosing a garland and a Christmas tree branch, make sure that the length of the LED product is 2 times the length of the branch. Each branch will be wrapped in a garland 2 times: first you will move from left to right, and then from right to left. By the way, the branch needs to be prepared in advance, since it will take some time to dry. Alternatively, you can cover the branch with acrylic or oil paint in your desired color.
If you want to create a more original product, we recommend additionally creating a frost effect. Regular toothpaste diluted with water will do. You should end up with a mixture that has a consistency similar to kefir with bubbles. Cover the branch with it and wait until it dries. The result will be truly fantastic!
Important. It is absolutely not necessary to use a Christmas tree branch. A branch of any other tree, such as an apple or cherry tree, will do. The main thing is to choose a strong and dense workpiece that will not break during operation.
The lamp can be created from either one or several branches. Let's consider the second option, since it is much more complicated than the first. To begin, secure part of the garland to the first branch. The garland needs to be laid out around the outline of the branch lying on the table. For convenience, move from left to right clockwise, starting from the base, following to the top and returning back.
In some areas, secure the LED strip with wire, cutting off the excess ends with wire cutters or pliers. Place the second branch on the table and arrange the garland around it. If the selected branch has small branches, then be sure to place the garland along their contour in the same way as you did with the base of the trunk.
 At the end, you should have a 50-60 cm piece of free wire left in order to freely connect the product to the outlet. In the lower part, next to the base, you need to fold the bends of the wires and tie them into a tight bundle. The resulting bouquet can be placed in a vase or simply placed on a shelf. Ideally, the lamp should be hidden under a glass form.
When choosing a black or white garland, be guided by the color of the branch. If it is dark, then it is best to use a black LED strip. If you covered the branch with a toothpaste solution, then a white product will do.
The article did not list all the varieties of New Year's lamps that you can make yourself from an LED garland. There are a huge number of options, but it is not at all necessary to choose a specific one. You can use the information received only to modify your own, original product. Give free rein to your imagination, and you will definitely succeed!
