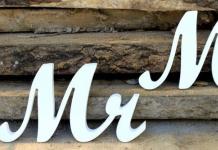
Newlyweds are trying their best to come up with original and bright ideas for their weddings. It has been especially popular lately to use a variety of exquisite details and decorative items in wedding photography, in particular the use of three-dimensional letters. But how to make letters for a wedding photo shoot in order to introduce a fashion trend into your celebration? Thanks to step-by-step instructions with detailed descriptions, you will learn how to make beautiful accessories for photo and video shooting. Complete the letters with bright, unique details and add a touch of individuality to the final decor.
Cardboard letters
Cardboard letters are considered easy to make. They are easy to make, the main thing is to be careful in your work, then the sides will come out smooth and the edges will be the same. Cardboard accessories do not take up much space during transportation; they are easy to transport to the photo shoot location. It will not be difficult for the bride and groom to hold them and actively use them during the photo shoot. We suggest you make letters with the initials of your names for the wedding or create some kind of romantic word or inscription. Subsequently, they can become details of your home interior.

Necessary materials
- Corrugated cardboard (recycle packaging from household appliances for this purpose).
- Scotch tape (you will need both double-sided and regular adhesive tape).
- Stationery knife.
- Scissors.
- Pencil.
- Ruler or tape measure.
- Professional marking board.
- Scrapbooking paper or beautiful colored paper.
- Any decoration elements that match the color scheme and theme of the celebration.
Stages of creation
- Use a professional marking board or a regular ruler to correctly mark the dimensions of the workpieces. Having decided on the desired size, draw the shapes with a simple pencil on cardboard. Then you need to cut out the blanks with a sharp stationery knife. We will need two parts for each letter, so we need to make them in two copies at once.

- We measure the length of each side of the workpiece around the perimeter. We cut out the sides: the thickness can be any, we will make them 5 cm thick. To do this, we cut out cardboard strips of the required length, 7 cm wide, leaving a centimeter allowance for hemming on each side. Having folded the allowances with your hands, we glue them to one side of the base with double-sided tape, forming the sides.
- We apply the second side of the letter to the side and also glue it with tape.
- We use regular adhesive tape to secure the part in random places for reliability.
- We decorate the resulting blank according to our own taste and desire.

A simple and quick way to design a blank is to attach it to beautiful paper (you can use bright wallpaper for this purpose), trace the shape with a pencil, adding a few centimeters on each side for folds. Cut the paper with scissors and glue it to the cardboard blank with PVA glue. Allow the glue to dry, then additionally decorate the facade with lace, beads, pearls, and artificial flowers.
Common options for words in capital letters for a wedding photo shoot: love, married, wedding, happiness, love, happy, just married, amore, amour. The phrases “I agree”, “Forever”, “Yes, I do”, “Family” also look beautiful in the pictures. Inscriptions with equation signs look elegant, for example, “Masha + Sasha = Love” or the inscriptions “Husband” and “Wife” with arrows facing the heroes of the photo shoot.
Photo

Volumetric letters made of fabric
Soft letters look gentle and elegant for a wedding photo shoot. These letters are pleasant to hold in your hands and look beautiful in photographs. Even those who have not held a needle and thread in their hands for a long time and have only basic knowledge of sewing techniques can make these accessories for a photo shoot. Show your imagination by choosing a bright fabric for your crafts, and then you will have beautiful accessories that will decorate your wedding photo shoot.

Necessary materials
- Soft, not too thin fabric, preferably using felt, fleece or felt. Give preference to high quality fabrics that do not fray at the edges.
- Sharp scissors.
- Strong threads to match the fabric.
- Sewing needle.
- Volumetric material for printing letters: padding polyester, padding polyester or holofiber.
- Decorating elements: bright buttons, appliqués, ribbons, lace.
Stages of creation
- At the beginning of the process, templates need to be made. To do this, it is recommended to write the required word or inscription in a Word document, installing the font you like. Visually determine the size by placing a ruler on the monitor with the inscription. Print out blanks with inscriptions.
- We apply the templates cut out of paper or cardboard to the fabric and trace the edges with chalk or a simple pencil. Next, we cut out the patterns, making two blanks of each.
- We apply the patterns with the wrong sides to each other and sew them together in an easy way - over the edge. Choose a colorful thread to sew in the same tone or opposite a contrasting color, for example, red thread to white fabric.

- When sewing the edges, we stuff the letter with a layer of filler, trying to make the thickness the same so that there are no unevenness.
- Carefully stitch the entire perimeter of the craft. We decorate with decorative elements: sew on buttons, fabric flowers, braid, lace.
Photo

Foam letters
Foam letters with creative inscriptions are a popular accessory for a wedding photo shoot. Lightweight foam words look beautiful in pictures. You can toss them in the air for creative and fun photo ideas. It’s easy to make large foam plastic parts for filming; you just need to acquire the necessary material, imagination and free time.
Necessary materials
- Polystyrene foam (use polystyrene from packaging for household appliances or specially purchase it at a hardware store, where they sell it in various thicknesses, so you can choose the thickness of the material needed for your idea).
- Bright marker.
- Stationery knife (sold at a hardware store in the wallpaper department).
- A piece of fine and coarse sandpaper.
- Various decorating materials: fabric, paper, paints.

Stages of creation
- On paper you need to make a stencil with the font you like. We attach the cut out letters to the foam and trace them around the perimeter with a marker.
- Using a utility knife, cut out the outlines of the letters.
- We clean the surface of the parts with coarse sandpaper, then finally sand the letters with fine sandpaper, trying to make a smooth surface.
- We decorate the letters: paint them with bright paint or cover them with colorful paper (some cover them with vintage-style newspaper, which needs to be cut into small strips), cover them with fabric or coat them with glue, and sprinkle glitter on top.

Foam letters decorated with garlands look beautiful and original. To do this, you can use either an LED strip of suitable length or regular New Year’s multi-colored garlands. Attach them around the perimeter of the letters with small strips of tape. Hang an illuminated sign on a tree branch outside using wire for a romantic evening wedding photo shoot. Unique, inimitable video and photo shots are guaranteed to you.
Three-dimensional letters will become a bright accent of wedding decor, decoration of the bride’s room and interesting props for a photo shoot. These can be the initials or full names of the newlyweds, the wedding date, various words of the corresponding topic or figures.
Few people know that you can make three-dimensional letters with your own hands. The material for their manufacture can be cardboard, foam or wood. For decoration you can use lace, satin ribbons, fabric, artificial flowers, thick threads, beads and sparkles, or you can simply cover the letters with paint.
What is needed to create letters from foam plastic
To make three-dimensional letters with your own hands from foam plastic, you will need the following materials:
- Styrofoam. You can buy it at a hardware store or use suitable pieces from the packaging of furniture and household appliances;
- sandpaper, coarse-grained and fine-grained;
- wallpaper scraps, newspapers or other materials for covering letters;
- glue – PVA, wallpaper, superglue;
- suitable decorations - ribbons, beads, flowers;
- ruler, stationery knife, marker, scissors.
If thin packaging foam is used, it is better to glue it in three layers. Moment glue and the like are not suitable for gluing layers; they corrode the foam.
Making letters

Making letters from foam plastic
Pieces of wallpaper left over from renovation are perfect for decoration. First you need to paste over the side edges of the product, and then the front and back. The joints can be decorated with satin or lace ribbon, and you can also use beads, threads, and feathers as decoration.
You can secure the foam letters using mounting adhesive or double-sided tape.
Paper letters
Many people don't like the sound of crumbling foam, so you can use paper or cardboard instead. To make three-dimensional letters with your own hands from paper you will need:

Decorating letters from paper
You need to draw a letter on a cardboard sheet; it is advisable to use straight lines, without curves. Then, using scissors or a stationery knife, cut out two parts of the future letter along the contour. Cut strips of cardboard approximately 7 cm wide and with a total length equal to the perimeter of the letter. Step back 1 cm from the edges of the strip, bend the edges and stick strips of double-sided tape on them. Glue the sides to one side of the product. Glue the other side on top. The resulting three-dimensional figure can be secured with strips of tape.
You can trace the letter on designer paper and make a little allowance. Then cut out the outlined outline and paste it over the product. For decoration you can use beads, ribbons, lace and beads.
Choose a word or phrase and write it in a computer program or by hand in your desired font. Try not to use a very complex font, it will be difficult to cut out. Make letter designs on paper. Lay out the foam you plan to use to make the letters in front of you and try the designs on individual pieces. If you plan to leave the letters without additional external decor, try to cut them out from a single piece.
Foam sheets can be purchased at craft and hardware stores.
Transfer the letter designs onto the foam using a ruler and a marker or felt-tip pen. Cut out the blanks with a sharp knife with a long, hard blade. Clean the edges first with a knife, then with sandpaper.
When cutting out letters from foam plastic, make sure that the blade of the knife goes perpendicular to the plane.
If the foam had large grains, during the cutting process large flaws could appear in the form of deep grooves that could not be sanded. Tear newspaper sheets into small pieces and cover all the letters with them in an even layer. Coat with PVA glue. After the papier-mâché has dried, sand all surfaces with sandpaper and prime. Then you can decorate the letters as you wish.
DIY letter decoration
Foam letters can be painted with acrylic paint. When using other paint, make sure that it does not dissolve the foam. It is most convenient to work with a sponge rather than a brush. This way the paint will be applied more evenly. If the letters are very large, use a foam roller.
The letters will look original if they are decorated with self-adhesive film. It is sold in different colors and textures. Choose the one most suitable for your business.
You can decorate the foam letters with a regular Christmas tree garland. Secure it with transparent tape along the outline of each letter. Don't forget to make sure there is an outlet or extension cord nearby.
For home decor, the letters around the perimeter can be decorated with LED strip. You will get a kind of night light.
Wrap the letters with colored wool threads. First, apply double-sided tape to the foam, and then apply thread in even rows. You can use one color, or you can make the letters multi-colored.
Decoration with foam letters
To decorate the room, make an inscription from foam plastic. To make it, use foam ceiling tiles. Cut out the desired word or phrase from it. Choose a suitable frame so that the inscription fits inside. Decorate the baguette and backing to match the style of the room. Stick the word on with a glue gun.
For original winter events
Polystyrene foam is a cheap, durable and very pliable material. It is often used to decorate rooms where a holiday, party or wedding celebration is planned. Letters cut out of polystyrene foam with your own hands can be used to create inscriptions, monograms, and logos.
The technology for making letters from foam plastic is very simple. It consists in the fact that an outline is first applied to the foam, then the desired letter is cut out, and after that it is decorated in various ways. In this tutorial you will learn how to cut out letters from foam and use them to create an inscription or logo to decorate your room. So let's get started.
We will need:
- letter templates (it’s more convenient to print on a printer and then cut out);
- a sheet of foam plastic 2-5 centimeters wide;
- cutter or regular knife;
- marker;
- glue.

Personal monogram
Do you want to decorate your front door or room with an original personalized monogram? Polystyrene foam is perfect for this purpose. The technology remains the same. First, create template letters from paper by choosing a font and printing them out.

The personalized monogram is ready. Now it needs to be decorated. How can you paint foam letters? Any paint you have on hand. The easiest way to do this is with spray paint. All that remains is to place the monogram of letters on a suitable background, and the craft is ready.
If you have plenty of time, you can decorate the foam letters with fabric. To do this, you need to attach letters to a piece of fabric, trace them along the contour and cut out the details. Don't forget to leave an allowance! Lubricate the surface of the letters with glue and wrap them with cloth. Wait for the glue to dry and enjoy the result.
