The question of what a brick cesspool is and what advantages it has is becoming more and more relevant, as modern people have begun to appreciate the comfort and benefits of civilization more and more. Of course, it is better to connect your house to the central sewer, but this is not always possible, which is why you have to make a cesspool and a sewer system with your own hands.
To give a cesspool is the most common way to organize a sewer system. And this is not at all accidental, since the principle of operation of such a structure is incredibly simple: sewage and sewage, used water and kitchen waste flow through pipes into a storage tank located on the site. As it fills up, you can clean it yourself or call the vacuum trucks. Let's figure out how to build a cesspool of bricks with your own hands.
Advantages and disadvantages
Any local sewer system has both its advantages and disadvantages. Of course, the cesspool is no exception. Advantages of a brick pit:
- Environmental friendliness. Sewage is either effectively cleaned or removed by sewage trucks to special drain stations.
- An obstacle to soil and groundwater pollution, since if the volume of wastewater is more than 1 cubic meter, the installation of a storage tank without a bottom is prohibited. With a small volume, the bacteria living in the soil will provide natural cleaning.
- Ease of operation and installation. Even a novice builder can do all the work on arranging a brick pit.
Note! To lay out the walls with bricks, it is not at all necessary to have a lot of experience. Since they will still be hidden from prying eyes, this is a way for beginners to practice bricklaying.
- No dependence of the storage tank on the level of groundwater or soil type.

Disadvantages of a brick pit:
- Possibility of unpleasant odors. Timely cleaning and the use of special preparations that accelerate the processes of waste decomposition will help you cope with this problem.
- They are not very durable. If you have a brick cesspool, the sewer will last about 15 years. Over time, it will become unusable due to the gradual decomposition of wooden struts and brickwork, which turns into clay with prolonged exposure to water.
- The need for frequent calls to vacuum trucks.
Stages of creating a brick pit
Building a cesspool with your own hands is a process that includes several steps:
- Selection of the location of the cesspool. The distance to residential buildings should be at least 5 meters, to the fence - at least two meters. In addition, it should be located as far as possible from the source of drinking water and lower in level. Otherwise, there is a risk of infection.
Note! When choosing a place for a cesspool, it should be possible to drive the sludge at a distance of less than four meters. Otherwise, the hose simply will not suffice.
- Preparation of the necessary tools and materials for construction will require: a bayonet shovel with a regular and long handle; shovel with special sides and a long handle; pegs for marking and fencing; roulette; stairs; building level; buckets; Master OK.
- Planning of sewer channels and estimation of volume. The volume of the drive is determined as follows. On average, 0.5 m3 is required per person living in the house. As a result, a family of five will need at least 8 m3.

The approximate dimensions of the cesspool are: depth - 3 meters, length - 3 meters, width - 1 meter. These dimensions are approximate. Also remember that the fill level should be one meter below the soil level. Otherwise, the drainage of the cesspool will be disturbed and wastewater may go beyond the storage tank.
Note! The depth of the sealed cesspool should not exceed three meters, otherwise pumping out sewage with a sewage machine will be difficult.
- Pit dig. You can dig a hole either on your own or using special equipment. Of course, the second option is much more expensive, but the services of an excavator will save you time and effort.
- Installation of a septic tank (if necessary). The septic tank allows for efficient waste treatment.
- Arrangement of ventilation. Ventilation is necessary for the release of methane released during chemical decomposition reactions. If the gas is not removed, there is a possibility of an explosion. Ventilation is carried out through the hatch, which must be free from soil, as well as through the ventilation pipe.
Pit work
The actual process of building a cesspool begins with earthworks - a very long and laborious process. The walls must be leveled and protected from collapse, the bottom must have a slope towards the hatch, which will be installed after the walls are erected.

The easiest way is to make a square or rectangular pit. A sand cushion 15 centimeters thick is installed at the bottom. A layer of concrete of the same thickness is laid on the pillow so that the concrete grabs well, it must be left for about 7 days. Then a cement-sand screed is made at the bottom.
Note! The bottom can be made from a prefabricated reinforced concrete slab, but it must also be placed at an angle.
Now you can move on to building walls. If you decide to use burnt bricks, then you should prepare a clay castle in advance. Masonry will be carried out on a base made of sand-clay mortar. After the wall is erected, it is plastered with the same mortar.
Note! The thickness of the masonry must be at least 25 centimeters, and the thickness of the partitions must be at least 12 centimeters. It is best to carry out laying by tying the bonding row and every fourth row with a strong cement mortar.
To reduce the water permeability of the brick and increase the life of the cesspool, the walls must be additionally covered with a layer of waterproofing. For this, experts recommend using modified bitumen or bituminous mastic.
Note! Bituminous waterproofing should only be applied to the dry surface of a brick wall.
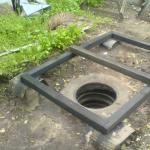
The next step is to install the floor. The overlap must be very reliable and durable, able to withstand heavy loads. As a ceiling, it is better to use reinforced concrete structures. From the sides, the pit should be blocked by at least 30 centimeters. And do not forget to leave a hole for the hatch so that it can be pumped out and cleaned.
![]()
To create a ceiling, formwork is made. The dimensions of the formwork should be at least 30 centimeters larger than the dimensions of the pit itself.
Formwork concrete is poured in two layers: the first layer is 7 centimeters, then reinforcement with bars at a distance of 10 centimeters, then the second layer of concrete is poured.
Note! If you want to make your own concrete floor, then you need to fill the structure at the same time as creating the floor. Then the overlap will be able to gain the necessary strength.
After the concrete has set well, the ceiling must be covered with a waterproofing material, for example, roofing material or plastic wrap. Then, from above, the ceiling is covered with soil, slag or soft clay. The hatch cover must be made double.
This will prevent freezing in winter and unpleasant odors in summer. The first cover must be installed at ground level, and the second - at floor level. Then the space formed between the covers is filled with slag, expanded clay or laid with a heater, for example, mineral wool or foam. It should be noted that the top hatch cover must be completely waterproof.
Now that all the work is done, you can enjoy an excellent do-it-yourself sewer system. It is only important not to forget to clean it periodically, and then you will not have any problems. It was not so difficult to bring urban comfort to a summer cottage or a country house, but the result was beyond all expectations.
