When you constantly meet with the problem of the appearance of excess water on the site, it is necessary to take measures to remove it. Otherwise, you will not only get into trouble in cultivating the site, but also jeopardize damage to the foundation of the house or nearby utility buildings. The manufacture of drainage, or rather, a drainage structure in this situation, is the only acceptable way out.
In this article, we will consider a simple and economical way to create drainage in a personal plot. 
Preparatory actions
Before you begin the process of assembling and installing a drainage structure, you need to decide what result you would like to achieve. Based on your decision, you need to create for yourself, at least at a primitive level, a project for the future system: determine its location, possible consequences of contact between the system and surrounding objects, dimensions, dimensions. Based on the generalization of all these data, it is already possible to calculate the material costs for the purchase of the entire volume of consumables. It is useful, by the way, to understand that the depth of drainage directly depends on the height of the well intended for drainage. It is customary to place the well a little higher than the elements of the entire structure. 
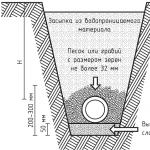
Now about the design itself: traditional (or “French”) drainage is a trench filled with gravel, separated from the ground by geotextiles (geotextile is used to prevent mixing of soil and gravel, it also passes water through itself and prevents weeds from growing). Gravel together with geofabric helps water to quickly soak into the ground, evenly distributing moisture along its location, thus preventing the collection and stagnation of water in a particular one place.
When creating this type of drainage, corrugated pipes are usually used, equipped with longitudinal holes on one side, usually made of PVC. At the end of the entire system, a drainage tank should be located, the task of which is to evenly distribute the accumulated water into the ground around it. To create this well, a two-hundred-liter plastic barrel in the form of a drum is well suited (the rounded shape of the container is more preferable in this case) with multiple holes in the bottom and walls. This well should be placed on a special gravel “cushion” (about 10 cm), the space between the walls of the pit and the tank is also filled with gravel (layer thickness 15 cm). Holes are made in the upper part of the barrel to receive incoming water, and one of the holes is to install a special drainage grate. You don’t need to make many holes, two or three, 5 cm each, are enough. One large hole is made in the upper part of the well wall, designed to enter the drainage system pipe.
The second major element of such a system is a catchment tank, the width of which should be approximately 30x30 cm. The tank must be equipped with a drain grate. personal plot is not a very costly operation. In the manufacture of the system, affordable materials are used and you need a little of them. The most expensive part you will need may be the catchment tank. A PVC pipe will cost much less. Gravel will need about two cubic meters. You will also need to purchase a special fabric - geotextiles.
Digging a drainage trench
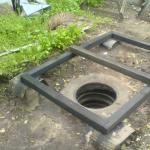
Next, you need to dig a trench from the catchment area to the drainage site and a pit to install a well on this side and a reservoir on the other. In the place for the drainage well, the pit will need to be deepened by 15 cm compared to the depth of the rest of the trench, the depth of which, in turn, you will need to independently calculate based on the dimensions of the drainage tank. 


Production of a drainage well
Using a drill with a diameter of 2-3 cm, you can easily turn the walls of the tank into a sieve. Through these holes, if possible, made at equal intervals, the waste water that has entered the barrel must evenly go into the surrounding soil. On the wall of the barrel, at the top, you should make a hole according to the diameter of the drainage pipe and prepare a mount for the pipe. 


trench filling
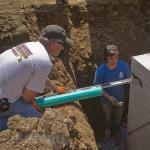
Then the excavated trench must be covered with geofabric. This will prevent silt and dirt particles from mixing with the gravel. Also, geotextiles will provide better absorption of moisture by the ground. Next, place an already prepared 200-liter barrel on an 8-10 cm gravel bed. Place a small amount of gravel around the barrel and make sure that the tank does not “walk” from side to side. Similar actions should be done with the water collector, which must be made so that its upper edge is along the edge of the earth's surface. The height of the water collector can also be adjusted by adding gravel. 


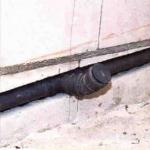
Make sure that the water collector is also immobilized. Then you need to connect both reserve cars to the drain pipe. It is important to know that the holes in the drainage pipe should be located on its lower side, while the pipe itself is laid down a slope. Fill the trench with gravel. Make sure that the surface of the earth and gravel remains 15 cm. Next, we mount the grate for draining on the tank. Then it is necessary to tuck the geofabric, making sure that the edges of the textile on both sides of the trench overlap, covering each other. 


Now you know how you can independently build drainage in just a couple of days at no significant cost. The main thing in this case, as in all others, is careful preparation.
Video How to make drainage on the site with your own hands
