The key to a comfortable stay in a private house is based on three “pillars”: a reliable foundation, a good roof and a well-equipped sewerage system. Most people think of a country house bathroom as an "outdoor convenience", but today a large selection of building materials opens up a lot of opportunities to organize a toilet inside the house, just like in an ordinary city apartment. In this article we will tell you how to build a toilet in a private house with your own hands at minimal cost.
Let's start with perhaps the simplest and most common way to build a toilet - using a cesspool. Of course, the sewer system is much more convenient, but not everyone has the opportunity to equip it. As for the cesspool, it does not require any professional skills, financial investments, and anyone can handle such work if desired. But first you need to decide where the toilet will be located - in the house or on the street in a separate room. It will be necessary to equip a cesspool in both cases. The most "popular" form of a toilet in a private house is the so-called backlash closet. The principle of its operation is identical to the village bathroom, but its appearance is much more aesthetic. Location selectionTo choose the right location for the toilet, it is necessary to build on not only personal preferences. Several factors must be taken into account. First, what distance will be between the toilet and the source of drinking water. It is desirable that the well be as far away from the latrine as sewage can contaminate it. The minimum distance should be 20 m (preferably 25-30 m). The second point follows from the first - drains should not poison groundwater or land, so they should be carefully isolated. And finally, we must take into account the constant direction of the wind, so that unpleasant odors go away from the territory and nearby houses.
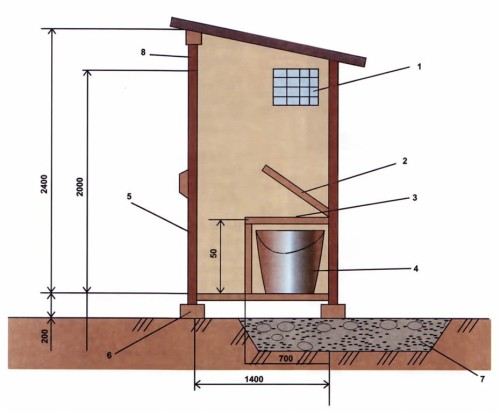
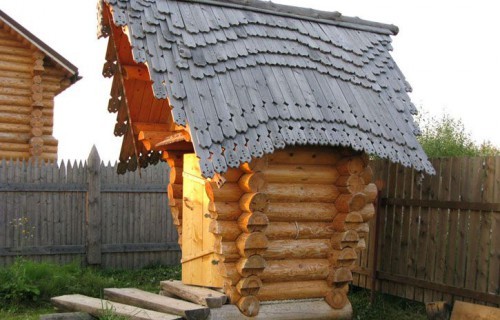
The easiest way to make a powder-closet is an ordinary wooden house, mounted on a support made of wooden beams or reinforced concrete blocks. In this case, the function of a cesspool is performed by a small container, which must be emptied as it is filled. This method has its inconveniences, but it takes the least time and requires virtually no investment. Pit deviceIf you do not have the desire to constantly mess with the sewage tank, you will have to organize a cesspool. The surest option for its installation is reinforced concrete rings, but even without them it is quite possible to make a full-fledged toilet in a private house with your own hands. How to make a cesspool:  It does not interfere with ventilation. To do this, use ceramic and asbestos cement pipes 100-150 mm in diameter. Connect the exhaust pipe to the backlash channel located at the chimney of a solid fuel stove or fireplace. If gas heating is installed in the house, the channel must be heated by a tubular electric heater up to 40 W, located inside the pipe. There will be a consistently good hood in the backlash channel if all joints are sealed. Sewerage in a private houseTo make a warm toilet in a private house, you will need to organize a full-fledged sewer system with a cesspool, piping and other plumbing delights. We must warn you that such work requires not only thorough preparation and financial investments, but also at least a superficial understanding of the principles of sewerage operation. Location selectionIf the restroom is located inside a residential building, this does not mean at all that it can be done anywhere. The dimensions of the toilet in a private house are usually small, so a room the size of a small pantry is ideal for it. As for the location, it is better to choose a site closer to the drain well so as not to lay pipes under the whole house.
To solve several problems at once, you can equip a combined toilet and bathroom in a private house, install a washing machine and other necessary equipment in the same room. But it also happens that there is simply no extra free space. In this case, you will have to select some corner of the room or corridor and fence it off with partitions. The entrance to such a bathroom can be cut through in an adjacent wall. Inexpensive materials like chipboard, plywood and drywall are suitable for construction.
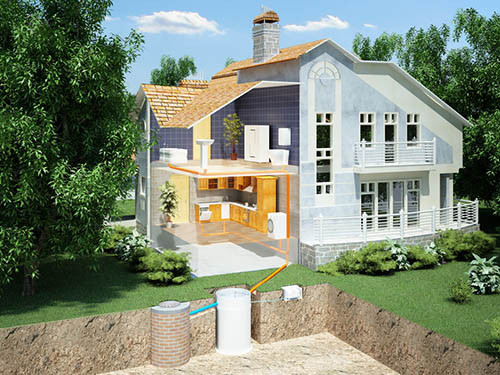
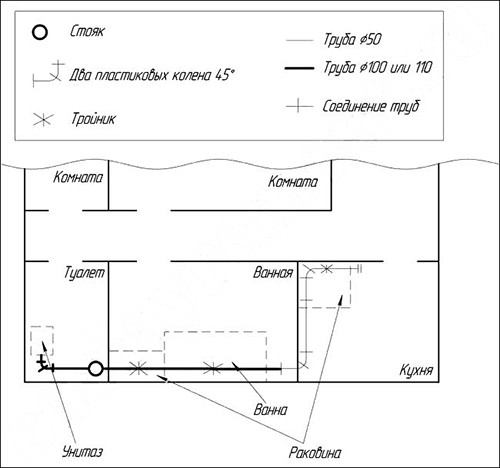
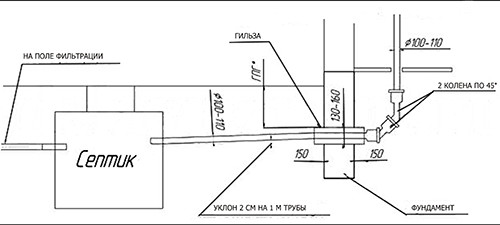
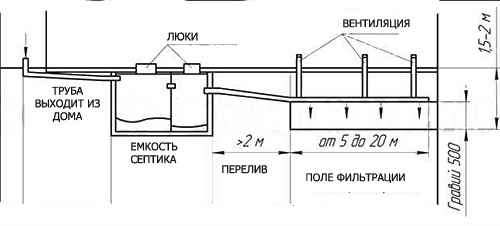
sewerage schemeBefore embarking on such a responsible business as laying a sewer, you need to carefully plan everything and make a detailed diagram, or even several diagrams. To begin with, it should be clarified that the sewage system consists of 2 parts: internal (riser, plumbing, pipes, wiring) and external (communications leading from the house to the cleaning station, centralized system or septic tank). In this chapter, we will look at how to make a sewer with a septic tank. It is recommended to create a scheme at the design stage of a building in order to place all “wet” rooms as close to each other as possible. If the kitchen, bathroom and toilet are next to each other, much less pipes will be required. The wiring diagram is arbitrary - there are no strict rules. The toilet diagram in a private house shows one of the possible variations:
When creating a drawing, keep in mind that pipes with a diameter of 100 or 110 mm with a total length of 1 m will be required to drain water from the toilet. For drains from the kitchen and bathroom, PVC pipes of a smaller diameter should be used - about 50 mm. Make various turns by connecting the 2 plastic elbows at a 45° angle to minimize the risk of clogging. Otherwise, this place will be constantly clogged, and cleaning the sewer is quite difficult. Another important point is the choice of a riser or collector pipe. Actually, the organization of wiring and, in general, all further work will depend on this. How to mark up a toilet in a private house (video): The sequence of creating the scheme:
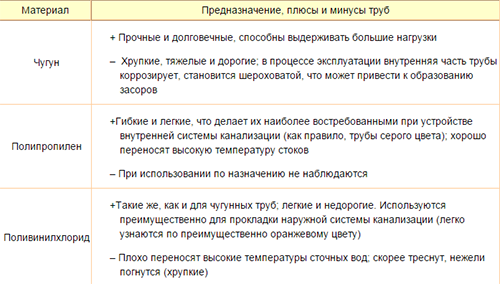
Pipe selectionThe choice of pipes depends on where they will be laid - inside or outside. And if earlier there was only one answer to all questions - cast iron, today PVC and PP pipes are considered the most practical products. For risers, pipes with a diameter of 100 and 110 mm are used, for draining liquid from a bathroom, washing machine and other plumbing fixtures - 40 and 50 mm. For external sewerage, more durable orange pipes are used. The table shows the pros and cons of using the most popular sewer pipes.
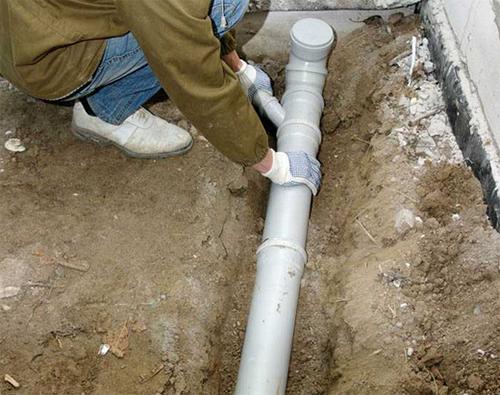
Internal sewerageInstalling an internal sewerage system is perhaps the most difficult and time-consuming task. To do this, it is better to enlist the support of at least one assistant in order to organize everything as quickly and efficiently as possible. All joints must be absolutely tight, for which they should be coated with silicone sealant. In places where pipes pass through walls, it is imperative to install sleeves. It is extremely important to properly organize the slope of the pipes so that the wastewater can flow independently in the right direction and does not stagnate inside the system. All standards and requirements are detailed in the relevant SNiP. The angle of inclination directly depends on the diameter of the products used. For sewer pipes with a diameter of 100 and 110 mm, the slope is 2 cm per 1 sq. m, for thinner plumbing - 3 cm per 1 sq. m. First of all, a release should be made so that later the external and internal systems correspond to each other. An outlet is a part that combines the outlet of the riser and the pipe leading to the septic tank.
The outlet is laid through the foundation wall at a depth below the freezing level of the soil, so this point should be clarified in advance. In some cases, it can be laid above the freezing level, but then you will have to spend money on high-quality thermal insulation of the pipe. Otherwise, in winter, all drains will freeze, and the toilet can only be used after the thaw.
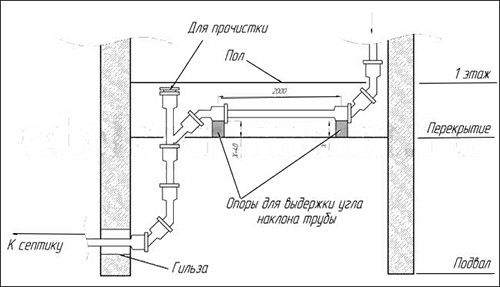
If the organization of the system takes place at the stage of building the foundation, the holes for the release are made immediately, if the house is already standing, it will be necessary to punch an opening for the installation of a drain pipe equipped with a sleeve. The sleeve looks like a piece of pipe with a thickness of 130-160 mm and protrudes on both sides of the house by at least 150 mm. The outlet diameter must be smaller than the riser diameter. The task of the sleeve is to set a slope towards the septic tank of 2 cm per 1 sq. m. Riser installationIt is advisable to place the riser in the toilet itself, given that the recommended distance from it to the toilet should be 1 m. The structure itself can be open or masked with a plasterboard box. It depends on whether you will install the pipes in close proximity to the walls or place them in special niches.
To connect sewer pipes to the riser, use oblique tees, and at the attachment points of pipes of various diameters, use adapters with appropriate connectors. Where pipes from a bathtub, sink or shower cabin will be connected, install a collector pipe 100 or 110 mm in diameter. Be sure to use water seals to prevent the release of unpleasant odors.
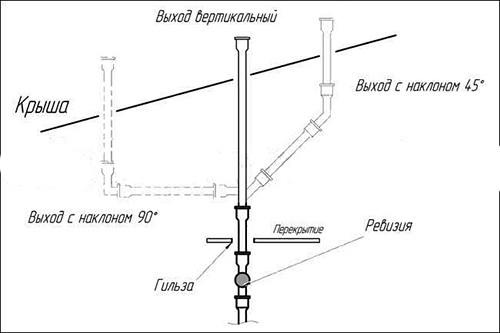
Installation and withdrawal of the fan pipe also plays an important role. This is a pipe that is a continuation of the riser and goes to the roof of the building. It is needed to ventilate the sewer system (the key to stable operation of the septic tank), maintain a constant atmospheric pressure in the system (prevents water hammer and air discharge). Thus, the durability of the entire sewage system depends on the arrangement of the fan pipe. It should be connected to the riser only after a revision has been installed on it. Removal is carried out through the attic at a convenient angle, as shown in the image below.
In no case do not connect the fan pipe to the general ventilation system or chimney! The outlet of the pipe should be located as far as possible from windows or balconies (minimum 4 m) and 70 cm from the roof. Ventilation outlets, chimney and fan pipe must be at different levels. External sewerageIf you have coped with the installation of a toilet and a shower room in a private house, then it will not be difficult to equip the outer part. As we have already said, for this they use more durable orange pipes that can withstand the load of several meters of soil and are protected from corrosion. The most important point in this matter is to organize wastewater treatment so that in the event of a leak they do not pollute drinking sources. The best solution to this problem would be to install a deep cleaning station, but the cost of such an undertaking will not please any economical owner.
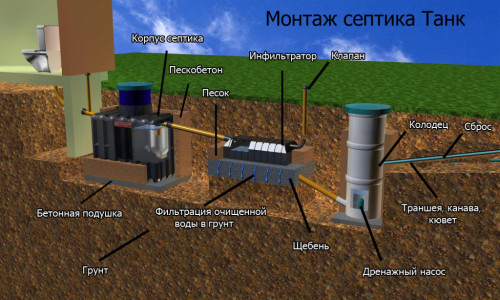
The second option is standalone installation. There are many types of them, for example, "Tank" enjoys a good reputation and is relatively inexpensive. And, finally, the most budgetary way is a homemade septic tank.
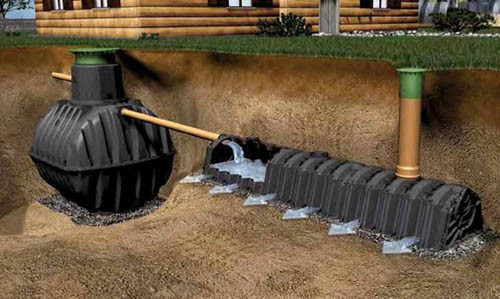
In the image below you can see a plan for arranging the simplest septic tank. Anyone who wants to save money and get a quality wastewater filtration system can handle this job.
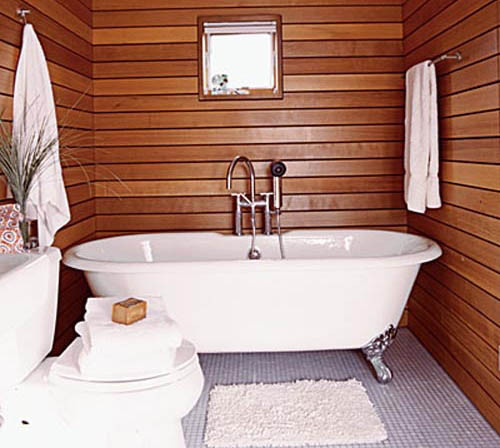
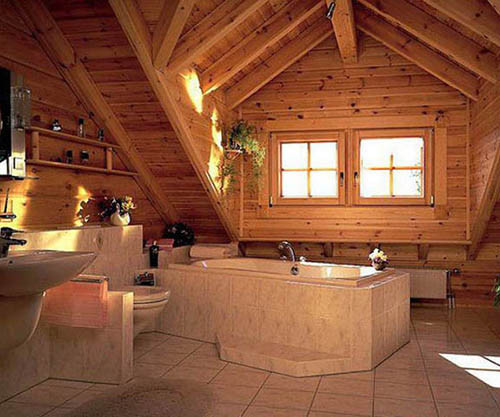
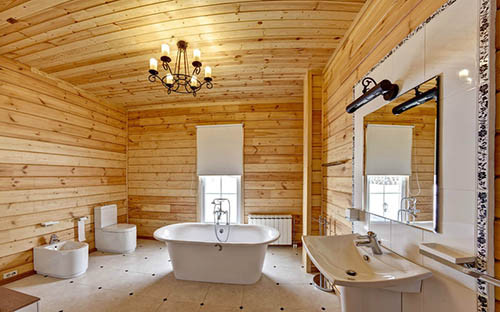
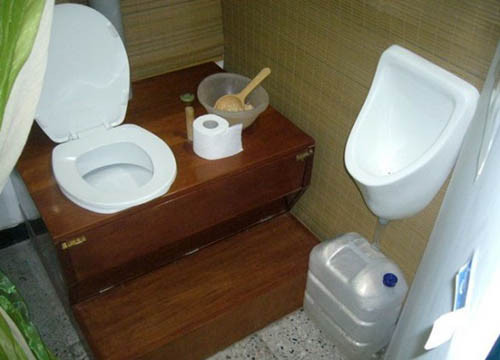
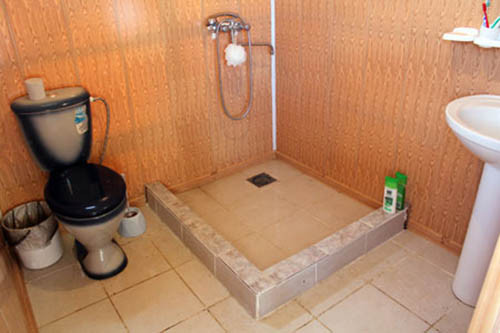
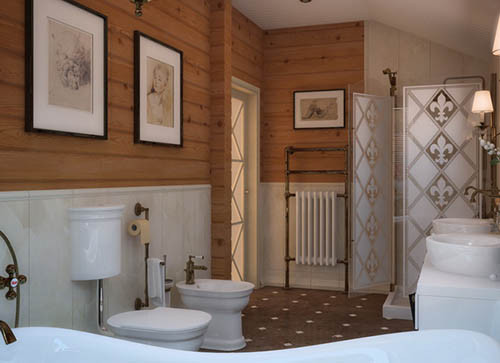
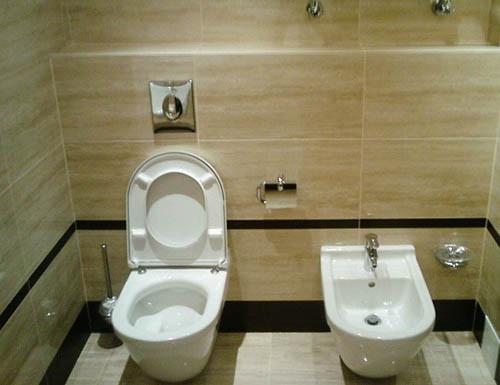
A settling septic tank consists of a tank or several tanks through which sewage passes. Heavy particles sink to the bottom, and the waters are clarified and undergo final purification in the filtration well (mechanical and biological purification). There are also simpler options, for example, when drains are collected in one large container and, as it fills up, they are pumped out by sewers. Installation of such a system is much easier, but this is where its advantages end, since in the future it is necessary to constantly monitor the level of effluents and pay for the services of sewers. We have described in general terms how to make a toilet in a private house, but in order to do such a grand job with high quality, you need to have professional plumbing skills and knowledge. If you are not confident in your abilities, but do not want to use the services of paid specialists, start with simpler methods (a backlash closet device with a small drainage capacity). Toilet in a private house, photoWe have prepared a photo selection of various ways to organize latrines. Perhaps one of the layouts of the toilet in a private house will appeal to you, and you will want to put it into practice.
|