How nice it is to escape from the stuffy metropolis and find yourself in your dacha! Fragrant greenery, birds singing and friendly sun - it's wonderful.
But, if there is no summer shower on your site, hot days will turn from relaxation into torture. But it’s not at all difficult to build a garden shower for a heated cottage with your own hands. It is only necessary to approach this process in detail.
Before proceeding with the construction of a summer shower, it is necessary to determine exactly where it will be located. Basic selection rules: 
- Locate the shower stall in a sunny location. It is desirable to find an area where the sun penetrates throughout the day. Then you can rinse with refreshing water at any time.
- The shower stall should be on a hill for the best outflow of water. Showering will use a lot of water. Stagnation of water under the booth is fraught with erosion of the soil and, as a result, loss of stability of the structure. Also, stagnant water will lead to unpleasant odors.
- Lack of drafts and visibility. Despite the fact that the wind is warm in summer, the presence of airflow can bring you a lot of trouble. And the location of the shower in the most prominent place is not desirable from an aesthetic point of view.
Organization of the drain
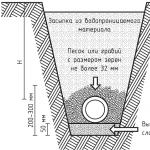
The best solution is to connect the drain to the gutter. If it is missing, dig a hole not far from the shower stall. Using a hose or pipe, connect the drain hole to the pit.
The platform for the summer shower should be tilted towards the drain pit.
In this case, the used water will flow freely along the inclined pipe.
Equip the bottom of the shower cabin with a tray or make a container for draining water yourself. To do this, fill the area with concrete of the size you need. Place bricks around the perimeter that will serve as a side. 
The shower drain cover must be provided with a waterproof cover. The following materials are suitable for this:
- ruberoid,
- hydrostekloizol,
- concrete with the addition of PVA,
- PVC film.
It is a mistake to use clay for drainage. Such flooring will wash out with water over time.
How much will it cost is detailed in this article.
How to build a country shower and toilet so that they do not interfere with each other is indicated in detail
shower cabin
Cabin design
The width and depth of the shower cabin must be at least 1 * 1 m, and the height of 2 m and above. The space inside the finished structure should be enough to turn around, raise your arms and bend over without obstacles.
It should also be noted that in the booth there should be a place for a dressing room where water will not penetrate. For a locker room, it will be enough to allocate 60 cm. Thus, the optimal size of the shower room will be 1.6 m * 1 m. A wooden beam can serve as a material for the frame. The standard diameter of the racks for such a structure is 100 * 100 mm.
Various methods can be used to give stability:
- Concrete every part of the frame;
- Attach the lower corners of the structure to pegs driven deep into the ground.
When designing a shower stall, consider the design of the buildings in your yard. The shower room should not stand out from the general style.

The project of a country bathroom with a shower compartment
Mounting
Cut the timber to the length you need. Connect the side parts of the frame in the form of frames. Reinforce each frame in the middle with jumpers from distortions. Jumpers are made from the same beam and should be installed at an angle of 45 degrees.
If you decide to make a shower cubicle with a size of 1.6 * 1 m, then the side parts will be 1 m, the back - 1.6 m, and the front 1 m, since in the front part it is necessary to leave a space for the door equal to 60 cm. For for a convenient passage to the shower room, it is not recommended to make a door less than 60 cm. Then you should connect the frames.
Before fastening the frames together, make sure that their diagonals match.
Having fastened the frames, reinforce them with jumpers at the top and bottom. Thus, you will get a solid frame that can be closed with polycarbonate or any suitable material. It will be interesting to know that along with a shower, you can also build a toilet, as well as a utility block, but how to do it correctly will help you understand the content of this
Install the resulting structure over the prepared inclined platform for water drainage. Use a spirit level to level the shower frame horizontally and vertically.

Stuff the slats on the bottom jumper. Leave a distance between them so that the water drains freely down onto an inclined platform.
For the shower door, make a frame in the same way: assemble a frame from 4 planks of timber and reinforce them with jumpers crosswise to protect the door from warping. The size of the frame should be approximately 1 cm smaller than the opening for the doors to open freely.
- slate,
- lining,
- moisture resistant OSB,
- cellophane,
- plastic,
- glass.
Please note that any of the materials listed must be opaque.
After choosing the base, cut the walls to the desired size and install them on the frame frames. The top and bottom of the booth do not need to be closed completely for good ventilation. The door must be cut separately. Install the doors on the hinges and sheathe the door with cellophane so that water does not get on the timber. But, so that it would not be expensive and very simple, it is indicated in the article.
Tank for water
The minimum volume of the water tank should be 100 liters, the maximum - 500 liters. The container is installed on the support posts above the shower.
Please note that the material from which the outdoor shower tank is made must not be subject to corrosion.

The best option would be plastic or stainless steel. If you chose the plastic option, you need to not only install it on supports, but also tie it to them. Since in the event of strong gusts of wind, an empty container may fall.
It is best to purchase a flat tank with a fitting thread for screwing in a tap. If this is not found, make a hole for the faucet yourself.
In a plastic barrel, a slot is made using a drill with a pen drill. If the water tank is metal, use a metal crown. Having cut the tap into the tank, install a water diffuser on it.
It is good if your container is equipped with a lid, thanks to which the water will not clog. The cover can be made of metal, plastic, glass or cellophane.
Water supply to the tank can be carried out manually or using a pump. The latter option is preferable.
Sources of water heating in the summer shower
The water in the garden shower can be heated in various ways.
Firewood
To increase the temperature of the water in the summer shower with firewood, install a stove next to the cabin. On its surface, place an expansion tank that will push hot water into the main shower tank. The principle of the expansion tank is the constant circulation of water.
Hot water from the heating system will go up, cold water from the tank above the shower will go down. The connection between the expansion tank and the main tank will be a metal pipe.
With a wood-burning heating system, you need to use a metal container for water, not a plastic one.

The layout of the heating source in the shower in the country
Electricity
Install a boiler or heating element with a power of 2 kW or more in the water tank. If you use a heating element to heat water, it must be inserted into the bottom of the water tank. The boiler is lowered into the tank from above. But be sure to monitor the water level during the heating process. Otherwise, your appliances may burn out.
To prevent a short circuit, the wire stretched from the outlet to the shower must be one-piece.
 A thermometer should be installed on the water tank, which will indicate when the heating devices can be turned off. Or purchase a tank with automatic heating, where there is control not only of the temperature, but also of the water level.
 A good option for a summer shower with electric heating would be to use 2 tanks at once: a large one for cold, a small one for hot water. In this case, each family member will be able to choose a comfortable temperature for themselves. Get a faucet to mix hot and cold water.
As in the case of heating with wood, it is not recommended to use a plastic tank along with heating appliances.
The sun
The most economical and hassle-free heating option is the sun's rays.
In this case, your shower stall should be in a place that the sun heats up all day. If this was not found, decide at what time it will be more comfortable for you to use the shower.
It is more convenient to rinse in the midday heat - which means that the shower stall should be in the place where the rays penetrate in the morning; If you prefer an evening shower, choose an area that receives the sun during the day so that the water has time to warm up.
How to enhance the effect of heating by sunlight?
- Paint the water tank black. The sun's rays warm up dark colors the most.
- Wrap the shady side of the tank with foil, as this material will keep the heat inside the tank.
- Using an additional frame, stretch a plastic film over the open tank, which will create a greenhouse effect.
Conclusion

An example of organizing a summer shower
After the final installation of the summer shower, you can create a certain style by adding a few details to it. Plant moisture-loving plants around the booth, which will not only please the eye, but also contribute to accelerated drainage. Decorate your shower room with decorative elements to turn an ordinary booth into a bright accent of your garden plot.


