During the heat, a simple summer shower without “bells and whistles” seems quite comfortable.
But as soon as sunny weather changes to cloudy, water procedures turn into torture.
And in the off-season - in spring or autumn - only a trained "walrus" can force himself to go into such a bath.
What about the rest, so to speak, normal people? There is only one way out - to provide heating. After reading this article, you can easily make a do-it-yourself heated shower in the country, in which you can comfortably wash yourself in any weather.
During the design phase, the following questions should be considered:
- Tank volume: depends on the number of users. For a quick rinse, 1 person will need at least 15 liters of water.
- The volume of the drain pit: the pit should be at least two and a half times the size of the tank.
- Frame and cladding material: the frame can be assembled from polypropylene pipes, rolled metal or wooden boards and beams. Any moisture-resistant sheet material is used for sheathing: plastic panels, polycarbonate, special plywood. When choosing a material for the first layer of cladding, there is no need to pursue aesthetics: for the purpose of insulation, a heated shower room will be pasted over with foam.
- Shower dimensions.
As experience has shown, the most comfortable are structures with dimensions of 1.9x1.6 m in plan (shower room + dressing room) and a height of a little more than 2 m.
Site selection
The requirements for a shower room are as follows:
- the relief should contribute to the discharge of effluents (we choose a place on a hill);
- the cabin should be well lit by the sun;
- the location of the bath should be protected from wind or drafts.
Often a shower cabin is made in the form of an extension to the south side of the house. A frame attached to the wall will be more durable, while the bath will be completely closed from the wind on at least one side.
Foundation preparation
 At the site of the construction of the cabin, it is necessary to select all the fertile soil, reaching the underlying soil layer - sandy loam or loam.
Next comes the laying of the foundation.
Foundation laying
The building under construction will rest on a foundation of bored piles. Such supports are constructed very easily:
- Using a garden drill, you need to drill a well, the bottom of which is located 30 cm below the freezing depth of the soil. The diameter of the well should be 100 - 150 mm.
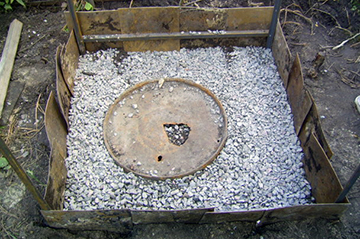
- At the bottom of the well, a 30-cm sand or gravel-sand pad is made. It needs to be compacted, generously pouring water.
- We lower a plastic pipe of the appropriate diameter into the well. It will simultaneously play the role of formwork and waterproofing for the concrete pile.
- Inside the pipe, it is necessary to fix a reinforcing cage of 3 vertical rods with a diameter of 8–12 mm equidistant from each other, connected by crossbars of rods with a diameter of 6 mm. All elements of the frame must be connected with annealed wire - welding is not allowed.
- It remains to fill the pile with concrete. At the final stage of pouring into concrete, it is necessary to cast in place the anchor bolt (in the center), on which the grillage beam will be put on.
Foundation for shower
In soft soil, instead of bored piles, driven piles can be used, made of a steel pipe with a diameter of 60 - 150 mm with a flattened end.
In this case, the anchor bolt for fastening the grillage beam should be welded to the pile.
Drain arrangement
At a distance of at least 3 m from the shower, you should dig a drain hole with a depth of about 2 m. It should be borne in mind that the distance between it and the house or other building should be at least 5 m.
If the soil at the construction site does not absorb water well, a well should be drilled at the bottom of the drain pit, which, with its base, would reach a formation with good water absorption.
 A polymer pipe must be installed in the finished well, so that its approximately meter section is outside.
Several holes should be drilled in the walls of the pipe at the upper end.
After that, the entire perforation, together with the end hole, is wrapped with geotextile.
There is a type of geotextile that resembles black isospan. In this case, it should not be used, since this material does not pass water well.
At the bottom of the pit and well, a backfill of crushed stone is made. Then a plastic barrel without a bottom or several tires that have served their purpose are installed in it. A hole should be made in the wall of this tank, to which the pipe coming from the shower will be connected.
 Dacha owners still use their land to a greater extent for growing vegetables and fruits than for recreation. On hot days, after hard work, you really want to freshen up, so a shower is a must. - consider how to build a frame structure.
How to organize a drain pit from tires, read. How durable is this system, what are its pros and cons.
On hot summer days in the country, it is quite possible to take a cool shower, but if the weather suddenly deteriorated or it just got colder in the evening, it is not so pleasant to swim under icy water. In this article, how to equip your shower with warm water using a heating tank.
Frame erection
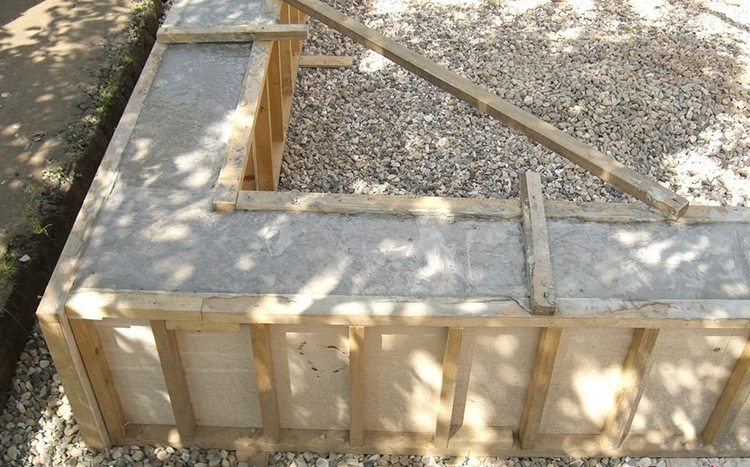
On the piles of the foundation, grillage beams should be laid, which at the same time will play the role of the lower strapping. Further, with the help of corners and self-tapping screws, racks are attached to them, the upper ends of which are connected by beams of the upper trim.
If the frame is assembled from wood, all elements must be treated twice with a water-polymer composition, then with biocides. The last stage of preparation is the treatment of wood with hot bitumen.
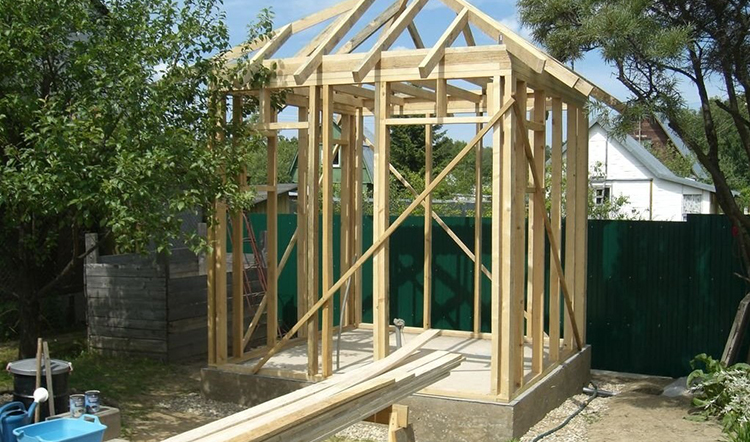
Wooden frame
It should be borne in mind that even with such precautions, high humidity will soon lead to the appearance of a fungus on the wood. To delay this moment, a wooden shower should be raised above the ground by 200 - 250 mm.
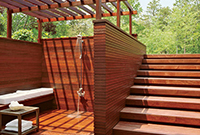
The frame is sheathed with moisture-resistant plywood or plastic, then the walls are pasted over with foam, on top of which colored polycarbonate is fixed. In the upper part of one of the walls in the dressing room and shower room there should be an opening covered with a transparent material.
It would be better if such a window opens in the shower cabin - this will make it possible to quickly dry it after water procedures.
Features of the construction of the heating system, floor
 For heating in the washing room, it is necessary to install an old thin-walled radiator connected to a closed circuit with heated water circulating through it.
The movement of water in the circuit is provided by a circulation pump.
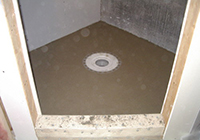
In the washing room, instead of the floor, install a purchased shower tray (low version).
It is installed inside a frame assembled from wooden beams.
The floor in the locker room is made in the form of a grid, which is assembled from bars with a section of 40x40 mm or polypropylene pipes. In the latter version, the holes in the pipes should be filled with mounting foam so that moisture does not accumulate in their cavity.
Barrel installation
On top of the cab, you can install a tank with an electric heater and a thermostat. Such products are sold today in the widest range.But this option has significant drawbacks:
- A significant part of the heat is spent on "heating the street".
- All households, regardless of preferences, will have to wash with water of the same temperature or wait until the water reaches a comfortable temperature after the previous user.
A more practical option is to attach an inexpensive shower boiler to the wall outside, protecting it with a canopy. An ordinary barrel is placed on top, from which water is supplied through a tee to the mixer and to the boiler. The outlet from the boiler is connected to the second branch pipe of the mixer.
 Before you start building a shower room in a country house, you need to study a lot of nuances, because when dealing with water, you need to be able to prevent possible leaks and damage to the foundation in advance. - recommendations on the order of construction work.
You will find tips for making a shower tray with your own hands in the article.


