Cooking recipe Bird's milk cake with chocolate soufflé:
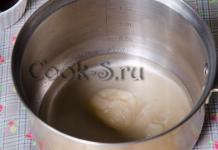
Pour agar-agar into a 1.5-2 liter pan and fill with water. Set it aside for now.

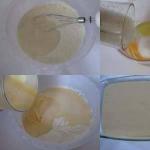
Prepare the sponge cake: beat 2 eggs into a bowl, add sugar and vanilla sugar.

Beat eggs with sugar for 7-8 minutes until fluffy and thick.

Add sifted flour.

And mix with a spatula until you get a homogeneous dough. Stir gently so that the egg mass settles as little as possible.

Line a mold with a diameter of 20-22 cm with baking paper or grease with a thin layer of butter and sprinkle with flour. Place the finished dough into the prepared pan and carefully level the surface.

Bake the sponge cake in an oven preheated to 190 C for about 15-17 minutes. Since everyone's oven is different and the cake may rise differently, baking times may vary. Check readiness with a skewer. Remove the finished biscuit from the mold and leave to cool completely.

Prepare the butter-chocolate soufflé base. To do this, break the dark chocolate into small pieces and melt in the microwave or in a water bath. The main thing is not to overheat the chocolate, otherwise it will form small grains. Let the melted chocolate cool slightly.

Place butter at room temperature into a bowl and beat until fluffy and creamy.

Without stopping whisking, pour in all the condensed milk in small portions.

Sift cocoa powder into the resulting cream and add cooled melted chocolate.

Beat until you obtain a smooth chocolate cream. Set the finished cream aside (do not hide it in the refrigerator).

Trim the top of the cooled sponge cake, if necessary, and cut it into 2 equal layers.

Carefully trim the edges of each cake. The cake layers should be slightly smaller than the diameter of the mold in which the cake will be assembled. To make the cakes smoother, you can use the bottom of a springform pan with a smaller diameter for cutting.

Place one cake layer on the bottom of the cake assembly pan.

Prepare agar syrup. To do this, place the soaked agar-agar on the fire and, stirring, bring to a boil. Boil it for 1 minute.

Add granulated sugar.

And stirring constantly so that the sugar is completely dissolved, boil the syrup to a temperature of 110 C. If you do not have a cooking thermometer, then cook the syrup after boiling for about 4-5 minutes over medium heat. The syrup will foam a lot during cooking, so be sure to use a deep saucepan. Remove the finished syrup from the heat and leave to cool.

While the syrup is cooling, pour 2 egg whites into a large bowl. Beat the whites until stiff foam.

Without stopping whisking, pour in the slightly cooled agar syrup in small portions. Pour the syrup in a thin stream under the blades of a running mixer and beat until a very dense and stable mass is obtained.

Switch the mixer to minimum speed and add chocolate cream into the protein soufflé in small portions.

Stir the soufflé until smooth.

Place the entire chocolate souffle in the mold on top of the sponge cake.

Place the second cake layer on top of the soufflé and press it into the mixture.

Now place the chocolate Bird's milk in the refrigerator until the soufflé has completely hardened. This will take about 1-2 hours.
Cover the finished cake with chocolate glaze. To prepare it in a water bath or in the microwave, melt dark chocolate with butter. Let the finished glaze cool slightly and cover the top of the cake with it. Return the cake to the refrigerator until the frosting has set.

Remove the finished cake from the mold; to do this, run a sharp knife along the sides and transfer it to a plate. If desired, you can additionally decorate the dessert with white chocolate and sugar beads.

Chocolate cake “Bird's milk” is ready!

Cut it into small pieces (it is very high in calories) and serve with a cup of aromatic coffee or tea.

First of all, let's prepare the necessary ingredients for making sponge cake and soufflé.
In a saucepan, combine agar-agar powder and water. Stir and set aside for 30-40 minutes or longer. Let me clarify right away that it is impossible to replace agar-agar with gelatin in this case.

In the meantime, prepare the sponge cake. Break the eggs into a bowl and add 75 g of sugar.

Beat eggs with sugar for 6-7 minutes. The eggs should turn into a fluffy and thick foam.

Combine flour with cocoa powder and sift into a bowl with egg foam.

Using a spatula or whisk, gently fold the dry ingredients into the egg foam until a homogeneous dough is obtained.

Pour the dough into a mold with a diameter of 20 cm. Pre-grease the baking dish with oil and dust it with flour or simply line it with baking paper.

Bake the chocolate sponge cake in an oven preheated to 180 C for about 12-15 minutes (depending on the features of your oven, the time may vary slightly). We check readiness with a wooden skewer or by pressing (the finished biscuit should spring back).

Remove the cake from the pan and transfer it to a wire rack to cool. We trim the top of the cooled sponge cake, and if it turns out to be too high, then trim it to a height of 1 cm, or you can cut it into two layers. Also, if desired, reduce the diameter of the cake to 18 cm.

Place the biscuit in a 20 cm mold (I used a ring), and, if desired, line the sides of the mold with border tape or parchment to make it easier to remove the sides from the cake.

Let's start making chocolate soufflé. First of all, melt the dark chocolate in the microwave or in a steam bath. It is very important not to overheat the chocolate!

Place soft butter in a mixing bowl and add vanilla sugar to it. Beat the butter for 2-3 minutes until fluffy.

Without stopping whisking, pour in the condensed milk.

Add the now cooled melted chocolate and cocoa powder.

Beat until you obtain a homogeneous chocolate cream. Set the resulting cream aside (do not hide it in the refrigerator).

Place the agar-agar solution on the stove and bring to a boil.

Add 300 g of sugar.

Stirring, bring the syrup to a boil (the sugar must have dissolved by this point) and cook it to a temperature of 110-112 degrees. If you don’t have a thermometer, then just cook over medium heat for about 4-5 minutes. Remove the syrup from the heat and let it cool slightly.

Meanwhile, beat 2 egg whites until stiff.

With the mixer running, add the syrup in small portions. Beat the mixture until you get a very thick and stable soufflé.

At the very end, add chocolate cream in small portions.

And thoroughly beat the soufflé until smooth.

Pour the resulting soufflé over the biscuit and level the surface of the soufflé. Place the cake in the refrigerator for 2-3 hours until completely set.

When the soufflé has hardened, prepare the glaze. Combine butter and finely chopped chocolate.

Melt until smooth and homogeneous. Let it cool a little.

We take the cake out of the refrigerator, transfer it to a plate and free it from the sides of the mold. Cover the cake with chocolate glaze.

We decorate the cake according to your taste and desire.

Let the glaze harden. The “Chocolate Bird's Milk” cake is ready!
You can serve the cake to the table.

Bon appetit!

Today I am fulfilling my first order - sharing with you the recipe for the classic Bird's Milk cake according to GOST. By the way, I prepared it for the first time, although the desire to make that very correct Bird has been accumulating and multiplying for many years. As it turns out, there is nothing difficult in preparing this delicious cake with a snow-white elastic soufflé, thin cupcake layers and chocolate icing. By sticking to the recipe, you can easily repeat the process and sincerely rejoice at the desired result.
I won’t delve long into the history of this famous and popular (to this day, by the way) cake. It’s better to tell you a little about the essence of its preparation. Today you can find a variety of recipes for Bird's Milk cake - it is even prepared with semolina, while some chefs use gelatin instead of agar-agar and add a huge amount of chicken eggs. The cakes, which are originally prepared with butter-whipped (cake) dough, are replaced with sponge cake.
Meanwhile, a real Bird's Milk cake should contain a snow-white soufflé, which is made from well-beaten egg whites brewed with hot syrup on agar-agar. A cream of butter and sweet condensed milk is also added there - it is this that makes the soufflé creamy and tender.
In order for you to get the Bird's Milk cake according to GOST the first time, I deliberately took a very large (40 pieces) number of steps. Don’t be scared - it will be simpler and easier when everything can be seen clearly and read in detail. I almost forgot to say one more thing: this cake uses a huge amount of sugar - 560 grams. If you wish, you can try to reduce it, but, frankly speaking, I have not tried and will not even try. Yes, the finished cake (weighing approximately 1 kg 400 grams) turns out sweet, even very sweet. Although the children unanimously said that they definitely do not need less sugar. Not surprising, they still have a sweet tooth. Just eat the cake in small pieces with unsweetened tea or coffee - then there will be complete harmony.
Ingredients:
Dough for cakes:
Souffle:
Chocolate glaze:
Cooking the dish step by step with photos:

The recipe for the classic Bird's Milk cake includes quite affordable ingredients (well, unless purchasing agar can be a problem). For the cakes, take premium wheat flour, two large chicken eggs (mine weigh 60 grams), granulated sugar, butter and a pinch of vanillin (can be replaced with a teaspoon of vanilla sugar). For the soufflé we will need a lot of granulated sugar, 2 egg whites (I have a total weight of 70 grams, so if you have small eggs, take 3 whites, you can’t go wrong), drinking water, butter, sweetened condensed milk, lemon juice (in the original uses 0.5 teaspoon of citric acid) and agar-agar. Finally, prepare the chocolate glaze from dark chocolate and butter. 75 grams of chocolate is enough for the coating, but I used 90 grams to additionally draw patterns.

So, we will divide the entire process of preparing this delicious homemade cake into several stages. First, we’ll bake the cakes, then we’ll make a soufflé, and finally, we’ll fill the finished cake with chocolate icing. The first step is to soak 4 grams of agar-agar in 160 milliliters of cold water (this is 2 level teaspoons, that is, under a knife). The original calls for 140 milliliters of water, but I added another 20 milliliters to lighten the cake a little. Leave the soaked agar on the table for about an hour.

Meanwhile, prepare two sheets of parchment paper, on which you need to draw a circle with a pencil along the diameter of the baking pan. I have 20 centimeters, but you can take more - then the cake will be wider, but at the same time lower. We will bake the cakes on these sheets, just don’t forget to turn them over so that the design is on the other side.

Now let’s start preparing the dough for our Birdie, while in the process you can immediately turn on the oven to heat up to 200 degrees (the dough is made very quickly). To do this, put 100 grams of softened butter in a suitable bowl (take it out of the refrigerator literally an hour and a half before).


Beat everything with a mixer or whisk for several minutes until the butter and sugar turn into almost cream. Then add the chicken eggs one at a time into the oil base, continuing to beat.

When you get a homogeneous mixture, pour in 140 grams of sifted premium wheat flour. All that remains is to mix it in to make a homogeneous dough.

The consistency of this dough is reminiscent of muffin dough (which, in fact, it is). It holds its shape perfectly and does not spread - like thick sour cream.


Spread the dough along the diameter of the drawn circle (you can not reach the edge a little, as the dough will spread a little during the baking process). If you don't have a spatula, spread with a spoon. Try to keep the height of the workpiece the same - then the cake layers will look prettier in the finished cake.

Bake the cakes one by one at 200 degrees for about 8-9 minutes each. In general, different sources write different temperatures (up to 230 degrees), but personally it seems to me that 200 degrees is ideal.

We cut the still warm cakes with a knife along the lines that we previously drew with a pencil. There is a small nuance here: if you want the cake layers to peek out from the soufflé (on the side) in the finished Bird’s Milk cake, cut exactly along the lines. If you prefer that they are not visible (only the snow-white soufflé on the side), cut 1 centimeter less lines. I think there is no need to advise where to put the scraps - there are many who want to eat them instantly. Let the cakes cool completely (this will happen very quickly, since the cakes are thin).

Next we move on to preparing the soufflé for the cake. To do this, first we will make butter cream with condensed milk, which we will then add to the protein-sugar base. To do this, put 200 grams of soft butter in a small bowl (we also take it out of the refrigerator in advance) and pour 100 grams of condensed milk into it.

Beat everything with a mixer at high speed until you get a completely homogeneous, smooth, fluffy and shiny cream. Beating for 4-5 minutes is enough - let it wait its turn on the table.

We remember that we soaked agar-agar. Place the saucepan over medium heat and, stirring occasionally, let the liquid boil.

Now add all 460 grams of sugar at once - only when the agar-agar has completely dissolved, otherwise the soufflé may not harden. It may seem that there is too little liquid in relation to sugar, but this is not so - everything will dissolve perfectly.

We wait for the sugar to completely dissolve, let the mixture boil, stirring constantly. Now it’s important not to miscalculate and cook the right sugar syrup. To do this, you can use a food thermometer and cook the syrup until its temperature reaches 110 degrees. I don’t have such a device, so I learned to determine readiness by eye. On a fire slightly below average, I cook the syrup for 8-9 minutes after it boils (already with sugar).


A test for readiness can be a thin thread that trails behind the spoon when you lift it from the syrup. Or a soft ball: place a drop of hot syrup in a bowl of ice water. If the syrup can be rolled into a soft ball that holds its shape well, the syrup is ready. Remove the saucepan from the heat and let the syrup cool for 3-4 minutes (you want its temperature to drop to 80 degrees, but not lower (the syrup will begin to thicken very quickly).


We begin to beat them at low speed, and when the whites become cloudy and a light foam forms (after about 30 seconds), pour in a teaspoon of lemon juice (or add 0.5 teaspoon of citric acid). Without stopping whipping, gradually increase the speed of the mixer to maximum and achieve the fluffiness of the whites. The mass should hold its shape well and not move (as for meringue).


Gradually you will see how the mass will become very dense and increase in volume. In consistency, it resembles the base for homemade marshmallows - just as thick and stable.

Without stopping the mixer (I stop it only to have time to take a photo), we gradually add the buttercream into the protein base. You just need to mix it quickly and at the lowest speed.

As soon as you see that all the cream has been incorporated, immediately stop whipping. The fact is that the soufflé will continue to thicken and it will be difficult to put it in the mold. In this case, the mass lazily flows from the rim like a wide ribbon.

It turns out a very decent amount of delicious creamy protein base for the Bird's Milk cake. We work quickly, as it will begin to cool rapidly (agar stabilizes already at 40 degrees).

Fill the cake with half of the souffle mixture. If you beat it, you will not pour it in, but spoon it out with a spoon due to its thickness.


Fill the cake with the second half of the souffle mixture. At the end it will begin to thicken and may not lie quite evenly.

To do this, quickly rotate the mold with both hands without lifting it from the table. The soufflé is leveled under its own weight. Place the cake pan in the refrigerator so that the top of the soufflé sets and is not sticky. My cake spent about half an hour in the cold - the soufflé had time to set so that it could be covered with chocolate glaze. If you are not in a hurry, let the workpiece cool thoroughly (a couple of hours is enough).
How to prepare aquafaba for a vegetarian version of the cake?
- You can simply take a can of canned chickpeas or white beans, strain the liquid through a fine sieve and use it. This is "aquafaba".
Or take 200 g of dry chickpeas, pour 600 ml of water for 12 hours. Next, drain this water, rinse the chickpeas, fill them again with the same amount of drinking water and put on fire. Bring to a boil and simmer over low heat for about 2 hours (add more water if necessary). The chickpeas should be completely cooked (but not mushy), and immediately after cooking there should be enough broth left in the pan to cover them by 1 cm.
After complete cooling, the level of the broth should be almost equal to the chickpeas.
It is necessary to put the pan with chickpeas in the broth in the refrigerator for 8-12 hours.
Then carefully strain the broth through a fine sieve and use it. So we made our own aquafaba.
Preparing the crust:
1.Mix condensed milk and sour cream. Sift together flour, baking soda and cocoa. Add dry ingredients, as well as vanilla and rum essence, to the liquid ingredients, mix well and quickly until smooth.
2.On baking paper, draw a circle with a diameter slightly smaller than the diameter of the future cake. Place the paper on a baking sheet, pattern side down.
Spread the dough over the drawn circle with a spoon and bake in an oven preheated to 175 degrees for about 10 minutes.
3.Remove the cake along with the paper from the baking sheet, turn it over and carefully peel off the paper. Leave the cake to cool completely. Trim the edges lightly if necessary.
4. Place the springform cake ring or the sides of the springform pan on a dish, line the sides with strips of baking paper or acetate film. Place the baked crust inside.
Preparation of orange confit:
5. Wash the oranges thoroughly, grate the zest from one of them on a fine grater (only the orange part of the peel). Mix the zest with 1 tbsp. Sahara.
6. Using a sharp knife, cut off the attachment points of the orange’s stalk and carefully cut off the peel completely, trying not to grab the pulp too much and leaving the slices “clean” (without the white part of the peel and without a film). Peel the second orange as well.
7. Next, cut out slices from the peeled oranges. For each slice, make two cuts with a knife, as if cutting it out of the films and then carefully removing it from the orange. Cut the slices prepared in this way into large pieces.
(in this recipe you can see a photo: how to peel orange slices in this way)
8. Squeeze the juice well from the orange parts remaining from cutting out the slices. Mix juice, slices and grated zest with sugar. Bring to a boil and cook over low heat for 1 minute.
9. Using a sieve, carefully separate the slices from the juice. Lightly soak the crust with orange juice. Weigh the remaining juice. Take enough cold water to make a total of 100 ml.
Combine the juice again with the orange slices.
10. Add agar-agar to the water, stir, add 1 tsp. sugar and place on low heat. Bring to a boil, stirring with a wooden spoon or spatula, and simmer for 30 seconds. Add the boiling agar syrup to the oranges and bring to the boil again.
11. Cool the oranges in the syrup until they begin to thicken. Carefully place them on the cake, spread with a spoon and put in the refrigerator to completely harden.
Soufflé preparation:
12. Chop the chocolate into pieces with a knife.
Melt the chocolate in a water bath over low heat, stirring with a spoon (the bowl of chocolate should not touch the water in the lower pan). Let the chocolate cool slightly (but make sure it doesn't start to harden and remains pourable)
13. Beat the butter with a mixer until fluffy. Add condensed milk in portions, whisking thoroughly each time. Next, gradually add melted chocolate in portions. Beat until you obtain a homogeneous, smooth chocolate cream. Because The chocolate will harden as it cools, making the cream denser, so until you add it to the soufflé, you can place a bowl of cream in a pan of lukewarm water (but be careful that the cream does not melt).
14. Wash the mixer bowl and attachments thoroughly, wipe with vinegar or lemon juice. Pour the aquafaba (or egg whites) into the mixer bowl, beat at maximum speed, adding lemon juice.
15. Prepare the syrup: mix agar-agar and cold water, add sugar. Cook the syrup over low heat, stirring occasionally. The sugar should have time to dissolve completely before boiling. Boil the syrup to 110 degrees or until it reaches a thin thread, when the syrup flows from the spoon in a continuous thin stream, which breaks only at the very end and jelly-like drops remain on the spoon.
16. Beat the aquafaba (or egg whites) until stiff peaks form; the whipped mass should not drip off the spoon. Continuing whipping, gradually pour in the prepared syrup with agar in a thin stream. After adding it, continue beating until the mass cools to about 50 degrees (you can tactilely feel that the beating bowl is still hot, but no longer scalding).
*If you do not allow the soufflé mixture to cool a little, the chocolate cream that we will add to it will melt. But it’s also not worth cooling for a long time, because... agar begins to harden already at 45 degrees.
17. Reduce the mixer speed to minimum and quickly, in 3 additions, add the chocolate cream, stirring until smooth, but not for long.
18. Stop the mixer and immediately pour the souffle mixture onto the cake before it hardens (the consistency of the mixture should be pourable so that the soufflé itself pours into the mold from the mixer bowl). Let it harden.
Preparing the glaze and decorating:
19. Melt the chocolate in a water bath, add butter and stir well. If the glaze is runny, wait a little and let it cool slightly.
20. Remove the ring or rim of the springform pan from the cake. Pour the chocolate icing over the edges of the top of the cake, allowing it to drip into neat drips onto the sides. Garnish with chopped chocolate and thinly sliced orange zest. Place the cake in the refrigerator for several hours.
By the way, I also tried different biscuits for this cake. The GOST version uses shortbread dough, many confectioners prepare homemade Bird's milk with a classic sponge cake and soak it well, I have also seen a version with almond sponge cake...
And we will bake something between shortbread and sponge cakes. And to be even more precise, we’ll make cake dough using yolks (we’ll still need whites for the soufflé, and we’ll add yolks at the same time). Baked in thin layers and cooled, it turns out to be moderately dense and crumbly, but does not break like “sand” and harmonizes perfectly with the delicate soufflé.
For two cakes 16 cm in diameter, take 80 g of butter at room temperature and 80 g of powdered sugar or sugar. Place in a mixing bowl.
Beat thoroughly with a mixer at high speed until the mass becomes fluffy and light. We can add vanilla extract (1 tsp) or vanilla sugar (10 g).

Add 3 yolks one at a time and beat thoroughly after each.

It turns out like this.

In a separate dry bowl, sift 100 g of flour, 0.3 tsp. baking powder and a pinch of salt. Mix well with a whisk.

Add dry ingredients to butter-egg mixture.

Mix with a mixer at low speed until smooth.

Let's bake cakes!
Now take a mold with a diameter of 16 cm (I have a pastry ring-cutter), line the bottom with baking paper or place it on baking paper/silicone mat. Distribute half of the dough (it’s better to weigh it so that the cakes are the same!) as evenly as you can. The most convenient way is with a small curved palette knife, the kind that artists use to paint in oils. As a last resort, help yourself with a silicone spatula. Like I'm here.

Place in an oven preheated to 180 degrees for about 15 minutes until golden brown. The exact time depends on your oven!

We do the same with the second cake. If your oven allows you to bake two cakes at the same time, you are lucky, use this opportunity)
Freshly baked cakes are very fragile, handle them very carefully. As they cool, they will firm up a little, but will still be quite brittle, so be careful.
While the cakes are cooling...

...let's make a soufflé!
For it we need one very important component - agar-agar. This is a natural gelling agent of plant origin. It is obtained from algae. It is considered an analogue of gelatin, but you should work with agar in a completely different way, and products with it have a completely different structure than those made with gelatin.
Agar-agar comes in different strengths, but I have never seen the degree of this strength indicated in any way, just as I have never seen it written on packages of gelatin how much it blooms (a unit of measurement for the strength of gelatin). Unfortunately, you have to learn all this the hard way.
It is also worth keeping in mind that agar weakens after a long shelf life. Fresh is stronger. So, when buying a lot at once, plan in advance where you will use it, and don’t let it sit.
This time I used agar-agar from the IDigo store, and it’s really armor-piercing, I’ll tell you) Very good. Light, odorless, strong. I recommend it to you with a clear conscience. It is also quite convenient that it is sold in small packs of 10 g. But, by the way, the consumption of agar is small: this package, for example, is enough for as many as three standard Bird's milk cake!

So, take 1 tsp. with a slide of agar-agar.

Place in a medium (not small!) saucepan. Pour 270 g of cold water there. Stir and set aside.

Now we take 180 g of good butter at room temperature and 80 g of high-quality condensed milk (in my personal rating “Rogachevskaya” still takes first place).

Beat them at high speed into a light, fluffy cream. If we use vanilla extract (I got it from here), then add it now (1 tsp). Set aside.

Let's take out the whites that we had left over from the yolks when we baked the biscuits. I remind you or inform those who don’t know that the whites need to be separated very carefully into a dry bowl so that not a drop of yolk gets into the whites. Place the whites in a large bowl and add a pinch of citric acid to them.

Let's prepare the form. This cake is convenient to make directly on the base. Let's place a ring for assembling the cake (or a mold without a bottom) with a diameter of 18 cm on the substrate and line the walls with acetate film or any other dense and even film, not food grade: too thin and soft, it will lie in folds and the cake will not have smooth sides.
Let's return to our agar.

Place the agar and water on the fire and bring to a boil. Add 430 g of sugar (don’t be alarmed, at first I also thought it was too much, but the soufflé turned out not at all cloying, but very balanced, just the way it should be!).

Bring to a boil. The syrup will rise very high and will bubble! That's why you shouldn't use a small saucepan.

We continue to cook the syrup. Having actively bubbling, it will settle slightly, but will continue to bubble.

Cook for about 10-12 minutes, until the temperature reaches 110 degrees (if you have a cooking thermometer) or until the so-called “thin thread”, when the syrup stretches behind the whisk or spoon like a thread.
But! Until the syrup has reached the desired consistency and temperature (at about 105 degrees or 8 minutes, but this very much depends on what kind of utensil and fire you have), you need to beat the whites into a strong foam.


Now the syrup is ready! It was difficult to film, but I hope it’s clear: the syrup really trails behind the whisk like an unbreakable thread. You will see it!

Turn on the mixer again and, whipping the whites at high speed, pour the syrup into them in a thin stream. We try not to pour it on the whisks!

The mass brightens and increases in volume right before your eyes!

Beat for another minute or two. The mass continues to grow and strengthen.

Under no circumstances should you beat the mixture until it cools. Do you see how our future soufflé is already wrapped around the whisks? You can stop at this stage.

Add our pre-prepared buttercream.

And at low speed with a mixer, mix it into the protein mass.

The mass immediately liquefies, but not too much. Stir until smooth. The soufflé is ready! Left…

...assemble the Bird's Milk cake!
The soufflé hardens quickly, so we also work at a waltz tempo. But if everything is ready in advance, don’t worry, don’t fuss, do everything beautifully, you’ll be in time.
We take out our pre-prepared form with a backing. Place the first cake layer on the bottom.

Pour half of our soufflé onto it. It is advisable to weigh and assemble the cake on a scale so that the layers are equal. I didn’t do this, but it’s better to do it if you have everything on hand and weighed the bowl in which you prepared the soufflé in advance. After weighing the soufflé along with the bowl, you will simply need to subtract its weight and divide the resulting number in half.

Place the second cake layer. It presses slightly into the soufflé on its own; I didn’t have to help it.

And pour out the second part of the soufflé.
All! In this form, put the cake in the refrigerator or freezer and keep it there until the soufflé sets. This will happen quite quickly, but it’s better to wait longer, at least an hour, or maybe even two. After the specified time has passed...

