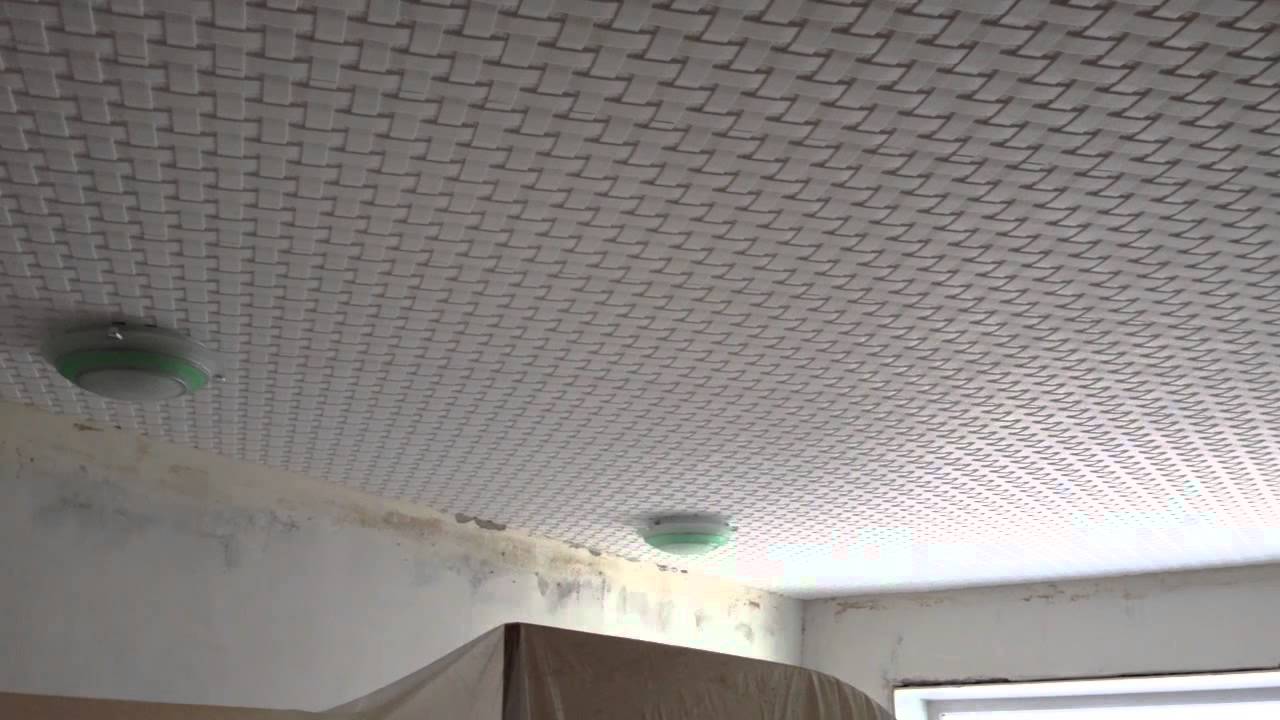
Ceiling finish
Seamless ceiling tiles can be safely considered an ideal coating that allows you to get a decent ceiling surface with an interesting relief in a short time and for little money. About the types of seamless tile coatings and how the injection ceiling tiles and plinth differ from them and will be discussed in this article.
In its final part, instructions will be given on how to glue the tiles with your own hands.
Description and properties

The photo shows how the injection ceiling plinth organically complements
It differs from other similar materials for the ceiling in that it is made in such a way that, in the process of attaching it to the ceiling, the joints between the individual elements are as invisible as possible. Proper gluing allows you to get a visually monolithic integral ceiling with certain properties.
Seamless tiles, based on expanded polystyrene, are made by hot pressing, which makes it possible to obtain denser and more durable sheets with a thickness of about 5 mm.

Ceiling injection
On sale, you can often find products with dimensions of 50 x 50 cm, packed in 8 pieces in one pack, which is designed for 2 sq.m of the ceiling plane.
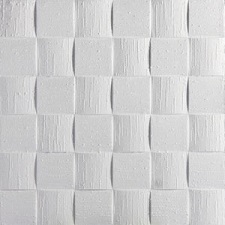
The material can have a different configuration with a smooth or wavy surface. They are made so that when the pattern of two elements is joined, they fit perfectly and continue each other.

Important! Seamless tiles can have a different design - imitate artistic wood carving, any natural texture and gypsum stucco. To determine the format and design, it is enough to take into account the features of the room, the style direction and personal preferences.

Seamless products with a geometric pattern for a modern interior
This finishing material has the following positive properties:
- fire resistance;
- Increased heat and sound insulation performance;
- Price for this material is noticeably lower than for other finishes;
- The material is moisture resistant, so it can be used in wet rooms;
- The material is practical and has a long service life;
- Tiles can be painted, and therefore allows you to realize any idea regarding the color scheme of the interior;
- With the help of seamless tiles, you can hide the defects of the draft ceiling.

Ceiling injection
High performance, combined with affordable cost, make seamless tiles one of the leading materials that allow you to independently finish the ceiling in any room.
Varieties

Depending on the method of production of tiles, which affects some of the operational properties of the material, there are three types of it:
- The simplest and most inexpensive option is stamped tiles., in the manufacture of which polystyrene granules are pressed into foam blocks under medium pressure. Such stamping allows to obtain products with a thickness of 6 to 8 mm. The strength of such a tile is less than that of other analogues, so it is necessary to carefully lay it. Material consumption may also increase for this reason. Such a tile does not have a protective front coating, and therefore is characterized by friability and hygroscopicity - contaminants easily penetrate into its structure, and wet cleaning of the material is not provided. Therefore, it is better to refuse to finish the ceiling in the kitchen;

- obtained using innovative equipment with simultaneous molding and pressing. It differs from other analogues of this class of finishing ceiling materials:
- strength;
- moisture resistance;
- hygiene;
- durability;
- high cost;
- restored after deformation.

Extruded polystyrene foam ceiling tiles are easy to process, and therefore, with a certain skill of working with it, you can perform a neat installation. The presence of cavities on the back side allows you to hide the defects of the ceiling and not perform its thorough preparation before installation.
Often the front layer of such a tile is laminated or impregnated with a special water-repellent compound. This quality allows it to be used in wet rooms - bathrooms and kitchens.

- Injection tiles are also characterized by greater strength than stamped tiles.. For its manufacture, foamed foam is used, which is sintered in a mold, and then subjected to high-temperature processing. As a result, the product acquires a small thickness, but has high heat and sound insulation, moisture and heat resistance, strength and environmental qualities.

The tile is characterized by the presence of a deep and clear pattern, which allows it to be used not only on the ceiling, but also on the walls to give them an intricate and original relief. This is also possible because the front surface of the injection tile can imitate the appearance of other materials - wood, ceramics, fabric or marble.
White tiles can be painted in any shade with paint that is evenly distributed over its surface.

Any is a fusible material, but injection products are processed using special compounds that make it difficult to burn. The dense joining of the edges of the elements is aimed at maintaining the integrity of the lines, which makes it possible to obtain an even ceiling covering without visible seams and transitions.
That is why it was called - seamless. At a cost, it is several times more expensive than stamped, but due to its high technical characteristics and expressive appearance, it is very popular compared to other analogues of this finishing material.

The surface of the products can be laminated or matte with a relief ornament or pattern.
Important! White ceiling tiles allow you to make the interior solemn, and compensate for the use of dark shades in it.

It is not difficult to calculate the amount of material required, and this is where the installation of the ceiling covering begins. The manufacturer on the packaging indicates recommendations for calculating the material per square meter. More often in stores you can find products with a size of 50 x 50 cm, 8 pieces in a pack, which is enough for 2 sq.m of the ceiling.
Advice. Given the possible formation of marriage, tiles should be purchased with some margin. It will also come in handy if one of the elements needs to be replaced in the future.
Preparatory work

Pasting the ceiling with tiles is not difficult, does not require special skills and tools.
A quality coating can be obtained through careful, unhurried work, the right adhesive and careful preparation of the base, which includes the following steps:
- Removal of the old finishing layer. Depending on the type of previous finish, one or another technique for its removal is used. Ordinary whitewash is washed off with water to a concrete base. The paint is removed with a metal brush, and the wallpaper and plaster are scraped off with a spatula. If the wallpaper is too firmly glued, then you can purchase a special wash;
- At the time of installation of the tiles, the lighting fixtures are removed, and the wires are securely insulated;
- The cleaned base is treated with a primer, which increases the level of adhesion between the material and the base.
Adhesive selection

No less important than surface preparation is the choice of adhesive composition.
The following properties are characteristic of high-quality glue:
- High adhesion;
- Clearly expressed viscosity;
- White color;
- Versatility;
- Without solvents in the composition;
- Maximum drying speed.
Types of glue

The above requirements are met by the following adhesive compositions that can be used when finishing ceilings with injection tiles:
Universal adhesives are presented by many manufacturers. Here are just a few of them:
|
|
| Using liquid nails, you can not only glue the tiles to the ceiling, but also process the joints, as well as glue the injection ceiling plinth. To work with this type of adhesive, you must purchase a special dispenser gun. Adhesive consumption depends on the type of substrate and its quality. To glue the tiles on a flat surface, apply a little glue on the corners and in the center. Liquid nails provide a strong, quality grip. Due to the thick composition, the adhesive is applied in a thick layer if necessary - when the ceiling is uneven.
Do not apply liquid nails too close to the edges of the tile, otherwise excess may form on its surface when attaching it to the ceiling. |
|
| Polyvinyl acetate varieties of adhesives include PVA and bustilate, which have several advantages - they do not have an unpleasant odor and are easy to use. The nuance of working with such glue lies in the need to apply it, both on the surface of the product and on the ceiling, therefore, material consumption increases. Then the foam panel is pressed to the base and waiting for the glue to stick, so the turnaround time increases; |
|
| Fixing tiles to acrylic putty cannot be called standard, but this method is quite effective. To do this, use a finishing acrylic putty with sufficient viscosity so that you can fix the product on the ceiling. To do this, it is applied in a thin layer, level and press the tile. In this case, a monolithic coating without gaps is obtained. |
|


Tile installation

- The tile is released from packaging a few hours before the process of gluing it;
- Markings are applied to the ceiling, having previously completed a sketch drawing, so that it can be clearly seen in which areas it will need to be trimmed;
- The markings are diagonal lines connected in the center. It is from the point of their intersection that the laying of the first tiles begins. For the center, you can take the place of installation of the lighting device;
- The first tile is smeared with glue and the product is applied to the ceiling, slightly pressing and aligning its position with respect to the markings. Glue is applied pointwise - in the center and edges of the tile;
- Subsequent fragments are glued as close as possible to each other. If excess glue protrudes from the gap, then they are immediately wiped off so as not to damage the decorative front layer of the product when it is subsequently removed;
- Joints are sealed with white acrylic sealant, but it is better to refuse silicone sealant, as it turns yellow over time.
The video in this article will tell you how to properly fix the injection ceiling plinth.
Various materials are used to finish the ceiling, including tiles. But, such a coating as there is a noticeable drawback. Seams are visible on the surface, which are difficult to disguise. There is an exit. This is a seamless tile for the ceiling, with which you can create coatings with a relief.
Styrofoam ceiling
Properly installed seamless ceiling tiles allow you to create a monolithic ceiling surface, on which the transitions between the elements of the coating are not visible. The places where the elements are connected to each other, of course, exist. But, such transitions, with the correct fastening of the material, are not noticeable.
Tiles on the ceiling without seams have the following characteristics:
- the material is made from expanded polystyrene using hot stamping;
- the panel has a sheet thickness of 3.5 to 15 mm;
- the size of each panel is 50x50 cm;
- the package usually contains 8 elements;
- when buying, you need to pay attention to the edges of the panels, which are wavy or even. During installation, it is easy to lay the panels. The material is made in such a way that when laying the pattern is laid out without problems, while the joints remain invisible;
- elements are produced whose surface imitates wood, stucco or stone. You can choose panels of any shade to combine with the overall style of the room.
The quality of a seamless foam ceiling may vary, and this parameter depends on the country of manufacture.
Types of seamless tiles
There are the following types of seamless panels, which are distinguished by manufacturing technology:
- pressed. These are panels with a pattern. The standard thickness of such elements is 5 mm. This is the most inexpensive type of seamless cladding;
- panels produced with injection treatment under the influence of elevated temperatures. Seamless sheets have a large thickness (8 - 15 mm). The tile differs in various structure and drawing. Such panels can be used to cover the kitchen ceiling, due to the water resistance of the material;
- extrusion technique. Panels are produced under high pressure. During the production process, polystyrene granules are mixed with special blowing agents. Next, the panels are covered with a film that imitates various materials. Such tiles are distinguished by a small thickness, which ranges from 3 to 5 mm. Although the material is thin, it is quite durable.
Seamless tiles produced by extrusion are the most expensive compared to the same material.
The difference between tiles in shape
Seamless tiles for the ceiling differ in shape, which depends on the type of panel edges:
- straight edges. These are square patterned panels. Each tile is exactly the same. When laying, the edges of the panels are so precisely and firmly in contact that a monolithic surface is obtained;
- edges with a complex shape. During laying, thanks to the wavy edges of the panels, an interesting pattern of the ceiling covering is created.

Tiles with laminated coatings can be used for rooms with increased importance.
Pros and cons of seamless tiles
In addition to the fact that seamless ceiling tiles create a surface without joints, the material has the following advantages:
- both a single panel and the entire ceiling covering are quite light. This is important because ceilings do not experience increased load with such a finish. Due to its low weight, the material is easy to transport and install;
- moisture resistance. The coating can be cleaned with a damp sponge and even cleaning products;
- good heat-insulating and noise-insulating characteristics;
- simple installation that does not require special skills;
- no need to mount the frame before laying the panels without seams, due to the small thickness of the material;
- the ability to choose any color shade and texture.
Important: when caring for the ceiling, you need to abandon cleaning products containing solvents.
Disadvantages of seamless coverage:
- brittle material. Therefore, during installation, you need to be especially careful;
- Tiles are poorly breathable. For apartments, vapor permeability is not so important, but for suburban buildings it is an important indicator. So, if air exchange is disturbed in a private house, then moisture and various microorganisms will begin to accumulate above the ceiling;
- at elevated temperatures, the panels may move away from the base ceiling covering. A competent choice of adhesive composition will help to exclude this phenomenon;
- the material is non-combustible, but is capable of releasing toxic substances and smoke in the event of a fire in the room.

Toxic substances can be released from seamless tiles and when exposed to too high temperatures.
How to glue?
Let's figure out how to glue seamless tiles on the ceiling to get a uniform coating.
You need to prepare the tools:
- building level;
- roulette;
- stationery knife, which can be used to cut elements. It is used if it is impossible to lay the panel along the edges of the ceiling surface;
- a spatula will be needed to apply glue sold in buckets, and not in tubes;
- a marker that marks the surface of the ceiling;
- ladder.

Preparatory activities
Ceiling preparation consists in removing the old facing coating:
- old wallpaper on the ceiling is first soaked with water, then cleaned with a spatula. After removing the wallpaper, the surface is sanded to get rid of adhesive traces;
- old putty and plaster are also removed with a spatula;
- whitewash is removed with soapy water, in several steps;
- old paint is removed with a spatula. You can use special solvents;
- water-based coloring compositions can be washed off with soapy water.
After removing the old coating from the ceiling, irregularities and defects in the form of cracks, chips and cracks are eliminated.
The level measures the height difference of the ceiling surface. If the difference is more than 5 mm, then the surface is leveled with putty. Cracks and crevices are also sealed with putty. Minor defects can be left, under a seamless tile they will be invisible.
At the final stage of preparation, several layers of a deep penetration primer are applied.
Adhesive selection
The quality installation of seamless tiles depends on the competent choice of glue. When choosing an adhesive composition, consider the following points:
- adhesive with solvents is not suitable, because such a composition corrodes the tile material. It is necessary to choose special adhesive water formulations;
- the adhesive must have good adhesion to any base surface, concrete or putty;
- the adhesive composition is selected not too liquid, otherwise the tile will slide. If, nevertheless, the adhesive consistency is liquidish, then after applying to the tile, you need to wait a bit until the glue hardens;
- choose an adhesive that does not set immediately. There should be time after applying the adhesive to adjust the position of the tiles.

Produced special adhesive compositions used for gluing foam.
Sticking
Before gluing a tiled seamless ceiling, you need to make a sketch on paper to understand how the panels will be located on the ceiling. Further, with the help of a tape measure, a pencil and a square, the markings are transferred to the ceiling surface. For convenience, divide the ceiling surface into 4 parts.
Panels are glued from the marking intersection lines. First, the first four tiles are mounted one at a time in the center of the room. 
Mount seamless tiles as follows:
- opening the package with the material, you need to remove the material and put it in the room for several hours. So the tiles will take room temperature, and are not deformed;
- glue is applied to the panels from the rear, from each edge and in the center;
- before using glue, be sure to read the instructions;
- after applying the adhesive to the panel, press the tile with a little force to the surface. Be careful not to break the fragile material. You can press the panels with a sponge or a soft cloth;
- for the panel to stick, you need to wait a few minutes. Immediately adjust the location of the tiles until the glue has hardened;
- the following tiles are mounted in the same way. There should be no gaps between the panels;
- excess adhesive must be removed immediately;
- cutting elements of seamless tiles are mounted along the edges of the ceiling surface;
- joints between panels are treated with acrylic sealant. It is not recommended to use silicone sealants because they turn yellow.
By observing the phased laying of tiles without seams, you can get a flat, monolithic ceiling surface.
Seamless plastic
Seamless plastic on the ceiling can be compared with plastic clapboard. Such material is often used to cover ceilings in bathrooms. The surface of the plastic can be glossy or matte. The panel thickness is 10 mm.
Installation of a ceiling made of seamless plastic can be carried out without preparatory work. Preliminary work will be needed only if the old coating was plastered and crumbling. Then the surface of the ceiling is cleaned and treated with an antiseptic solution from mold.
Before installing seamless plastic, you need to decide on ceiling lighting. By the time of installation of the coating, it is necessary to conduct wiring, and determine the location of the lamps. If the lighting fixtures are heavy, then additional ceiling mounts will be required to hold the structure.

Seamless plastic ceiling coverings are mounted according to the following methods:
- harpoon. Fixation of seamless plastic is carried out using a baguette made of aluminum or plastic. A compressible bar is attached to the canvas, which straightens out in the groove;
- wedge. Wedge clamps are used to adjust the tension of the seamless web;
- cam. The canvas is fixed with the help of a baguette with a movable element, into which the seamless canvas is tucked.
The cam method of fixing seamless plastic is considered the most convenient. But, such a ceiling coating is recommended for small rooms. In large rooms, the moving part of the seamless plastic is pulled back. In this case, the canvas may not withstand the load.
When installing a seamless plastic ceiling, you need to consider the following points:
- the plastic sheet should be 15 cm smaller than the required size;
- a special heat gun is used to heat the material before installation;
- the edges of the seamless web are fixed during the continuous supply of warm air;
- when the edges of the canvas are fixed, the seamless coating is tucked into baguettes on the walls;
- if there are protruding edges of the seamless web, they are removed with a sharp knife.
The protruding edges remain after using the technique without a harpoon.
Tiles used for finishing ceiling surfaces have one unpleasant property: when laid, they form very noticeable seams. Sometimes this is not a disadvantage and even emphasizes the stylistic decision. But, as a rule, they try to get rid of the latter. An alternative is seamless ceiling tiles that form a flat surface.
Types of ceiling tiles without seams
Seamless tiles are made from polymeric materials and in terms of user qualities, they are not much different from ordinary ones. Its peculiarity is in the production technology. The edges of such a product are slightly bent so that when laying the seams between them are not visible.
The back side of the tile is smooth, which makes it easy to attach to the surface. A relief pattern of varying complexity is embossed on the front, although there are also smooth models. It is worth noting that the ornament also contributes to the formation of a uniform surface, as it distracts attention from the seams.
Important! Seamless PVC ceiling panels are thinner and less durable than comparable wall cladding products. Therefore, they cannot be used for finishing vertical surfaces.
Classification by manufacturing technology
Plastic trim is produced in several ways. Depending on the manufacturing technology, the properties of the product change:
- pressed - the most affordable, the material is fed to a stamping press, where it takes the appropriate shape - with a smooth or embossed surface, the thickness of the product does not exceed 5 mm, the mechanical strength is low;
- injection - plastic is sintered in special forms and it acquires high strength, the thickness of the product varies from 8 to 15 mm, this allows you to form a complex texture and pattern;
- extrusion - during production, foaming compounds are added to the polymer mass, and then blanks are formed under the influence of high temperature, a protective film is applied to the strips, which also performs an aesthetic function: it imitates metal, wood, stone with high accuracy; the thickness of the product is not more than 5 mm, but its strength is very high.

Extruded ceiling tiles are the most expensive. However, it is durable and provides a huge selection of patterns and textures.
Form classification
The classic tile is a rectangle or square. Modern technologies allow you to get more interesting seamless plastic tiles for finishing the ceiling:
- curved edge panels- the ends of the tiles have a complex shape: wavy, zigzag, with recesses of a different configuration, it is these "irregularities" that provide a stronger and tighter joint, the seams are invisible even at a short distance;
- variant with calibrated edges– ideally precise geometry of the product creates a smooth, seamless ceiling, even with the use of completely smooth tiles;
- decorative ceiling panel- this is the name of models with a catchy and very embossed decorative pattern, more often these are injection tiles, in which the thickness allows you to reproduce stucco molding.

The complex shape not only masks the seams, but also hides some defects in an uneven surface.
Pros and cons of seamless ceiling panels
Ceiling tiles without seams have a considerable number of advantages:
- seamless finish has a very low weight and does not load the ceiling surface, it can even be mounted on plasterboard ceilings;
- the same feature ensures high speed of installation and ease of installation;
- when joining seamless tiles, minimal gaps remain; if products with calibrated edges are used, you can get a perfectly flat ceiling;
- polymer products are resistant to direct action of water, the combination of high temperature and humidity causes difficulties, as in the bathroom, laminated products must be used there;
- the cost of even the most expensive extrusion model is still lower than most other finishing materials;
- despite their small thickness, plastic ceiling panels have good soundproofing and heat-insulating properties, this is a useful quality when noisy neighbors live upstairs;
- the decorativeness of the material is very high - a variety of textures, patterns, imitation of natural material, allows you to design a room in any style.
There are also disadvantages of a seamless finish:
- good sound insulation is ensured by the impermeability of the material, ceiling panels have very low water permeability and do not remove moisture, because of this property it is undesirable to use them for ceiling cladding in wooden houses, since as a result moisture will accumulate in beams and boards and lead to decay;
- seamless panels are treated with antipyrines, this provides self-extinguishing properties in case of fire, however, at the same time, the tile melts, and harmful substances are released during melting;
- due to the low thickness, the plastic lining is prone to brittleness, especially for pressed material;
- incorrectly selected or poor-quality adhesive can negate all the advantages of seamless tiles.
Finishing properties largely depend on the method of manufacture. For example, the extrusion material has high mechanical strength and is free from such a disadvantage as brittleness.
Rules for choosing seamless ceiling panels
When choosing, you need to pay attention not only to decorativeness, but also to the purpose and properties of the material. It is worth considering a few rules.
- The trim should be inspected. The relief must be without chips, a smooth surface without deformation, the edges are completely intact and even, without damage.
- The back side of the ceiling panels must be flat and uniform, no dents or roughness are allowed.
- Even the pressed material must have sufficient strength. To check the quality of a tile, you only need to hold it by the corner for 10 seconds. Poor finish cracking.
- Laminate tiles are suitable for rooms with high humidity: bathroom, kitchen. Not laminated and without painting are used only in dry rooms.
Important! Seamless panels can be painted independently in any color.
Seamless ceiling tiles in the interior: photo
A variety of finishes provides it with a very wide application in the design of premises. Different styles, different heights of rooms, different colors are not a problem for seamless panels.
The ability to imitate stucco is indispensable when decorating rooms in the baroque or classic style.

It is possible to perform more complex work - to reproduce a luxurious coffered ceiling.

Finishing combines relief and exquisite pattern.

Patterned seamless ceiling fits into the modern style.

You can choose the material and with a pattern in the Art Nouveau style.

The possibilities of finishing are very extensive, it is not surprising that the material is so popular.
How to glue ceiling tiles without seams
The creation of a seamless ceiling is carried out in several stages.
- Calculate the required amount of material. The area of the entire ceiling is divided by the area of \u200b\u200bthe tile and at least 10% is added for possible trimming.
- You will need tile material, skirting boards, decorative sockets for lamps, glue for laying plastic panels, a primer for the ceiling. Everything should be purchased and tested.
- If the ceiling surface is uneven, contains rusts, drops, long cracks, then it is first leveled with putty. The ceiling is then primed to improve adhesion.
- Mark the surface from the center point. This eliminates installation errors.
- Seamless tiles are glued parallel or diagonally. Glue is applied to each product around the perimeter, applied to the ceiling and pressed tightly for 10 seconds.
- The next panel is applied as close as possible so as not to leave a gap. Residues of glue are immediately cleaned.
Important! So that the tiles do not disperse when dried, the joints are sealed with adhesive tape.

After laying the tiles, skirting boards and sockets are mounted.
How to glue a seamless ceiling tile is shown in the video.
Conclusion
Seamless ceiling tiles form an even, smooth ceiling when laid. The decoration is very diverse, it reproduces not only a different ornament, but also different materials - wood, stone, metal.
One of the main disadvantages of ceiling tiles is the presence of well-visible seams at the joints. To remedy this situation, a special type of seamless ceiling tile was developed.
general information
Expanded polystyrene (a derivative of polystyrene) is used as a material for the manufacture of such plates. Finished products can have a thickness of 3.5-15 mm, having a different shape (not only square). The surface of the elements, as a rule, is decorated with a pattern, which, when laid, forms an integral composition. Tiles on the ceiling without seams can quite plausibly imitate woodcarving, stucco molding or decorative plaster. The edges of the products are made using a special technology that makes it possible to achieve almost complete invisibility of the butt sections. If they can be considered, then so much up close.

For the manufacture of ceiling tiles, the following technologies are used:
- Pressing. Expanded polystyrene is fed to a stamping press, where it is given the desired shapes and patterns. The thickness of such plates is 5 mm, with an area of 0.25 m 2. Pressed ceiling tiles are considered the cheapest.
- injection processing. In this case, the expanded polystyrene mass is sintered inside special high-temperature molds. This makes it possible to obtain sufficiently thick (8 -15 mm) and durable products at the output. Injection plates are distinguished by a wide variety of patterns and textures.
- Extrusion. During the production process, polystyrene granules and foaming compounds are mixed at high temperature and pressure. The finished mass is divided into strips: they are covered with a special film before cutting. Such a coating gives the products the desired texture. It can be an imitation of metal, wood, plaster or stone. Extruded boards have a very small thickness (3-5 mm) and have the highest strength among all materials of this class.

Types of ceiling tiles without seams according to the type of butt edges:
- with straight edges. Standard products of a square shape, the pattern on which is applied using one of the technologies mentioned above. To achieve the tightest possible fit of the individual elements to each other, their edges are made very accurately. This makes it possible to minimize the docking gap, which is practically invisible from the side.
- Complicated edges. This line includes the so-called. "Designer" ceiling tiles with wavy edges. After docking, a very beautiful pattern is obtained, making the ceiling finish unique.
Advantages and disadvantages
The popularity of seamless ceiling panels is due to the presence of a number of advantages:
- Ease. Given the low weight of polystyrene, individual elements and finishes as a whole will not create a significant load on the ceiling. This greatly simplifies installation work and transportation of material.
- Aesthetics. The ceiling finish obtained after installation is monolithic. This is especially appealing to those buyers who do not like ceiling seams.
- moisture resistance. For seamless polystyrene foam tiles, direct contact with water is not terrible. This allows periodic wet cleaning of the surface from dust and dirt, using a soft cloth and detergents.
- Cheapness. Ceiling tiles are among the cheapest options for a beautiful ceiling design. Despite the fact that such a finish is often referred to as budget options, it looks quite presentable.
- Fire safety. As an additional coating, seamless ceiling tiles are treated with fire retardants. As a result, even with direct exposure to a flame, such a finish does not burn, but only melts.
- Sound and heat insulation. Styrofoam products are characterized by low thermal conductivity and the ability to dampen noise from above.
- Easy installation. To glue the ceiling tiles, you do not need special construction skills or the availability of expensive tools and materials. Much simplifies the work without the need to equip the frame.
- small thickness. This makes it possible to avoid known problems when frame suspension systems underestimate the total height of the room by 50-100 mm. For this reason, slab finishes are especially appreciated by owners of small dwellings.
- Large assortment of patterns and textures. After laying, the seamless surface can be painted in any color.

Weak sides of the ceiling without seams from polystyrene foam tiles:
- fragility. When working with expanded polystyrene panels, special care must be taken, because. their edges may break off.
- Zero vapor permeability. The surface created by seamless tiles does not allow air to pass through. In the conditions of a multi-storey building made of concrete or brick, this moment is not fundamental, which cannot be said about country wooden cottages. There, a violation of air exchange can provoke the accumulation of excess moisture inside the ceiling.
- The need to use only high-quality glue. Under the influence of high humidity or temperature, individual trim elements are sometimes partially peeled off. To avoid such phenomena, it is necessary to carefully select the mounting adhesive.
- Heat toxicity. The tile does not burn during a fire, however, it exudes smoke and other toxins that are harmful to humans.
To wash the surface of a seamless tile, it is forbidden to use detergents based on various solvents. This may damage the foam.
Material selection
To get beautiful and durable ceilings without seams, you need to purchase high-quality tiles.
Here are some helpful tips for this:
- The back of the ceiling tiles. It should not have any depressions, pits or elevations. If such defects are present, this directly indicates a violation of the manufacturing technology of the product. In this case, there is a real risk that the finish has other defects that are not visually visible.

- Product edges. They must not have any chips or other damage, otherwise the effect of a seamless surface cannot be achieved. For testing, you can try dry joining two or more tiles together. First of all, it is recommended to subject elements with wavy edges to such a check. It is important to make sure that there are no visible seams between them.
- Outer side. The patterns should be clear, and the surface as a whole should not have noticeable depressions, inclusions and other defects. Seamless panels for the ceiling, when joined, should lead to the formation of an even pattern without displacement.
- Brittleness test. You need to take one of the tiles around the corner and carefully lift it. If the product breaks down or begins to bend strongly, we can safely conclude that it is of poor quality.
Glue selection
Before gluing ceiling tiles without seams, it is necessary to choose a high-quality mounting mixture. It must be resistant to moisture and temperature fluctuations.
- It is immediately worth excluding all solvent-based formulations from the options under consideration. During spreading on the tile, they will begin to quickly destroy the material. Also, these brands of glue contain toxins that are harmful to human health. The best option in this case is water-based formulations.
- The mixture must have excellent adhesion. This will ensure a good fixation of the tiles on concrete or putty substrates.
- It is much more convenient to work with thick glue. This makes it possible to avoid slipping of the panels during gluing to the rough base. With liquid glue, everything is more complicated: first, they smear the back surface of the ceiling element. Next, a pause is made to thicken the composition, and only after that gluing is performed. As a result, work is much slower.
- If the glue sets very quickly, this introduces additional difficulties in the installation process. There should always be time to adjust the tiles according to the markup.

Injection ceiling tiles without seams are recommended to be fixed with Moment Montazh, Bustilat and Titan adhesives. For convenience, in the departments where ceiling tiles are sold, special compositions in the form of mastics are placed. They have been developed taking into account the specifics of polystyrene products.
Tools
To glue a seamless ceiling, as a rule, the following devices are required:
- Level. Needed to determine the evenness of the base base. Also, with its help, they monitor the correct laying of foam plates.
- Measuring tools (ruler, square and tape measure).
- Construction knife with a set of spare blades. In the course of gluing a tile, it will sometimes be necessary to cut it to size. Basically it is about the last elements from the wall.
- Putty knife. It is convenient for them to spread glue from a bucket. If the mounting mixture is sufficiently liquid, it is better to use a brush or roller instead of a spatula.


- Pencil (marker). Before starting installation, the surface of the black base is marked, which greatly simplifies further installation. A preliminary drawing of the placement of the tiles is carried out on paper.
- Construction goat or old table. Given the fact that you have to work at height, these devices must be comfortable and reliable.
Training
When starting to arrange a ceiling finish from seamless foam tiles, it is necessary to properly prepare the base surface. The main task is to completely remove the old finish to the very foundation.
The cleaning technology depends on the type of previous finishing material:
- Old wallpaper. Wet with warm water, pause for soaking and tear off with a sharp metal scraper. There should be no paper particles or traces of glue left on the surface.
- Ceiling tiles, putty, plaster. The tile can be torn off with a scraper, but it is better to moisten the old putty or plaster first.
- Whitewash. It is washed out with clean water for two or three times.
- Oil paint. Here you have to scrape off with a scraper or knock down with a pickaxe.
- Water based paint. Weak compositions are washed off with water, strong ones are torn off mechanically. The finished surface should be washed well with soapy water.
- A well-adhering plaster or putty layer can be left on. The main thing is that there are no cracks, drops and potholes on it.

Other preparatory activities:
- The base base is carefully studied for all kinds of defects and differences.
- Dismantling of all ceiling lighting fixtures, with mandatory wiring insulation. Ideally, it should be completely de-energized.
- All detected differences of more than 4-5 mm are leveled with a starting putty.
- Putty is also used to seal chips, sinks and cracks. Minor defects and irregularities can be ignored, because. seamless polystyrene tiles successfully hide them.
- Priming concrete or plaster base. For these purposes, deep penetration compounds are usually used: this allows for reliable adhesion to the draft ceiling. For fidelity, priming is practiced in 2-3 layers.
markup
In order for the finished finish to be beautiful and harmonious, it is recommended to draw up a layout of the ceiling tiles. When measuring the length and width of a room with a tape measure, it should be borne in mind that the dimensions of opposite walls often have slight differences. The plan is first drawn on a piece of paper: this makes it possible to accurately calculate the required number of tiles and the order in which they are arranged. Most often for laying use an orderly or diagonal pattern. It is most convenient to start work from the center point of the ceiling.

Next, the laying plan is transferred from paper to the ceiling surface. This will require a ruler, square, pencil and construction twine. Depending on the chosen scheme, the ceiling is divided into 4 sectors, diagonally or in the center of opposite walls. One or another installation procedure involves cutting individual elements.
Least waste when using a simple in-line scheme. A more beautiful diagonal pattern will require more cuts. In any case, the material must be taken with a margin.
Seamless ceiling tiles
Technology, how to properly glue ceiling tiles without seams:
- A day before the start of finishing work, it is recommended to remove the ceiling tiles and packaging and lay them out on the floor of the room being repaired. This will enable the material to adapt to the conditions of the microclimate of the room, which will protect it from deformation after installation.
- Glue is recommended to be applied on the back side of products, in the central sector and on the edges. For the convenience of uniform distribution, it is better to use a spatula.
- For liquid glue, you will need to pause for its setting (the exact time is usually indicated on the package). Viscous mastics do not need such protective measures.
- The gluing of the first tile deserves special attention: it must be carefully aligned along the marking lines and pressed with some effort. It is important not to overdo it here, otherwise the product may break or deform. The next three are laid behind the first plate - the result should be a square in the center of the room.
- After gluing each panel, it is necessary to wait some time: it is necessary for a good adhesion of the adhesive to the base base. Each element is carefully adjusted relative to the marking lines and adjacent squares.

- In a similar way, the installation of all other plates takes place, with proper docking with each other. There should be no gaps between them. Adhesive that accidentally gets on the outer surface must be removed immediately using a damp sponge. It is not recommended to leave this procedure for later, because. hardened composition is very difficult to remove.
- The laying of the remaining solid slabs is carried out according to the previously drawn up scheme.
- All polystyrene elements that are farthest from the walls usually need to be trimmed. To do this, use a sharp clerical knife and a steel ruler.
- Acrylic sealant can be used to mask small gaps at the joints. Silicone mixtures in this regard are very impractical, as they gradually turn yellow.
- To make the finished surface as seamless as possible, it is recommended to paint with an acrylic composition.
The tile, which acts as a material for finishing ceilings, has one significant drawback - the presence of noticeable seams that cannot be eliminated or at least well masked. But she had an alternative, and favorably distinguished by a number of advantages. This is a seamless ceiling tile that has successfully occupied its niche among the materials for finishing apartments, houses, offices and other premises.
Types of seamless tiles
This material is a plate made of expanded polystyrene (belonging to the class of foam plastics), with a thickness of 3.5 to 15 millimeters. The shape of the tile can be different (not just square), and the surface has a pattern that, when laid, folds into patterns. Also, seamless polystyrene foam tiles can reproduce the texture of wood carvings, stucco or artistic plaster. The edges are made in such a way that when laying at the joints, the seams are almost invisible (they can only be seen at a very short distance).

There are the following technologies for the manufacture of such tiles.
- pressing- the mass of foamed polystyrene on a stamping press turns into a plate of a certain shape and pattern. The thickness of the material is 5 millimeters, the area (for most brands) is 0.25 square meters for one tile. Tiles made using this technology have the lowest cost.

- injection processing- expanded polystyrene is sintered in a mold under the influence of high temperatures. The result is thick (from 8 to 15 millimeters) and durable sheets. Tiles made using this technology have a large selection of patterns and textures.

- Extrusion– Polystyrene granules are mixed with blowing agents at high temperature and pressure. The resulting mass is formed into strips, which are covered with a special film and cut into separate plates. Thanks to the film, this finishing material can imitate metal, wood, plaster or stone in texture and color. Extruded seamless tiles are very thin (from 3 to 5 mm) and durable, but also more expensive than other types.
Ceiling tile prices
ceiling tiles

According to the form, seamless ceiling tiles can be divided into two categories.
- with straight edges. Square tiles with a pattern applied to them using the above technologies. The dimensions of each individual piece and its edges are made very precisely to ensure that the tiles fit snugly against each other with the smallest possible gap that will not be visible from the outside.
- With complex edges. This category features various "designer" brands of scalloped edged ceiling tiles. Connected together, they form an aesthetically attractive pattern that gives the room a uniqueness.

Advantages and disadvantages of tiles
Why is Styrofoam Seamless Tile so popular? You can answer this question by giving a complete list of its advantages.
Important! When cleaning finishes from seamless tiles, you can not use household chemicals containing various solvents - they can easily damage the foam.

But any material, in addition to advantages, has its drawbacks.
- Fragility - when working with expanded polystyrene panels, you should be extremely careful.
- Lack of vapor permeability - seamless tiles do not allow air to pass through. For city apartments with concrete floors, this is not critical, but for country cottages with wooden floors and thermal insulation, this is a big problem - if air exchange is disturbed, excess moisture can accumulate above the ceiling.
- Under the influence of high temperatures, expanded polystyrene tiles can partially peel off from the ceiling. To prevent this, you should responsibly approach the choice and purchase of glue.
- Finishing in a fire does not burn, but emits a lot of smoke and a certain amount of substances harmful to humans.

Tile selection rules
The first step to a beautiful and durable ceiling is choosing a quality finish. This fully applies to seamless ceiling tiles. There are several signs of a well-made and quality material.
First, pay attention to the back surface of the ceiling tiles. It should be perfectly flat, without any depressions or swellings. Their presence indicates a violation of the manufacturing technology of the material, which means that the tile may have other defects that cannot be immediately noticed.

Second, carefully inspect all edges of the ceiling tiles. There should be no chips or other damage, otherwise they will be visible at the joints of the panels with each other.
Advice! Don't forget to try joining two or more tiles together, especially if they have wavy edges. Check that there are no visible seams between them.
Thirdly, check the patterns and, in general, the entire outer side of the seamless tile - there should not be any depressions, inclusions or other defects. When connecting several panels, an even pattern without offsets should be obtained.
Fourth, take one of the tiles and carefully lift it up, holding one of the corners. Good material should not break or bend much in this case.
Prices for seamless tiles on the ceiling
seamless ceiling tiles

By checking several plates from the packages you purchase according to the above signs, you can fully verify the high quality of the material.
Table. Popular brands of seamless ceiling tiles.
| Name | Type of | Dimensions, mm | Manufacturer |
|---|---|---|---|
| extruded | 500 to 500 | VTM Holding |
| extruded | 500 to 500 | MartinPlast |
| Pressed | 500 to 500 | Korikov |
| injection | 500 to 500 | Marbet Sp.zo.o |


Now let's move on to the next step - compiling a list of the necessary tools and buying glue, with which the seamless tiles will be laid on the ceiling.
How to choose the right tile adhesive
The quality of the adhesive directly affects the service life of the ceiling tile, how well it will stick to the ceiling when the temperature or humidity inside the room changes. When choosing, the following nuances should be considered.

Advice! For laying seamless ceiling tiles, glue of the Moment Montazh, Bustilat and Titan brands is suitable. Ordinary PVA glue is also suitable. In addition, today you can purchase many formulations designed specifically for foam ceiling tiles.

Required Tools
To install seamless ceiling tiles, you will need the following tools.
- Level - to determine how even the draft ceiling is, and to control the correct laying of foam boards.
- A long ruler, a square and a tape measure - for various measurements.
- Large stationery knife with a replaceable blade - for cutting ceiling tiles. It is used in cases where it is not possible to lay the entire slab along the edges of the room.
- Spatula - if the glue is not packed in a tube, but in a bucket, then a tool is needed to apply the composition to the tile. Replaced with a brush or roller.
- Pencil or marker - to mark the location of the tiles. It will not be superfluous to take several sheets of paper to make any notes or sketches.
- Stepladder or table.


Preparatory work
Before the immediate start of laying foam tiles, the ceiling surface must be prepared. The main thing in this matter is to completely get rid of the remnants of the old finish. Depending on its type, cleaning methods differ.

Tip! If the layer of plaster does not break off and does not collapse when lightly tapped with the handle of a spatula (or other tool) and does not have large differences in height, this finishing layer can be left and seamless ceiling tiles can be glued directly onto it.
Step-by-step description of the preparatory work.

Gluing process
First you need to make a plan of how the tiles will be located in the room. Use a tape measure to measure the length and width of the room, keeping in mind that two opposite walls may have slight differences in size. Make a preliminary sketch on a sheet of paper to calculate the required number of tiles and their approximate location. The most commonly used laying patterns are shown in the figures below.


Now you need to transfer the markup to the ceiling. To do this, use a ruler, square, pencil or marker. In this case, it is necessary to divide the room into four parts, diagonally or in the middle of opposite walls. This is done with the help of stretched threads.

Advice! Regardless of the laying method, part of the plates will have to be cut with a clerical knife. Keep a spare of several copies, as seamless ceiling tiles often break.
After marking the ceiling, you can start laying the tiles. The process is as follows.
Ceiling tile adhesive prices
ceiling tile adhesive

Step 1. Unpack the finishing material and leave it in the room for several hours - the temperature of the ceiling and tiles should be the same so that the latter does not deform after installation.
Step 2 Apply glue to the back of the tile, in the center and along the edges. If necessary, spread the adhesive with a spatula.

Step 3 If the glue has a liquid consistency, wait a while (you can find it out by reading the instructions for the composition).
Step 4 Press the tile to the area marked on the ceiling, apply some force (but not excessive, otherwise the material may break). First, the first four foam panels are laid in the center of the room, one at a time on the previously marked parts of the room.


Step 5 Wait a while for the adhesive on the tile to bond to the ceiling. Before that, adjust the position of the tile so that it lies flat.
Step 6 Repeat the above steps with the next tile, attach it to the ceiling and dock with the previous one. There should be no gaps between them. Remove excess glue immediately, because when it dries, it will be difficult to do this.
Step 7 Lay all remaining seamless tiles.
Ceiling panel prices
ceiling panels

Step 8 Lay the cut pieces of tiles along the edges of the room.
Step 9 Treat the joints of the plates with acrylic sealant. Do not use silicone compounds - they turn yellow over time.
Seamless ceiling tiles are an inexpensive and visually attractive finishing material. With a responsible attitude to the selection of materials and laying technology, you will get a beautiful ceiling, the finish of which will last for many years.
Video - Seamless tiles on the ceiling in the nursery


