Drywall constructions help to quickly, cleanly and beautifully fix all the shortcomings of the old ceiling, and it will cost relatively inexpensively. But a plasterboard suspended ceiling in the kitchen must be designed taking into account all the features of the room: humidity, lighting, geometry, flaws in the ceiling tiles. Do you want to know everything about it? Read the article!

The undeniable advantage of the GKL is that the unusual geometry of the suspended structure will emphasize the features of the chosen interior style and help visually divide the room into several functional areas.
Why GKL

When choosing a material for finishing the ceiling in the kitchen, you need to consider several important parameters:
- It is in the kitchen that good ventilation is important, and especially in the studio kitchen. Stretch ceilings are made of a thin and durable film that completely blocks the movement of moist air vapor. As a result, the smallest drops settle on the ceiling. Drywall "breathes", providing an ideal microclimate in the room.

If you like film ceilings, there is an alternative. You can decorate a drywall ceiling with self-adhesive bright patterns and patterns from the film, it will be cheaper than a stretch coating, and the effect is no worse.
- Film webs impose certain requirements on the power and quality of light bulbs. For incandescent lamps - no higher than 60 W, and for halogens - 35 W. I love the bright light in the kitchen, these requirements stopped me from ordering stretch ceilings.

- Drywall is stronger and harder to damage or tear. And although stretch ceilings are positioned as resistant, it is very easy to tear them when washing.
- The design of the GKL allows you to arrange a spacious niche in the corner of the kitchen and securely hide all communications.

- For private houses, GKL is preferable, as it additionally retains heat in the room and contributes to high-quality ventilation of the kitchen.
An additional plus is that a plasterboard false ceiling can be placed anywhere, for example, to build doors for access and maintenance of communications. With stretch ceilings, this will not work.

The biggest plus of drywall is the price, the cost of such ceilings is 40-50 percent lower than stretch ceilings. But this is if you take high-quality film coatings, and not fake.
Kitchen Design Ideas

Plasterboard ceilings in the kitchen, with proper placement, will help to effectively and conveniently organize the space. How to do it?
The first idea is a multi-level ceiling

For a kitchen-studio, a multi-level ceiling option is suitable, as it will help to visually delimit the space of the working and dining areas. If the room is less than 10 square meters, then you can choose a two-level option, with curved lines and backlighting from halogen bulbs along the edge of the wave.

The disadvantage of complex multi-level ceilings is that they do not look good in rooms with a height below 2m30 cm. It should be borne in mind that one level is approximately 5 - 8 cm in height. Therefore, designers recommend making out the second level of the suspended structure from the corner to the center, by sector, as seen in the photo.

Another option for low rooms is a combination of hemming and hanging structures. Part of the drywall panels is attached directly to the ceiling, and the second level is installed on hangers.
The advantage of this installation is high-quality insulation and excellent sound insulation.
Idea two - ceiling partition

Designs in the form of a narrow partition of the original geometry look beautiful, which can be lowered from the ceiling. But it is not necessary that such a partition reach the floor, you can effectively divide the room into several functional zones and, with the help of small arches or partitions, half the height of the room.

With the help of curved lines and contrasting colors, it is possible to make even a small room much more spacious, without losing comfort and functionality.

Another plus of plasterboard ceilings is the ability to install any type of lighting and lighting.
The third idea is a combination of colors and textures

Plasterboard ceilings in the kitchen can be covered with any finishing option - plaster, plastic lining, film. Therefore, it is possible to effectively combine several materials of different colors and textures, creating an exclusive and unique design.

Due to the fact that it is possible to create structures of any shape from GKL sheets, the possibilities of exclusive kitchen interior design are limited only by the imagination of the owner of the apartment.

The combination of glossy and textured surfaces, stylized as torn stone or marble, looks beautiful, which will decorate the kitchen dining area.
Fourth idea - roomy mezzanine niches

If you make the box for the ceiling around the perimeter of the kitchen wider, then you can not only hide all communications (ventilation, piping and electrics) in it, but also arrange a comfortable roomy niche.
You can also order comfortable shelves from gypsum, which will save the cost of furnishing. But, in this case, the guides under the shelves must be mounted on reinforced suspensions.

When I was installing a suspended ceiling in the kitchen, I asked to make a microwave box. I have a large one and it does not fit on the shelves in the headset. It turned out very convenient and no need to order additional brackets.
On the sides, this shelf was trimmed “under a wild stone”, and glass was used as a door. Looks great. Approximately the same as in the photo above.
Fifth idea - original arches

Arches from the ceiling are a great solution for small spaces. They do not hide the space and divide the studio kitchen into certain zones. Arches are characteristic of different interior styles. They fit perfectly into the Mediterranean style or emphasize the sophistication of a classic interior.

If you make arches from irregular curved lines, this will help create an original design in the modern modern style, which is so fashionable in the coming 2017.
Idea six - combination

Since GKL is combined with almost all finishing materials, you can choose interesting mixes of natural and artificial finishes:
- The combination of film ceilings in the center with their GKL box around the perimeter will make the kitchen taller.

- Artificially aged wooden beams and plasterboard sheets finished with decorative plaster are the perfect solution for an ethnic-style kitchen.
- A fashionable and popular combination of glass mirrored stained-glass windows and plasterboard suspended ceilings will create a unique design in a light “flying” style.

- The popular combination of “natural stone” finishes and plaster looks very impressive, but is only suitable for large areas.

- A colored stained-glass window in the center with beautiful lighting will become the center of the composition and spectacular design of the kitchen in any style.
Due to the fact that drywall on hanging boxes can be combined with any modern materials, kitchen design can be done at a very reasonable cost. And the result will exceed the wildest expectations.
Rules for combining colors, shapes and lighting

The design of plasterboard ceilings for the kitchen can be very diverse.
But in order for the design to look harmonious and not cause an overwhelming impression, it is important to follow a few rules for the design of any interior:
- It is possible to mount any drywall structures in private houses only after the building shrinks, and this is at least a year for houses made of stone and brick, and up to three years for log cabins made of wood.

- Along the edge for small kitchens, it is better to choose diffused lighting directed towards the ceiling, so the room looks larger and higher.
- A different glow will also emphasize the functionality of the kitchen areas. Above the desktop, brighter lighting with spotlights. In the dining area - soft diffused light with the help of a diode tape.

- For small kitchens, the design instruction recommends using only a fragment of a suspended structure. For example, a beautifully curved petal or a spectacular semi-arch that starts at the dining table in the corner and ends in the center of the ceiling.
![]()
- If the hanging elements are placed in the corners of the room, then the room will appear higher.

- The bent elements of the suspended level pointed towards the center will help to visually increase the area.

- The wrong geometry of the room can be corrected by knowing the features of the color to change the geometry of the space. Dark colors take up volume, while light colors make the kitchen more spacious. Fragmentary use of dark color concentrates attention. You can effectively combine the black and white fashionable range this season to make the kitchen more spacious.

Another plus of the GKL ceiling is that it is quite possible to do the repair and change of design with your own hands, without spending money on expensive specialists. The easiest option is to make a smooth decorative drywall plaster, and then just paint it at your discretion.
If you dwell on the textured plaster of the ceiling, then you need to take into account that any textured surfaces hide the area and it is difficult to update their decor yourself.

Summary
I think I've convinced you that drywall is a versatile material that feels great on a kitchen ceiling. However, before installing it, you should also watch the video in this article, where there is still a portion of interesting decor ideas for such structures. And I invite you to discuss the topic in the comments. I would be glad if you share interesting and inexpensive design ideas.
Today we have to find out how practical plasterboard ceilings are for the kitchen. We will weigh the pros and cons of the solution, as well as get acquainted with the features of the construction of GKL structures in a humid room with a high probability of contamination of the ceiling and walls. So let's get started.
Grade
First of all, we need to decide how appropriate a plasterboard ceiling is in the kitchen.
pros
- The suspended structure allows you to hide the differences between the floor slabs, traces of flooding by neighbors and other ceiling defects. The size of the irregularities does not matter: they will all remain invisible to the viewer;

- Plasterboard ceiling in the kitchen does not require preparation of the base. At all. You do not need to clean old coatings and re-plaster the surface;
- , combined with stretch inserts or plaster ceilings;
- Plasterboard kitchen ceilings allow you to mount built-in lighting. At the same time, GKL, unlike plastic panels or PVC film, is not afraid of significant heating, which allows the use of lamps with inexpensive halogens or incandescent lamps of considerable power;

- A plasterboard ceiling in the kitchen allows you to hide an openly laid ventilation duct and other communications (air conditioning lines, a local network, horizontal sections of transferred water supply risers, etc.);

- Finally, its price attracts the GKL: a sheet of ceiling material 9.5 mm thick and 2.5x1.2 meters in size will cost the buyer about 200 rubles.
However: the costs do not end with the purchase of drywall. In addition to it, for the installation of the ceiling, you will need to purchase a profile, fasteners, putty and other auxiliary materials.
Minuses
They also exist:
- Plasterboard ceilings in the kitchen do not tolerate flooding. Meanwhile, the kitchen is one of the rooms where floods are most likely: a rag that plugs the outlet of a neighbor's sink or a clogged sewer can lead to flooding;

- GKL has a fairly high hygroscopicity (the ability to absorb water). Stably high humidity can lead to its swelling, deformation and loss of mechanical strength by the ceiling;
- Like any suspended ceiling in a plasterboard kitchen, it will make it lower;
However: the height of the room in the case of the simplest single-level ceiling will decrease by only 4 centimeters. The visual reduction in the volume of the kitchen can be compensated by increasing its illumination and using light colors in the fine finish.

- When frying in an open pan, splashes of fat can fly over long distances. Including hitting the ceiling. Washing them off a painted surface is a more than trivial task.
Expenses
When installing on a turnkey basis, a single-level plasterboard ceiling in the kitchen will cost the customer at least 800 rubles per square meter. Do-it-yourself installation will reduce costs to 300 r / m2.
For comparison:
- The price of a square stretch vinyl film for turnkey installation starts from 260 rubles;

- The design of wall panels will cost a little more - 350-400 rubles per square;
- the most expensive on our list: materials for their assembly cost at least 650 rubles per square meter.
conclusions
Plasterboard ceilings in the kitchen are quite appropriate, but with several limitations:
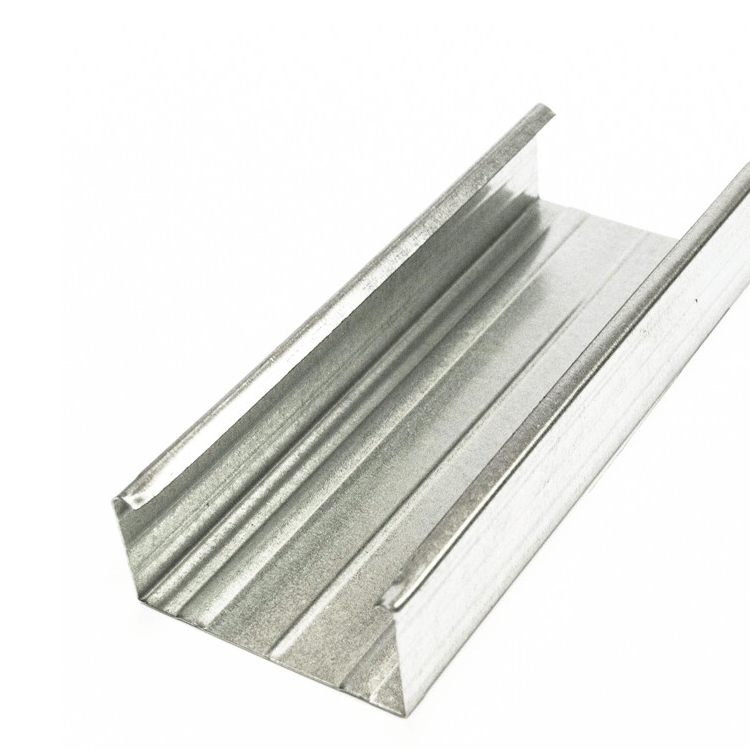
- For the manufacture of crates or frames, you must use only and exclusively galvanized profile. A slightly cheaper bar is more likely to warp with seasonal and daily fluctuations in indoor humidity;

- The kitchen needs efficient supply and exhaust ventilation: in this case, the humidity in it will not be high around the clock. To do this, it is enough to install an exhaust fan instead of a ventilation grill or mount an exhaust hood above the stove;

- For mounting the ceiling, it is desirable to use moisture-resistant (green) drywall(cm. ) . It differs from the one intended for dry rooms (white) with antifungal additives in the composition of the gypsum core and a cardboard shell that is resistant to contact with moisture;

- For a fine finish, washable coatings must be used.(read - wet abrasion-resistant paints based on silicone and acrylic resins).

materials
What materials will be needed to assemble a ceiling in a drywall kitchen with your own hands?
Here is the minimum set required to make a single-level ceiling:
| Image | Description |
|
|
Ceiling plasterboard (9.5 mm thick) is purchased for the area of the room with a margin of 10-15%. The excess will go to waste when trimming the sheets. |
|
|
Profile PP 27x60 mm is used to assemble the crate. The length of the profile should be equal to or slightly exceed one of the dimensions of the kitchen. The number of PP is calculated for a crate step of 600 mm. |
|
|
The PNP profile 27x28 mm is needed as guides and is responsible for attaching the suspended ceiling to adjacent walls. The total length of the PNP should be equal to the perimeter of the kitchen. |
|
|
Straight hangers are responsible for fastening the crate to the ceiling. They are mounted along each rail in 60 cm increments. |
|
|
Wedge anchors attach hangers to the ceiling and rails to the walls. Unlike dowel nails, they will securely hold the ceiling structure even in case of fire, when plastic dowels can begin to melt. |
|
|
9 mm self-tapping screws are needed to connect PP and PNP profiles with each other and with suspensions. |
|
|
25 mm self-tapping screws will fasten the plasterboard to the crate. |
|
|
Finishing putty on a gypsum binder is needed for filling the ceiling after installing the GKL. |
|
|
Serpyanka (fiberglass mesh with an adhesive layer on one of the surfaces) is responsible for reinforcing the seams. Without reinforcement, fluctuations in humidity and temperature will lead to the appearance of cracks after one or two years of operation of the finish. |
|
|
An acrylic-based penetrating primer will prepare the ceiling for painting. |


Tools
Now let's prepare the tools.
What you need to mount the ceiling in the kitchen with your own hands from drywall:
- Perforator with a drill for drilling holes for fasteners;
- Metal scissors. With them we have to cut a galvanized profile in place;
An important point: it is highly undesirable to use a grinder for cutting. Abrasive cutting leads to strong heating of the metal; at the same time, a thin layer of low-melting zinc completely burns out in the cut area. In conditions of high humidity, a profile without an anti-corrosion coating begins to rust quickly.

- A screwdriver with a cross bit (preferably with a screw-in depth limiter) for assembling the crate and its plasterboard sheathing;

- Water or laser level and chalk line for marking;
- Hammer for mounting wedge anchors;
- A long metal ruler, tape measure, pencil and a sharp knife for cutting drywall;
- Cord or thread. They will serve as a guide for us when installing the ceiling crate;
- A bucket and a mixer or a drill with a whisk for making putty;
- Grater or grinder with abrasive meshes for sanding the ceiling;

- Brush, roller and paint tray for priming and painting.
Technology
So, how to mount a plasterboard ceiling with your own hands in the kitchen?
Assembly of the crate
Here's the step by step:
- Mark up by level. The line of the ceiling is beaten off on the walls with a chalk cord. If the ceiling should not hide the built-in lights, the markings should be 27 mm from the lower ceiling point - the thickness of the PP and PNP profiles;

- Fasten the PNP profile along the marking line. Mounting step - no more than half a meter. PNP is attached end-to-end, without overlaps;
- Mark the axes of the battens on the ceiling surface with a step of 600 mm and fix the hangers according to the marking with the same step;
- Insert the cut-to-size PP into the guides, and press them to the ceiling with curved hangers;
- Pull cords or threads between the guides perpendicular to the crate;
- Alternately lower the profiles of the crate to the level of the cords and pull the ears of the suspensions to their side walls, then bend the part of the ears protruding beyond the PP profile upwards;

- Connect the ends of the PP profiles with the guides with self-tapping screws. The ceiling frame is ready.

Sheathing
How to fix drywall to the ceiling in the kitchen?
Each sheet is aligned with an edge in the middle of the PP profile and screwed to all the elements of the crate overlapped by it with 25 mm self-tapping screws. Fastening step - up to 20 cm.
A few tips for this stage of installation:
- Work with a helper or using props, clamps, etc. GKL is a fragile material and easily breaks even under its own weight;

- Screw fasteners no closer than a couple of centimeters from the edge of the sheet. Otherwise, the edge will crumble;
- The fastener heads must be recessed relative to the surface of the drywall sheet without breaking through the cardboard shell. If you do not have bits with a depth limiter on hand, set the screwdriver's ratchet to actuate when the cap is immersed;

- When cutting GKL with a hacksaw or an electric jigsaw, a huge amount of dust rises into the air. In order not to breathe it and save yourself from the need to do a general cleaning throughout the house, drywall should not be sawn, but broken along the incisions previously made with a knife;

- Do not be afraid to leave a gap of 1-2 centimeters between adjacent sheets. Putty will hide it.
Reinforcement and putty
Tool - two spatulas (width 10-12 and 30-35 cm).

The putty is mixed in a wide container with a volume of at least 8-10 liters. The volume of a single portion should allow you to work it out in 30-45 minutes: by this time, the gypsum begins to set and become unsuitable for puttying.
An important point: knead the gypsum only in a clean bowl, otherwise the seized lumps will interfere with you, falling under the spatula. The gypsum mixture is poured into water and after a pause of 3-5 minutes for swelling, it is mixed to a uniform consistency.

The seams between the sheets cut to size (read - with rectangular edges), before puttying, need to be jointed - chamfered. Jointing will fill the seam without cavities in it and reduce the likelihood of cracks.

Then the seam is glued with a sickle, after which it is densely filled with putty using cross-shaped movements of a narrow spatula.

The second layer is applied with longitudinal sliding movements of a wide spatula after the first layer has dried and hides the reinforcing material.

Continuous filling of the entire surface of the flow is only necessary if the reinforcement of the joints is distinguished by its thickness. The putty is applied in two layers perpendicular to each other "on a strip" or in one layer of millimeter thickness.

Sanding and priming
How to prepare plasterboard ceilings in the kitchen for painting?
Preparation is carried out in three stages:
- After the gypsum has completely dried, the seams or the entire surface of the ceiling are polished. For grinding, bright lighting is needed, falling on the surface at an oblique angle: it will highlight all the irregularities with shadows;

- Then the ceiling is vacuumed or dusted with a brush;
- The last stage of pre-finishing is the primer. The primer is applied with a roller or brush in one layer. Its task is to stick the remaining dust to the ceiling, reduce the absorption of paint and ensure its strong adhesion to the surface.

Painting
Between filling the joints and painting the ceiling, at least a couple of weeks must pass: otherwise, the joints due to the unfinished gypsum hydration processes will stand out with a shade. The paint is applied with a roller in 3-4 layers.
When painting the ceiling, you should follow a few simple rules:
- The first to be painted over with a brush are the adjunctions to the walls;

- The entire surface is painted in one layer in one step. Take a long pause - get a visible thickening of the coating on the border of the dried area;

- Each layer is applied at right angles to the previous one. So the stripes from the edges of the roller are less noticeable;
- The last layer is applied parallel to the prevailing light. The reason is the same.

Design Choice

There are several rules that should be followed when choosing a plasterboard ceiling design:
- Given the dimensions of the room, its height and layout, they decide what the shape and number of levels will be. In its manufacture of a false ceiling, fewer sheets, effort and time will be spent. If the area, and most importantly, the height of the room allows, then you can make a two-level ceiling. In spacious rooms, multi-level complex systems will visually make the space more compact;

- Finishing affects the design - complex ceilings cannot be pasted over with wallpaper or tiles with high quality, such a finish is ideal for flat surfaces, where it will add variety. A complex system, a motley or too embossed finish can visually make it heavier. It can be combined - it is important to think through all the nuances;

- The design is influenced by the appearance and type of fixtures that are supposed to be used. It is necessary to think in advance of their number and location. The latter largely depends on the arrangement of furniture and the location of functional areas.
Kitchen area and construction type - what is the connection?

It was previously noted that in many ways the area of \u200b\u200bthe room affects the type of suspension system, its color and complexity:
- Kitchen with low ceiling, can visually acquire additional volume due to a single-level light design with a sufficient number of built-in lamps;

- If the room is spacious, but the height does not allow you to install a multi-level system, then you can use several shades in the finish;

- As mentioned earlier, a room that is too spacious will look more comfortable when using a complex multi-tiered system;

- In an open-plan apartment or when combining a kitchen and a living room, multi-level systems are used for space zoning, highlighting the dining or working area.

Advice. You can visually divide the room into functional segments using built-in lights, the shape of a protruding volume, or the use of several colors and textures in the finish.
Conclusion
As you can see, even a novice can make a plasterboard ceiling in the kitchen. The attached video will introduce you to the original designs of suspended ceilings and describe in more detail the technology of their installation. Good luck!
Consider the advantages and disadvantages of plasterboard ceilings in the kitchen, and also talk about what form it is desirable to choose for the kitchen.
Pros and cons
Drywall, or gypsum board, is an environmentally friendly material consisting of gypsum lined with cardboard. Installation of such a ceiling takes 1-3 days, depending on the area of the room and the complexity of the pattern. But the ceilings are perfectly smooth, beautiful and durable.


pros

Minuses
- Installation must be carried out by an experienced technician. Any error in the design, uneven frame will lead to cracks.
- A neat paint finish is required so that no seams are visible.
- Drywall ceilings are not recommended for installation in new buildings. A house that is still shrinking will cause the frame to warp and crack.
Thus, plasterboard ceilings for the kitchen are ideal. Moreover, they can be combined with popular tension structures.

Varieties of designs

It is necessary to distinguish between the ways in which drywall is attached to the ceiling.


Combined ceilings are excellent for modern styles when drywall is combined with. In this case, you can also consider the play of the color palette by choosing the color of the stretch ceiling to match the color of the furniture or making it, on the contrary, contrasting.

Types of plasterboard ceilings
Types of plasterboard ceilings are distinguished by the number of levels:


Choosing the design of plasterboard ceiling for the kitchen
With the help of the shape of the ceiling, you can not only emphasize the style of the interior, but also visually change the shape of the entire room:


Please note that the forms that you use for drawing on the ceiling must be repeated in the interior. The combination, for example, curly smooth curves on the ceiling and furniture with strict rectangular lines, looks extremely sloppy and inorganic. Conversely, a strict square on the ceiling, suitable for a minimalist style, will look like a contrast if you have smooth, rounded furniture.

To achieve completeness in the interior, you can continue the ceiling pattern on the wall. For example, wavy lines flowing smoothly into the same lines on the wall create a unique interior. It would be good to repeat the semicircle above the working area of the kitchen by installing, for example, a semicircular island. The same bar drain can be distinguished if you build a drywall box over it of the same shape as the bar itself. By the way, in this case, you will not need to spend money on lamps, since built-in or chiseled lamps on the ceiling provide excellent lighting.
Choosing a paint
Drywall is considered a versatile material that can be both painted and wallpapered, finished with textured plaster, decorative molding, and even create frescoes.


Since we are talking about a kitchen where you have to clean more often, painting is considered the best option. Consider which paints are best suited:
- Water-based paint is the most economical option. The ceiling is bright. But you will have to repaint often, since the water emulsion is easily soiled and does not like moisture. The undoubted advantage of this choice is a large selection of color palettes.
- Water-dispersion paint - moisture resistant, does not wash off for a long time. Such a ceiling can be wiped with a damp cloth. It also has a rich color palette.
- Acrylic or latex based paint is a great choice for plasterboard ceilings. Thanks to this paint, a coating is created on the ceiling that is resistant to steam and moisture. The surface can be easily washed.
- The silicate-based paint is also moisture resistant. The advantage of this paint is that it does not require the addition of aniseptics.
- Silicone paint has absorbed all the best from acrylic and silicate. It is plastic, easily covers cracks up to 2 mm, and after application forms a protective film.
Important! Pay attention to the combination of colors and interior style. So, classical styles prefer matte surfaces more, therefore it is better to choose matte paints in soft pastel colors for painting. But the glossy ceiling perfectly emphasizes the modern design of the kitchen.

Thus, plasterboard ceilings can radically transform the interior of the kitchen, make it stylish, functional and beautiful.
The choice of materials for finishing the kitchen is always not easy, as something is constantly cooked in the room, steam is released, fat and oil fly in different directions. Therefore, in order not to become a constant hostage to cleaning, materials are chosen for the kitchen that are subsequently easy to clean. Is drywall such a material, will it be appropriate in the kitchen? What are its advantages and disadvantages? We will analyze these questions below.

One of the undoubted advantages of a false ceiling in the kitchen is the ability to hide flaws. If there are defects on your ceiling, then the false ceiling will completely hide them. Also, such a coating does not require any surface preparation. There is no need to putty or prime the ceiling.
Drywall does not deform, unlike plastic, so you can place lighting fixtures as you like without fear of damaging the material. At the same time, it is cheap, even with the purchase of other materials needed for fixing, you do not have to spend a lot of money. In addition, its installation is very easy, which saves on hiring specialists. Anyone who has at least some idea of \u200b\u200brepair work can install a drywall construction with their own hands.

The appearance of drywall structures is diverse. Single-level, multi-level. The choice is so wide that it will definitely bring any project to life. If you want to make waves on the ceiling, circles, squares, steps, or somehow unusually arrange a light zone with various light elements, all this allows you to make drywall.
All of the above relate to the advantages of a plasterboard ceiling, but it also has disadvantages.
Drywall does not tolerate moisture. In other rooms this may not have played a role, but in the kitchen, where steam rises and the possibility of flooding is very likely to be fatal. Also, frequent cleaning seems to be very doubtful, it is impossible to wipe with a damp cloth, which complicates the cleaning process. You can use waterproof plasterboards, but this will raise the overall cost in price. Also, to repel moisture, drywall is coated with moisture-resistant paint.
Of course, if you install the right ventilation system in the kitchen, it will save your ceilings. There should be a hood above the stove and then drywall will be an excellent choice for finishing the ceiling in the kitchen.

How to make a plasterboard ceiling with your own hands
Plasterboard ceilings in the kitchen can be done independently, without calling specialists.
Required tools:
- Level
- Roulette
- Perforator
- screwdriver
- square
- Pencil
- Hacksaw
- Spatula and putty
- Reinforcing tape
Lighting. They must be purchased before installing the ceiling.
Based on the type of lighting, decide how many centimeters lower the suspended ceiling will be from the main one. If you have spotlights, then you need to retreat more than 8 cm, if not, then 5 cm will do.

An important stage of work is markup. Draw a horizontal line across the entire area of the room. It is required to measure all 4 corners and the center of the room. The lowest angle will be the starting point. Mark the desired distance from the floor and draw a horizontal line to all corners according to the level. If you have a laser level on hand, it is better to do this job with it.
Drill holes for dowels along the lines drawn with a drill, a distance of about 35 cm. Screw the profiles. After fixing the profiles, it's time for the hangers. They are fixed on the ceiling at a distance of 65 cm. For the convenience of work, pre-mark the markings. The main profiles are inserted into the guides and fixed on the hangers. After that, they need to be bent.
Secondary profiles are attached to the main profiles at the joints of drywall sheets. Now you have a frame for sheets. Next up is the wiring. It is necessary to lay all the wires in the grooves. Route the wires to the location of the lamps. Next up is the wiring. It is necessary to lay all the wires in the grooves. Route the wires to the location of the lamps.

After all of the above, the turn of attaching drywall sheets to the frame. This process is not easy, it takes place in several stages. Before installation, you need to determine how many sheets you need. Usually there are more sheets than the perimeter of the room, so they need to be cut off. Cut the sheets with a hacksaw or utility knife, the ends must fit exactly into the frame. The cardboard is cut on both sides, and then gently breaks if the knife does not pass through. The cutting edge must be even. Trim if necessary with a knife.
Now you need to cut holes for the lamp, lamps, sockets. Place the lighting devices on the sheet and carefully cut a hole with a hacksaw.
Sheets are attached to the frame either longitudinally or across. If you decide to mount across, then the sheets must be placed perpendicular to the supporting profiles. If longitudinal, then in parallel with the supporting profiles. In the presence of additional laths, the installation of sheets is carried out from the corner, if not, then from the end or center. Install the self-tapping screws 10 mm from the edge of the sheet, the screws on the front side perpendicular to them. The screws must not go through the cardboard. Do not install sheets close to the wall, they must remain on the profile. When attaching, it is better to work in pairs: one holds, the other fastens. The sheets are adjusted to each other and fastened to the frame with screws.

It is best to wait a couple of days before puttingty. So you can find out if there are any defects. Putty can be processed joints or the entire ceiling. It depends on the quality of the putty itself, it is better to apply a cheap one around the entire perimeter and paint with a roller. Before work, prepare the seams by first cleaning them with a knife. Apply a small layer of putty, then lay the reinforcing tape inside and apply another layer of putty. After that, it is worth waiting a couple of days until the seams are completely dry. Remove all irregularities with sandpaper. After drying, paint the surface.

If you decide to make a multi-level ceiling, then you do not need to paint at this stage. On a piece of paper, draw a drawing of the future curly frame and mark the markings on the ceiling. The width of the second level is equal to the width of the first. Fix the guide profile, attach the main guides to it. The profile needs to be bent along the radius of the required sections. Route the wires for the lamps to the right places. Saw the sheet of the required shape and attach to the profile, as before on the first level. Then it remains only to close the resulting box with a sheet of drywall and install the lamps. Putty the box, wait a couple of days and paint. Your ceiling is ready.

Ceiling design in the interior of the kitchen
Which plasterboard ceiling to choose in the kitchen depends only on your imagination. There are general types of design that can be changed depending on your desires.
The most common option is just a flat single-level ceiling. It hides all the flaws and occupies a minimum of height.

A little more difficult to install, but multi-level ceilings look more beautiful. The second level can be made curved, straight, wavy. But it is better not to do it if you have a low kitchen. Multi-level ceilings will eat up a lot more space.

Figured ceiling. Very difficult to install, it is better not to do it yourself. This design can be decorated with a central decorative element.

Frame ceiling. One of the simplest options for a multi-level ceiling. Consists of several steps. Typically, this design is complemented by several lighting zones.

Diagonal ceiling. The main design element of such a ceiling are various wavy or straight designs.

zone ceiling. Such a ceiling allows you to divide the room into several zones. It is very convenient when decorating the kitchen, you can separate the dining area and the cooking area.
Plasterboard ceilings often go hand in hand with various lighting layout designs. You can create a spectacular design with a chandelier as the centerpiece.

There is another option without accents, just distribute different lamps or LED strips along the radius of the ceiling, creating different lighting. This option is convenient for creating different zones and degrees of illumination.

Plasterboard ceiling in the kitchen is an excellent solution for leveling the surface. Gypsum board construction does not require dirty work on plastering the surface. The design of drywall is convenient if your ceiling is very uneven or you need to hide the communications of the apartment.
Types of false ceiling by installation method
Frame installation without hangers
Mounting diagram without hangersIf the kitchen is small and the width of the kitchen no more than 2.5 meters, then the false ceiling frame can be mounted without suspensions. Using the rack profile PS 50×40, you can mount it from wall to wall. To strengthen the structure, you can connect two profiles together by inserting one into the other. Get a kind of box of profiles.
This drawing must be transferred to the rough surface.
 markup
 Installation of fastening for profiles (suspensions)
- As fastening of profiles, either direct suspensions (photo 2) or suspensions on long rails are used. (picture 1) .
- Cross (short) guides are attached only to crab connectors. The distance between the suspensions is not more than 500 mm.
 Fastening profiles on suspensions (low ceiling lowering)
  Fixing profiles on straight hangers (small lowering of profiles)
 If you do not make crossbars in the ceiling structure, then the sheets must be fixed across the profiles.


 in the near future - forecasts and expert opinions")


 in the near future - forecasts and expert opinions")


