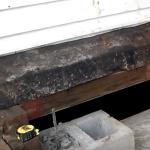
Violation of the integrity of the foundation is a phenomenon often found in wooden buildings with a solid age. It happens that the house itself is kept in excellent condition, but the base has rotted due to external factors and the inability to get close to the structure due to its penetration into the ground. In such cases, there are 2 options:
- Demolish the old house and build a new one.
- If the building is in good condition, it is not advisable to dismantle it, raising the foundation of a wooden house and reconstructing it will be a rational decision.
There are even technologies for lifting and moving stone and multi-storey buildings, but on your own, without the help of specialists, you can only lift a small wooden house using conventional devices.
The general principle of lifting or which houses can be raised
The essence of the technology is to bring the jack under the wall above the foundation and directly raise the building. Lifting devices will need 4, their power should be at least 10 tons or according to the calculation: take the approximate mass of the house and divide it by 4, you get the load on one jack. The device should be selected with a power reserve.
Supporting objects are inserted into the opening gaps as they increase: beams, bricks, blocks around the entire perimeter. In this way, wooden houses made of timber, logs, and wooden panels can be torn off the ground. These materials and the way they are attached to each other are able to compensate for minor distortions that occur during the work, and the house does not crumble.
The situation is more complicated with block, monolithic, stone buildings. The rigid connection of the structural components is not able to withstand distortions and the destruction of individual parts of the bearing and self-supporting frame occurs. In such cases, a technological approach is required:
- Metal plates or beams are installed under the wall, which take on a uniform load from the entire perimeter of the house;
- Powerful jacks are installed under the plates at many reference points and lifting is carried out.
This process is impossible without special equipment and qualified specialists.
Repair foundation or build a new house
Before deciding to replace the foundation, the whole situation should be assessed:
- Is the house itself suitable for further living;
- If the building is suitable, decide whether the foundation needs to be restored or completely changed.
In cases where the restoration of a house is a more affordable option than building a new one, of course, you need to start with the main supporting structure. Why does foundation failure occur?
- Long service life, as a result of which the constituent elements had time to rot;
- For the same reason, a house can sag on one side or corner, a general skew occurs;
- Incorrect construction of structures. This phenomenon occurred everywhere 50-60 years ago: they built what they could and how they knew how, the technology was rarely observed;
- Erosion of soils, high groundwater levels give their results.
Problems can also arise in newly built houses:
- Incorrect calculation of the foundation structure, its insufficient deepening, as a result - cracking of the structure as a result of heaving of the soil;
- Errors in construction technology;
- The low base does not allow sufficient insulation of the floor of the first floor, which is why the rooms are cold, constantly damp.
In the case of old houses, there is only one recommendation - no restoration, a complete replacement of the foundation! The tree in adverse conditions will continue to collapse and the effect of the work will not last long. You should choose a monolithic concrete base device. For new houses, the situation is assessed individually: if there has been a significant violation of the integrity of the structure, it is advisable to completely replace it with a more powerful foundation. If there is tangible discomfort from dampness on the ground floor and the impossibility of insulating the floor, you can resort to raising the basement.
Foundation calculation
To determine the correct depth for laying a new foundation, assess the condition of the soils:
- The presence of groundwater on the site;
- Soil type: sand, clay or rocky base.
Sands and rocky soils without groundwater are ideal for construction. On such it is possible to put shallow foundations, without taking into account the level of soil freezing in the region. For reinforced concrete tape, it is enough to take 50-60 cm in depth.
Clays and fluid soils require a different approach. If the house is one-story or two-story with a lightweight construction without weighting with concrete floors, it will be enough to install a shallow strip or column foundation. The latter is much cheaper. The depth is taken based on the depth of soil freezing, the laying can be located at the level of ½ or 1/3 of the table value.
When constructing a shallow foundation, it is necessary to create a compensation cushion of sand and gravel under the structure. It will take on the pressure of the soil during heaving and the structure of the house will not lead.
If the house has a basement, it is advisable to build a recessed foundation. To do this, you need to use the SNiP "Construction Climatology" and take from its application the depth of winter freezing of the soil in the region. Add 20-30 cm to the result. This is true for both strip and column foundations. If there is a basement for a columnar foundation, it will be necessary to create enclosing walls and carefully insulate them.
Preparing the bottom wall trim
In order for the house to be able to withstand the rise without destruction, it is important to check the condition of the lower trim in order to identify its weakness. If the log is rotten, dried out, it must be replaced or dismantled before installing the jacks. You can make a cut under the lifting mechanism to the whole log through the defective one.
In general, before starting work, you should check the entire lower tier: tap it, identify weak logs. To this end, it may be necessary to involve a professional to accurately diagnose the condition of the walls.
What you need to prepare for work
To raise the foundation of an old wooden house, you will need a small set of tools and fixtures:
- Shovel;
- 4 jacks;
- Laser or bubble level;
- A set of wooden bars and planks of different thicknesses.
To dismantle it, you will need a puncher, crowbar, ax - any tools for disassembling the old structure, based on its material.
Preparatory work

If you need to raise a wooden house and pour the foundation, you need to dig a trench around the perimeter of the building. Its depth should correspond to the design depth of the new foundation, and the width should be enough for convenient work and installation of equipment, optimally - 60 ... 70 cm.
As mentioned earlier, a place must be prepared for the jack. To do this, a seal is created in the ground at the corners of the house for installation, a thick board is laid. It is desirable that the device is located directly under the wall. If there is an old foundation under the wall, a separate part of it should be cut down. Next, the fragile belt of the wall is dismantled to a whole and strong one. Now you can put the jack. On its lifting plane, it is desirable to put a thick metal plate with a width greater than the thickness of the timber. This is necessary so that in case of insufficient strength of the tree, the mechanism does not pierce it, and the load on the plate will fall evenly.
Some sources claim that you can take 1-2 jacks. If we imagine the situation in practice, what happens: you need to raise the structure evenly, and with 1 or 2 devices you will have to constantly move around the perimeter. In addition, the design of an old house may not withstand such a skew. Feel free to take 4 jacks at the corners (or more, depending on the type of perimeter) and get to work.
How to raise an old wooden house with a jack
The first thing to remember is no rush! At every step, you need to control the process and urgently take action in case of unforeseen situations.
Jacks installed. We begin to slowly lift the devices 2-3 centimeters one after the other. A larger bias is not desirable. Raised - put a support-plank. Then they raised it - put another board. When the free distance is significant, the boards can be replaced with more durable bars. Supports are installed at the frequency necessary to support the walls. Under 6 meters, you can set 2-3 supports.
When the lifting height is sufficient for subsequent work, you can proceed to dismantle the weakened part or the entire foundation. A perforator, an ax, a crowbar and other auxiliary tools will help here. It is important to carefully clean the place for a new foundation.
Now let's move on to the design itself.
When choosing a strip foundation, we build a formwork, make a sand and gravel cushion 20-30 cm, install a frame. Concrete is poured with wheelbarrows or a hose from a concrete truck. Be sure to tamp the solution with a submersible vibrator. The period during which concrete will gain 70% of its strength is 5 ... 7 days. After that, the house can be lowered onto the foundation.
To install columns with a small depth, you can use monolithic concrete or ceramic bricks. We lay out or pour supports into the formwork, put on a pillow of sand and gravel.
In all cases, the walls of the foundation structure should be waterproofed to maintain its integrity for a longer period.
On the columns we make a monolithic concrete grillage or use a ready-made reinforced concrete beam.
Before lowering the building onto a new foundation, it is very important to make a layer of roofing felt or other polymeric insulator between dissimilar materials (wood and concrete). We lay 2-3 layers along the grillage or the top of the tape.
Restoration of the lower crown
If the lower crown of the wall was removed due to dilapidation, do not forget to restore this belt. To do this, you need a prepared log or timber. We put them on a new base. We cut out the places where the jacks are installed; after their removal, the missing parts will be inserted into place. But if the lifts are only in the corners, then there will be no problems. We carefully insulate the gaps between the bars with caulking, flax-jute or synthetic winterizer.
Now we lower the jacks at the same speed as we lifted them - 2 cm from each corner. After removing the mechanisms, we insert, if necessary, the sawn parts of the first tier, insulate and close all the holes.
If the house has a stove or an annex
Separately, it is worth mentioning the old houses with a stove. It has its own foundation, so it will not rise with the house. Before lifting a wooden house, it is necessary to free the floor surrounding the stove, the chimney hole in the ceiling and roof, so that the pipe can move freely. After the work is completed, when the house is put in place, if the work is done correctly, the floor and ceiling will remain unscathed.
If the house has an extension, there are 2 options:
- 1) Raise it with the house;
- 2) For the duration of the work, unhook the connections of the extension, if this does not violate its stability.
The second option is more understandable and simple, but the choice must be made solely by evaluating the situation.
One of the problems that residents of their own homes face during the cold winter is the need to increase the efficiency of home stove heating in order to provide some fuel savings while creating comfortable living conditions. What is the reason for this problem?
It arises due to the peculiarities of the combustion of fuel in the furnace. In each stove, in addition to the firebox, there is always a blower through which air enters to maintain the combustion process. To accumulate the heat released during the combustion of fuel, the stove has a shield with smoke channels. The brickwork of the shield has a certain heat capacity, which cannot be increased even with the furnace constantly burning. At the same time, the heated room air begins to flow through the blower into the furnace and, ultimately, flies out into the chimney. It is replaced by colder air from the environment, which again needs to be heated by radiant and convective exchange from the stove shield. Thus, it becomes clear that in order to increase the efficiency of stove heating, it is necessary to organize a channel for the entry of cold air into the blower from an unheated room. This is a fairly fruitful idea and it should be implemented taking into account the design features of the furnace and the overall design of the house. One of the options, implemented with my own hands, is given below.
At that time, when choosing stove heating in my country house under construction, I settled on the option of a fireplace stove with a stove and an oven, which I liked for its versatility. Since my land plot was located on a drained swamp with a close groundwater level, I had to build a basement so that there was no dampness in the house. Therefore, a heated level and unheated rooms in the basement appeared in the house. Therefore, in order to implement the idea of increasing the efficiency of the furnace, it is necessary to create an additional air channel for the blower from the basement
The creation of an additional air channel provides for the following work:
- formation of a side inlet channel in the blower of the furnace;
- formation of the entrance channel to the basement of the basement for the intake of cold air;
- assembly and fixing of the pipeline connecting two prepared channels.
The entrance channel to the blower was made in one of the bricks of the side wall using a perforator cutter. The result of the work is shown in Fig. 1 . View of the inlet channel in the blower. I created a channel to the basement by drilling 6 holes in the floor with a pen. The result of the work is shown in Fig. 2 View of the channel in the basement. Finally, having collected the necessary pipeline with a valve, he connected the two channels. The final view of the air intake channel is shown in Fig. 3 View of the formed channel.
Now, before kindling the furnace, it is necessary to open the valve of the additional air intake channel without opening the blower door and ignite the fuel. The view of the working furnace is shown in Fig. 4 View of a heating stove, and in Fig. 5 View of the air channel of a heating stove.


- How to fold the oven with your own hands. The order of laying the furnace. (0)
It's time to show how to fold such a fireplace stove. To do this, it is necessary to make sections as thick as a brick of the entire array of the fireplace stove. IN […] - How to solve the problem of heating the premises of the basement (0)
The approach of cold weather made it necessary to evaluate the results of operating the means of heating the premises of the basement floor of the house under […] - Creation of a heating system for a private house. Part 3 (0)
Choosing heaters for your home heating system In order for your home heating system to provide comfortable living outside […]
Wooden houses are very popular. However, after several decades of operation, these structures have to be overhauled. It consists in replacing the lower rows of rotten logs or raising and strengthening the foundation. In order to carry out such repairs, it is necessary to raise the building.
What structures can be raised
 For major repairs, only one-story buildings of the following types are raised: from wooden beams; from rounded and other logs; panel wooden houses.
Structures timber or hardwood, for example, larch and oak serve for quite a long time. Until now, there are houses of pre-revolutionary construction, and this is over 100 years old, which have retained their almost original appearance.
Modern wooden buildings are not so durable. The reason for this is the quality of the timber, which became especially susceptible to various diseases after the start of the "atomic era" and the ongoing nuclear bomb tests.
In this regard, structures made of wood are necessary every 15 - 20 years scrutinize to identify signs of rot and the appearance of fungus, especially the lower crowns of wooden houses suffer from this.
Signs of problems
 There are several such signs and they can be seen almost with the naked eye. Namely: partial or complete violation of the foundation of the house; deepening into the ground of the foundation; subsidence of the building in one of the corners; a large skew of windows and doors, as well as the slope of the building.
After inspection and identification of many more additional work, a decision is made to raise the house. Simultaneously create a plan, according to which they acquire the necessary building materials and tools. In addition, the following major renovations are planned:
- replacement of rotten crowns of the building;
- prevention of further subsidence;
- alignment of the skew of the entire box around the perimeter;
- wood treatment with chemicals from decay;
- full or partial replacement of the foundation.
Such great work carried out within 1 - 2 weeks, involve the whole family and several invited experts.
Preparing to raise the building
Before lifting the house, it is necessary to carry out actions that ensure ease of lifting and further repairs. This is done for safety net in case of sudden and unforeseen destruction of the structure. It is imperative to do the following:

In many houses, the floor is arranged on logs, which have their own columnar foundation. The walls of this building are connected to the floor only by skirting boards, which will also have to be removed. In addition, the upper crowns, on which the rafters are attached, must be well connected reliable blocks 50 mm thick or bars so that the roof does not part. You also need to separate the veranda attached to the wall.
When everything is ready choose suitable jacks for wooden houses. For ordinary standard buildings with a total area of 60 to 100 sq. meters, hydraulic jacks with a lifting capacity of 5 - 10 tons are quite suitable. You need at least 2 of them. Drivers of heavy trucks always have such lifts.
Cooking wooden pallets with a thickness of at least 50 -- 80 mm, on which jacks for lifting and steel plates under the heads of these devices will be installed. There should be a small indentation in the center of them to prevent the jack from slipping.
Instructions for raising the house
 In practice, the lifting of the house is carried out quite rarely, but if it has already been done, then they do all the work that is possible during this event. This includes the replacement of rotten lower logs, and the treatment with chemical compounds from the fungus, and a complete repair of the foundation. At the same time, the building frame is leveled.
Logs prepared to replace rotten ones must be dry, free from bark beetles and treated with special solutions that protect against moisture. Bricks for the foundation are chosen well-burnt and red. They are suitable for corners, withstand loads of several tons and are not afraid of dampness. It is also necessary to prepare cement and sand for mortar.
All actions to raise the building are done slowly and clearly taking precautions. It is best to start such an event in the morning.
To raise the house with your own hands, the step-by-step instruction says the following:
- Start from the most sagging corner. At a distance of about a meter from it, they dig a recess in the ground to install a jack with flooring. The soil must be firm and dry.
- The lift is brought under the lower log, and, subject to its integrity and strength, a prepared steel plate is placed under the head of the device. If the log is rotten, then cut a recess for the jack pin to a stronger surface.
- Proceed directly to the rise of the corner. Do it carefully. The lifting height should not exceed 5 - 6 cm at a time. At the same time, the prepared supports and stands are wedged in to lighten the load on the lift.
- Carefully inspect the structure to identify unforeseen complications.
- In the presence of two jacks, the second corner is prepared for raising. They also dig a recess for the pallet, on which they put the next lift. They bring it under the log, put a plate on the head and raise the house. Prepared bars and dies are installed under the lower crown.
- Put the jack in the middle of the log. They do the same operations. They raise it a little, by about 2 - 3 cm. Be sure to put stops.
- Return to the first corner. Raise, trying to level the frame, but no more than 6 - 7 cm. Be sure to insert supports from chocks or blocks. They try to make sure that the entire side is on supports.
- Look at the building again.
- Jacks are removed from reinforced and raised corners and the other side is prepared for lifting. Perform similar actions.
- Return to the first two corners and lift the house until the entire box is completely level. This is checked by the water level.
- The building must be raised clockwise or counterclockwise until the entire structure is level.
- Reliable supports are placed under the walls under the lower crown around the entire perimeter of the building.
After the house is raised, it reinforced on all sides with props. Then the repair work necessary for this object is carried out.
Unlike a large house, a bathhouse can be raised faster. This takes 1-2 days. In some cases, it is raised in a few hours. The speed of work depends on experience. If there is no experience in how to raise a bath on jacks, a video that can be easily found on the Internet can help with this.
If there are problems with the foundation, there are two ways out - to build a new house or try to restore and replace it. In the second case, it is necessary to raise the house, and then carry out work with the foundation. The technology is available for buildings of any type, even for high-rise buildings, but you can only raise a wooden house on your own - it responds better to uneven loads.
In case of problems with the foundation, the way out is to raise a wooden house and replace or reconstruct the foundation
What kind of house can be raised
In principle, specialists raise houses of any type, including brick or block ones. But with your own hands you can only cope with wooden houses - from logs, timber. You can also independently raise panel wooden houses. All of them, by virtue of their design, are the easiest to tolerate uneven loads, so when lifting, you can use one or two powerful jacks. They are usually rearranged around the perimeter - moving clockwise or counterclockwise, gradually raising the frame with a foundation. Due to the fact that the wood is elastic and resilient, the slight distortion created during operation is compensated, preventing the building from crumbling or cracking. This, and even the small weight of wooden structures, allows them to be lifted with their own hands.

This is how a block or frame house is raised - a lot of hydraulic jacks controlled from one point
Brick or block houses will not endure such an operation. They react very poorly to distortions and unevenly applied loads. Therefore, this process is much more complicated and expensive. Steel beams are brought under the building, creating a reinforcing belt below. Along the perimeter, powerful pneumatic jacks are installed, which are controlled from one point (control panel or computer). They start climbing at the same time. Only in this case it is possible to avoid the destruction of a brick, frame or block house.
When the need arises
Most often, it is necessary to raise a wooden house when there are problems with the foundation. Our cities and villages still have a lot of houses that were built 40-50 years ago. At that time, few people in private construction strictly adhered to building codes. They built as they could, from what was. Because the foundations of those years are gradually being destroyed, the houses warp. So there is a need to raise a wooden house to replace or restore the foundation.
But problems with the foundation are not only for old houses. Newly built houses also have errors during construction:
- insufficient deepening of the strip foundation, due to which, during heaving, the foundation is covered with cracks;
- insufficient waterproofing, which leads to dampness in the house;
- a low base, and because of this, it is cold in the house and it is impossible to carry out insulation, since a very low basement makes it impossible to carry out any work.
There are many more errors, but these are the most common. In all cases, repair, modernization or replacement of the foundation is required, which means that the house must be raised.

The second common reason why a wooden house needs to be raised is that the first crowns of the log house have rotted. The result is the same: the house settles and the further, the more. The rot continues to spread. Therefore, the log house is raised, after which the old rotten crowns are removed, replacing them with new ones. Otherwise, the repair of the log house cannot be carried out.
And the third reason is the need to move the building. This situation is not so common, but it also happens. Sometimes an unsuccessful site is chosen for the construction of a building, then a new foundation is put in another place and the house is dragged. But first you need to lift it, then install rollers - special ones with rollers or cut pipes - and then transport it somewhere. Sometimes a decision is made to move the house due to problems with the foundation. But at the same time, there is no desire to live in a house that stands on "chicken legs" all the time of repair.
What do you need to raise a wooden house
The technology is simple, and therefore you can do this work with your own hands, but you need to be extremely careful. So what tools do you need:

In general, this is all that is required in order to raise a wooden house.
Sequencing
First, it is worth assessing the condition of the building and especially the lower crowns. If the log house is sheathed with clapboard on the outside, it is removed, an awl is stuck into the beam or log. If it easily enters, then the wood is damaged, it will need to be changed. So, you buy a bar of a suitable section (even if the frame is made of logs), sealing tape, antibacterial impregnation for wood in contact with the ground. You process the timber, lay it to dry.

If the house has a brick oven, around it you need to dismantle the floor a little, free up the places where the chimney passes through the ceiling and roof. If, you also need to cut off the supply and return pipelines - then it will need to be slightly redone and welded again. It will also be necessary to disconnect all communications if they come from the underground - water supply, sewerage, etc.
If there are extensions to the house under a common roof or connected to the walls of the house, the matter is more complicated. It is required to free the house (the best option) or fix the extension to the main house and lift everything together. The second option is more complex, it is implemented if at least one wall has a rigid connection with the main house - for example, it is solid with the wall of the house. But even in this case, one cannot do without a preliminary consultation with a specialist. It is much easier to lift the house if nothing pulls it and does not interfere with the rise. Later, the extension can be raised separately. This is an option if it is made incoherent or connected - these are only staples or other similar ties.
Immediately before work, it will be necessary to open the windows and open the doors. This will not allow them to be damaged during distortions.
How many jacks to put and where to place them
If the house is built on a strip foundation and the strip is equal in width or larger than the size of the log house, you will have to cut openings in the strip for the installation of jacks. Otherwise, you won't be able to install them.
It will be easier if the building stands on a pile or column foundation. These are usually light structures such as a bathhouse, a small country or garden house. In this case, the soil at the jack installation sites is leveled, compacted, and a rigid, even base is placed on it. This is a piece of a wide board or a sheet of thick metal. It is important to provide a good, reliable support - when lifting a wooden house in this case, the load is transferred to the ground pointwise, at the places where the jacks are installed. And the load at these points is very large. To prevent the jack from “driving” during operation, a reliable foundation is required.

If the house stands on a strip foundation, first of all, openings are broken out in the foundation with a sledgehammer for the installation of jacks. They are made along the perimeter, after about 2-2.5 meters, but stepping back from the corner at least half a meter. Mandatory platform in the place of cutting - pier. Make the opening so that the jack stands up freely and the platform is level. Also, studs are cut around the perimeter of the house, with which the frame was attached to the foundation. Further, having cleared the openings from construction debris, a jack is installed. Under it, it is desirable to lay a metal sheet. It will more evenly distribute the load, will not allow the material to crumble under the stop.
A little about the number of jacks and their carrying capacity. You can have at least one. But then the work will be lengthy - it will have to be rearranged in each of the holes, lifted to the selected level, and then move on. This is exactly what is usually done when lifting a house on their own. But there can also be two or three jacks - they can be installed in adjacent openings and lift everything to the same height. The work will go faster, but the risk of skew increases. Those who professionally lift houses usually have enough jacks to install them on two opposite sides and lift a wooden (log or panel) house at the same time.
The load capacity of the jacks depends on the size of the house and on their number. Usually take on 8 or 10 tons. These are ordinary lifts for trucks, there are a lot of them on the market, they cost relatively little.

One more thing: it is desirable to additionally fix several lower crowns of the log house - to drive in large metal brackets. It is also worth fixing the extension, places of cuts and other problem points. This will prevent the house from crumbling in the process of work. The same "paper clips" are installed in the replaced areas.
The process itself
Raise the frame a little with a jack. Only 2-3 cm at a time. No more. In the gap formed between the log house and the whole part of the foundation, the previously cut linings (pieces of boards) are laid. When laying the supports, they try to give them the shape of a truncated pyramid - they put boards of greater length down, and less and less above. This design is more stable than bars of the same length stacked on top of each other.

If the house has piers (cuts), it is also desirable to support them. As you rise in these places, linings are also necessarily laid, and not only at the place where they intersect with the main walls, but also in a couple of places along the length (under the house). If at first it is impossible to do this, due to the low height of the subfloor, they do it later, when the height has already been gained at least a little. For some time, due to elasticity, they will hold out, but then it is advisable to give them support.
After installing the pads, the jack is lowered, removed, go to the next opening, raised again, the pads are laid, and so on. In the process of work, several thin linings from boards are replaced with more massive ones from a bar - the smaller their number, the less likely they are to slip out or fall apart.
The direction of movement - clockwise or counterclockwise - does not matter. It is important to bypass all points sequentially. The amount of lift is the same everywhere. You can navigate relative to the whole part of the foundation - measure the distance to the lower crown. After each climb, the house is inspected. It should not crack or have a visible slope.
After passing one circle, they move on to the second, then the third, and so on until the required height is reached. Usually they raise it by 30-35 cm on their own, but professionals can also raise it by 80 cm. Further, the required work is carried out - the foundation and / or log house is repaired or replaced.
What's next
If after lifting the foundation will be dismantled, the house is transferred to new supports - hung out. To do this, take a beam of large cross-section (usually a pair), bring it under the frame, fix it on both sides. Under each corner, two such stops are installed - on both sides. The total is at least eight. If the wall is long, install the same support in the middle.

The supporting beam can be laid on folded brick or concrete pillars. It is better not to use an earthen support for this - it can “float”. After all the supports are installed, you can disassemble the old foundation and carry out further work.

This is classic technology. But, as you understand, it is not very reliable - these stops can fall, settle, etc. Repair or replacement of the foundation is a long process, anything can happen. A more reliable way is to weld supporting pedestals from a thick-walled metal corner, a small I-beam.

What else are cubes good for? They do not interfere with the reinforcement of the foundation. Pass the reinforcement through them, then pour everything into concrete. You teach a monolith with super-reinforcement. A very good option: both reliable from the point of view of safety, and does not interfere with the work (it interferes less, for sure), and increases the reliability of the foundation.
The difference of lifting a small wooden house
If the house is small, without cuts, with light walls and without outbuildings (or they can be dismantled), you can raise a wooden house by installing two ten-ton jacks in opposite corners. Raise them alternately to a small height, after each ascent along the perimeter, laying out the lining wherever possible. These gaskets should be of different thicknesses - so that even a centimeter gap can be filled.

With this technique, it is especially worth paying attention to the corners where the jacks are not installed. Their emphasis must be reliable.
The operation of heating devices, as well as the safety of residents of houses with stove heating, depend on the draft in the chimney. Troubleshooting will help you feel comfortable and confident in your home. You can increase or adjust the pressure indicator with your own hands.
Useful information about chimney draft
All residents of country or private city houses are familiar with the concept of chimney draft. Do they know the meaning of this term?
If we move a little away from dry scientific terminology, then draft can be defined as a natural phenomenon in which air moves from one area to another, namely, from an air zone with high pressure to a zone with low pressure. All this happens with the help of a ventilation device - a special channel in the chimney.
Using such a process of aerodynamics, mankind began to use fireplaces, stoves, boilers, heating their homes with the help of various types of fuel - coal, firewood, peat, etc.
From a properly designed and built chimney and, accordingly, from good draft depends:
- the quality of space heating;
- reduction of fuel costs;
- safety of being in buildings with their own heating.
What influences the size
There are three groups of factors that must be taken into account when constructing and inspecting a chimney.
House moments
A number of factors indoors can significantly affect the presence / absence of traction and its strength:
- The material from which the building is built.
- Average room temperature.
- The maximum amount of air space in the dwelling.
- The number of people permanently inside the dwelling.
- The presence of internal sources that additionally consume oxygen (heaters, heaters, stoves, etc.).
- The regularity of fresh air intake (ventilation, ventilation).
External factors
There are other factors that determine the draft of the chimney, and they are located outside the heated room. We are talking about the temperature of the external environment, atmospheric pressure, humidity, wind direction. Such a phenomenon as temperature changes during the day can also affect traction - due to the movement of cold and warm layers of air.
Difficulties with traction appear for various reasons, some can simply be overlooked. For example, problems with air escaping through a chimney can occur if the chimney is well below the ridge of a building or tall nearby trees.
Features of the design of the chimney
The draft may be different depending on the design characteristics of the chimney:
- height;
- the presence of insulation;
- tightness;
- location (internal/external);
- length;
- presence / absence of irregularities or roughness, etc.
It is necessary and possible to control the traction in the room using the "levers" of the first and third factors (intra-house and design). Natural changes, of course, do not depend on man.
Keeping the draft in the chimney under control is a prerequisite for safe and comfortable living in your own premises. If the draft is very weak, then it is almost impossible to light the stove and heat the home.
With reverse thrust, the gases generated as a result of combustion are “thrown” into the living room, and not into the air through the pipe. This is very dangerous for human health and life!
With a very strong draft, all the heat is rapidly drawn out through the chimney channels to the outside, not having time to warm the heated room to the desired temperature.
Why does backlash occur?
Weak thrust can become the basis for the formation of reverse thrust. How can you recognize that traction is not all right?
This is “said” by moments that can be ascertained with the naked eye: a lot of smoke in the stove, soot on the door, incoming movement of smoke inside the house. In other words, smoke, cinder from combustible fuel does not go into the chimney through the chimney, but tends to get into the living room with the door open and through the cracks.
Causes of reverse thrust:
- Design flaws in the chimney. Low pipe - increased risk of reverse thrust. The higher the pipe, the better the process of extracting exhaust gases and smoke. The optimum height of the pipe is about five meters.
- Correspondence of the pipe diameter with the parameters of the furnace device. For a powerful furnace, a chimney with a pipe of a rather large cross section is required. But the measure is very important here, because using a pipe that is too wide will make the combustion process unprofitable (all the warm air will literally fly into the pipe). It is unacceptable to use several pipes with different sections in the chimney!
- Use of non-smooth pipes. Irregularities, chips, roughness, etc. - an obstacle to good traction. Over time, the chimney opening may narrow due to soot deposits and other combustion elements and impede the process of kindling the stove, its normal functioning.
- Violation / lack of ventilation. Drafts, open windows in rooms above the firebox do not help the process of fuel combustion, but distort it, making it useless and unsafe.
Chimney channels made of metal are in many ways inferior to brick pipes. Rapid heating and the same rapid cooling do not benefit the heating system in general and the chimney in particular.
Reverse thrust can also appear for objective reasons that do not depend on a person. Strong gusts of wind, rainy, overcast weather with high humidity are unfavorable moments in terms of traction problems.
There is such a term as temporary reverse thrust. What is this? In this case, it is worth talking about violations of traction temporary, for several days. After a certain period, traction returns to normal.
Temporary back draft can happen due to a cold room that has not been heated for a long time. Very cold air accumulated in the chimney pipe prevents the fuel from burning quickly. Therefore, smoke can be “pushed out” from the chimney into a dwelling, bathhouse or other room with a stove or fireplace.
It is very easy to eliminate cold air in the chimney - heat the pipes by burning ordinary newspapers, wallpaper, paper in the oven. The main thing is that these materials are well dried.
If problems with traction can be fixed constantly or with a certain frequency, then it is necessary to take measures to eliminate bad traction.
Strength test
Before you throw your energy into fighting bad traction, make sure that the traction really leaves much to be desired.
You can check the traction with the help of special devices or on your own. Simple ways to fix traction:
- Light a paper sheet, let it burn a little. Bringing it to the stove or fireplace, extinguish the paper and observe the direction of the smoke. If it goes to the pipe - good traction, deviates in the opposite direction - reverse traction, if it maintains "straightness" - there is no traction. Similar manipulations can be done with thin cigarette or toilet paper without setting fire to it.
- If there are smokers in the house, then follow the direction from cigarette smoke or from the flame of a match, lighter near a fireplace or stove. Draw conclusions in the same way as the first paragraph.
- The flame of an ordinary candle can also help in determining the draft in a home.
- A pocket mirror brought to the firebox and covered with condensate may indicate problems with removing smoke from the stove.
- The presence of too much draft, which takes away useful heat from the room, is indicated by an audible hum in the stove - a loud hum.
- The color of the fire in the furnace can be an indicator of different traction. Golden hue - good traction, white flame - excessive traction, red color and black smoke - poor traction, high probability of reverse thrust.
Anemometer is a device familiar to many people of the Soviet period. With this device, it was possible to measure the draft of the chimney. Readings within 10–20 Pa were considered normal. The disadvantages of the device are its low accuracy when the wind strength is less than one meter per second.
Modern industry offers a sufficient number of devices for measuring draft, there are devices that fix draft at the inlet and outlet of the chimney.
Troubleshooting
If you have stated problems with traction, then, of course, they need to be fixed as soon as possible.
The choice of means to deal with bad or reverse draft depends on the reasons that led to the abnormal operation of the chimney.
Pipe cleaning
One common method for improving traction is pipe cleaning. Fuel, burning in the furnace, releases various substances that settle on the inner surface of the chimney. Soot adheres well to pipes if they are uneven or bent.
How to clean the chimney so that there is good draft?
First of all, acting purely mechanically. Chimney channels can be made wider by getting rid of plaque in the following ways:
- After cooking about one bucket of potatoes, peel and cut them. Potato peels will work too. Throw a little into the furnace and wait. When burned, potatoes will release starch, which will become a tool that can soften soot formations. Soft pieces of soot will fall off on their own, and firmly stuck ones will have to be removed mechanically.
- Aspen firewood. Heat the oven with two or three logs. They will heat up the chimney pipes very much and help get rid of soot. But this method requires special care, because the probability of a fire will be very high (soot may ignite).
- Rock salt. This method is more suitable for prevention. Salt added at the time of burning improves the condition of the chimneys.
- Pipe brush. A heavy load is attached to a brush suspended on a steel rope and lowered into the chimney openings. By lowering and raising this structure, it is possible to force soot formations to fly off the pipe walls and fall into the furnace. These fragments are then removed from the firebox.
The second group of anti-soot measures is based on the use of chemicals. The most popular chemicals for cleaning the chimney are Log Chimney Sweep, Kominichek. According to the instructions, chemicals are added to the coals formed during the burning of a stove or fireplace and continue to be heated. After all the fuel burns out, it is advisable to leave the coals, because they continue to “work” in terms of cleaning the chimney (at least this is what the manufacturers advise).
Do not believe the spiteful critics who talk about the mandatory ignition of soot when using the chemical method. This method does not pose any danger, since the beneficial effect is due to chemical reactions, and not due to the ultra-high combustion temperatures of the reagent.
Special mention should be made of the observance of safety measures during all work related to the chimney. Do not fix chimney problems in windy weather! Try to use safety devices while working at height!
Structural Troubleshooting
If certain features of the chimney design are identified that adversely affect the traction force, adjustments should be made to eliminate them. Such actions should include:
- dismantling of several disparate pipes and installation of a single chimney channel;
- pipe superstructure on the roof to the required height;
- insulation of chimney elements, etc.
Arrangement of ventilation
In some cases, draft may improve if drafts are not allowed in the house or bath. To help with problems with traction, you can install ventilation devices on windows.
In the absence of the desired effect after all the above methods, modern devices should be adopted to improve draft in the chimney.
Installation of appliances
To improve the operation of the chimney, it is best to use special devices that allow you to regulate and control the draft. Such devices can be bought at the store or made by hand.
Special adjustment devices
Modern instrument makers have taken care of the release of special devices that regulate draft in the chimney:
- Regulators. They are installed on the chimney outlet to normalize the draft in the heating system, and also as a means of influencing the heating efficiency.
- Deflectors. Such devices are fixed on the chimney from the outside. The draft speed is improved due to the fact that the diameter of this device is much larger than the chimney pipe, and, therefore, a low pressure area appears in it when air flows around it.
- Chimney flue. It is a special design that performs several functions at once: improves traction, protects the pipe from raindrops and snow whirlwinds. The operation of the device is similar to the operation of the deflector; the thrust speed is normalized due to a decrease in external air resistance.
- Smoke fan. It is very popular among owners of houses with a heating system. An artificial air vortex is created inside the chimney due to the operation of the ventilation system, which requires electricity to connect. Compliance with all necessary safety measures is a prerequisite for the installation and operation of such a device to improve chimney draft.
All devices installed on the chimney pipe to improve draft require mandatory control, especially in winter. This is due to the fact that additional appliances attached to the chimney from the outside can clog, freeze (in winter) and thereby prevent the chimney from working properly. The blockage obtained "with the participation" of devices can cause back draft and the penetration of carbon monoxide into living quarters.
Do not forget to regularly inspect along with the chimney and devices that help increase traction.
Photo gallery: draft control devices
The most common device among users of stove heating  Such a device is especially relevant for improving the operation of stoves and fireplaces.
  Useful and beautiful device
  By installing such a device, you can increase the performance of the entire heating system.
Self Troubleshooting
Let's try with our own hands to make the firebox process safe and efficient. The most common way to deal with the accumulation of soot in pipes is a brush with a sinker.
We clean the pipe with a brush
To get started, let's prepare everything you need:
- Hard bristle brush. The diameter of this device is selected taking into account the cross section of the pipe (from fifty to three hundred millimeters).
- Thin metal cable (can be replaced with a very strong rope or rope).
- Weight for hanging to the brush.
Do not start work if there is strong wind or excessive humidity outside. Try to think over and use reliable insurance to protect yourself from unforeseen events.
Ruff is weighted with a sinker, attaching it to the bottom of the device. The brush itself is hung on a cable. All fasteners must be especially reliable, otherwise the structure will fall apart and you will have to perform additional actions - to "fish" them out of the pipe.
First, they clean all the inspection holes in the chimney, and then they start cleaning the pipe itself. By making several movements up and down, you can get rid of the soot that will fall from the pipe into the furnace. It is best if someone else is near the oven to signal efficiency and when to stop working.
Finish cleaning the pipe should be when the soot stops pouring.
You can also clean the pipe with the help of improvised means, about which many videos have been shot.
Video: we clean the pipe with improvised means
Choice of devices for regulation
Consider some of the characteristic features and methods of using devices for controlling and adjusting thrust.
Such structures are installed on the chimney (in its very upper part) to create obstacles to air flows. The intensity of the wind force drops noticeably when it encounters such devices placed on a pipe. The smoke comes out through the channel "to the will" due to the ingress of weak air currents into the pipe. These flows "hook" the exhaust gases and "push" them out.
Deflectors eliminate the possibility of clogging the pipe, as well as tasteful, significantly improve the appearance of the entire building.
There are several types of deflectors:
- TsAGI;
- round Volpert;
- Grigorovich;
- in the form of a plate;
- in the form of the letter H;
- rotating;
- vane.
Almost all of these devices are made of stainless steel, in rare situations - of copper. Using brackets, clamps, bolts, sealing tape, the deflector is attached to the chimney pipe. Some devices are also equipped with additional functions: to extinguish sparks (to eliminate a possible roof fire), to control the temperature of the outgoing air (in this case, the sensor is triggered if hot air does not come out and there is a possibility of reverse draft).
The disadvantages of using deflectors are their minimal efficiency in calm weather.
Photo gallery: types of deflectors
 The most common device for improving traction
  Such a device can be purchased in specialized stores.
  The choice of device depends on the design features of the pipes and your preferences.
Rotary devices
Turbines installed at the top of the chimney use the energy potential of the wind. Air currents set in motion a rotary nozzle (it always moves in the same direction), and thus the air is rarefied near the chimney. The ingress of any foreign objects and precipitation into the chimney with a rotary pipe is completely excluded.
Rotary pipes have a big disadvantage, similar to the operation of the deflector. Their use on a calm day is ineffective.
Draft regulators
Such devices are a real find for residents of country houses, lovers of baths and fireplace gatherings. These devices are attached to the chimney of the boiler. They are equipped with a metal plate with a load that balances it on one side. When the draft is good, the metal plate does not prevent the free access of air to the chimney. With weak or reverse thrust, the metal plate serves as a kind of stupor.
The range limits for thrust are set by the consumer himself, the usual parameters are 10–35 Pa.
The device works completely autonomously, it does not require the supply of electric current.
How to increase traction with your own hands: homemade devices
Before you start building the deflector yourself, weigh your strength, review the available materials, and only then get down to business.
Drawings and diagrams
To create a deflector with your own hands, you need to use diagrams and drawings. You can use ready-made ones, presented in large numbers on the Internet, or you can do it yourself, based on the data of ready-made diagrams and drawings.
Photo gallery: ready-made traction instrument schemes
 On the Internet you can find a good help for the construction of the device
  Carefully study the instrument diagrams and choose the one that suits you
  The diagram shows the device of this device for improving traction
  The diagram shows the components of this device
If you decide to check yourself and save money at the same time, arm yourself with measuring instruments to determine the inner diameter of the chimney. Depending on this value, it is possible, focusing on the table, to determine the necessary parameters for the height of the deflector and the width of the diffuser.
With an inner diameter of 120 mm, these parameters are 144/240, respectively, for a diameter of 140 mm - 168/280; if the internal section is 200, then 240/400; for a cross section of 400 mm, you will need a deflector height of -480 mm, and a diffuser width of 800 mm.
You can calculate the necessary parameters (for a specific pipe diameter) yourself, using simple calculations. To determine the width of the diffuser, the inner diameter of the pipe must be multiplied by 1.2; we consider the width of the umbrella for protection -1.7 x d; we find out the total height of the structure if we multiply the value of the internal section by 1.7.
Having received all the dimensions, we build drawings for more accurate cutting. We draw diagrams on a sheet of drawing paper or on the back of the remaining pieces of wallpaper.
It is best to build a drawing in full size. So that when cutting, simply attach the cut paper parts to the steel sheet and not recalculate the data taking into account the scale of the drawing.
We stock up on materials and tools
Everything must be prepared in advance so as not to be distracted during the work.
We need to make a deflector:
- galvanized sheet with a thickness of at least half a millimeter; stainless steel can also be used;
- metal scissors;
- drill with different drills;
- rivet setting device;
- hammer;
- pliers;
- clamps, nuts, bolts;
- marker (for transferring the drawing to a metal sheet).
preliminary stage
The preparatory work consists not only in drawing the details of the device, but also in cutting them out and trying them on. All paper elements are fastened with paper clips or a stapler and applied to each other. If everything fits, then you can carefully remove the bartacks and straighten the templates.
Do not neglect the process of creating a deflector, try to think about your safety. In order not to injure your hands and to protect your eyes, use gloves prepared in advance and special glasses.
Getting Started
So, everything is in place, you can start!
A step-by-step description of the sequence of actions will help you:
- We transfer the parts cut out of paper to a galvanized sheet. We should get a development of the following elements: a cap, a diffuser, an outer cylinder and a rack.
- Using metal scissors, carefully cut out all the components of the deflector. In places of cuts, the metal is bent with pliers to a half-millimeter thickness and “passed” with a hammer.
- Diffuser, cap and cylinder blanks are rolled up and holes for fasteners are drilled (if bolts are used). Connections are made with rivets or bolts, in exceptional cases welding can be used (semi-automatic).
- To fix the cap, we prepare 3-4 strips of metal. The dimensions of the strips are 6 by 20 cm. The strips, bent from the edges and tapped with a hammer, must be bent in the shape of the letter P. On the cap, five centimeters from the edge, drill 3–4 holes and fasten the metal strips with bolts.
- The other ends of the galvanized strips must be attached to the diffuser, thereby "looping" the cap and diffuser.
- The resulting structure is inserted into the shell.
You can see the construction of the TsAGI deflector with your own hands in the video.
Video: do-it-yourself TsAGI deflector
Mounting the deflector
The first way is to climb onto the roof and, observing safety precautions, attach the device made to the chimney pipe.
You can make your job a little easier - attach the deflector to an additional pipe, which you then raise to the roof and insert into the main pipe.
We put the home-made device in place in a second, safer and more convenient way. We will need a piece of pipe with a slightly larger diameter than the chimney pipe. Stepping back from the edge of the cut pipe about fifteen centimeters, we mark and make holes, we perform the same manipulations on the wide part of the diffuser.
Attention! The drilled holes must match!
We fix the pipe and diffuser with the help of studs inserted into the holes. We screw the nuts on both sides - from the side of the pipe and diffuser and tighten them. When working, we make sure that there are no distortions and damage.
Using a clamp, we tighten the structure with a deflector on the chimney pipe. Try to do this so that there are no gaps or gaps.
The process of self-adjusting traction is necessary in order to live and relax comfortably and safely in a house with stove heating. To do this, you can use different methods that are suitable for your chimney design: cleaning the pipe with a brush, “chemical cleaning furnace”, installing special devices. Traction control devices can be bought or made independently.
