A soldering iron is considered one of the most common tools that can be found in the home of any owner. It is not necessary to be a specialist and solder professionally. But every representative of the stronger sex should have general fundamental knowledge. Breaks in wires in electrical appliances, contacts in sockets, headphones, repairing circuit boards are frequent phenomena, faced with which a person wants to learn how to learn how to solder.
What is a soldering iron?
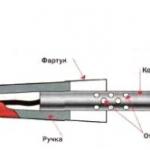
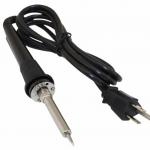
This is a special heat-emitting device with a power of 15 to 40 W, sufficient for soldering wires, boards and microcircuits. There are soldering irons, the power of which is higher. They are intended for light soldering - for soldering badly connected wires of thick diameter or for soldering XLR connectors. The function of the heating element in soldering irons is performed by a nichrome wire, which is wound on a tube containing a "sting" - the working surface of the device. The sting is a copper rod that is heated from
Copper is used in the soldering iron device, since this metal has a high thermal conductivity. The heat supply to the wire is due to electric current. The soldering iron device contains an insulator, which is mica. For safety reasons, it prevents the wires from contacting the metal tube and the soldering iron casing.
Which soldering iron to choose?
Learning how to solder correctly is easy, but with a well-chosen tool. Among the wide variety of these devices, an amateur master who decides to repair office equipment should choose an acoustic soldering iron, which is small in size and has good performance. It has a low heat capacity, which is desirable for fine soldering work in chip assembly. It is better for a novice master to opt for a device whose power does not exceed 40 watts. It is important that the soldering iron is also not weaker than 15 W, since the power in such a product will not be enough even to connect simple office equipment wires. It is preferable to buy a tool with a three-way grounding plug. Its presence will prevent possible voltage dissipation during the movement of electric current to the metal tube.

An industrial soldering iron is suitable for performing work on connecting calibration wires, chassis and stained glass work.
Which sting is better?
The working parts of soldering irons, depending on the size, are of two types:
- ordinary, the diameter of which is 0.5 cm;
- miniature with a diameter of 0.2 cm, used for soldering very thin wires and copper parts.
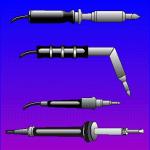
The working parts of soldering irons can be in the form of a needle, cone and spatula. The latter form is the most common, since it makes it possible to scoop up the required amount of solder. In addition, for the convenience of soldering, the tip can be straight or curved.
What is the principle of soldering?
The soldering procedure consists in joining two metal elements using a third (solder). In this case, the melting temperature of the parts to be joined must be higher than that of the third element, which, in the molten state, penetrates into the gaps of the parts to be joined, as well as into their structure, providing a mechanical connection. At the same time, an electrical contact is observed between the connected parts.
What do you need to work?
The soldering procedure is not difficult. The question of how to learn to solder from scratch is easily solved. To do this, it is enough to acquire the necessary material and, following the instructions, begin training.
Where to learn to solder?
You can train at home by soldering conventional electrical wires. The main thing is to follow the safety instructions.
At work you may need:
- a soldering iron (according to professionals, a tool with a power of 20-40 W will be enough to work with small wires in electronics and radio engineering);
- pliers;
- scissors;
- a set of needle files;
- sandpaper;
- insulating tape;
- rosin;
- solder.
The question "how to learn to solder" will be resolved after a few trainings. The beginner will gain confidence and experience. Step-by-step instructions for soldering can help him with this.
Where to begin?
- Sting preparation. To do this, using pliers and needle files, you need to clean the working part of the soldering iron. The sting should have an angle of 30-45 degrees. In the event that the tip is damaged, it must be sharpened again, giving the necessary shape. After that, the tip is tinned - the heated soldering iron should be dipped first in rosin, and then in solder.
- For safety reasons, it is necessary to prepare a lining under the soldering iron. This is due to the fact that the device is heated to a temperature of more than 300 degrees and operates under high electrical voltage. It is important to optimize your workplace during the operation of the soldering iron. It is desirable that a piece of textolite or plywood be used as a lining. Special trays for solder and rosin are also needed.
- Cleaning the surfaces of the joined metals under the solder. To do this, you need a solvent or soldering acid. It is important that the surfaces to be soldered be free of oil, grease and other contaminants.

Sequence of work
How to learn how to solder correctly, it will become clear if you follow the step-by-step instructions. Necessary:
- Install the soldering iron on the stand and plug it into the mains.
- Dip in rosin. This is done 5-7 minutes after connecting to the outlet. The purpose of this procedure is to check the heating temperature of the tip and get rid of scale. The soldering iron is considered ready for use if the rosin boils and melts. If it only softens, then the sting is not heated enough. When the soldering iron overheats, the rosin hisses and splatters. In this case, the device needs to cool down a bit.
- Treat surfaces with tin. Molten solder covers the joints of metal products.
- Press the tinned surfaces together. In places where they are combined with a soldering iron, apply a new portion of solder. The parts to be joined must be pressed until the solder has cooled and hardened.

Solder use
Successful soldering is possible with the skillful selection of the necessary solder - an alloy of tin and lead. The most common solder is POS-40 and POS-60. They are characterized by a low melting point (183 degrees) and are used in most soldering work to connect steel elements. This standard solder is in the form of a wire with a diameter of 2.5 mm, which is very convenient for working with microcircuits.

For soldering aluminum parts, it is advisable to purchase a special aluminum solder. During operation, it is important to remember that, when heated, tin-lead compounds emit gases that are very harmful to humans. Therefore, it is recommended to work with them in a well-ventilated area using special respirators, gloves and goggles.
How to learn to solder wires?
So, the sequence of work is standard for all. The connected ends of the wires are tinned. But for reliable fastening, it is recommended to tightly twist them together. During the procedure, the tip of the soldering iron is directed with one hand to the joints, and with the other hand, solder wire is brought to this place.
In some cases, twisting the wires is not possible. Then the ends of the wires to be connected must be laid parallel to each other and squeezed with pliers. The work is done with one hand, the second - directs the tip of the soldering iron with solder to the junction. Holding the ends of the wire must be done after the soldering iron tip is removed from the soldering area.
Sometimes there is a need to connect the end of one wire to the middle of another. Twisting in this case is done by wrapping the end of the wire around the other to which it is attached.

It must be remembered that butt soldering wires is not possible, since its reliability depends on the strength of the mechanical connection.
The question of how to learn how to solder wires is one of the most relevant among Internet users. Having mastered the technique of splicing and soldering, the craftsmen get the opportunity to independently, without the help of specialists, perform a number of the following tasks:
- seamless heating equipment;
- cord extension for electric guitar;
- connecting the usb cable to the antenna, etc.
What is heat shrink?
When splicing wires, professionals recommend using special ones. Their diameter must be twice as large as that of the wire. The tube is put on one end of the wire. After its mechanical coupling with another wire and soldering, the heat shrink is dragged to the place of their connection. It should be positioned so that 1 cm remains at each end of the seam. After that, soldering is performed again. The heat shrink should evenly cover and heat the wire connection. As a result of exposure to high temperatures, the tube is soldered, providing reliable insulation in the connection zone, as well as the strength of mechanical adhesion.
How to learn to solder boards?
Before embarking on complex soldering, for example, working with diode strips, experts recommend that novice craftsmen get inexpensive budget boards. Having trained on them and having mastered the standard soldering techniques, after a while the beginner will learn how to solder microcircuits.

This type of soldering consists of successive steps:
- Preparatory. Before starting work, you need to ensure a strong connection and lower the resistance. To this end, the surface must be thoroughly cleaned of grease and dust. For degreasing, you can use napkins and soapy water. Acetone is used when you need to polish the surface of the circuit to a shine. Methyl hydrate is recommended as a safer solvent. It is just as effective as acetone, but has a less pungent odor.
- Placement of soldered parts of the board. Before you learn how to solder a circuit, you need to know the location of all its elements. In the very first place, flat parts are subject to soldering. This is a resistor and a varistor. Then proceed to the capacitor, transistor, transformer, microphone and potentiometer. This sequence guarantees the safety of board elements that are sensitive to temperature effects.
- Heating the joint to improve the thermal conductivity of the metal. The tip of the soldering iron must be leaned against the components of the circuit for a few seconds. It is important to prevent it from overheating. Bubbles appearing on the surface will testify to it. In this case, the soldering iron must be removed from the soldering area.
- Solder application. It is carried out until a slight elevation appears on the diagram.
- Removal of surplus. It is carried out after hardening and cooling of the solder. It is recommended not to rush, but to allow the circuit to cool down for a while. This is important, because you can break the connections made, and the work will have to be done again.
Every man should learn how to solder circuits. This will make it possible to repair plugs, modems, etc. with your own hands.
Soldering as a process is not limited to working with copper wires and microcircuits. Having mastered the ability to use a soldering iron on wires, you can proceed to subsequent, more complex operations using various solders and various metals.
Whatever innovations the modern market of radio repair tools offers, soldering iron remains one of the most reliable and secure devices.
The process of soldering wires and microcircuits is considered effective, because it allows you to achieve the strongest possible connection between wires and small parts.
This result is achieved by adding a special material to the contact area - solder, which has a lower melting point than that of the parts to be joined.
Thus, soldering with a soldering iron is the effect of a certain temperature on different metal surfaces for their strong and high-quality connection. However, before you start working with a soldering iron, you should first understand the rules of soldering and other subtleties of this process.
What you need for soldering with a soldering iron
To solder something, you first need to prepare all the tools necessary for this process.

With all the necessary tools at hand, you can start working with a soldering iron.
How to solder with a soldering iron with rosin
 Rosin has such unique qualities, as the ease of dissolution in various organic compounds, such as acetone or alcohol. When heated, this substance can break down complex chemical compounds like copper, tin or lead. Therefore, the correct use of rosin helps to reduce the likelihood of spreading of the substance, the destruction of the oxide coating, as well as high-quality tinning of the soldered elements.
You also need to consider that the thinner the tip of the soldering iron is, the easier it will be to work with it, especially when it comes to soldering very thin wires and parts. Therefore, if it is not sharpened yet, this should be done before starting work.
Process description

There should not be any particular difficulties when working with the tool. To make everything go smoothly, it is best to first practice working with rosin on details that you will not be sorry to throw out later. After all, experience always comes with practice.
Soldering wires
In order to properly solder copper wires with rosin, you must follow a certain sequence of actions.

As you can see, there are no particular difficulties with soldering wires with rosin. The main thing is not to forget to tin the wire and check the quality of the soldering. If necessary, tinning should be repeated several times until the wires are firmly connected with solder.
Having figured out how to use a soldering iron, you should consider a few recommendations for working with this tool.

If you take note of these little tricks, then the process of soldering parts will be quick, and most importantly, qualitatively.
Summing up
 The soldering iron is a versatile tool, with which you can quickly connect broken wires or contacts, as well as quickly repair a microcircuit or connect light metal surfaces.
The ease of use of the device allows any man to learn how to use it in the shortest possible time.
And what is important: to work with a soldering iron, you do not need any professional skills.
What do we need for soldering? Of course, a soldering iron (ideally a soldering station), tin solder, rosin, ideally solder wire, which is a long, thin tin tube wound on a coil, similar to a wire, in the cavity of which there is rosin. Those. when soldering, in this case, we do not need, as in the old fashioned way, to lower the tip of the soldering iron, then into rosin, then into solder, and all this happens simultaneously at one point. More on this below...
You can purchase all the necessary components at your nearest radio store.
If you do not have a soldering station, which is initially ready for soldering immediately after switching on, but an ordinary soldering iron, then before work (especially if it is new), you need to prepare it in a special way - tin it, otherwise it will not solder. What is it "to tin", now we will analyze.
How to tin a soldering iron?
We take a file and apply it flat to the cut of the soldering iron tip. Now we sharpen in the same plane, periodically looking at the sting, until it becomes flat, smooth and shiny.
After that, we lower the heated tip into rosin and immediately into solder (in tin). There will be almost no solder to stick to the sting, so immediately after this procedure we apply the sting to a small board, preferably of natural origin (not chipboard) better than spruce or cedar (resinous), but in principle any will do, only it will take longer to mess around.
So, we repeat this procedure (rosin > solder > plank) until the cut of the sting from yellow - with an overflow of bluish color of heated copper, prepared previously with a file, becomes silvery and shiny from the solder covering it evenly. This is what is called "tinning", in this case a soldering iron.
A tinned soldering iron tip should look something like this:

Now we will learn how to solder the wiring (previously, by tinning it) to a brass tin, also tinning it from the beginning. We dip the tip of the soldering iron into the rosin, then into the solder, and immediately, with the plane of the tip parallel to the plane, we bring it close to our brass guinea pig, not allowing the rosin to evaporate, we press it, then we grind it, we crawl, in general - we tin. If the rosin has evaporated or spread, we repeat the process, and gradually, gradually, our tin is covered with solder adhering to it with high quality. If the material is clean or without strong oxides, then such tinning occurs quickly.
If wire solder is used, then we lean the tip of the soldering iron against the tin, and bring the tip of the wire solder to the point of their contact, trying to touch the tinned part of the soldering iron more, and rub it against this part so that the tin with rosin enriches the contact point.
How to tin a wire?
Now we're tinkering with the wiring. We carefully remove the insulation just enough so that we have enough space for soldering, and for the location of the heat shrink tube, (or other insulator) so that later there are no “shorts” (short circuits) ...

The wire is easier to tinker, because. usually, under insulation, the metal is clean, not oxidized. We dip it into rosin, putting the tip of a heated soldering iron on top of it, and slowly pull the wire out from under the soldering iron, after the rosin melts and smokes. This is done, as they probably understood, in order for the molten rosin to wrap around the contact part of the wire. Now we enrich the soldering iron tip with solder, touching the tin, bring the tip to the rosin adhering to the wiring.
If the wire is copper and clean, tinning will occur immediately.


How to solder a wire?
We have a tinned experimental brass tin and a tinned wire, which we now have to connect, imprint with heated solder and then cool in order to permanently maintain their electrical connection, which we do by bringing the tinned part of the wire to the tinned part of the tin.
We bring a soldering iron tip enriched with solder to the place of their contact so that the solder qualitatively envelops the tinned parts of the soldered parts. The rosin involved in the process will contribute to this. If something doesn't work out - dip into it. After the parts are in the molten solder, try not to move them anymore. You can lightly blow on the soldering place until the solder shine slightly darkens, which will indicate that the soldering has solidified.

And probably, the final touch - you can still dip a small paint brush into the solvent and rinse the rosin residues in the soldering points.
 How to solder?
Before starting to consider the question: “How to solder?” One thing needs to be mentioned...
Soldering is different. You need to understand that there is a big difference in the method of soldering a hefty 2 watt resistor to a regular printed circuit board and, for example, BGA chips to a multilayer cell phone board.
If in the first case you can get by with a simple electric soldering iron with a power of 40 watts, hard rosin and solder, then in the second case you will need to use such devices as a hot air station, non-cleaning flux, solder paste, stencils and, possibly, a station for lower board heating.
As you can see, the difference is significant.
In each case, you need to choose the soldering method that is the most suitable for a particular type of installation. So, for soldering microcircuits in a planar package, it is better to use hot-air soldering, and for mounting conventional output resistors, large-sized electrolytic capacitors, contact soldering with an electric soldering iron should be used.
Consider the simplest rules for conventional contact soldering.
To begin with, it is quite enough for a beginner radio amateur to master the usual contact soldering with the simplest and cheapest electric soldering iron with a copper tip.
First you need to prepare a minimal soldering kit and a soldering tool. How to prepare an electric soldering iron for work has already been described in the article on preparing and caring for a soldering iron.
Many people think that it is better to use a soldering iron with a non-burning tip for soldering. Unlike copper, a fireproof tip does not require periodic sharpening and tinning, since recesses - shells - do not form on its surface.

Burnt soldering iron tip
(for clarity, the copper sting is pre-treated with a file).
The photo shows that the edge of the copper tip is uneven, and the resulting recesses are filled with solidified solder.
The non-burning tip of widely used soldering irons, as a rule, has a conical shape. Such a tip is not wetted by molten solder, that is, solder cannot be taken on the tip with its help. When working with such a soldering iron, the solder is delivered to the place of soldering using a thin wire solder.
It is clear that it is difficult and inconvenient to use solder in pieces or rods when soldering with a soldering iron with a non-burning tip. Therefore, for those who want to learn how to solder, it is better to start their practice with a conventional electric soldering iron with a copper tip. The disadvantages of its use are easily compensated by such conveniences as the ease of use of solders in any design (wire, rod, lump, etc.), the possibility of changing the shape of the copper tip.
An electric soldering iron with a copper tip is convenient because it can be used to easily dose the amount of solder that needs to be brought to the soldering point.
Cleanliness of soldered surfaces.
The first rule of high-quality soldering is the cleanliness of the surfaces to be soldered. Even for new radio components bought in a store, the conclusions are covered with oxides and pollution. But with these minor contamination, as a rule, the flux, which is used in the soldering process, copes. If it is clear that the conclusions of radio components or copper conductors are heavily contaminated or covered with oxide (greenish or dark gray), then before soldering they must be cleaned either with a penknife or sandpaper.
This is especially true if used radio components are used when assembling an electronic device. A dark coating usually forms on their conclusions. This is an oxide that will interfere with soldering.
Tinning.
Before soldering, the surface of the leads must be tinned - covered with a thin and even layer of solder. If you pay attention to the conclusions of new radio components, then in most cases you will notice that their conclusions and contacts are tinned. Soldering tinned leads is faster and better, as there is no need to pre-prepare the leads for soldering.
To tin the copper conductor, first remove the insulation from its surface and clean it of contaminants, if any. Then you need to process the soldering surface with flux. If lump rosin is used as a flux, then the copper wire can be placed on a piece of rosin and the wire can be touched with a well-heated soldering iron tip. Beforehand, you need to take a little solder on the soldering iron tip.
Then, by moving along the wire, we distribute the molten solder over the surface of the conductor, trying to heat the conductor itself as best and more evenly as possible. In this case, lump rosin melts and begins to evaporate under the influence of temperature. An even coating of tin-lead solder without lumps and spools should form on the surface of the conductor.

The melted rosin helps to reduce the surface tension of the molten solder and improves the wettability of the surfaces to be soldered. Thanks to the flux (in this case, rosin), a uniform coating of the conductor with a thin layer of solder is ensured. Also, the flux helps to remove contaminants and prevents the surface of the conductors from oxidizing during heating with a soldering iron.
Warming up the soldering iron tip to operating temperature.
Before starting soldering, it is necessary to turn on the electric soldering iron and wait until its tip warms up well and its temperature reaches 180 - 240 0 C.
Since a conventional soldering iron does not have an indication of the temperature of the tip, it is possible to judge the sufficient heating of the tip by boiling the rosin.
To check, you need to briefly touch a piece of rosin with a heated sting. If the rosin does not melt well and slowly spreads over the tip of the soldering iron, then it is still underheated. If the rosin boils up and steam is abundant, then the soldering iron is ready to work.
In the case of soldering with an underheated soldering iron, the solder will look like a slurry, will quickly harden, and the surface of the solder contact will have a rough appearance with a dark gray tint. Such soldering is of poor quality and quickly collapses.
A high-quality solder contact has a characteristic metallic sheen, and its surface is smooth and shiny in the sun.
Also, when soldering various radio components, it is worth paying attention to the area of the soldered surfaces. The larger the conductor area, for example, a copper track on a printed circuit board, the more powerful the soldering iron must be. During soldering, heat transfer occurs and, in addition to the place of soldering, side heating of the radio component or printed circuit board also occurs.
If a significant heat removal occurs from the place of soldering, then it is impossible to heat the place of soldering well with a low-power soldering iron and the solder cools very quickly, turning into a loose substance. In this case, you need to either heat the surfaces to be soldered longer (which is not always possible or does not lead to the desired result), or use a more powerful soldering iron.
For soldering small-sized radio elements and printed circuit boards with tight mounting, it is better to use a soldering iron with a power of no more than 25 watts. Usually in amateur radio practice, soldering irons with a power of 25 - 40 watts are used, powered by 220 volt AC. When using an electric soldering iron, regularly check the integrity of the insulation of the power cord, since in the process of work there are cases of its damage and accidental melting by the heated parts of the soldering iron.
When soldering or desoldering a radio component from a printed circuit board, it is advisable to monitor the soldering time and in no case overheat the printed circuit board and copper tracks on its surface above 280 0 C.
If the board overheats, it may be deformed at the place of heating, delamination or swelling will occur, the printed tracks will peel off at the place of heating.
Temperatures above 240-280 0 C are critical for most radioelements. Overheating of radio components during soldering can cause damage to them.
When soldering parts, it is very important to fix them firmly. If this is not done, then any vibration or displacement will compromise the quality of the soldering, as the solder takes several seconds to harden.
In order to perform high-quality soldering of parts “on weight” and to avoid displacement or vibration during the cooling of the soldered contact, you can use a device that is called “ third hand”.

"Third Hand"
Such a simple device will not only allow you to easily and effortlessly solder parts, but also save you from burns that can be obtained if you hold the parts while soldering with your hand.

"Third hand" in action
Soldering safety precautions.
In the process of soldering, it is quite easy to get a burn, albeit a small one. Most often, fingers and hands are burned. The cause of burns, as a rule, is haste and poor organization of the workplace.
It must be remembered that in the process of soldering don't have to put in a lot of effort to the soldering iron. It makes no sense to put pressure on the printed circuit board with it in the hope of quickly melting the solder contact. You have to wait until the temperature at the place of soldering reaches the required. Otherwise, the soldering iron tip may slip off the board and accidentally touch the hot metal with fingers or palms. Believe me, burn wounds take a very long time to heal!
It is also worth keeping your eyes away from the place of soldering. It is not uncommon that when overheated, the printed track on the board exfoliates with a characteristic swelling, which leads to splashing of the smallest droplets of molten solder. If you have goggles, then you should use them. Once enough soldering experience has been gained, goggles can be discarded.
It is advisable to solder in a well-ventilated area. Vapors of lead and rosin are harmful to health. If it is not possible to ventilate the room, then it is worth taking breaks between work.
The ability to solder in modern life, saturated with electrical appliances and electronics, is as necessary as the ability to use a screwdriver. There are many methods for soldering metals, but first of all you need to know how to properly solder with a soldering iron. Such a seemingly simple action has a lot of subtleties and nuances - starting with the choice of a tool and ending with security measures when working with it.
General issues
It is metals that are used, they tend to spread over the surface if they are in molten form. This is facilitated by the forces of gravity and moderate tension. This property allows you to connect multiple parts. They are covered with a layer of solder, fixing the elements in a certain position.
It would seem that everything is elementary: he melted the metal and covered the place of fastening of the parts with it. In practice, a more complicated situation is observed, because it is important that the part is both durable and conductive by electric current. Ideally, the layer should be thin, but with maximum coverage.
To better ref To proceed with this operation, you need to consider the following points:
Knowing how to do it right is the key to success. Everything is not so difficult, because there are many universal options with which you can easily solve most of the actual tasks when soldering. All the necessary information is contained on the labels, so before buying any brand, carefully read what is written there.
Typically, fluxes are needed for etching and removing the oxide film. In addition, their application is an excellent way to protect against corrosion. Without them, it is difficult to imagine a full-fledged preparation for soldering, because if the parts are not tinned, then high-quality articulation cannot be achieved. As a rule, these substances are mixtures of salts, alkalis and acids.
There are two types of fluxes:

 The choice is made on the basis of specific goals to be achieved. It is better that both varieties are present in the arsenal.
Fixing is done using solders. As a rule, lead-tin marks (POS) are used. After marking, there is always a number that indicates the concentration of tin. The more impressive this indicator, the higher the resistance to mechanical stress and electrical conductivity. The melting point is lower. The lead in the compound is needed for curing. Without it, tin will not be able to maintain uniformity.
On sale there are special varieties of solders in which there is no lead (BP). It is replaced by indium or zinc. A big plus of such compounds is the absence of toxicity. The melting point is higher, but the strength is much more serious.
You can find fusible brands. These are Wood's and Rosé's solders. They spread at a temperature of 90-110 degrees. Such connections are used in the creation and repair of equipment.
The variety of types of work and the conditions in which they are performed has given rise to the emergence of several types soldering equipment.

Choosing a soldering iron tip
 This part of the structure is different in shape and material from which it is made. The most primitive option is an awl-shaped sting. There are many variations: a blade, a cone, a bevel, etc. When choosing a shape, you need to have an idea about the work that will be performed by this sting. It is important to purchase something that will provide the maximum area of \u200b\u200bcontact with the surface.
As a rule, the material is used copper, to which various impurities are added (for example, chromium or nickel). This improves performance. In particular, durability is significantly increased.
An uncoated sting quickly becomes unusable. It has to be cleaned periodically tinker. In order to level this flaw, it is recommended to forge this element and grind it in order to give one form or another.
In various situations, this tool can be used with a number of features that are worth paying attention to. Not only the final quality depends on this, but also the degree of feasibility of the operation as a whole.
Soldering wiring
 The ends are dipped into the flux and after that we pass along them with a sting moistened with the same solution. It is important to shake off excess wires. Do not neglect this if you want to achieve a quality connection and flawless functioning.
When the preliminary stage is over, we twist the wires and warm them up with a small amount of solder. All free space must be filled with the molten mixture.
If stranded conductors are meant, tinning can be dispensed with. The ends are simply wetted and fixed without pre-treatment with a sting. Inside switchboards, this operation is not carried out, since the risk of corrosion is high. In addition, such designs do not belong to the category of detachable.
Electronics repair
 Correct approach is achievable only by experience. If you have never done such work, use the help of a specialist who will tell you how to work with a soldering iron in this case, because it is important that someone controls and makes timely edits into the process. But if we are talking about a typical printed microchip, even the one who first picked up the instrument will cope.
Easiest to solder small output elements. We first fix them with some kind of viscous substance in the holes. Firmly press the sting on the back to warm up. Then we introduce solder into the place of soldering (it should not be too much).
If the output element dangles, first we wet it with flux. With this technique, a small drop of tin from the soldering iron is transferred to the leg. The substance flows down, filling the hole.
Large parts
 Cable sleeves, tanks and utensils have a high heat capacity, so the process service and the connections look a little different.
First we achieve complete immobility. This is done using clamps or plasticine (wax). Then point soldering is performed.
Next stage - tinning. It is performed at the fixation points. It is important to approach this process with the utmost care.
Then - the free space is filled with solder. Special compositions are used, which are characterized by infusibility and the ability to maintain tightness over a long period of time.
If you have to make a large seam, the role of a soldering iron can be played by a copper hatchet heated on fire. This is all, what you need for soldering in such cases.
Important Points

Working with a soldering iron is not as easy as it might seem. The development of this skill will significantly expand the range of operations and technician that you can use.
