How to solder? First you need to purchase a minimum set of tools. This set should include:
For soldering, you need to purchase an ordinary soldering iron with a power of 40 watts.
- screwdrivers of different sizes and shapes;
- pliers;
- wire cutters;
- files of different lengths and shapes;
- hammers;
- tweezers;
- soldering iron;
- solder (tin);
- flux (rosin).
As for the soldering iron, it is better to purchase the usual version with a power of 40 watts. Such devices are powered by a 220 V mains supply. For home use, such a device is enough. You can connect a power regulator to the soldering iron, which will control the temperature of the tip.
To properly solder, you need to familiarize yourself with the main stages of work, materials that can be soldered together. Learning how to solder yourself is easy, the main thing is to follow the recommendations and follow the safety rules.
What solder to use
To weld two parts together, you must use a special solder. It is an alloy of tin and lead. It is worth noting that the proportion of the two components can be completely different and is selected depending on the purpose. Most often, solder is a regular wire or tube that is filled with flux. Despite this, solder wire is more popular, since the flux will be used anyway.

For solder, a special alloy of lead and tin is used.
Solder marking is carried out taking into account the melting temperature and hardness of the material. For convenience, solders are marked with a code, which consists of letters and numbers. For example: POS-60, POS - tin-lead solder. The number 60 means the percentage of the first material, in this case the alloy contains 60% tin and, accordingly, 40% lead. Solder can also be distinguished by color. If it contains more lead, it will have a dark color. Such solder melts at higher temperatures. For soldering at home, it is best to use POS-60. The melting temperature of such solder does not exceed 190°C. Despite the high percentage of tin content, soldering is very strong.
Fluxes are used to eliminate oxides from the surface of the elements to be joined. They will further protect the solder and metal from oxidation. Flux well wets the surface of the material. Today, the most popular flux is rosin. This material is made from pine resin. Appearance resembles amber, has a transparent yellowish tint.
Back to index
Preparing the soldering iron for work
Before you start working with a new soldering iron, it must be prepared. The preparation of the tool consists in sawing its working part - the sting.
To do this, you need to use pliers to clamp the sting and a file to process the tip of the tool. Ideally, the tip of the soldering iron should be dihedral with an angle of at least 30°.
Most often, in soldering irons, a nichrome wire acts as a heating element.

It is wound on a tube in which a copper rod is located - a sting (the working surface of the tool). Passing, the electric current heats the nichrome wire, which transfers heat to the copper rod. Mica acts as an insulator, which prevents the wire from coming into contact with the protective casing and the metal tube.
It is very important to adhere to safety rules during work, so it is necessary to prepare not only all the devices, but also additional devices that will facilitate the work process. One of these devices is a soldering iron stand. You can buy it at the store or make it yourself.
To make such a stand, it is necessary to prepare a small wooden block and a metal lid, which is used for canning on the farm. From the lid you need to make a small rectangular box. In the future, the remnants of solder and flux will be added to it. After the bath is cut out, its edges must be processed with a soldering iron, since they are very sharp. At the end, such a bath is attached with self-tapping screws to a wooden block.
Back to index
final preparation
How to solder with a new soldering iron? The question arises quite often among beginners who have just purchased an instrument. First of all, you need to turn on the soldering iron in the mains and wait until it heats up. After heating, the working surface becomes dark blue.
To eliminate such scale, it is necessary to clamp the sting with pliers and carefully remove it with a file. After that, quickly dip the soldering iron into the rosin and touch the solder on both sides. After that, the working surface must be drawn along the bottom of the prepared metal bath until the solder covers the entire surface. Periodically, the sting is required to be moistened in rosin.
In order for the soldering process to be carried out efficiently, the soldering iron tip must always be clean and well-groomed, and the solder layer on it should be evenly distributed. In this form, the work surface should be at the end of the work.
When a novice electrician watches the work of a master with a soldering iron, then all the actions seem simple and understandable.
However, as soon as you pick up the tool yourself, troubles immediately begin: the solder does not hold, the contacts fall off, the insulation burns out, the sting is covered with soot.
To prevent this from happening, certain rules must be followed.
The master knows and executes them. For a beginner, I advise you to first understand how to solder with a soldering iron correctly. Only then can you take on this job.
Features of the preparation of the workplace and tools
3 main secrets: posture, light and air
Even at home, high-quality soldering requires a comfortable worker posture with good lighting. I recommend installing a desktop near the window, which receives the sun's rays during the daytime, and an artificial source shines in the evening.

Soldering is associated with the heating of substances, the release of fumes. Although heated rosin smells like pine needles, this smell, if inhaled frequently, is still harmful. And other fluxes and acids are even more dangerous. Once in the body through the respiratory system, they accumulate and cause chronic diseases.
Therefore, ventilation is important. Work with an open window, and even better - use a forced hood.
Useful gadgets
A short, paper-lined tin can is needed to work with solder and rosin.

A special stand helps to store a heated soldering iron, and a sponge allows you to clean the hot tip from oxides.

It is convenient to remove excess molten solder with a desoldering pump.

Work with small objects is facilitated by tweezers, small vices, third-hand devices. The easiest option: ordinary pliers with an elastic band.

You can make other simple designs with your own hands.

Choosing and preparing a soldering iron
The sale offers various models with voltages from 12 to 220 or 380 volts. Each soldering iron is created for a specific job, although it has universal capabilities.
They are evaluated by the power consumption of electrical energy, which is spent on heating the tip of the tip.
It is convenient to solder radio components with a soldering iron with a power of 40 ÷ 60 watts, and for wires choose 80 ÷ 100.
For novice solderers, it is enough to use simple models of two soldering iron designs with:
- heating from nichrome wire and copper rod;
- ceramic insert and nickel-plated copper tip.


The first type of soldering iron is cheaper, but it requires constant care of the tip, it takes longer to heat up to the desired temperature, and it wears out faster.
A soldering iron with a ceramic insert works better, but it is more expensive. In addition, ceramics require careful handling. It can break from mechanical shock.
Personal preferences
I have been using Moment-type transformer soldering irons for more than 30 years.

Some people don't like it because of the extra weight. But for me this indicator is not critical. The power of 65 industrial standard is good for amateur radio soldering, but it is not enough for connecting electrical wires.
Therefore, I assembled a more powerful design with my own hands.

About counterfeit brands
For a long time I could not understand why I like transformer soldering irons, and they are massively criticized on the Internet. Even in the article mentioned above, readers expressed a negative opinion about them to me, scolding the fragility and poor quality.
I realized this only after a visitor to my site sent me a burnt-out soldering iron from the Chinese company Licota for experiments.

It looks very nice, has a low weight, fits comfortably in the hand and is originally packaged. Upon closer acquaintance with him, I found many defects in installation and design. He painted them in separate articles:
- and the need to modify its internal surfaces;
- old Soviet and modern from China.
When buying cheap soldering irons from dubious sellers, you can run into low-quality products, lose money and time. Pay attention to electrical performance and warranties.
There are various other . But it is better to start learning soldering on the models described above.
About tip sharpening
Cleanliness is not only a guarantee of our health, but also a guarantee of high-quality soldering. It must be observed during work.
The copper tip of the soldering iron is heated to such a state that oxides and deposits form on it. When they penetrate the solder, you can forget about the quality of the soldering. Therefore, the end of the sting should always be clean and well sharpened.
Its shape is created for a certain type of parts to be soldered:
- "flat screwdriver" transfers heat well. It is used to warm up massive parts;
- "pyramid" or "sharp cone" makes it easier to control the amount of heat. It is used to connect small radio elements or thin wires;
- "blunt cone" sharpened for soldering wires of medium cross section.
The first type of sharpening is more popular. It can be shaped by hammer blows. Then the metal is better compacted and retains its properties longer.
By placing this tip on the part to be soldered with a plane or an acute angle, you can control the degree of its heating.
Modern soldering irons with ceramics have a set of removable nozzles of the most necessary shapes. They are covered with a layer of nickel on top, do not require sharpening and preparatory processing.
How to tin a copper sting
The tip of a new soldering iron without a protective nickel coating needs to be covered with a thin layer of solder, which will protect it from carbon deposits and premature wear. For this:
- the soldering iron is turned on under voltage, warming up the tip to working condition;
- immerse it in a piece of rosin;
- melt the solder, distributing it over the surface of the tip of the sting. It is convenient to use a wooden object.
What are the stages of soldering
The main objective of this technology is to connect two metal parts, most often conductors, with a low-melting alloy so that they hold firmly and pass an electric current with the lowest possible resistance.
To do this, you need to follow a series of steps in sequence. Let's analyze them using the example of soldering wires. This:
- removal of insulation from the connected ends of the wire;
- mechanical cleaning of metal lived to an ideal state from oxides;
- heat treatment with flux - tinning the ends with a thin layer;
- heating the solder with its application to the place of soldering.

Stripping
The dielectric layer of the wire may be made of polyethylene, cloth, lacquer, or the like. It needs to be removed.
It is best to do this work with a sharp knife, placing its blade almost parallel to the axis of the metal core. This will prevent cuts and deep scratches. They weaken the mechanical strength and increase the electrical resistance. This cannot be allowed.
Thin wires coated with varnish can be treated with an open flame of a match or lighter. The same method is suitable for twisted pair and even thicker cores.

On sale there are special pliers of various designs for stripping the insulation from the end of a wire of any diameter. They allow you to professionally perform this work without damaging the core.

After removing the insulation, the condition of the metal surface is assessed. Pay attention to cleanliness, the absence of dents and cuts.
Removal of contaminants and oxide film
Only pure metal can provide a high-quality connection of parts when soldering. It is created by mechanical surface cleaning and chemical solutions.
First, they work with a knife blade, slightly pressing it against the contaminated metal at an obtuse angle. The core is pulled from the insulation layer to the bare end, slightly rotating in one direction. The metal will immediately lose its dullness, it will begin to shine.
Chemical cleaning involves treatment with solvents, alcohol, FES flux.
Tinning pads
The final cleaning of the metal surface of the conductor is carried out by flux heat treatment using a tinned soldering iron tip. The most popular and versatile remedy is rosin. It is used in the solid state, dissolved in alcohol or jelly.
Sale allows you to purchase rosin in any form and provides a wide range of other fluxes.

The sequence of tinning the wire core with solid rosin:
- Warm up the soldering iron to the desired temperature. It can vary from 180 to 240 degrees and depends on the solder and the metal parts being joined. To control the heating, the tips are touched with a tip of solid rosin. If it begins to rapidly form steam, then the heating is normal.
- The cleaned conductor is placed on the rosin and touched with a soldering iron tip. The wire is rotated to evenly coat the molten flux.
- The soldering iron tip melts the solder and applies it to the rosin-treated wire, evenly distributing it over the surface.
A solution of rosin in alcohol is applied with a brush to the surface to be tinned or simply dripped through the dropper tube.

Jelly-like rosin is squeezed out of a special syringe, which is very convenient to do.
The conductor treated with liquid or jelly-like rosin is heated with a heated tip of a soldering iron with a drop of solder, dispersing it over the entire contact area.
Direct soldering
It is started after both contact pads are prepared for connection: cleaned of dirt and oxides, tinned.
The soldered ends are connected together. A piece of solder is applied to them with a heated soldering iron, ensuring its spreading over both sites. After that, the sting is sharply retracted to the side, and the parts remain stationary until the tin solidifies completely. This is judged by a slight darkening of its color.
Properly performed soldering is characterized by a strong connection of contacts and a smooth surface of the solidified solder, which is slightly shiny. Check its quality with a small mechanical force to break.
If the surface of the solder has darkening and unevenness, then the soldering is not reliable, it needs to be corrected.
These include:
- Heating of the parts to be joined should be carried out not with the tip of the tip, but with its side surface. This provides more contact and better temperature transfer. However, when working with a blunt-tipped tip or a transformer soldering iron, this advice will not help much.
- To give increased strength to the created connection, an additional twist of wires is created.
- The mechanical device of the third hand makes it easier to fix the fixed position of the parts to be joined.
- New electronic components are manufactured with tinned contact surfaces. If they are not contaminated with anything, then flux and solder can be immediately applied to them without prior tinning. This speeds up the soldering process.
- The sale offers the craftsmen a tubular solder, inside of which the flux is located. Usually it's rosin. This combination is easier to work with: the number of intermediate operations is reduced due to the simultaneous supply of both components.
4 Signs of Quality Soldering
The reliability of the connection is evaluated by:
- the brilliance of the created surface layer;
- no excess solder on parts;
- tensile strength of the control mechanical force;
- the integrity of the insulation layer, the absence of traces of melting.
If you still have questions on this topic, then ask them in the comments. I will definitely answer.
At first glance, it seems that everything is very simple - I took a soldering iron, solder, and you can immediately start assembling an interesting device. But in order to assemble a working electronic homemade product, you need to have at least the primary skills of high-quality and reliable soldering.
If the theory can be read and remembered, then the skills of high-quality soldering will come only with practical experience. Therefore, it is necessary to train a lot on old or unnecessary boards, but start all the same with theory.
As soon as the soldering iron begins to melt the solder, you can solder it, to do this, cover the tip with a thin layer of solder and wipe it on a sponge moistened with water. This will remove the remnants of the old solder from it. In the process of soldering, also do not forget to periodically wipe the sting on a damp sponge. Before soldering a conventional radio element, it must be prepared; for this, the leads are bent so that it fits into the holes on the printed circuit board without any problems. In this case, it will not be superfluous to check the installation again before starting the soldering process.

Place the soldering iron tip between the lead and the PCB as shown in the figure, heat the soldering point to the desired temperature. But try not to heat the element for more than 2 seconds, so as not to damage it.

After a second, bring the solder to the desired place. Hold the tip of the soldering iron still for a second, maximum two, so that the solder melts evenly and is distributed in the desired area. After that, without moving the radio component, move the soldering iron to the side. Do not move the radio part for a couple more seconds until the soldering point has cooled down. The excess ends of the leads should be cut off.

Carefully inspect the soldering area: The connection between the pad and the lead of the radio component must be smooth and shiny. If suddenly the soldering place has a spherical shape or connected to neighboring contact pads, heat the soldering place with a soldering iron tip until the solder melts and remove its excess. If the place is matte and somehow scratched, then you should also heat it up to the melting temperature of the solder, and then let it cool down a bit without moving the radio element. Add a little solder if needed. Let's move on to a practical example:

Then, using the "third hand" amateur radio device, which can be made from crocodile clips, we solder the wires.
If necessary, we put a thermocambric on the place of soldering, and warm it up with a hairdryer, if there is no special one, then you can use a regular one, or even warm it up on a burning match.
Soldering this is a method of joining two or more metal parts with a low-melting metal such as tin. In amateur radio, solder is usually used, which contains about 60% tin and 40% lead. This alloy is fusible and begins to melt at 180 degrees. Usually, solders are used during the process of soldering electronic circuits, they are produced in the form of thin tubes, inside of which there is a special resin that acts as a flux. Heated solder creates an excellent internal connection with such metals: copper, brass, silver, etc., if the following conditions are met: The surfaces of the parts must be cleaned from oxides. The radio element at the place of soldering must be heated to a temperature above the melting point of the solder. While working with a soldering iron, the soldering point must be protected from oxygen exposure; for this, fluxes are used that form a protective film over the junction.
Very often, novice radio amateurs touch the junction of two or more components with the help of tin with the very tip of the soldering iron tip. Because of this, insufficient heat is supplied to the junction. With practice in assembling various circuits and radio structures, the skill of optimal heat transfer will also appear. And you will bring the soldering iron tip so that a large contact area forms between it and the junction.
Another typical mistake of a novice radio amateur is the following situation. You melt some solder with a soldering iron and with some delay bring it to the junction. In this case, some of the flux evaporates, the solder without a protective layer forms an oxide film. On the contrary, it is necessary to simultaneously touch the place of soldering with a soldering iron and solder. This will ensure that the work area is covered with a drop of pure flux before it has time to evaporate.
Soldering radio components on printed circuit boards is much easier than connecting the free ends of the conductors by weight, because the holes in the board are an excellent fixator for the soldered radio component. There are five main steps in soldering components to a PCB:
1. Solder and soldering iron tip must be brought to the junction at the same time. The tip of the soldering iron must be in good contact with the processed output and the board.
2. The tip of the soldering iron should not be moved until the solder has spread evenly over the entire area.
3. Use a soldering iron tip to trace a semicircle around the output being processed.
4. When the required amount of solder is at the place of soldering, the solder wire is removed from the place of such work.
5. Very quickly remove the soldering iron tip from the place of soldering. Until the solder has cured.
If the tip of the soldering iron has the right temperature, the whole process lasts no more than one second. And after a little training, all the "heels" of soldering will be even, neat and beautiful.
I propose to introduce into your amateur radio arsenal a metal sponge for washing dishes and a piece of thick cloth or foam rubber.
As you probably noticed:
After finishing such work, a dark soot appears on the tip of the soldering iron, to remove it we moisten a piece of cloth with plain water, and draw the tip of the soldering iron over a rag every time if scale appears on it. If the formed carbon deposits do not completely disappear, use a metal sponge
And as a result, the soldering iron tip is again clean and shiny with solder, and soldering takes place without complications and damage to expensive radio components
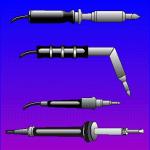
Soldering iron tips can be divided into two classes: copper tips and removable nickel-plated tips.

Types of soldering tips
Nickel-plated tips, used with a special collapsible soldering iron, with the ability to adjust the temperature. There are the following nickel-plated stings:
sting-needle used when working with very small radio components, such as those made using SMD technology. It is simply an indispensable accessory for the repair of mobile phones, smartphones and tablets and other high-tech gadgets, with a high mounting density.
Blade-shaped sting used for dismantling and mounting large radio components. Well suited in the process of soldering multi-pin microcircuits.
Drop sting used to carry a drop of solder, which in turn improves the quality of the joints.
curved sting it is mainly used for desoldering radio components in combination with the copper braid method to remove excess solder from the board.
Several secrets and technologies of home-made manufacture and use of a tubular sting in amateur radio practice are revealed.
If there are usually no difficulties when dismantling transistors, resistors and other low-output radio elements, but if it is necessary to remove a microcircuit or microcontroller, then there are a lot of difficulties. How can we be? Below are a few simple methods that are well suited for dismantling chips.
Copper Braid Method
You can buy a copper braid at any amateur radio store, but if it wasn’t at hand, then it’s easy to make it from some types of wires in which it is under insulation, for this we carefully remove the latter, and then fluff it a little, and it’s not bad to impregnate braid in a liquid flux, as it weakens the surface tension and the solder is better absorbed.
The use of a desoldering pump in amateur radio practice
The physical principle of operation of the desoldering pump is based on drawing in the molten solder. By the way, this solder can be reused.
We bring the wound desoldering pump to the surface of the contact pad melted with a soldering iron, and press the button. The solder is drawn into the device. It remains only to repeat this technological process with each output of the microcircuit.
If you decide to take this amateur radio device, then buy only one that is made of metal. Plastic can be thrown almost immediately into the trash can. Over time, any desoldering pump loses its suction power, but this is not a reason to take a new one, you just need to disassemble it and throw out the solder that has accumulated there from the suction compartment.
How to solder a chip using medical needlesWhen dismantling failed multi-pin radio components (microcircuits, coils, transformers, etc.), you can use a simple device made from a medical dropper needle.

The principle of dismantling is well understood from the figure. Each output of the microcircuit is heated separately, and after the solder is melted, a slightly sawn needle is put on it with a turn. After the solder hardens, the needle is pulled out with scrolling. But we must carefully monitor so that the remnants of the flux do not have time to freeze, otherwise you can unscrew the conclusion itself.
First: The tip of the soldering iron must always be clean and optimally heated for soldering, depending on the type of solder used. Usually the temperature of the soldering iron tip is 300 degrees. A new soldering iron tip can be hammered to form hard work on the working surface, and then filed to give the correct shape.
After that, we tin the tip of the soldering iron, in other words, cover it with a thin layer of solder. Don't forget to dip it in rosin.
To adjust the temperature of the sting, I recommend using.
Second: Use suitable fluxes and solders for soldering. There are several dozen types of solders, but in amateur radio practice, POS-61 is most often used, consisting of 61% tin and 39% lead with a melting point of about 190 degrees.
it is desirable to use acid-free. The most famous and common flux is rosin.
Third: The conclusions of parts, conductors and contact pads on printed circuit boards must be cleaned to a high-quality shine and tinned.
Fourth: Clamp or third hand
The soldering process could become much easier if a person had three hands. Therefore, I advise you to use small clamps in which you can fix a part or a small board during installation work.
Given the state of our power grids, especially in rural areas, the voltage drop in them is sometimes tens of volts below normal, and you have to think about increasing it to the nominal value, at least for a soldering iron, otherwise you can forget about proper high-quality soldering. To solve this problem, I propose to assemble a simple set-top box circuit. When the switches are off, the device works correctly, as well as at the output we have half the mains voltage.

This is especially convenient when the intervals between solderings are significant and there is no reason to completely turn off the main tool of the radio amateur. When the SW1 switch is on, the design works according to the full-wave rectifier circuit, this is for the case if the mains voltage is normal. With both switches on, the temperature of the tip will increase due to the addition of the reactive energy component stored in the capacitor. You can add more containers, through additional toggle switches and adjust the temperature.
The metal tweezers holding the soldered radio component also serve as a heat sink. For the same purpose, it is also possible to use a crocodile clip if it is put on the semiconductor terminal to protect against overheating.
The flux is used for proper soldering, more precisely, it is designed to remove residual oxide films and grease and protect the surfaces to be soldered from oxidation. If the flux is not used, the soldering will not be of high quality - there may be poor electrical contact, and it happens that the soldered part falls off.
Flux washAvailable as a spray or in jars. I advise you to use such washes to remove flux residues from the board, which can lead to oxidation of the contacts.
So, today I want to consider not only an interesting project on microcontrollers, but also very useful in the daily work of a radio amateur. This is a do-it-yourself soldering station using AVR microcontrollers.
When assembling various electrical and radio engineering devices, soldering is popular. It provides electrically conductive connection of copper wires and other copper products with each other, with electrical circuit components and other metal parts made of pure copper and copper alloys, as well as aluminum soldering. Soldering is simple, very flexible, and allows low contact resistance of the connected components.
The essence of soldering technology is to heat the contact zone with its subsequent filling with liquid metal fusible solder. After cooling, the melt provides electrical contact. Before soldering the wires, an additional treatment of the surfaces to be joined is usually necessary (most often the so-called tinning of the wires), which guarantees long-term stability.
In the absence of vibrations and shock loads for small parts, good bond strength is achieved. In all other cases, they are soldered with additional fixation.
What may be needed for soldering?
Soldering requires a heat source. You can solder using an open flame, an electric spiral, as well as a laser beam. The latter allows you to solder even pure metal. Houses use mainly an electric soldering iron. It is designed for:
- installation and repair of various electronic circuits;
- design and repair of electrical equipment;
- tinning with a layer of solder of various metal products.
soldering iron
Solder with a hand soldering iron, which is used for:
- warming up the connected components;
- heating the solder until it turns into a liquid state;
- applying liquid solder to the elements to be joined.
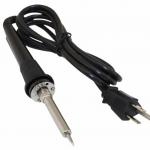
The soldering iron, which is shown in Figure 1, contains:
- nichrome wire spiral heater insulated with mica film or fiberglass;
- copper sting, which is located inside the spiral;
- plastic or wooden handle;
- housing for placing the soldering iron tip and spiral.
Connection to the electrical network is made with a cable about 1 m long, which exits the back of the handle through the bending radius limiter.
The wooden or plastic handle is shaped like a simple pen. Electronic circuits are soldered with low-power products equipped with pistol grips with a trigger button for quick heating of the tip. One of the options for such a tool is shown in Figure 2.
 Figure 2. Radio soldering pistol type
 Household soldering irons are designed to be connected to a 12 and 220 V mains.
220 - volt soldering irons, for reasons of electrical safety, must be equipped with a 3-pin plug that provides reliable grounding. For 12-volt equipment, a simple 2-pin flat plug is enough.
Solder
They are soldered with solder - an alloy of tin and lead, additions of other metals are possible. The solder is in the form of a tube or wire of various diameters. Tubular solder is filled with rosin inside, soldering with it is more convenient.
Lead is introduced into the alloy to reduce cost. Its specific content is different, which is directly reflected in the brand. For example, POS-61 (very popular tretnik) means:
- P - solder;
- OS - tin-lead;
- 61 - with 61% tin content.
In everyday life, they are soldered with alloys with a reduced tin content, it is advisable to tin the dishes with the POS-90 composition.
In addition, they solder with soft and hard solders. Soft compositions have a melting point of less than 450, the rest are classified as solid. The melting temperature of POS-61 solder is 190 - 192 °C. Due to the difficulties of heating, high-temperature soldering using hard solders with an electric tool is not performed.
Compositions with the addition of low-melting metals: aluminum and cadmium - aluminum is soldered. Due to the increased toxicity, soldering with them is possible only if there is no alternative.
Flux
They must be soldered under - an auxiliary component that provides:
- dissolution of oxide films on the surface of the parts to be joined;
- good adhesion of solder alloy to them;
- improving the conditions for spreading the alloy over the surface with the thinnest layer.
Usually, rosin is used in this capacity, as well as compositions based on its mixture with alcohol, glycerin and zinc. Rosin has a softening point slightly above 50°C, and boils at 200°C. Chemically, rosin is quite aggressive towards metals and hygroscopic; when saturated with moisture, it quickly increases conductivity. Depending on the additives and their concentration, it exhibits the properties of neutral or active fluxes.

Rosin flux is sold as a powder, in lumps, or as a solution of rosin.
Silver, stainless steel and some other metals can only be soldered using special fluxes (known as acid fluxes or soldering acids).
Some installers who solder wires, to improve the quality of tinning, preheat on an aspirin tablet, the vapors of which act as a flux.
Solder pastes
Solder paste is a combination of solder and flux. It is soldered in hard-to-reach places, as well as when installing leadless electronic elements. The composition is applied to the component, which is then simply heated with a sting.
You can make your own pasta. To do this, tin filings are mixed with liquid flux to a gel-like consistency. Store the paste in sealed packaging, the shelf life due to oxidation of tin does not exceed six months.
Soldering iron stand
They solder with a sting heated to a high temperature, so during the break the tool is left on a stand. For powerful soldering irons, it is performed with two supports: the rear for the handle, the front for the body. The supports are mounted on a plywood base, which is used for:
- installation of a box with rosin;
- solder wire storage (an example is shown in Figure 3);
- cleaning the sting.
Figure 3 shows that the stand does not require scarce materials and can be made by hand.
 Figure 3. Homemade stand for a powerful soldering iron
 For low power devices, a cone-shaped holder is often used (normal or spiral, which is also shown in Figure 3), into which the tool is inserted with a sting.
Older models of stands are equipped with a working temperature controller, an LCD display for indicating the temperature of the tip, Figure 4. Such a soldering tool is often called a soldering station.
 Rice. 4. An example of a soldering station with an indicator
 Solder Removal Braid
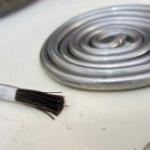
They are soldered with a braid in cases where it is necessary to remove solder from the printed circuit board when dismantling parts. It is a dense mesh of thin copper wires coated with flux.
The principle of operation is based on the surface effect: the grid "absorbs" the solder melted on the printed circuit board due to capillary forces.
Usually the width of the braid is about 5 mm, the delivery is rolled in a case with a diameter of about 5 cm.
Solder removal functions can be performed by the outer braid of an old flexible coaxial cable.
Security measures
Compliance with safety precautions:
- promotes protection against thermal burns;
- prevents the occurrence of a fire;
- protects against electric shock.
Before you start soldering, you should make sure that the power cable is working. The sting should not touch the occasions, as well as other objects. The soldering iron must always be placed on the stand. It is forbidden to touch its body, you can take the tool only by the handle.
Preparation
workplace
They always solder in normal general lighting (not worse than 500 lux), if necessary, create more comfortable conditions, use a source of local lighting.
Good ventilation should be taken care of. The hood gives the best results; in its absence, solder intermittently to ventilate the room from rosin vapors (every hour with intensive work).
Choosing a soldering iron by power
Solder with soldering irons of various capacities. It is usually assumed that:
- low-power soldering irons (20 - 50 W) are convenient for working with electronics, allow you to solder thin wires;
- 100-watt tool with a thickness not exceeding 1 mm;
- 200 W or more allows you to solder such massive parts that initially require the use of powerful soldering irons.
It is easy to judge the power of the device visually: a 50-watt soldering iron turns out to be slightly larger than a fountain pen, while a 200-watt soldering iron has a total length of about 35-40 cm.
Soldering iron to work
Before using for the first time, the remains of factory grease must be removed from the body. Burning out leads to the appearance of smoke and an unpleasant odor. Therefore, the soldering iron is turned on through an extension cord, exposing it to the street through the window for a quarter of an hour.
Then the soldering iron tip is forged with a hammer: the copper seal increases the service life. The tip of the sting is shaped:
- at an angle or on a cut - for spot work (an example is shown in Figure 5);
- knife-shaped - with such a sting several contacts are simultaneously soldered (typical for microcircuits);
- special - they solder some types of radio components.
 Figure 5. An example of a universal sharpening of a soldering iron tip and proper tinning of its working area
 Before you start soldering, you should clean the tip from the oxide film. This procedure is performed with fine-grained sandpaper or a velvet file, as well as chemically: immersion in rosin. The cleaned sting is tinned with solder.
If necessary, you can solder at the point with a powerful soldering iron. To do this, a copper wire with a diameter of 0.5 - 1 mm is wound onto its tip, using its free end to heat the solder.
Parts for soldering
Solder always in several stages. First prepare the surface of the metal conductor:
- removal of the oxide film followed by degreasing;
- tinning (deposition of a layer of tin on the surfaces in contact).
Then you can connect the parts.
Be sure to clean the wires that were in use.
The oxide film is removed with a file, sandpaper, a knife blade. In the case of flexible wires, each wire is processed.
The insulation of the enameled wire is removed by dragging it over the surface of the PVC tube, to which it is pressed with a heated sting.
A sign of readiness is a uniformly shiny surface without oxide film residues.
They are always soldered with degreasing, i.e. wipe the surface with a lint-free cloth or a cloth moistened with acetone or white spirit.
New wires have no oxide film. They are serviced immediately after the removal of insulation.
It is necessary to tin the copper conductor under a flux; after heating, the solder should cover the metal surface with a thin layer. In the presence of sagging, soldering is not recommended, the wire is placed vertically, passing the soldering iron from top to bottom. The excess molten solder then flows to the sting.
If necessary, then the cleaning and tinning procedures are combined. To do this, place the wire covered with rosin in sandpaper, heat it with simultaneous rotation.
The quality of the flux of some types decreases during long-term storage, as well as under the influence of atmospheric moisture. Therefore, such fluxes are soldered with additional control of the expiration date.
Step-by-step technique for soldering wires
Soldering wires is performed in the following sequence:
- Remove the insulation over a length of 3-5 cm (on wires of a larger diameter, the length of the removed section is longer).
- If necessary, clean and degrease the connected cores.
- Form a tight twist of wires.
- The resulting splice is treated with flux.
- Solder is collected on the tip and the twist is soldered, heating is continued until it is completely spread; if necessary, repeat several times. The solder should fill all the cavities of the splice as shown in Figure 6.
- The resulting splice is isolated.
 Figure 6. Soldered solid wires
 Soldering aluminum wires with each other, as well as with copper wires, has no fundamental differences, with the exception of a more complex tinning procedure.
A step-by-step method for soldering radio components to a board
Usually, radio components and factory printed circuit boards have leads and current-carrying tracks that are tin-plated. They can be soldered without prior tinning. Boards are tinned only when they are self-made.
The soldering procedure includes steps such as:
- With tweezers, the leads are bent at the required angle, then they are inserted into the holes of the board.
- Fix the part with tweezers.
- They collect solder on the tip, immerse it in rosin, attach it to the connection point of the output with the board as shown in Figure 7. After heating the surfaces, the solder flows onto the tracks of the board, the output of the element, the contacts of the microcircuits, evenly distributed over them under the action of surface tension forces .
- The part is held in the desired position with tweezers until the solder solidifies.
- After soldering is completed, be sure to rinse the board with alcohol and / or acetone.
- Additionally, the absence of a short circuit of the board components caused by solder drops is controlled.
 Figure 7. Soldering the leads of radio components on a printed circuit board
 For better fixation, it is advisable to sharpen the tweezer jaws or use a special tool of the type shown in Figure 8.
Excess leads are removed with side cutters.
 Rice. 8. Version of soldering tweezers
 On reusable boards, the mounting holes are cleaned of solder residue with a wooden toothpick.
When working, it is advisable to observe the following rules:
- the tip is oriented parallel to the plane of the board;
- due to the danger of overheating of radio components, as well as peeling of current-carrying tracks due to overheating, the boards are soldered for no more than 2 seconds;
- before soldering, the tip should be cleaned of oxides.
Possible Soldering Problems
With a certain quick-learning skill, soldering provides good contact. A few problems are easily identified visually. These include:
- weak heating of the connected components or the so-called. cold soldering - the solder acquires a characteristic dull color, the mechanical strength of the contact drops, it quickly collapses;
- overheating of the components - the solder does not cover the surface at all, i.e. the connection is virtually non-existent;
- movement of the connected components until the solder solidifies completely - a visible sharp break in the film of the hardened solder, there is no connection.
The elimination of these defects is carried out by re-soldering.
Conclusion
The solder connection provides high quality combined with manufacturability. The procedure is easy to implement (you can learn how to solder in a couple of hours), but you need to carefully perform several sequential operations, carefully observing the work technology.
Correct soldering is possible only with a serviceable tool.
Possible soldering problems Solder always with strict observance of safety regulations.
Video tutorials on how to solder
It would seem that the very question of how to properly solder with a soldering iron is very simple. I dipped the tip in rosin, put some solder on the tip, and touched the contacts of the part to be soldered.
In fact, to do this job you need certain skills that come with experience. Otherwise, how to explain the difference in the quality of soldering made by different craftsmen?
How to quickly learn to solder
In order to master the basics of soldering, you need to choose the right tool. Let's start with the main thing, with the choice of a soldering iron.
Choosing the right soldering iron
In most cases, a soldering iron with a 40-60 W copper tip, a stand, flux (rosin is best) and solder will do.
You should not chase expensive ceramic devices and soldering stations. For training, the basic set is quite suitable. And don't forget the tweezers.
IMPORTANT! After you master the basics of soldering, it will become clear that the training kit is suitable for 90% of homework with a soldering iron.
Many advanced radio amateurs have been using Soviet soldering irons without regulators for decades.

And the quality of soldering can be envied by the owner of a soldering station equipped with the latest technology.
It takes practice to solder properly.
If the tool is new, it is necessary to prepare a sting, sharpen and tin. This method is only suitable for copper tips.

How to tin a sting, step by step instructions
If you have already used the tool, then this video will help you properly prepare the sting for work.
Next, cut a few pieces of wire of different sizes, and find any broken electrical device (transistor receiver or cassette recorder). From this set you can make a great training ground.
How to properly tin a sting if the solder does not stick - video
Solder and put back the radio components on the diagram, connect the wires with and without twisting. The best teaching aid is self-practice on components that you don’t mind ruining.
Sequencing
Do not rush to immediately connect the two parts with solder. First, learn how to strip the wire and pad on the circuit board. Then practice tinning the stripped wire.
Try to solder two, and then a three-pin radio component (for example, a transistor) from the board. And only after that try to solder cleanly. Remember the main rule - first warm up the place of soldering, then add solder to it.
There are several ways to add solder.
- Bring the molten composition to the tip of the sting
- Bring the wire of solder to the junction and press everything with a sting until the composition begins to melt.
